
Twas a nice bright morning in our kitchen — lot’s of good light for assembling the Korg NTS-1 Digital Synthesizer Kit.
If you have watched the Korg video assembly instructions, you know that there isn’t much to the actual assembly process. The printed circuit boards (PCBs) are fully populated, tested and ready to go. All you need to do is to break the boards down, to stick on and connect the ribbon controller, and to insert and tighten a few screws.
Overall, the assembly process took about 40 minutes. I kept an iPad with the assembly instructions nearby, pausing the video at the end of each major step. Assembly was easy and if a small modest amount of labor keeps the kit cost low, I’m all for it!
Here’s a few short comments.
- Breaking the boards apart was the step that I feared most. One needs to be firm when snapping boards apart at the seems, but no major issues with flex. Be bold!
- Those silver screws are tiny!
- Inserting the ribbon controller cable was the biggest issue. The locking tabs were closed and I didn’t suss the direction in which they slide. (They slide in the same direction as the cable, not perpendicular to it.) Thus, I used needle nose pliers to insert the ribbon cable, using more force than necessary.
- Keep the tiny screwdriver. You may need to fix your eyeglasses some day. 🙂
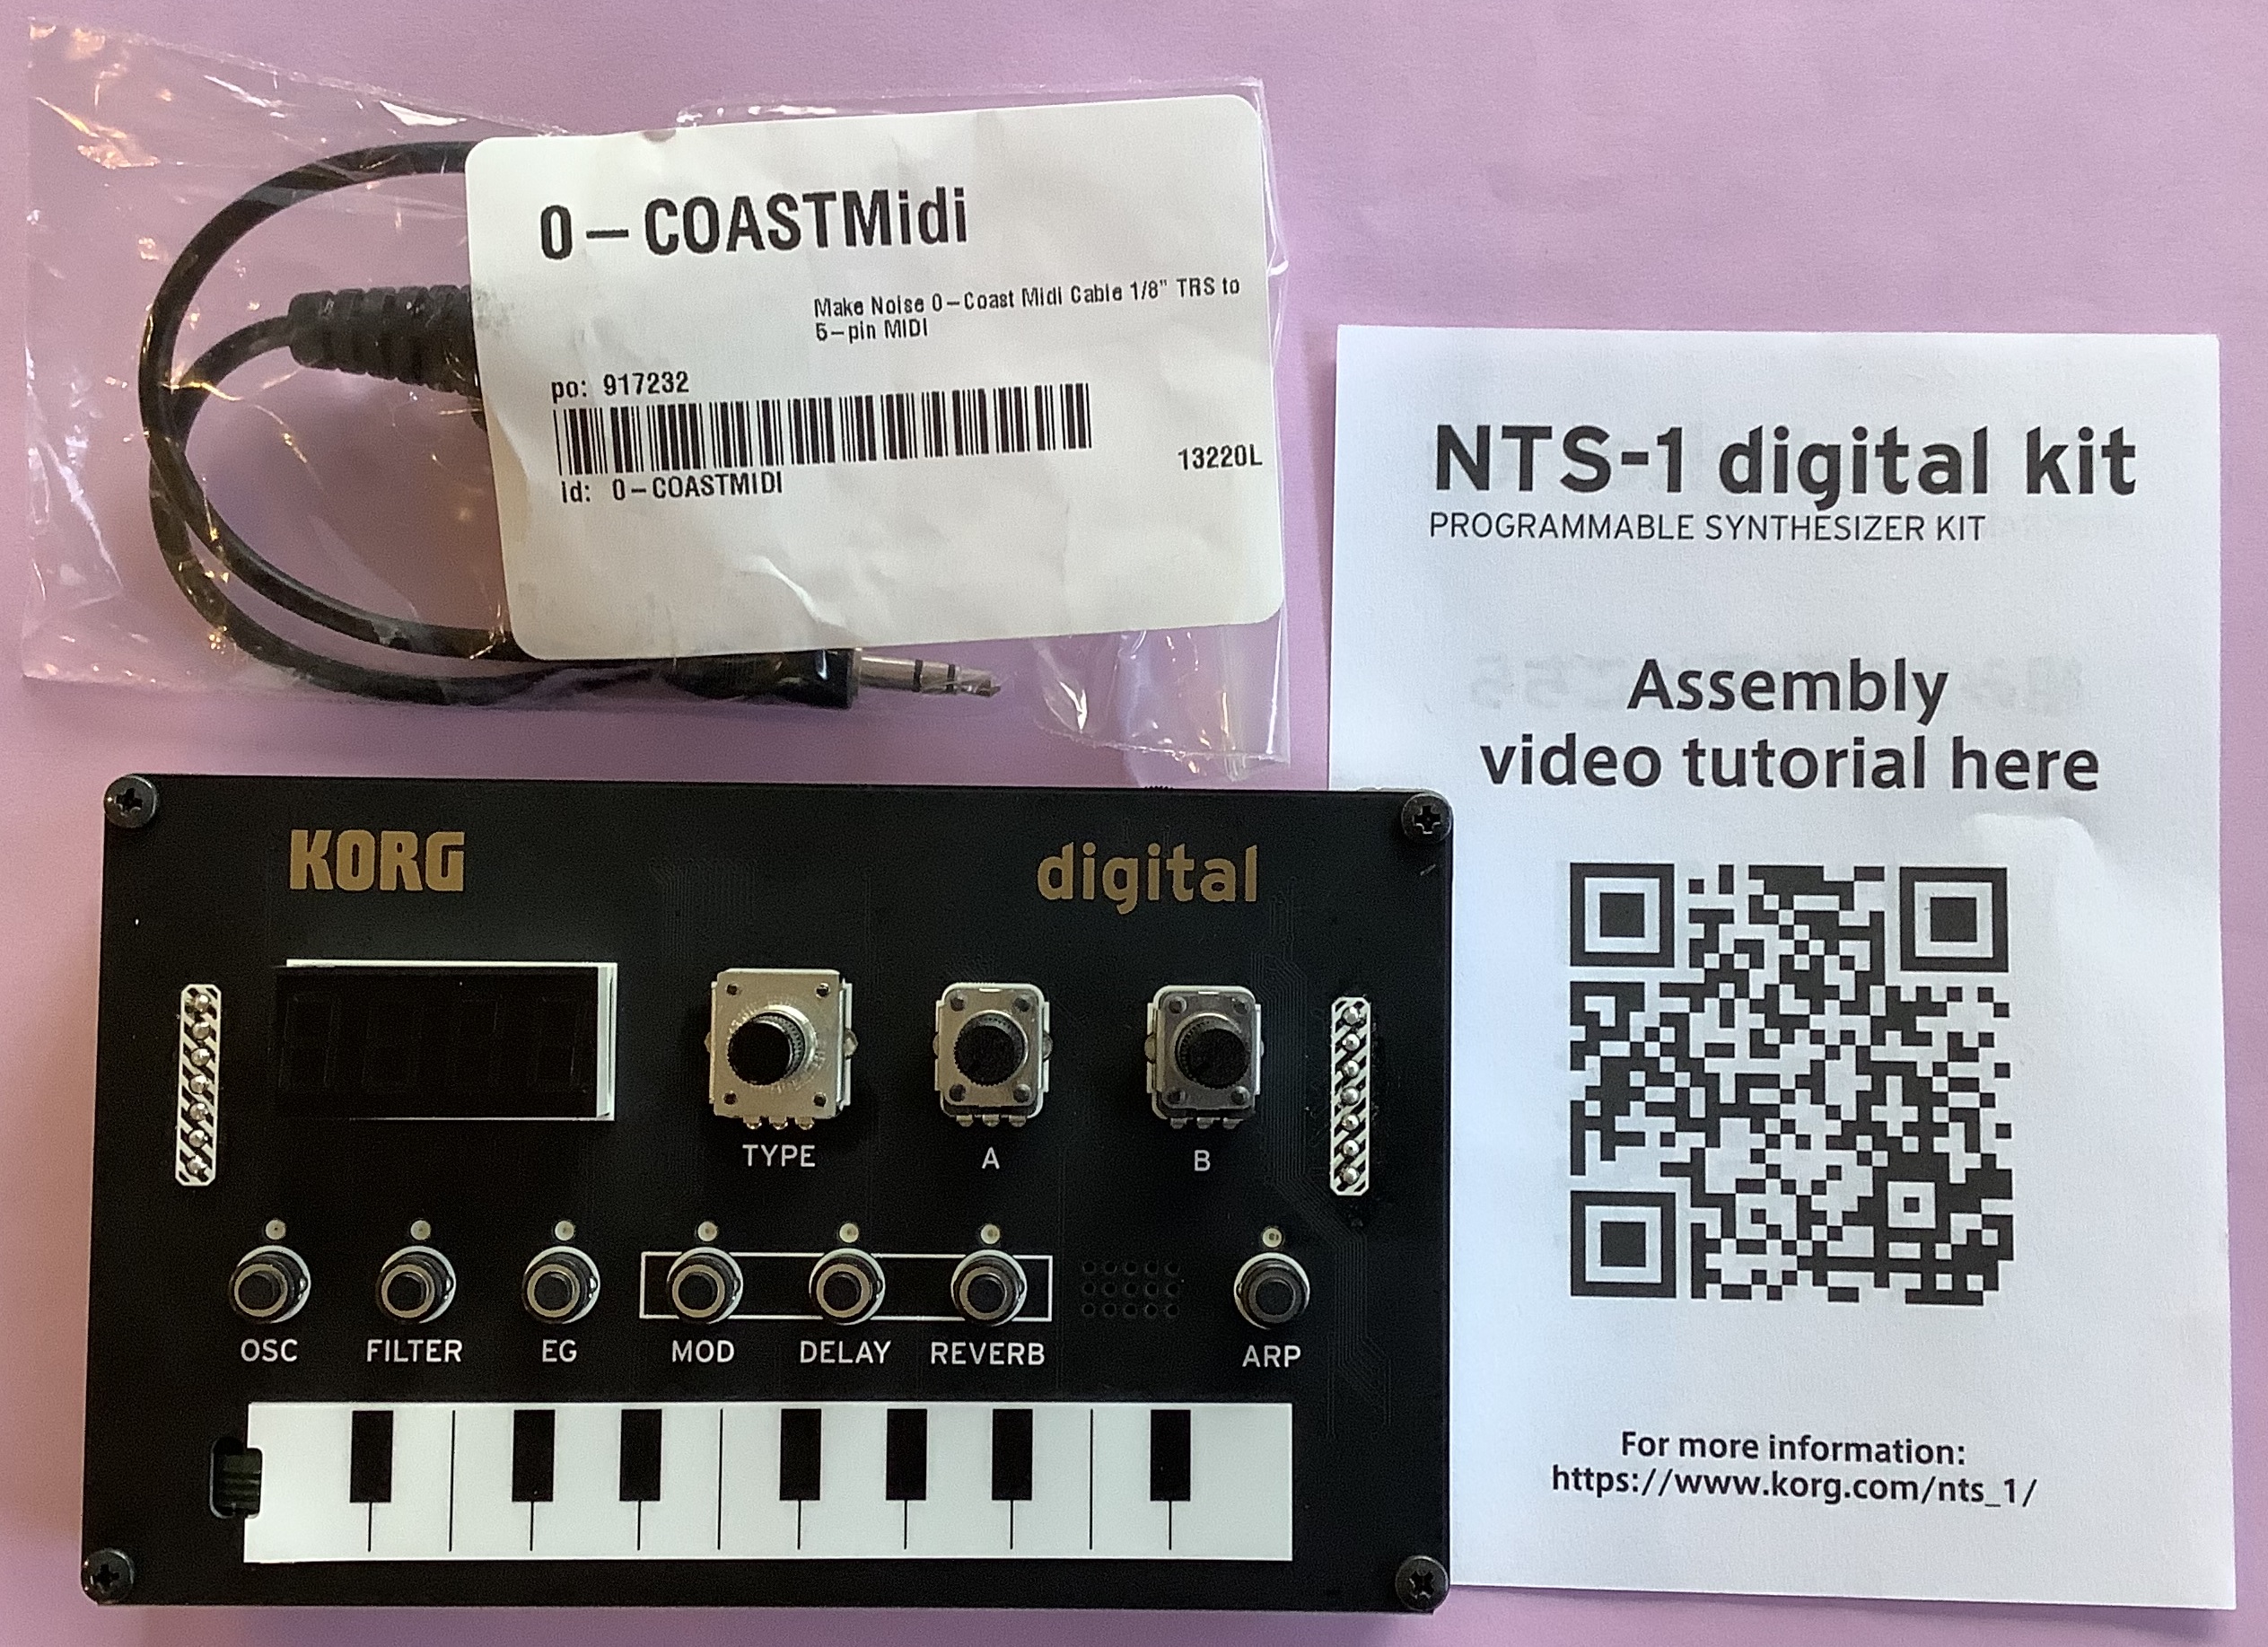
Once everything was assembled, I rushed upstairs and connected the NTS-1 to the Yamaha SHS-500 Sonogenic. When I bought the NTS-1 from Sweetwater, their site recommended the Make Noise O-Coast 5-pin to 3.5mm TRS adapter cable as an add-on accessory. Fortunately, I went for it and didn’t have to search through storage bins looking for an appropriate adapter. The MIDI cabling looks baroque with a 5-pin MIDI adapter on each end.
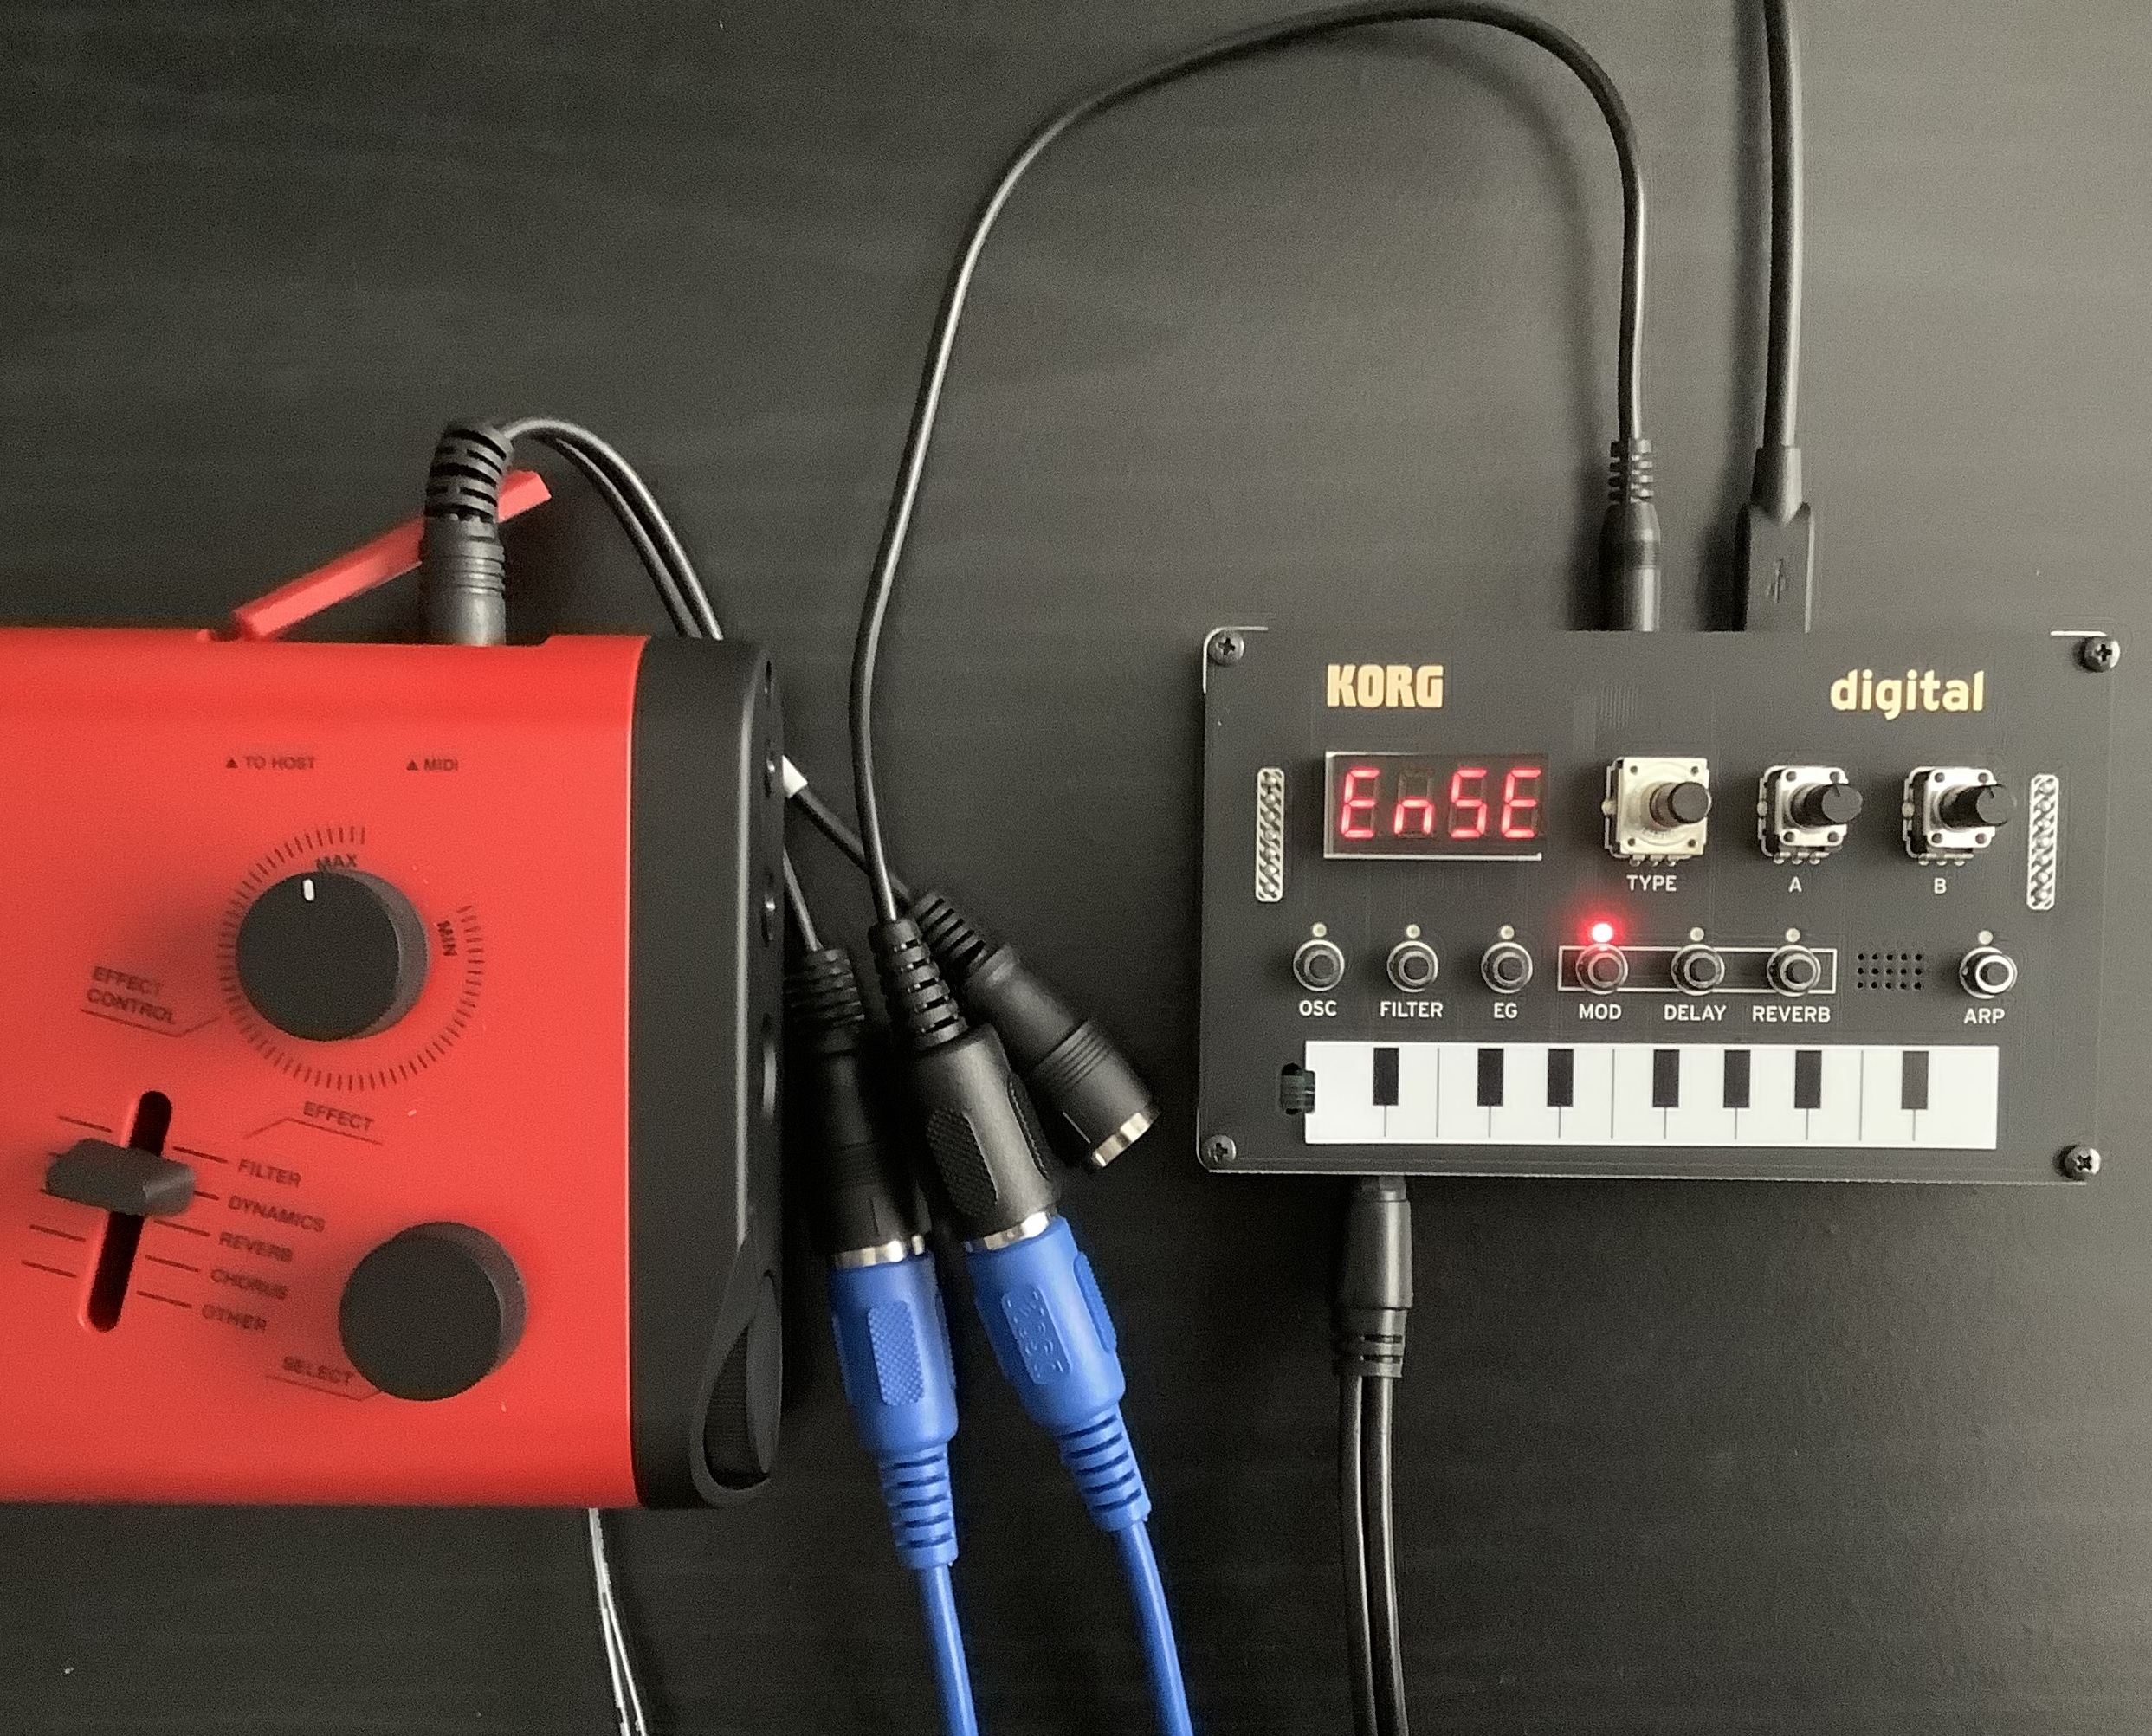
The wiring rat’s nest makes me wish for a wireless solution. Someone needs to invent a Bluetooth MIDI board that 1. plugs into a USB-B device connector and 2. connects to an advertising Bluetooth MIDI peripheral. With the current state of things, most (all?) devices act as a peripheral, assuming that they will connect to a central tablet-based application. Currently, there isn’t a general way to replace a 5-pin cable with a Bluetooth MIDI link (i.e., you can’t connect a keyboard to a keyboard!)
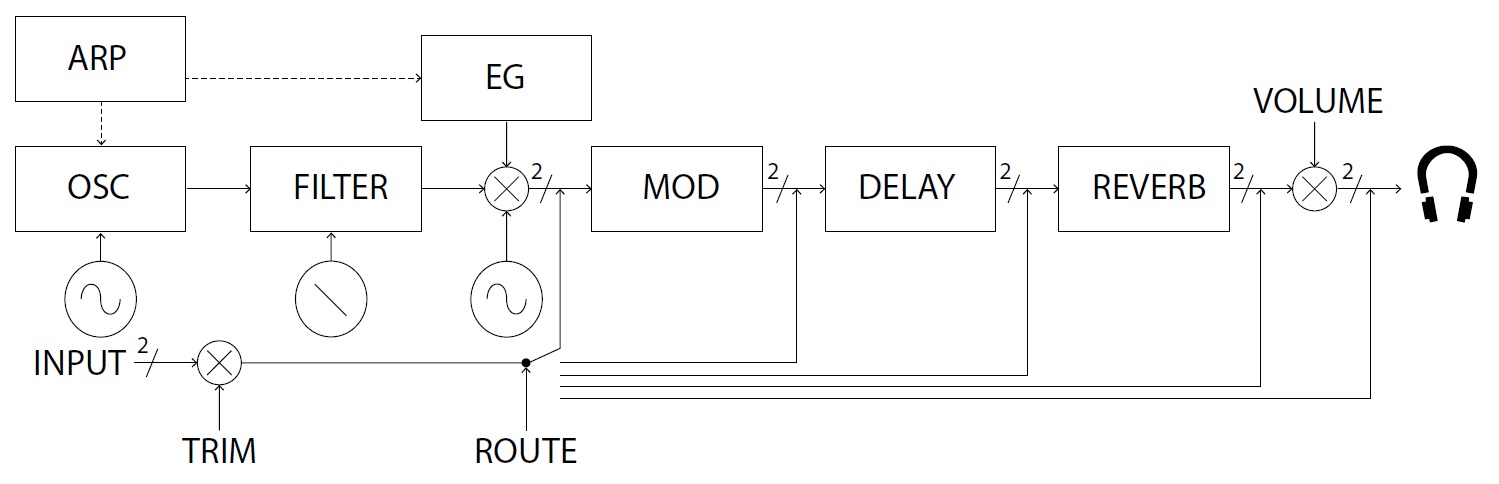
It’s ugly, but everything worked! The NTS-1 is a single oscillator, monophonic synthesizer. Its user interface is easy to navigate. I soon had the classic Chameleon synth bass dialed in. The single oscillator by itself sounds a little bit thin, but the Ensemble effect is a good thickener.
The filter is decent, especially the 4-pole low pass filter (LPF). It isn’t difficult to push the filter hard into ringing self-oscillation. It truly is a shame that the external audio input bypasses the filter. I would love to put the Sonogenic’s signal through the filter.
My final experiment for the day involved connecting the NTS-1 to my iPad Air 3. Immediately, I got the dreaded:
Cannot use assessory. NTS-1 digital kit: This accessory requires too much power.
Oddly, the iPad Air 3 continued to power the NTS-1, just killing data communication. The NTS-1 specifications claim 500mA or less power consumption. So, what the what, Apple?
I was hoping to unlock a few more instruments in Korg Module. I guess that experiment will wait for another day.
Copyright © 2020 Paul J. Drongowski