
I’m happy to make a first report about the Korg NTS-2 Oscilloscope kit. The NTS-2 is bundled with the book “PATCH & TWEAK with KORG”, by Kim Bjorn. Whatever the reason for the delay, it took Korg several months to deliver after the NTS-2 was first announced. Fortunately, the bundle finally hit my doorstep. 🙂
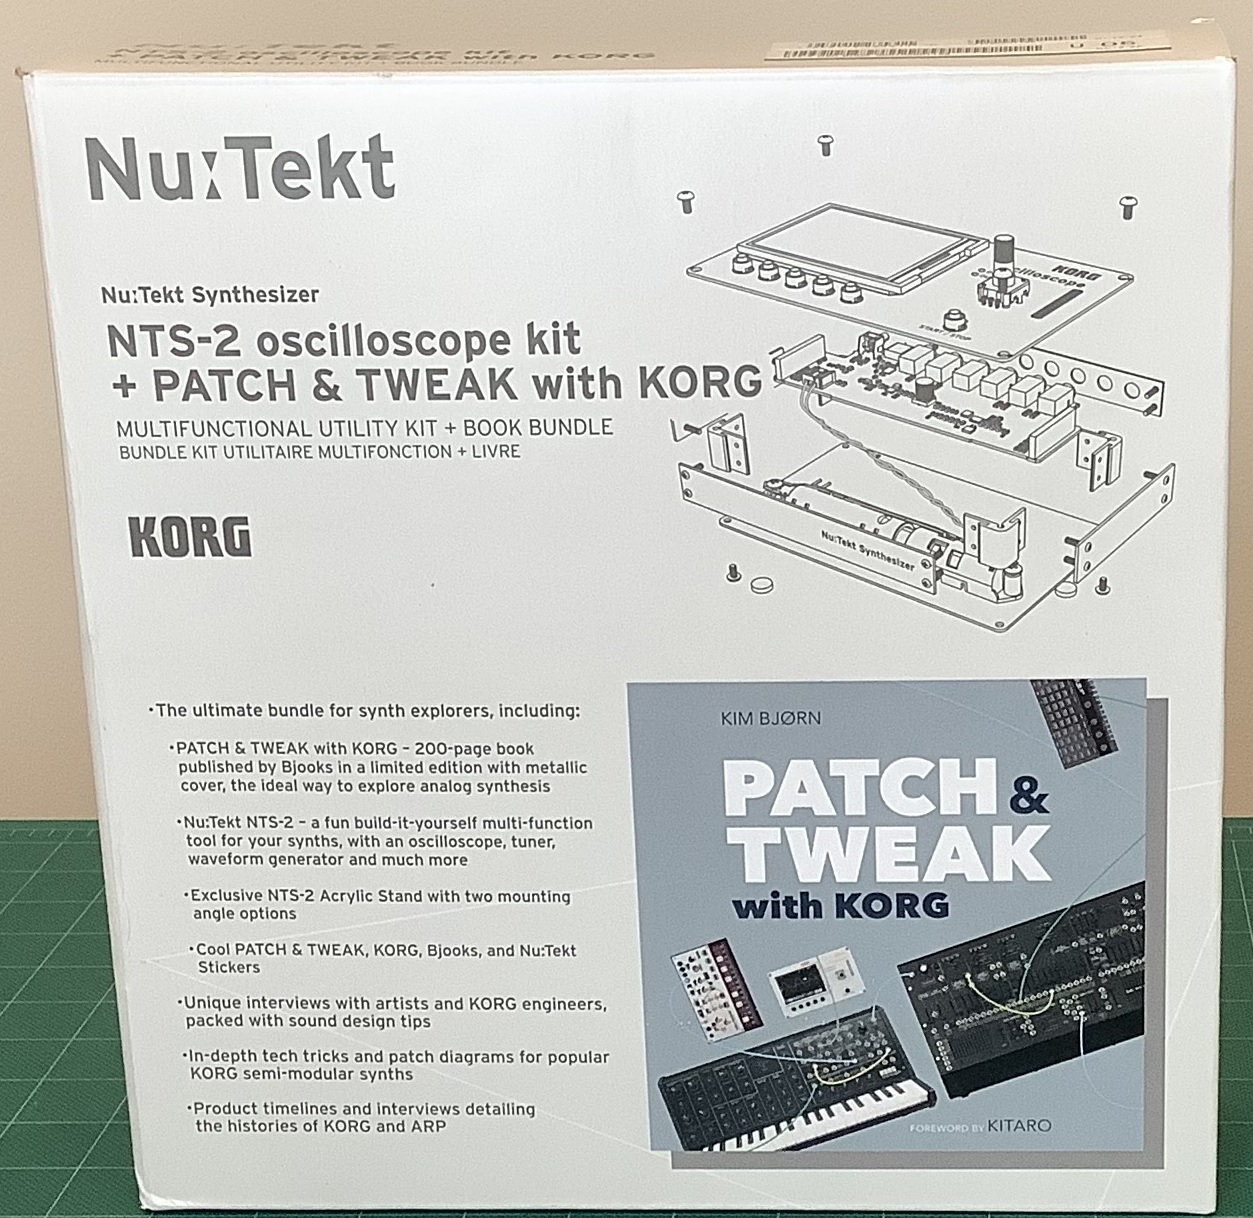
The NTS-2 kit and book are a fairly hefty package, mainly due to the weight of the enclosed book. The book looks, feels and weighs like a “coffee table” book. Tain’t light.
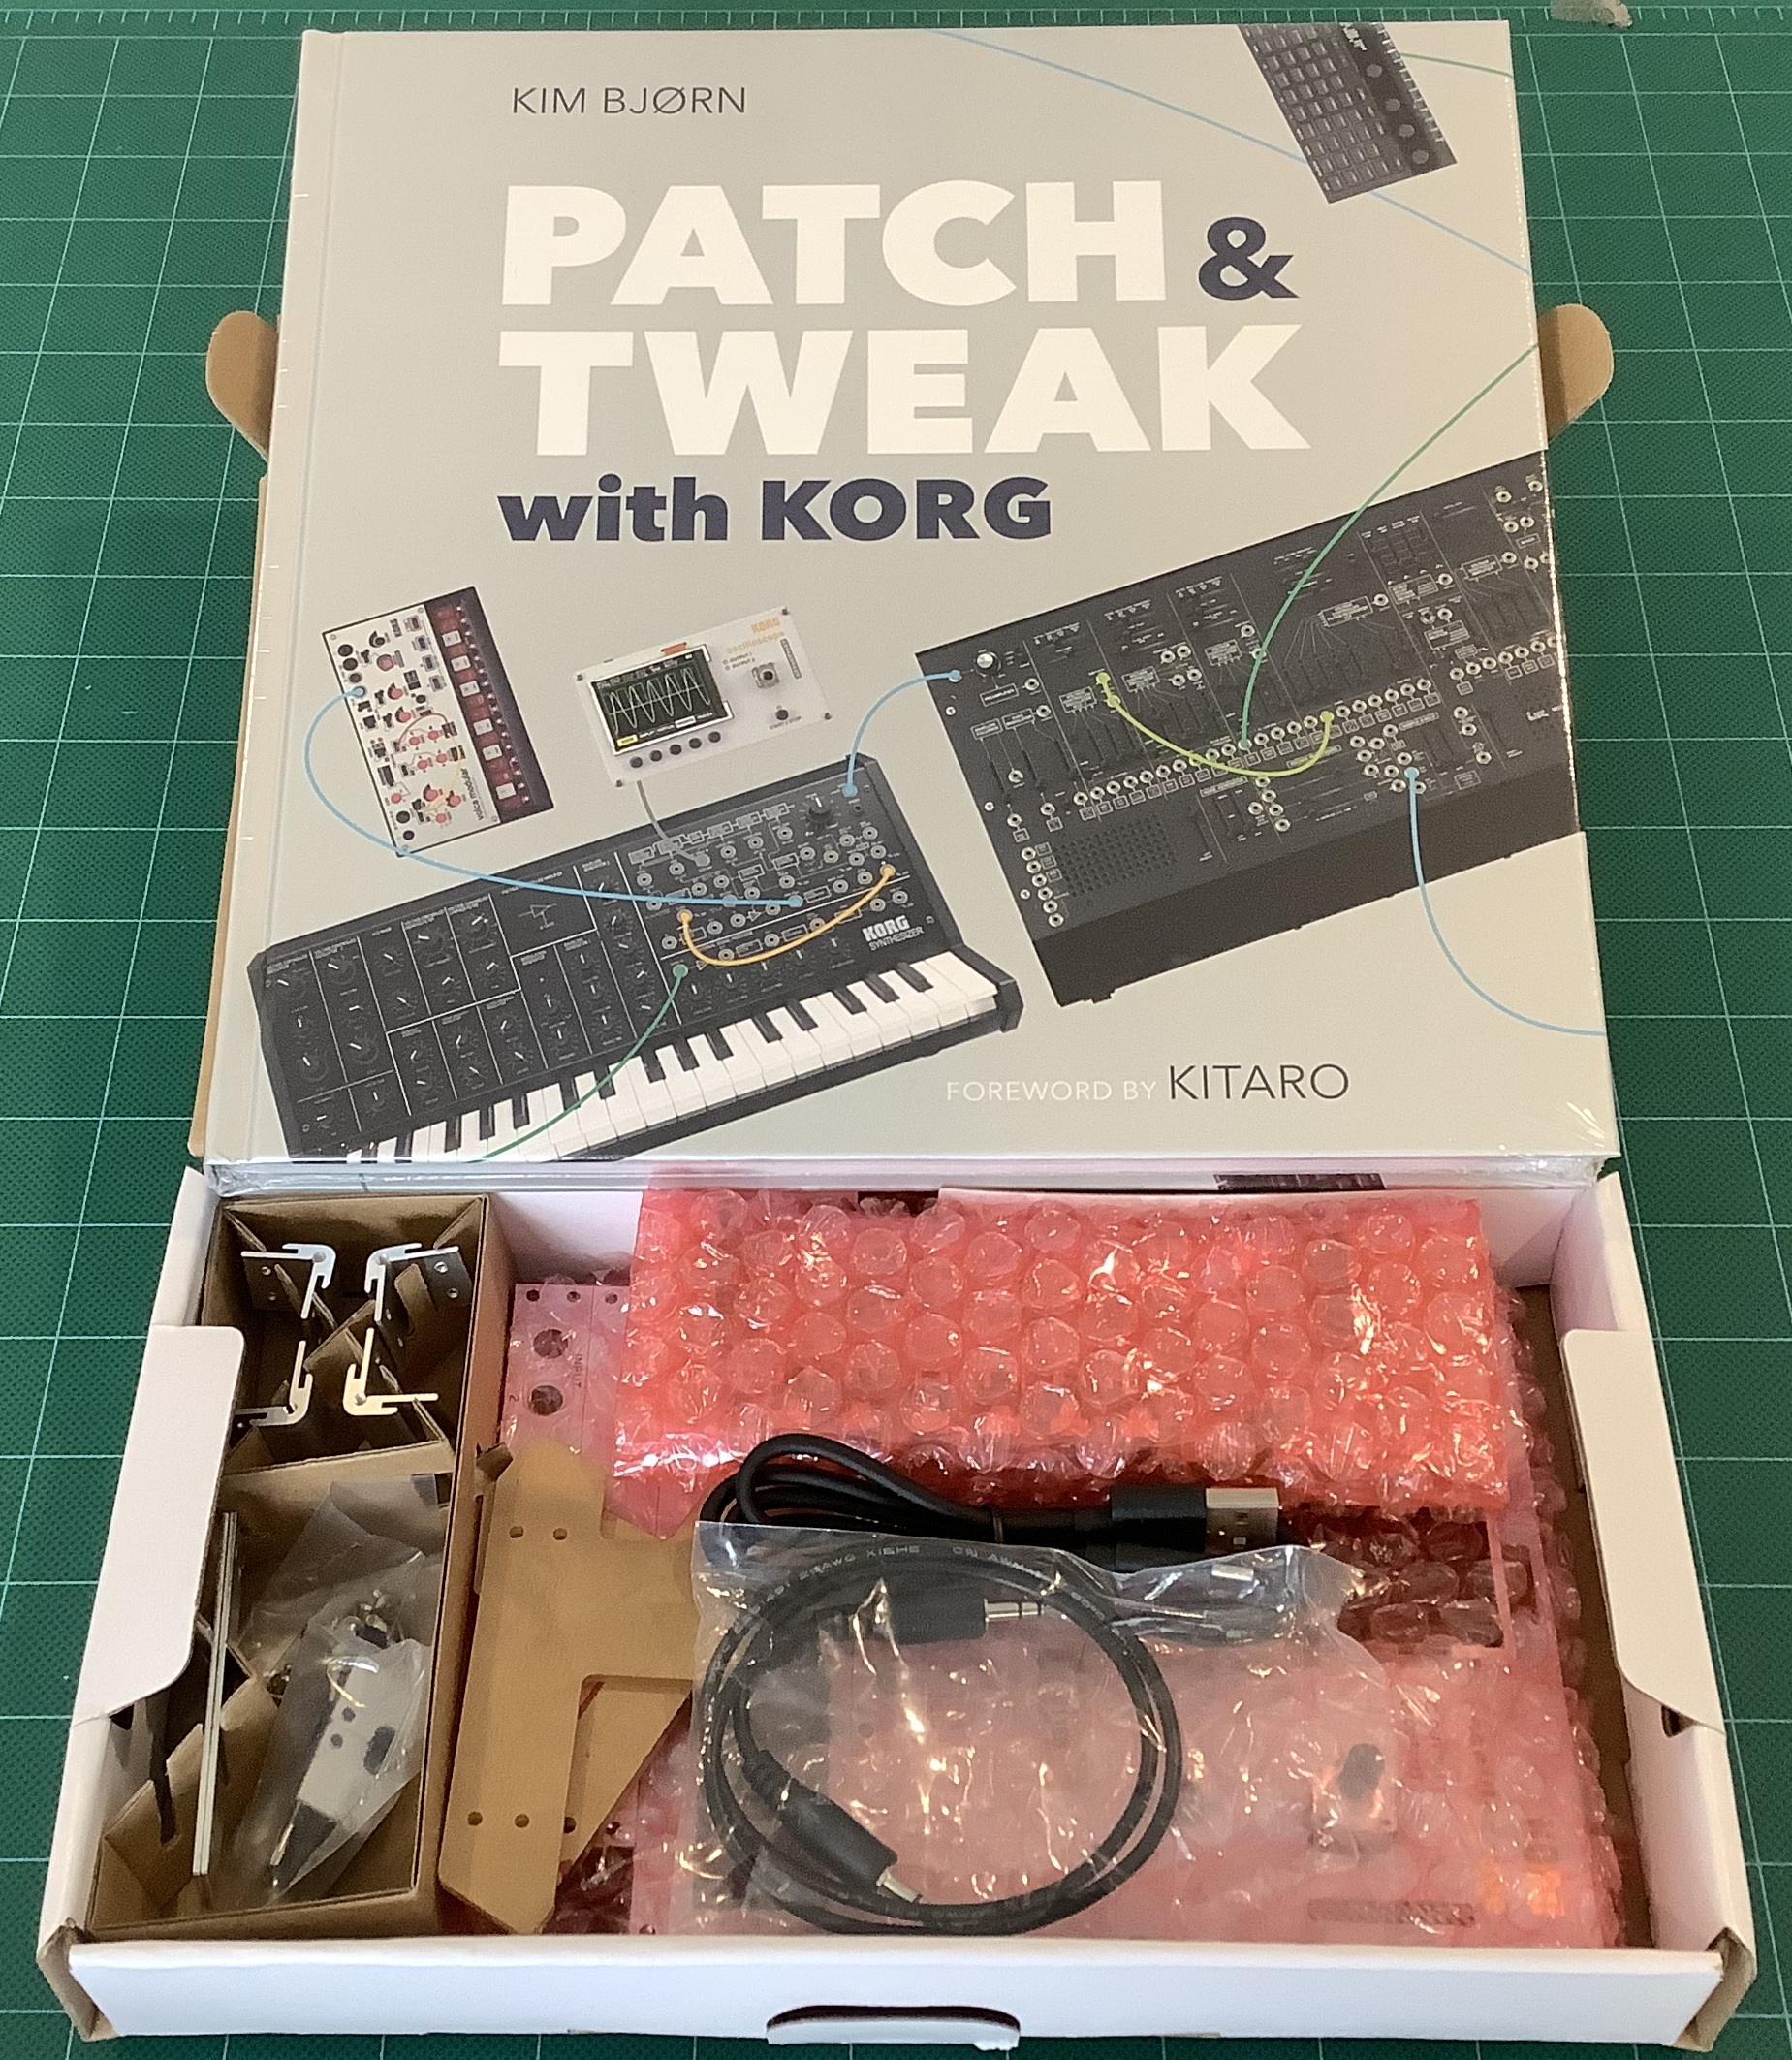
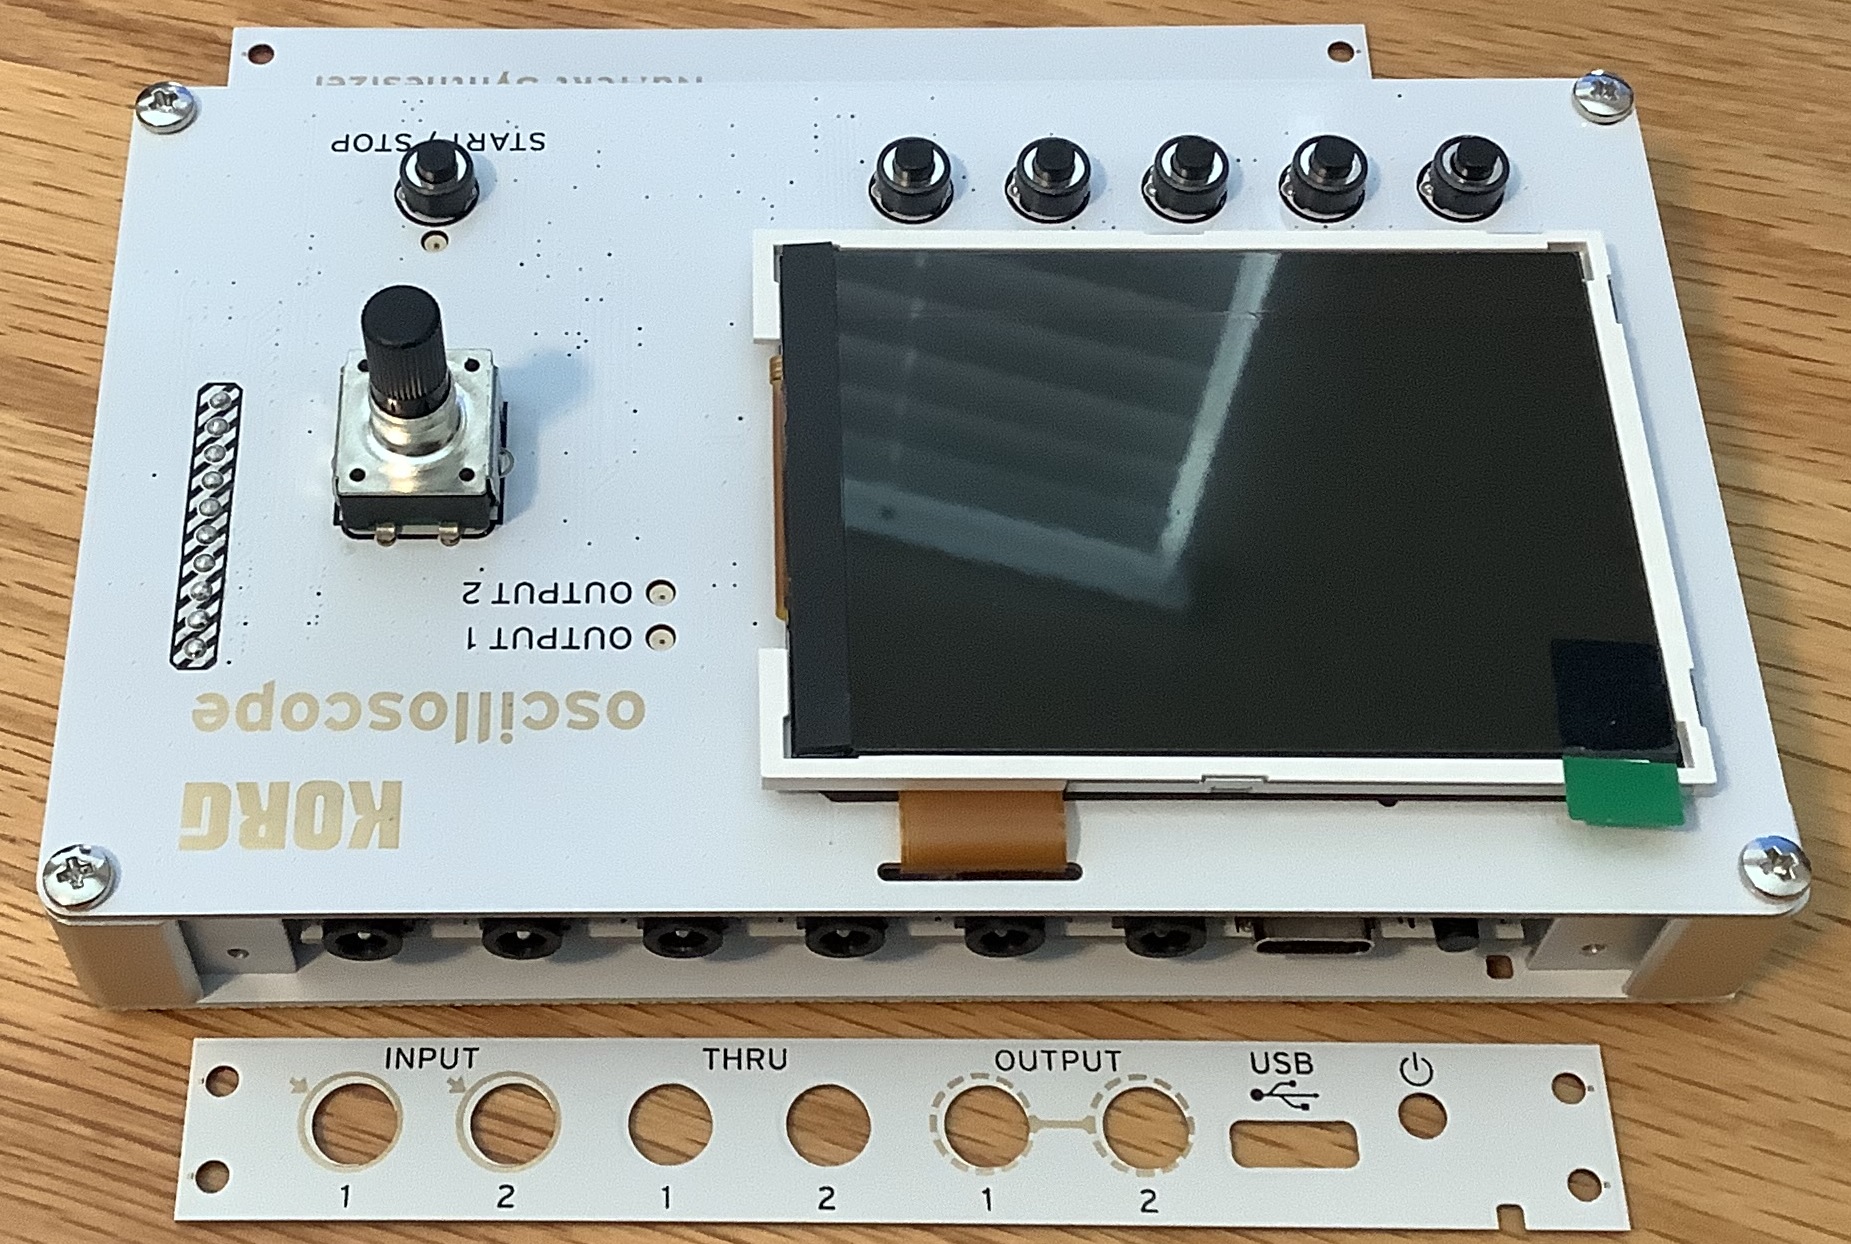
The NTS-2 kit itself is packed in an unmarked white box. All the components are lovingly protected by bubble wrap. In addition to the printed circuit boards (PCB), you get the now-familiar corner and side pieces, hardware, USB Type-C cable, a way-too-short 3.5mm stereo cable and two acrylic stand pieces.
Printed circuit boards
The Nu:tekt manufacturing concept is rather clever. Korg design and manufacture one (or more) large-ish, break-apart PCBs for each kit. The PCBs are loaded with surface mount (SMT) components and other random stuff like the display and battery holder. No soldering is required. Thus, one gets all of the benefit of SMT without the grief of soldering components made for mice. [My old hands and developing cataracts can barely handle work at this fine level.]
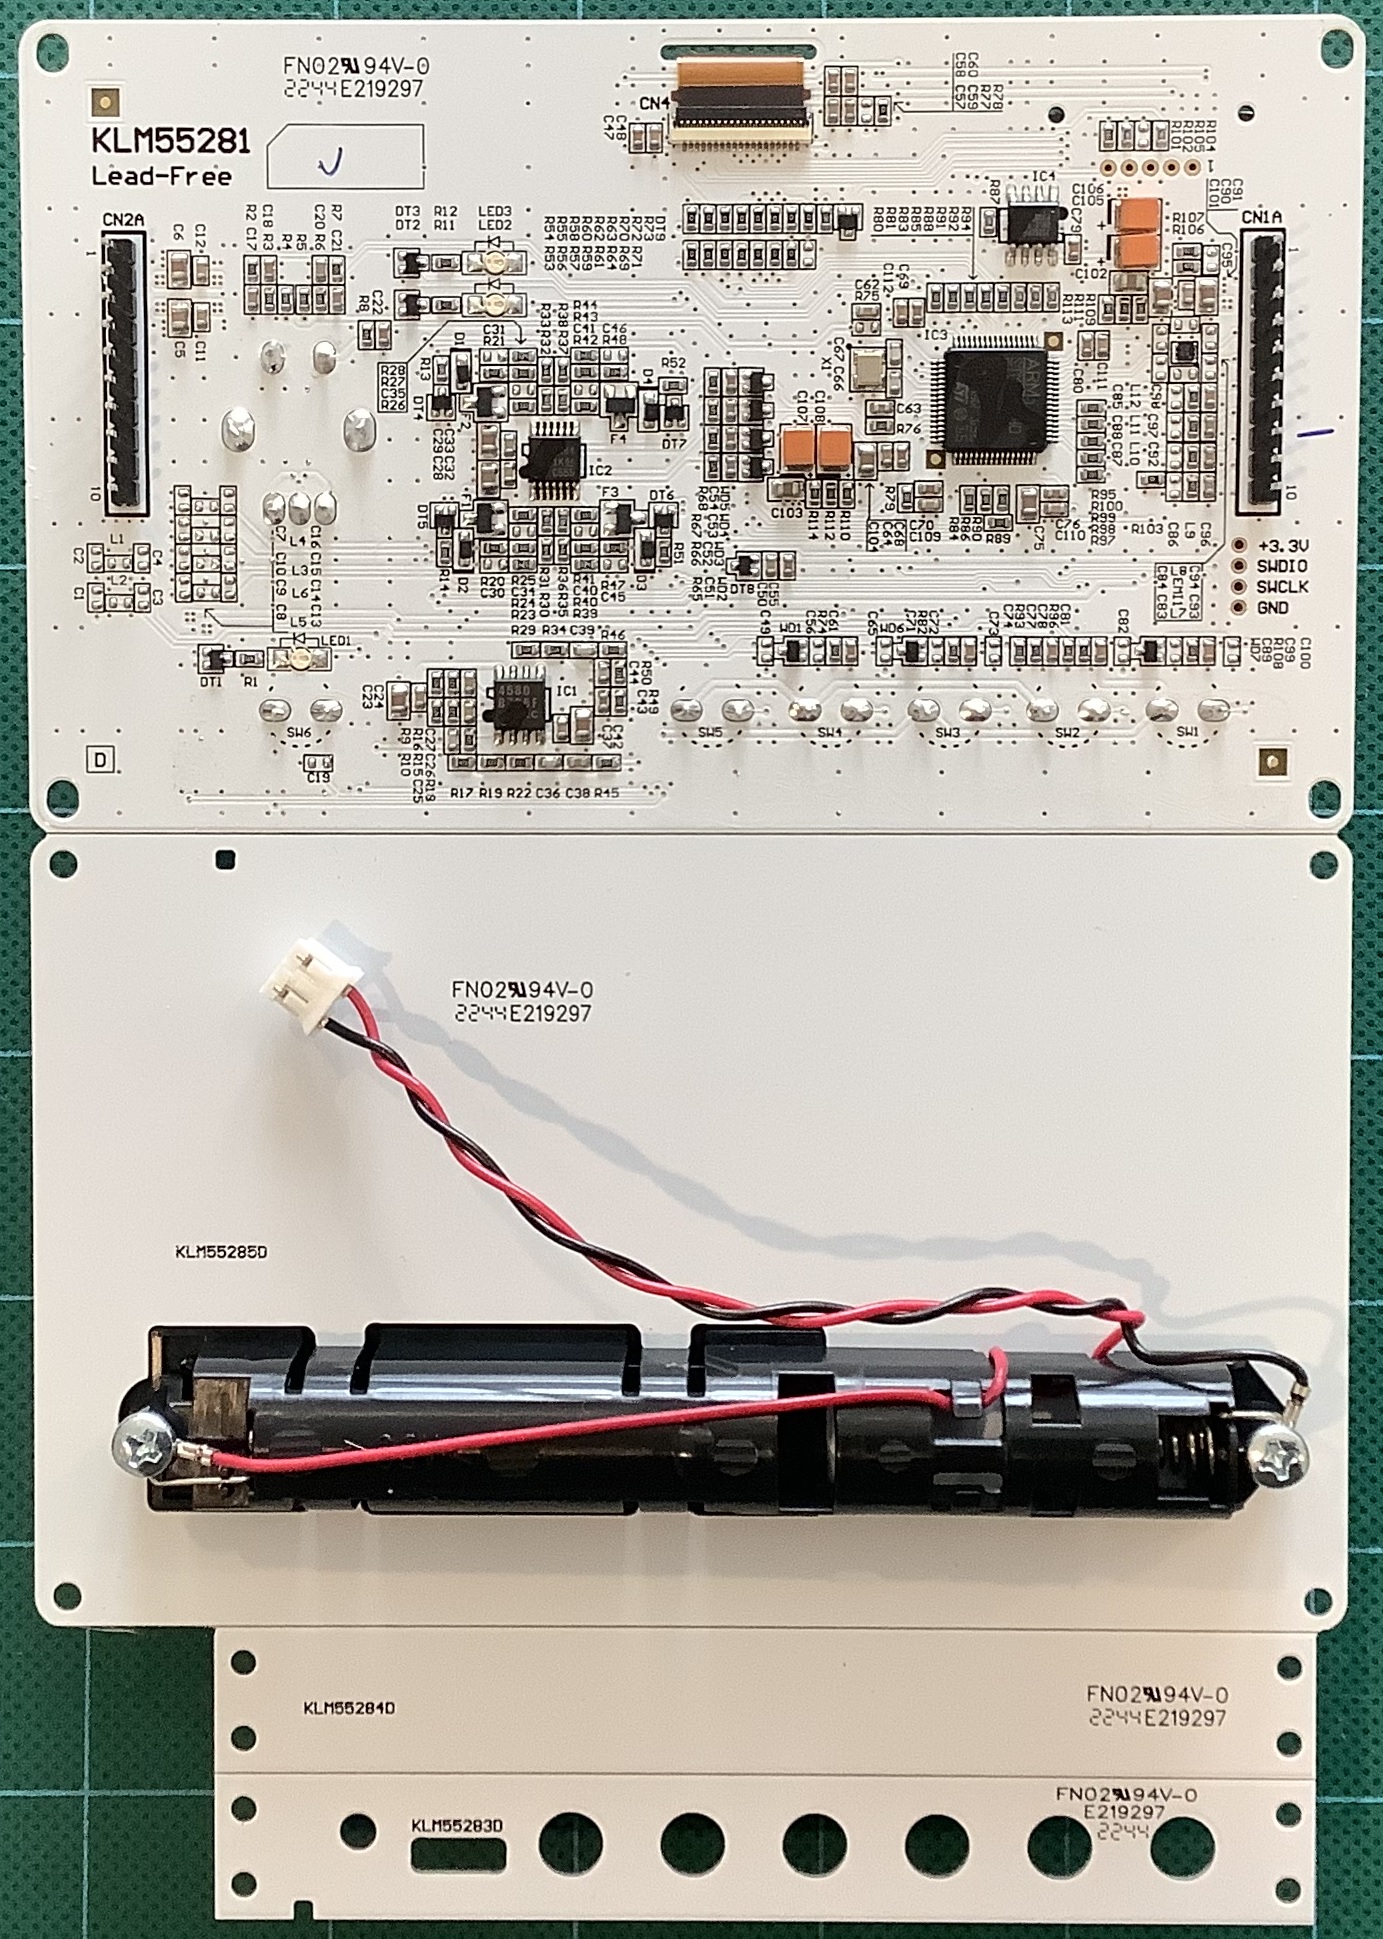
The main board consists of four subboards to be broken apart.
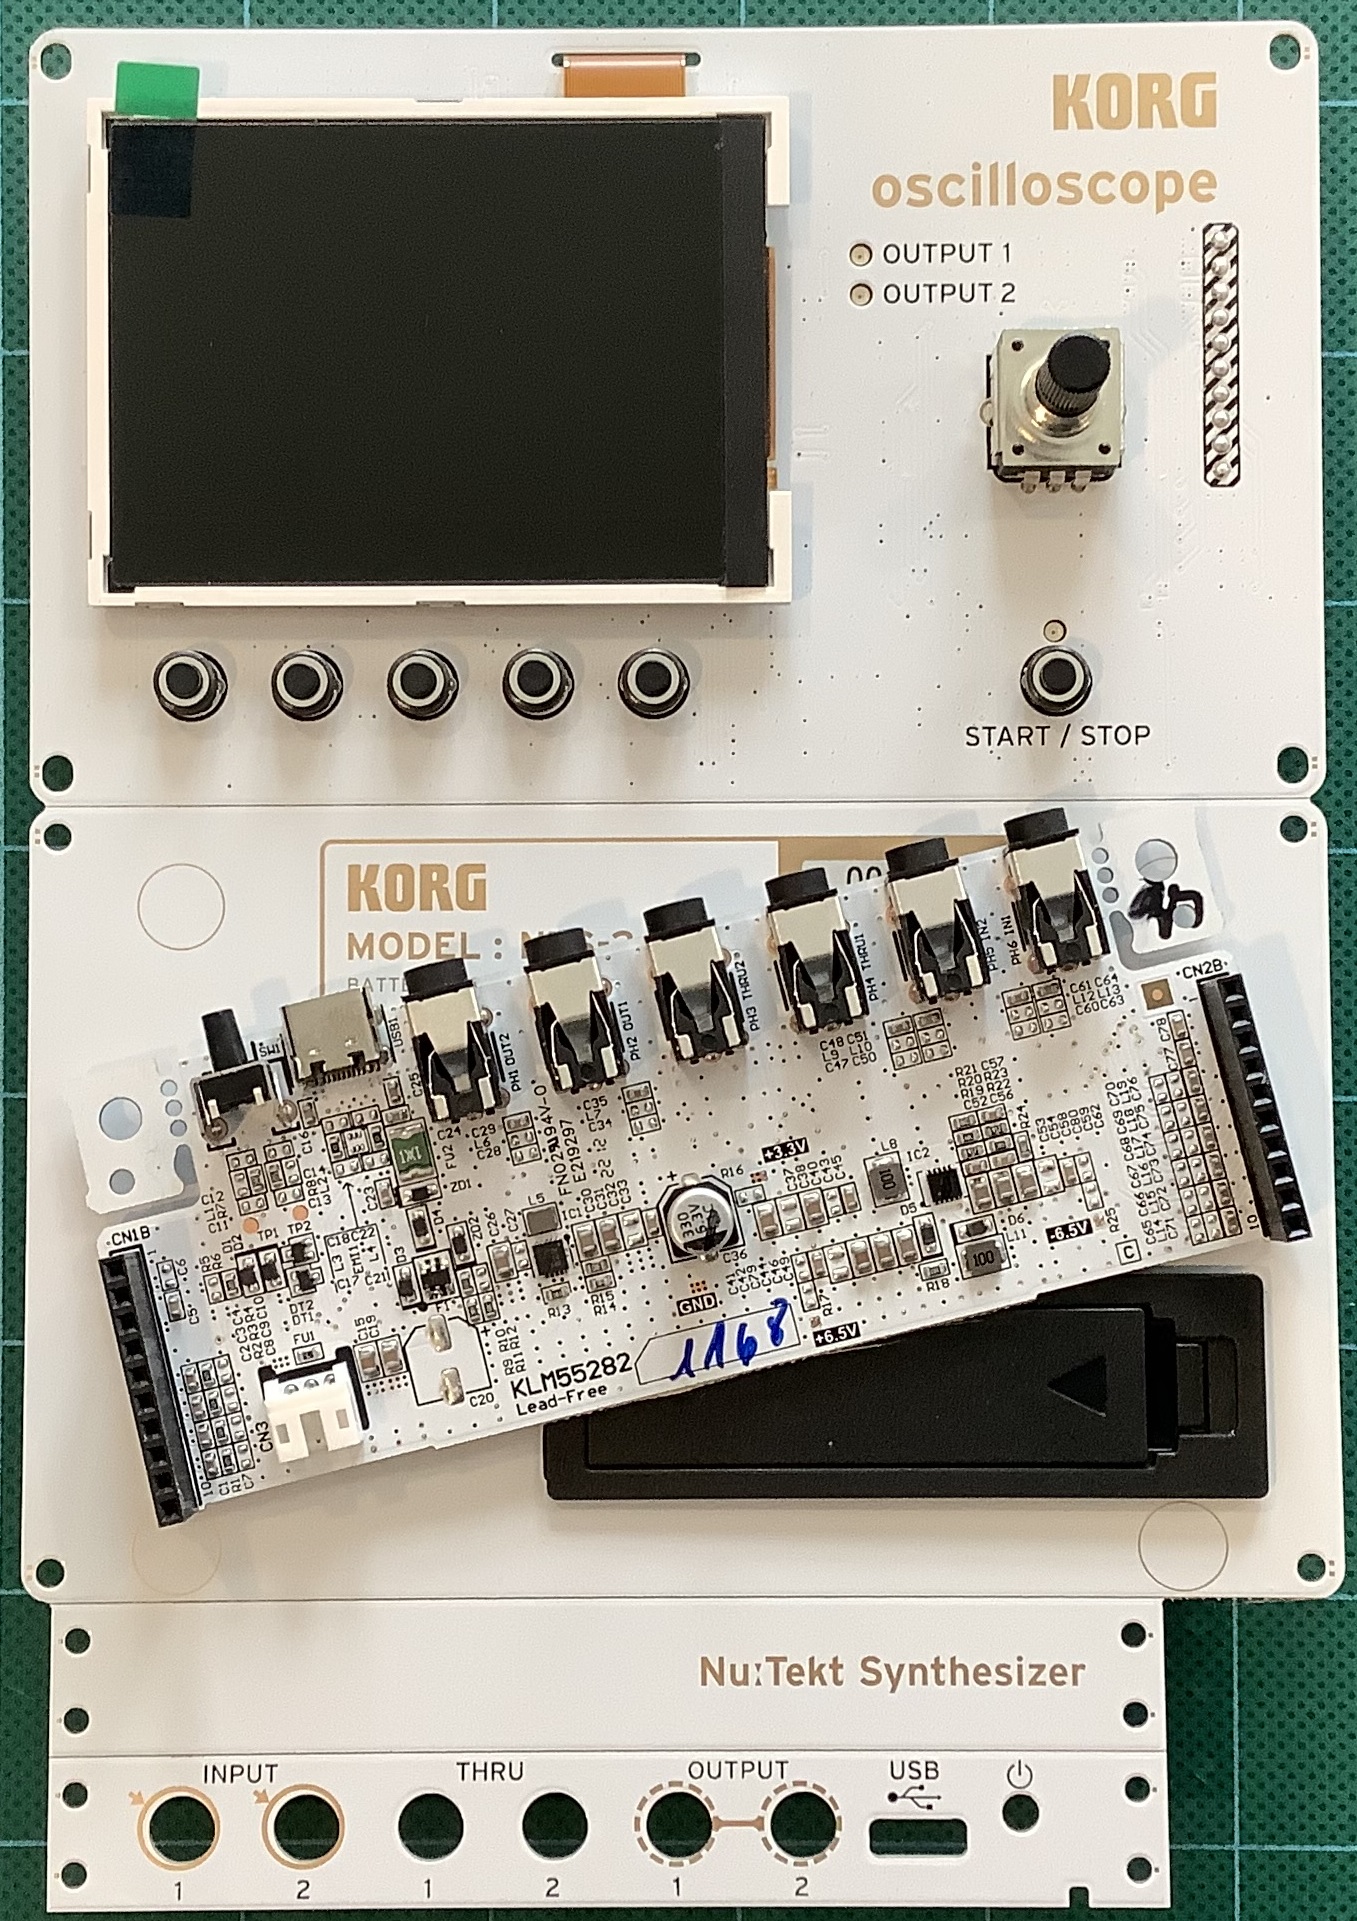
The color display (240×320 pixel 2.8″ LCD) is mounted on the flip-side of the main board. A second fully-assembled PCB has the jacks, ON/OFF switch and other gizmos needed for interfacing. The interface board plugs into the main board.
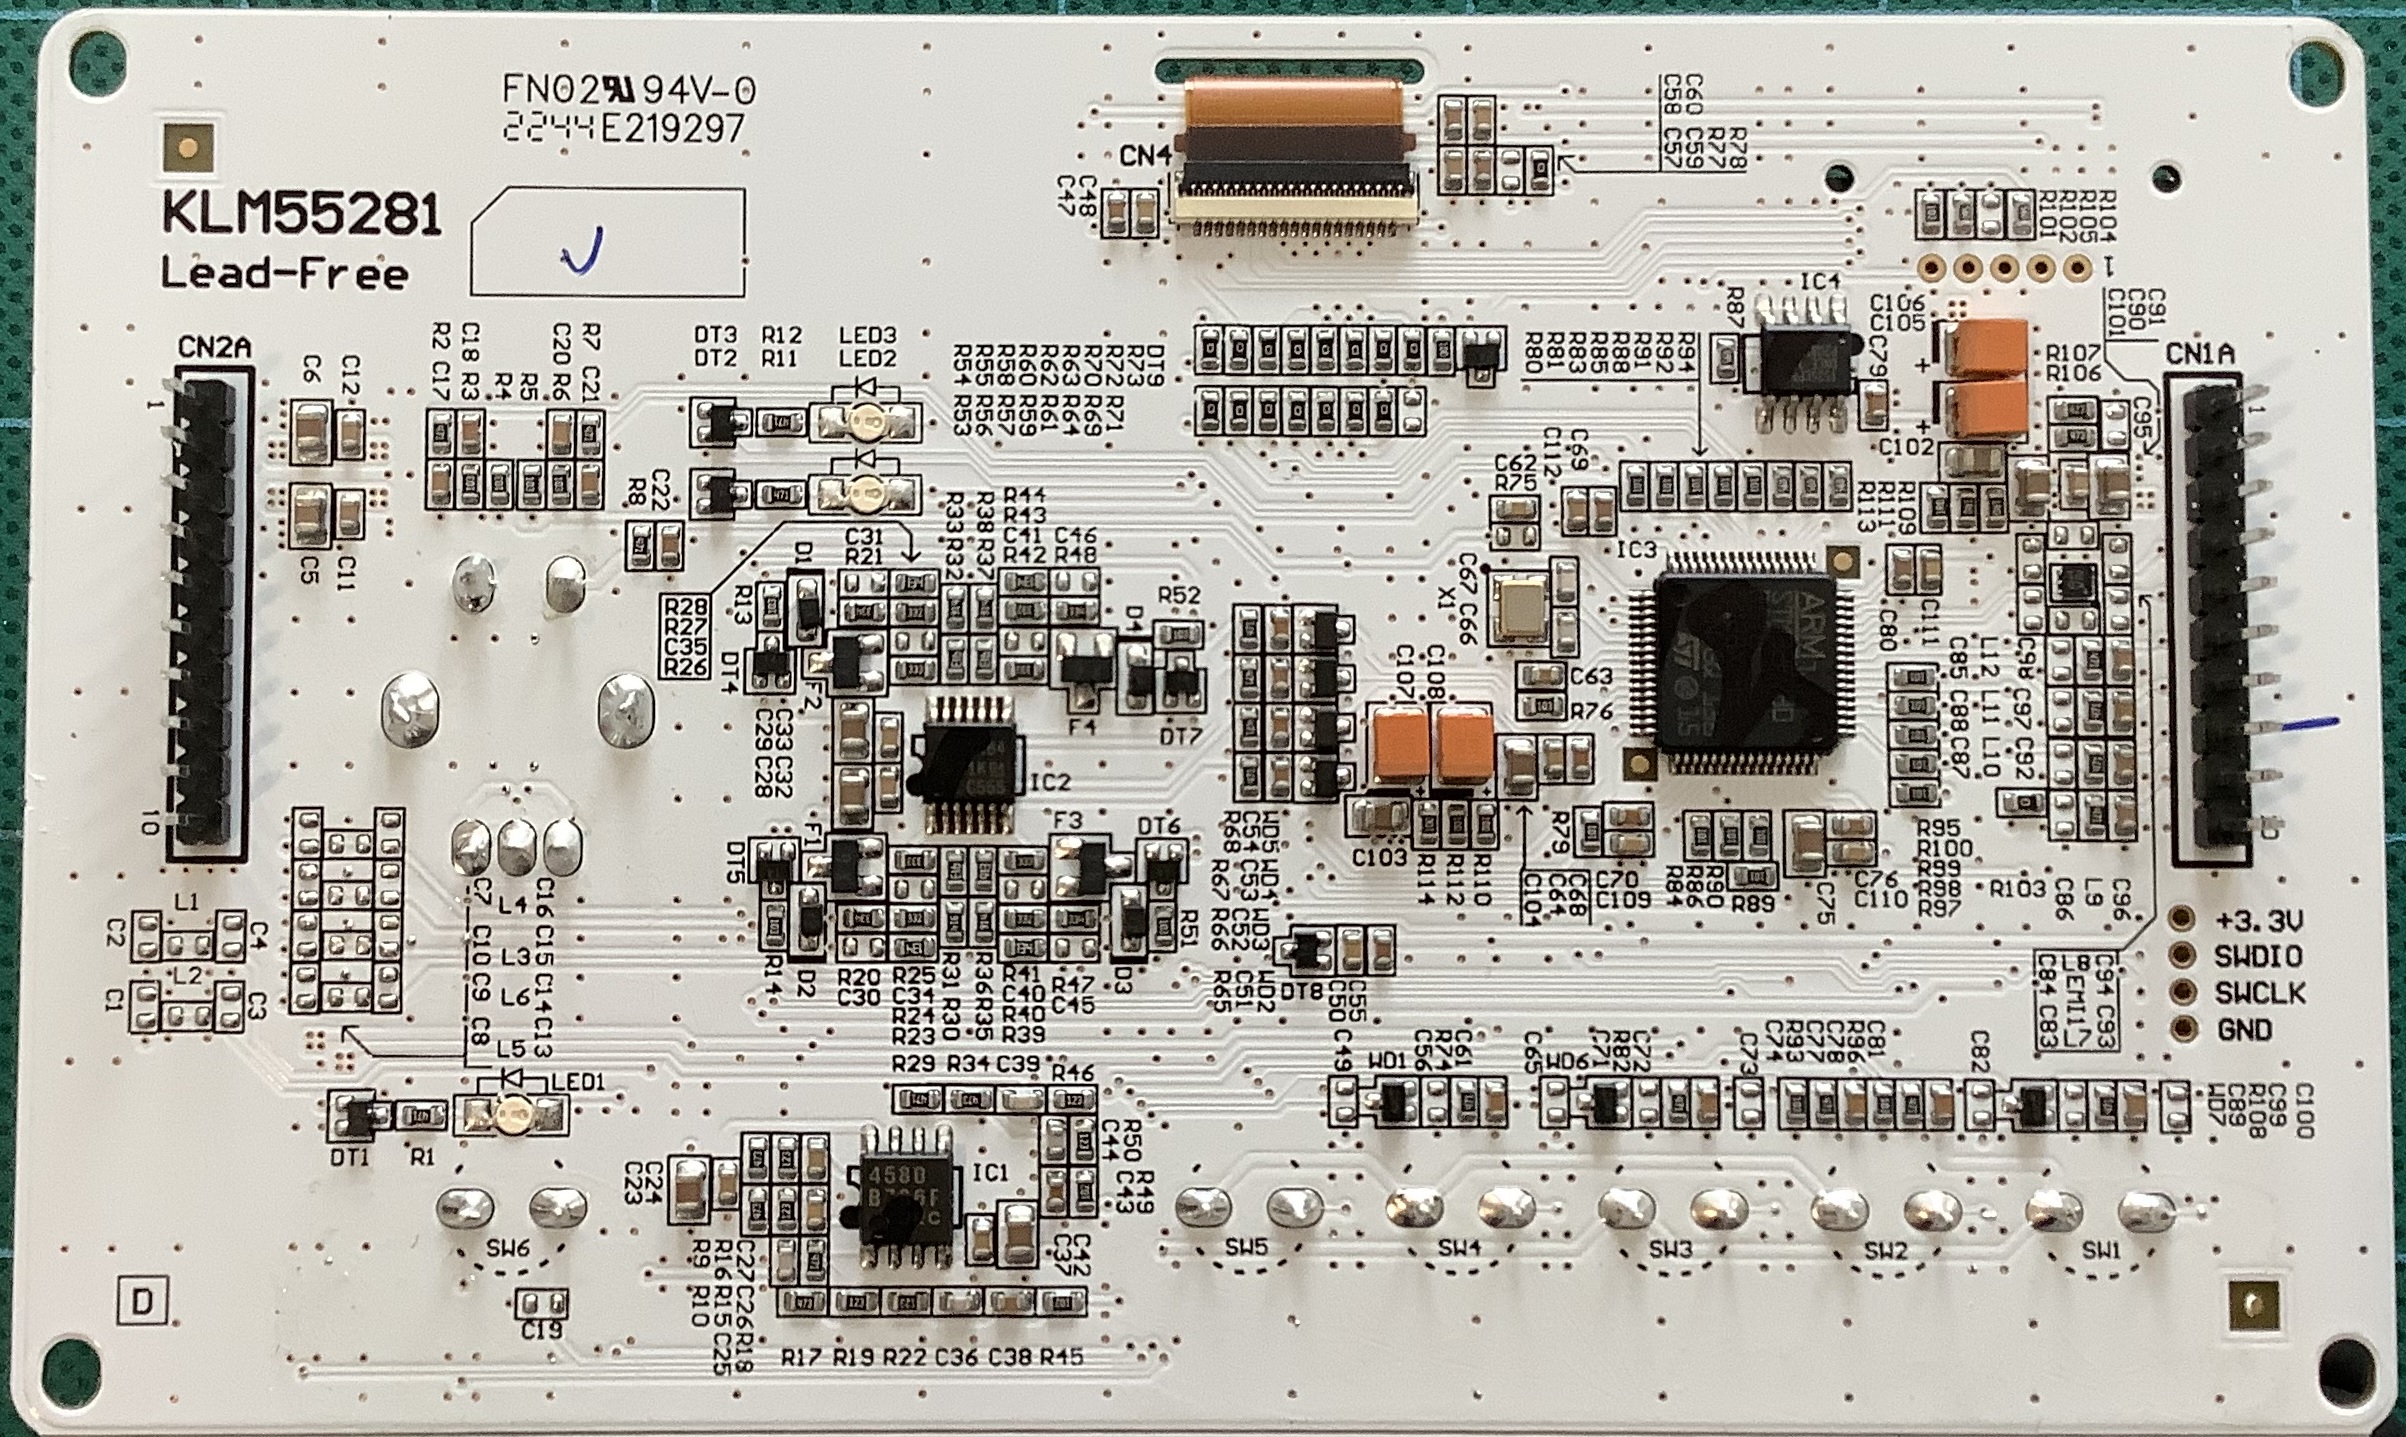
The image above is a close-up picture of the main electronics, including the ARM processor. Thank you, Korg, for wave-soldering this!
Assembly
The NTS-2 follows the pattern established by the rest of the Nu:tekt product line. The NTS-2 arrives disassembled and you do the work of putting the major components together. The kit includes assembly instructions, and “1, 2, you know what to do.” [Apologies to Junior Wells.]
The kit includes the cutest little screwdriver I’ve ever seen. Keep the screwdriver and use it to repair your eyeglasses. Yep, the kit screws are freaking small.
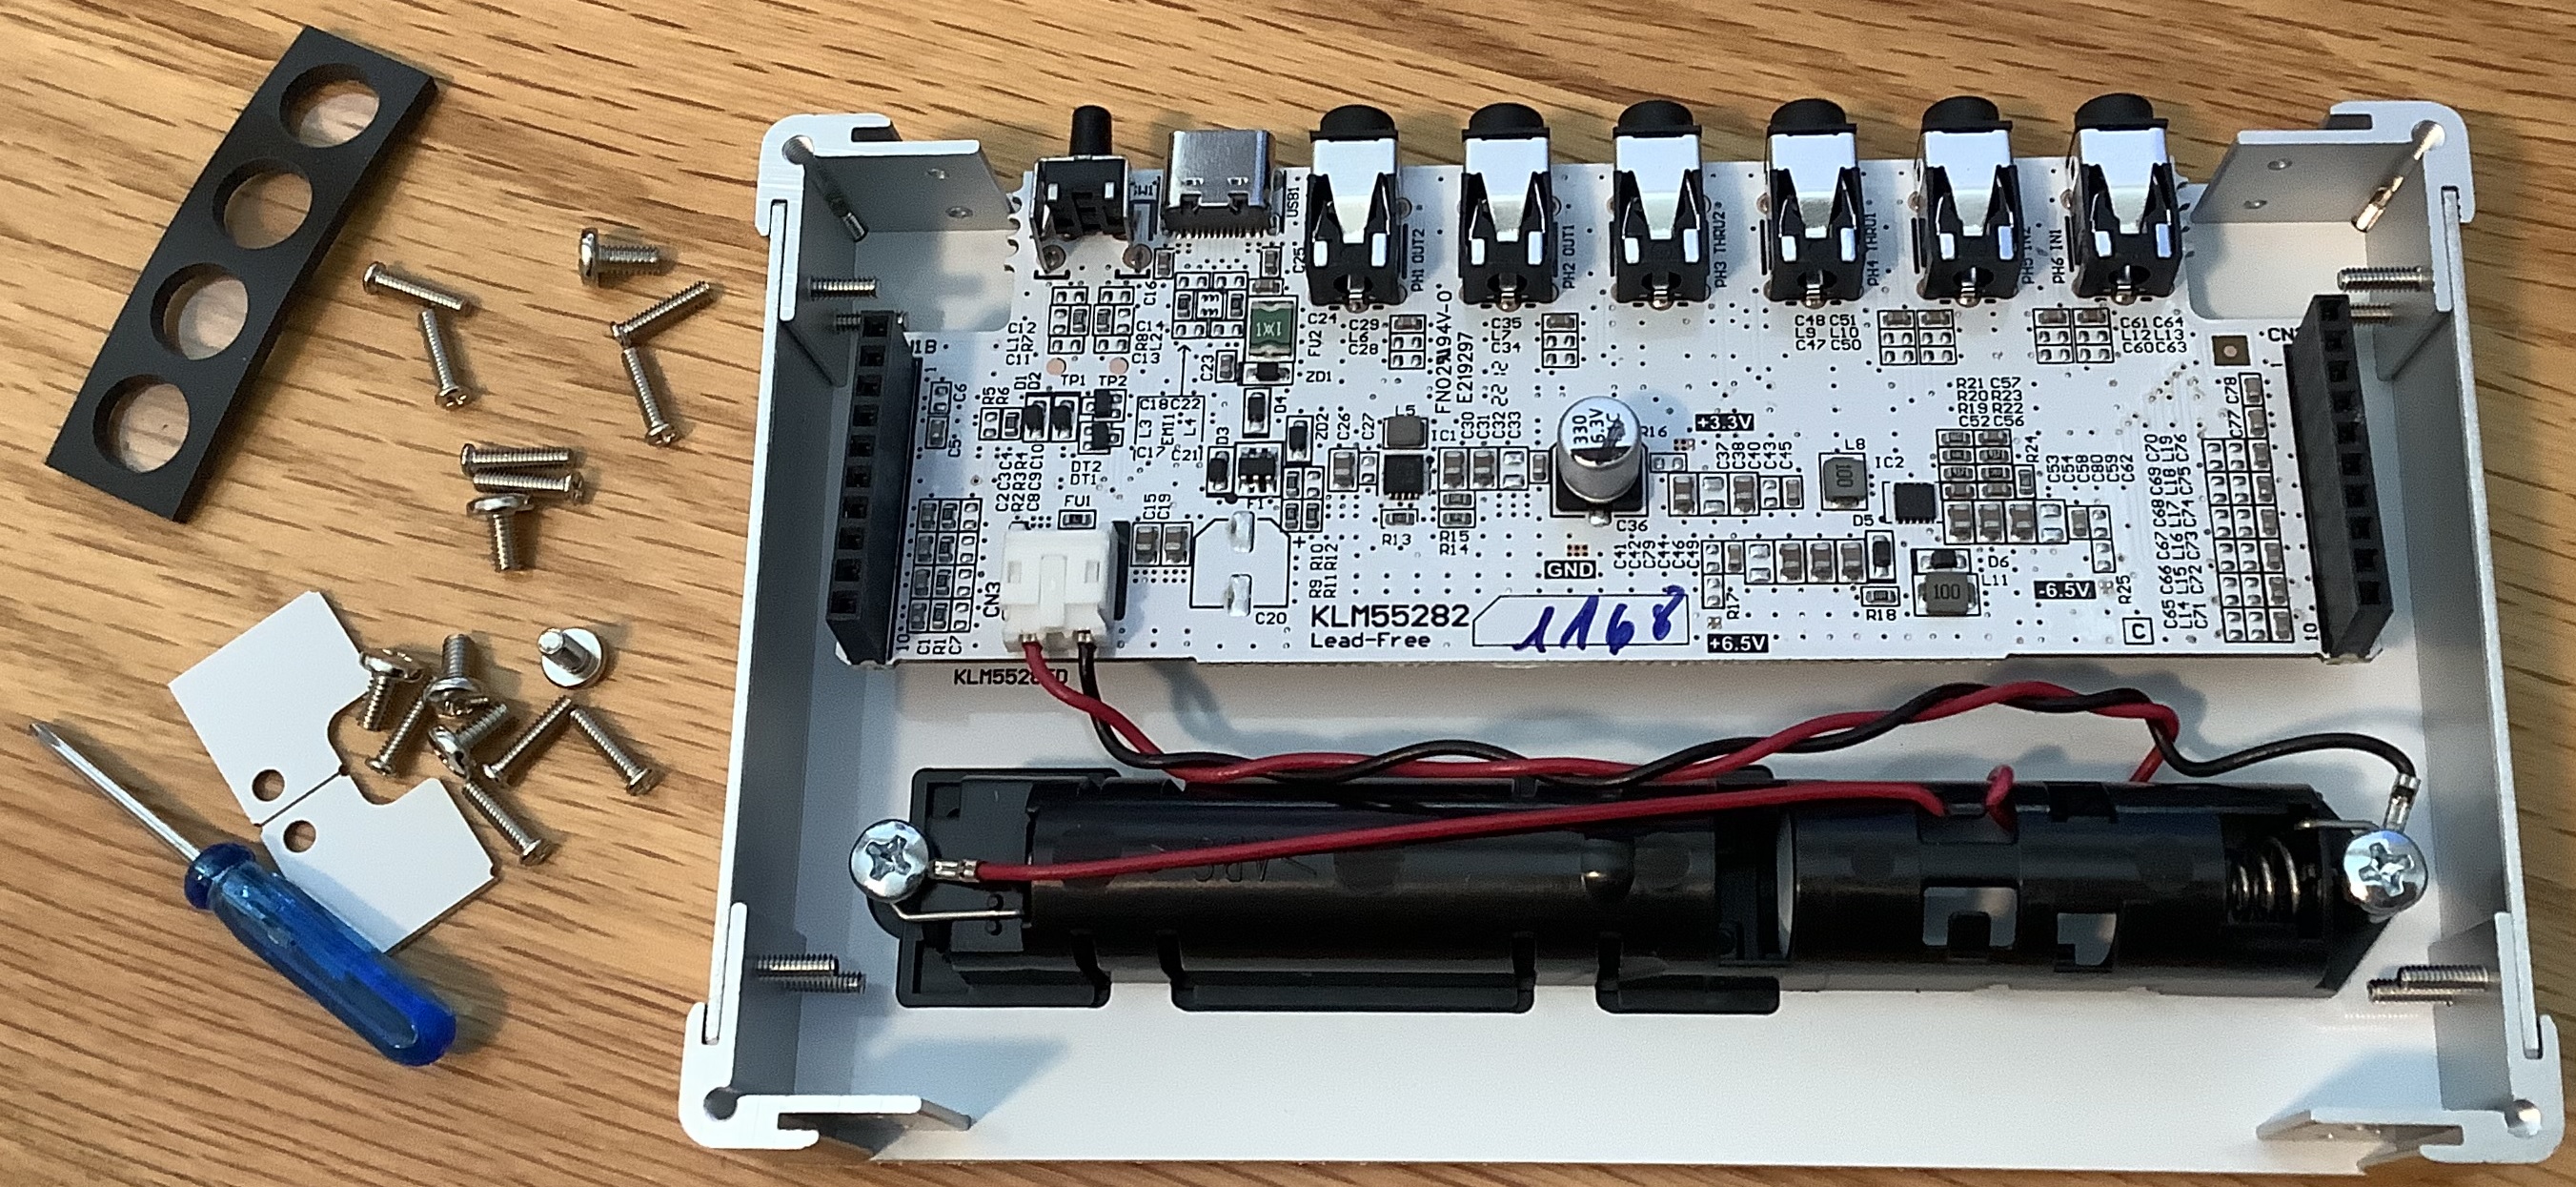
The image above shows the bottom assembly. You can see how the metal corner and side pieces tie everything together. Note the orientation of the interface board. Getting the orientation right is the only step that requires any real thought. Don’t forget to connect the battery lead to the interface board.
Screws secure the main board, AKA “the top”, onto the metal corners — after you’ve plugged the interface and main boards together, of course.
Assembly time is roughly the length of the Skye & Ross album (one hour). Overall, it was a fairly pleasant way to spend the morning, including coffee.
PATCH & TWEAK
The PATCH & TWEAK with KORG book fits the cliche, “richly illustrated.” If you want to know about synths — KORG synths, in particular — this is a fantastic book.
If you want to learn how to operate the NTS-2, not so much. The book has a few basics, however you must download the NTS-2 Owner’s Manual from the Korg web site to get the real dope. The Owner’s Manual (4 pages) isn’t much to look at although it does list the basic control parameters for each of the four operating modes:
- Oscilloscope mode (SCOPE)
- Function generator mode (WAVE)
- Spectrum analyzer mode (FFT)
- Global mode / settings
The book suggests how the NTS-2 may be used — not how to actually do any of that stuff. I recommend a little background reading about oscilloscopes (the Wikipedia page at the very least).
The NTS-2 operates on either USB power or two AAA batteries. I put in two AAA batteries, hit the switch, and no smoke. 🙂 No idea about real-world battery life at this point.
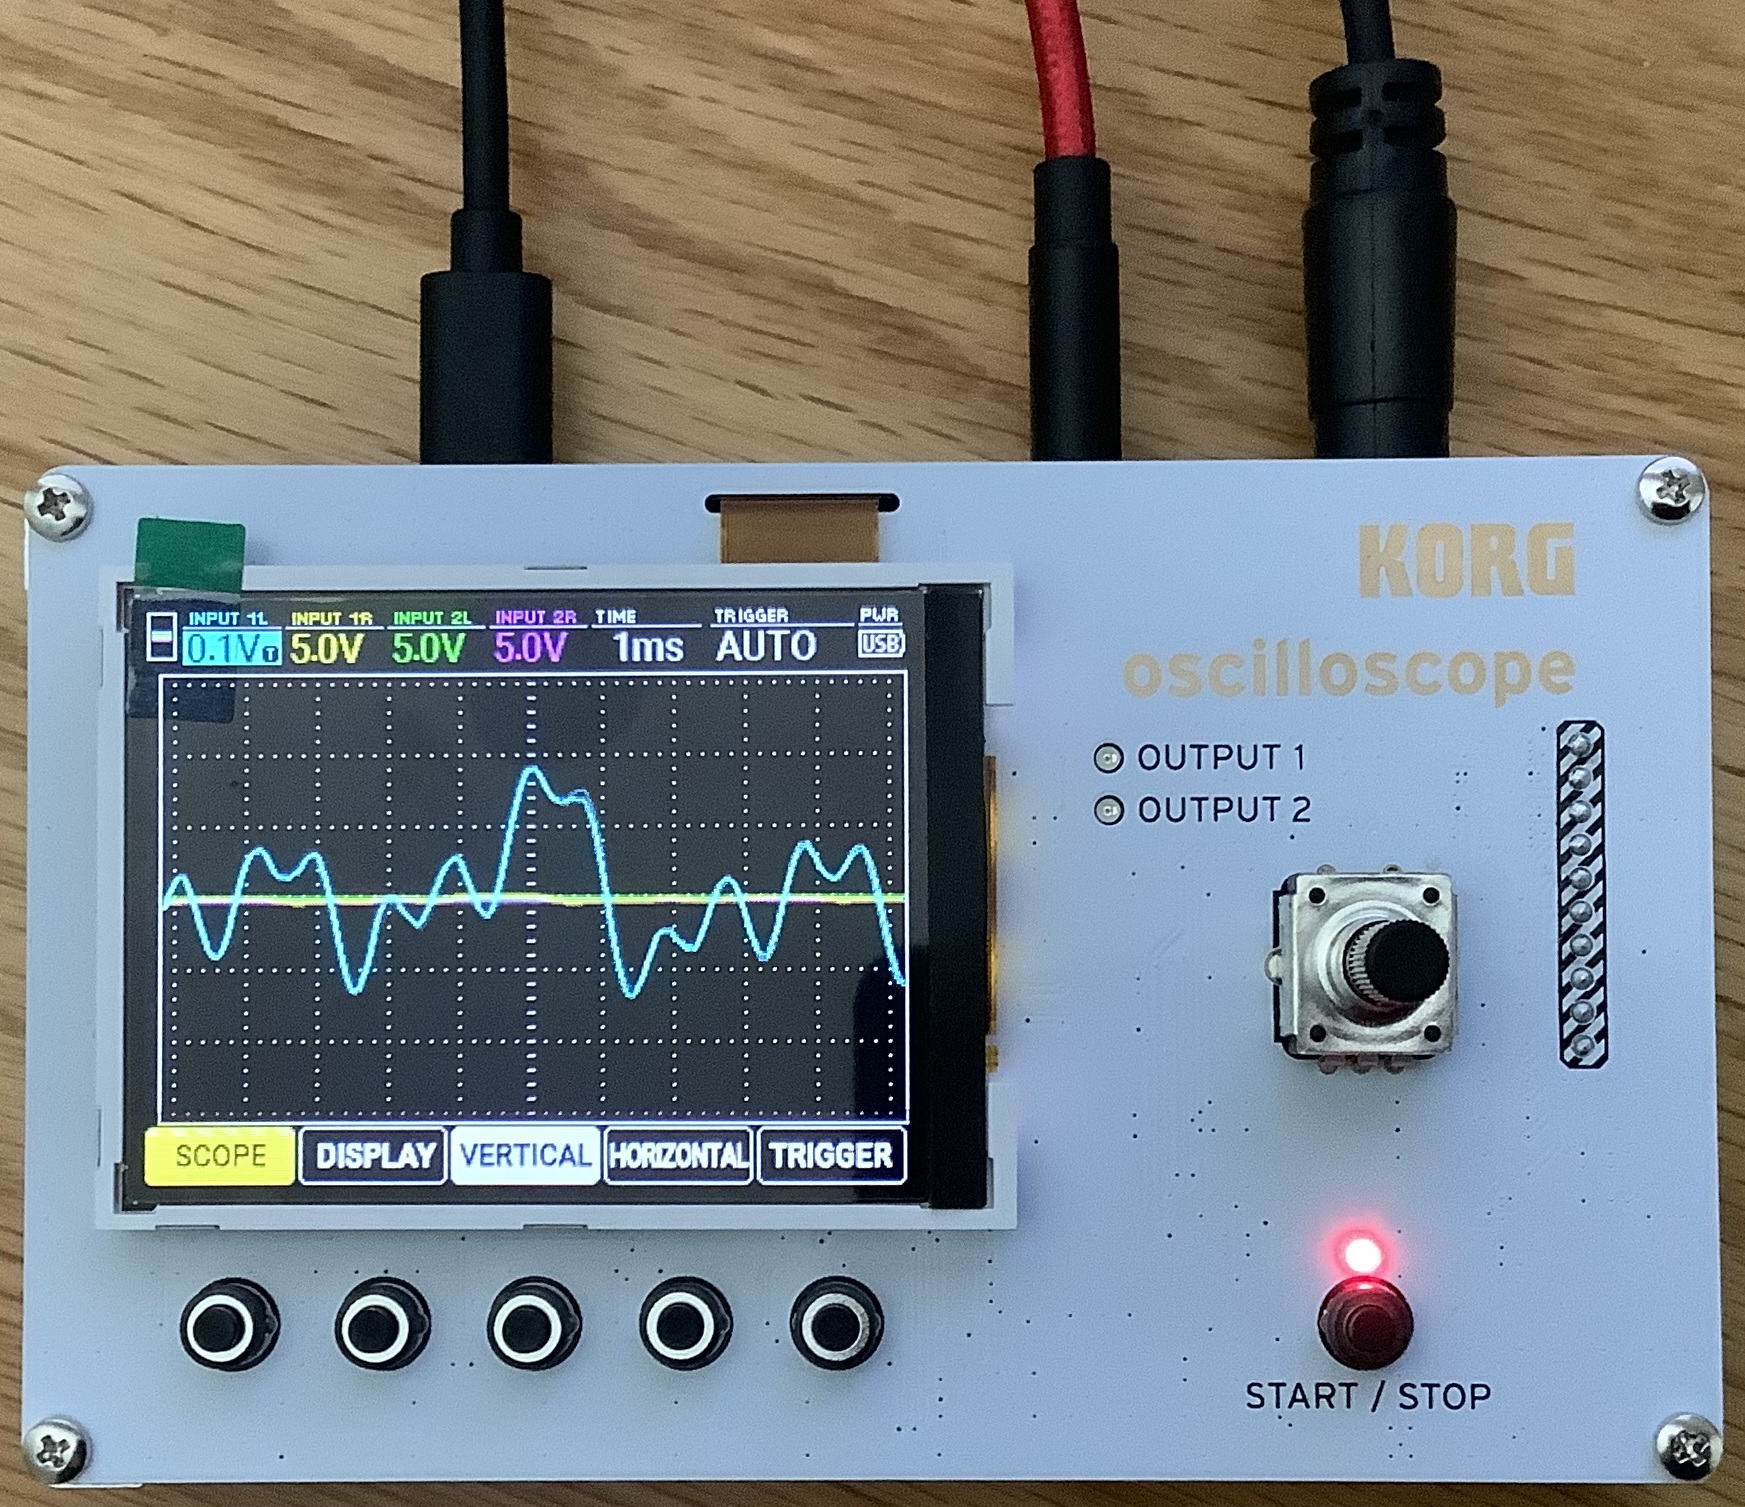
The user interface is menu-driven and is a lot easier to understand than my old Gabotronics oscilloscope. The front panel buttons line up with the on-screen menus. Simply press the appropriate button to rotate (navigate) through the menu items.
I wanted to see what happens if I just put a (mono) audio signal into the NTS-2 without any set-up or prep. This seems like the most typical first use scenario. I’ll bet the NTS-2 was inspired by the Korg Minilogue scope; people love to watch signals dance around.
First, you need to know that the INPUT and signal THRU jacks are stereo and the OUTPUT jacks are mono. I connected the NTS-2 INPUT to the MONO out from Yamaha MODX, selected an organ patch and taped down a key to form a simple tone generator. 🙂 Select SCOPE mode and press VERTICAL to select Input 1L.
And, flat line. What the? Well, out of the box, the vertical voltage range is set too high, 10 volts. The MODX is line out (approximately 1V max). Turn the parameter knob and change the vertical range to 0.1V. (The current range is shown in the status bar at the top of the display.) Now, we got picture!
Thanks to the simple NTS-2 menu system, I had fun playing with the function generator, too. I did have trouble grokking the FFT spectrum analyzer and need to revisit FFT mode after reading up.
I’m quite pleased with the NTS-2 and it should handle audio and control voltage analysis, no prob. I don’t know what to expect when analyzing high speed digital signals. The old Gabotronics does OK with digital and it has a logic analyzer capability which the NTS-2 does not. I use the Gabotronics with its Windows app because the Gab is absolutely horrible as a stand-alone scope. The NTS-2, on the other hand, does not have a personal computer-based app (at least not yet).
Thus, if you intend to do a lot of digital troubleshooting, you may want to consider one of the many inexpensive bench oscilloscopes that have popped up in recent years. If you want to do audio only and want easy fun, try the NTS-2.
Copyright © 2023 Paul J. Drongowski