
In my last post, I described the process of trimming audio stems for use on the Teenage Engineering EP-40 Riddim. The general procedure is:
- Create a new project and set its tempo.
- Import the audio stems (files) into time-aligned tracks.
- Tweak the tempo to improve alignment.
- Set loop points, listen and adjust.
- Select the loop regions.
- Trim and/or split to isolate the regions across all tracks.
- Export the isolated regions to individual WAV files.
I demonstrated this process in action using (Cakewalk) SONAR Home Studio. Parenthetically, I thought that the same process could be applied in Ableton Live.
Well, I took my own challenge and finished off a construction set using Live. The audio loops and stems are part of the Renegade Audio (RA) Dub Invasion construction kit. Dub Invasion is Number 10 in the Renegade Audio Launch Pad series. Dub Invasion is 289MB of goodness and I had barely scratched its surface because manual trimming in Sound Forge Audio Studio is too slow and tedious. Sounds like the perfect test case for trimming via Live.
Just to be clear, I’m running Ableton Live Intro version 12.4.3. You don’t need the full Live Suite. The ubiquitous Lite version may be good enough, too, but I haven’t tested the same procedure with Lite. Lite comes bundled (free!) with many hardware products, so you may already have a Lite license.
Working with loops and one-shots in Live is a breeze. First, I created a new Live Set (project) and set the tempo 125 BPM. Then I dragged loops and one shots into Live’s Session View — you know, the place where you launch clips. Dub Invasions WAV loop and one-shot files are (generally) time-aligned at the beginning. Remix stems are aligned to the beginning of the (stem) song. If you’re going to snag audio from a stem, you will need to do a little more trimming.
Once you have the loops and one-shots pulled in, give them a try and see if they fit together. That’s the great thing about Live. It’s also fun to trigger clips and get ideas for how you might arrange them on the EP-40 Riddim. I needed to reduce the published BPM (125 BPM) by half (62.5 BPM) to get the right feel.
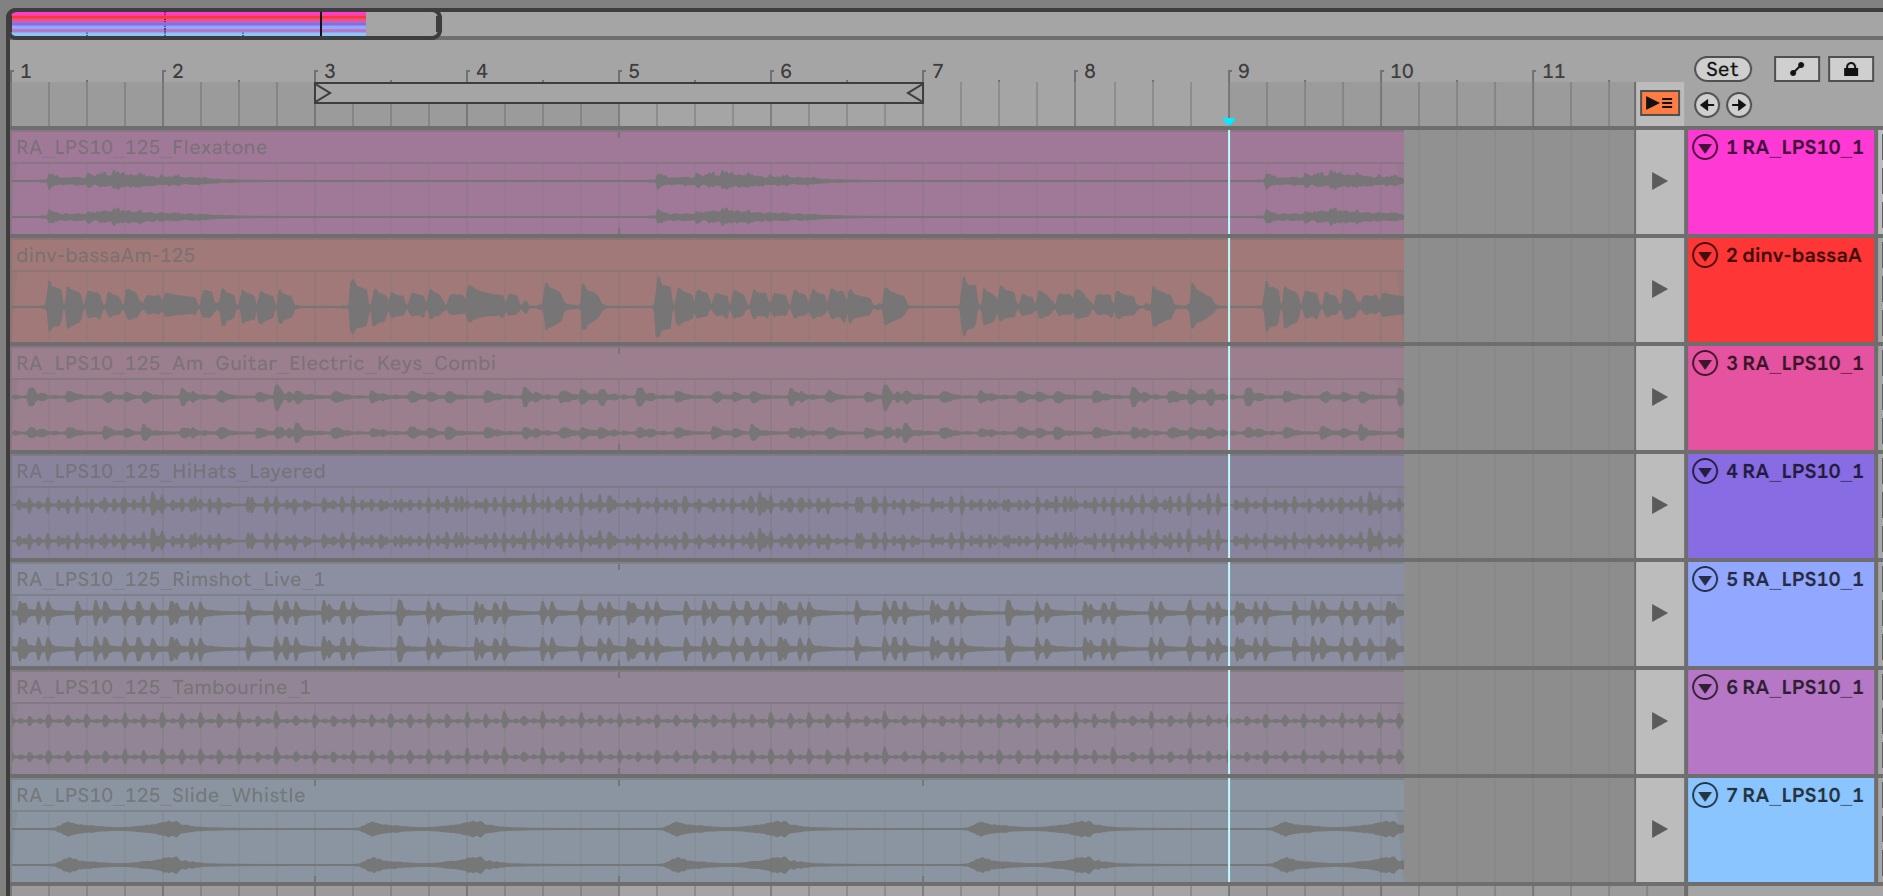
Audio loops in Ableton Live Intro
Next, I armed several loops in the Session View and switched to the Arrangement View. The Arrangement View displays typical DAW tracks (horizontal lanes). Then, hit record. Live will play the armed clips and record audio into the lanes. I ran off about ten measures of audio with the intention of trimming to eight bars (or less).
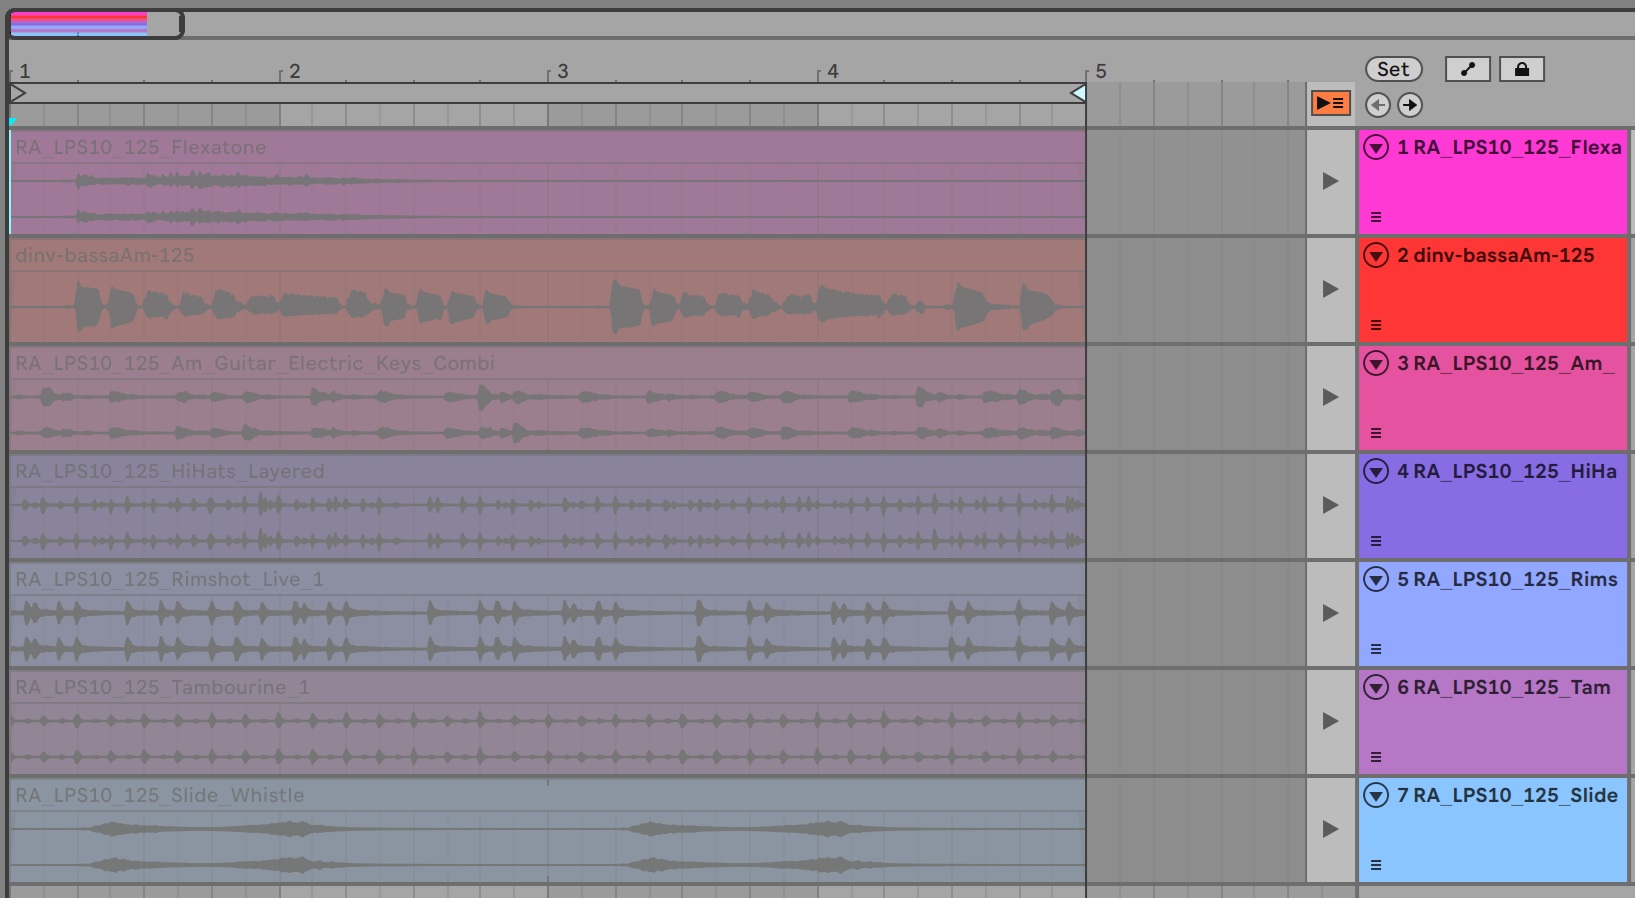
Loops trimmed and ready for export
With audio in the lanes, I created a loop by moving the start and stop braces in the time-line. Play the loop, listen and adjust. Keep in mind that longer loops require more memory. Be parsimonious.
It may be sloppy style, but I used the selection braces to choose measures that I wanted to delete from the end of the clips. I moved the braces to the beginning and end of the unwanted measures (time), selected all of the tracks, and deleted the selected time period. Then I re-adjusted the braces to select the loop/one-shot audio to be exported.
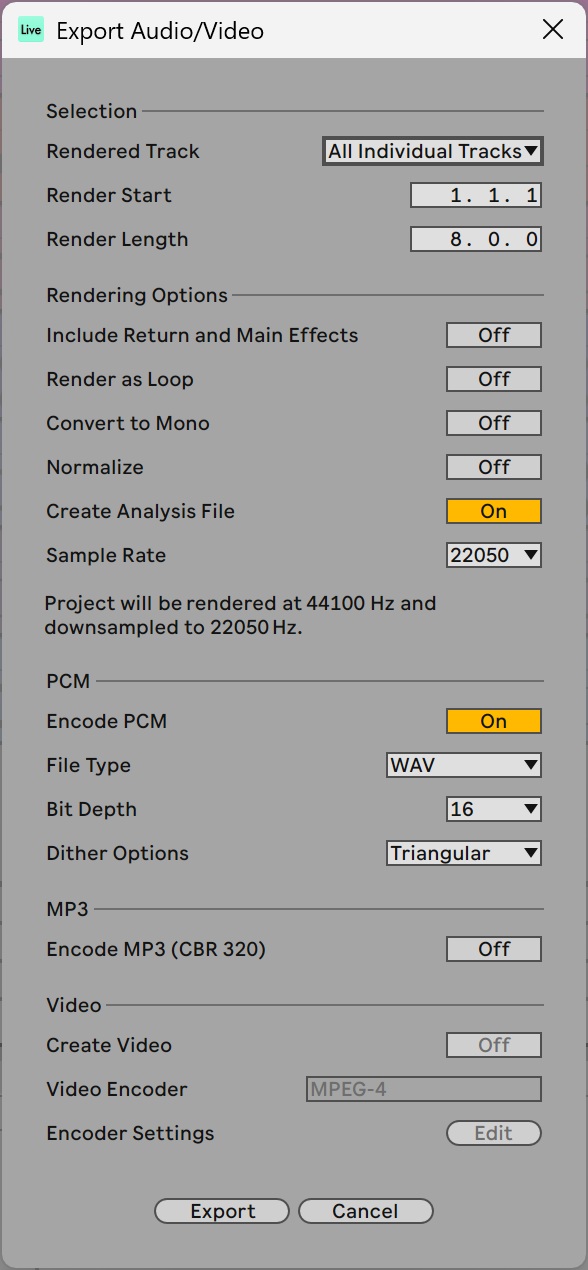
Ableton Live export options
As hinted, choose “Export Audio/Video…” in the File menu. Live pops up a dialog box where you set export options. I chose to render “All Individual Tracks”. That option produces one WAV file for each track. Set the starting point and render length. Set the sample rate (22,050Hz), file type (WAV) and bit depth (16). Optionally, you can create a Live Analysis File (ASD), too.
Click the Export button and navigate to the destination directory. Click the Save button and Live writes a WAV file for each track in the specified audio format.
Working in Live is faster than SONAR and much faster than manual editing individual files in Sound Forge. Going forward, I will be using Live.
Teenage Engineering sale
Here’s a time-sensitive reward for reading this far. Teenage Engineering is having a sale (30% off) until August 7, 2026. Browse to the Teenage Engineering site for details and the (secret) discount code. I ain’t telling.
If you would like to support the Yamaha Musician’s Forum, the Forum’s partner Thomann is participating in the sale. Make your purchase through the Forum and give the Forum a boost.
Copyright © Paul J. Drongowski