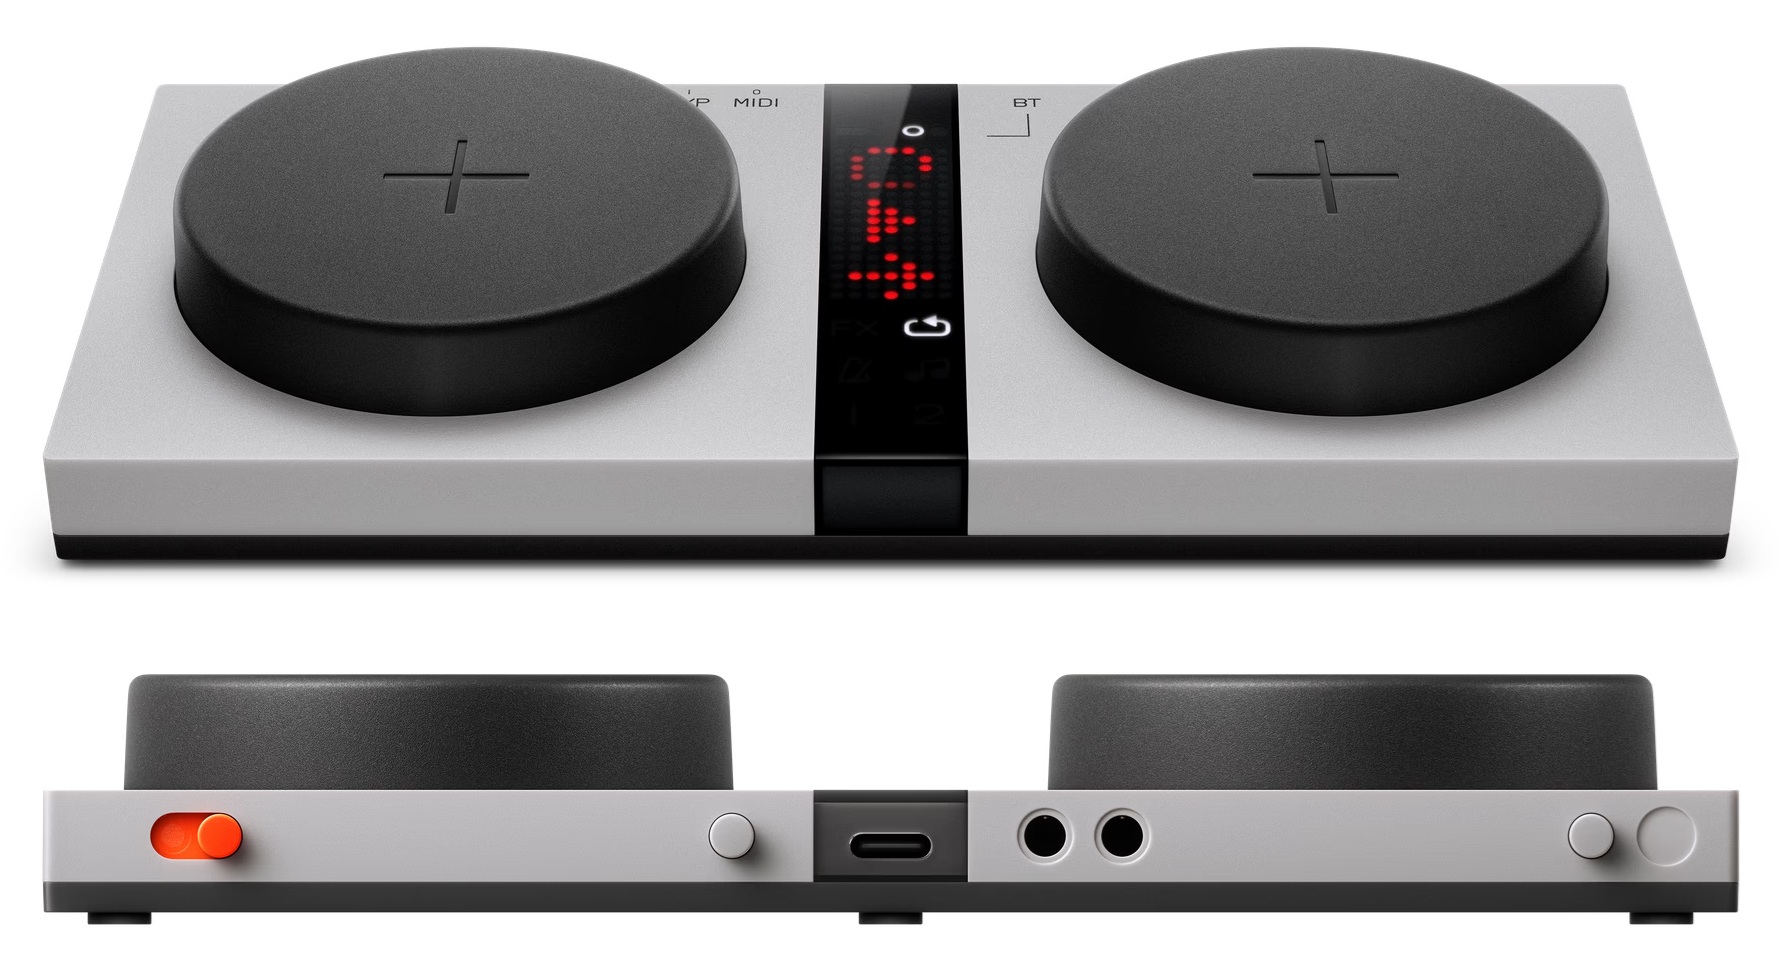
Trim construction kit with Ableton Live

In my last post, I described the process of trimming audio stems for use on the Teenage Engineering EP-40 Riddim. The general procedure is:

  • Create a new project and set its tempo.
  • Import the audio stems (files) into time-aligned tracks.
  • Tweak the tempo to improve alignment.
  • Set loop points, listen and adjust.
  • Select the loop regions.
  • Trim and/or split to isolate the regions across all tracks.
  • Export the isolated regions to individual WAV files.

I demonstrated this process in action using (Cakewalk) SONAR Home Studio. Parenthetically, I thought that the same process could be applied in Ableton Live.

Well, I took my own challenge and finished off a construction set using Live. The audio loops and stems are part of the Renegade Audio (RA) Dub Invasion construction kit. Dub Invasion is Number 10 in the Renegade Audio Launch Pad series. Dub Invasion is 289MB of goodness and I had barely scratched its surface because manual trimming in Sound Forge Audio Studio is too slow and tedious. Sounds like the perfect test case for trimming via Live.

Just to be clear, I’m running Ableton Live Intro version 12.4.3. You don’t need the full Live Suite. The ubiquitous Lite version may be good enough, too, but I haven’t tested the same procedure with Lite. Lite comes bundled (free!) with many hardware products, so you may already have a Lite license.

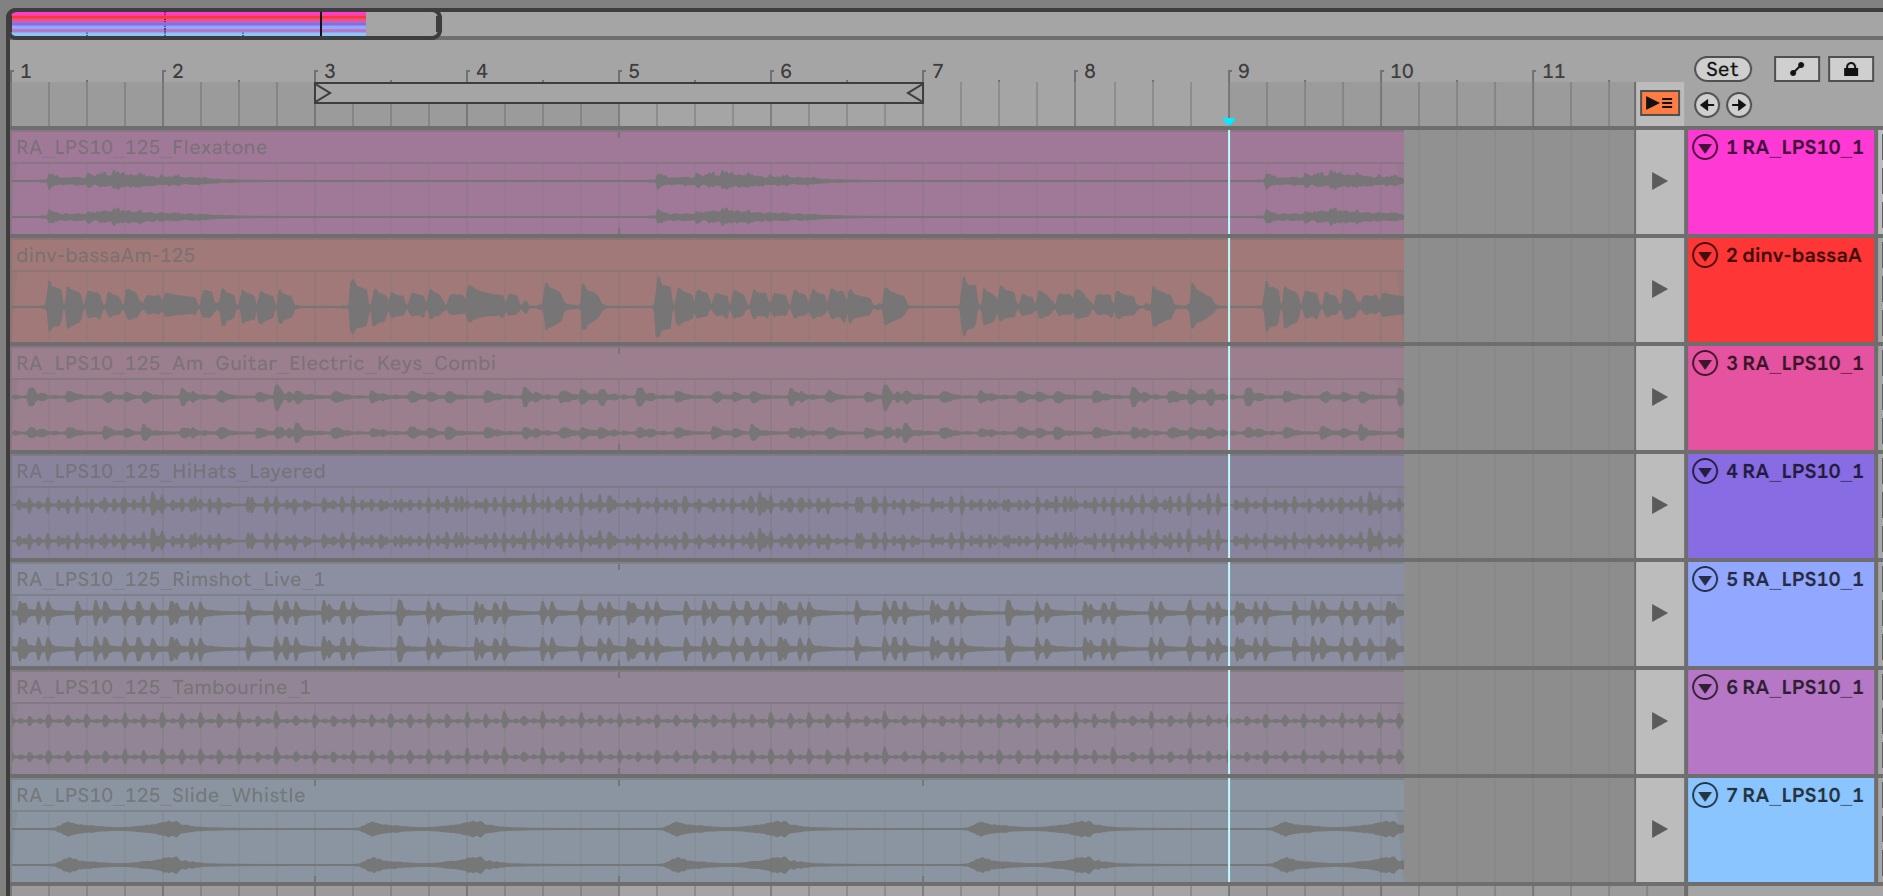
Working with loops and one-shots in Live is a breeze. First, I created a new Live Set (project) and set the tempo 125 BPM. Then I dragged loops and one shots into Live’s Session View — you know, the place where you launch clips. Dub Invasions WAV loop and one-shot files are (generally) time-aligned at the beginning. Remix stems are aligned to the beginning of the (stem) song. If you’re going to snag audio from a stem, you will need to do a little more trimming.

Once you have the loops and one-shots pulled in, give them a try and see if they fit together. That’s the great thing about Live. It’s also fun to trigger clips and get ideas for how you might arrange them on the EP-40 Riddim. I needed to reduce the published BPM (125 BPM) by half (62.5 BPM) to get the right feel.

Audio loops in Ableton Live Intro

Next, I armed several loops in the Session View and switched to the Arrangement View. The Arrangement View displays typical DAW tracks (horizontal lanes). Then, hit record. Live will play the armed clips and record audio into the lanes. I ran off about ten measures of audio with the intention of trimming to eight bars (or less).

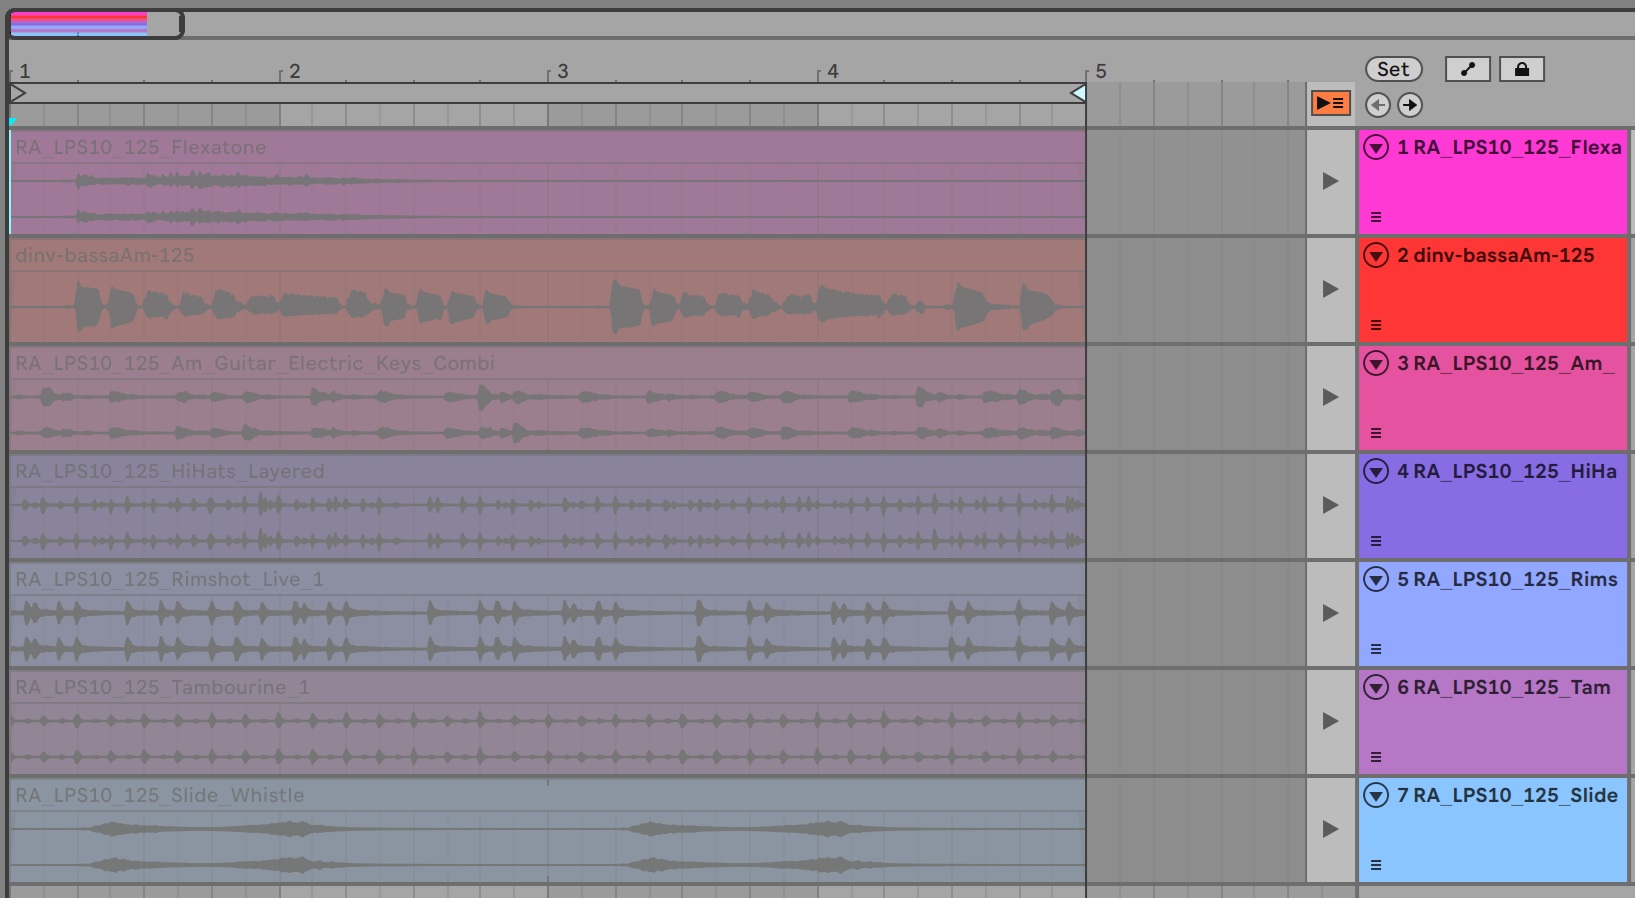
Loops trimmed and ready for export

With audio in the lanes, I created a loop by moving the start and stop braces in the time-line. Play the loop, listen and adjust. Keep in mind that longer loops require more memory. Be parsimonious.

It may be sloppy style, but I used the selection braces to choose measures that I wanted to delete from the end of the clips. I moved the braces to the beginning and end of the unwanted measures (time), selected all of the tracks, and deleted the selected time period. Then I re-adjusted the braces to select the loop/one-shot audio to be exported.

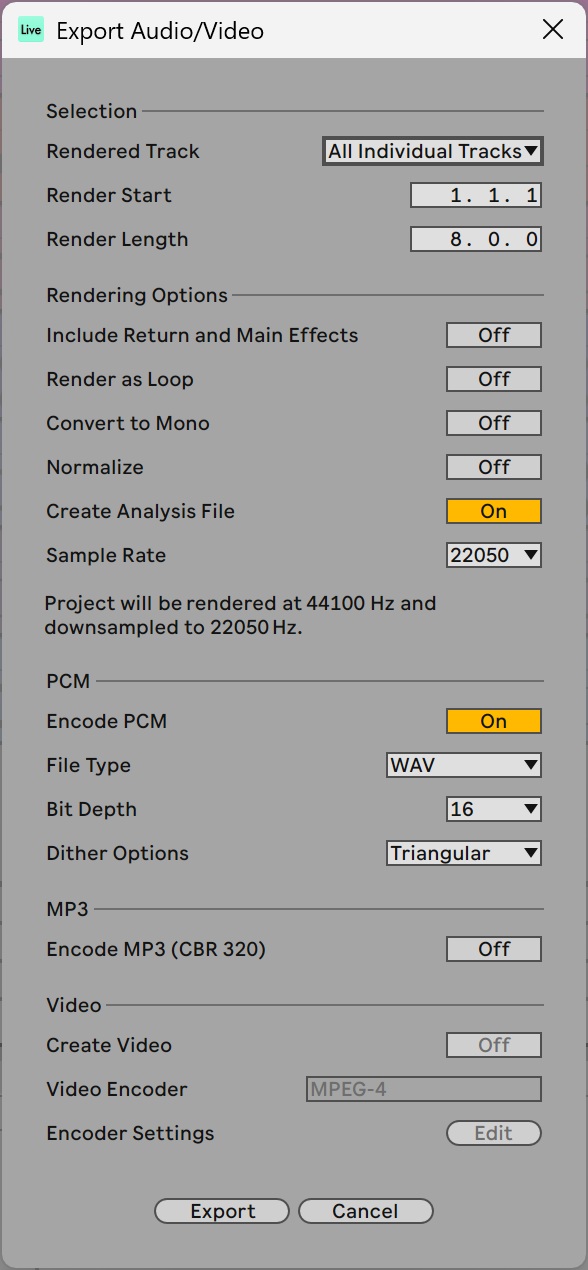
Ableton Live export options

As hinted, choose “Export Audio/Video…” in the File menu. Live pops up a dialog box where you set export options. I chose to render “All Individual Tracks”. That option produces one WAV file for each track. Set the starting point and render length. Set the sample rate (22,050Hz), file type (WAV) and bit depth (16). Optionally, you can create a Live Analysis File (ASD), too.

Click the Export button and navigate to the destination directory. Click the Save button and Live writes a WAV file for each track in the specified audio format.

Working in Live is faster than SONAR and much faster than manual editing individual files in Sound Forge. Going forward, I will be using Live.

Teenage Engineering sale

Here’s a time-sensitive reward for reading this far. Teenage Engineering is having a sale (30% off) until August 7, 2026. Browse to the Teenage Engineering site for details and the (secret) discount code. I ain’t telling.

If you would like to support the Yamaha Musician’s Forum, the Forum’s partner Thomann is participating in the sale. Make your purchase through the Forum and give the Forum a boost.

EP-40 Riddim PDFs

Don’t forget about my EP-40 Riddim PDFs. I swizzled and condensed parts of the on-line guide. Just recently added are two PDFs for the EP-136 K.O. Sidekick: basic operation and effects.

Copyright © Paul J. Drongowski

Add a construction kit to EP-40 Riddim

At some point, you will want to add new content to your Teenage Engineering EP-40 Riddim. I bought my EP-40 as a loop machine. I like interacting with it — bringing layers in and out, blasting a siren, adding FX, etc.

My favorite reggae and dub loop producer is Dubmatix (artist Jesse King). Dubmatix produces sound libraries for Renegade Audio, which can be found on Loopmasters and other on-line retailers.

Dubmatix has been super-generous over the years releasing free taster and gift packs. Keep an eye on the Dubmatix web site or get on the Dubmatix mailing list.

I like to pay back generosity and have purchased several Dubmatix sample packs. I also have a zillion taster packs which are a good way to dip your toe in the water before buying.

Today, I want to show how I processed and imported the Renegade Audio Dub Yard Funk taster pack into EP-40. Dub Yard Funk is volume 40 in the reasonably-priced Dub Pack series. A Dub Pack is a construction kit with the instrument parts broken into pre-trimmed loops and sounds. Loop duration runs from 10 seconds up to a minute, depending upon title.

It’s like Dub Packs are made for the EP-40 Riddim, except for loop size. Out of the carton, the EP-40 is stuffed with 92MBytes of factory content and eight artist songs. That leaves 36MBytes free for your own content and one project (number nine). [Someday I will explore project and sample management after getting the nerve to delete factory-installed artist projects.] Thus, we gonna need to do some trimmin’ and squeezin’ to get Dub Pack loops into EP-40.

Instead of diving into a full 250MByte Dub Pack and swimming around, I downloaded the Dub Yard Funk taster pack from Loopmasters. That way you can follow along and experiment on your own. Plus, I like the sound of this pack! It’s easier to do monkey-work when you like what you’re hearing. 🙂

The Dub Yard Funk taster pack contains twelve WAV files:

RA_DYF_77_Abm_Bass_Gtr_Main.wav
RA_DYF_77_Abm_Gtr_Music_Combo_3.wav
RA_DYF_77_Abm_Gtr_Music_Combo_Echo_2.wav
RA_DYF_77_Abm_Guitar_Wah.wav
RA_DYF_77_Abm_Keys_Skank_Combo_2.wav
RA_DYF_77_Abm_Melodica_Skank.wav
RA_DYF_77_Abm_Vox_2.wav
RA_DYF_77_Full_Drum.wav
RA_DYF_77_Mixed_1.wav
RA_DYF_77_Mixed_Perc_6.wav
RA_DYF_77_Perc_Flexatone.wav
RA_DYF_77_Tops_2.wav

Each file is 12.9MB in size with a 29 second duration. Clearly, these ain’t gonna fit into my EP-40’s free space (36MB). Sample format is 44,100Hz, 24-bit stereo. Going lo-fi will squeeze things down.

Listening to the full drums or skanks, for example, one realizes that there is a lot of redundancy here. Fortunately, the audio is aligned across files and it is possible to select and trim loop-length excerpts across all of the files.

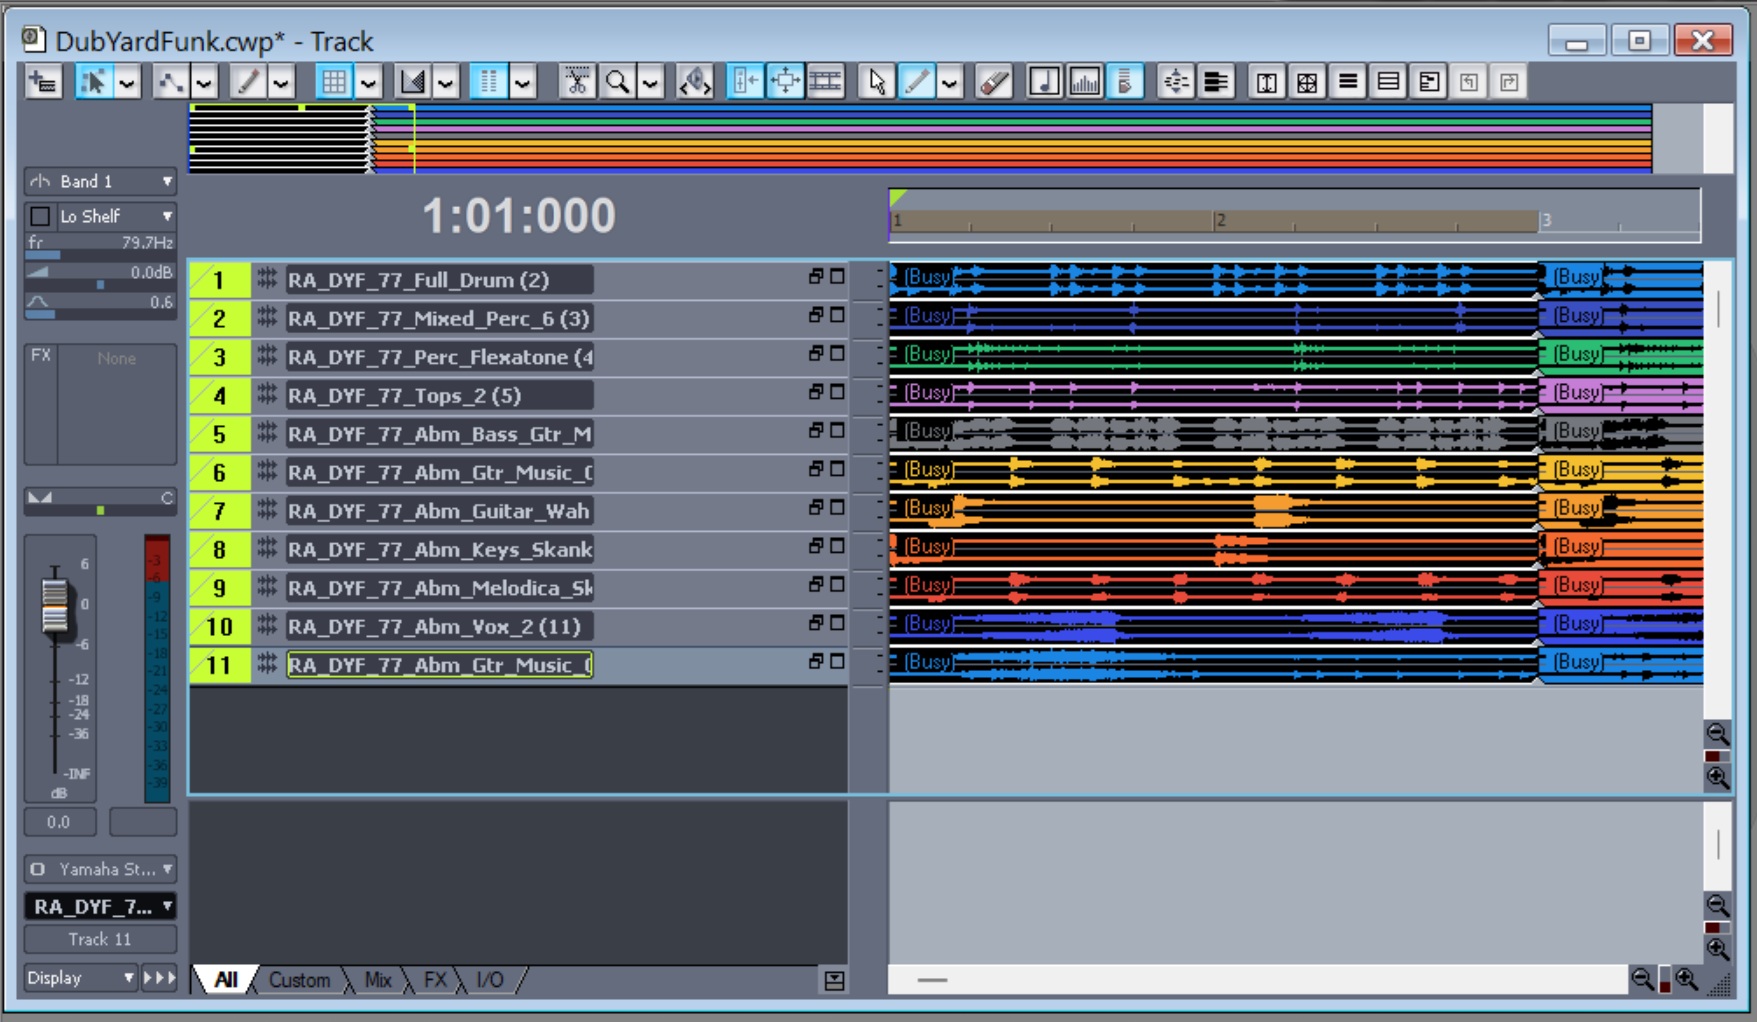
Here’s how to do a quick chop-job in SONAR. (Yes, it’s ancient Cakewalk Home Studio, again.) First, set the project tempo (77BPM). The correct project tempo makes it easier to snatch two or four bar loops. Next, drag each file into an SONAR audio track. I decided not to include the full mix, RA_DYF_77_Mixed_1.wav, because we can and will layer the individual pieces/parts interactively on the EP-40 in Live State. Tweak the project tempo to fine-tune time alignment to the start of each measure.

The next few steps use SONAR’s audio clip capabilities. Turn on looping and choose loop start and end points. Press play and listen for glitches. Tweeze the project tempo (or loop points) if you must. When everything sounds good, select all of the tracks loop bars. Go into the Edit menu and choose Split. Enable the Split At Selection option and click OK.

SONAR clips ready for export

At this point, you should have a four bar clip for each stem as shown in the track screenshot. Go to the File menu and choose Export > Audio. Under Source Category, choose Tracks from the drop-down list. Choose the target audio format. I went with 20,250Hz, 16-bit stereo in order to reduce file size. Enter a short identifier (e.g., “tt”) in the file name field to make SONAR happy and click Export. SONAR should now write eleven (or whatever) WAV files where each WAV file is a four-bar clip in the specified audio format.

I got the following files. What did you get?

tt-RA_DYF_77_Abm_Bass_Gtr_Main (6)-5.wav
tt-RA_DYF_77_Abm_Gtr_Music_Combo_3 (7)-6.wav
tt-RA_DYF_77_Abm_Gtr_Music_Combo_Echo_2 (12)-11.wav
tt-RA_DYF_77_Abm_Guitar_Wah (8)-7.wav
tt-RA_DYF_77_Abm_Keys_Skank_Combo_2 (9)-8.wav
tt-RA_DYF_77_Abm_Melodica_Skank (10)-9.wav
tt-RA_DYF_77_Abm_Vox_2 (11)-10.wav
tt-RA_DYF_77_Full_Drum (2)-1.wav
tt-RA_DYF_77_Mixed_Perc_6 (3)-2.wav
tt-RA_DYF_77_Perc_Flexatone (4)-3.wav
tt-RA_DYF_77_Tops_2 (5)-4.wav

SONAR appended “tt” at the front of every file (clip) name. These names are way too long for the Teenage Engineering Sample Tool, so I renamed them to:

    dyf-bassAbm-77.wav  dyf-echoAbm-77.wav  
    dyf-combAbm-77.wav  dyf-flex-77.wav     
    dyf-drum-77.wav     dyf-keysAbm-77.wav  
    dyf-meloAbm-77.wav  dyf-vox2Abm-77.wav
    dyf-perc-77.wav     dyf-wahAbm-77.wav
    dyf-tops-77.wav

I renamed the files using a short batch file. [Windows.] I found out — the hard way — that the EP Sample Tool likes sample names 16 characters or shorter. My names are 14 characters or less (excluding the “.wav” extension). The output files are much smaller: 540KB or roughly 6MB for all eleven files. That’ll fit!

I did the chop job with SONAR. Your DAW probably has similar features. [Note to self: try Ableton Live Intro.] The basic procedure is:

  • Create a new project and set its tempo.
  • Import the audio stems (files) into time-aligned tracks.
  • Tweak the tempo to improve alignment.
  • Set loop points, listen and adjust.
  • Select the loop regions.
  • Trim and/or split to isolate the regions across all tracks.
  • Export the isolated regions to individual WAV files.

I suggest studying DAW features to select, trim and export audio stems en masse. It took reading, trial and error to get things going in SONAR.

By the way, I’ve tried editing and trimming audio files individually to produce fixed-length loops (i.e., all loops have the same length (N samples)). The above method is much faster and less labor-intensive because you can operate on multiple stems/loops in one swack.

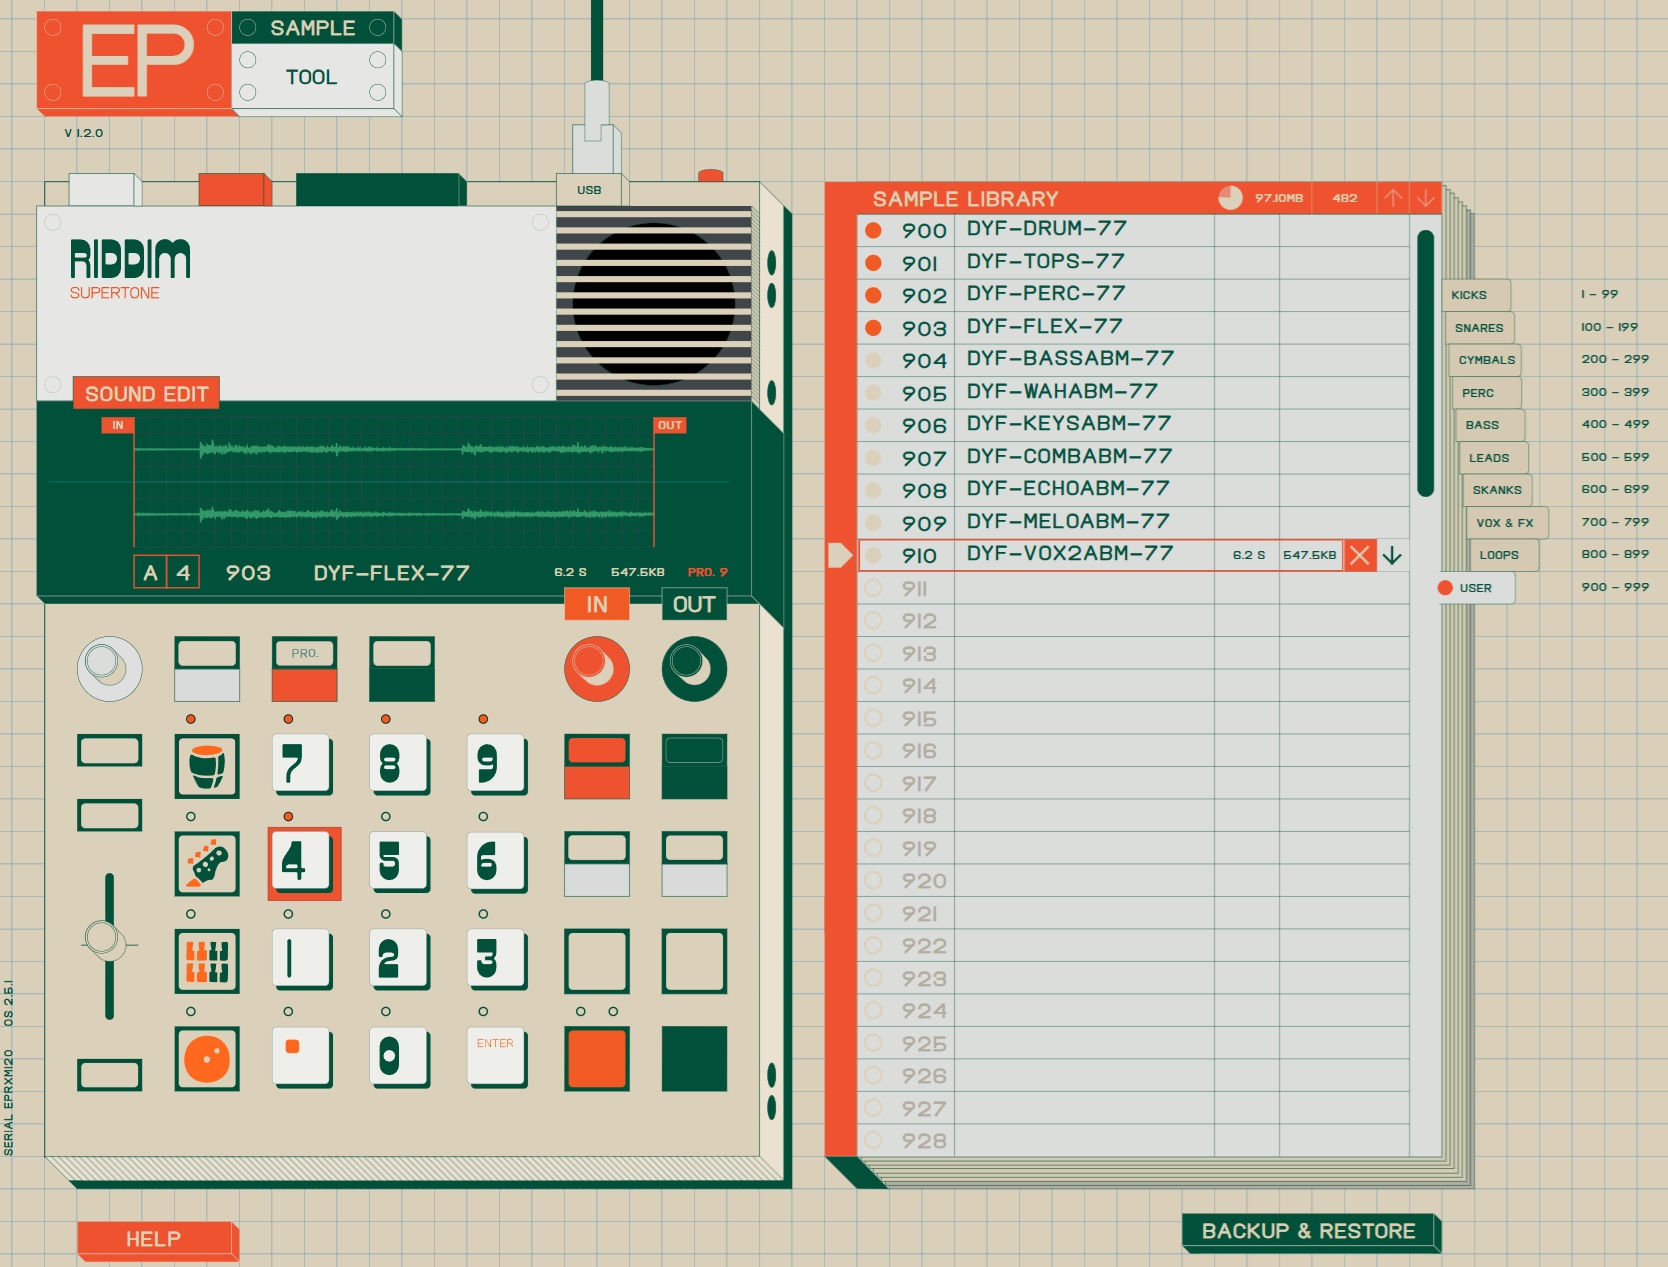
The final step is to import the loop files into the EP-40 ecosphere. Connect an EP-40 to your computer and fire up the Teenage Engineering Sample Tool in your web browser. (The browser must support Web MIDI.) If you get an alert box saying “teenage.engineering wants to control and reprogram your MIDI device”, click the Allow button. The app searches for your EP-40 (make sure it’s ON!) and displays the familiar tabbed directory of its samples.

Dub Yard Funk on board the EP-40

Now it’s time to drag the clip WAV files to the EP-40. Once the sample files are in the directory, you can assign each sample to a pad by dragging it from the directory to a pad. You will need to get into Sound Edit and set the pad play mode to one-shot, key, legato or loop. [See my EP-40 PDF cheat sheets.]

Give it a try! Dubmatix taster packs are good for learning and practice. Be sure to buy the full packs and keep Dubmatix mixing!

Copyright © 2026 Paul J. Drongowski

Get yer EP-40 Riddim PDFs

Rastaman! Rockers! I have not forgotten the Teenage Engineering EP-40 Riddim.

While messing with construction kits (again), I got frustrated with the on-line EP-40 guide. Like many people, I want a guide on my own machine, preferably in PDF. Even better, a guide on paper right next to the Riddim.

Teenage Engineering EP-40 Riddim

Necessity is the mother of invention. I rolled up my sleeves and created six PDFs. Each PDF concentrates on a particular aspect of the EP-40. The on-line guide has sooo much white space, I managed to pack a lot of detail into each PDF by squeezing it down. I swizzled the on-line guide to focus on layering and playing loops, and the Supertone synth. If I get into beat making with the EP-40, I will make more PDFS about sequencing.

I’m sharing these PDFs:

These PDFs are not comprehensive, so please do not give up on the on-line EP-40 guide. As I said above, they won’t give you much help sequencing or using MIDI/SYNC, for example.

Now the somewhat disappointing news. I created the PDFs from screenshots, not text. Thus, the PDFs are not searchable. I opted for more PDFs with at most two pages per file. You should be able to narrow your interest to a particular PDF and should be able to scan quickly through its two pages. Sorry ’bout the lack of text search.

All of the PDFs display text and diagrams on a solid white background. I tried to make the text and diagrams as readable as possible on paper when printed.

The EP-40 OS 2.5 update adds several substantial features.

  • USB audio
  • Reversing samples
  • Selectable sampling rate (26,250Hz, 32,000Hz, 46,875Hz)
  • Longer MONO samples (up to 40 seconds)
  • Equal length AUTOCHOP
  • Arpeggio (one-shot or legato type samples)

Working with Yamaha SEQTRAK and Teenage Engineering Riddim, wow, they are very different machines. Unless you intend to buy both, choose wisely, padawan.

Copyright © 2026 Paul J. Drongowski

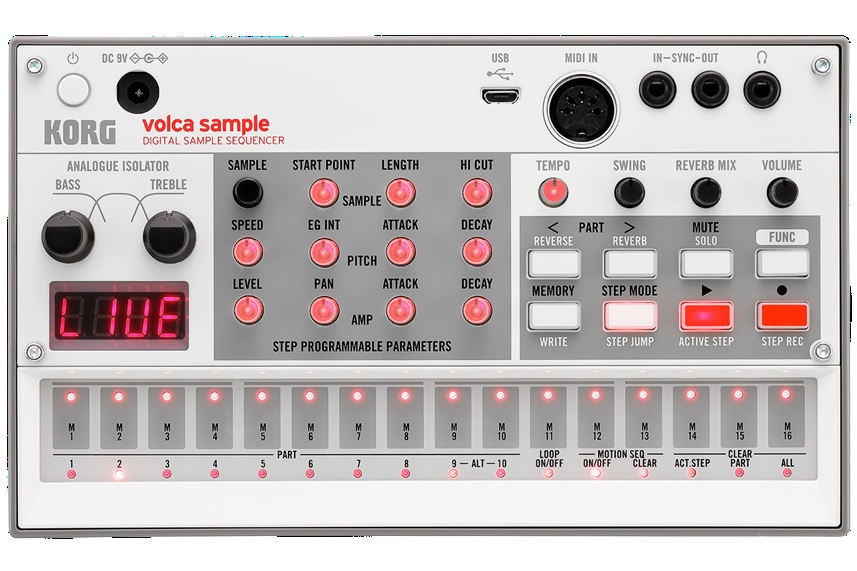
Comparison: SEQTRAK, EP-40 Riddim, Volca Sample

I’m taking a break from the toys to compare:

All four machines are deep so you’re not going to get an in-depth analysis of features and so forth. I’m going to concentrate on immediacy and fun. Each box has its own best uses and I will offer my opinion.

A word about manuals

Wait! You were going to talk about immediacy and the first thing you mention is manuals?

All four machines support direct production of a single pattern. Sooner or later, you’ll need to learn about song structure, chaining, etc. and you will need to do menu diving. That’s where a good manual can help because if you can find information fast, you won’t lose the buzz.

In that regard, the AN200 manual is the best. Not only can you read and search the manual in PDF, the AN200 came with a nice thick paper book. In terms of content, the AN200 manual was written when Yamaha obviously cared about manuals and good technical writing.

Today, not so much. The SEQTRAK guide covers the usual front panel and button pressing stuff, but is woefully short about the SEQTRAK app. You are expected to puzzle out app functionality. Unfortunately, some app features are not obvious like click and hold on a step to reveal step parameters. It took me forever to discover that one.

The Teenage Engineering EP-40 user guide is at roughly the same level as the SEQTRAK manual. The EP-40 is more intuitive to use right out of the box. Once you want to get into customization, though, you’ll be looking into the guide. Unfortunately, TE does not provide a PDF manual and you’ll need an Internet connection to keep the guide by your side. Can’t really search the on-line manual either.

The Volca Sample 2 owner’s manual is the worst. The paper and PDF versions are broad sheets. Text is shown in mice type — too tiny for humans. I do paper origami and blow up parts of the manual onto regular 8.5″ x 11″ paper. Korg, this is ridiculous. Also in the ridiculous department is the poor readability of TE’s and SEQTRAK’s app text (tiny size, low contrast). As I’ve mentioned elsewhere, I literally read the 4K 24″ monitor screen with a magnifying glass. Inexcusable.

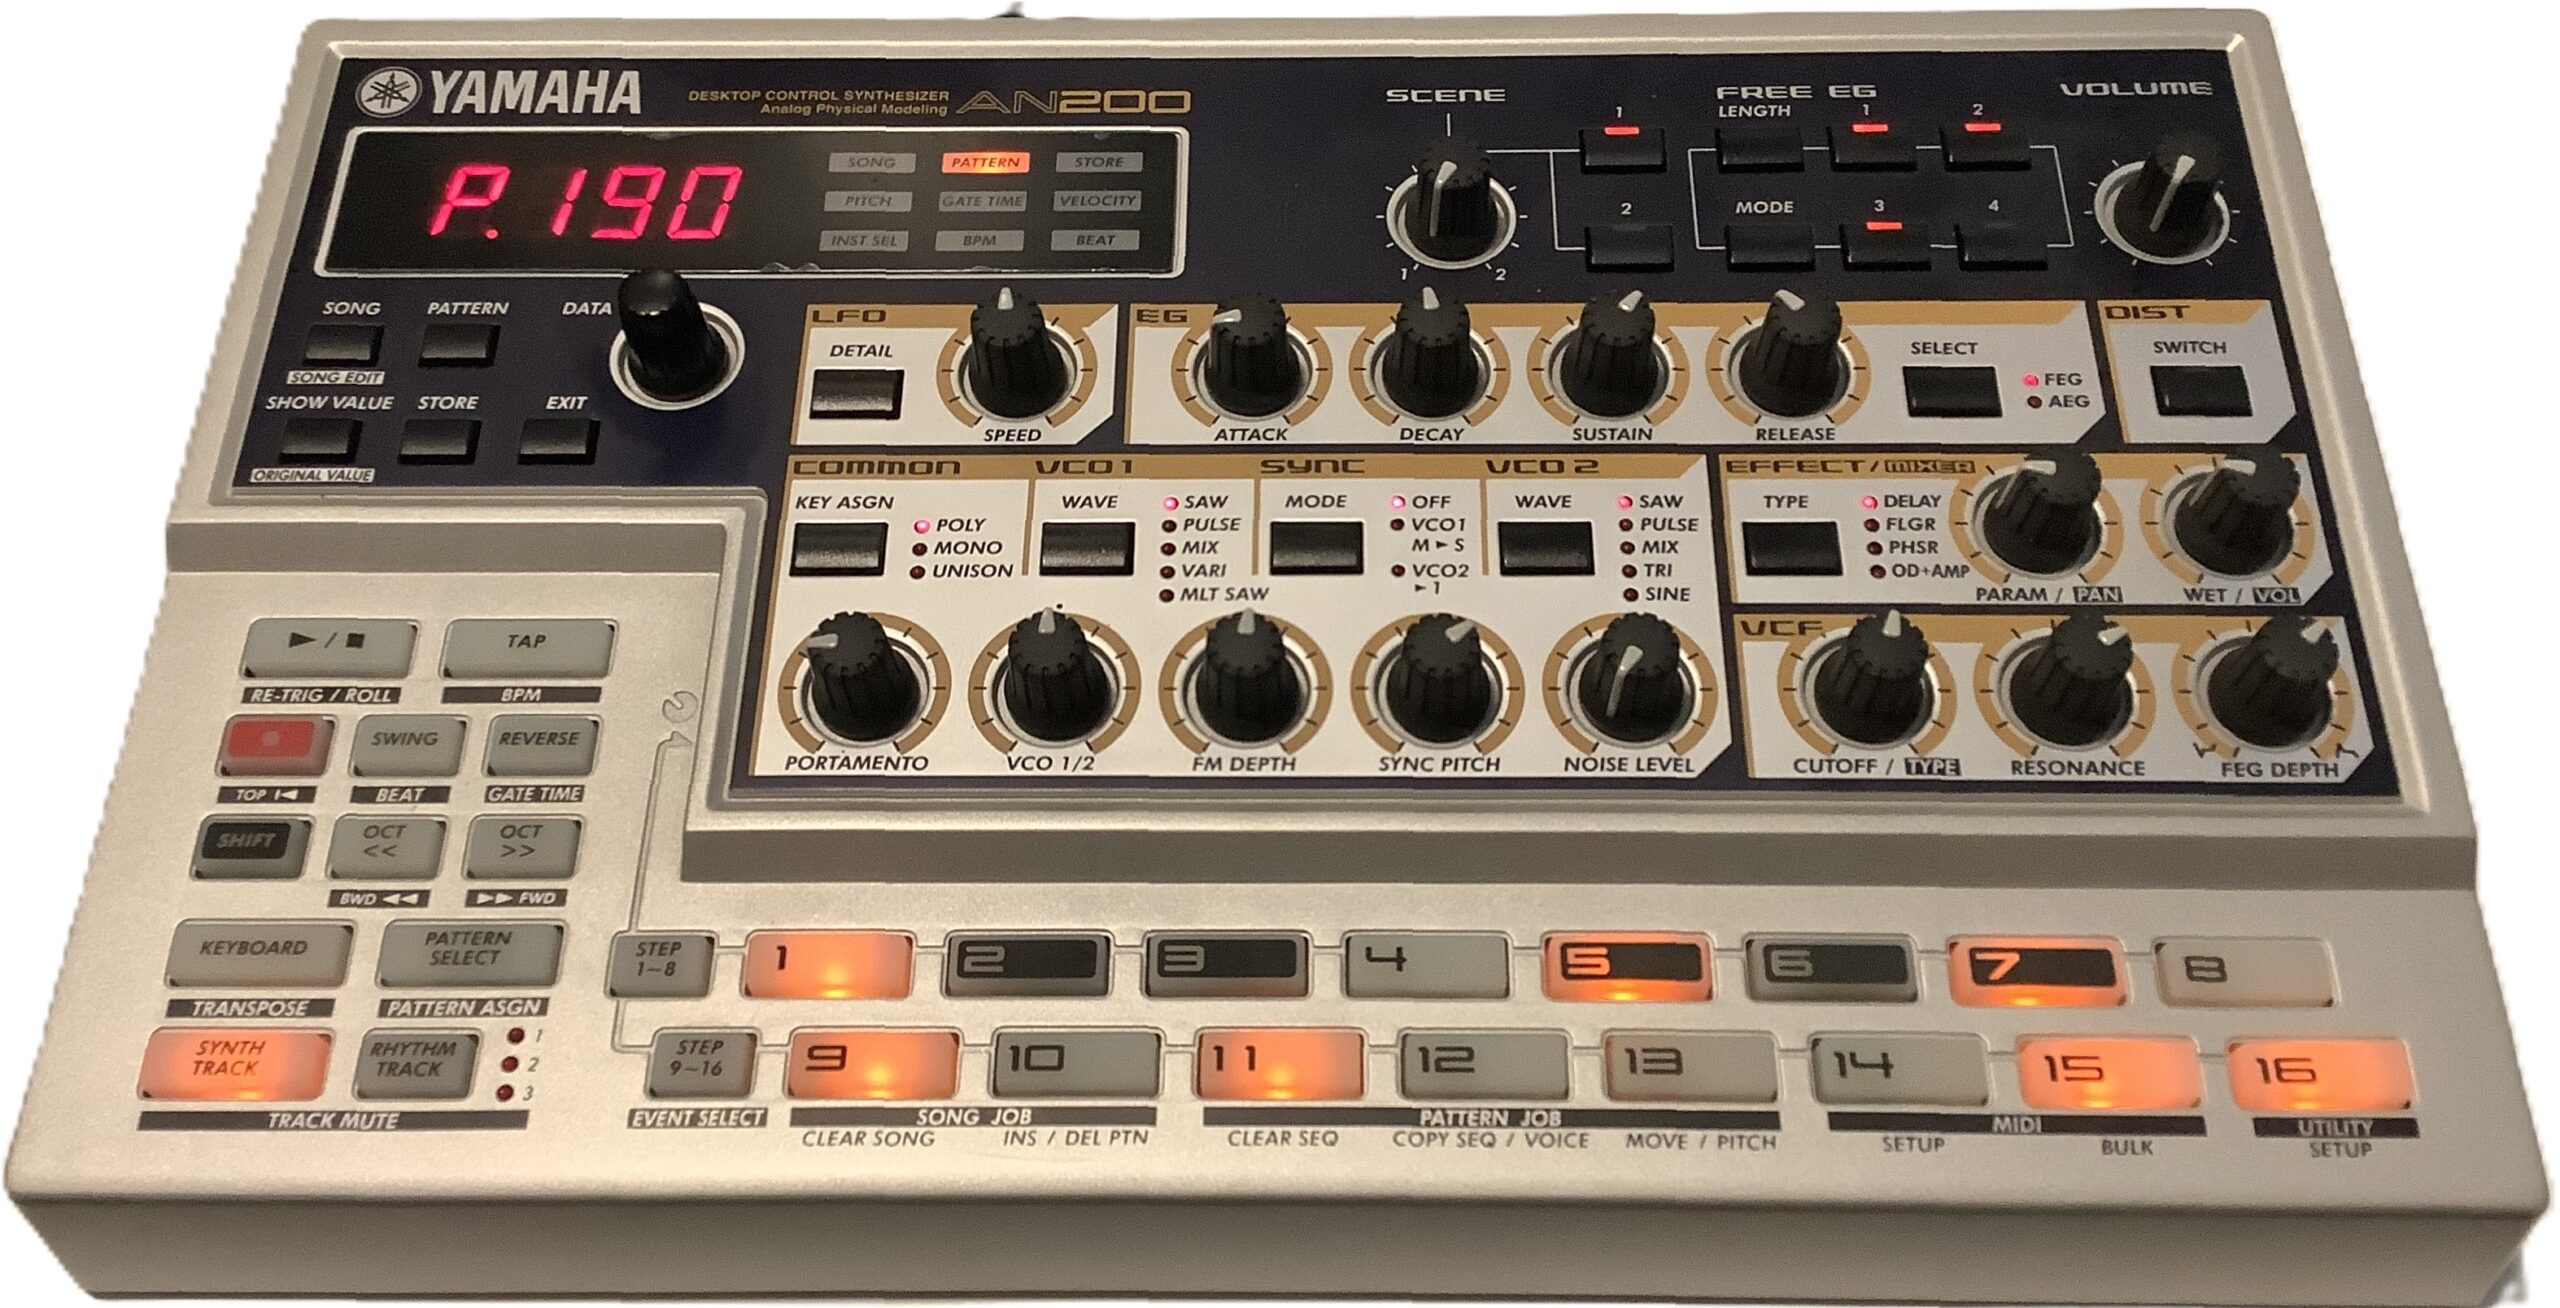
Yamaha AN200 Loop Factory

The AN200 is the OG. It’s big (13″ x 8″) and lights up like a pachinko machine. Therein lies the magic. Ya get big back-lit buttons, big knobs, and clearly readable legends on all of the controls. There isn’t any guessing about where the SHIFT button will take you.
Yamaha AN200 — the OG

AN200 is vintage and you pay market price. Unlike the three modern machines in this comparison, the AN200 factory content is fixed and you cannot add your own samples. The factory patterns are stuck in the late 90s and if that’s your thing, good. You won’t find much downtempo or chill.

In terms of immediacy, it’s hard to beat all of those controls and lights. If you want to do more with help from a PC or Mac, you’re stuck with legacy software (the AN200 editor) from 2001.

The AN200 is fun. I enjoy working with it again. I’m capturing patterns and converting them to SEQTRAK. [I’ll leave that topic for another post.] You get five analog physical modeling voices on one synth track and three AWM rhythm tracks. People still pine for Yamaha AN of yesteryear, so I ain’t complaining.

Korg Volca Sample 2

The Sample 2 remains on the undercard. For $150 USD, you get a pretty decent sample-based beat box. The Volca can’t sample new sounds itself, so you need to load the Volca via Korg’s sample librarian.

As to immediacy and fun, the Sample 2 has a lot going for it. The front panel has a bunch of well-labelled, back-lit mini-knobs and buttons. If someone knows a little bit about beat boxes and sample playback, hey, one-two you know what to do. Like the AN200, the Sample 2 has a four digital LED display meaning feedback is limited and often cryptic.
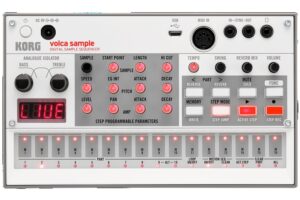
Korg Volca Sample 2

Memory capacity is way low — too small for long loops. Even if you toss all of the rather nice factory content, you won’t be loading a lot of mix stems. I just want to tell the Sample 2, “You’re a beat box and you will always be a beat box.” Never-the-less, I don’t regret owning the little pup.

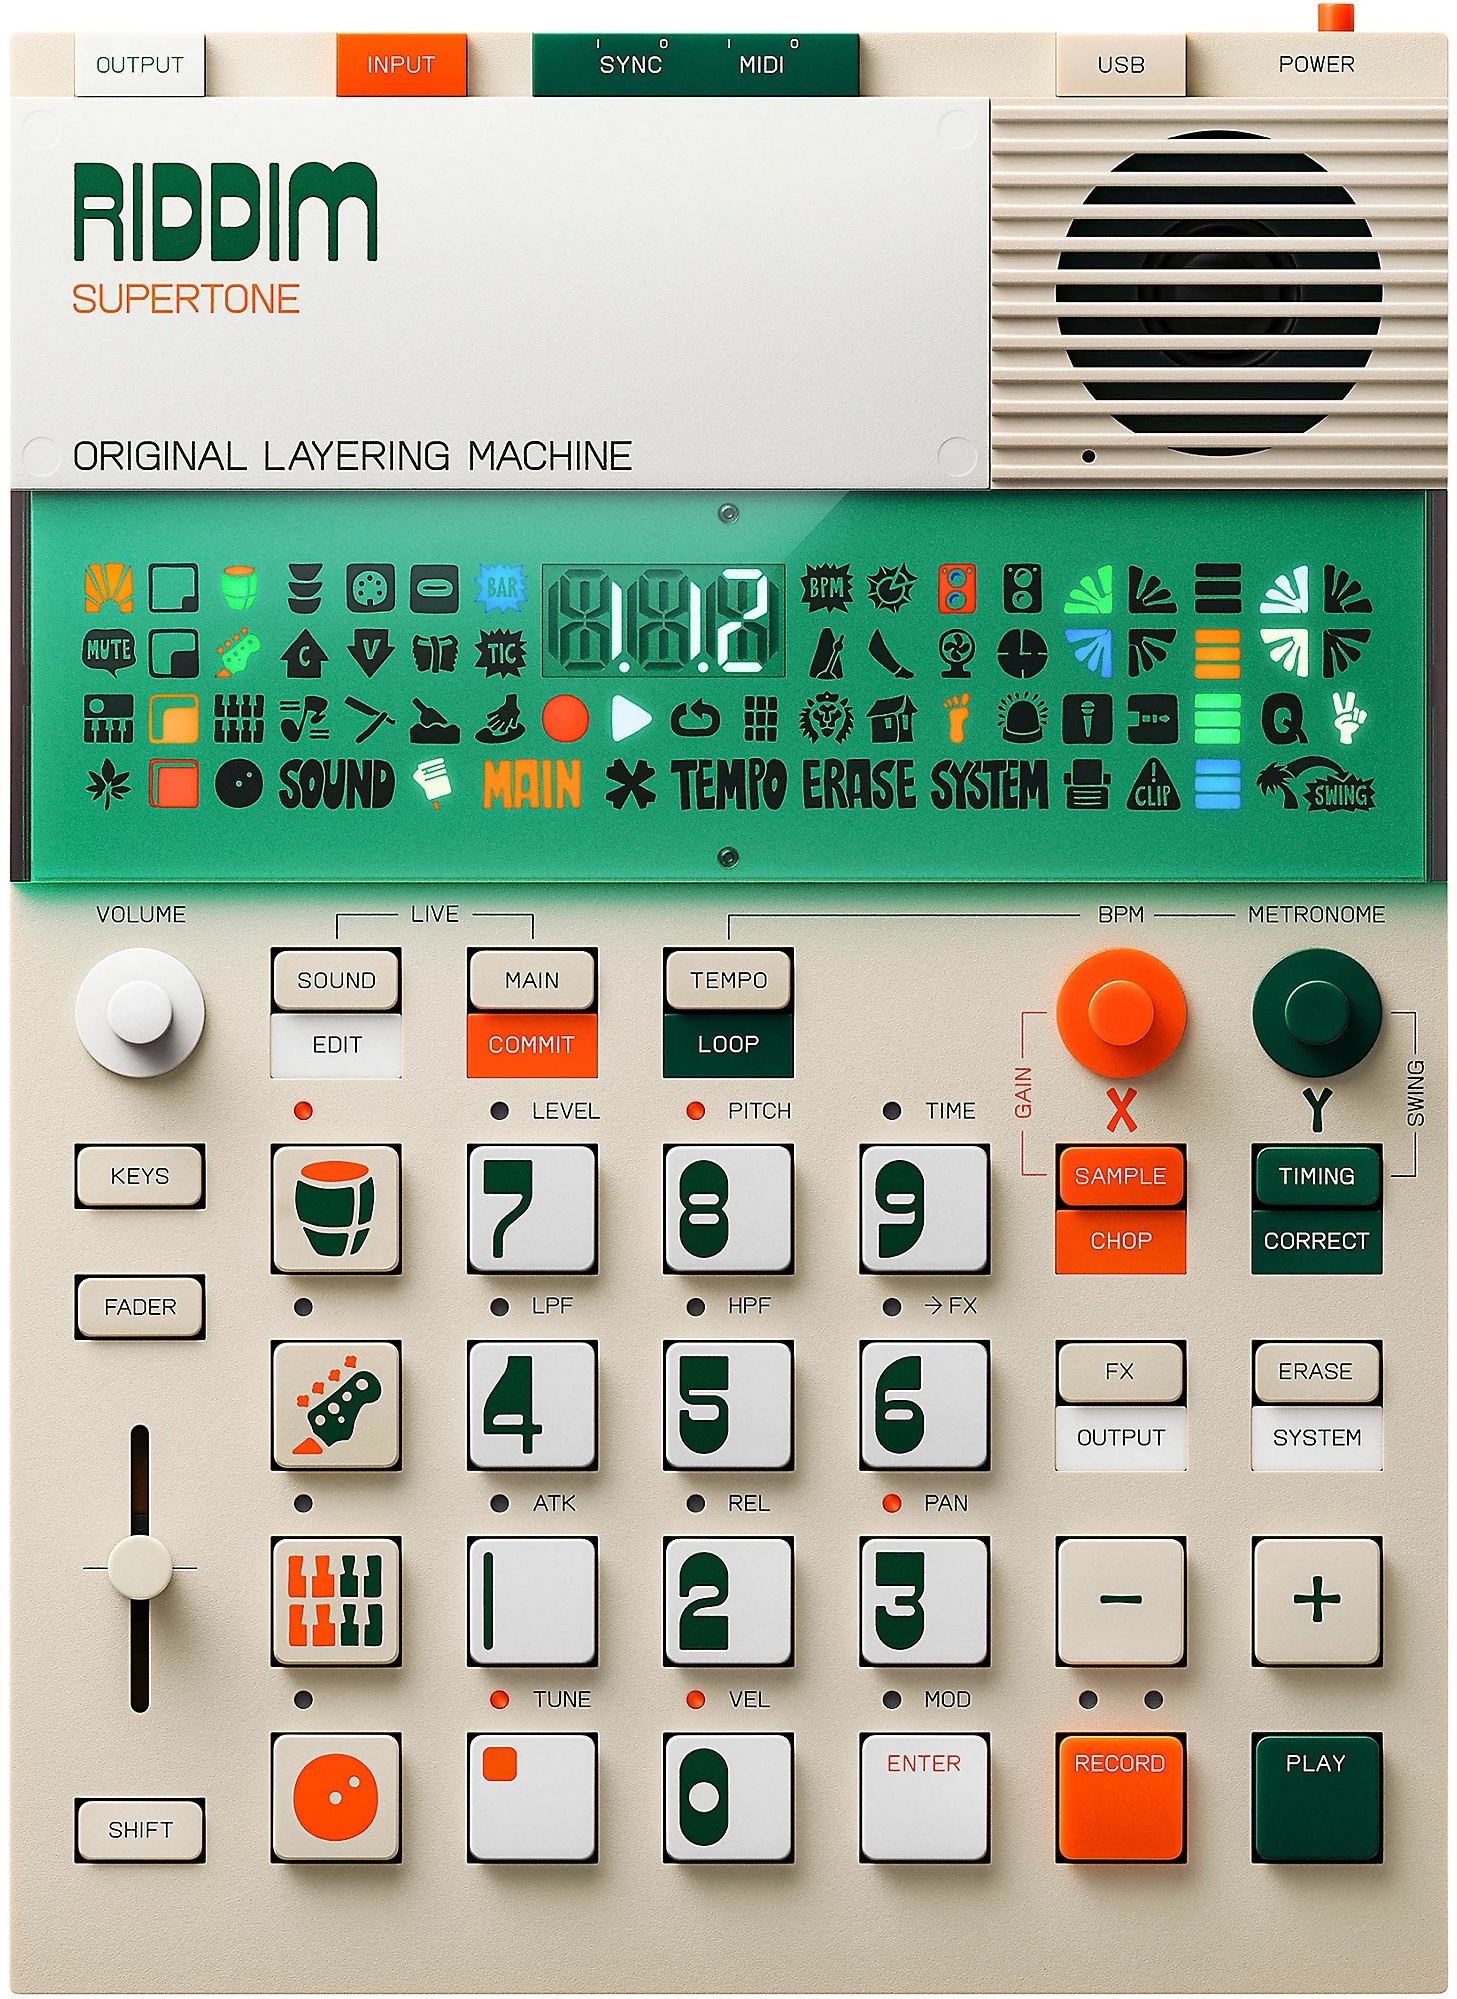
Teenage Engineering EP-40 Riddim

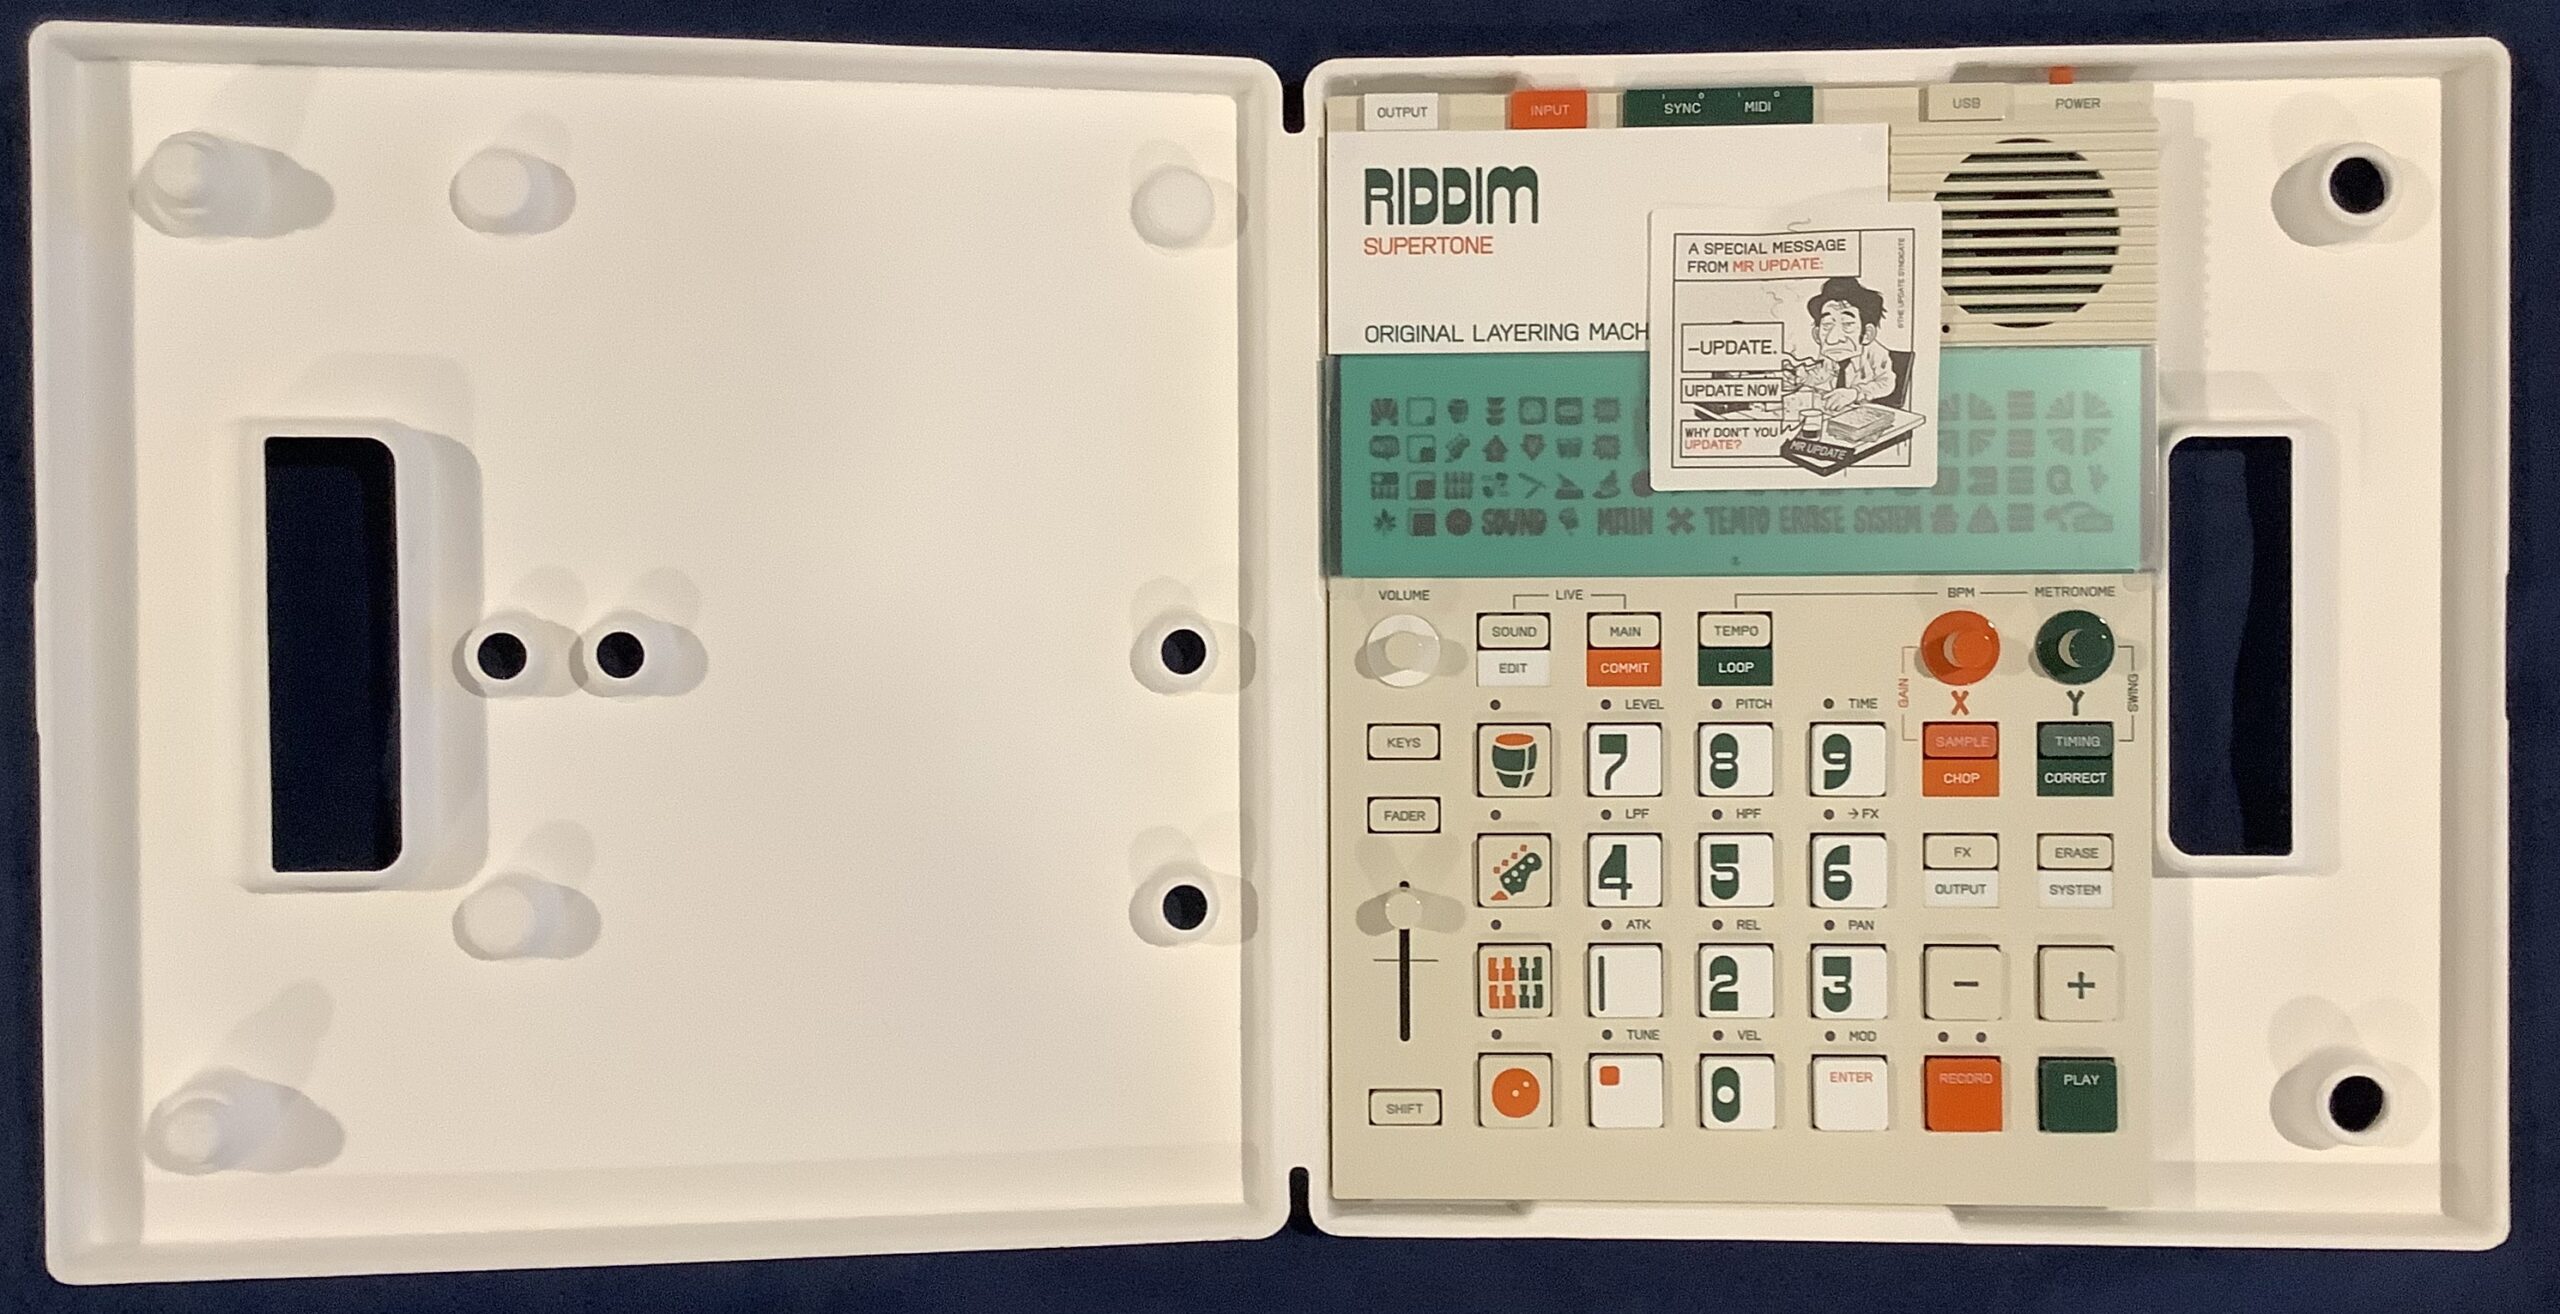
The TE EP-40 gets my vote as “Most fun right out of the box.” Those big buttons demand pushing and the control legends are easily read and understood. You do need a clue or two from the included Getting Started card. For example, you need to know that the “instrument” buttons select one of the four tracks, how the fader and knobs affect parameters, etc.

The funnest element is being able to perform a full song right from the git go. The Riddim says “Original Layering Machine.” That’s an apt description. You can make beats, but the ability to play and perform from long loops that stay in sync hits my sweet spot. It takes more reading to know how to drop in effects and navigate projects. The effects, by the way, are right on point. The built-in Supertone synth is not bad although you need to read about sound editing to expand its somewhat limited range.
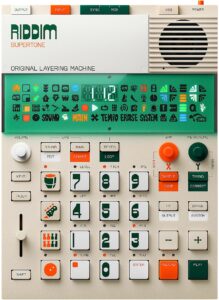
Teenage Engineering EP-40 Riddim

I hope EP-133 K.O. II users have as much fun. A fair bit of my enthusiasm comes from the Reggae content and styling theme. TE recently upped the K.O. to 128Mbytes of sample space — just enough to be dangerous. Riddim has the ability to sample on the fly and it doesn’t take much to fill up the 32MB or so of free space. Kicking content out of Riddim is like deciding which of your children to leave behind on the loading dock. Ouch.

The EP-40 has a three digit display. It also has a large bank of Swedish hieroglyphics. I still don’t know what half of those symbols mean. 🙂 The symbols are useful when you know what they mean (e.g., MIDI activity).

I know it’s possible to make beats with this thang. OK. I am not a beat maker and prefer long loops. Thus, EP-40 suits my use case (AKA production style). I’ve been rummaging through reggae loops trying to get new “songs” together. I wish there was an easy way to audition a few loops together to see if they fit without going through the download process. Oh, well, there is always Ableton Live for that… Eventually, I will venture into downtempo and chill; I don’t see any technical barriers.

Sample 2, EP-40 and SEQTRAK have built-in speakers. The EP-40 has the best of the lot, although none of the speakers is good enough to use stand-alone for very long. All are “courtesy speakers” and you’ll be plugging into monitors anyway.

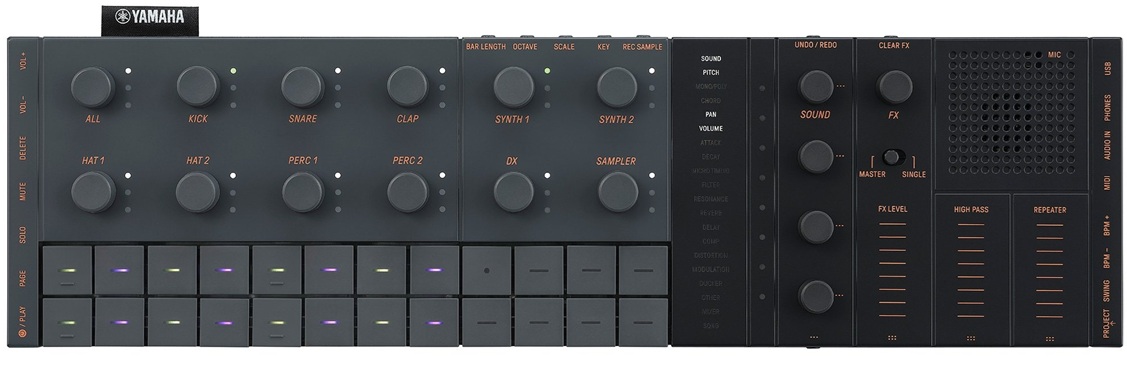
Yamaha SEQTRAK

When folks first saw SEQTRAK, they gasped, “Yamaha is trying to copy the Teenage Engineering OP look.” Yep, Yamaha’s industrial designers shot for a sleek minimalist look and hit the mark. After playing EP-40, though, my next impression was, “Gee, Yamaha achieved the look, but they left out the fun.” TE tries to build in playfulness as well as modernist industrial design.
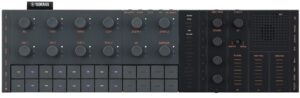
I had waited a long time to jump on the SEQTRAK wagon because I am not a beat maker. Beat making is SEQTRAK’s primary use case. I will let the Interweb’s argue the case for and against on that basis.

I will use SEQTRAK as a sound module — no doubt about it. This module has a huge internal library of AWM2, sampled and 4-op DX sounds. (The DX sound set could be a little beefier.) The AWM2 sound set is “MX+” (or “XS+” depending upon your reference point). None of us should have trouble putting the factory sounds to work modulo the MIDI channel restrictions.

As a standalone beat making tool, I can see how the SEQTRAK is somewhat unapproachable. There are small side buttons and connection points. Purpose is sometimes clear (e.g., USB. phones, VOL+, VOL-) and sometimes not (e.g., PAGE, DELETE, PROJECT). Plus, what is that quasi-display in the middle with words that light up? SEQTRAK does include a multi-lingual “Quick Operations Guide” with about 20 pages of instructions and tips. Thank goodness.

I didn’t really get into SEQTRAK until I fired up the SEQTRAK app. Now we’re talkin’. The app is far more relatable and it provides a longer user guide. Thanks to the app and its guide, I understand the track layout, effects structure, project management, etc. I have a long history with Yamaha gear and immediately “got” SEQTRAK as a sequencer and synth.

When I saw MIDI import and export, I decided to convert a some of the old DJX-II patterns to SEQTRAK. After a few minor stumbles, I got reasonably familiar and competent at SEQTRAK conversions. Now my SEQTRAK has several jazzy songs, each song (project) with six different pattern (sets) up to eight bars (the SEQTRAK max) in length. Most importantly, they sound danged good for the money. I could see loading (up to) eight songs and performing a live remix standalone.

SEQTRAK prices have dropped to where a punter shouldn’t hold back — if beat making is your thing. I don’t think SEQTRAK would be the best engine for long, stem-like loops. TE’s EP approach is a better fit for that production process.

Is there a champ?

Is there a champ? That depends on your musical process. Beat makers should be happy with SEQTRAK once they climb the learning curve. Us kids who just want to have fun and are inclined toward stem-like loops will be happier with a TE EP-40 or EP-133 K.O. II. Gratefully, neither device is beastly expensive (about $300 USD each). Both are good value.

Copyright © 2026 Paul J. Drongowski

Review: Yamaha Seqtrak

Yamaha Seqtrak went on sale last month — at the fantastically low price of $250 USD. OK, that got me. 🙂

By now, there are a mess o’ Seqtrak videos on-line. You’ve probably watched and heard the demonstrations and tutorials. Therefore, I will concentrate on my personal experience and reactions. It will be hard to avoid comparisons to Teenage Engineering EP-40 Riddim and Korg Volca Sample 2. I’ll save comparisons for another day.

Gotta say up front, I am not a beat maker. My beats sound like a 1960s home organ and I ain’t proud of them. That’s why I waited so song to get a Seqtrak. It’s primary advertised use-case is beat making, so I decided to wait until the price fell to impulse level.

The Seqtrak has four very high quality noise making sections; five, if you count the excellent effects. You get:

  • Seven parts (channels) for AWM2 drums/percussion,
  • Two parts for AWM2 synth voices,
  • One part for 4-op FM (a la Reface DX)
  • One part for sampler playback.

If you have the latest updates installed, the seven drum parts can be reassigned to either AWM2 synth or drum kit. That means you can turn Seqtrak into a 9 channel AWM2 sound module with a channel of DX FM.

The factory AWM2 sound set is no slouch. I compared the Seqtrak waveforms against the Motif XS and XF. I would call the Seqtrak an “XS+” — some desirable additions from the XF, but minus Megavoices (like the MX) and the S6 acoustic piano. Seqtrak also gets some of the later digital effects like HD reverb, guitar amp simulators (REAL DISTORTION), compression (UNICOMP), and EDM, hippity-hop sound bashers.

250 bucks is roughly the cost of a mid-range software synth. You would be very hard pressed to find a MIDI sound module with Seqtrak’s capabilities for $250. Forget the General MIDI module crap out of China. Buy a Seqtrak. [Seqtrak is manufactured in Malaysia.] You give up a few channels and you need to live within the Seqtrak’s channel structure. Read the manual.

Seqtrak has a frightening amount of connectivity: USB C, Bluetooth, Wi-Fi, MIDI. The MIDI dongle is very weird. Its 3.5mm plug has five (5) contacts; good luck finding one of these things. The dongle works fine and I had Seqtrak working with my Arturia Keylab Essential in nothing flat. Should work fine with the Novation Launchkey, too. Using the Seqtrak app, I programmed nine AWM2 channels and DX with my favorite voices. I then selected among the faves by changing the MIDI send channel on the Keylab Essential.

Another approach is to tag sounds as favorites through the app. Then use the SOUND knob to scroll through your favorite sounds.

Seqtrak as a sound module — check!

The Seqtrak app is a brilliant piece of work. It provides basic AWM2 “quick edits” and full access to effects and effect parameters. The app also has a beautiful FM editor. I intend to build a translation app in order to use the Seqtrak app as an editor for Reface DX. The SysEx is similar between both units.

As I mentioned, I am not a beat maker. That is Seqtrak’s intended market, however. Yamaha shot for a Teenage Engineering aesthetic and hit the mark. On the other hand, the rather sparse appearance of the front panel and buttons left me uninspired and lost. The unit is super-light, which is great until you press those side buttons and Seqtrak slides away. I quickly learned to steady the unit with my thumb, second hand, whatever. Also, I never got into multi-button combinations — why I never played Street Fighter…

This is where the app is not only brilliant, but essential. I spent the last two weeks converting a few DJX-II patterns to Seqtrak and I cannot imagine working without the app. The latest updates (now v2.0) make Seqtrak what it should have been on day one. With only eight project slots, back-up and project management is an absolute necessity.

A few app features got a heavy work-out when converting patterns: MIDI import, mixer, sound assignment, effects editing. The Seqtrak app is very well integrated with the hardware and you can move between on-screen controls and hardware controls without thinking about it. Kudos. As Yamaha recommend, start working with the app and you will eventually learn how to use Seqtrak stand-alone.

My biggest niggle is the same as Teenage Engineering’s Riddim software — font size and contrast. I work on a 4K monitor on Windows 11. By default, Windows wants to display everything at native resolution. Yeah, you can change the scale factor, but that changes the scale factor for all applications. Like TE’s software, I’m reading text with a magnifying glass. Software developers, have your grandmother use your app. If she can’t read the text, fix your app!

Seqtrak is a lot of tech for not very much money. If Seqtrak fits your work-flow and use cases, go for it.

Copyright © 2026 Paul J. Drongowski
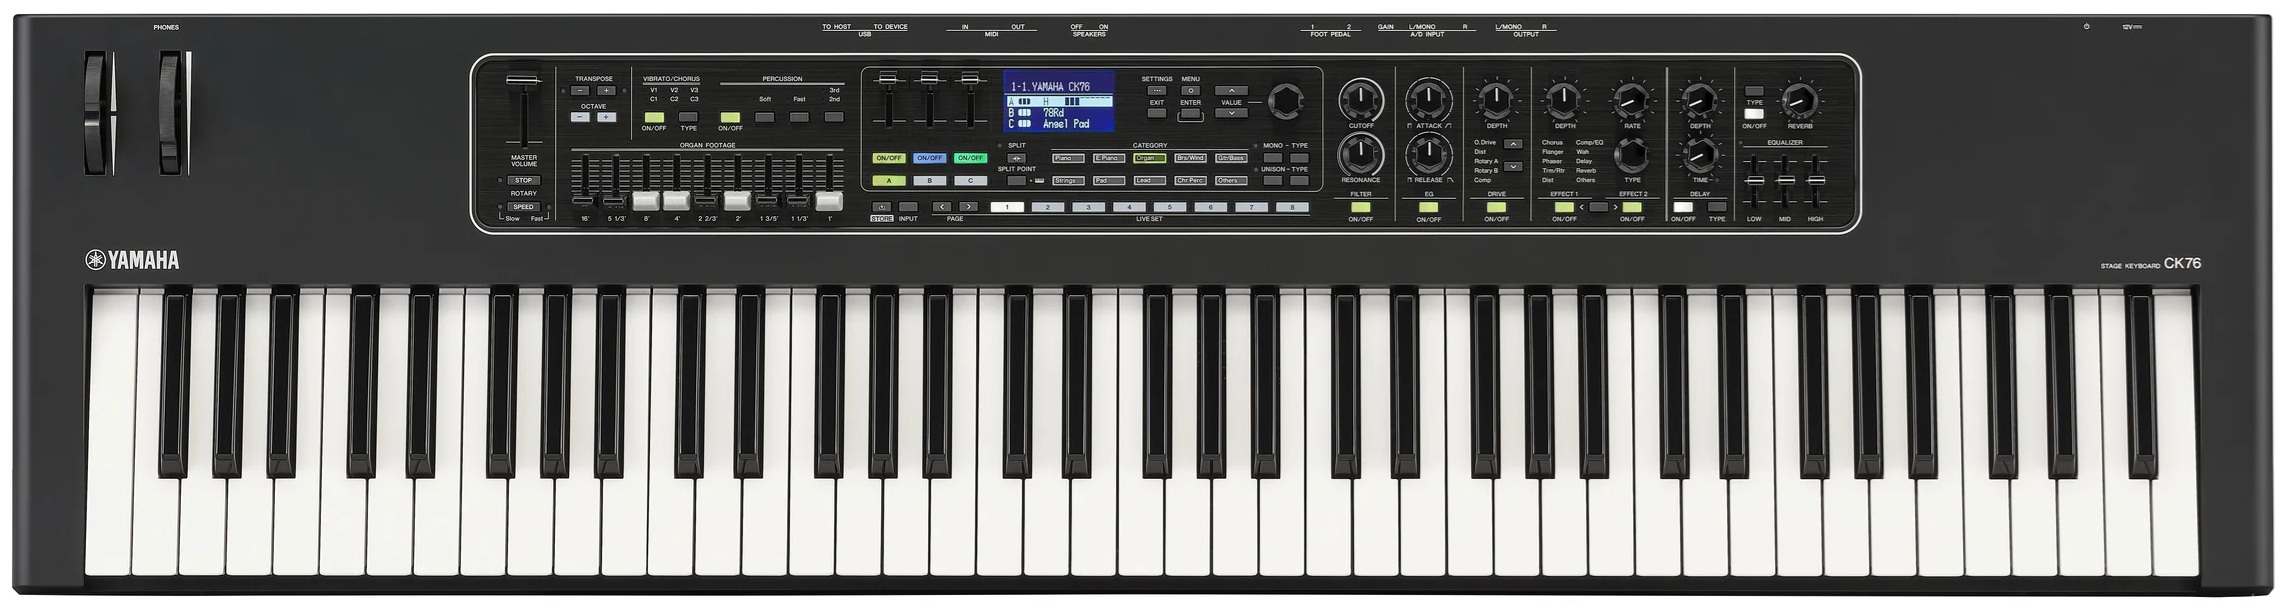
EP-40 Riddim: Jammin’ (1)

Teenage Engineering labelled the EP-40 Riddim “Original Layering Machine.” The Riddim lives up to its mission — jammin’.

The first question I asked is “How are the factory songs?” The EP-40 comes pre-loaded with nine projects:

 #  Abbrev   Artist         Sub-genre                   Key  BPM
--  --------------------------------------------------  ---- ---
 1  JAMMY    King Jammy     Dancehall                   E     85
 2  MPROF    Mad Professor  Dub                         Fmin  86
 3  DRSKL    DRE Skull      Dancehall and electronic    Amin  81
 4  MFLUX    Mafia & Fluxy  Dancehall and reggae        Gmin 134
 5  MPC                     MPC layout                  Fmin  82
 6  RIGO     Rigo Fuego     Electronic dancehall/Latin  A     94
 7  CROWN    Mighty Crown   Reggae and dancehall        Dmin  88
 8  BABY G   Baby-G         Dancehall                   Dmin  71
 9  PO                      Pocket Operator             D     81

TE credits several other artists, but doesn’t associate their names with specific samples or songs. At least their contributions are recognized.

EP-40 has a few different major modes. One of these modes — LIVE STATE — is made for jammin’. You get into LIVE STATE by pressing the [SOUND] and [MAIN] buttons together at the same time. You’ll see “LIV” in the display and the icon next to the MAIN icon will flash.

Teenage Engineering EP-40 Riddim

It’s easy to change the project: Press and hold [MAIN] and a numbered button from [1] to [9]. Hold that number button down! I was “clicking” the number button and then wondering why the project didn’t change. 🙂 If you’re successful, the display will show “P” and the selected project number.

Eventually, you’re going to want to mix and match or play a melody on an external MIDI controller. Here is a table with project key, tempo and chords:

 #  Abbrev     Key  BPM  Chords       Loop sample #'s
--  --------  ----  ---  -----------  ----------------
 1  JAMMY        E   85  | E  |       824 to 835
 2  MPROF     Fmin   86  | Fm | Eb |  849 to 861
 3  DRSKL     Amin   81  | Am | Em |  812 to 823
 4  MFLUX     Gmin  134  | Gm | Dm |  862 to 873
 5  MPC       Fmin   82  | Fm | Eb |  874 to 885
 6  RIGO         A   94  | A  |       886 to 898
 7  CROWN       Dm   88  | Dm | C  |  836 to 848
 8  BABY G      Dm   71  | Dm |       800 to 811
 9  PO          D    81  | D  | G  |

Feel free to mash things together. Reggae/dub typically uses simple chords — no jazz extensions, so don’t get too cute.

Project 9 is kind of a ringer. It’s meant to be a placeholder for your first project (assuming that you don’t want to throw projects 1 to 8 away). The project imitates the sound of a TE Pocket Operator (PO).

You have to take the BPMs with a grain of salt. MFLUX at 134 feels like 67 BPM — it certainly doesn’t feel like trance or garage!

The four basic layers are selected using the [DRUM], [BASS], [MELODY] and [PLATE] buttons on the left hand side of the button matrix. Select a layer and then play the other nine buttons in the 4×4 matrix. You’ll quickly discover a common layout across factory projects. (MPC is an exception and follows the MPC layout.) For example, here are the pad assignments for each layer in the JAMMY project:

Drum Pads
   JAMMY DRMS A 85   JAMMY DRMS B 85    JAMMY DRMS C 85
   JAMMY HH          JAMMY OH           MUD TOM B
   JAMMY KICK        JAMMY RIM A        JAMMY RIM B
   JAMMY FILL A 85   JAMMY FILL B 85    JAMMY FILL C 85

Bass Pads
   JAMMY BASS A 85   JAMMY BASS B 85   JAMMY BASS C 85
   SUPERTONE 6       SUPERTONE 6       SUPERTONE 6
   SUPERTONE 6       SUPERTONE 6       SUPERTONE 6
   SUPERTONE 6       SUPERTONE 6       SUPERTONE 6

Melody Pads
   JAMMY MEL A 85    JAMMY MEL B 85    JAMMY MEL C 85
   SUPERTONE 4       SUPERTONE 4       SUPERTONE 4
   SUPERTONE 4       SUPERTONE 4       SUPERTONE 4
   SUPERTONE 4       SUPERTONE 4       SUPERTONE 4

Spin Plate
   SUPERTONE 8       SUPERTONE 8       SUPERTONE 9
   RIGO FX A         WHAP              DRSKL FX C
   SYREN             WIRE              ONE
   BACKSPIN M        XPLOSION          FOGHORN

The top three buttons are loops. The bottom three drum buttons are fills. The inner bass and melody 3×3 pads play tones. The spin plate 3×3 buttons trigger one shots like sirens. You can use any custom layout, of course. I’ll stick to TE’s convention in order to keep my mind straight.

The looping is neat. The EP-40 keeps loops in sync, so you can switch in and out of loops without dropping the beat. If you prefer to fade a layer in or out, press and hold the layer’s button ([DRUM], [BASS], [MELODY] or [PLATE]) and move the slider.

When the drum layer is selected, you can add extra hits (and fills) while playing a loop. Simply hit one of the lower 9×9 pads.

You have two options when playing a melody: KEYS mode or no KEYS mode. Press the [KEYS] button to enable (or disable) KEYS mode. When KEYS mode is enabled, all 12 number pads play a tone. Disable KEYS mode and the pads behave according to their assignments (e.g., loops, one shots, Supertone, etc.)

If you’re with me so far, everything is kind of dry-ish. We need to add effects and dub this motha out. Drop everything out except the drum layer. Press and hold the [FX] button along with one of the number pads. The display visually animates an effect when the effect is triggered. The default effect is delay (DLY). You’ll hear stutters, repeats, pans and the stock-in-trade deep echo reverb. Some of the effects mess with the stereo field so patch into stereo monitors when possible!

I hope that’s enough to get you started.

TE EP-40 Riddim: Opinion

I’m having fun and I’m happy with the EP-40. Mostly, I’ve played and jammed with the factory projects.

The factory content is pretty darned good (cleanly recorded). One might say, it’s tame when compared to deep, heavily processed dub (fully expressed commercial tracks). On the other hand, simplicity gives us the opportunity to add and mangle as we see fit.

The performance workflow is free and easy. If you like the sound of reggae or dub, you will enjoy the factory songs. You will also appreciate the ability to interact with the prerecorded loops, sirens and other sounds. A reggae enthusiast should be happy if they don’t mind splashing out $300 USD for eight songs.

A reggae or dub song is often built on one or two chords, like the Riddim factory loops. Be prepared to do serious work, however, if you want to write and record more complicated chord progressions. For example, Psalm 95 If Today by Trevor Thomson.

Stay tuned for my experiments with Supertone and Ting. Check out the Riddim and Ting unboxing.

Copyright © 2026 Paul J. Drongowski
TE Riddim and Ting outta the box

My version of an unboxing video… [Minus the boring video]

Thanks to the folks at Alto Music, I’ve got a brand new Teenage Engineering EP-40 Riddim and EP-2350 Ting bundle.

Unzip that strip!

Both Riddim and Ting arrive in a brown box. Opening the brown box is like tearing into an overgrown Pocket Operator. It feels the same way.

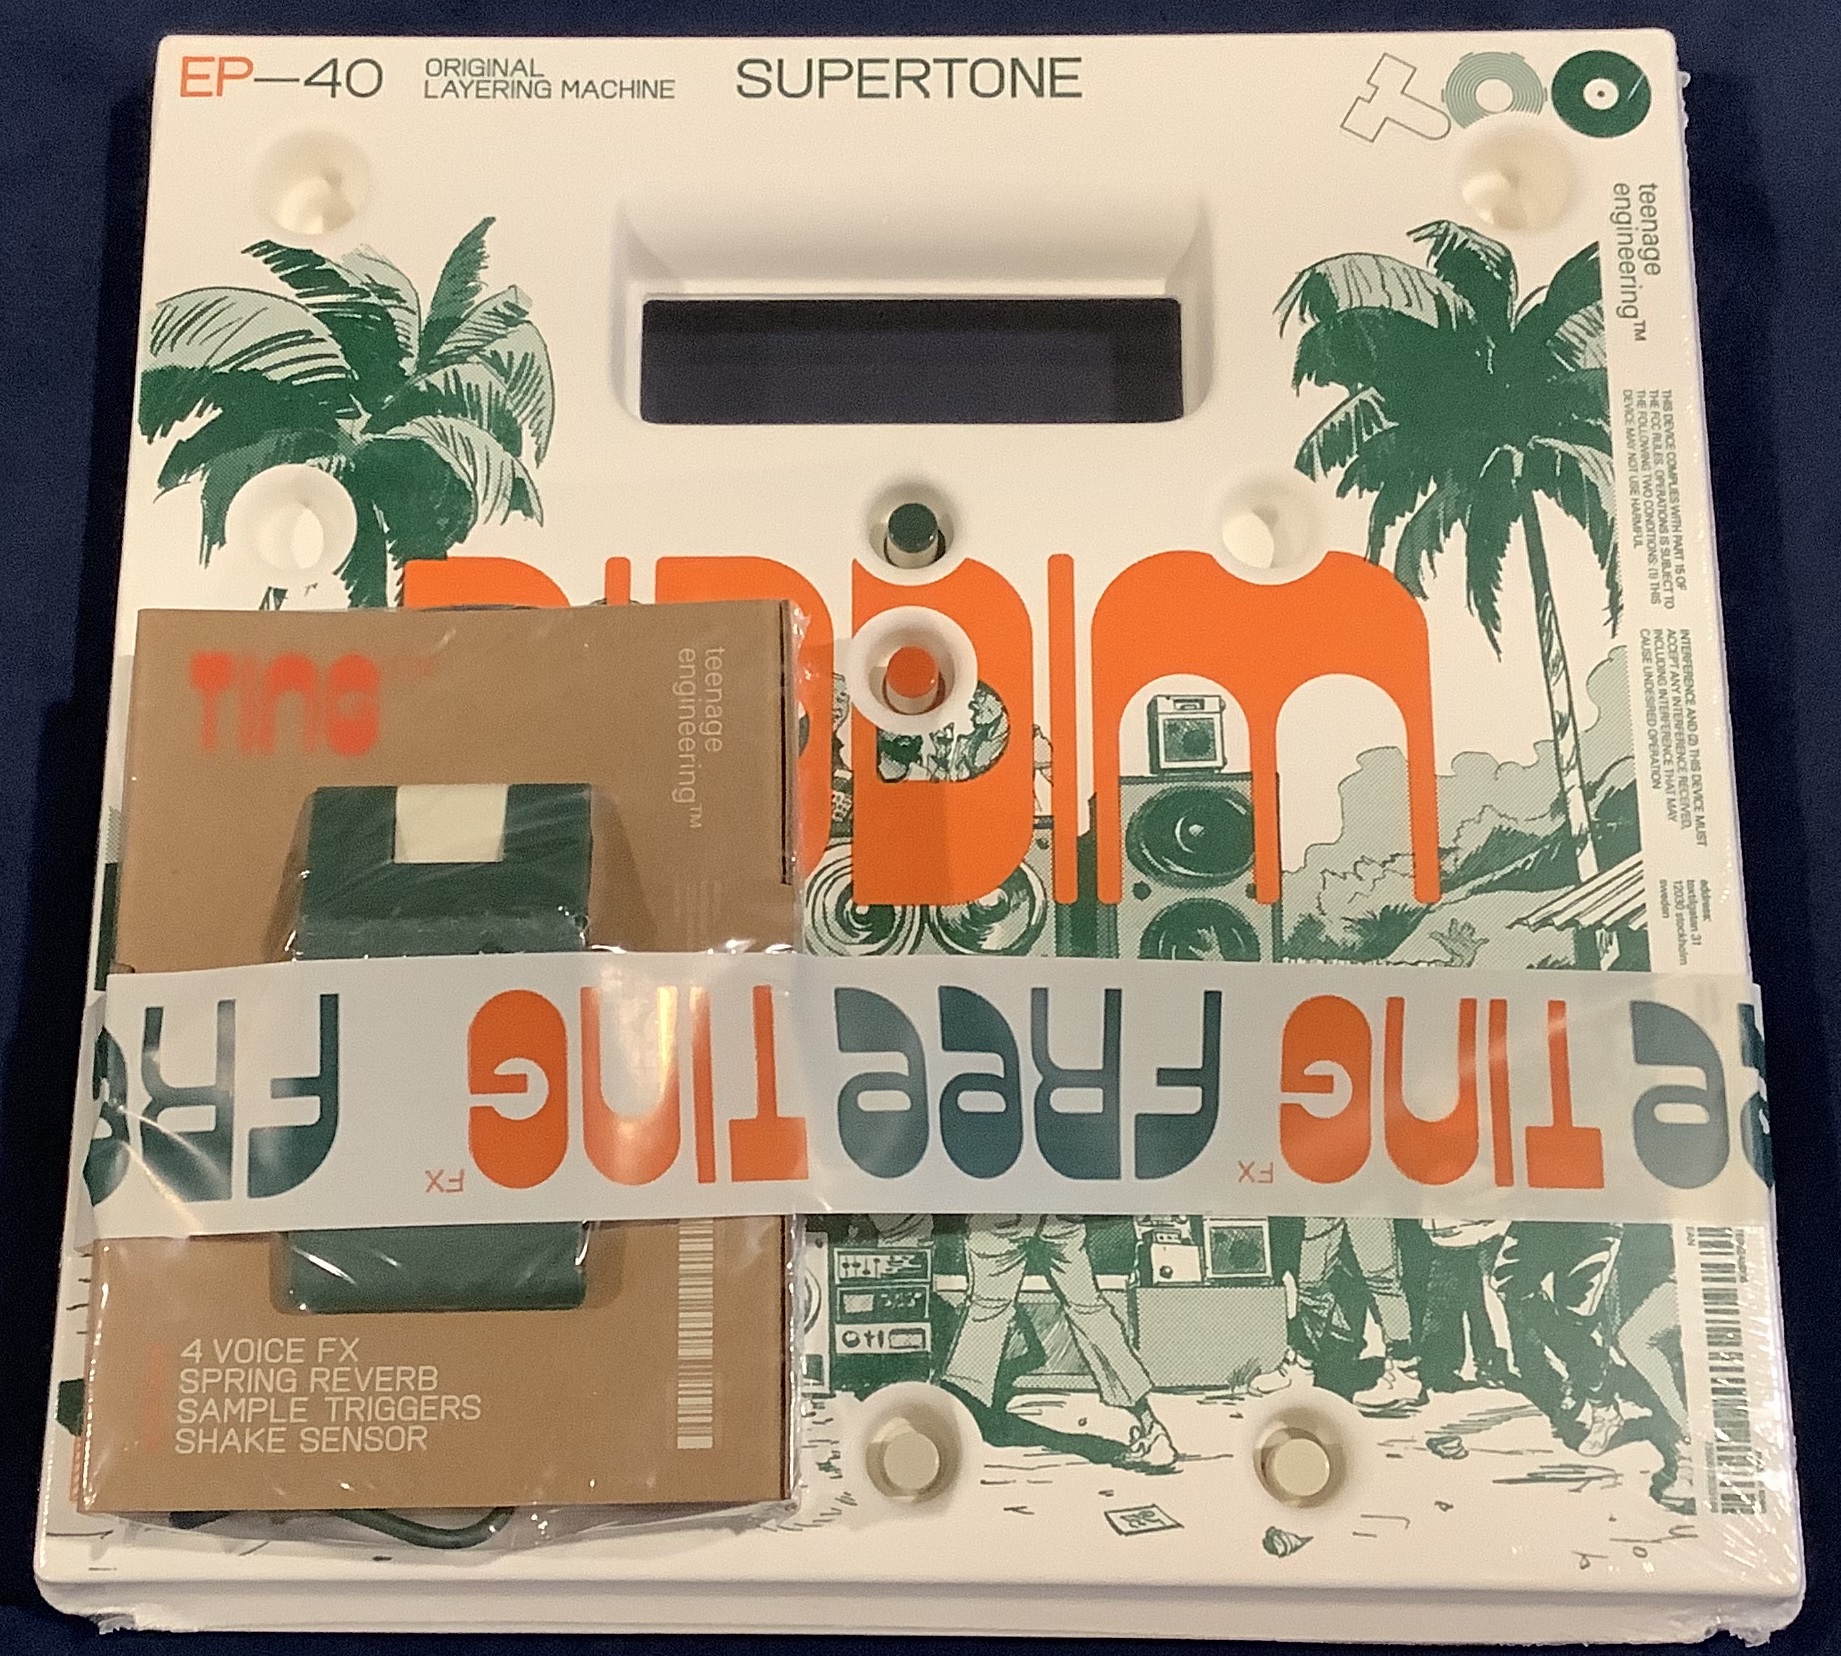
TE EP-40 Riddim and EP-2350 Ting bundle

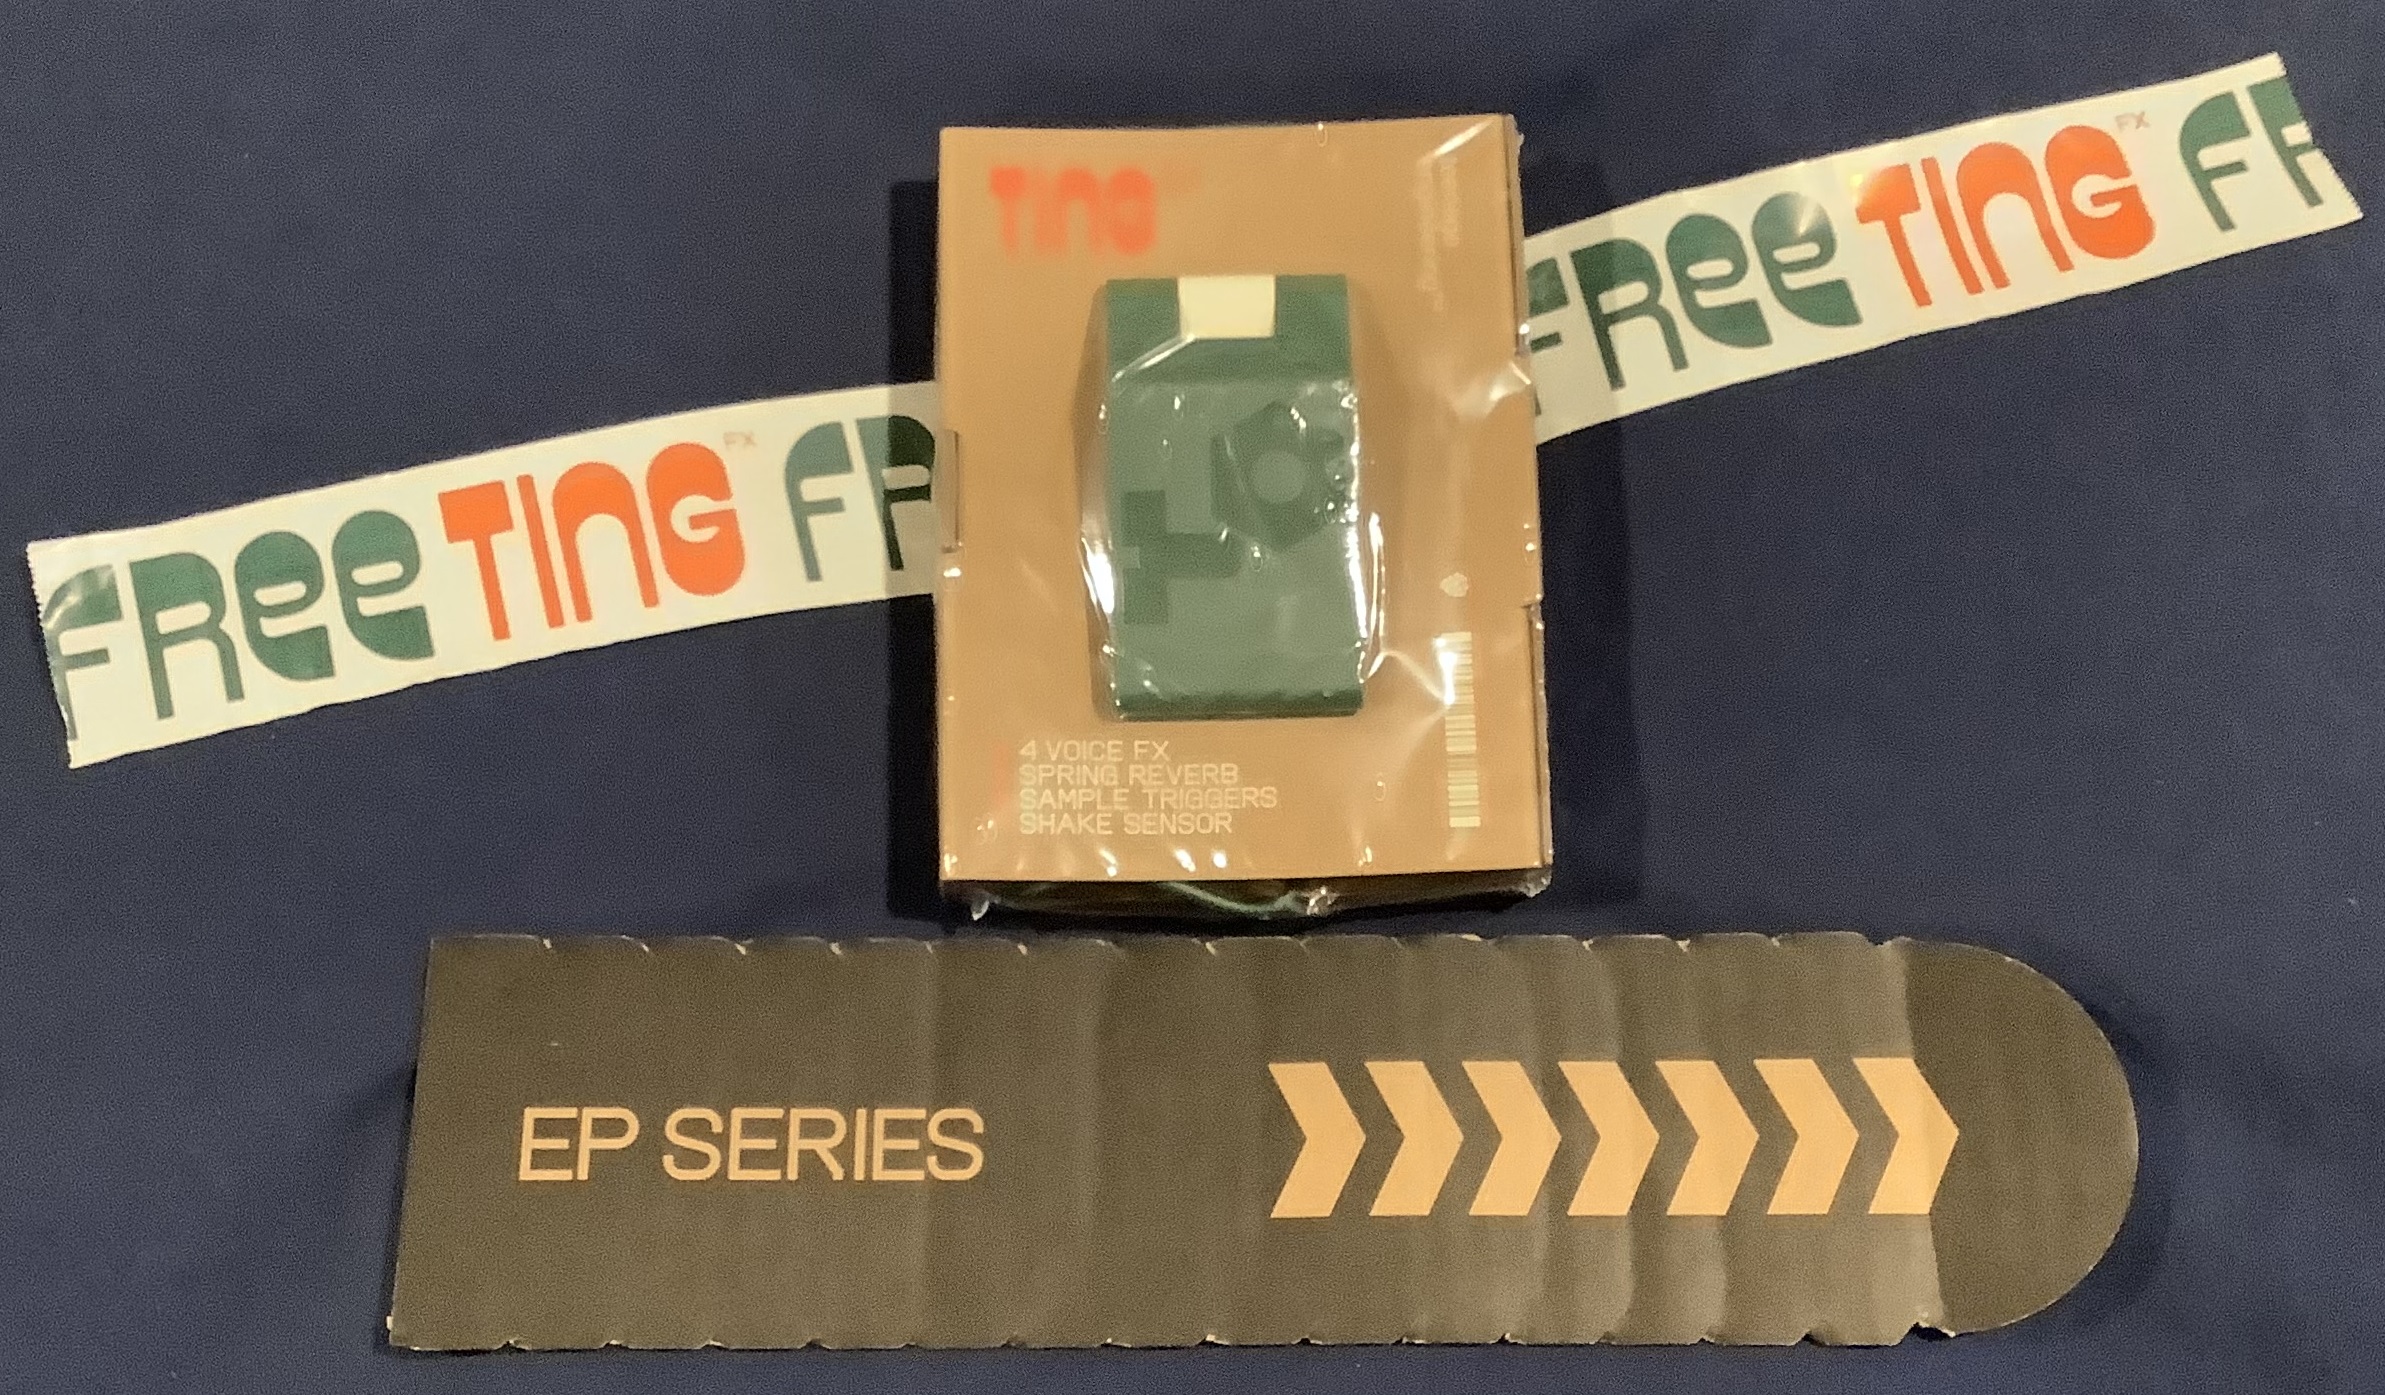
Riddim and Ting are taped together. The “Free Ting” tape is cute and I saved it. I’ll find something fun to do with it. 🙂

Free Ting and let it loose

Strip off the tape and there you have Ting in its own shrink-wrap. Riddim is shrink-wrapped, too.

TE EP-40 Riddim

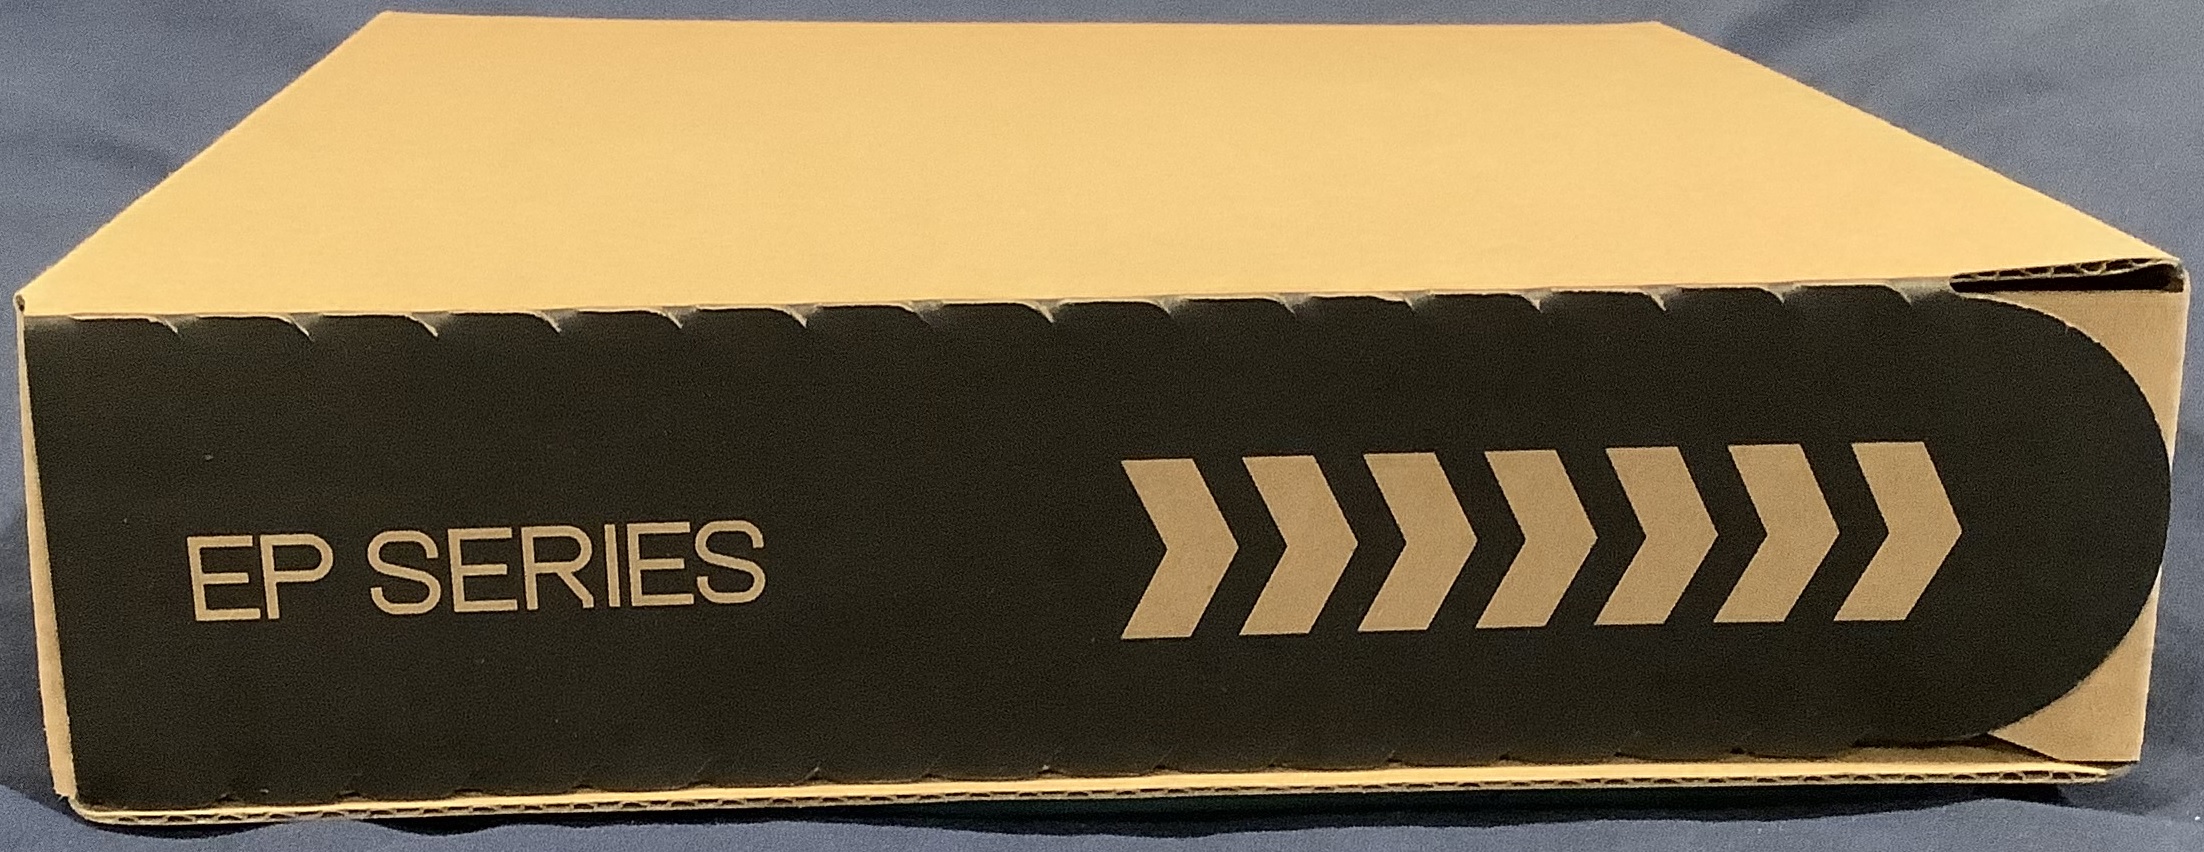
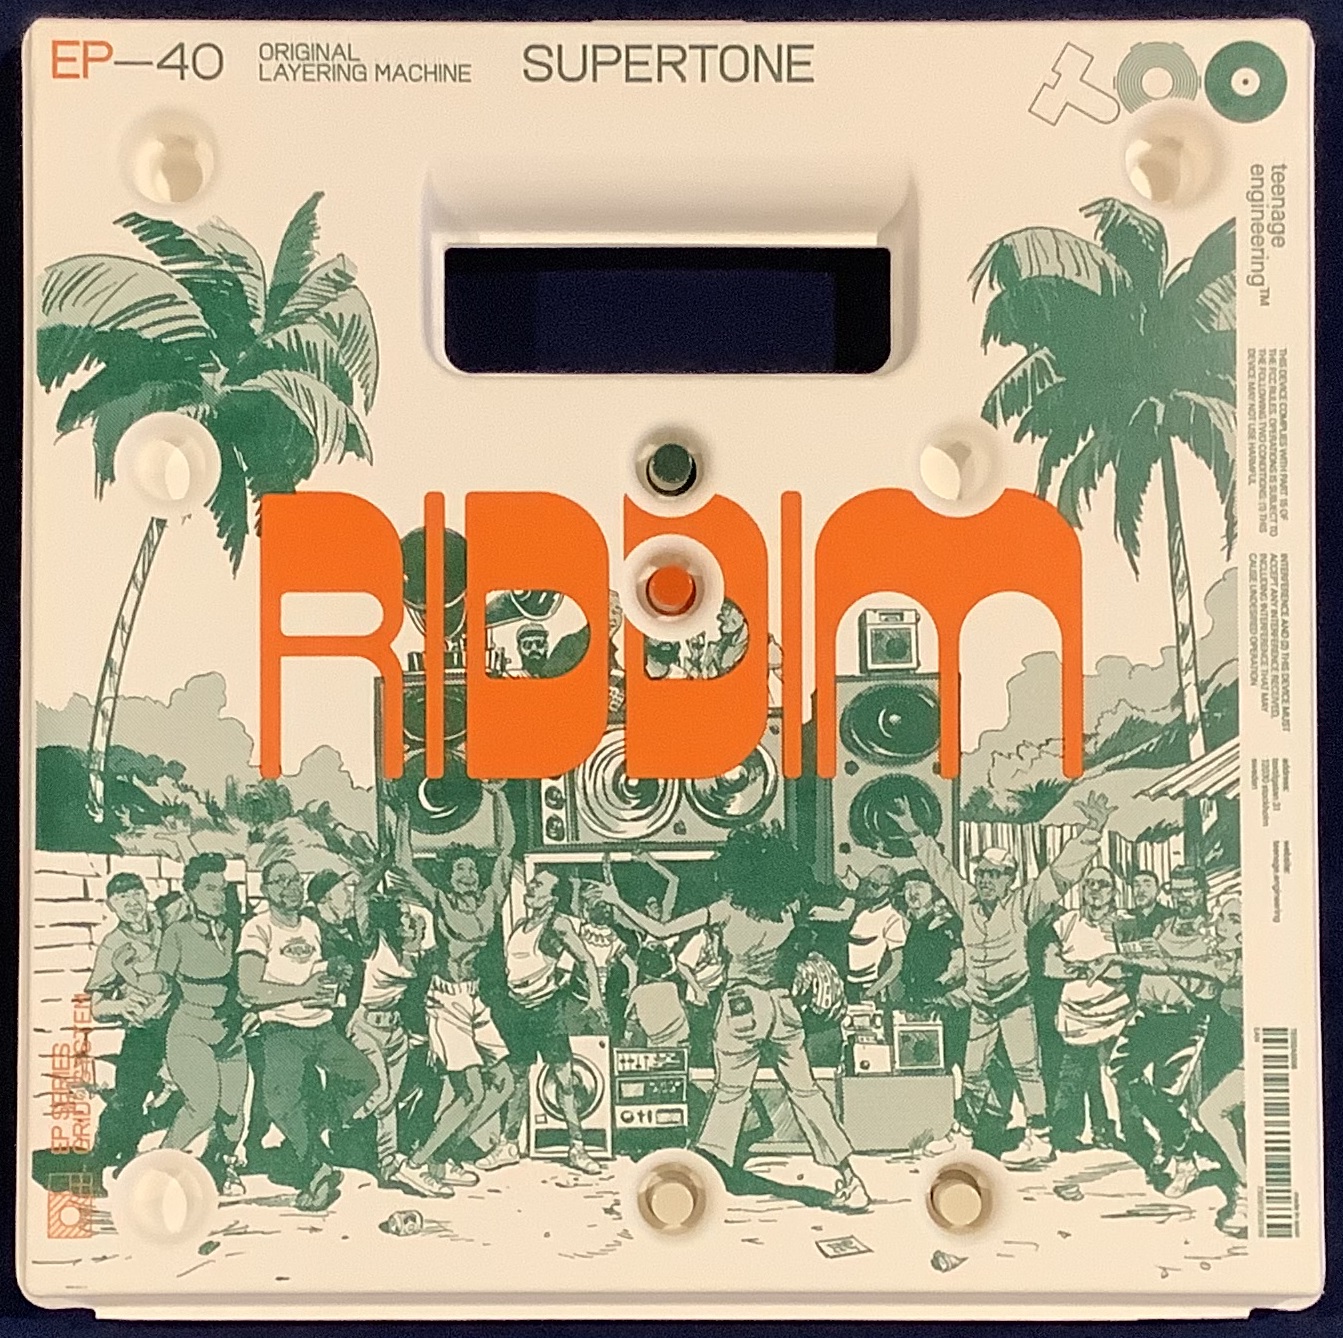
The EP-40 ships in a box of its own. No secret, Teenage Engineering is an industrial design studio as much as it innovates consumer electronic devices. The EP-40 box is an example of TE’s sustainable formed paper packaging. Printed graphics reproduce quite well on this stuff.

TE EP-40 formed paper box

TE freely admit that the initial EP-133 packaging led to shipping damage. They learned their lesson. The EP-40 package has pass-through holes for the pot and slider knobs. The holes provide a lot of support around the knobs.

The paper case is good enough for light duty. If you take Riddim out of the studio into a club, you’ll want something stronger, padded and more protective. Still, the packaging is a nifty, visually attractive innovation.

The EP-2350 Ting packaging — printed brown cardboard — looks a bit spartan in comparison. None the less, Ting is well protected during shipping.

The bundle has an R. Crumb inspired reminder to update. Updating Riddim is relatively painless. Connect Riddim to your PC, run Chrome, open the Web-based TE Update Utility, allow the tool access to the Riddim via Web-MIDI, and the Update Utility does the rest.

The Web-based EP Sample Tool is easy to use, too. Like the Update Tool, you must grant access to Riddim over Web-MIDI (USB). This is a great way to explore the factory samples and pad assignments.

The EP Sample Tool does project-specific and full backups. I made a copy of everything because I will eventually toss some of the factory content and install my own construction kits.

The EP-40 Riddim is pre-loaded with nine projects. Eight projects are reggae/dub. The ninth project is a hyper-active P.O. style project — readily tossable unless you are really into P.O. Oh, yeah, the initial factory content occupies 92MBytes leaving 36MBytes free.

My one gripe — TE needs to increase the font size throughout the EP Sample Tool. I have to read sample sizes and free space with a magnifying glass on my 4K monitor. Please.

Love the written word and pictures? Much faster than watching a ten minute unboxing video. 🙂

Copyright © 2026 Paul J. Drongowski
TE and Alto Music: Success!

Today’s post is a positive customer service story — the kind that I like to write!

I purchased a Teenage Engineering EP-40 during the last few days of 2025. Alto Music was having a holiday coupon sale and I said, “What the heck?”

This was my first order from Alto Music. They pop up in product searches and they are one of the few Teenage Engineering (TE) reps in the USA. The stars aligned, so why not?

Alto’s fulfillment was swift. Unfortunately, the EP-40 suffered a hardware problem. I was able to investigate the problem by measuring voltage at the battery terminals without opening the case and voiding the warranty. I reported the issue to Teenage Engineering who determined that the hardware issue is covered under its warranty.

According to TE, warranty issues in the USA are handled through the retailer — in this case, Alto Music. Alto quickly set up the return procedure. Alto kindly covered return shipping in accordance with their policy. I now have a replacement EP-40 in hand and it is working fine.

The staff at Alto Music are very friendly and helpful. I will not hesitate to place an order with them in the future.

A word about patience. Yes, it took time for everything to play out. Most of the delay was due to shipping, weather, and the holidays. For example, the replacement was delayed several times by the atrocious winter weather in the Midwest. In an age of instant communication, we forget that physical objects don’t just materialize. Please be patient and courteous with customer service staff.

I want to conclude by saying “Thank you” to both Alto Music and Teenage Engineering.

Copyright © 2026 Paul J. Drongowski
Korg Volca Sample riddim?

Teenage Engineering wisely got out ahead of everyone and released the EP-40 Riddim and Ting combo just before the holidays (and January 2026 NAMM).

I went absolutely berzerk when I heard the EP-40 and quickly pulled out the Korg Volca Sample 2 to see what I could do. There’s a lot to love about the Sample 2. Its USB port and the Korg Volca Sample Librarian make sample management a snap. The step programmable sample parameters supply a lot of dynamic messin’ along with the tempo and swing knobs. The controls may be small, but I love their immediate accessibility.

The analogue isolator controls are a kick, too. You can dynamically kill or boost the low and high ends. Korg provide similar capabilities in their Volca Mix. That and the compression and stereo field effects are the reason why I keep the Volca Mix in the toolbox.

I wanted to create long-loop grooves as though I was working in Ableton Live. One of my favorite entertainments is to launch Live and drop in a few samples and hear what comes out. The Sample 2 workflow is not as smooth as Live since everything needs to go through the Volca Sample Librarian. Oh, well.

Other issues arise when using long samples (e.g., two or more bars). Lack of sample space is a major issue. The Sample 2 has only 8 megabytes — yes, 8 megabytes — of sample space. The Sample 2 operates at a 31.25kHz sampling rate and it’s not clear if down-sampling saves any space. (The Librarian does sample rate conversion.) An old trick to save space is to “pitch up” incoming samples and then slow them down during playback (returning the sound to its original pitch). This technique adds yet another prep step and buzzkill.

The Sample 2 comes with great factory samples. That’s both good and bad. The factory samples occupy roughly 80% of sample memory leaving you with 20% free. That’s roughly 26 seconds of available user sample time. Sure, you can wipe the factory samples, but really?

I smacked into limited memory capacity immediately. I trimmed several dub loops into 2 to 4 bar loops. None the less, drum, bass, skank and fill loops hit 100% right quick.

Loops longer than two bars trip another issue. Longer loops continue to play after hitting the stop button. This is known behavior and it is annoying. Next, if you want to play a two bar loop, you need to adjust the tempo down to half. That way, one can trick the Sample’s sequencer into thinking it’s a two-bar sequencer. Of course, this spreads the 16 sequencer steps across two bars thereby cutting your time resolution in half (eighth notes). Go for four bars and the resolution is cut to four quarter notes per bar.

Overall, I think Korg conceptualized the Sample 2 (and its predecessor) as a digital beat box to which a user can add short one-shots. In that regard, Volca Sample is quite successful, especially at its price point. It’s not designed for long samples.

I always like to give the gear I have (Sample 2) first shot and buy if necessary. As to EP-40 Riddim and Ting, I’ll have more to say after UPS gets here. 🙂

Teenage Engineering, by the way, are showing Field System Black in time for NAMM 2026. If you want to hear more about TE’s development process, I strongly recommend WVFRM’s interview with David Eriksson, co-founder and lead engineer of TE. If I were teaching today, it would be required for class.

Copyright © 2026 Paul J. Drongowski