
Well, maybe two minutes. 🙂 Let’s say that you want to use Yamaha Genos™ solely as a synthesizer. Here’s a quick start or at least enough to get you familiar enough to get into the Owner’s Manual.
Turn accompaniment off
If you want to use Genos as a synth, I recommend turning the accompaniment features off. Accompaniment is all the AUTO stuff including styles, rhythm pattern and such. Press the ACMP button in the left hand corner of the front panel. If the light is off, accompaniment is off.
Select a new voice
When you power on Genos, you’ll see the HOME screen as shown below. [Click images to enlarge.]
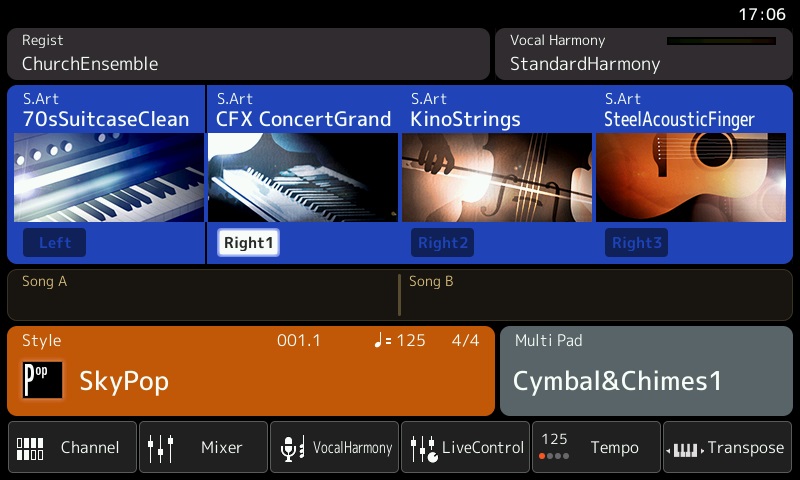
The HOME screen is a top-level view of Genos’ current configuration. From here, you can select a voice for each of Genos’s Parts: LEFT, RIGHT1, RIGHT2, and RIGHT3. (More about this in a second or two.)
Touch the big square button for the CFX Concert Grand. In response, Genos displays the voice selection screen. The Part (RIGHT1) is shown in the upper left corner of the screen. Use the soft buttons on the left hand side of the screen to select a voice category. Then use the tabs (P1, etc.) to navigate through pages and pages of available instruments. Touch the instrument that you want to assign to the Part.
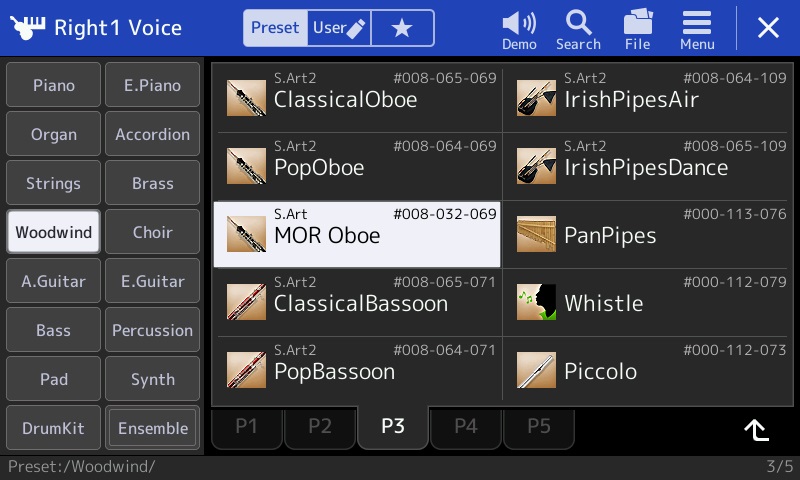
In the example above, I touched the Woodwind button, went to page 3 (P3) and selected the MOR Oboe voice. If you press the nice bright HOME button on the front panel (located just to the right of the screen), Genos will display the HOME screen and you will see the MOR Oboe voice assigned to RIGHT1. Those six bright gateway buttons are the most important shortcuts into the Genos menu system.
Parts is parts
The LEFT, RIGHT1, RIGHT2 and RIGHT3 business is a cut-down form of (Yamaha) synth parts and zones. Unlike a synth where you can create arbitrary keyboard zones, splits and layers, the Yamaha arranger concepts are more limited.
Each of LEFT, RIGHT1, RIGHT2 and RIGHT3 are voice parts which can be turned on and off. There are four voice select buttons and four voice on/off buttons in the lower right hand corner of the front panel. The voice select buttons choose the current Part for editing, etc. The voice on/off buttons turn the voice on and off, letting one add or remove a voice while playing.
LEFT, RIGHT1, RIGHT2 and RIGHT3, from the synth perspective, are also keyboard zones. In terms of voice splits, you can have a single left hand voice (LEFT) and up to three layered right hand voices (RIGHT1, RIGHT2 and RIGHT3). If you’re playing with accompaniment styles, chord recognition is often in the left hand and melody/comping is in the right hand. (This is a gross simplification; Genos has more capability for chord recognition than this.)
The screen shot below shows one of my orchestral splits. There is a cello in the left hand and there is an oboe plus flute layer in the right hand.
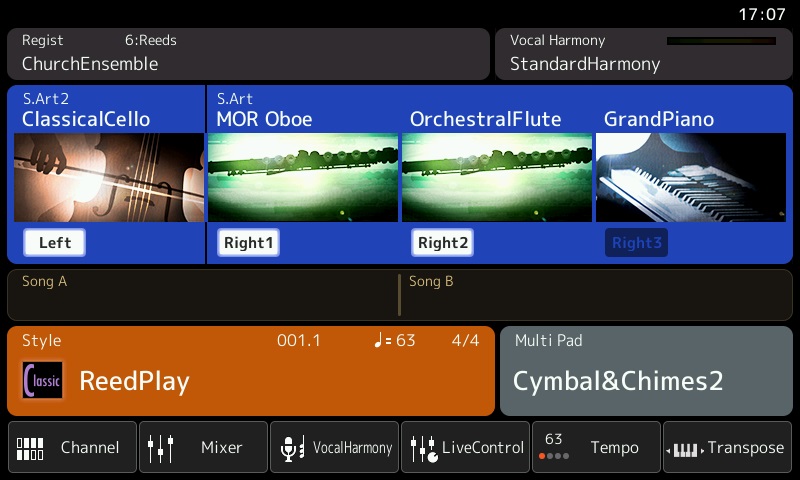
Ordinarily, the the split point is middle C. If you want to change the split point (and other aspects of the key layout), press the MENU gateway button on the front panel. Genos displays a page of buttons that lets you tweak tempo, transpose, MIDI, split point and fingering, and just about everything else which is Genos.
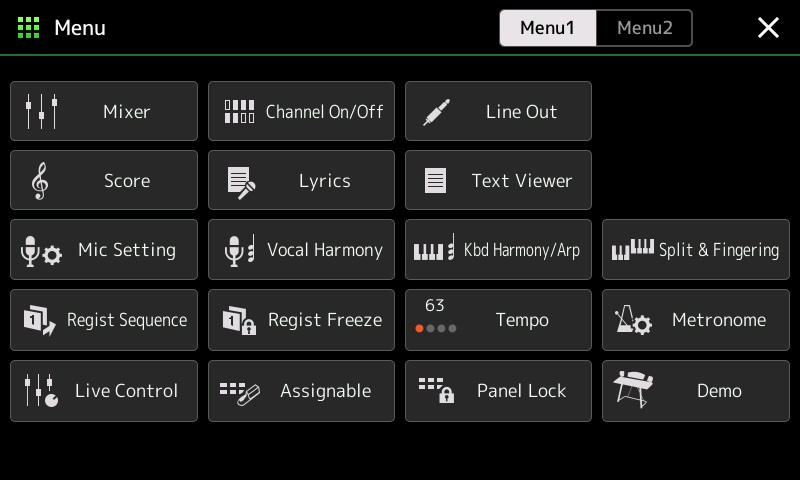
Touch the Split & Fingering button and Genos displays the screen giving control over the split point.
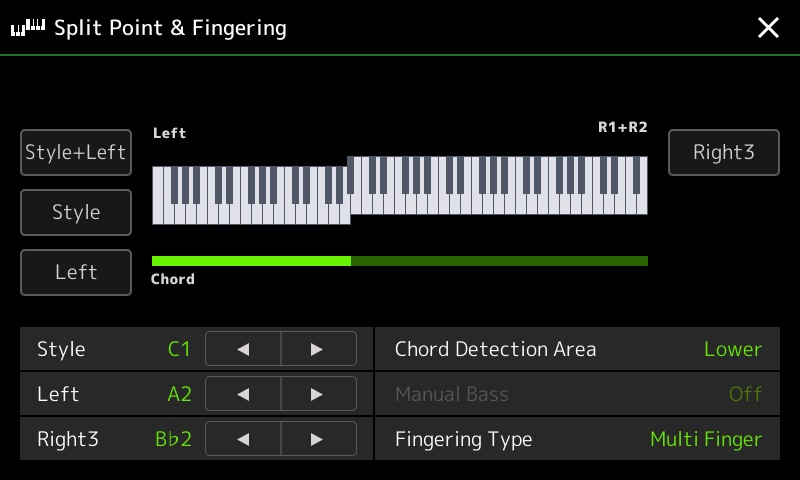
Press the arrow buttons to move the split point(s) around. Or, press and hold one of the three soft buttons on the left hand side of the screen. While holding one of those buttons, press the desired split point on the keyboard.
A word of caution — watch out for the RIGHT3 split point. Genos offers a little more flexibility for the RIGHT3 zone than the simple scenario that I’ve described here. Please see the Owner’s Manual page 49 for more details. Sometimes the RIGHT3 setting causes confusion. (Why don’t I hear…?)
How to remember settings
Now that you have a voice set-up, you’ll want to remember it. Genos remembers such things in registrations. A registration is a memory location that remembers all sorts of fun stuff: the current voices, the current style, tempo, MIXER settings, etc. The Owner’s Manual Chapter 7 goes into registrations in detail.
To save the current configuration, press the MEMORY button on the front panel. Then press one of the ten numbered registration buttons. The current configuration will be saved to that location (button).
Even though it’s beyond the scope of a two minute introduction, the ten registrations taken together constitute a registration bank. Genos can save and recall banks. I strongly recommend saving the entire bank to either the Genos internal memory or to a USB flash drive. Otherwise, it’s all to easy to lose your work by overwriting a button!
Extra credit
Keen eyed readers probably noticed the words “MIXER settings.” Yep, Genos has an on-screen mixer for balancing levels and other tweaks. Press the soft Mixer button at the bottom of the HOME screen to see more. BTW, when I use Genos as a synth, I set the STYLE level to zero in the MIXER. I’m paranoid and don’t want any unintended and unwanted auto accompaniment triggered when I’m playing Genos purely as a synth.
If you don’t want to deal with the MIXER, then grab those sliders and knobs! The LIVE CONTROL screen shows the currently assigned knob and slider parameters. The OLED display switches between slider and knob values whenever a slider or knob is moved. Use the KNOB ASSIGN and SLIDER ASSIGN front panel buttons to flip through parameter groups. The groups are configurable, but that is way beyond extra credit.
The Voice Part Setup screen is another way to tweak. Press the front panel VOICE gateway button. Genos displays the Voice Part Setup screen (below).
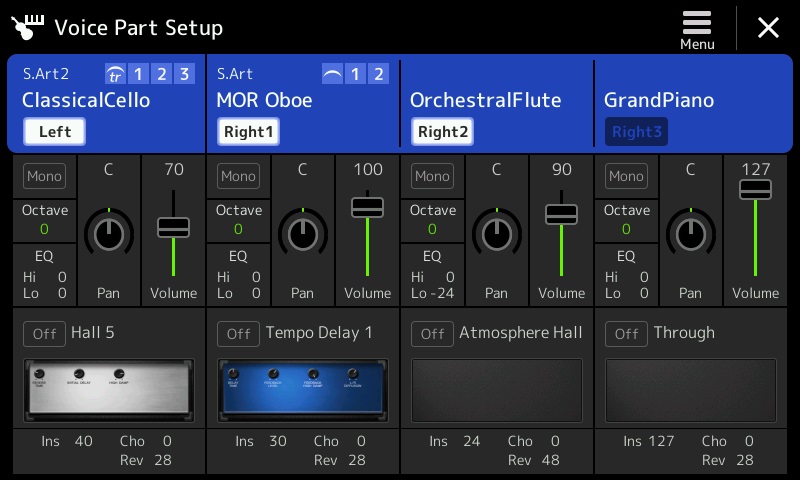
Here, you can turn Parts (voices) on and off, set levels, set pan, change the octave range, and change the DSP effect assigned to the voice. Peek and poke away!
Copyright © 2019 Paul J. Drongowski