
As part of the littleBits revival, I pulled the Arturia Keystep from storage. The Keystep has a nice keybed and sequencer, and supports a wide range of interface options: 5-pin MIDI, CV, gate, sync and USB MIDI.
Although I love its industrial design, the Keystep keys have always been somewhat unreliable. Straight out of the box, one of the keys did not trigger reliably. After moving and storage, unfortunately, several more keys became flaky or non-operational. Time to tear down and clean! [Click images to enlarge.]
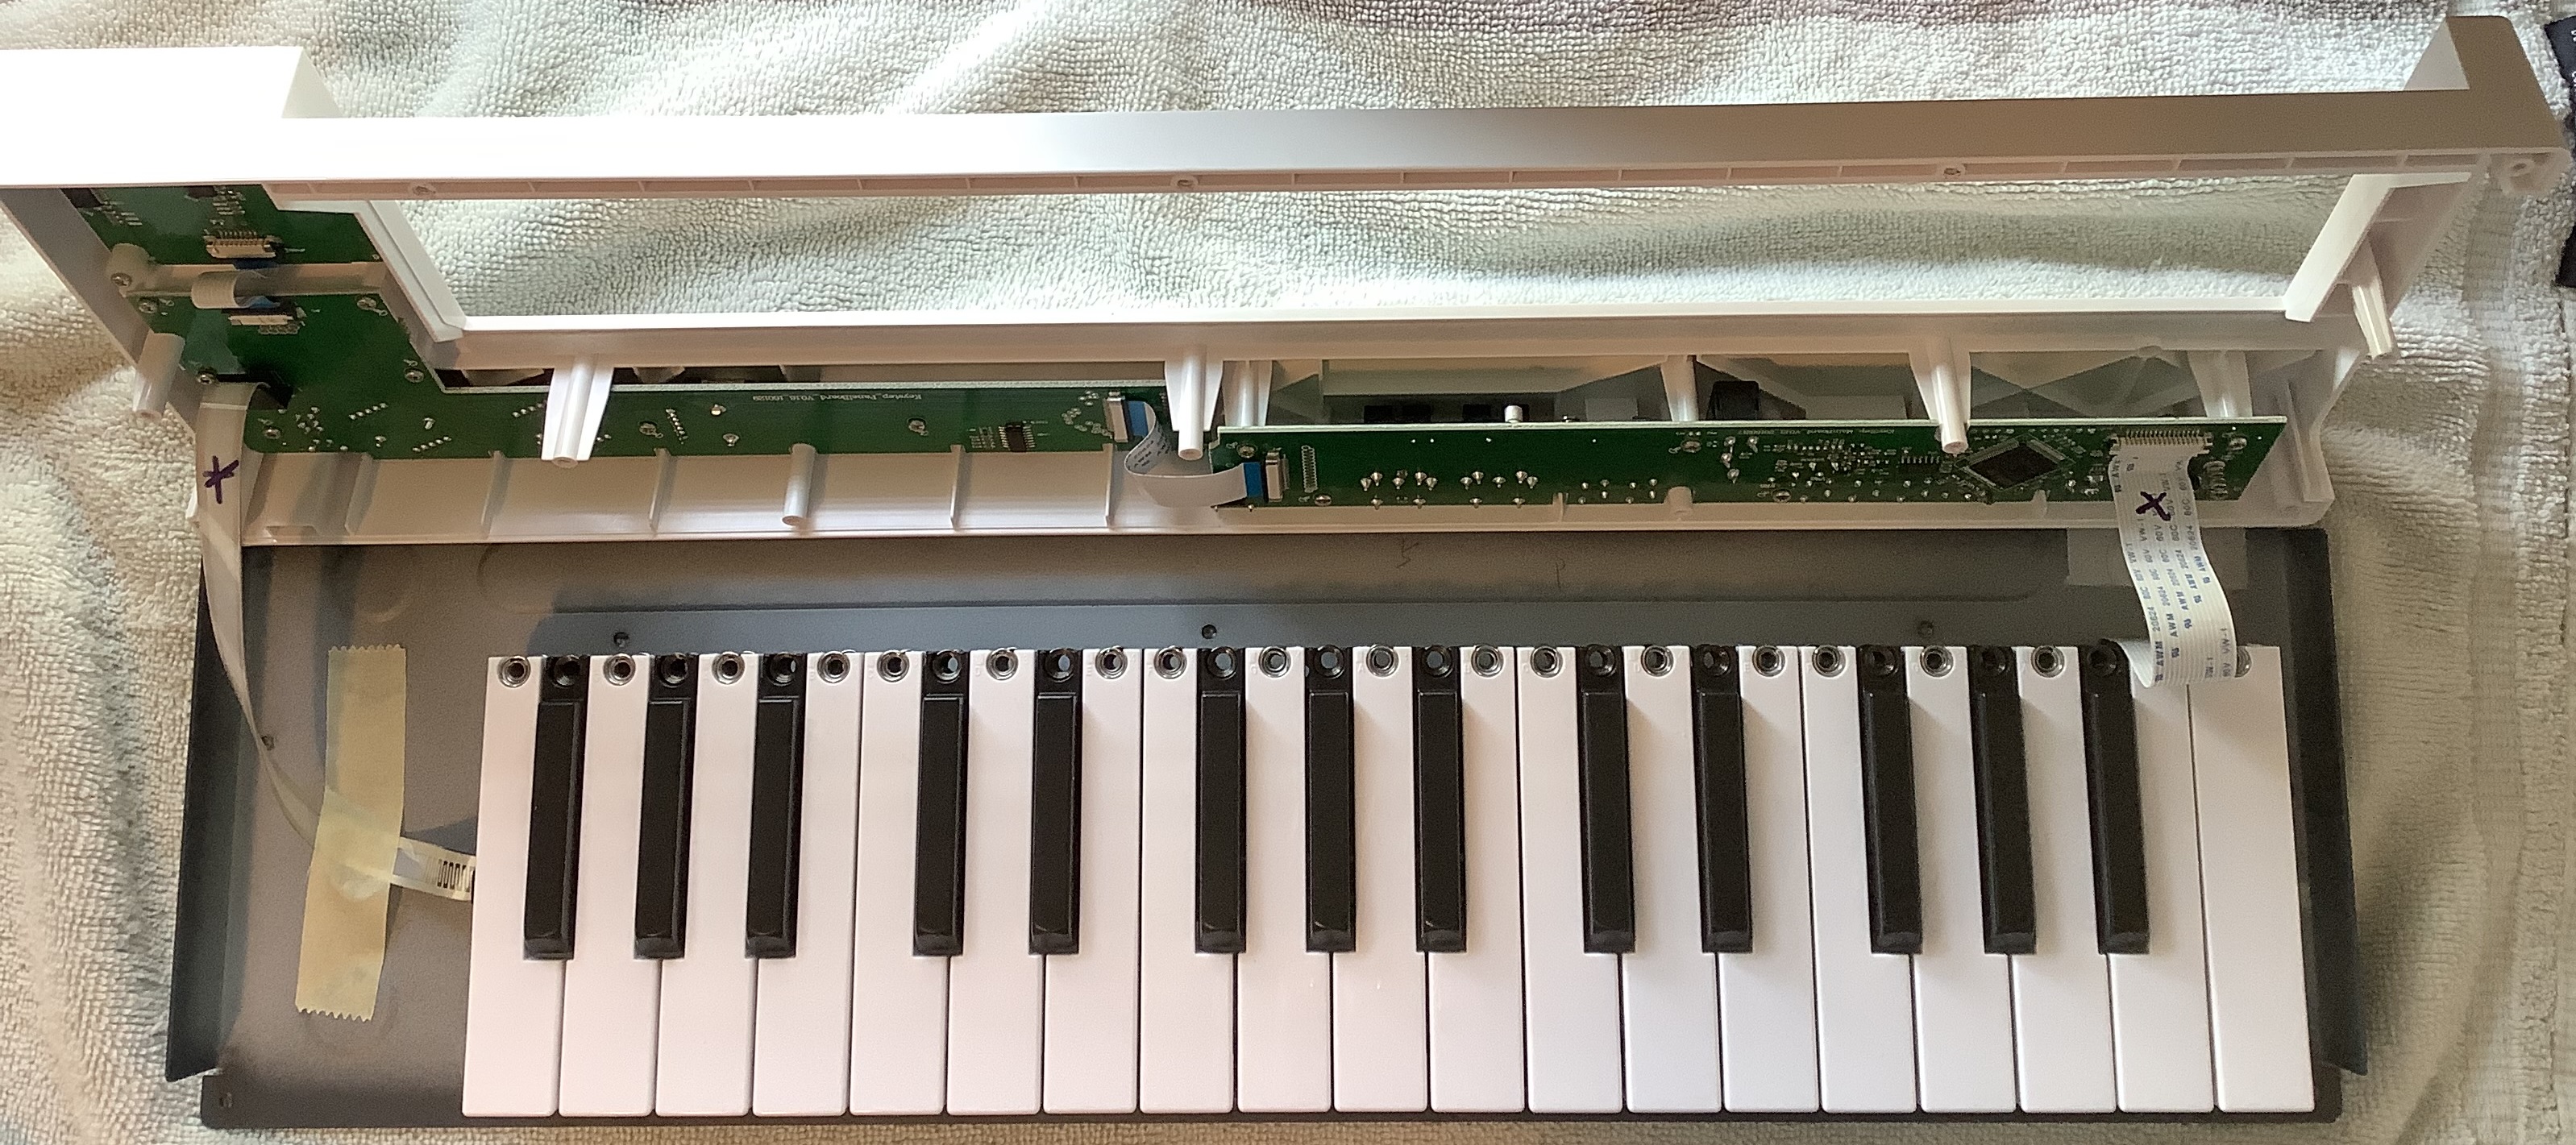
I watched a Youtube video covering repair of the aftertouch ribbon. Initial disassembly is straightforward: 1. Pull off the knobs. 2. Remove the 14 large screws on the bottom. 3. Carefully open the top (white or black front panel.
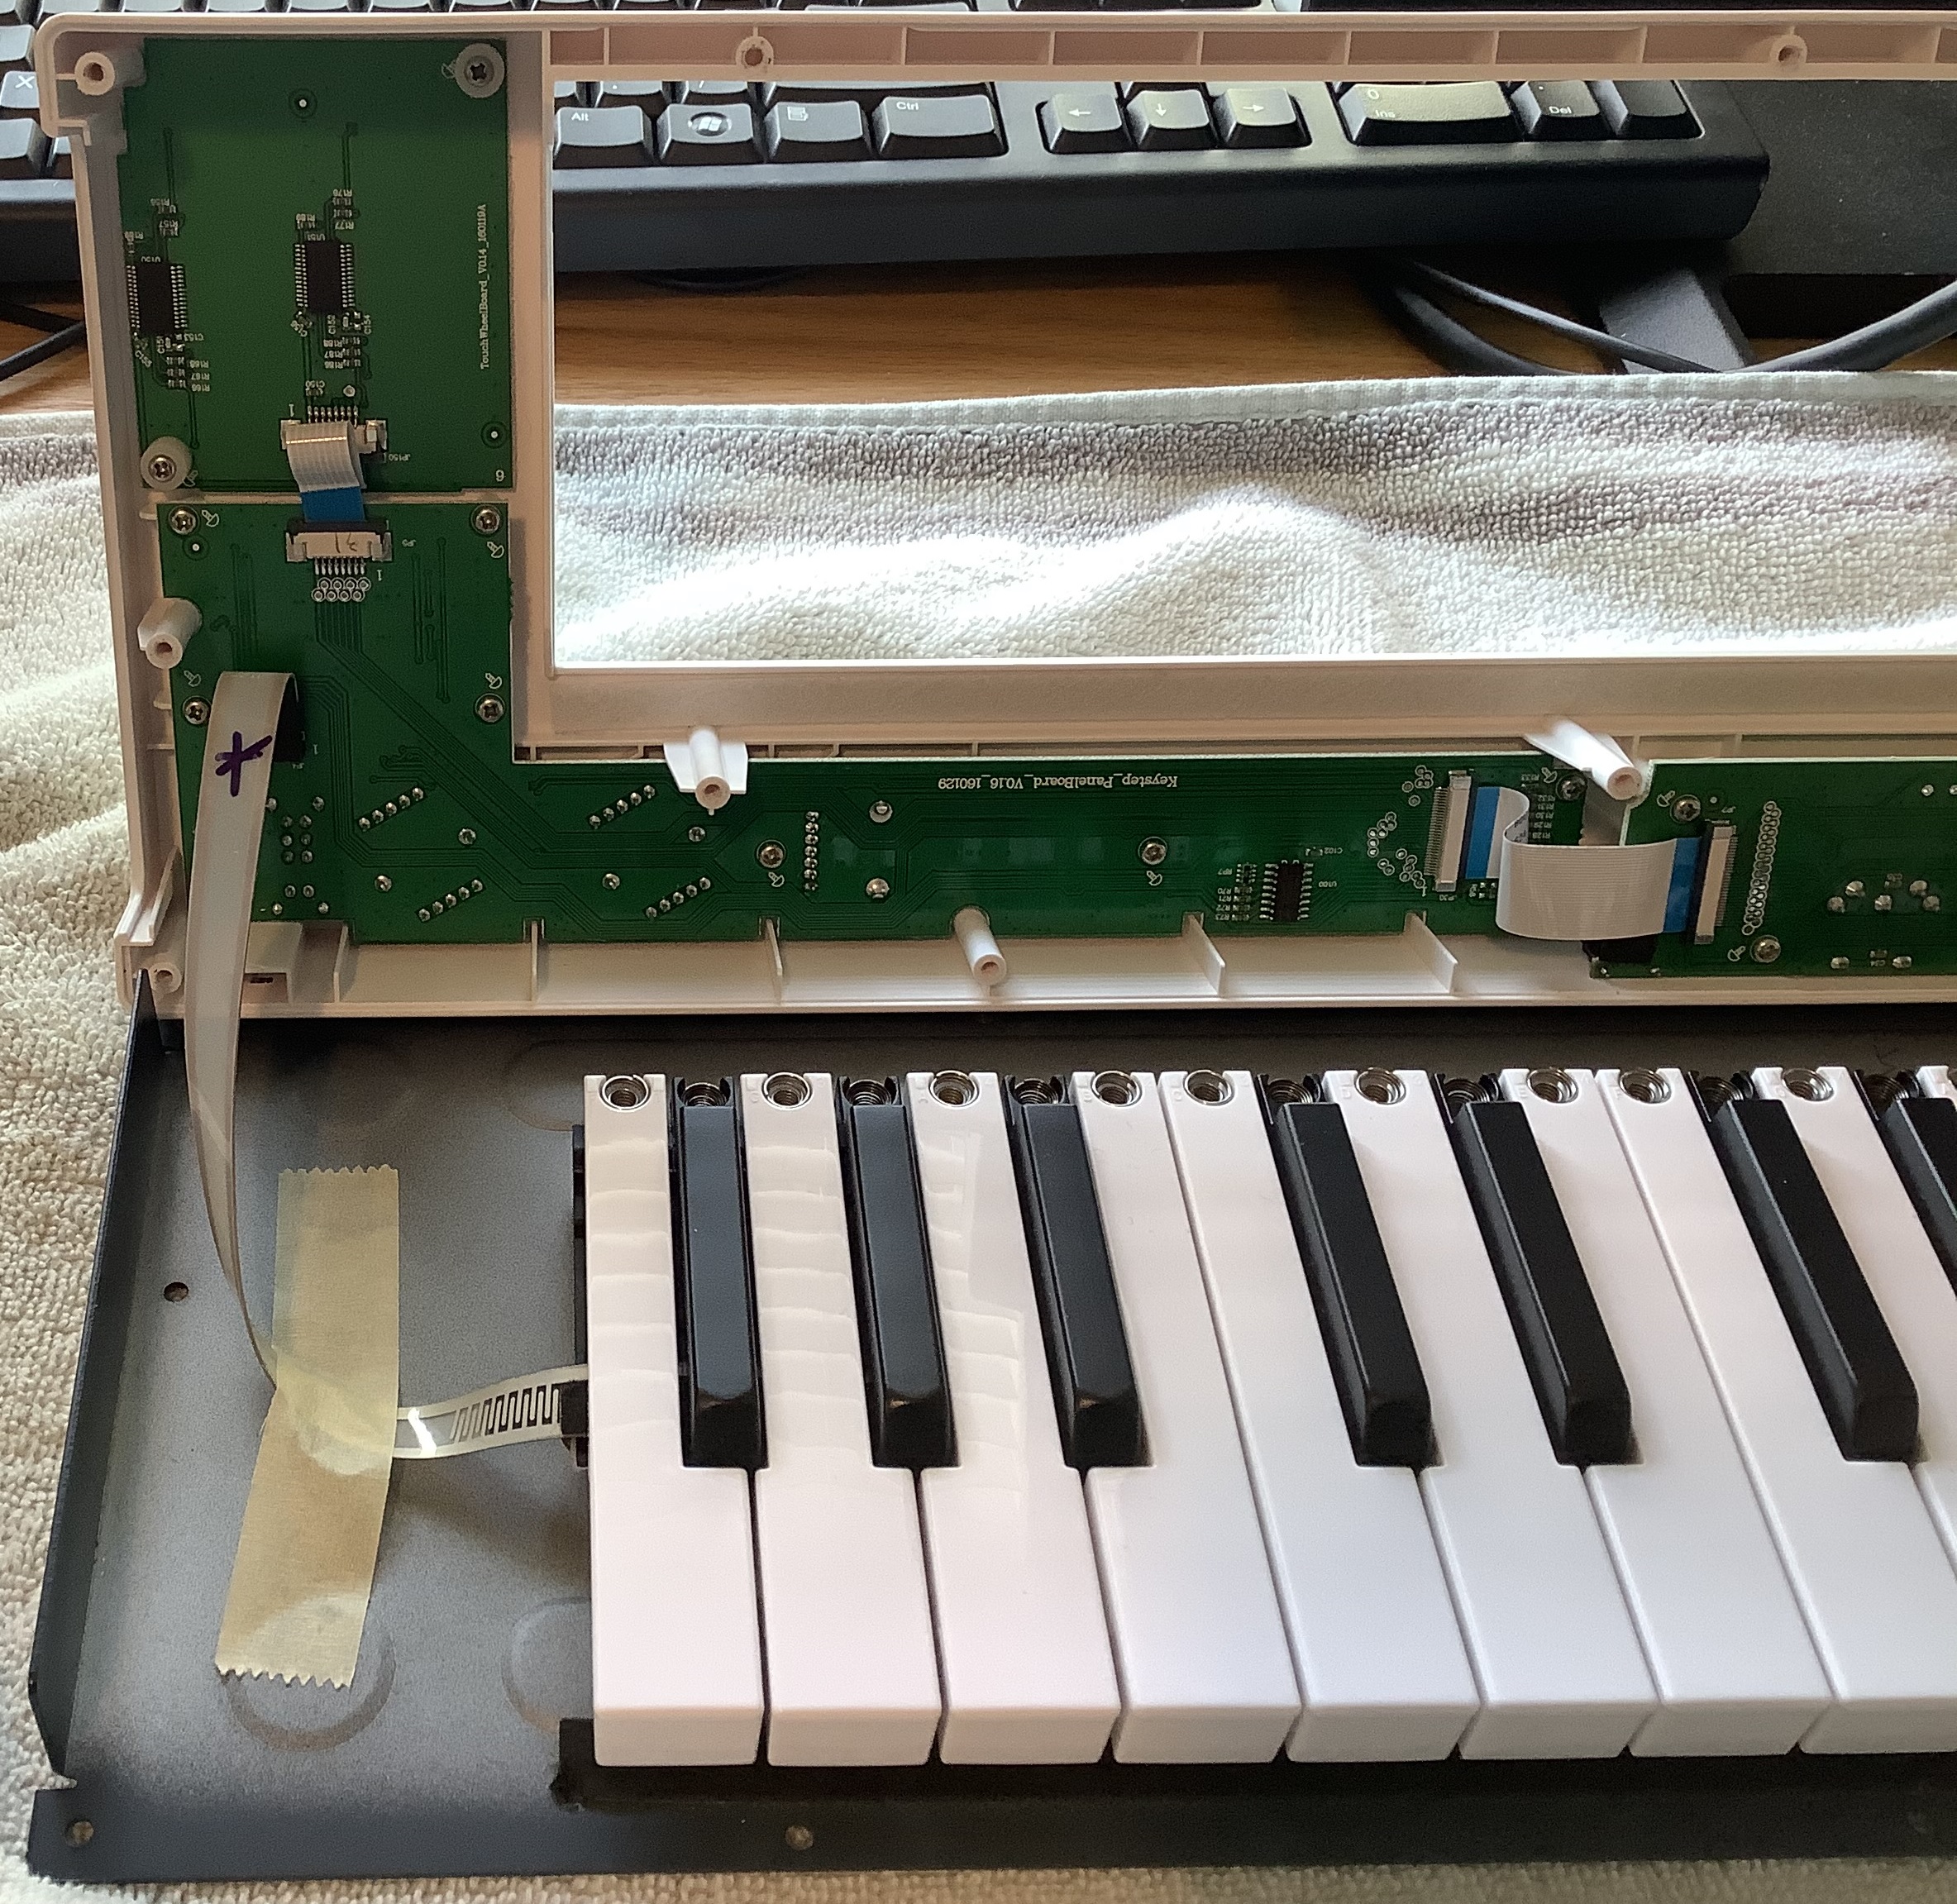
The key assembly connects to the main electronics through two ribbon cables: the aftertouch cable and the key matrix cable. I marked the top side of each cable so I would know the correct cable orientation during re-assembly.
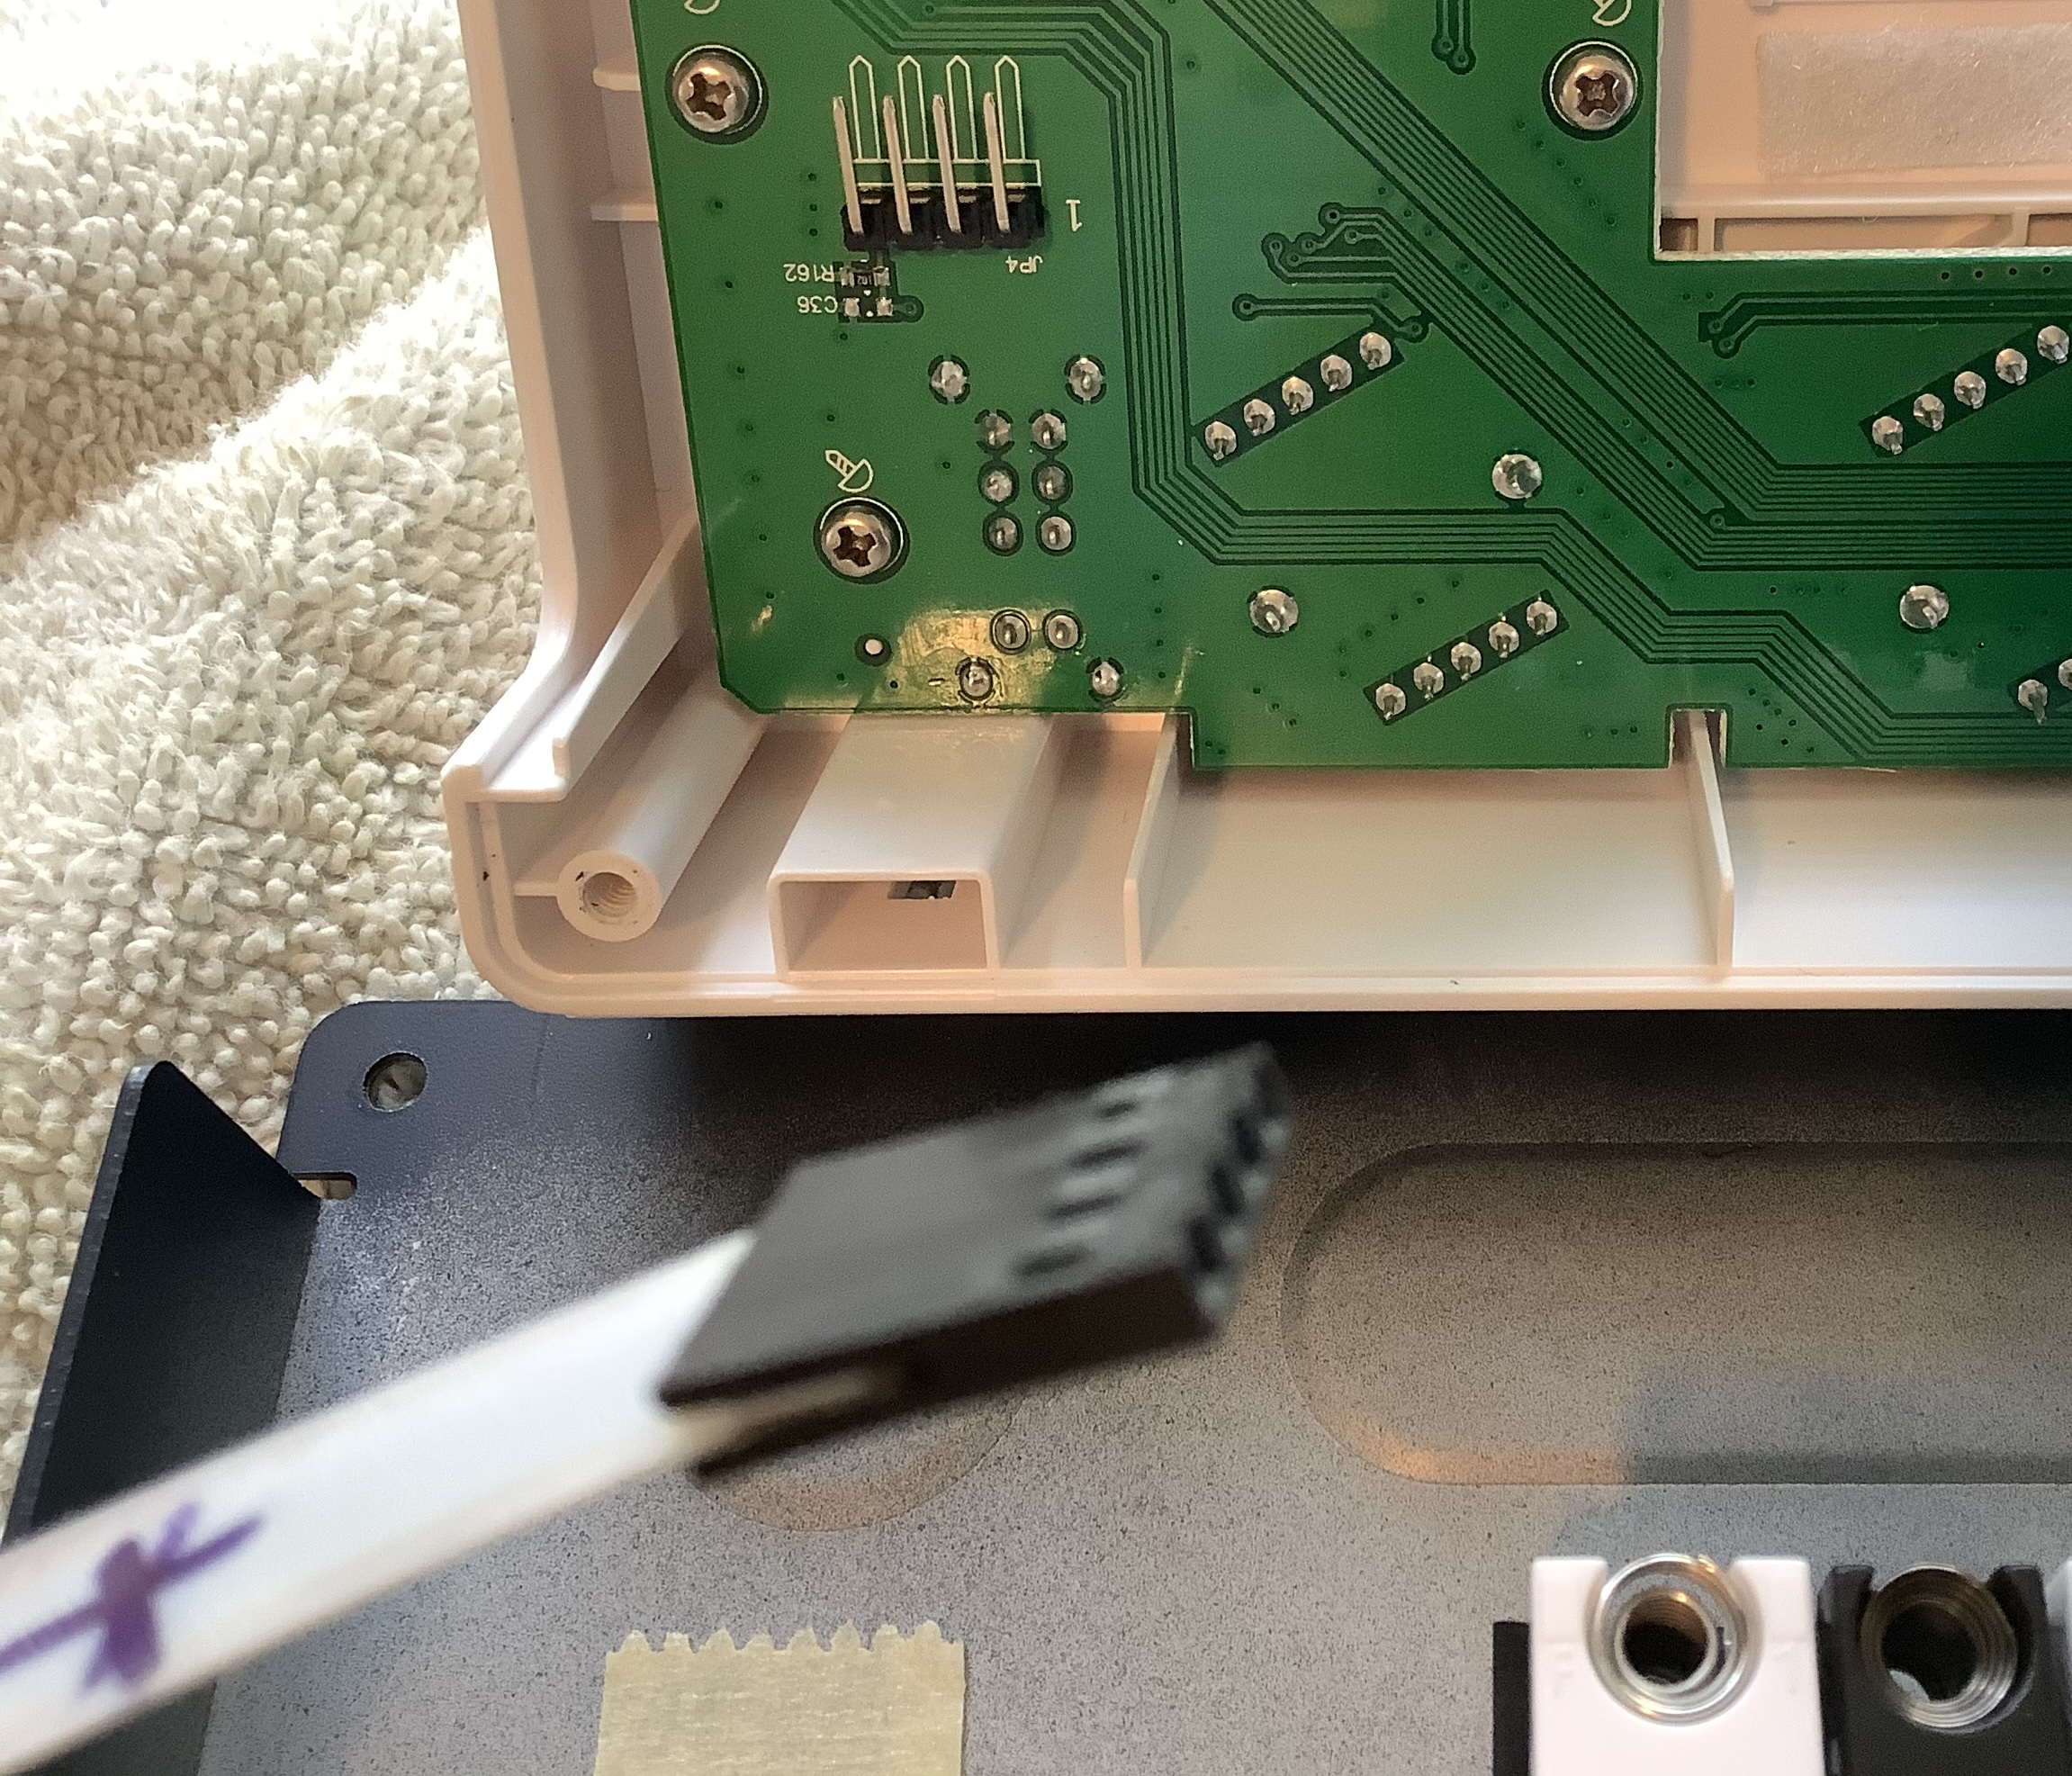
The aftertouch cable has a four socket connector that slides over four right angle pins on the printed circuit board. Disconnecting it is easy; just slide the connector out in the same direction as the pins. Please note the black X. That’s my mark so I know how to orient the cable when putting everything back together. This is important because there isn’t an indexing mechanism for the cable and it’s possible to insert it the wrong way.
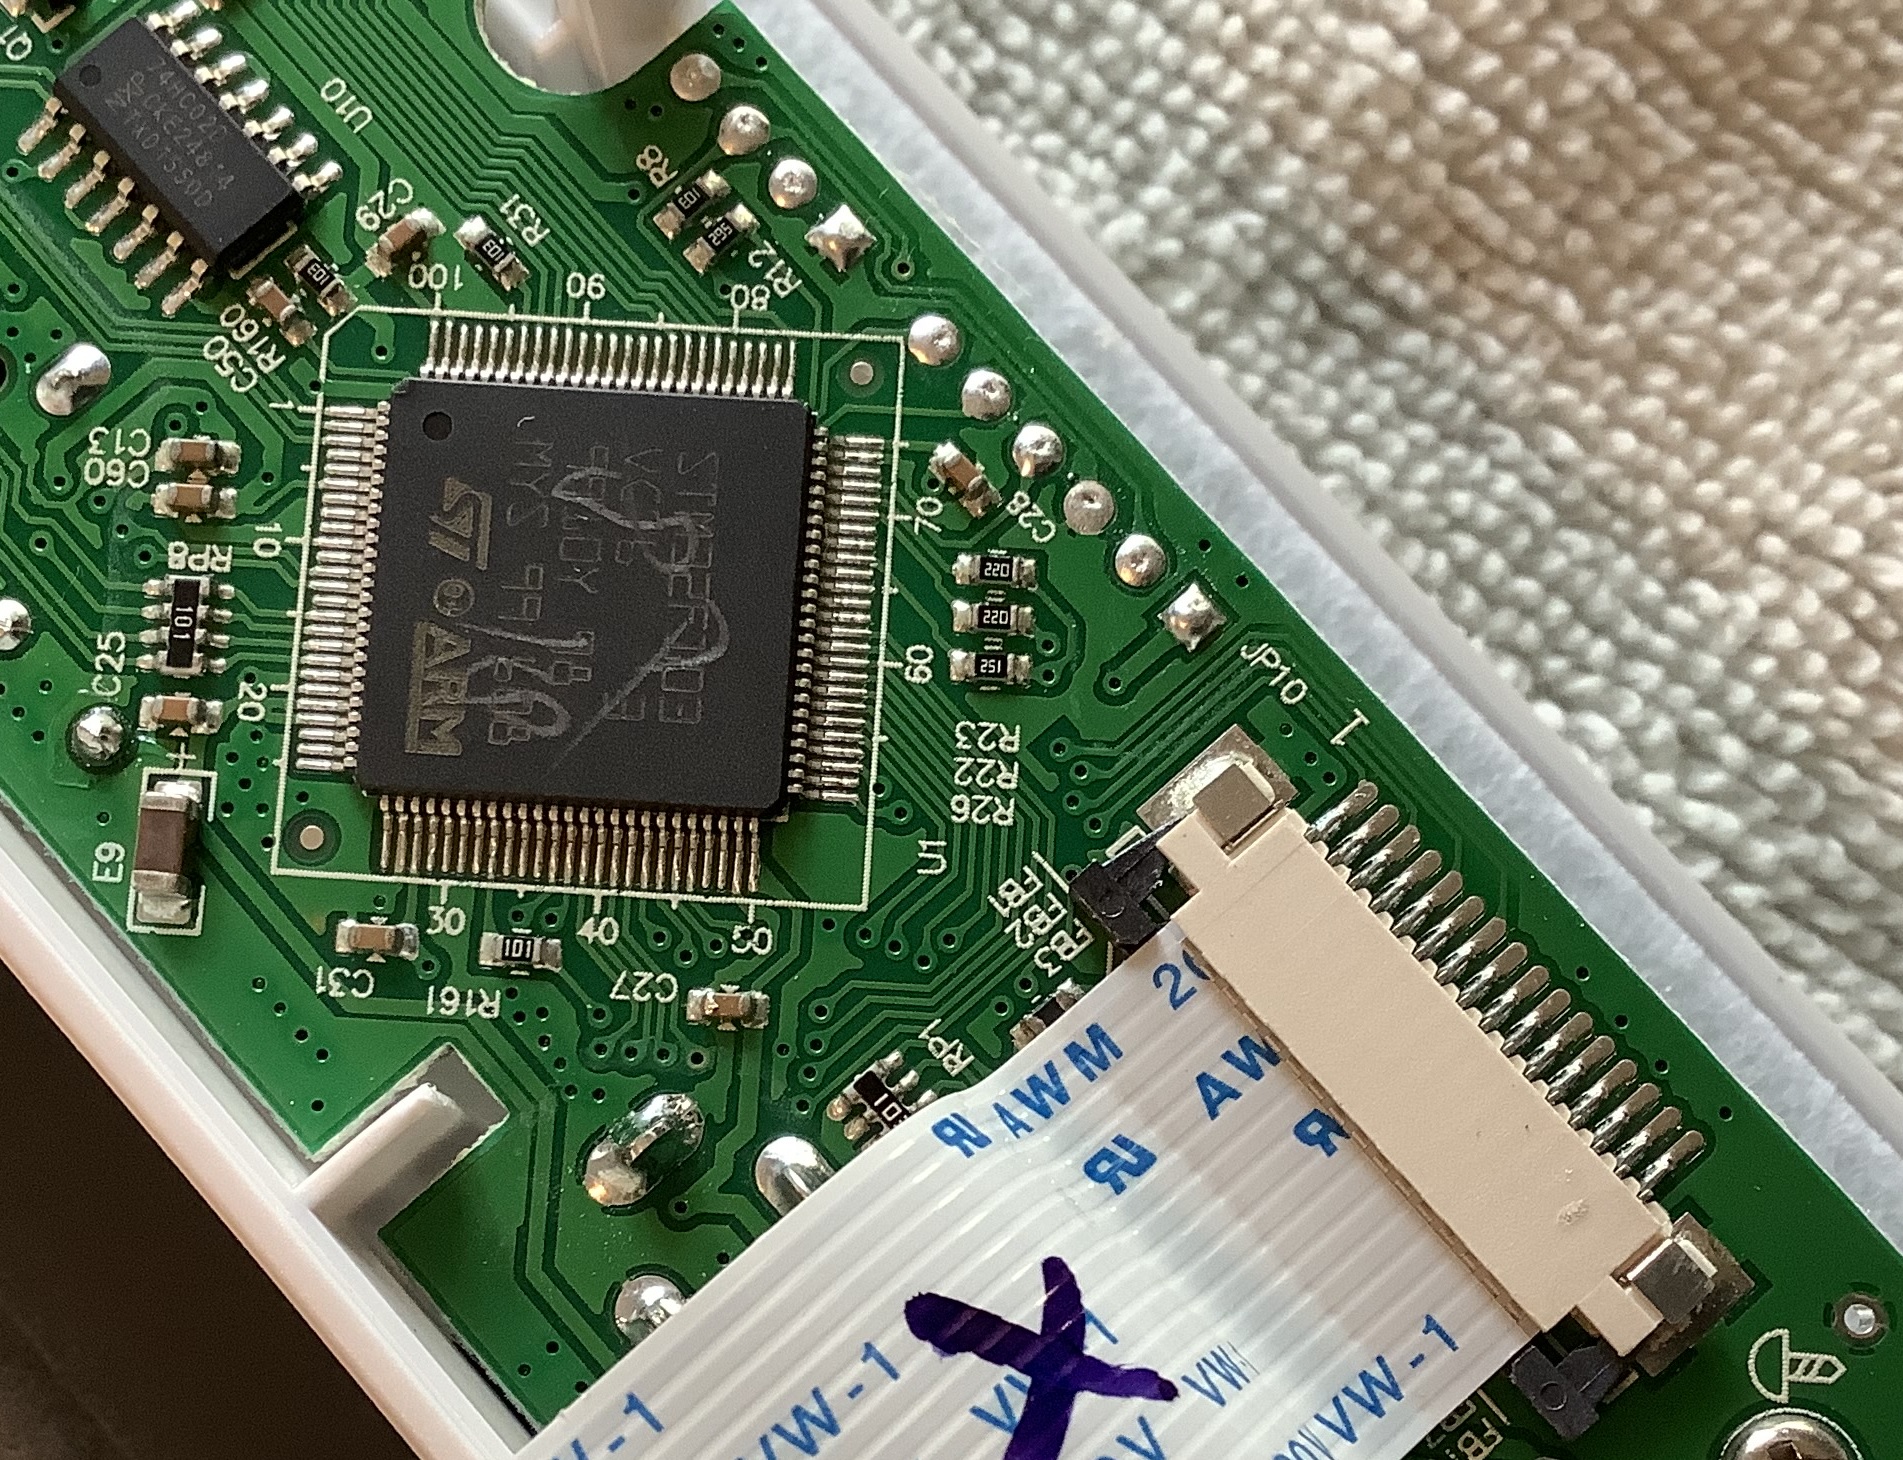
Next, one needs to disconnect the key matrix cable. Once again, I marked the cable in order to know its correct orientation. The cable is paper thin with exposed leads at the end. I always get faked out by these newfangled PCB cable connectors. Slide the two black tabs on either side of the connector in order to release the cable. During re-assembly, you’ll insert the cable and slide the tabs to lock the cable into place.
While we’re here, that’s an ST Micro STM32F103 ARM processor which is the brains of the whole operation. Ya know, for a 100 bucks (USD), there’s a lot of technology and quality built into this thing!
After disconnecting the cables, the front panel electronics can be separated from the keybed in the metal chassis tray. Now it’s time to remove the keybed itself by removing the 10 small screws on the bottom of the tray.

Flip the keybed over and you see the key matrix PCB. The key matrix lets the ARM scan the key contacts. The tiny components are switching diodes. For the time being, ignore the missing keys (!). I’ll explain later…
Next, remove the four tiny screws holding the key matrix PCB in place. Then, carefully push back the four black plastic tabs, one at a time. Remove the PCB and flip it over.
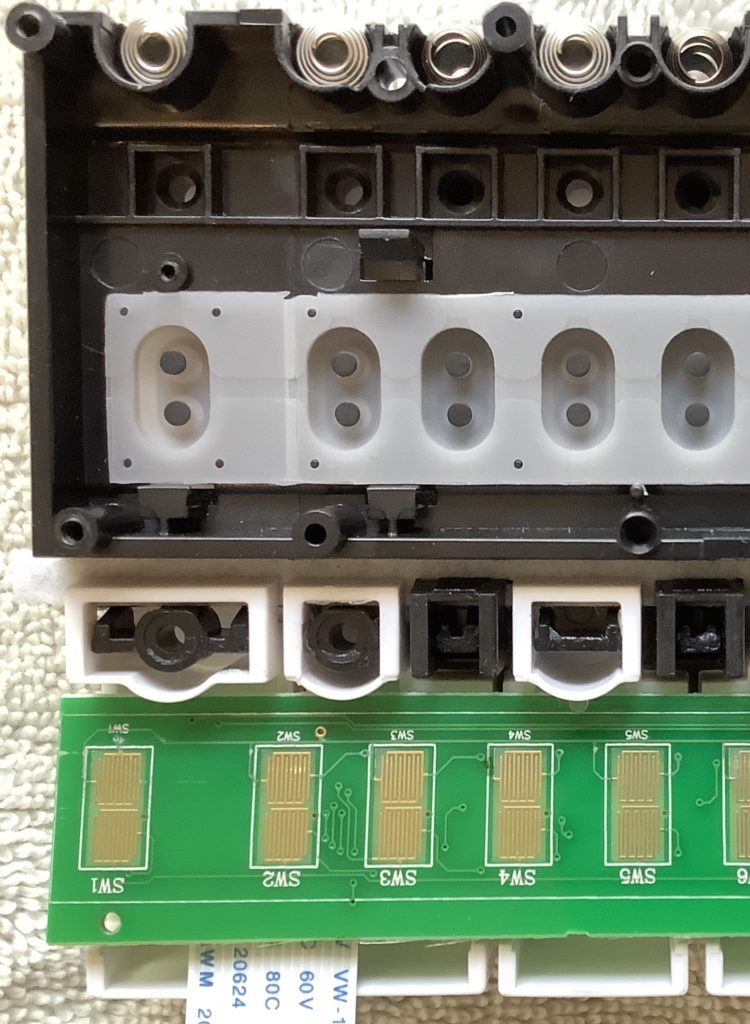
Now you see the actual key contacts. This is the money shot. The PCB has two maze-like traces for each contact. The black dots on the rubber contact strip make two separate electrical connections on the PCB when a key is pressed. One connection is made first, followed by the second connection. The ARM software senses the connections and measures the time between contact. The software maps this time into the MIDI note velocity.
At this point, I used alcohol prep pads (70% isopropyl alcohol) to clean both the PCB traces and each of the black dots on the rubber contact strip. These are the same small pads that doctors or nurses use before a finger stick test. Be gentle! I didn’t see any visible dirt, so maybe key flakiness is due to manufacturing residue. [I’m not a smoker.] Based on Web comments, flaky Keystep keys is a common problem — a frequent problem in what is otherwise a fine product.
From here, you need to reverse the disassembly steps in order to nail everything back together again.
Fixing broken keys or aftertouch
Now, to explain the missing keys. The original video demonstrates a repair to the aftertouch strip. I naively thought that I could get access to the key contacts through the top of the keybed. You only need to remove keys when fixing the aftertouch strip or broken keys. Do not remove keys if your goal is only contact cleaning.
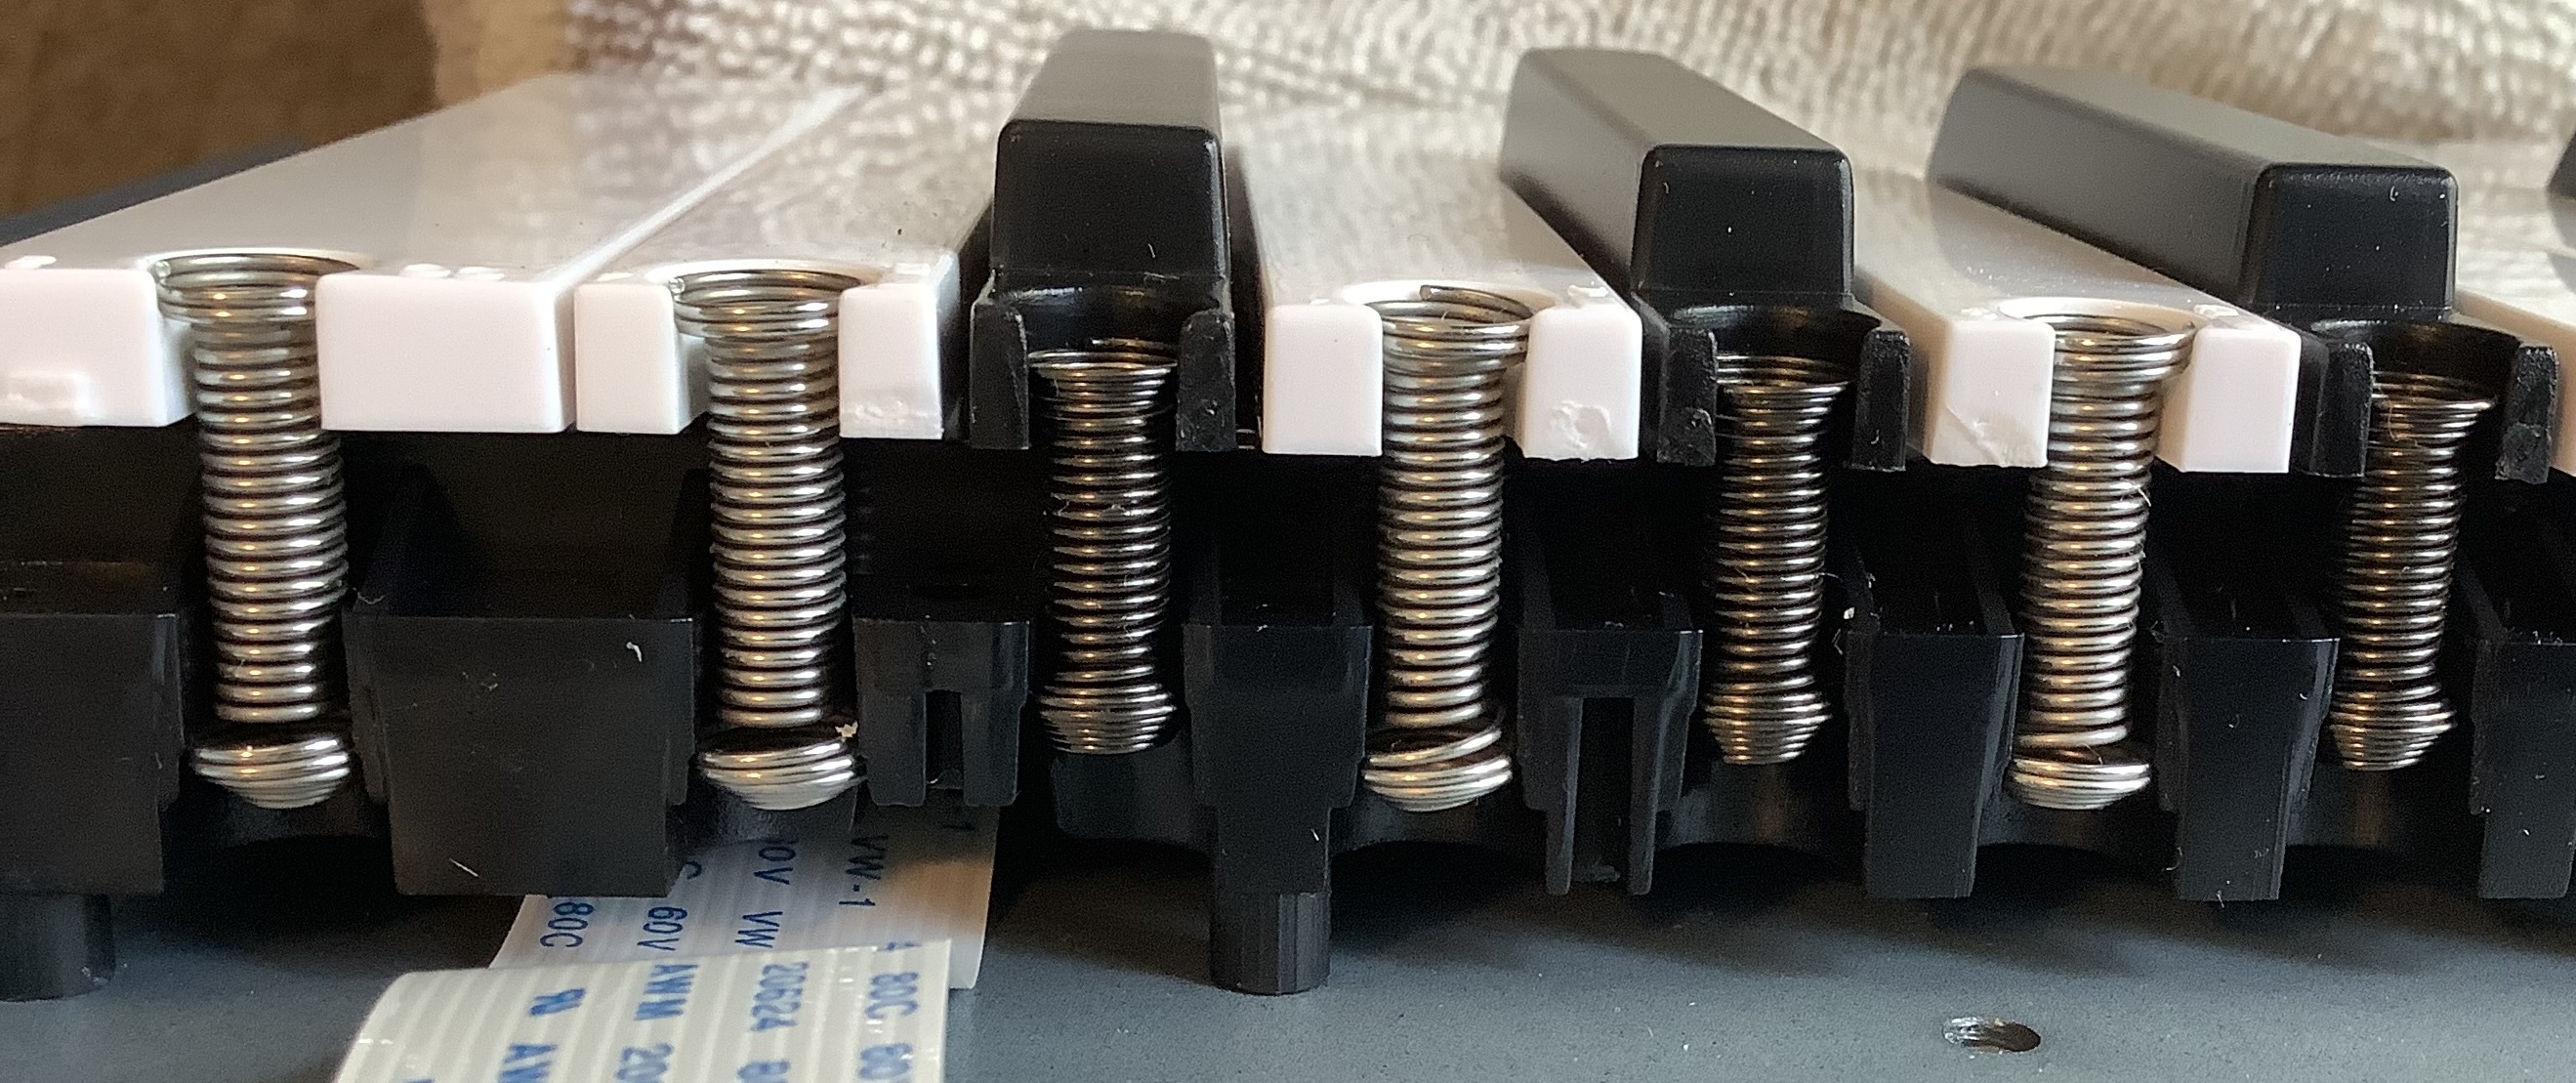
My mistake did create a photo-op, however. In the picture above, you see the springs which give the keys their bounce. The springs hold the keys in place. To remove a key, you need to gently push down on the spring and release the “rounded” end of the spring from the black keybed frame. These little buggers will fly off, so be careful! During re-assembly, the conical ends fit into the key holes. Stretch the spring until the rounded end fits into the corresponding pocket in the keybed frame. Another re-assembly tip: do all of the black keys first.
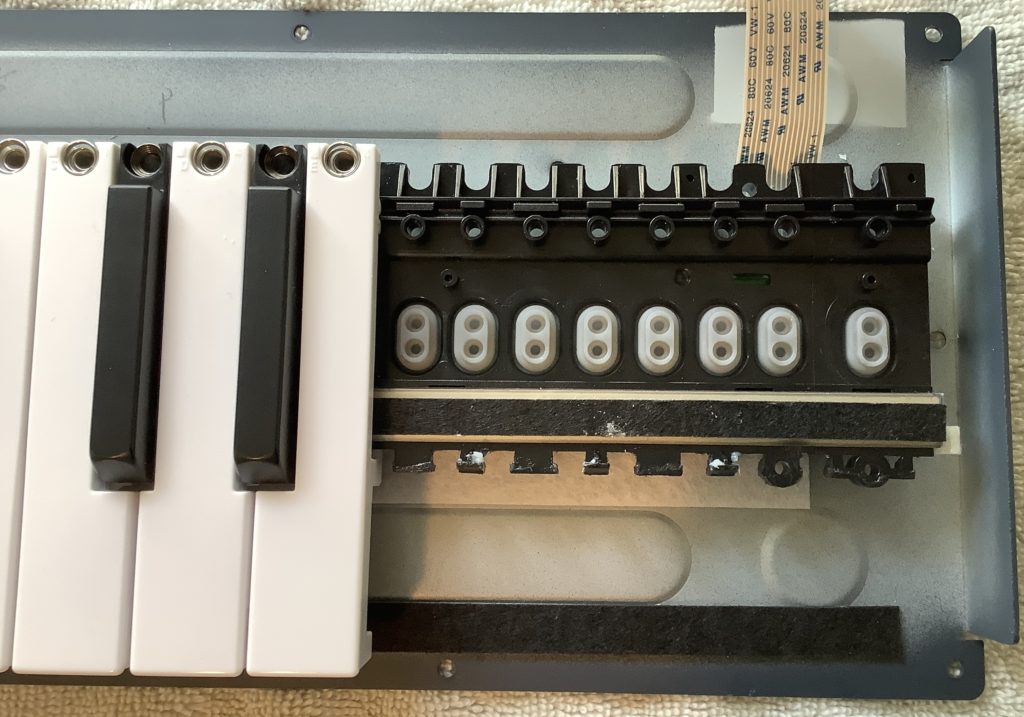
The final picture shows the top of each rubber contact pair poking up through the black keybed frame. These are the top sides of the rubber contacts that we cleaned. The black strip running along side the key contacts is the aftertouch strip.
I connected the reassembled Keystep to my PC (via USB) and got the familiar start-up light show. I launched MIDI OX and tested each key. All keys responded quickly and reliably.
All in all, the process was relatively easy although care must be taken. I like the Arturia Keystep and love it even more, now that all of the keys are working.
Bonus: Learn how to tune littleBits with Keystep.
Copyright © 2020 Paul J. Drongowski