
In my last post, I investigated the gated CV signal produced by the littleBits MIDI Module. Now, let’s take a look at the Envelope Module.
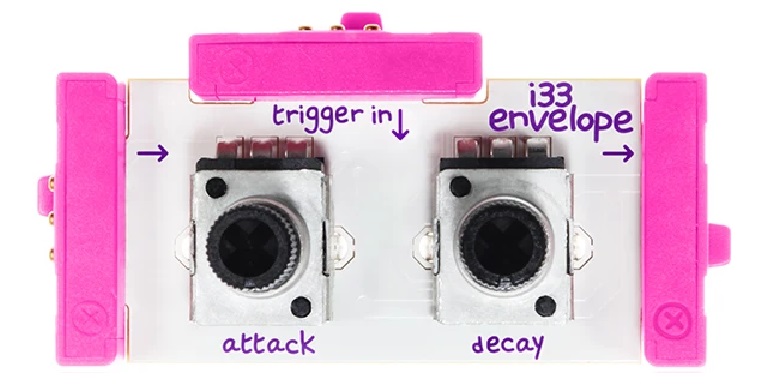
The littleBits Envelope Module is rather basic with only attack and release controls (no decay or sustain controls). The module has two inputs:
- The primary input at the left end of the module typically receives the audio to be shaped by the envelope.
- The trigger input receives an (alternative) trigger signal.
The Envelope Module triggers in one of two ways:
- When the primary input transitions from zero to a positive voltage.
- When the trigger input transitions from zero to a positive voltage, usually 5 Volts.
Allowing the primary input to trigger envelope generation simplifies connection. It is also easier to use conceptually. A beginner doesn’t need to understand envelope generators, voltage controlled amplifiers and how the two interact. A beginner doesn’t need to wire in a separate envelope generator. Everything happens along a single audio signal path and “it just works.”
The simple circuit below is all one needs to get started with synthesis:
Power --> MIDI --> Oscillator --> Envelope --> Speaker
If you have is the basic Synth Kit, then the MIDI Module may be replaced by the Sequencer Module or Keyboard Module. As we saw in the last post, the Gated CV output from the MIDI Module turns the oscillator ON and OFF (gate) and sets the oscillator pitch (CV). When the Oscillator is generating audio, the audio signal triggers the Envelope Module which shapes the audio amplitude. The shaped audio (now with attack and release segments) is finally sent to the speaker.
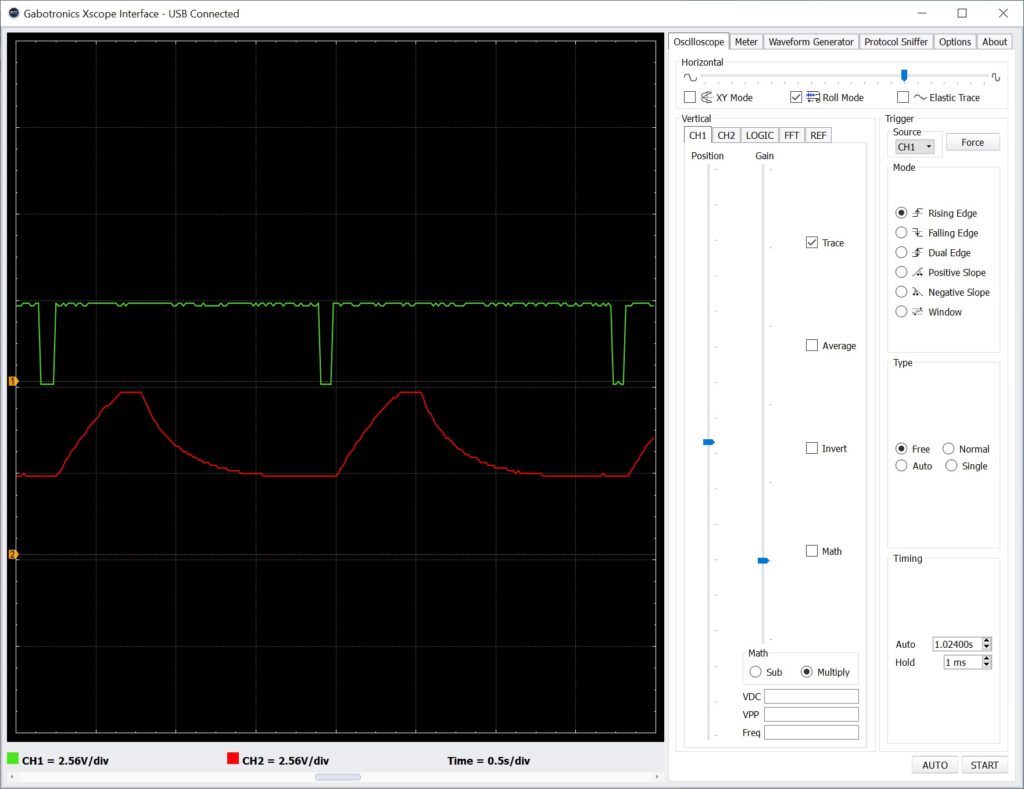
I connected this simple circuit to a dual trace oscilloscope. I found that the attack and release phases are sequential without an intervening sustain phase. The duration of the entire envelope is the sum of the attack duration and release duration. There isn’t a decay phase either. In other words, holding the gated CV longer does not sustain a note! The maximum duration of the attack phase is about 1 second and the maximum duration of the release phase is about 2 seconds.
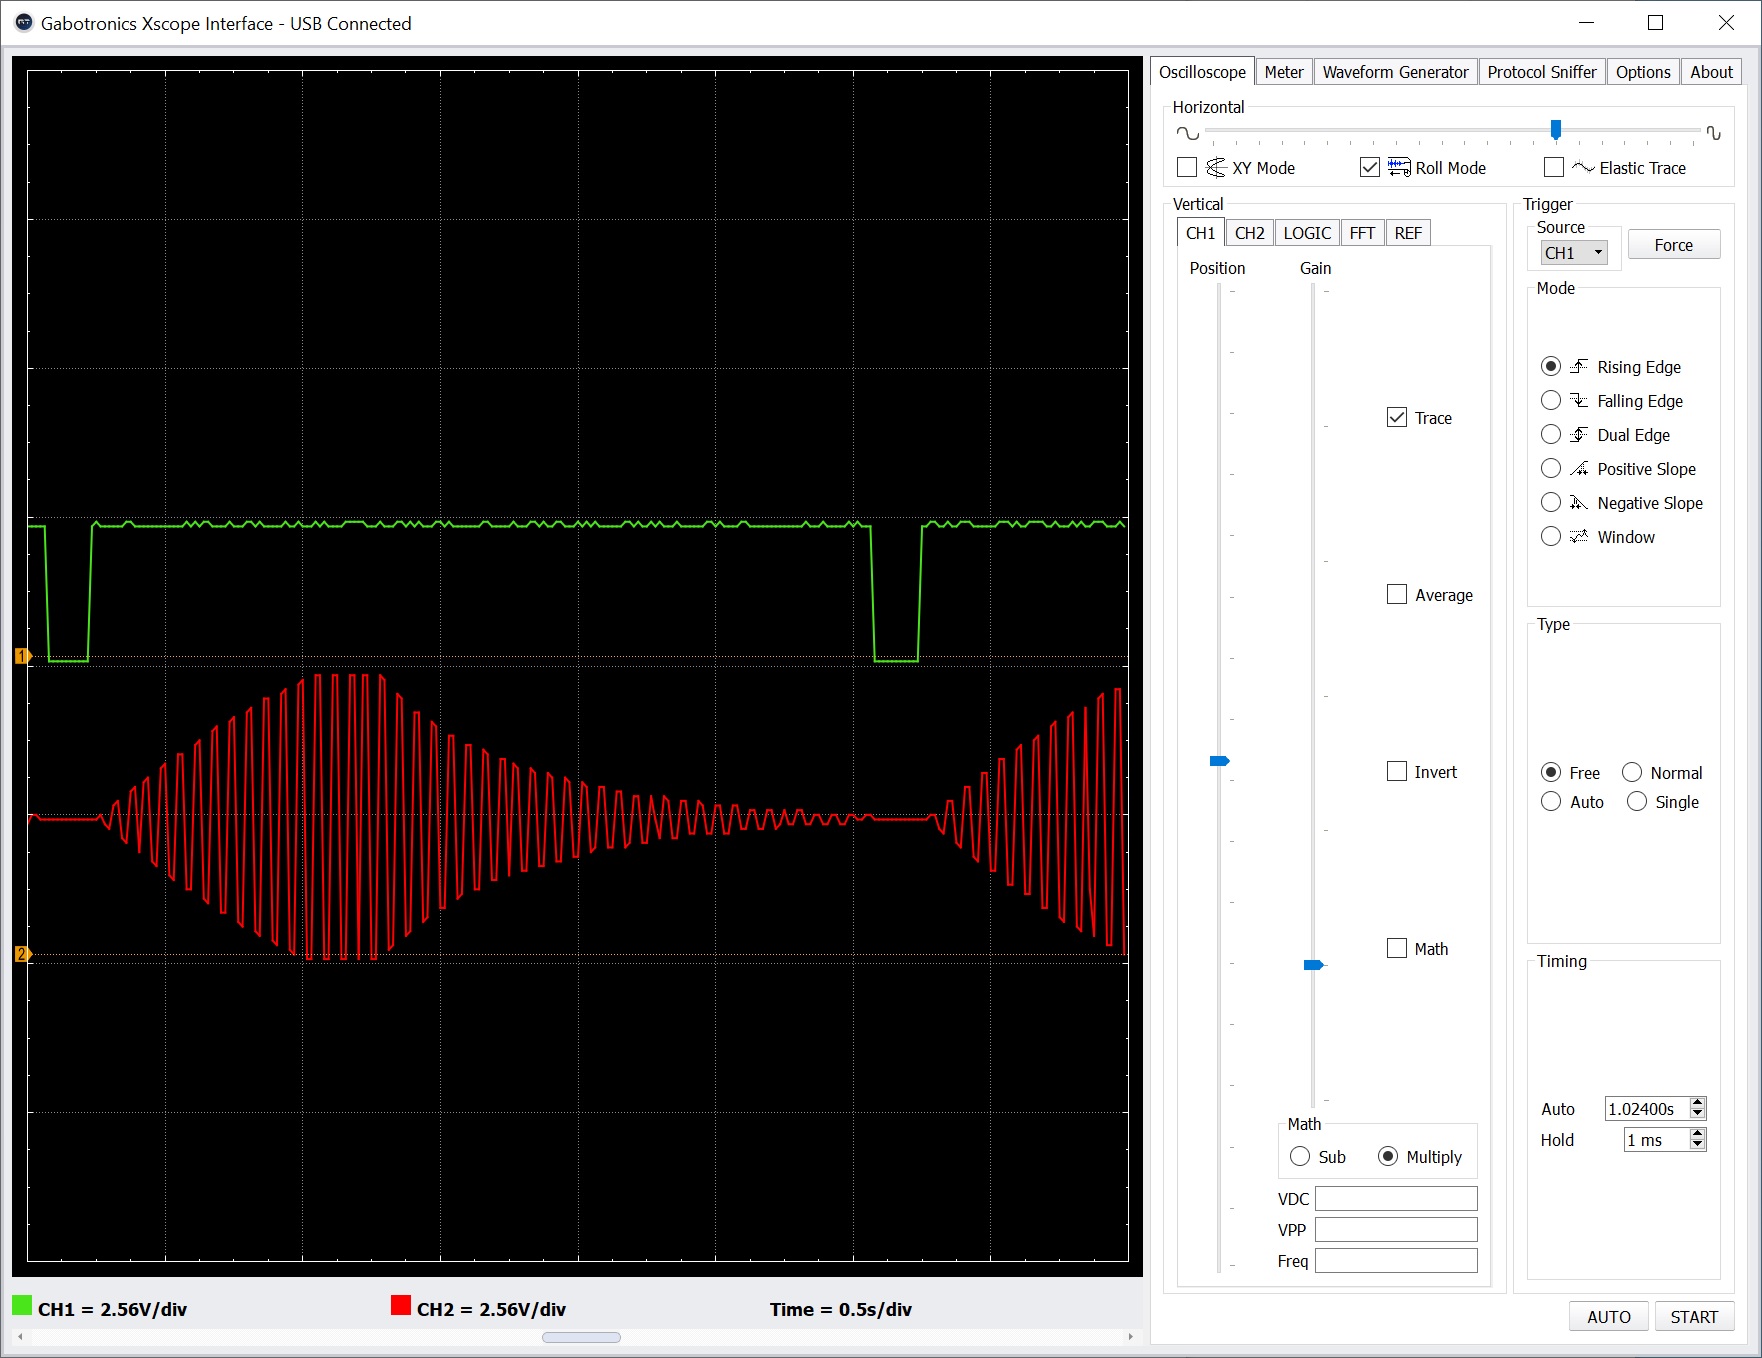
The oscilloscope traces above show the final, shaped audio signal when attack and release are set to maximum. [Click images to enlarge.] The top trace (green) is the gated CV signal from the MIDI Module. The bottom trace (red) is the shaped audio signal. Each horizontal grid mark is 0.5 seconds. Please note that the gate must be as wide as the attack duration plus the release duration to obtain the full contour.
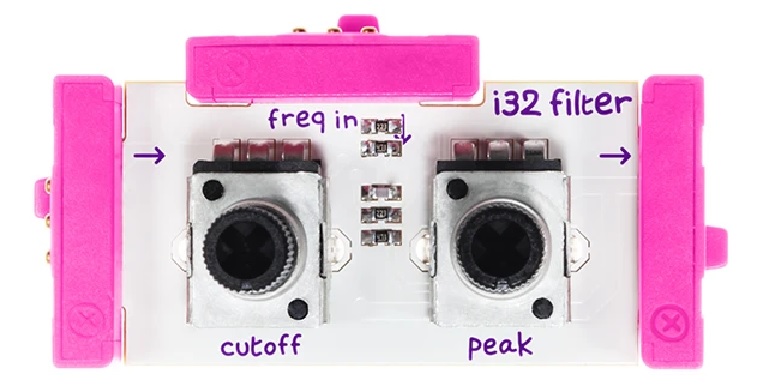
Skipping ahead to the Filter Module for a moment, the Filter has an input which allows cutoff frequency modulation. In a typical modular synth, this input is tied to a separate envelope generator. In keeping with the littleBits “It just works” philosophy, you can drive the cutoff input with the audio signal as seen in the circuit below:
                                                ----
                                               |    |
                                               |    V
   Power --> MIDI --> Oscillator --> Envelope --> Filter --> Speaker
Yes, this actual works as shown in the oscilloscope traces below. The top trace is the gated CV signal from the MIDI Module. The bottom trace is the output of the Envelope Module which is connected to the Filter cutoff modulation input.

littleBits envelope generator
I’ll bet that you’re wondering if the littleBits Envelope Module can be made into a conventional envelope generator. So did I. It would be great to have a conventional synthesis chain with separate envelopes for amplitude and filter with separate attack/release (AR) controls for each envelope.
Here’s one experimental solution:
               --> MIDI IN  --> Oscillator --> Filter --> Speaker
              |       |                           ^
    Power --> |       | Trigger                   |
              |       V                           |
               --> Envelope ----------------------
If you have a second Envelope Module, you can insert it between the Filter and Speaker Modules, forming a conventional OSC→VCF→VCA chain. I have only one Envelope Module and built the circuit shown above. I used a littleBits Split Module to send the Power output to the MIDI Module and Envelope Module. This is the ideal situation for powerSnaps, if you got ’em.
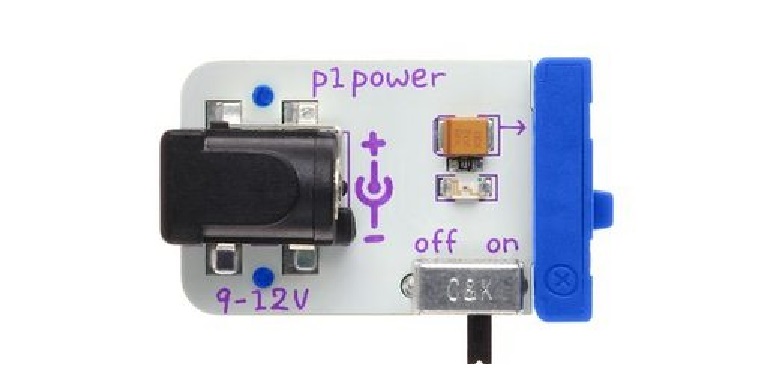
How does this circuit work? The Power Module provides the +5V and ground power rails, of course. The Power signal output is tied to 5V. Thus, the Envelope Module sees a constant 5V signal at its primary input. The littleBits MIDI Module triggers the Envelope module. The envelope generator inside the Envelope Module triggers and shapes the constant +5V input signal into the familiar attack and release envelope contour.
The oscilloscope traces above show the gated CV signal (top/green trace) and the output from the Envelope Module (bottom/red trace). Yep, the final audio sounds exactly as expected having the familiar wah-wah filter funk. The final audio sounds cleaner when the filter cut-off frequency is modulated by the “pure” envelope generator.
One final detail. The internal littleBits envelope generator is based on a 555 timer circuit. If you’re curious about the internal design of this or any of the littleBits modules, be sure to visit the littleBits Eagle file repository where you will find schematics.
Copyright © 2020 Paul J. Drongowski