Most of my project postings described a project in a completed state with full code, electronic design, etc. This post covers some things that I’ve learned during my current open investigation. Think of it as a “breather” before the next push.
Audio folks who get into Arduino often ask, “Gee, why not use PWM to produce audio — a poor man’s DAC?” 8-bit PWM resolution is the default supported PWM mode. The resolution and the bandwidth is not sufficient to support decent audio. First off, the PWM stream must be converted to an analog signal using a low pass filter, with a typical corner frequency of 150Hz or so. The default mode is really intended to control servos and such.
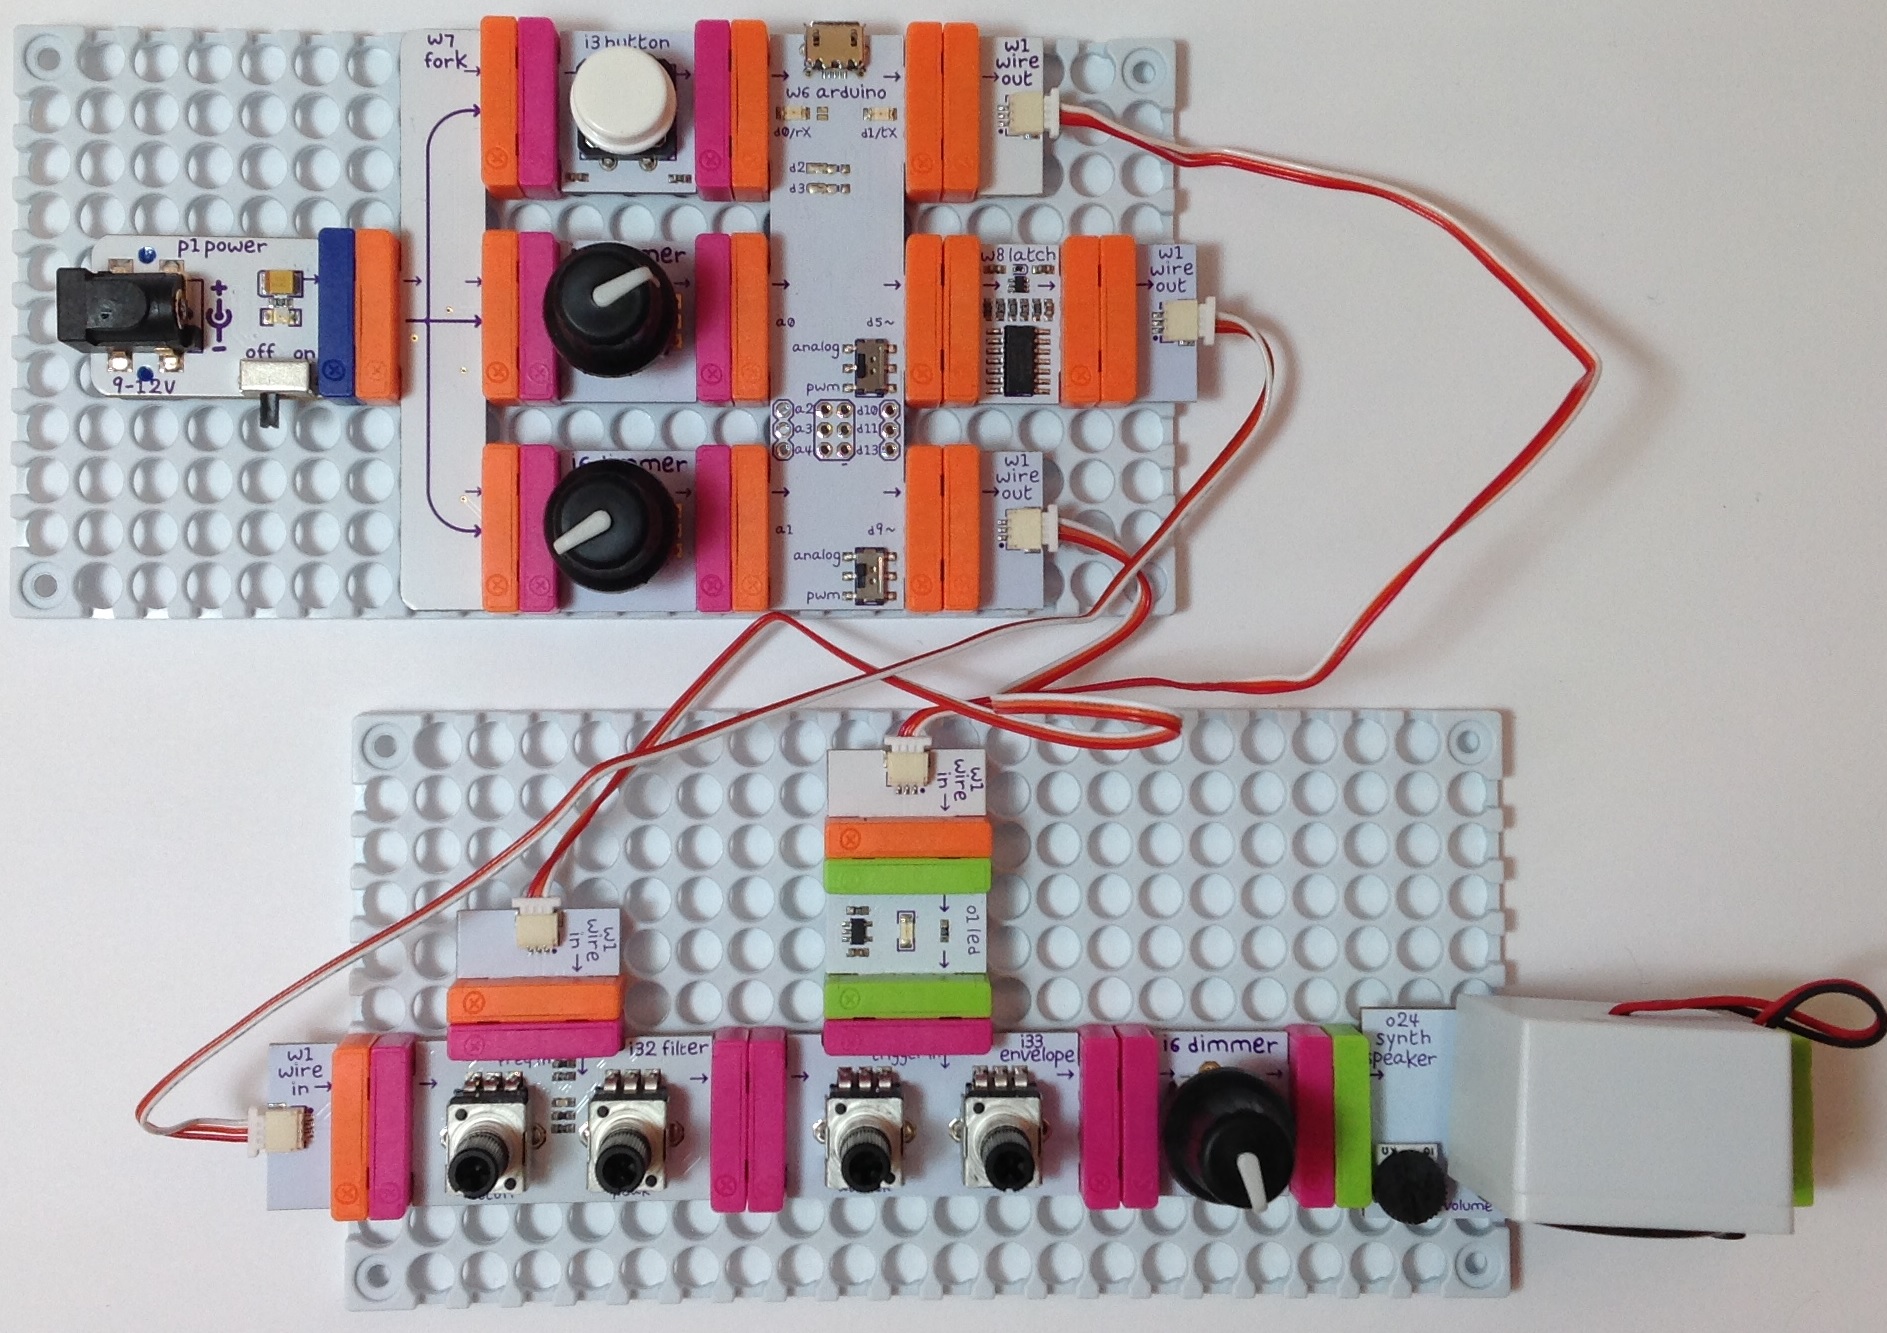
The littleBits Arduino is a good example implementation. The PWM outputs have a filter to convert the PWM bit stream to an analog voltage. The filter can be switched off if you want access to the raw digital data or PWM bit stream, making the Arduino’s outputs quite versatile. Depending upon your perspective, the littleBits filter is quite good for low bandwidth applications, not so good for audio. In fairness, littleBits never claim to support audio via their PCM hardware.
The PWM signals are generated by the Arduino’s timer/counter hardware. The Arduino UNO and Leonardo, for example, have three timers which can generate a PWM signal:
- TIMER0: 8-bit PWM, pins D5 and D6,
delay()
- TIMER1: 8-bit and 16-bit PWM, pins D9 and D10
- TIMER2: 8-bit PWM, pins D3 and D11,
tone()
Timers 0 and 2 are used by the Arduino delay() and tone() functions, respectively. So, you cannot use these functions and expect to generate PWM at the same time.
All appears lost for audio until one discovers TIMER1’s 16-bit PWM mode. I decided to try 16-bit PWM on the littleBits Arduino with the hope that the pre-existing filter would successfully convert the PWM bit stream to audio.
Long story short, the littleBits filter is too good at its job! The filter looks to be an active Sallen-Key low-pass filter with a corner frequency of 49 Hertz. Through much of my experimentation, I sent percussive samples (e.g., open high hat and cymbal) through TIMER1’s PWM channel. The littleBits filter neatly removes all of the high frequency signal resulting in a low frequency thud like a kick drum or low tom.
So, instead, I decided to switch off the littleBits filter and convert the PWM bit stream through a passive, low-pass filter of my own. The following table summarizes the RC components and filter characteristics that I tried:
    Resistor                  Capacitor  Corner frequency
    ------------------------  ---------  ----------------
    100 (Brown Black Brown)     0.1uF     15915 Hertz
  * 150 (Brown Green Brown)     0.1uF     10610 Hertz *
    220 (Red Red Brown)         0.1uF      7234 Hertz
    330 (Orange Orange Brown)   0.1uF      4822 Hertz
     1K (Brown Black Red)       0.1uF      1592 Hertz
    10K (Brown Black Orange)    0.1uF       159 Hertz
I held the capacitance constant in order to find the best resistance for the filter. The 150 ohm resistor worked best. It produced the best quality audio with the least artifacts although I still need to tame a high pitched whine. I may have to add another filter stage (a so-called “2-pole” or “second order” filter). The corner frequency is roughly the Nyquist frequency — no accident.
At this point, it probably appears that it was a smooth ride from start to finish. Nothing could be further from the truth! Here are a few “learning moments” from the journey.
First, be sure your power is clean. I started out with a switching power supply that successfully drives Arduinos big and small. The output signal had a raunchy buzz that I could not extinguish with the filter. Turns out, the switching supply is noisier than heck and the noise gets into the audio. I replaced the switching power supply with a clunky, old, heavy Yamaha PA-3B and the raunchy buzz went away.
Next, don’t trust code that you find on the Web. I started with timer configuration code from what appears to be a reputable site. After hours of frustration, I read up on the TIMER1 hardware and rewrote the code. The original code simply could not have worked as it set non-existent bits in the timer control registers! Here is my timer configuration code and interrupt service routine (ISR).
    //
    // TIMER1 PWM. Single PWM, phase correct, 22050KHz.
    // PWM_FREQ = 16,000,000 / 22,050 =  726 = 0x2D5
    // PWM_FREQ = 16,000,000 / 11,025 = 1451 = 0x5AB
    //
    #define PWM_FREQ   363

    void PwmSetup() {
      // Clear OC1 on compare match, 8-bit PWM
      //TCCR1A = _BV(COM1A1) | _BV(WGM10) ;
      TCCR1A = _BV(COM1A1) ;
      // PWM TOP is OCR1A,  No prescaler
      TCCR1B = _BV(WGM13) | _BV(CS10) ;
      // Generate interrupt on input capture
      TIMSK1 = _BV(ICIE1) ;
      // Set input capture register to sampling frequency
      ICR1H = (PWM_FREQ >> 8) ;
      ICR1L = (PWM_FREQ & 0xff) ;
      // Turn on the output pin D9
      DDRB |= _BV(5) ;
      sei() ;
    }

    //
    // Interrupt service routine (ISR)
    //
    ISR(TIMER1_CAPT_vect) {
      if (sampleCount > 0) {
        sample = (int8_t)pgm_read_byte_near(sampleArray+sampleIndex) ;
        dacValue = sample  ;

         // Output through OC1A
        dacValue += 127 ;
        OCR1AH = (uint8_t) (dacValue >> 8) & 0xFF ;
        OCR1AL = (uint8_t) dacValue & 0xFF ;

        sampleCount-- ;
        sampleIndex++ ;
        TXLED1 ;
      } else {
        TXLED0 ;
      }
    }
TIMER1 implements a bit capture capability along with the PWM generation stuff. The bit capture counter is configured to generate sampling interrupts, i.e., the PWM side is fed at a 20,050 samples per second rate. The output compare register controls generation of the PWM signal. It’s the place where a sample is fed.
If you go to use this code, the samples are stored in program memory (PROGMEM) and are 22,050Hz, 8-bit, mono. The sampleArray contains the samples. The two global variables sampleCount and sampleIndex control sample selection from the array. The sampleCount is preloaded with the number of samples in the array by the loop() function. The TXLED macros only work on Leonardo and indicate when samples are being played or not. These macros could be removed in production code.
Third, get the sampling frequency right. Corollary: Use a pitched sound like a sine wave of known frequency to make sure that the sampling frequency is correctly configured. The PWM generation in this design is configured to be phase correct, which halves the frequency. High frequency content becomes even more “thud-like” at a lower frequency making it difficult to sort out other configuration and filter issues. I got around this barrier by feeding a digitized 440 Hertz sine wave into the PWM conversion. When the tone sounded an octave lower than expected, I realized that I needed to double the configured sampling frequency.
Trust me, the road was not straight and smooth. I didn’t make progress on filter design until these issues were resolved. Science and engineering ain’t so simple, but the challenge is both fun and rewarding.
Update 18 July 2016: Take a sneak peek at the source code for the Arduino Beat Box (TR-808 lo-fi drum machine). The source code contains the final TIMER1 set-up and interrupt service routines.