As Moe Szyslak might say, “He ain’t pretty no more!”
Last time through, I mentioned that I wanted to add a SPI digital-to-analog converter (DAC) to the littleBits Arduino module. The Microchips MCP4921 is a good candidate. It is a 12-bit DAC which communicates via the Small Peripheral Interface (SPI) bus or “SPI.”
The littleBits Arduino module is essentially an Arduino Leonardo. As such, its SPI port is available through the module’s ICSP pads. (“ICSP” stands for “in-circuit serial programming,” by the way.) The ICSP pads are the group of pads (two rows of three pads) between the D5 and D9 bitSnaps.
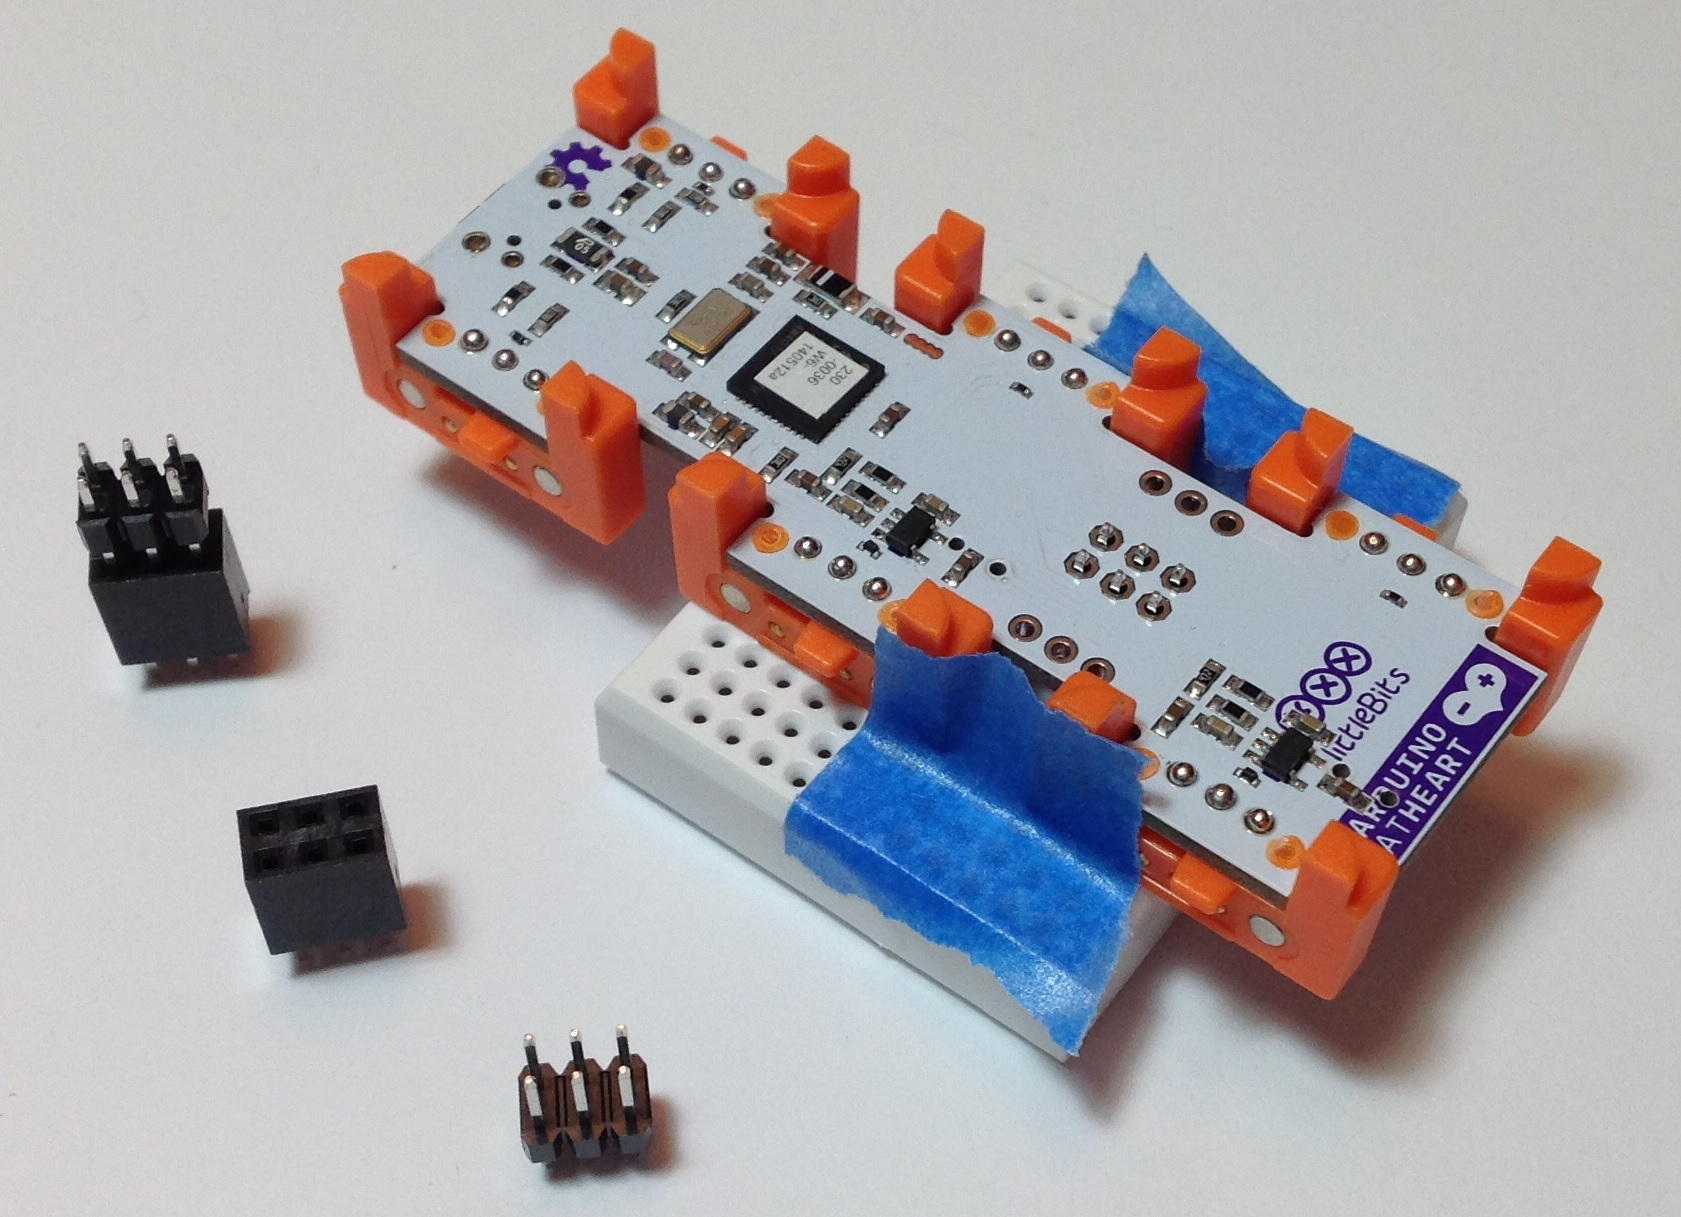
I soldered a 2×3 vertical pin header to the ICSP pads using a very simple jig. The image below is a “before and after” picture. (Click images for higher resolution.) The jig is a solderless breadboard that holds the header in place. I pushed the header into the breadboard just enough to hold the header and then placed the Arduino module over the header and pressed down. The idea is to get the black base of the header in contact and properly aligned with the module printed circuit board (PCB). The blue strips of masking (painter’s) tape keep the assembly together. The “after” part of the image shows the module with the header soldered in place.

The jig really makes the soldering job easy. I have used other methods like trying to tape the header pins in place, but this approach was a piece of cake and frustration free.
The image below shows the header, module and jig just before soldering. The picture also shows the 2×3 vertical pin header and a compatible 2×3 female header block. You could install the female header block instead. I went with the male header because most ICSP cables expect a male header on the PCB to be programmed.
I ordered the parts from Mouser Electronics. Mouser and Jameco are my usual “go to” sources for components and tools. Here are the part numbers:
- Harwin M20-9980346 03+03 DIL VERTICAL male header 2.54mm
- Harwin M20-7830342 03+03 DIL VERTICAL female header 2.54mm
- BPS BB170-WH White 170 point solderless breadboard
- BPS ZW-MF-20 ZIPWIRE Female-Male 20cm
- BPS ZW-MM-20 ZIPWIRE Male-Male 20cm
The “2.54mm” refers to the pin spacing (AKA “0.1 inch”). The female header is $1.19 and the male header is $.24. Buy at least ten of each and the price goes down a little. The contacts are tin; gold is a little more expensive.
I plan to make (eventually) little PCB “hats” using the female header blocks. The idea is to build a small, single-purpose circuit that plug onto the ICSP header or littleBits Proto module header like a hat. This approach would eliminate point-to-point connections using jumper wires. I may experiment with this approach once I get the basic DAC circuit ironed out and tested.
I really like Busboard Prototype System (BPS) products. BPS has the most useful prototyping board patterns. They also have these nifty ZIPWIRE ribbon cables. The wires terminate with individual male pins or female receptacles. Let’s say you need to make six connections from the ICSP header to a solderless breadboard. Then tear off a group of six wires and associated terminations. Push the receptacles onto the male header and push the pins into the solderless breadboard. The individual wires are color-coded in order to make the correct point-to-point connections at both ends. I’ll use ZIPWIRE to connect the Arduino SPI port (ICSP) to a solderless breadboard with the SPI DAC circuit.
If you have a littleBits Arduino module and want to make the most of it, it’s time to break out the soldering iron. Best of luck!