
Test driving Yamaha’s CK88 motivated me to get off my tail and learn how to make the experience of playing MODX more CK-like. In particular, I want to make better use of the MODX front panel sliders for drawbar control.
This requires the most basic knowledge of MODX (Montage) Performance structure. All MODX folk should read through the first section of the MODX Reference Manual, titled “Basic Structure.” In this post, I’m going to concentrate on the Tone Generator Block.
Now, honestly, I don’t expect you to recall and understand every detail! Here are the essential basics:
- A Performance is a single set of sounds consisting of multiple Parts.
- Each Performance has two types of parameters; parameters unique to each Part and parameters common to all Parts.
- An Element is the basic, smallest unit for an AWM2 Normal Part.
- A Normal Part consists of up to eight Elements.
- Each Part is created by editing parameters unique to each Element and parameters common to all the Elements.
Yep, those are direct quotes from the manual (with a few simplifying tweaks). That’s pretty much all of the “theory” that you need to know. The rest is button pushing. 🙂
I’m going to focus on single part organ Performances in this article. That will streamline the discussion. If you understand single part Performances, you should be able to scale up to multi-part. When navigating the CATEGORY screen, single part Performances are displayed in green text; multi-part Performances are displayed in blue text. I assume you know how to select a Performance…
Deconstruction
Knowing how to deconstruct a Performance is an essential MODX skill, even if you’re a player and not a sound designer. This is the way to wring the most out of the factory presets whether you ever intend to change a single preset or not.
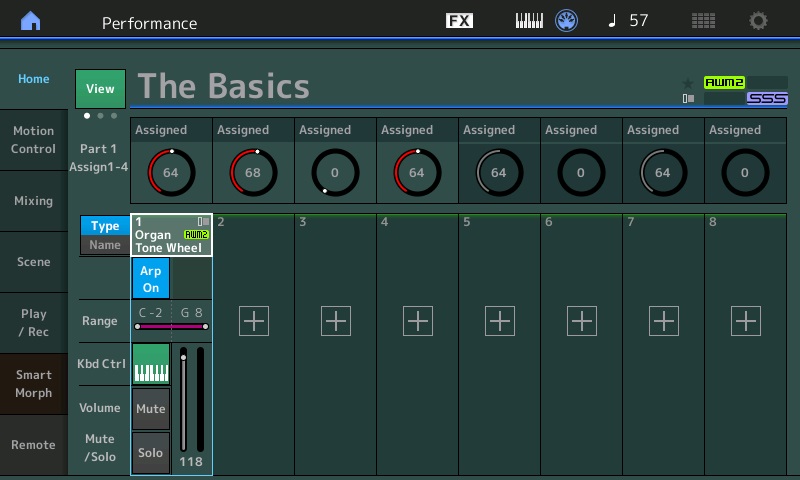
To get started, press the CATEGORY button, then find and select the organ Performance named “The Basics”. This is a single part Performance and, yeah, it’s basic. 🙂 Press the ENTER button to go to the main screen.
When the Performance name is highlighted, pressing the EDIT button takes you to the COMMON parameters for the Performance. I’ll discuss some of those parameters in a future note about effects (i.e., system-level effects like reverb).
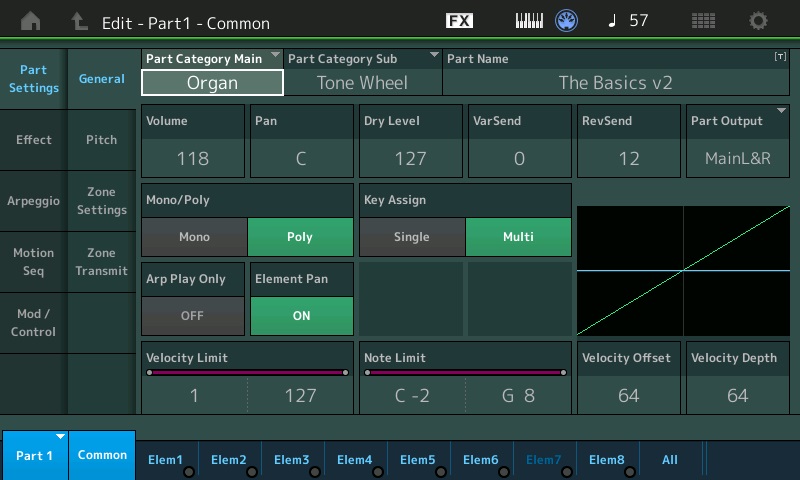
For now, use the arrow keys to navigate down to the first part. (You can touch the first part, too, to select it.) Press the EDIT button and MODX displays the COMMON parameters for the first and only part in “The Basics”. There’s tons of fun stuff here including access to the insert effects like rotary speaker. [Another day.]
What we really want is information about the Elements in “The Basics”. You’ll find a row of on-screen buttons along the bottom of the display. These buttons are especially handy when navigating through Parts, COMMON parameters and Elements. We could step through the Elements one by one by pressing the “ElemX” on-screen buttons. Let’s hit “All” instead.
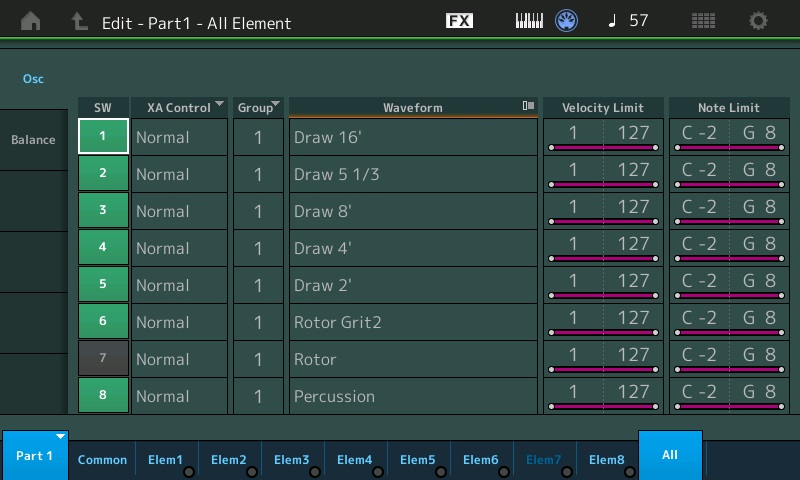
MODX displays a table showing all of essential parameters (information) about the Part (the “Osc” tab). Each row in the table is an Element showing:
- Element ON/OFF status
- Extended Articulation (XA) control
- Waveform
- Velocity limit
- Note limit
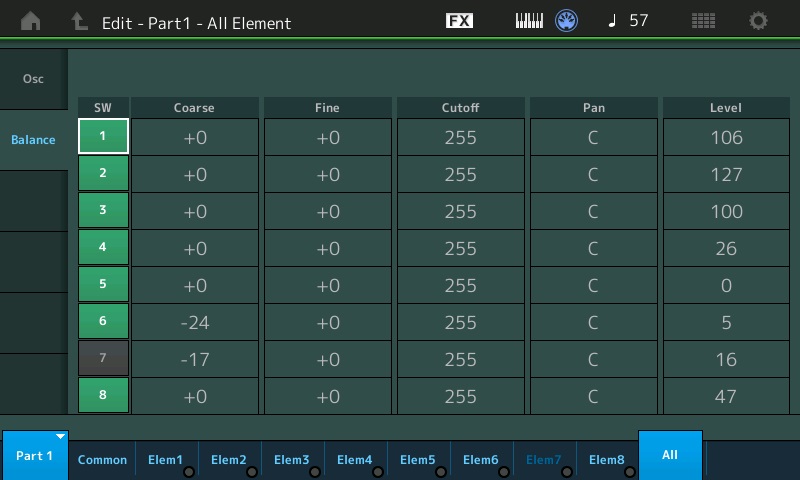
Press the “Balance” tab. MODX displays another table showing:
- Element ON/OFF status
- Coarse tuning (semitones)
- Fine tuning (cents)
- Filter cutoff
- Pan
- Level
Wow, this is a terrific overview! Now you know how I populate and compose all of these kinds of tables on my site.
Drawbars and settings
Let’s stop here and reflect on what we’re seeing.
    MODX/Montage Performance: The Basics

    El# Waveform       Level  Coarse
    --- ------------   -----  ------
     1  Draw 16'         106     0
     2  Draw 5 1/3       127     0
     3  Draw 8'          100     0
     4  Draw 4'           26     0
     5  Draw 2'            9     0
     6  Rotor Grit 2       5   -24
     7  Rotor             16   -17
     8  Percussion        47     0
“The Basics” consists of five individual drawbars: 16′, 5 1/3′, 8′, 4′ and 2′. In Hammond language, the registration is (roughly) 68 6210 000. There is also percussion, provided by Element 8. Element 6 adds a little bit of rotor grit. Element 7, rotor whine, is turned off initially. Press the on-screen ON/OFF button for Element 7 if you want to add rotor whine to the mix.
Extra credit. Press the on-screen “Elem7” button. This takes you to the main page of parameters for Element 7. You can turn Element 7 ON/OFF there and do a whole lot more damage to it! Press “All” to return to the table(s).
You can change the drawbar registration by adjusting one or more of the Element levels. For example, touch the Level parameter for Element 1 in order to select it. Then, hold a key, spin the data wheel and listen to the sound change. More dramatically, change the Element 5 level and listen to the 2′ drawbar come in.
Play the drawbars
Of course, this isn’t a practical way to change a registration while playing. That’s where the MODX front panel sliders come in.
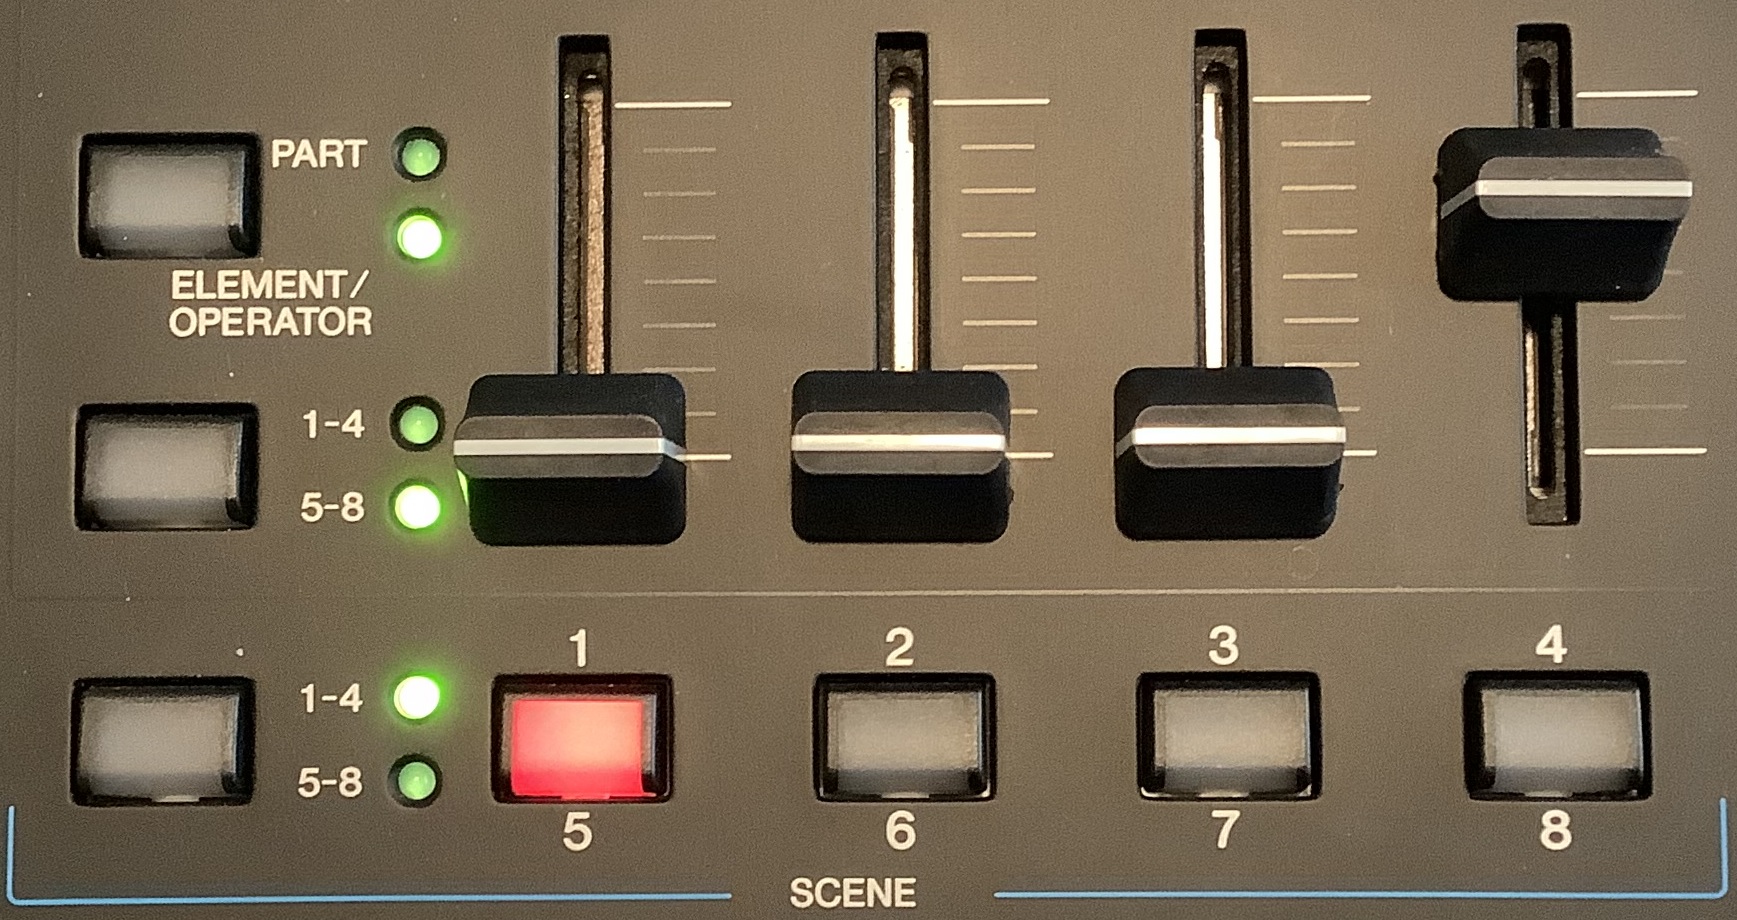
As shown in the picture above, use the top button to select ELEMENT/OPERATOR. Use the middle button to select Elements 5 through 8. Now move the first slider and watch Element 5 level change. Hold a key and hear the change.
Congratulations! You can now play the drawbars and you understand the relationship between the sliders and Element levels.
But, wait, there’s more. Move the fourth slider to change Element 8 level. This adds and removes percussion. Move the second slider (Element 6 level) and listen to the rotor grit. Now you know how to make your Leslie sound busted. 🙂
If you grok all of this, try deconstructing the “More Shade” Performance. Judging from its name, this Performance tries to emulate “Whiter Shade Of Pale.”
    MODX/Montage Performance: More Shade

    El# Waveform       Level  Coarse
    --- ------------   -----  ------
     1  Draw 16'         127     0
     2  Draw 5 1/3        41     0
     3  Draw 8'          127     0
     4  Draw 4'          107     0
     5  Draw 1 3/5        18     0
     6  Rotor Grit 2      18   -24
     7  Rotor             23   -17
     8  Percussion         0    -7
Copyright © 2023 Paul J. Drongowski