Polyphonic Arduino synthesizer

If you’re interested in building an Arduino-based ROM-pler, this next project is for you!

One of my long term dreams is to build a low-cost 60s-style combo organ. My latest project uses an Arduino UNO as a sample playback, sound synthesis engine. Although the waveforms are taken from the old VOX Continental and Farfisa Mini Compact organs, the design and code could easily use single cycle waveforms from a vintage synth, a string machine, your first born child, whatever! The 60s combo organ project is essentially a software ROM-pler that plays back up to five waveforms at a 22,050Hz sampling rate.

The project hardware consists of an Arduino UNO and a Narbotic Instruments MidiVOX shield. The MidiVOX shield has a Microchip Technologies MCP4921 12-bit digital to analog converter (DAC) and an opto-isolated MIDI input. Although the MidiVOX is no longer in production, it’s basic circuitry is easy to recreate; several other popular audio shields use the MCP4921.

Waveforms are stored in the Arduino’s program memory (PROGMEM), just like code. Program memory is non-volatile and the waveforms are ready to go just like a pre-loaded sketch. The combo organ sketch sets up TIMER1 to generate interrupts at a 22,050Hz sample playback rate. The interrupt handler reads the next sample for each of five virtual tone generators, sums the samples together, and writes the next aggregate sample to the DAC.

MIDI communication is performed through the standard Arduino MIDI library (version 4.2). The sketch registers two callback functions via the library: a note ON handler and a note OFF handler. The MIDI note handlers configure the five virtual tone generators. The sketch’s loop() function is trivial — it merely calls the MIDI library read() function and checks a reset button on the MidiVOX shield.

We all know that Direct Digital Synthesis (DDS) — the usual approach for sample playback — is a compute intensive technique for sound synthesis. DDS dynamically shifts the pitch of a stored waveform from its root pitch (the frequency of the sampled note) to the target pitch (the frequency of the MIDI note played by the musician). DDS performs waveform pitch-shifting through phase accumulation and interpolation. Floating point arithmetic is too slow and most DDS implementations use fixed point arithmetic. Even then, the computational load is heavy.

So, how did I achieve five note polyphony? Instead of storing a single waveform at a single root pitch, my approach stores twelve waveforms — one waveform for each basic pitch in the chromatic scale. The algorithm uses integer phase increments, thereby eliminating floating or fixed point arithmetic and interpolation entirely. The approach requires more space, but is quite fast. Each sampled instrument occupies 20% of program memory, allowing up to four different instruments before running out of PROGMEM.

Here are two quick MP3 demo files: a Farfisa-type sound and a and a VOX-type sound. I created the vibrato by routing the audio signal through an inexpensive Behringer UV300 vibrato pedal.

As usual, we always publish code. Need a cheap ROM-pler? Now you’ve got one!

Update 22 July 2016: If you’re into retro, be sure to check out the Arduino lo-fi beat box project. Filled with lo-fi TR-808 goodness!

MidiVOX: An appreciation and review

They just don’t make ’em like they used to. In the case, of the Narbotic Instruments MidiVOX shield for Arduino, I really mean it!

The MidiVox is a bit of a blast from the past as Narbotic no longer manufacture and sell the MidiVOX shield kit. Major bummer. Luckily, I purchased one of these little gems from the MakerShed when the shields were available a few years ago. Narbotic kindly maintain the design information and code on their Web site.

To me, the MidiVox is a most logical combination of a MIDI IN port and a 12-bit digital-to-analog converter (DAC). The MIDI port incorporates a 6N138 optocoupler for electrical isolation and a 5-pin DIN connector. The port is connected through a “PGM/MIDI” switch to Arduino digital pin D0, also known as the serial receive (RX) pin. The PGM position connects the serial pin the usual way in order to download to the Arduino. The MIDI position connects the Arduino serial RX pin to the MIDI IN circuitry. The switch component is robust and is easily accessible when the MidiVOX is on top of the Arduino and/or other shields.

The 12-bit DAC is a Microchip Technology MCP4921. This DAC is used in several other audio shield designs including the Adafruit Wave Shield and the Nootropic Design Audio Hacker Kit. The MCP4921 connects to the Arduino SPI port through digital pins D13 (SCK), D11 (MOSI), and D9 (chip select/slave select). Conventional practice recommends using D10 as slave select (SS), but it isn’t a big deal to use D9 instead as this is mainly a software issue. Slave Select (called “chip select” in the MCP4921) chooses and enables communication with the slave device. This capability is essential when more than one device is connected to the same SPI interface as in the case of the Nootropic Audio Hacker shield.

Although it seems like a no-brainer to connect all SPI devices to the Arduino SPI pins, the Adafruit Wave Shield does not follow this approach. It connects the SD card interface to the SPI pins, but connects its MCP4921 to three ordinary digital pins. The Wave shield software bit-bangs the digital pins to transfer data to its DAC. I’m not a fan of this approach, preferring to use standard libraries instead of possibly buggy, poorly documented bit twiddling code.

The MidiVOX shield implements a 2-stage, passive filter following the DAC output. The MidiVOX sends a mono signal through an on-board trim pot into a 3.5mm audio output jack. Trim pots are usually rated for a relatively small number of operating cycles, so it’s best to set this level once and make volume adjusts at an external mixer, preamp, or whatever.

The MidiVOX shield provides a DATA LED controlled by digital pin D7. The shield also has a RESET button (momentary contact switch) connected to digital pin D6. This button is ACTIVE LOW, meaning that the button pulls D6 to ground when it is pressed. Therefore, the pin mode should be configured as INPUT_PULLUP such that D6 is pulled up internally when the button is not pressed (i.e., the momentary contact switch is open).

Construction was easy. The resistors have five color bands, but don’t let this throw you off. The construction directions give the correct color code and you can (and should!) always check resistor values with a meter before insertion and soldering. I replaced the basic header pins with “stackable headers” (two 8-pin and two 6-pin). Stackable headers provide a way to make easy external connections to the shield stack from a breadboard, etc.

The completed board is shown in the photo below. The MidiVOX is stacked on an Arduino UNO with the USB, audio and MIDI cables, and is ready to go.

MidiVox

I wrote a diagnostic sketch to check out the different parts of the MidiVOX. I wish manufacturers would provide check-out sketches instead of relying on somebody’s possibly flaky application sketch for smoke testing. If something is busted, it’s important to find it early through a directed test that isolates the failure. Fortunately, everything checked out OK the first time!

The MidiVOX diagnostic program is an Arduino sketch to check out parts of a Narbotic Instruments MidiVOX shield. Rename the “loop” functions and rebuild in order to test a particular section of the shield.

Since the MidiVOX is discontinued, we’re all out of luck if we want to get (another) one. However, I strongly recommend studying the MidiVOX design. When I first got started with Arduino and MIDI, I borrowed the MIDI IN circuitry and the low pass filter design. These are simple, solid circuits and are good basic building blocks for other designs and applications.

Where to next? My dream is to build a low-cost 60s combo organ with the era-appropriate look and sound. The organ would look like a Vox Continental with a Z-shaped chrome stand and bright red Tolex covering. It would sound like either a Farfisa or a Vox — nothing too nuanced with all of the drawbars or tabs turned on. I’d like to use a cheap and lightweight MIDI controller as the keyboard. The controller would drive a low-cost (Arduino-based?) sound generator. I’m hacking out a prototype using an Arduino UNO and the MidiVOX shield. More to come…

Make music with MMS on a PSR

Yamaha Mobile Music Sequencer includes features for Motif, MOX and Tyros5, but did you know that you can create music using MMS on your PSR arranger? Yes, you can!

I’m using MMS with both the Yamaha PSR-E443 and PSR-S950 and I have written up a tutorial on making music with MMS on PSR/Tyros. This article concentrates on set-up, MIDI voice selection and MIDI file export which are aspects not covered by the MMS manual. The tutorial complements the many on-line videos that demonstrate composition and mix down. In particular, I show how to use the full 128 voice General MIDI voice set in the PSR, thereby expanding your sonic palette beyond the limited range of voices built into MMS.

Enjoy and keep on keepin’ on!

Scat voice expansion pack

I’m pleased to release version 1 of my jazz scat voice expansion pack for Yamaha PSR-S950 and PSR-S750 arranger workstations. The expansion pack has five PSR voices which let you create “Take 6” style, a cappella arrangements and other kinds of jazz voice performances. Give the MP3 demo a try!

Four of the PSR voices are individual syllables: DOO, DOT, BOP and DOW. The DOO syllable is looped and let’s you create sustained chords for backing. The DOT, BOP and DOW syllables are short and provide scat-like expression. All four syllables are combined into a velocity-switched voice where you select and play one of the syllables based on how hard you strike the keys (i.e., MIDI note velocity). You will need to adjust touch response (and practice!) to get the most playable and musical result.

Here is a link to the expansion pack file. You need to download and UNZIP this file, then install the YEP file by following the directions in the Yamaha PSR-S950/PSR-S750 Owner’s Manual. See the section titled “Expanding Voices”.

I am also releasing the multi-samples that I used to create the expansion pack in case you would like to create a scat voice for your own synthesizer or software instrument. If you are curious about how I created the expansion pack voices and the samples, please see this blog post.

Both the scat voice expansion pack and the scat voice samples are released under a Creative Commons Attribution 4.0 International License.

Creative Commons License
ScatVoices and ScatVoice samples by Paul J. Drongowski are licensed under a Creative Commons Attribution 4.0 International License.

You are free to use the expansion pack voice or samples (even for commercial purposes) as long as you provide a link to http://sandsoftwaresound.net from your own web site AND/OR explicitly credit me in your creative work, e.g., “Scat samples/voice by Paul J. Drongowski”.

Sampling “scat”

In this post, I describe the process and tools that I used to capture samples for my jazz scat voice. I will eventually release the voice (for the Yamaha PSR-S950 workstation) and its samples under the Creative Commons attribution license. I’m not the best singer, so I’ve had to rely on technology as much as possible while still producing a musical result. I want to emphasize that I sang, edited and produced all of the samples and the voice patch; it is original work.

The jazz scat voice is inspired by the (in)famous “jazz voice” patch found in Roland keyboards. The Roland patch is based on samples from the Spectrasonics Vocal Planet library by Eric Persing and Robby Duke. Their work was clearly influenced by Take 6 and other contemporary a cappella artists.

My patch uses four multi-samples where each multi-sample is a particular syllable taken over 12 (or so) pitches. The multi-samples cover the natural range of the human voice from F3 to F6 where C5 is middle C. The four syllables are: DOO, DOT, BOP and DOW. The DOOs are long, looped samples that provide a musical bed or harmony. The remaining three samples are short one shots suitable for melody, punctuation and accents. The DOW syllable falls.

The basic patch design is summarized in the following table.

Syllable Type Vel low Vel high Gain
DOO Loop 1 89 0 dB
DOT One shot 90 105 -3 dB
BOP One shot 106 119 -6 dB
DOW One shot 120 127 -9 dB

The table shows the MIDI velocity range to each syllable (multi-sample). It also shows the relative gain for each syllable. The gain decreases as velocity increases in order to maintain a more consistent volume level as the keys are struck harder to trigger the one shots.

At a strategic level, the sampling production process consists of two major steps:

  1. Capture a natural voice sample for each syllable and pitch. These natural voice samples are the formants to be used in the next step.
  2. Capture a vocoded sample for each syllable and pitch while playing the appropriate formant sample through the PSR-S950 vocoder.

This process produces scat syllable sounds that are consistent, pitch accurate and in the case of the DOO syllable, loopable.

Here’s a run-down of the practical problems that motivated this approach. My voice is an untrained baritone. It cannot possibly cover the F3 to F6 range without hysterical noise and possible voice damage. As I discovered, it is nearly impossible to sing pitch accurate short syllables such as these without proper training! I needed to find a method that would give me a consistent and pitch accurate sound across the desired range of pitches. This is a greater challenge than I originally anticipated and a lot of experimentation led to the two-step method. It took about 3 weeks to find the method and then a further two weeks of production work.

Now, the details.

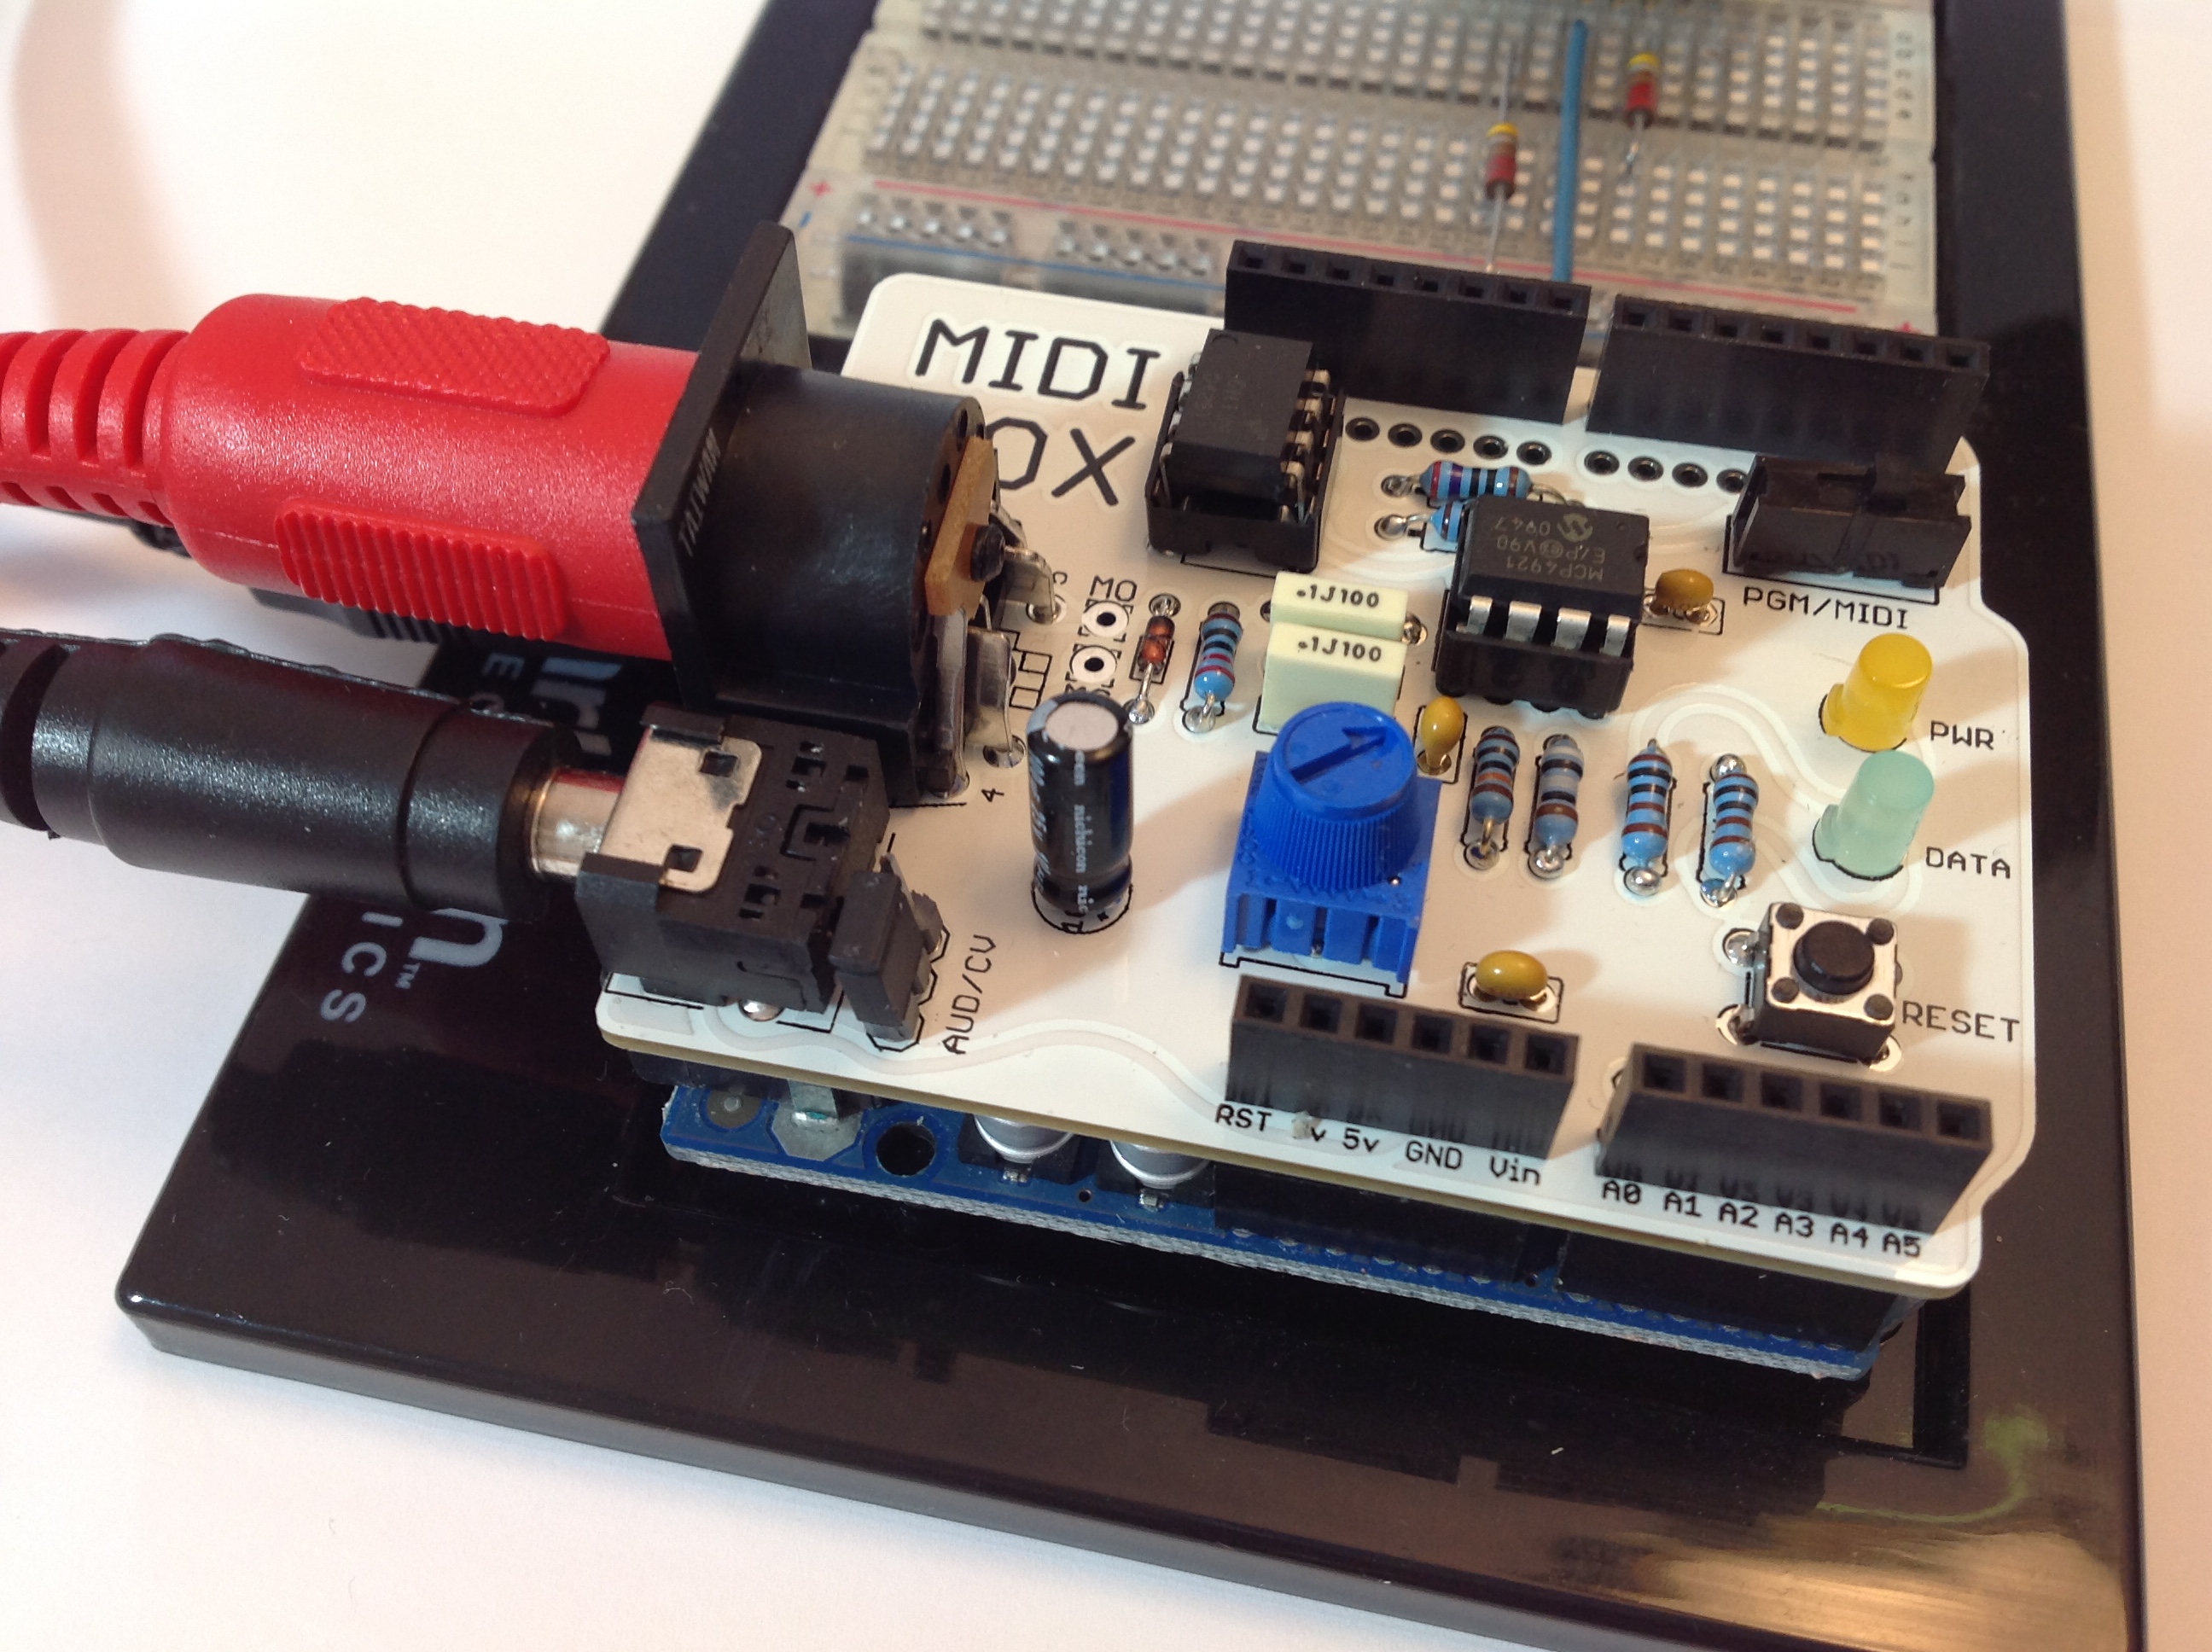
I used a Roland Micro-BR digital recorder to capture both natural voice and vocoded samples. This little wonder is great — easy to use, fast and above all, quiet. For natural voice, I sang into a Shure PG-81 condenser microphone feeding an ART TUBE MP preamp. The TUBE MP is a really Swiss army knife providing phantom power for the PG81, a little bit of tube warmth, and conversion from XLR to a line level audio signal. The output of the TUBE MP is connected to the Micro-BR. For vocoded voice, I connected the line level mono output of the PSR-S950 to the Micro-BR. In both cases, all Micro-BR input effects are disabled and gain staging is established before hitting the RECORD button.

Formants are captured and produced in the following way. I sang each syllable multiple times at each of the desired pitches while recording to the Micro-BR. The pitches cover the F3 to F6 range such that no resulting final sample would be transposed up more than one semi-tone and/or down two semi-tones. Transposing up or down more than these limits negatively affect sound quality (obvious sample speed-up/slow-down). The entire sampling session is converted to WAV format and then transferred to a PC where Sony Sound Forge Audio Studio is used to review the sung syllables and to select the best one at each pitch. Each selected syllable is saved in its own WAV file. The selected syllables are tuned with Celemony Melodyne. The tuned syllables are the formants for the vocoding phase.

Sony Sound Forge is a solid audio editor. I can work fast in Sound Forge and its “Copy new” function is ideal for cherry picking a recording session. In a few cases, I had to amplify a sample to compensate for low level. When singing across such a wide range of pitches, one needs to rely on electronics/software for amplification in order to avoid voice strain! For tuning, I used the trial version of Celemony Melodyne Single Track which installed with Sonar X3. Although the procedure to enable the trial period was wonky, Melodyne is a great tool and I will very likely buy a copy.

In the second major production step, the formant syllables are sent to the PSR-S950 vocoder and vocoded syllables are recorded on the Micro-BR. The S950 vocoder is not a true synth vocoder. (The Motif/MOX and Tyros vocoders are true “synth” vocoders.) The S950 vocoder is part of its vocal harmony proceesor. Its “VocoderMONO” mode is designed to let (untrained) voices sing into a microphone and impose the formants onto a rather natural sounding, pitch accurate synthetic voice sound.

My early investigation found that the PSR-S950 vocoder needs clean formants that are near the desired final pitch. By clean, I mean formants that do not overdrive the vocoder input and are relatively free of the (un)natural gurgles and what not in the sounds made by the human vocal system. (Well, my vocal system anyway.) The first major step in the overall process let me select the cleanest formants. However, attempts to sing outside one’s natural vocal range introduce gurgles and rasps at the low end and off-pitch histrionics and screeches at the high end. The first major process step choses the cleanest formants and tunes them to the desired pitches.

I loaded the formant samples into a Roland RD-300GX piano as an Audio Key set. Each formant sample is assigned to a particular key and is played by the RD-300GX when the key is struck. Basically, this arrangement gives me a simple one-shot playback engine. The output of the RD-300GX is connected to the microphone/line input of the PSR-S950 in order to drive the vocoder. The mono output of the PSR-S950 is connected to the Micro-BR.

Once everything is connected and levels are set, a little trial and error is needed to find the best formant at each desired vocoder pitch. Think of this as a dry rehearsal for the final recording. Frequently, the formant at the same desired vocoder pitch is the best choice for the vocoded sample. However, sometimes one of the nearby formants is better or produces a more consistent timbre or articulation across the multi-sample. This involves a lot of critical listening and A/B comparison, producing a list of formant and pitch pairs.

Then, it’s time to hit RECORD and capture the vocoded samples by playing the desired pitch on the S950 keyboard and playing the corresponding desired formant on the RD-300GX. Once again, the recording session is converted to WAV format, is transferred to the PC, and is separated into individual WAV files.

At this point, the DOT, BOP and DOW one shot samples are pretty much complete. The DOO samples need to be looped. For some zany reason, Sony Sound Forge Audio Studio saves loop points in Acid METADATA within a WAV file. The Yamaha voice editor does not pick up this information. After searching the Web, I discovered that loop info within a WAV file is not really standardized. Given that the target tool is from Yamaha, I decided to use Yamaha’s Tiny Wave Editor (TWE) to loop the vocoded DOW samples. This worked out pretty well as TWE’s crossfade looping eliminated some bad thumps without introducing artifacts. A lot of trial and error was still involved in choosing the loop points, however. TWE can be found for free on the Web, by the way.

The final production step is to bring all of the vocoded samples into the Yamaha Expansion Voice Editor (EVE) and produce the final voice as part of an S750/S950 expansion pack. I made five voice patches:

  1. DooLoops: DOO syllables over MIDI velocities 1 to 127
  2. GetLayeredUp: All syllables, velocity-switched
  3. DatStuff: DOT syllables over MIDI velocities 1 to 127
  4. BopOnPop: BOP syllables over MIDI velocities 1 to 127
  5. Dow2008: DOW syllables over MIDI velocities 1 to 127

The multi-samples are most easily tested and normalized individually. Plus, the DOO loops and other syllables are musically useful by themselves without velocity switching. I built the GetLayeredUp patch after testing the individual multi-samples and normalizing the volumes of the individual samples within. Choosing the patch names was really fun! (Apologizes to George Clinton.)

The Yamaha Expansion Voice Editor is a trial version for which the trial period was, ahem, adjusted. Yamaha needs to just face facts and release an official version of EVE. Zillions of S750/S950 people are already using EVE and if Yamaha is somehow trying to protect its expansion pack franchise, well, that train done left the station a looooooooooong time ago. At this point, an official EVE would enhance the PSR product ecosystem and sales.

EVE does not implement velocity levels/switching. I used V. Muller’s version of the OLE Toy binary editor to set the element velocity ranges in the GetLayeredUp patch. Thank you, V. A huge amount of effort went into the analysis of YEP files and Python coding and he deserves all of the credit.

Thanks to vocoding, the final samples have a consistent sound. They are a little bit plain Jane by themselves, however. I gave each patch a little bit of reverb (reverb send level 20). I also added the “Ensemble Detune 2” DSP effect (send level 64). This is a truly spiffy effect — a chorus without modulation that gives the impression of an ensemble of slightly detuned voices. It is exactly the kind of gloss that the scat voices need.

Although the velocity ranges in GetLayeredUp are reasonable, users should still expect to tweak the keyboard velocity sensitivity and touch response to their personal needs. For example, I need to play GetLayeredUp on the softest touch setting. Your mileage will definitely vary!

Please stay tuned for the initial release of the expansion pack and multi-samples.

Vocaloid is not just for anime!

As I mentioned in my last post, I’m developing a new sample-based voice for the Yamaha PSR-S750/S950 arranger workstations. Roland is famous for its “jazz scat” voice which uses velocity-switching to trigger syllables like DOO, DAT, BOP and DOW at pitch. This synth voice is good for a cappella-like arrangements (think “Take 6”) or free melody lines. It’s a real boon for those of us with weak natural voices and technique.

The Roland scat voice incorporates samples from the Spectrasonics Vocal Planet library produced by Eric Persing and Roby Duke. Although these are great sounds/samples, I want to distribute both the workstation voice (as an expansion pack) and the samples within. I intend to make my work available under a Creative Commons attribution license. Thus, I want and need to produce fully original samples in order to avoid copyright and licensing issues.

The quest

These goals and desires launched a month-long quest for suitable “scat” samples. I decided to base the scat voice on the four syllables DOO, DOT, BOP and DOW where the DOOs are looped and the other syllables are one-shots. The DOOs are triggered at relatively low velocity and provide a pad-like bed while the DOTs, BOPs and DOWs provide short staccato accents/melody. The voice implementation requires a set of multi-samples for each syllable where the multi-samples are spread across the natural range of the human voice (F3 to F6 where C5 is middle C).

Freesound.org has a few individual sounds, but nothing in the way of multi-samples across a range of pitches. I next decided to try sampling my own voice. A few tentative attempts left me highly discouraged! I’m a baritone with a relatively small range — definitely not F3 to F6! Plus, I lack training and my technique is not particularly good.

I then began to experiment with vocoding. I was hoping to achieve loopable, pitch-accurate samples by using my voice as a formant and imposing my voice on a pitch accurate synth sound (the carrier). I experimented with the vocoders in the PSR-S950 and the Yamaha MOX6 workstation. The MOX6 vocoder is great at producing dance-floor sounds, but not so good at producing more natural vocal sounds suitable for jazz.

Not to be too cagey, I eventually found good use for the S950 vocoder and will describe this process in a separate post. Before I went in that direction, however, I discovered and tried Yamaha’s Vocaloid.

Vocaloid

Here is how Yamaha describes Vocaloid.

Vocaloid is a technology for singing voice synthesis developed by Yamaha, and the name of this software application. The software allows users to input melody and lyrics in order to synthesize singing. In other words, with this technology, singing can be produced without a singer. Singing voice synthesis is produced by using fragments of voices recorded from actual singers, called the Singer Library.

To a user, Vocaloid consists of two parts: the Vocaloid editor and one or more libraries. Generally, Yamaha does not provide the libraries and prefers to license the Vocaloid technology to third parties (like Zero-G) who develop libraries using their own artists.

Vocaloid has an active and enthusiastic on-line community among anime enthusiasts. There are Japanese and English singer libraries for various anime characters or personas. These singers are not appropriate for jazz! Fortunately, there are a few singer libraries for pop and classical vocals.

Mini-review

Vocaloid is not inexpensive. The full Vocaloid version 3 editor is about $160USD and individual Vocaloid 3 singer libraries are $150USD. Thus, it’s hard to take a casual drive by the latest Vocaloid technology and give it a try. Vocaloid 4 has just been announced along with Cyber Diva. Pricing, unfortunately, has not budged.

Luckily, Zero-G has a fire sale on a few individual Vocaloid 2 libraries which include the version 2 editor. I bought the Zero-G Tonio library for $50USD. This is a much smaller amount to gamble in order to get a taste.

Tonio is an opera singer. The Tonio demo is very good (it’s opera!) and after messing with Vocaloid and Tonio, someone sank a lot of work into that demo! You can get very nice results from Vocaloid if you are willing to spend countless hours tweezing a performance. I recommend the on-line Vocaloid reviews at Sound on Sound Magazine. The reviews are right on the money and provide useful information to help get you started with Vocaloid. (SOS is great that way.)

To make a long story very short, you edit the vocal performance in the editor by entering lyrics into a piano roll editor. You then change the attack, vibrato and other aspects of the vocal performance. These tweaks are essential for getting a good result.

Ultimately, Tonio is an opera singer and his vocal characteristics are a distinct part of the vocal samples that underlie the singer library. There ain’t no way to turn this nice Italian boy out and make him sing pop! He isn’t Bruno Mars. Please keep this in mind if you decide to try Vocaloid in a project of your own. Make sure that the voice library is a simpatico match with the target genre/style. This is why I moved on from Tonio and Vocaloid for the scat voice project.

The technology

Yamaha has invested heavily in the Vocaloid technology and have filed many patents. They are conducting joint research with The Music Technology Group (MTG) of the Universitat Pompeu Fabra in Barcelona. The MTG, by the way, are the people behind the Freesound.org web site.

Vocaloid does a lot of intense digital signal processing (DSP). It modifies and concatenates sound in the frequency domain. It performs a Fast Fourier Transform (FFT) to convert from the time domain to the frequency domain, modifies the spectral characteristics of the sound, and then performs an inverse FFT to return to the time domain. This is too much computation to perform in real-time. Thus, there is always a delay while Vocaloid renders a performance before playback.

Yamaha protects its intellectual property (IP) through patents and rarely publishes results in the scientific literature. Vocaloid is an exception, probably due to the partnership with MTG. Here is a short list of a few papers on Vocaloid and its technology.

  • Singing synthesis as a new musical instrument, Hideki Kenmochi, IEEE International Conference on Acoustics, Speech and Signal Processing, 2012 (ICASSP 2012).
  • Sample-based singing voice synthesizer by spectral concatenation, Jordi Bonada and Alex Loscos, Proceedings of the Stockholm Music Acoustics Conference, August 6-9, 2003 (SMAC 03).
  • VOCALOID – Commercial singing synthesizer based on sample concatenation, Hideki Kenmochi and Hayato Ohshita, International Speech Communication Association (ISCA), Interspeech 2007.

You don’t need to know all of this to use Vocaloid, but it’s good to know that there is cutting edge science behind the product.

I strongly recommend the developer interview with Michael Wilson which is published at the Vocaloid US web site. The interview gives insight into the incredible amount of work and detail behind the development of the latest library, Cyber Diva. This interview is extremely informative. Thanks, Michael. Articles such as this one bridge the gap between vacuous press releases and scientific papers giving everyone a greater appreciation for the technology behind a product.

It is also the best case to be made against software piracy. Innovation, research and development is fueled by money. Cheat developers out of their just payment only if you wish to kill off future innovation!

The Vocaloid technology reminds me a little bit of Super Articulation 2 (SArt2) on Tyros. SArt2 concatenates tones together to product realistic articulations such as legato and glissando. SArt2 works in the time domain and computes in real time although latency remains a very practical concern. (There are patents.) Perhaps someday when sufficient parallel processing resources are inexpensive, there will be an SArt3 that computes in the frequency domain.

A dive into some old Roland gear

I haven’t taken a deep dive into any gear lately and my ears need a break! So, here goes.

The Web is a wonderful source of distractions. After discovering the new Roland Sound Canvas app for iPad, I was searching for some information about the later model Sound Canvas modules and came across the Roland Service Notes for the XP-80 workstation, the XV-1010 module, and the SK-88Pro Sound Canvas. I still have these instruments in my sonic arsenal although they don’t see as much day-to-day use anymore. The orchestral sounds, in particular, hold their own today and I occasionally play the XP-60 at my church gig. Some of the sounds like the Voice expansion board (taken from Vocal Planet) are unique and stellar.

Roland have their “Service Notes” and Yamaha have their “Service Manuals.” To each his own name. However, keep these terms in mind when searching the Web for documentation on the innards.

As you might expect, there are similarities to Yamaha’s approach and some differences. These instruments are embedded computer systems for Pete’s sake — they just happen to make joyful noise. These instruments were developed in the late ’90s and early 2000s.

Roland — like Yamaha — drew from the Hitachi (now Renesas) processor families. The XP and XV use the more powerful SH-1 series CPUs while the SK uses the less powerful H8/510.

All of instruments have a custom tone generation chip. Roland’s naming convention for the tone generator ICs does not suggest how these chips fit into a family although the “XP” mnemonic is used throughout. The tone generators each have a dedicated RAM for effects processing similar to the Yamaha SWP51 series. The tone generators have a dedicated wave memory interface. The Yamaha SWP51 supports two 16-bit channels while the Roland tone generators have a single 16-bit data channel. I’m just know starting to appreciate how tone generation is a bandwidth-sensitive application and the single vs. double channel difference may be functionally significant. Certainly, the Yamaha approach requires many more pins, but it supports higher bandwidth. More polyphony? More voice elements? Hmmm.

Since these are older instruments, the wave memory size is not about to knock you out. However, this is an important reminder that wave memory size isn’t everything. Roland developed and programmed very good sound sets for these instruments. The wave memory may seem miniscule in the era of multi-gigabyte sample libraries, but it’s what hits the ears which matters the most.

Here are the details — straight, no chaser. Speaking of which, I’m knee deep in the development of a scat vocal voice for the PSR-S950. This project has taken a month so far and I’m only about 90% finished. Stay tuned.

Roland XP-80

Following is a list of the most relevant bits of sand in the Roland XP-80 workstation:

IC5     XP         Unidentified      Custom tone generator

IC12    SH CPU     HD6437034SC66F    Hitachi SH7034 Superh RISC engine
IC36    WAVEROM B  LHMN5PNA          4MByte WAVE ROM for tone generator
IC37    WAVEROM A  LHMN5PN9          4MByte WAVE ROM for tone generator
IC10    MASK ROM   TC5316200CF       MASK ROM on system bus (data+code)

IC17    SRAM       HM62864LFP-7SLZ   SRAM on CPU system bus
IC19    SRAM       HY6264ALJ-70TE2   DRAM for LCD controller
IC14,15 DRAM       LH64256BK-70      EFX DRAM for tone generator
IC21,22 DRAM       HM514800CJ-80     DRAM on CPU system bus

IC39,41 DAC        PCM69AU-1/T2      24-bit DAC

The SH7034 is a 32-bit RISC engine (SH-1 architecture) with peripheral interface logic integrated onto the chip. The SH7034 chip also has a 64KByte ROM/EPROM and a 4KByte RAM. The CPU has 32-bit datapaths, sixteen 32-bit general registers and a five stage pipeline. It has a multiply and accumulate (MAC) unit.

The XP tone generator (TG) is not explicitly identified in the parts list. It is merely labeled “XP” in the circuit schematic. The tone generator interface to the WAVE ROM has 23 address bits and is 16-bit data parallel. The WAVE ROMs provide data as 16-bit words. Each ROM has 21 address bits and the 16-bit data bus is shared between all ROMs. Each ROM is 4MBytes for 8MBytes total WAVE ROM. This checks with Roland marketing literature.

The Burr Brown PCM69AU is a dual 18-bit DAC capable of 16x oversampling. This part was also manufactured by Texas Instruments.

Roland XV-1010

The XV-1010 is a one expansion slot sound module in the JV/XV family. The XV-1010 has the basic XP sound set plus the “Session” expansion sounds — essentially a built-in SRJV expansion board. The XV-1010 does not have much of a user interface and not much is required in terms of processor power to support it.

Here is a table of the main ingredients in the XV-1010:

IC1    CPU            HD6437016F28
IC2    SRAM           TC551001CF-70L      RAM on CPU system bus
IC3    XP6            RA09-002            Custom tone generator
IC4    DRAM           MN414260DSJ-06T1    DRAM on CPU system bus
IC5    DRAM           MN414260DSJ-06T1    Tone generator effect DRAM
IC6    WAVE ROM A     LHMN0PVW            8MByte WAVE ROM
IC7    WAVE ROM B     LHMN0PU5            8MByte WAVE ROM
IC14   FLASH MEMORY   LH28F160S5T-L70     FLASH memory on CPU system bus
IC26   DAC            AK4324-VF-E2        DAC driven by tone generator

The Hitachi SH7016 is another member of the SH-1 RISC processor family. Peripheral interface logic is integrated onto the chip making it ideal for embedded applications (like a synthesizer). The CPU has 32-bit datapaths, sixteen 32-bit general registers, and a five stage pipeline. The CPU has a multiply-accumulate (MAC) unit. The SH7016 has 64 KBytes of mask ROM and 2 KBytes of RAM (when the 1KB cache is enabled).

The tone generator IC wave memory interface has 23 address bits and a 16-bit data bus. Each WAVE ROM has 22 address bits and they share the 16-bit data bus. The basic XP sound set is stored in an 8MByte ROM and the Session sound set is store in an 8MByte ROM for a total of 16MBytes of wave memory.

The EXP-B SLOT has 21 address bits and an 8-bit data bus. The narrow data bus is probably a legacy artifact from the earlier JV-series instruments.

The Asahi Kasei (AKM) AK4324 is a 1-bit, 128x oversampling stereo DAC with
a maximum 96KHz sample rate. It includes a 24-bit digital filter.

Roland SK-88Pro

The SK-88Pro is an SC-88 Sound Canvas built into a 3 octave MIDI controller with the Roland two-way pitch bend/modulation stick. The SK has two MIDI IN ports with 16 channels each. The controller is built like a tank and is almost as rugged as made-of-metal Roland workstations. I would not trade this thing for any of the toy-like controllers on the market today!

Here is a table listing the important integrated circuits:

IC1     CPU              HD6415108F          H8/510 microcontroller
IC3     XP               RA01-005            Custom tone generator
IC4     CUSTOM DSP       MB87837PF-G-BND     Unique to the Sound Canvas?

IC8     PROGRAM ROM      LH538U29            Main program and data
IC17    WAVE ROM         UPD23C32000AGX-314  4MByte WAVE memory
IC13    WAVE MASK ROM    LHMN0PNM AB         4MByte WAVE memory
IC15    WAVE MASK ROM    LHMN0PNN CD         4MByte WAVE memory
IC12    DSP RAM          NN514260J-60        256K x 16-bit word memory

IC50,51 DAC              UPD63200GS-E2       DAC for each channel

IC5     SUB CPU          M38881M2-152GP      Handles MIDI input/output
IC7     SUB PROG ROM     LH5S4H0B            Program and data ROM

The Hitachi H8/510 microcontroller family uses a 16-bit CPU core. The H8 has 16-bit datapaths, eight 16-bit general registers and a maximum speed of 10MHz. The H8/510 has integrated peripheral logic and is designed for embedded applications.

The SUB CPU handles MIDI input and output nothing more, nothing less. This is different than Yamaha’s SUB CPU which does heavy lifting.

The custom DSP IC communicates with the XP tone generator. The custom DSP has a dedicated 256K x 16-bit word DRAM. The tone generator has a dedicated 256K x 16-bit word DRAM for effects processing.

The XP tone generator has three WAVE ROM ICs: IC13, IC15 and IC17. The three WAVE ROMs have 21 address bits each and share a 16-bit data bus. The tone generator drives 22 address bits; the least signficiant bit, WA0, is not connected. Address bits WA[1:22] are sent to the WAVE ROMs. The high order bit, WA22, appears to function as a (ROM) chip select. This implies 12MByte of WAVE ROM total.

Send MIDI from USB-B to 5-pin

Please see the bottom of this page for an update.

Way back in January 2014, I outlined a way to send MIDI from a USB-B only controller to a keyboard or module with classic 5-pin MIDI using Raspberry Pi as a bridge. Finally, one year later, I got to try out this idea.

It seems like MIDI over USB has taken over the MIDI controller world!

New controllers now communicate MIDI data over USB instead of using the old 5-pin DIN interface. 5-pin MIDI is dirt simple and is just a faster form of plain old serial communication — no bus protocol, no host/client, no hassles.

The world was 5-pin MIDI for a long time and many classic synthesizers and workstations only have a 5-pin DIN interface. Most of the new controllers have only a USB-B device port and expect to be connected to a USB-A host port for power and communication. If you want to use your new controller with an old 5-pin MIDI synth, you have a communication gap to bridge. Because USB is a peripheral bus with a sophisticated protocol, USB cannot be directly connected/converted to simple 5-pin MIDI signals.

There are two ways to bridge the gap:

  1. Buy a bridge box like the Kenton MIDI USB Host (about $115USD) or iConnectivity iConnectMIDI4+ ($200USD).
  2. Use a PC-based DAW to bridge 5-pin MIDI ports and USB MIDI ports.

Both solutions involve software, a computer, a 5-pin MIDI IN/OUT interface, and a USB-A Host interface. The old synth (or whatever) is connected to the computer through the 5-pin MIDI IN/OUT interface and the controller is connected to the USB-A Host port. The software streams the MIDI data between the 5-pin and USB worlds.

The Kenton is portable, but is a little bit pricey for my taste. Also, the Kenton is not readily available in all parts of the world (e.g., the USA) and shipping is expensive. The PC-based bridge is not so portable and maybe you don’t want to take a laptop to the gig.

Hmmm, let’s see. Computer? USB Host interface? Software? Raspberry Pi!

The Rapsberry Pi B+ would be the ideal model with its four USB Host (A) ports. From the hardware perspective, here’s what we need to do:

  • Connect the USB MIDI controller to one of the Raspberry Pi USB-A Host ports.
  • Connect a bog standard 5-pin MIDI to USB-A interface to one of the other USB Host ports.
  • Connect the 5-pin MIDI IN/OUT ports on the interface to the appropriate 5-pin MIDI ports on the old synth.

This is exactly how we would connect the controller and synth if we used the PC and the DAW except we have replaced the PC with the Raspberry Pi (much smaller and only $40USD).

For software, the Raspbian Linux operating system comes with ALSA audio and MIDI support. We need to use the ALSA aconnect utility to identify the incoming and outgoing MIDI ports and to connect the appropriate ports.

I wanted to try this approach without buying any new hardware. Unfortunately, my Raspberry Pi is the earlier model B with only two USB-A Host ports. I need at least one more port to connect a keyboard and mouse, so a hub has to enter the picture somewhere. I found that the ALSA software did not recognize the controller or MIDI interface through my cheapo non-powered USB hub. Please keep this possible limitation in mind during your own experiments.

Here’s my test set-up. The keyboard controller is an M-Audio Keystation Mini 32. I used an Apple keyboard and mouse for regular user I/O. The Apple keyboard has a built-in hub and adds two USB-A ports. The keyboard is connected to the Raspberry Pi and the mouse is connected to one of the keyboard USB-A ports. The Keystation is connected to the second USB-A port on the Apple keyboard through a USB-A to USB-B cable.

USB-B to 5-pin MIDI connection diagram

The 5-pin MIDI IN/OUT ports are provided by a Roland (Edirol) UM-2ex USB MIDI interface. This interface is connected to one of the Raspberry Pi USB-A Host ports. The UM-2ex has a switch to select either the standard driver or an advanced proprietary driver. Select the standard driver setting. You want to be “class compliant” all the way for best results. Connect the 5-pin MIDI IN/OUT ports to the synth using standard MIDI cables. For this test, the synth is a Yamaha PSR-S950 arranger workstation.

Boot Raspbian and log in. You can either run aconnect from the initial shell or you can start the X Windows systems. For this example, I chose to start X Windows so I could capture output from aconnect.

Type “aconnect -i” to display a list of the readable input ports. These are the ports which provide incoming MIDI data.

$ sudo aconnect -i
client 0: 'System' [type=kernel]
    0 'Timer           '
    1 'Announce        '
client 14: 'Midi Through' [type=kernel]
    0 'Midi Through Port-0'
client 20: 'UM-2' [type=kernel]
    0 'UM-2 MIDI 1     '
client 24: 'Keystation Mini 32' [type=kernel]
    0 'Keystation Mini 32 MIDI 1'

The “$” charcter in the example output is the shell command prompt. The output shows the UM-2ex MIDI input port (client 20) and the Keystation (client 24). The Keystation input port is the source of the MIDI data that we want to send to the synth.

By the way, sudo is required when entering these commands through X Windows as an ordinary user. Superuser privilege is needed to set up ALSA connections.

Type “aconnect -o” to display a list of the writeable output ports. These are the ports which send outgoing MIDI data.

$ sudo aconnect -o
client 14: 'Midi Through' [type=kernel]
    0 'Midi Through Port-0'
client 20: 'UM-2' [type=kernel]
    0 'UM-2 MIDI 1     '
    1 'UM-2 MIDI 2     '
client 24: 'Keystation Mini 32' [type=kernel]
    0 'Keystation Mini 32 MIDI 1'

The output shows the two UM-2ex MIDI OUT ports (client 20 ports 0 and 1) and the Keystation (client 24).

Finally, type “aconnect 24:0 20:0” to establish a bridge between the Keystation port and the UM-2ex MIDI OUT port.

sudo aconnect 24:0 20:0

The first port (24:0) on the command line is the sender and the second port (20:0) is the receiver.

Play a few notes on the controller. If the controller and synth are communicating on the same MIDI channel (usually channel 1 by default), then you should hear some sound from the synth — assuming that the volume is turned up and the synth is connected to an amp, and so forth!

Type “aconnect -x” to remove all connections when finished. Individual connections can be removed using the -d option. If you ever need usage information about aconnect, just type “aconnect -h” or “man aconnect”.

Just for fun, I tried using the Yamaha PSR-E443 for input instead of the Keystation. I replaced the Apple keyboard hub with a powered USB hub, too. (Apple keyboards and Linux don’t always interoperate as friends!) The PSR-E443 keyboard sends on MIDI channels 1 (main voice), 2 (dual voice) and 3 (split voice). By assigning these MIDI channels to RIGHT1, RIGHT2 and LEFT on the S950, I could play a layer in the right hand with a split bass in the left hand.

So, there you go! A simple, cheap bridge between a USB MIDI controller and an old school 5-pin MIDI synthesizer. The next step is to find a way to discover and connect MIDI ports through a boot time, start-up script. If you solve this problem, please post the solution!

Update:If you enjoyed this blog post, then you might like these articles, too:

Mining the Yamaha DJX II

Update: Follow this link to download a free collection of PSR/Tyros DJX-II styles.

Time to party like it’s 1999!

The Yamaha DJX II was the second generation of Yamaha “DJ” keyboards that were targeted for musicians/producers working in “dance” styles (e.g., tekno, hip-hop, drum’n’bass, etc.) Thus, the DJX II uses loop-like “patterns” as its basic musical element instead of arranger styles. The DJX II is best remembered for its unusual keyboard; Some octaves had white whole note keys while other octaves used grey. That’s because different octaves controlled different functions like selecting a pattern to play or transposing a pattern.

The DJX II had a selection of fairly decent patterns in different dance-oriented genres. Although I’ve never heard a DJX, it’s sound was probably hobbled a little bit by the sound set. The DJX II had only 4MBytes of wave ROM! The internal and external patterns are available for download from the Yamaha support site. Seems like a place to find and mine some useable musical phrases, and naturally, I’m looking for the funk. The target keyboard is the PSR-S950 arranger workstation.

The ZIP files from Yamaha unpack into a bunch of standard MIDI files (SMF). Each SMF contains a group of ten, musically related patterns that form a construction set. The SMF has a small amount of set up information at the beginning: General MIDI reset, reverb type select and chorus type select messages. Each pattern within the SMF begins with a MIDI text marker from “1” to “10”. In order to convert the SMF for the PSR-S950, I changed these markers to arranger style markers (e.g., “Main A,” “Intro A,” etc.) and added “SFF1” and “SInt” markers to the first measure. The new marker name determines the method by which the arranger will play the pattern. More about this in a second.

As I mentioned above, the DJX patterns are assigned to keys such that a single key press plays a particular pattern. The patterns are laid out according to black and white keys as follows:

Pattern  Type  Key color
-------  ----  ---------
1        Main  White
2        Fill  Black
3        Main  White
4        Fill  Black
5        Main  White
6        Main  White
7        Fill  Black
8        Main  White
9        Fill  Black
10       Main  White

Main patterns are on the white keys and fill patterns are on the black keys. Fill patterns are not restricted to one measure; a pattern may be anywhere from 1 to 256 measures in length.

Given these considerations, you may need to be a bit creative when assigning a pattern to an arranger section. Please recall that arranger introduction, ending and main sections may be 1 to 256 measures in length. Fill-in and break sections are limited to one measure. A DJX “fill” pattern may be greater than one measure and cannot always be assigned to an arrange fill-in section. Further, you may not even want to assign the fill pattern this way, preferring to invoke the pattern from one of the section buttons instead. The three introduction buttons (sections) are good destinations for a “fill” pattern because the section acts like a manually controlled fill button. The arranger will play the fill pattern (introduction) and then automatically proceed to the selected main section.

Patterns assigned to arranger ending sections are a little problematic. An arranger ending will stop playback unless another section is selected. You’ll need to fast finger the arranger buttons when jamming.

Even though this seems complicated, it’s not really. The more difficult and time-consuming part is dealing with the drum sets and note mappings.

First, some background is needed. The DJX channel layout is very different than the arranger channel layout. Here is the layout for the 53_Soul pattern file, which is typical of all DJX II SMFs:

Channel  DJX PC#     DJX voice         S950 voice/kit
-------  ----------  ------------      --------------
9        126   0  3  BD Kit        --> Real Drums
10       126   0  4  SD Kit        --> Real Drums
11       126   0  1  B900 Kit      --> Hip Hop Kit
12       127   0  5  Analog Kit1   --> Analog Kit
13       0   112 34  Pick Bass     --> Pick Bass
14       0     0  1  Bright Piano  --> Bright Piano
15       0   112 17  Jazz Organ    --> Organ
16       0   113 27  60's Clean    --> Tremolo Guitar

Channels 9 to 12 are rhythm, channel 13 is bass, and channels 14 to 16 are phrases. By (un)convention, channel 9 is bass drum, channel 10 is snare drum, channel 11 is high hat and channel 12 is percussion. Channels 9 to 12 must be set up as drum parts:

F0 43 10 4C 08 08 07 01 F7
F0 43 10 4C 08 09 07 01 F7
F0 43 10 4C 08 0A 07 01 F7
F0 43 10 4C 08 0B 07 01 F7

These System Exclusive (SysEx) messages must be added to the initialization part of the SMF in order to select different drum kits independently under XG.

You’ll need to choose new drum kits for the rhythm channels since the DJX II has its own unique, non-standard kits. This part is totally creative. Who’s to say what the new style should sound like? If it moves your booty, then it’s a winner! Fortunately, the bass drum, snare drum and hi-hat channels seem to use these drum instruments exclusively. This narrows the re-mapping problem. I remapped the kick first just to get a listenable groove going and then tackled the snare followed by the hi-hat. The following chart lists the DJX II drum kits and the roughly equivalent S950 drum kit.

DJX II drum kit           S950 drum kit
------------------------  ------------------------
127 0  5 Analog Kit1      127 0  25 AnalogKit
                          126 0   8 AnalogSet     [GM]
127 0  8 Analog Kit2      127 0  58 AnalogT8Kit   [Major update]
127 0 10 Analog Kit3      127 0  59 AnalogT9Kit   [Major update]
127 0 13 Analog Kit1D     127 0  58 AnalogT8Kit   [Distorted version]
127 0 14 Analog Kit2D     127 0  59 AnalogT9Kit   [Distorted version]
127 0 12 RhBox Kit
127 0  9 Hard Kit
127 0 11 Break Kit        127 0  57 BreakKit
127 0  6 Dance Kit        127 0  27 DanceKit      [Major update]
127 0  4 Electronic Kit1  127 0  24 ElectroKit
                          126 0   3 ElectronicSet [GM]

126 0  0 Electronic Kit2
126 0  1 B900 Kit
126 0  2 DJX Kit                  HipHopKit?
126 0  3 BD Kit
126 0  4 SD Kit
126 0  5 HH Kit
126 0  6 Human Kit        
126 0  7 Scratch Kit

127 0  0 Standard Kit1    127 0  0 Standard Kit1  [Legacy]
127 0  1 Standard Kit2    127 0  1 Standard Kit2  [Legacy]
127 0  2 Room Kit         127 0  8 RoomKit
                          126 0  1 RoomSet        [GM]
127 0  3 Rock Kit         127 0 16 RockKit        [Legacy]
127 0  3 Rock Kit         127 0 90 RockKit2
127 0  7 Jazz Kit         127 0 32 JazzKit
                          126 0 35 JazzSet        [GM]

The DJX-specific kits (BD kit, SD kit, B900 kit, etc.) do not remotely follow General MIDI-ish conventions. It takes a lot of note mapping to get these drum patterns to play sensibly. I recommend playing back the SMF from a DAW (like Sonar) while tweaking the SMF. Do not attempt note remapping on the arranger — you’ll only drive yourself crazy!

Chord progressions are part of the patterns, so the melody/chord phrases need to be transposed like introductions and endings. Please review Note Transposition Rules (NTR) and Note Transposition Tables (NTT) before forging ahead. Since the channel layout is unconventional, the CASM information must be changed to be consistent with the MIDI channel data. Channels 9 to 12 are configured for rhythm NTT/NTR (root fixed, bypass) and the Channels 13 to 16 are configured for intro/ending NTT/NTR (root transpose, bypass). The chord root must be changed to match the phrases (53_Soul: Fm7, 59_ClubFunk: Dm7). You’ll need to identify the root (the musical key) either by ear or by analyzing the chord harmony.

Tool-wise, I did most of the editing in Sonar X3. I used Jørgen Sørensen’s CASM editor ( http://www.jososoft.dk/yamaha ) to create the CASM section for the style and to change the NTR, NTT and chord root information. Special thanks go to Jørgen for creating such great and helpful tools!

Oh, yeah, the final results. Here is a link to the ZIP file containing the 53_Soul and 59_ClubFunk styles. Enjoy!

Prototino in progress

This week I got rolling on my next MIDI project — a mini MIDI controller with two knobs (potentiometers) and two buttons. I intend to mount the electronics in a Hammond 1991XXBBK enclosure, also known as an (ABS) stompbox. Plastic is OK because the box will reside by the pitch and modulation wheels on the Yamaha PSR-S950 arranger workstation. The plastic is less likely to mar the finish of the keyboard. (I hate scratches.) The ultimate goal is to augment the real-time control provided by the wheels.

The area next to the wheels is fairly small and a stompbox fits into it neatly. A stompbox is a fairly small, shallow box, so I needed an Arduino-based prototyping board that fits into a small enclosure. I first consider an Arduino plus prototyping shield combo, but rejected that solution. The Arduino + shield stack fit into a standard Arduino enclosure about the same size as the 1991, however, the pad-per-hole layout would have made soldering a bear.

Enter the Spikenzielabs Prototino. The Prototino is roughly 2 1/8 inches by 2 7/8 inches in size, compatible with the 1991. Its prototyping area uses the more standard DIP layout with two and three hole pads. This layout is soldering friendly. About one third of the surface area is taken by a minimal Arduino implementation: an ATMega 328P, crystal, power regulation and ICSP/FTDI connections. The voltage regulator is optional and I elected to leave it off in favor of an external 5V center positive power adapter. Here’s a picture of the assembled Prototino before pots and switches.

Prototino

The connector at the end of the long tail is a 2.1mm power connector. This will eventually be mounted through a hole in the side of the 1991 enclosure along with a 3.5mm stereo jack for the MIDI OUT port.

The Spikenzielabs’ directions are decent enough, but here’s a few more tips. The directions identify the optional power components to be omitted during assembly. The directions do not mention where to make the +5VDC and ground connections, however. As you can see in the picture, power and ground are connected to the +5V and GND pads in the prototyping area.

The directions also describe how to connect the FTDI cable. I have a Sparkfun 5V FTDI cable and decided to go that route for programming. The directions are a little sketchy (no pun intended) on how to configure the IDE for the Prototino. This led to the usual scrambling around in the Device Manager, etc. when the IDE wouldn’t communicate with the Prototino. Yes, you do need to select the correct COM port. You also need to select the appropriate board. With the Sparkfun cable, choose “Arduino Pro or Pro Mini” from the list of boards. This always seems to be a hassle and probably puts off a lot of beginning makers.

Finally, now that the power light comes on and the sketch is downloaded, how do we really know that the Prototino is operating normally? A stock Arduino UNO, for example, has an LED tied to one of the pins and comes preloaded with the blink sketch to turn the LED ON and OFF. The Prototino just sits there. Fortunately, one can easily whip up a sketch that uses the serial port and serial port monitor to see if the Prototino is genuinely alive. The setup() function needs to turn on the serial port and display a message:

    Serial.begin(9600) ;
    Serial.println("Hello world.\n") ;

The loop function can do something playful, if you wish. Compile and download the sketch, then look for the output in the IDE’s serial port monitor.

Experience with the Prototino has been positive so far. I plan to mount pots and switches on the back side of the Prototino and to mount the Prototino to the lid of 1991 enclosure. This will let me connect the FTDI cable to the Prototino and program the device in situ. Stay tuned!