Saturday was a glorious warm day in Boston — perfect for a trip to Cambridge and Music Expo Boston. Music Expo is a series of mini-conferences produced in association with Sound On Sound magazine. Boston is fortunate to have Music Expo this year along with Miami and San Francisco. Loic Maestracci is the main organizer and he did he bang up job. The iZotope development labs and studios were the local host and venue.
Music Expo has an informal workshop feel to it. Even the more “formal” presentations had a friendly, laidback vibe with people freely getting into Q&A. Several companies had exhibits which were hands-on. (More about this later.) For example, Ableton had three Push 2 systems on hand where you could sit and try one out with the guidance of the booth staff.
Two session tracks and the exhibits ran in parallel, so one needed to pick and choose carefully. If I leave anyone out from this review, apologies — there was just too much going on at once.
My day got started with a fine performance by Elyssa Nicole Fontes and Megazoid. Elyssa is a composer and vocalist who uses backing tracks to perform. The staff had made a decision to move Elyssa and Megazoid to a more accomodating studio, so Elyssa had to fill dead air while the techs brought up her gear and tracks. This goes to show that artists always need to be prepared to handle tech issues in front of a live audience. Elyssa handled the situation with poise and aplomb. It also gave the attendees a chance to ask many questions about her technique, gear, mix, etc.
I then dropped by the Arturia booth to say “Hello.” The Arturia team certainly showed how to travel light with various ‘steps, a laptop and a MiniBrute. That MiniBrute is too cool for school and tiny! I’m glad that I visited the booth early because they seemed quite busy throughout the day.
Next stop was the Yamaha booth. “Booth” is not quite the right word as Yamaha were ensconced in a recording studio. They were demonstrating their latest — the MX88, Montage and Reface — with the MX88 and Montage routed through Yamaha HS8s and a sub. And joy of joy, the demonstrator was Phil Clendeninn! Like most studios, this one had a comfy couch in the back, so I kicked back while Phil ran through 30+ minutes of the best of Montage. Among other sounds, he desconstructed the Seattle Strings performance. The violins are far more realistic and expressive than the MOX patch which I am now using for exposed lines. Oh, I am so ready for this.
Highlight of the day number one: I finally had a chance to meet and chat with Phil. Phil is better known as “Bad Mister” (yes, the dude can play) who has written many useful, informative Motif and Montage guides and has answered zillions of questions on the Yamaha synth site and on the langouring Motifator site.
We covered a lot of ground. When I mentioned Yamaha arrangers, his response was “Oh, ho, you just wait!!” BTW, having done booth duty at SIGGRAPH and elsewhere, I’m amazed at the amount of energy and enthusiasm that Phil brings, and brings, and brings. It’s very hard to maintain that kind of level.
While we were conversing, I finally had a chance to try a Yamaha Reface YC. Of all the Reface, the YC could still win my heart thanks to Vox and Farfisa nostalgia. I always wanted a Continental as a kid, but had to settle for a Mini Deluxe Compact. (More well-kept vintage gear which I wish that I still had.)
I mentioned to Phil that I hadn’t been able to play a YC since launch despite efforts to find one in Boston, Seattle, and Lord knows where else. He acknowledged that this is a problem in this day and age of Internet sales. He ran through a list of concerns that a physical retailer would have: physical security to keep demo units from developing legs, knowledgable staff, etc. He thought that the lack of knowledgable staff also hurts mid- to high-end arranger sales in North America. Sometimes musicians need to be shown what an instrument can do in order to make a sale. The array of buttons on a modern arranger or synth can be intimidating and you don’t often know where to dive in.
From my point of view, there is only one nationwide brick and mortar music store in the U.S., Guitar Center, and unfortunately, knowledgeable keyboard staff are few and far between. I had a flashback to AMD days and the brick and mortar dominance of Best Buy in the computer, laptop, tablet space. It’s difficult to sell and support technogically complicated products to end users. (Please keep this thought.)
With a crush of people coming in, I bade Phil farewell and stopped at the Q Up Arts booth. Q Up Arts were demonstrating the California Keys (for N.I. Kontakt) — a sampled Fazioli 10ft grand. California Keys is cleverly packaged and I won’t spoil the surprise.
Highlight of the day number two: My wide-ranging conversation with Douglas Morton of Q Up Arts. To those in the know, Douglas is a talented, veteran sound developer and artist. I used a number of Q Up Arts products back in the day when samples were provided on audio CDs. (And dinosaurs roamed the Earth.) We began discussing the good old days of audio editing, vintage computer gear, Douglas’s work for the Salt Lake City Aquarium, ending with cross-country skiing in Utah. Douglas lives in two gorgeous locations: Dana Point, CA and Park City, UT. (Been to both and once lived in SLC myself.)
One of the subjects that we touched on was how to bring up the next generation of players on new software and gear. (Familiar theme now, huh?) Youtube videos only go so far; it’s got to be hands on. I quickly thought back to my experience in the morning at the Ableton booth. Push 2 is a spiffy product. That display, c’est magnifique! The Push 2 user interface, however, is not as immediately intuitive as the Novation Launchpad, for example. Thank goodness there was an Ableton staff member on hand to guide me. (Shades of gramps with a smart phone. 🙂 )
Douglas thought that an educational tour of high school and college music labs might be part of the solution. I thought of Living Computers Museum+Labs in Seattle. Education is where Living Computers could ace the synth exhibits at the Museum of Pop Culture, also in Seattle. (MoPOP was formerly known as the “EMP Musuem” and is another Paul Allen venture.) The MoPOP synth exhibits, at least when I visited a few years ago, didn’t offer much in the way of guidance and weren’t inspirational. Living Computers, however, have enthusiastic staff, labs and an educational outreach mission.
Lunchtime and I was able to hear Decap deconstruct his track See You Out There. Decap is a West Coast hip hop music producer (Talib Kweli, Snoop Dogg, Ne-Yo, and Tim Kile). I enjoyed his presentation very much while unwinding and eating lunch in the iZotope cafeteria. Coffee was provided, gratefully, as I had left the house early to drive to the MBTA subway stop. Decent coffee at that.
One big take-away from Decap is the need for playfulness and persistence. His tracks grow from ten minutes of sheer inspiration through four or more days of perspiration as he experiments and shapes it. His experience fits with my current personal philosophy. Put the phone (or tablet) down, start playing and stick with it. Stop pining after the next new tool. You probably have everything that you need already. Just get on with it! Be spontaneous, playful, and take advantage of happy accidents.
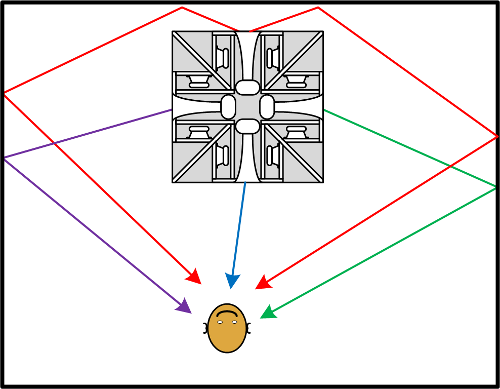
Cakewalk demonstrated a prototype virtual reality (VR) system for clip-based composition. You navigate a 3D space where you are surrounded by instruments and virtual pads that select and control clips. Reflecting on the experience today, I think they have a solid technology demonstrator. I give them my computer science respect for getting their system up and running. Cakewalk still need to find the killer hook that makes you want to pull out your credit card though. Surround sound development? It’s early days yet and I wish them the best.
Next session was a panel discussion about “D.I.Y. in the Recording Studio: Building and Maintaining your Analog Gear.” The panel consisted of six folks who are hands on engineers and producers. Great advice from all although I have a small quibble with making one’s own cables. I make terrible cables! I’d rather build a kit to gain electronics experience than fighting crappy home-built cables while performing or making a track. That’s just me.
The panelists spoke about how they got started. It struck me that all of the panelists got started by playing with electronics even if early experiments didn’t work out so well. Just do it! The notion of playful, enthusiastic, self-directed learning is totally at odds with today’s mania for educational accountability and teaching to the test. What is happening to the creative dimension of engineering and the arts in this country? Engineers and artists are bright, intelligent people and we seem to be actively stifling early enthusiasm. Arg!
At that point in the day, I had to call it quits and head home. It takes a while to get home from Cambridge and I didn’t want to get too strung out. What a glorious day walking in Cambridge. Kendall Square looks like “Science City” in a futuristic sci-fi movie with all of its computer and bio labs. The trains were a little crowded with very colorful people heading to and from Boston Pride. A great day all around.
My conversations and experiences convinced me of the value of Music Expo. Youtube videos, e-mail, texts, etc. are not enough. You need to rub shoulders with other kindred souls, converse, handle gear, ask questions, hear other people’s questions, get answers, be guided. NAMM is not the right venue. Music Expo Boston had it right: friendly, personal and interactive.
Copyright © 2017 Paul J. Drongowski