The Yamaha SHS-500 Sonogenic has hidden (undocumented) MIDI abilities! This post covers “What mother didn’t tell you.” I’m working on a MIDI Designer-based user interface for the SHS-500 and spent time exploring its MIDI implementation. Here’s the results.
For those who are “tl:dr”, The MIDI implementation is similar to (based on?) the Yamaha PSR-E463/-EW410. If you continue reading, you’ll learn a few new things about the E-series models, too.
General MIDI tone generation
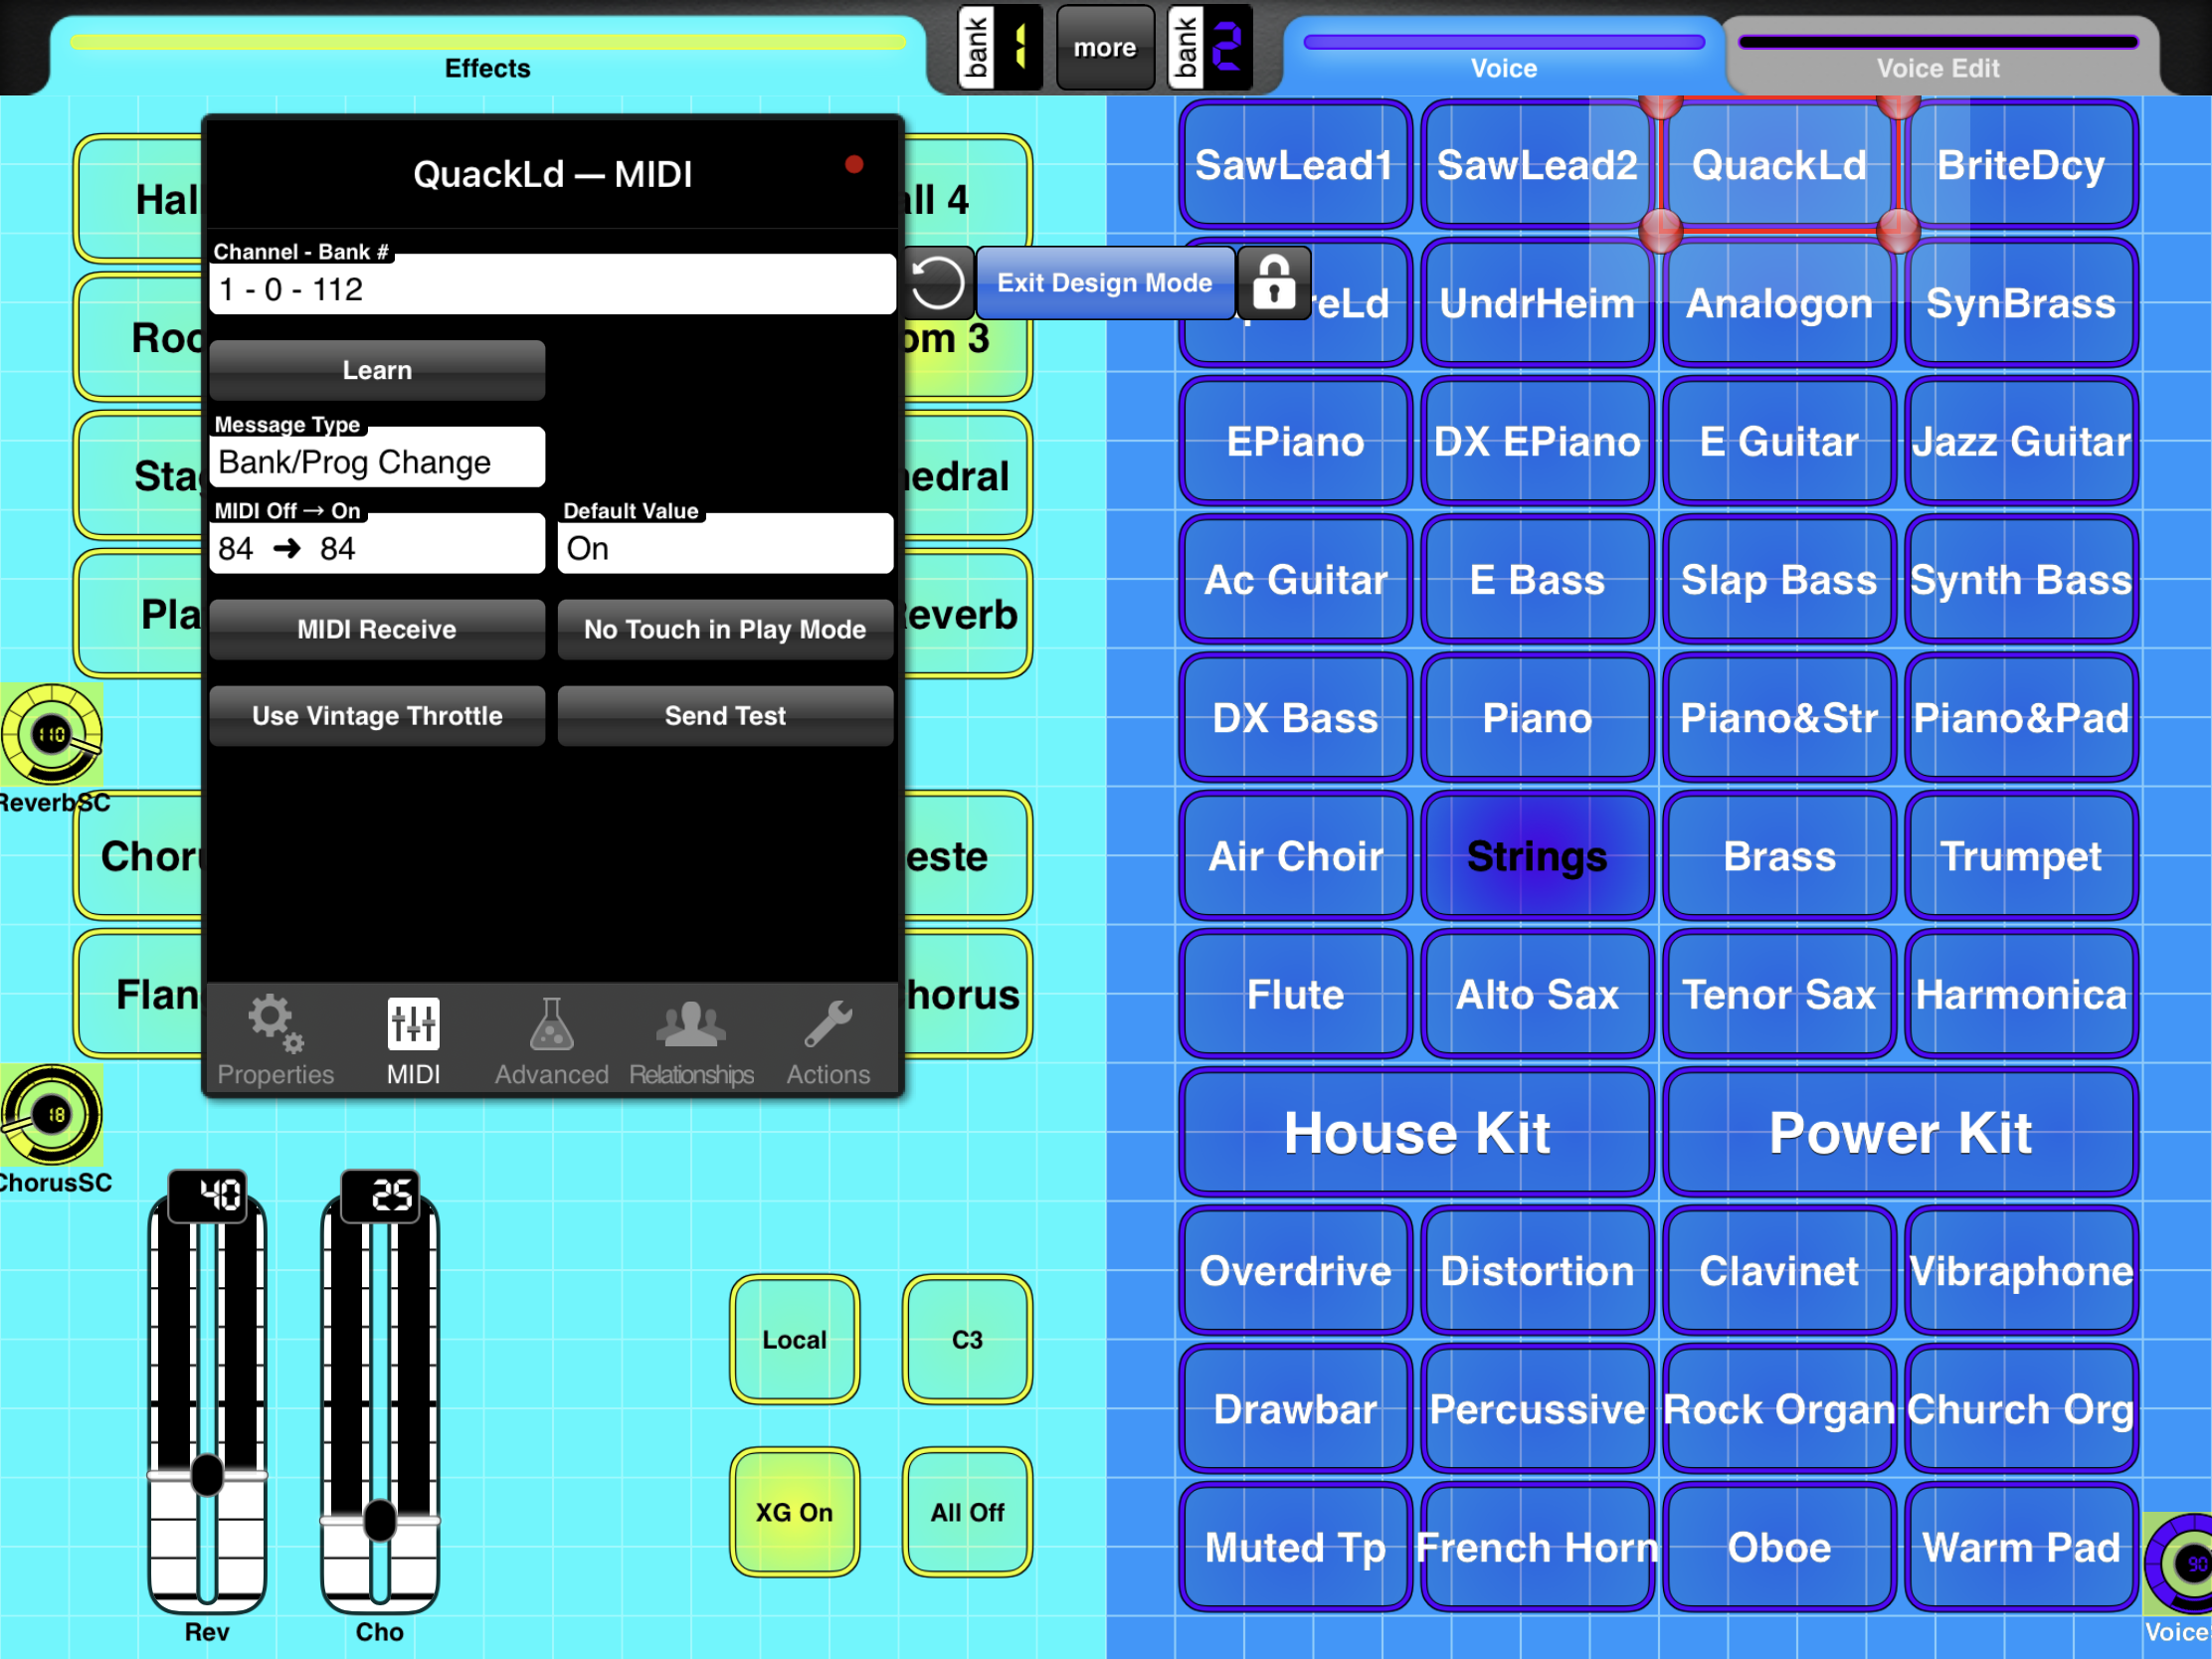
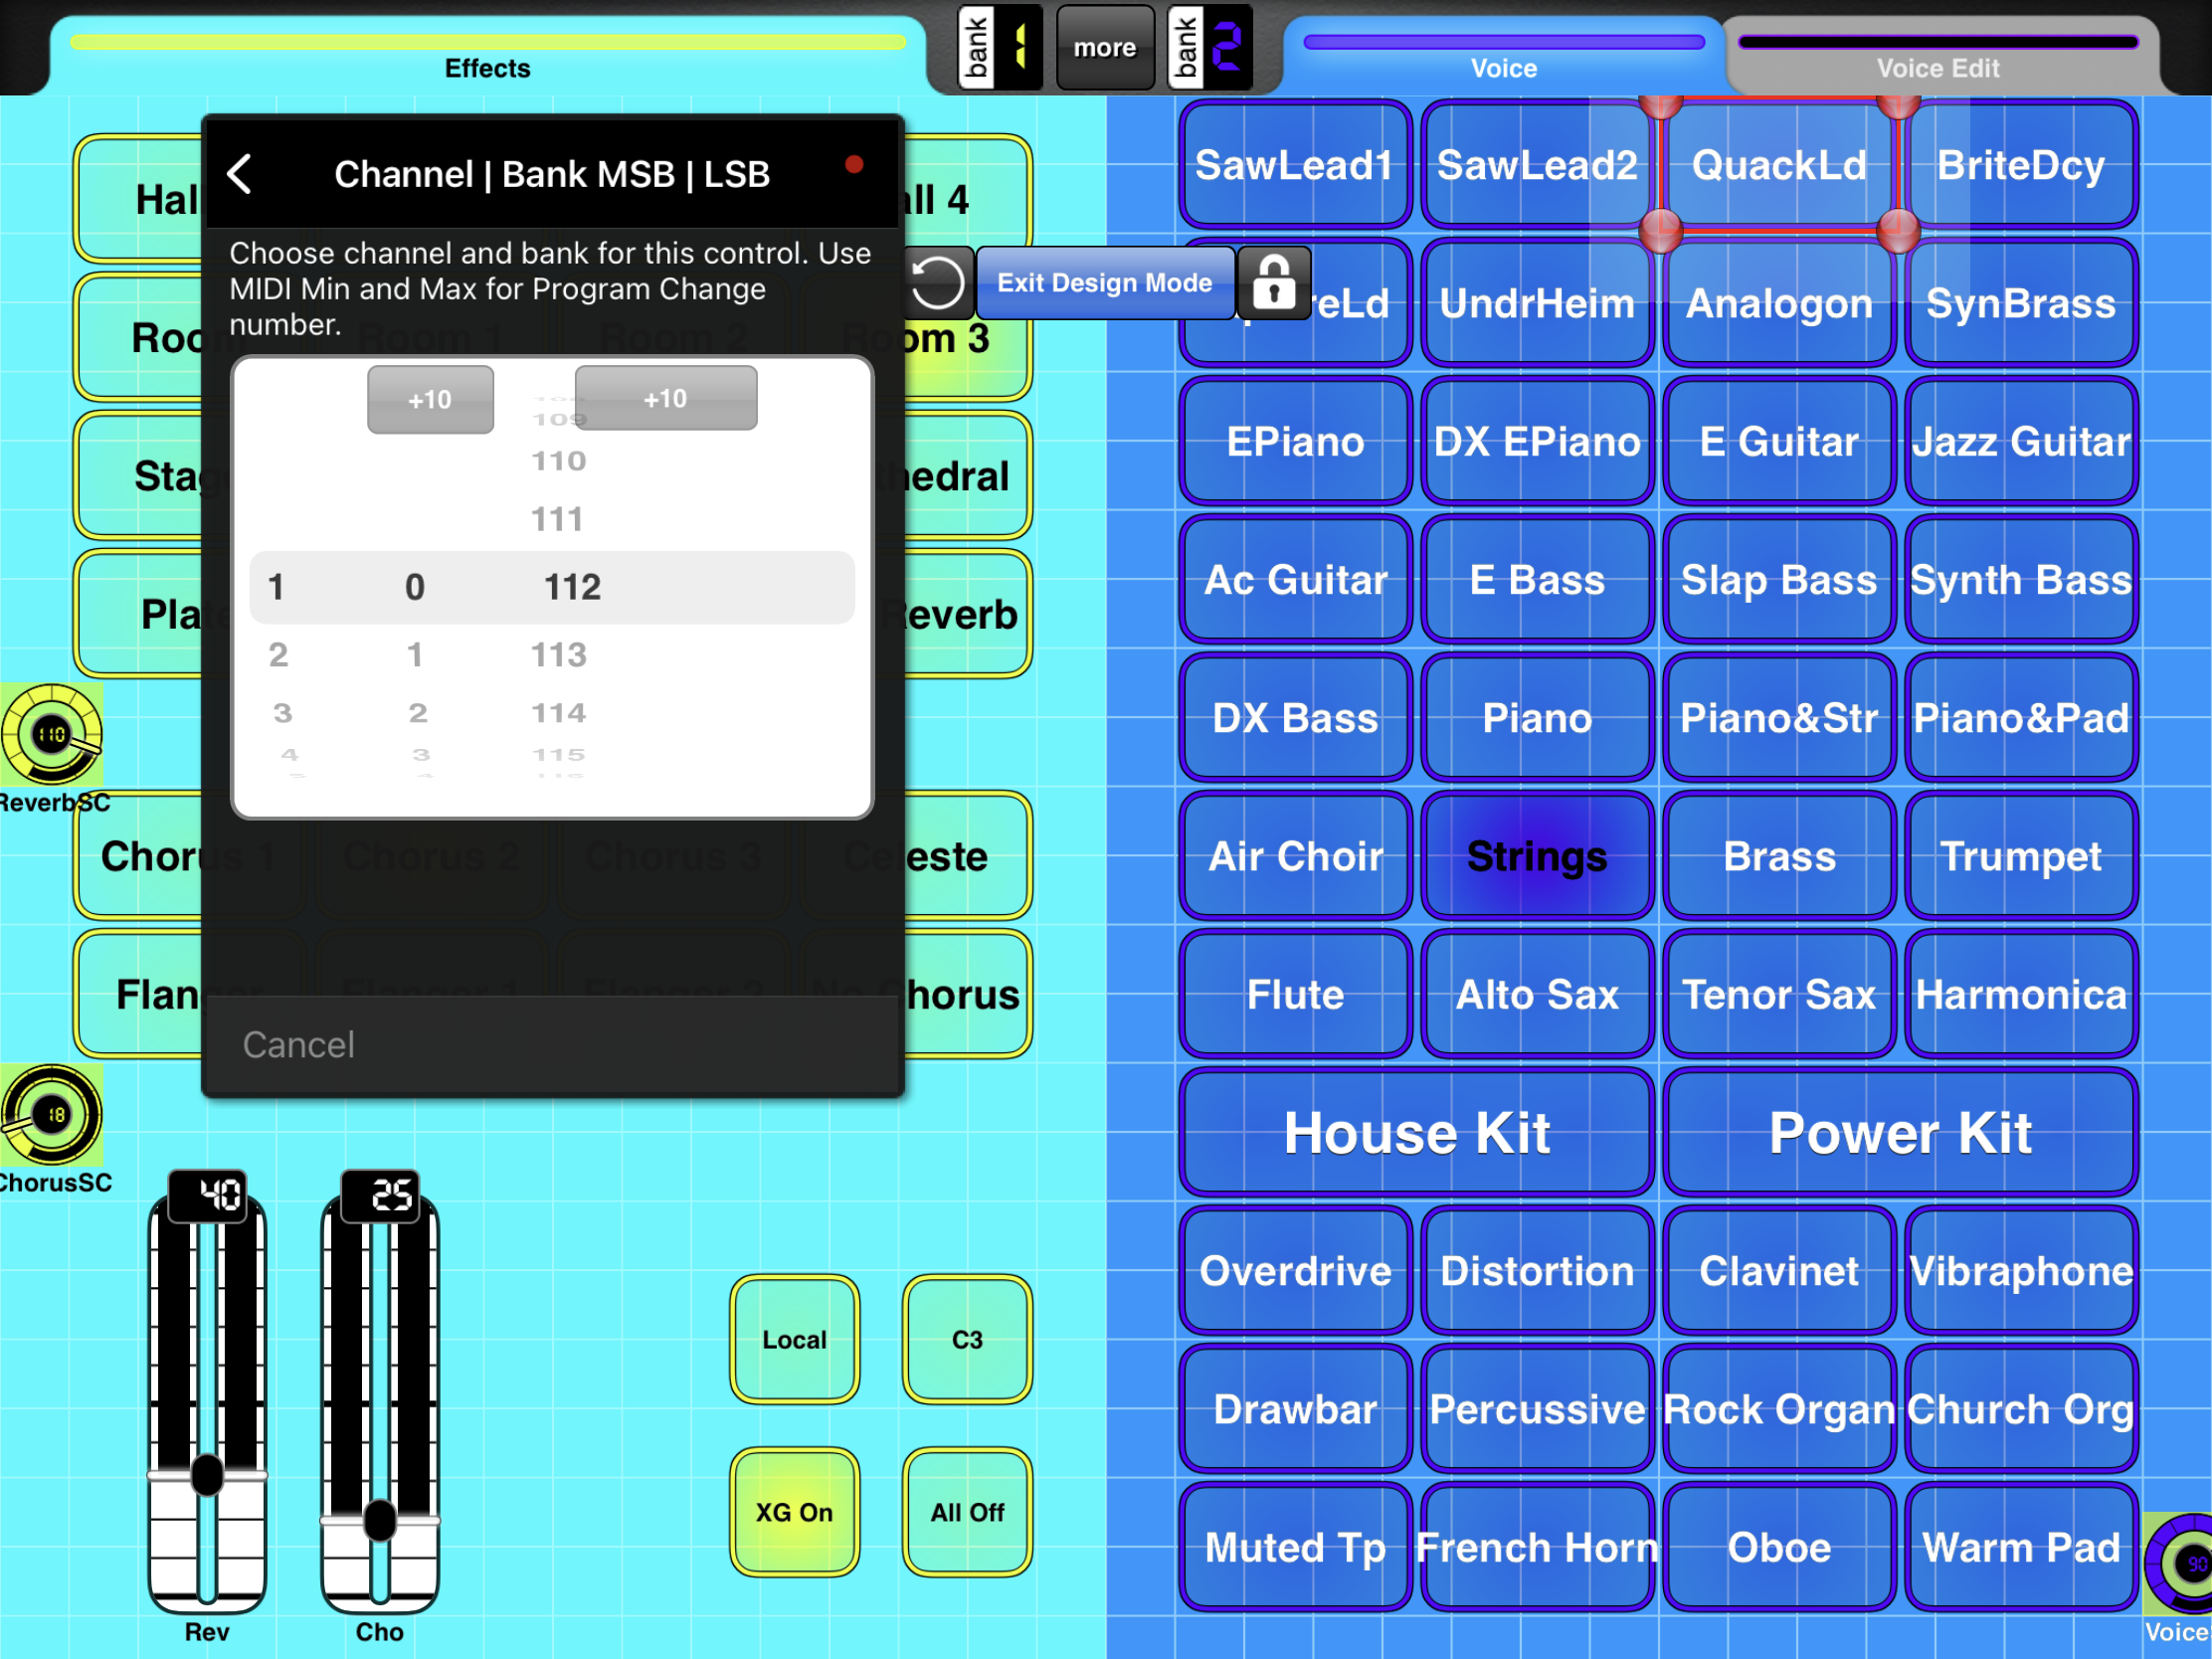
The big news, of course, is the built-in General MIDI Level 1 tone generator. You can use the SHS-500 as a full 16-channel, multi-timbral General MIDI (GM) sound source (GM System On/Reset):
F0 7E 7F 09 01 F7
You can also enable and select the panel voices by putting the Sonogenic into its ultra-light XG mode (XG System On):
F0 43 10 4C 00 00 7E 00 F7
I won’t reproduce the GM voice table here nor the list of SHS-500 panel voices. Consult the SHS-500 Reference Manual for the bank select and program change values needed for panel voice selection.
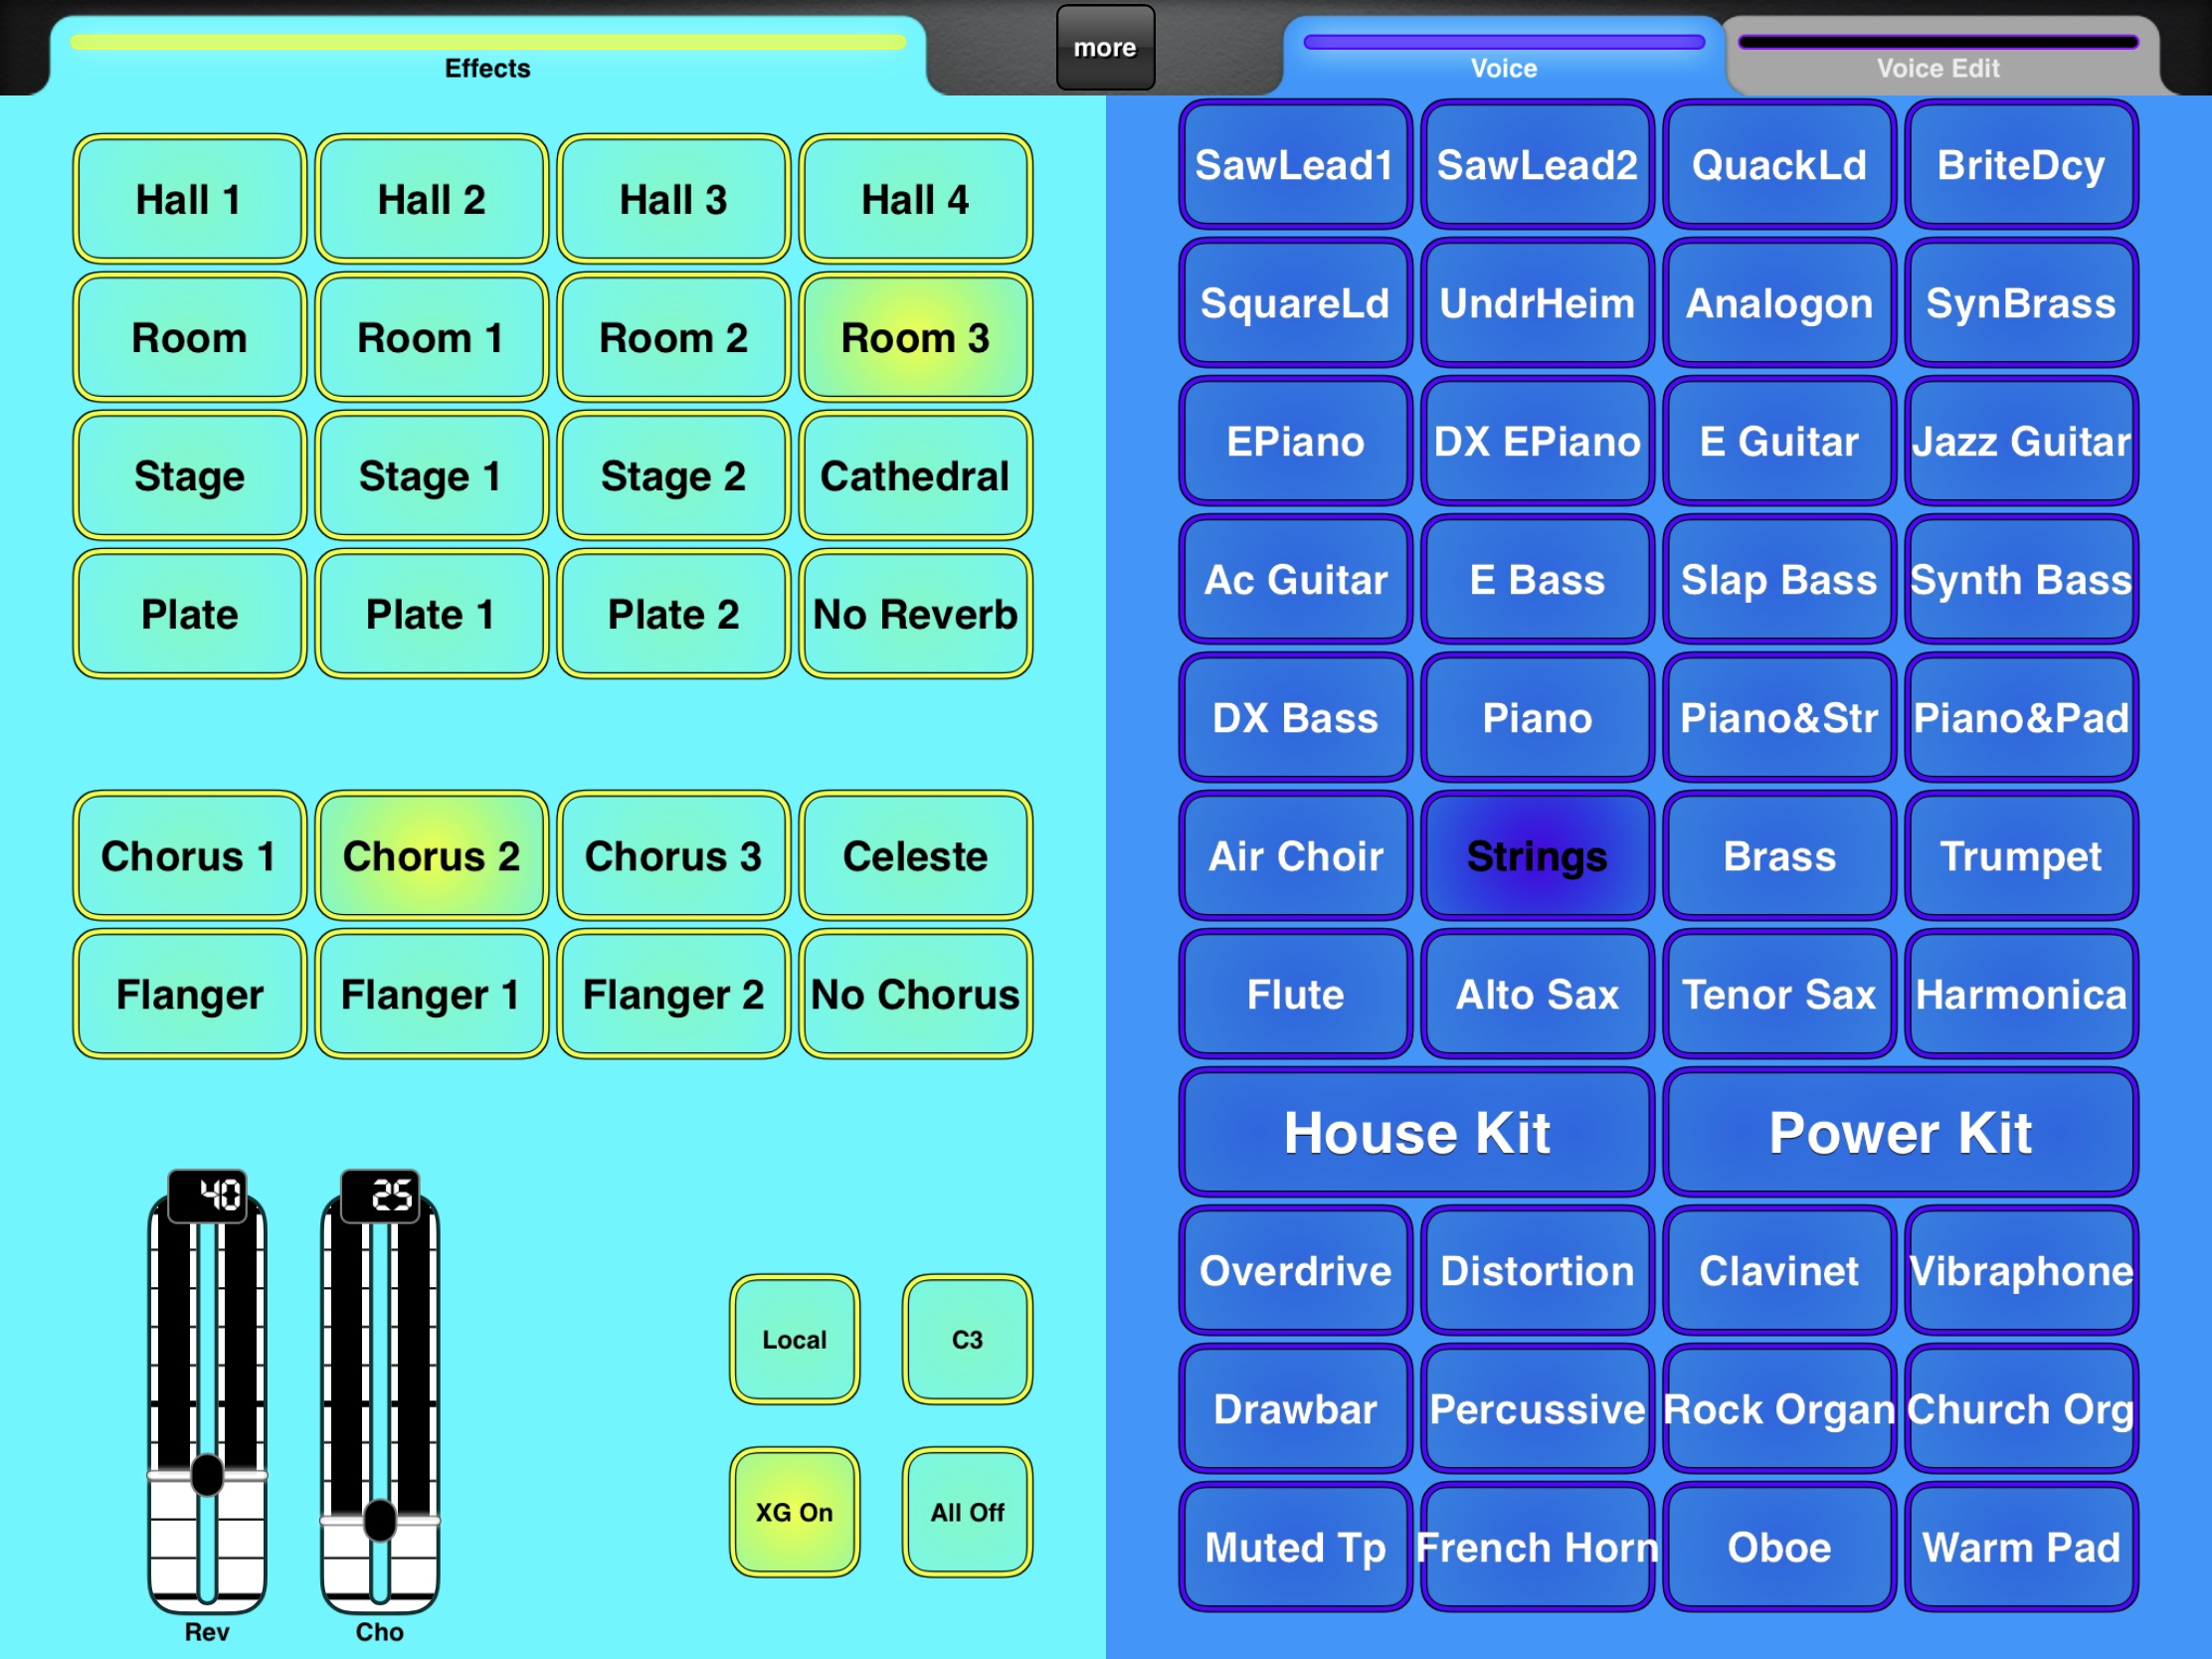
Chorus and reverb effects
Like the E463/EW410, the Sonogenic implements a smattering of basic chorus and reverb effect types. Reverb type is selected by a MIDI message of the form:
F0 43 10 4C 02 01 00 MSB LSB F7
The reverb types are:
                MSB  LSB  SysEx
                ---  ---  -----------------------------
    No effect     0    0
    Hall 1        1    0  F0 43 10 4C 02 01 00 01 00 F7
    Hall 4 *      1    1                       0  01
    Hall 2        1   16                       01 10
    Hall 3        1   17                       01 11
    Cathedral *   1   23                       01 17
    Room          2    0                       02 00
    Room 3 *      2    7                       02 07
    Room 1        2   17                       02 11
    Room 2        2   19                       02 13
    Stage         3    0                       03 00
    Stage 1       3   16                       03 10
    Stage 2       3   17                       03 11
    Plate         4    0                       04 00
    Plate 1       4   16                       04 10
    Plate 2       4   17                       04 11
Please note the three reverbs added in the E463 (Hall 4, Cathedral, Room 3).
Chorus type is selected using a MIDI message of the form:
F0 43 10 4C 02 01 20 MSB LSB F7
The chorus effect types are:
             MSB  LSB  SysEx
             ---  ---  -----------------------------
 No Effect     0    0
 Chorus 3     65    0  F0 43 10 4C 02 01 20 41 00 F7
 Chorus 2     65    2                       41 02
 Celeste      66    0                       42 00
 Chorus 1     66   17                       42 11
 Flanger      67    0                       43 00
 Flanger 1    67    8                       43 08
 Flanger 2    67   17                       43 11
Unfortunately, Yamaha have not given us a way to select the DSP effect type. The Sonogenic does not implement CC#94 which is needed to control variation send when the variation effect is configured in system mode. I performed many experiments trying to enable the DSP effect as an insertion effect, failing all attempts. Yamaha’s MIDI set-up (for SMFs) on the E463 does not contain DSP configuration. So, I think we’re hosed when it comes to DSP effects via MIDI.
I couldn’t find a way to change the Master EQ through MIDI.
MIDI Continuous Controllers
The SHS-500 Sonogenic implements the following MIDI Continuous Controller (CC) messages:
 CC#  Function / purpose
 ---  -----------------------------------------------
  0  Bank Select (MSB)
  1  Modulation
  5  Portamento Time
  6  Data Entry (MSB)
  7  Main volume (channel volume)
 10  Pan  11  Expression  32  Bank Select (LSB)
 38  Data Entry (LSB)
 64  Sustain (Off: 0 to 63, On: 64 to 127)
 65  Portamento On/Off (Off: 0 to 63, On: 64 to 127)
 71  Resonance
 72  Release Time
 73  Attack Time
 74  Cutoff Frequency
 84  Portamento Control (amount of portamento)
 91  Reverb depth (Effect 1 Depth)
 93  Chorus depth (Effect 3 Depth)
 96  RPN/NRPN data increment
 97  RPN/NRPN data decrement
100  Registered Parameter Number (RPN) LSB
101  Registered Parameter Number (RPN) MSB
120  All Sound Off
121  Reset All Controllers
122  Local On/Off switch (Off: 0 to 63, On: 64 to 127)
123  All Notes Off
124  Omni Off
125  Omni On
126  Mono (0 to 16)
127  Poly
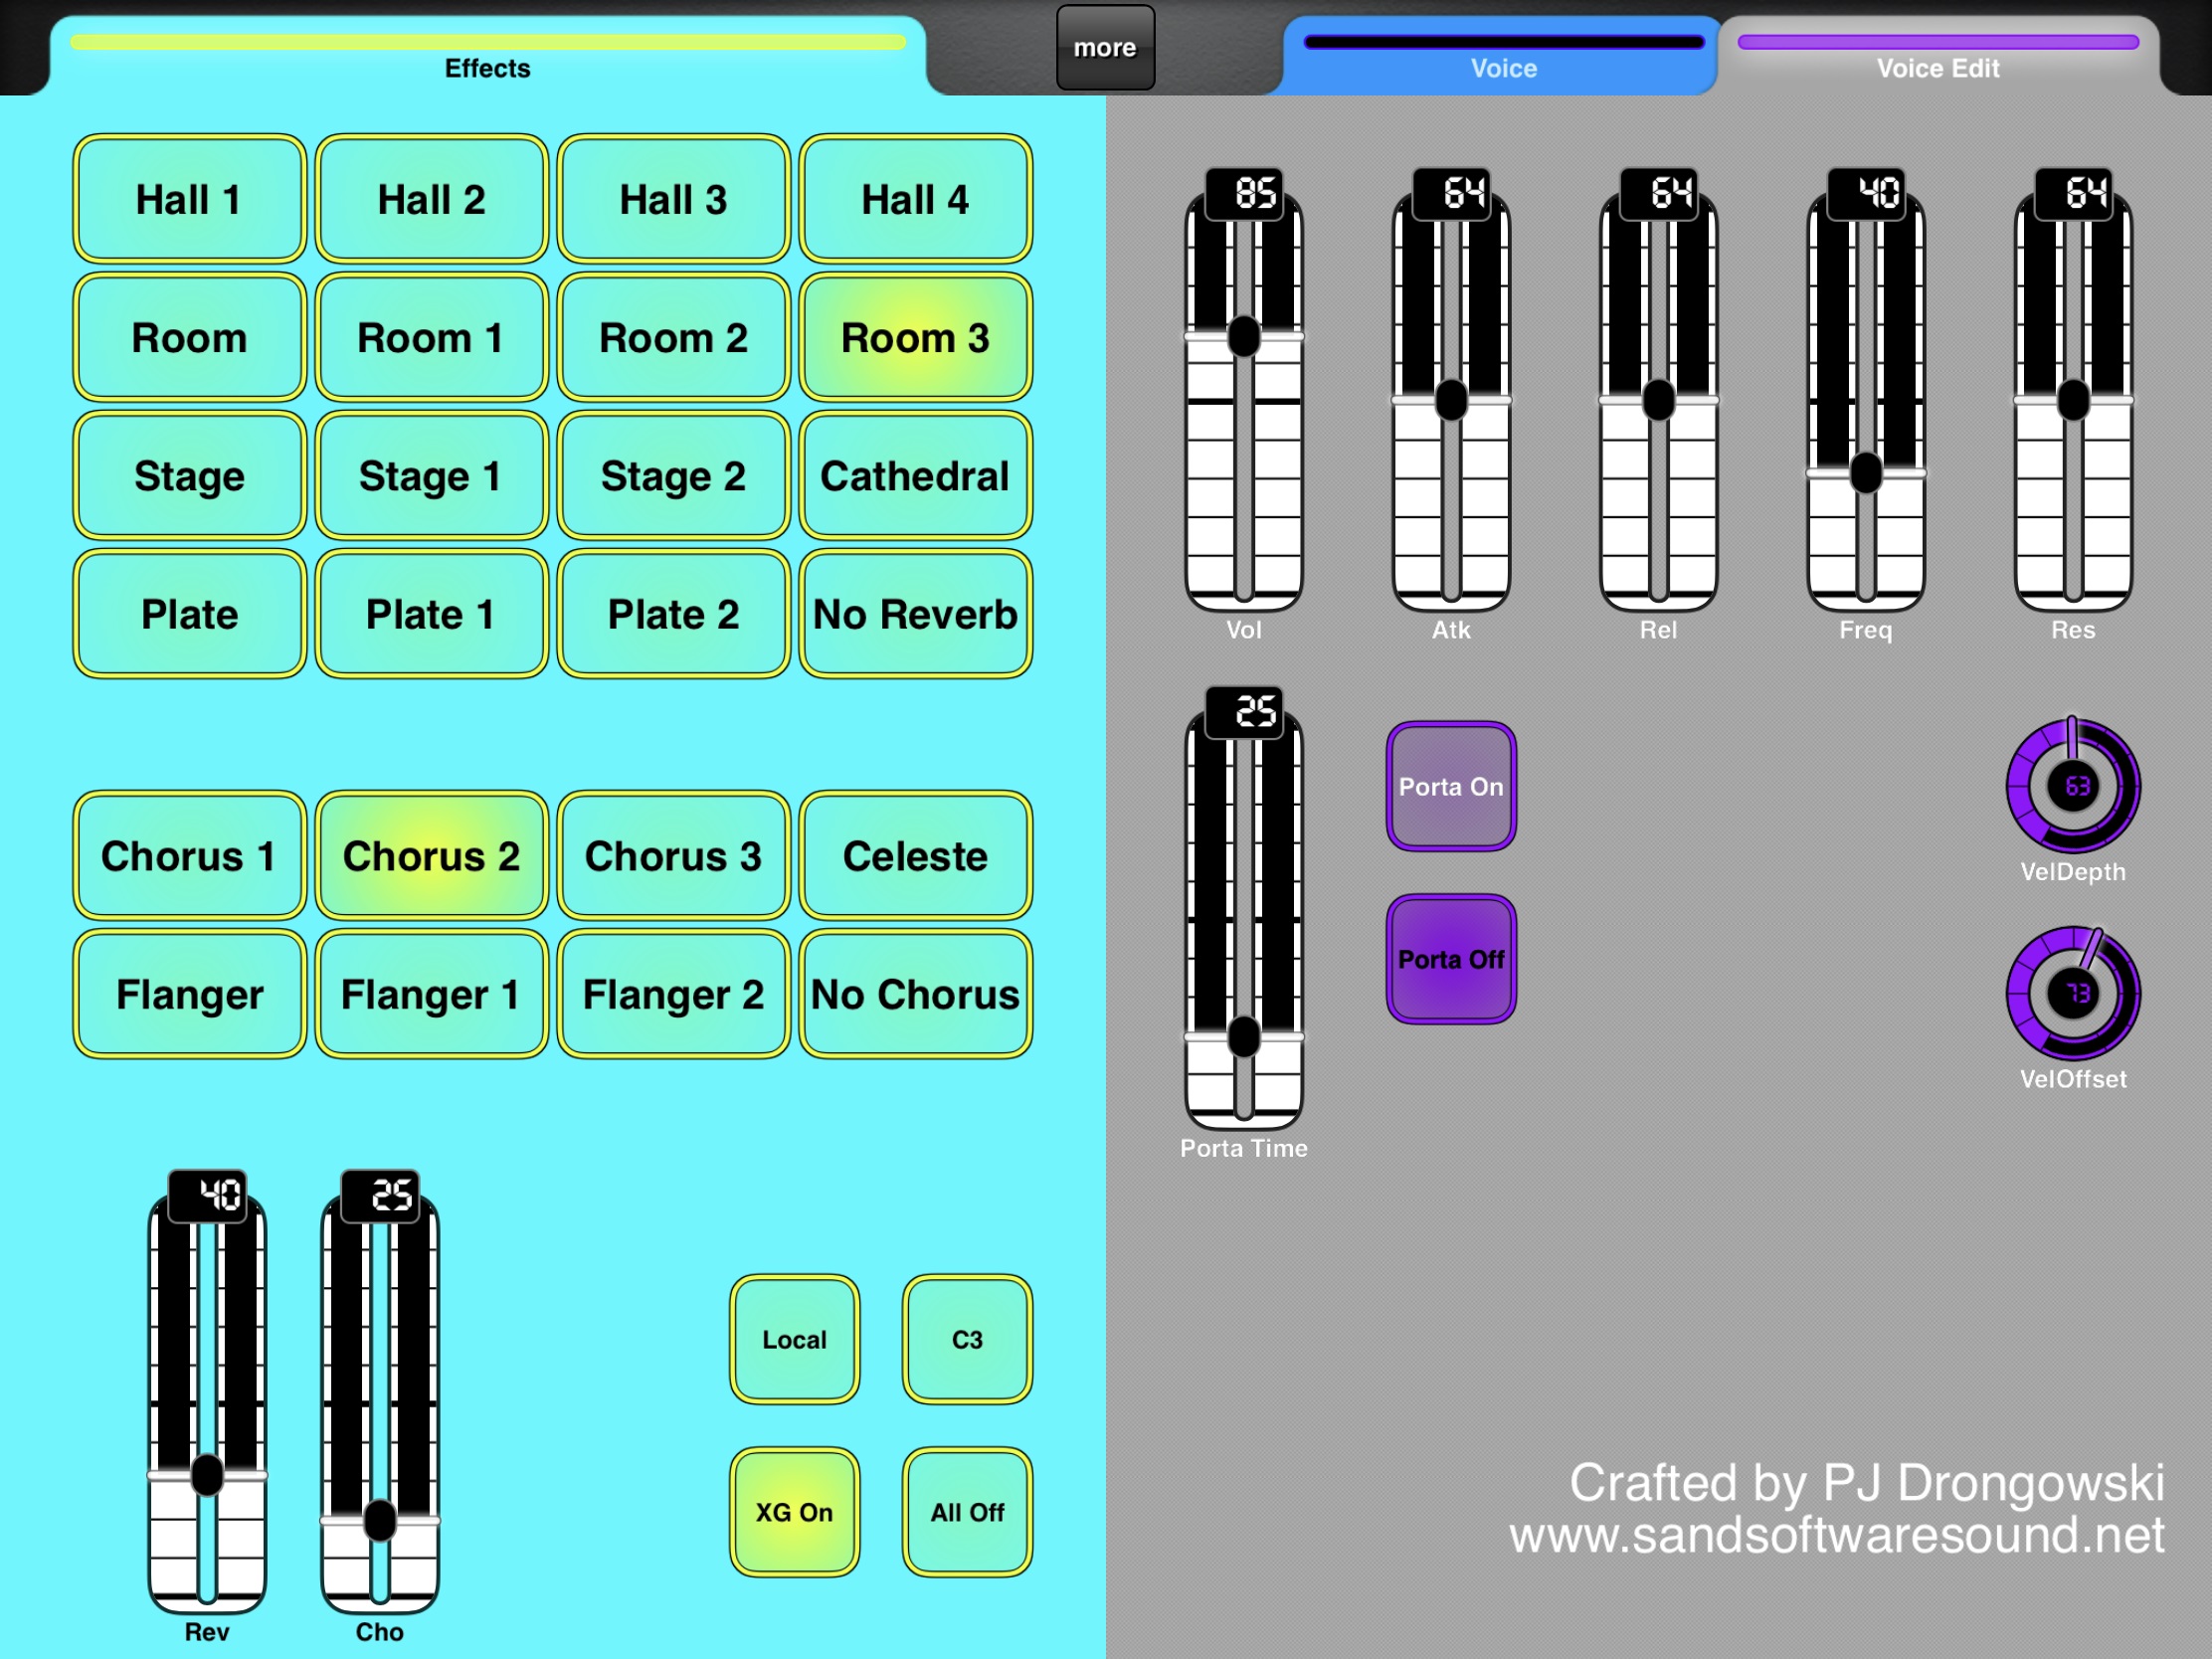
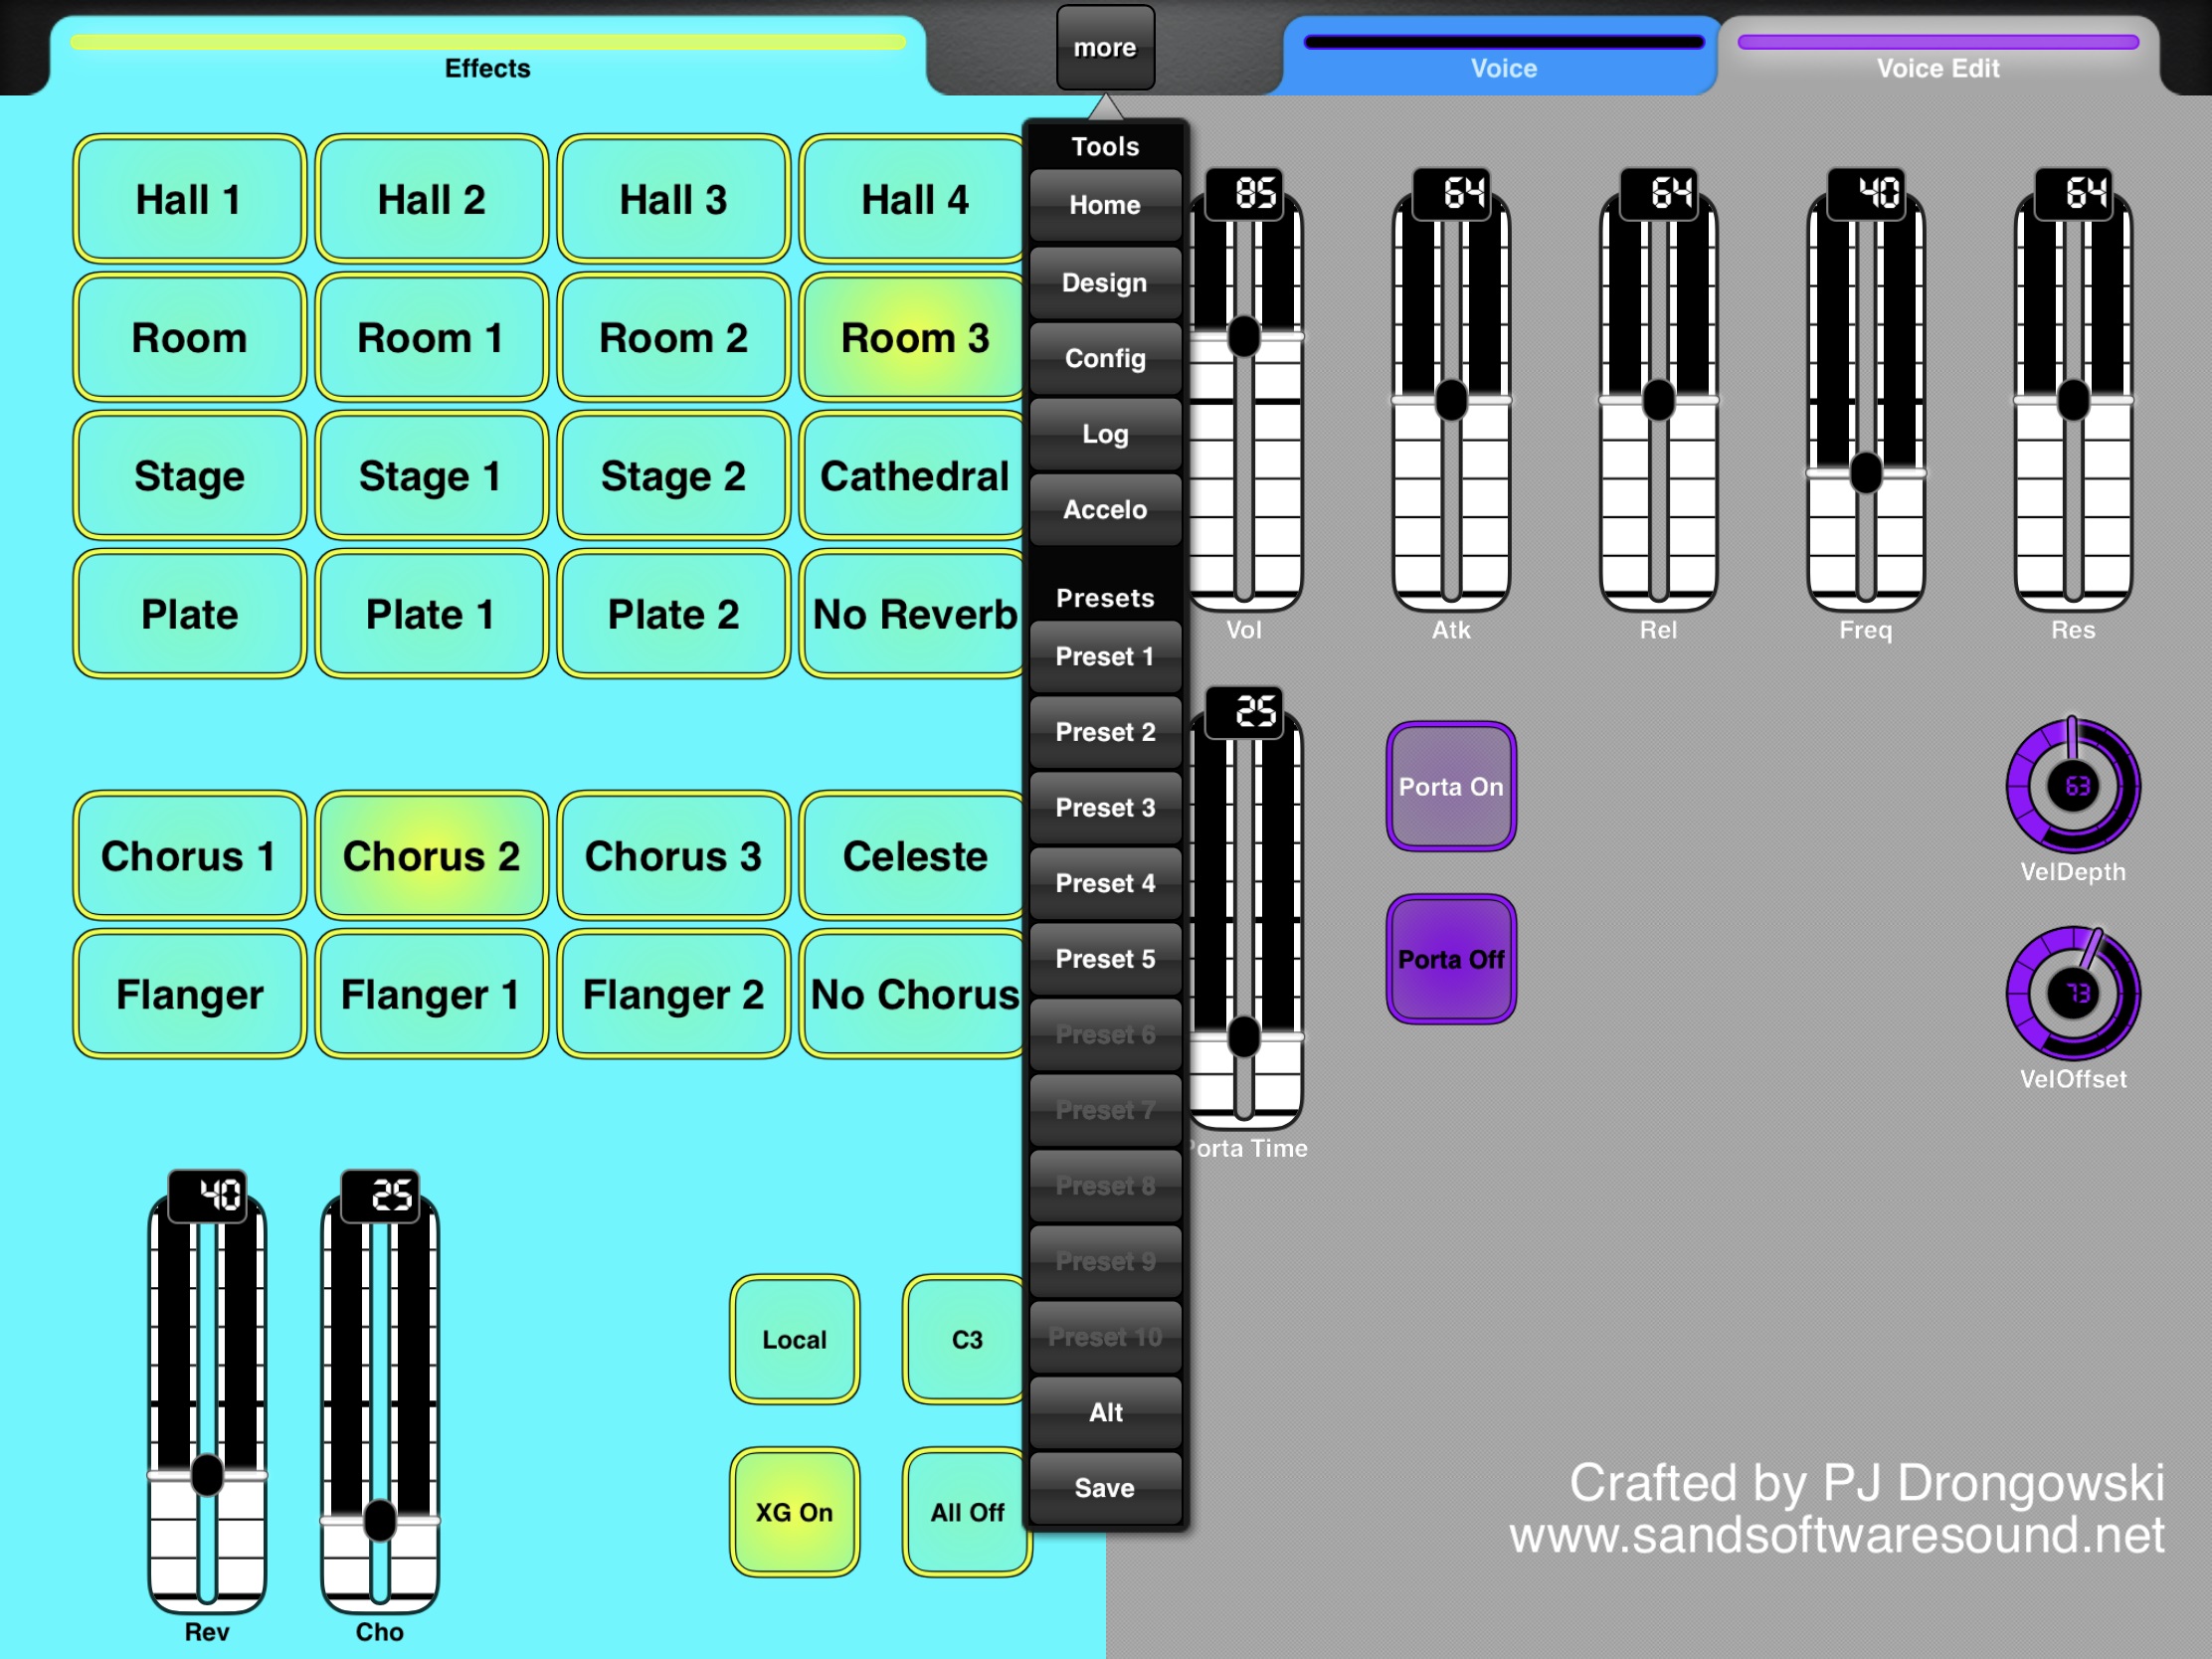
These CC channel messages are pretty standard. Without deep diving, note that CC#91 and CC#93 set the reverb depth and chorus depth, respectively. It’s still possible to have a lot of fun with CC#71, CC#72, CC#73, and CC#74 for voice editing. However, you’ll have to find a way to save your edits since the Sonogenic doesn’t have any user patch memory. I’m hoping to edit and save patches through my MIDI Designer user interface.
Sadly, there isn’t a way to control vibrato. It would be nice to control vibrato rate and depth, but what you hear is what you get. The best one can do is to control vibrato depth via CC#1 modulation.
Registered Parameter Numbers
The Sonogenic implements the General MIDI Registered Parameter Numbers (RPNs):
RPN MSB  RPN LSB  Function / purpose
-------  -------  -------------------------------------
   0        0     Pitch Bend Range
   0        1     Fine Tuning
   0        2     Coarse Tuning
   0        5     Modulation Sensitivity
I tested only coarse tuning as a means to achieve transpose.
No Non-Registered Parameter Numbers (NRPN) are supported.
Utility messages
The PSR-E463 MIDI Reference lists a few “utility” messages:
- MIDI Master Volume
- MIDI Master Tuning
- Local ON/OFF
I tested Local ON/OFF and the Sonogenic responds to it. (The SHS-500 MIDI implementation chart shows this message as recognized).
None of the General MIDI Level 2 messages are implemented, e.g., Master Coarse Tuning. Thus, options for transpose (note shift) are limited.
XG extensions
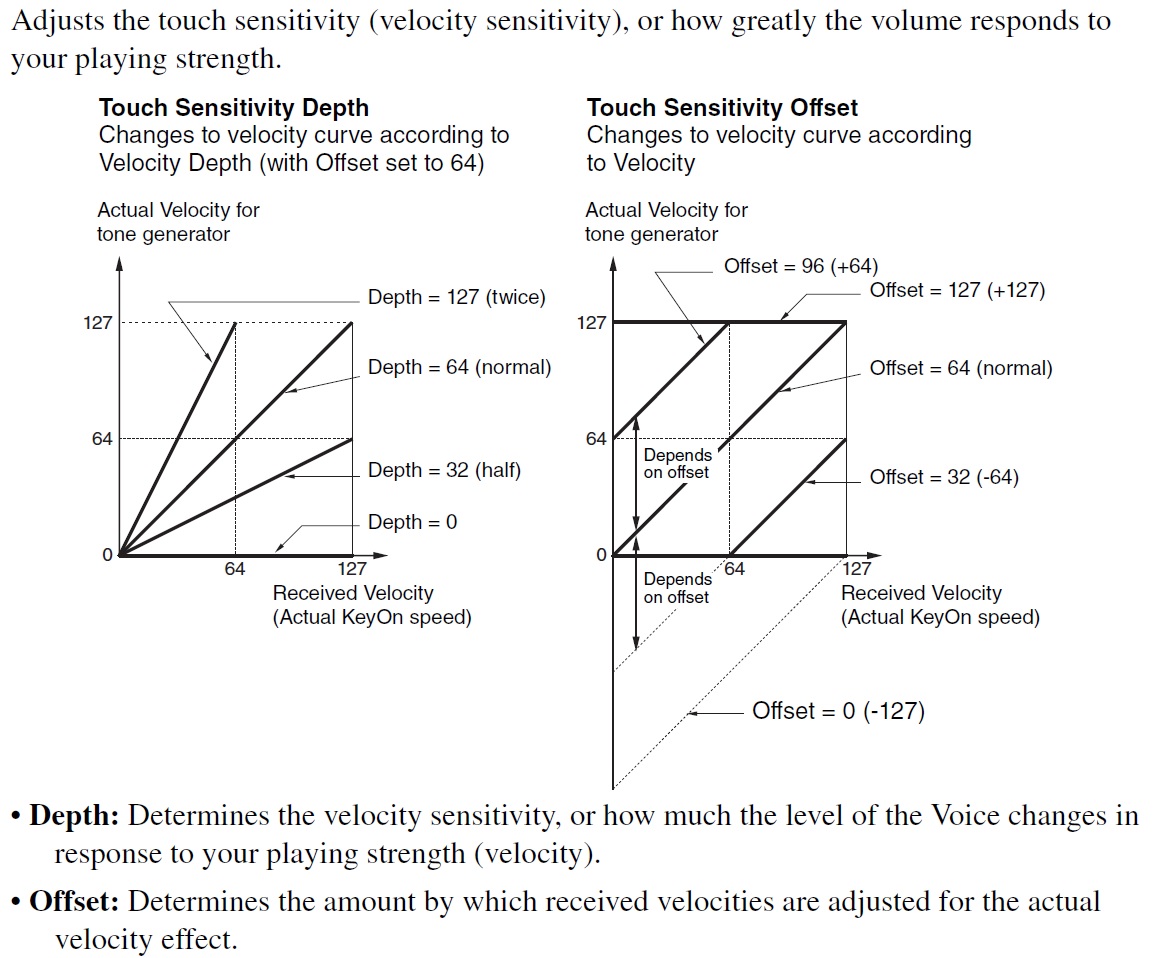
I spent a fair bit of time searching for Yamaha XG extensions. Almost all XG extensions are ignored except velocity sense control:
Velocity Sense Depth (Part: 1, Default: 64)
    F0 43 10 4C 08 00 0C vv F7
Velocity Sense Offset (Part: 1, Default: 64)
    F0 43 10 4C 08 00 0C vv F7
I’m glad velocity sens control is supported. Organ voices, in particular, do not respond to key touch. If you want to turn off touch response in a MIDI channel, try:
    Velocity Sense Depth: 0
    Velocity Sense Offset: 115 to 127
Both parameters default to 64 (Hex 0x40).
Based upon my analysis of E463 song set-up messages, the Sonogenic is likely to support XG Scale Tune messages.
Display chord name
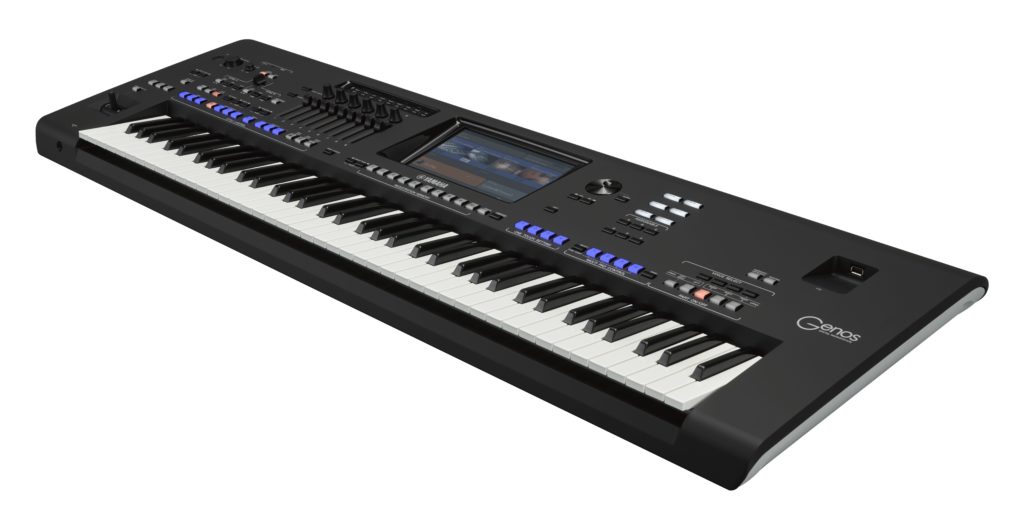
You’ve probably seen demonstrations of Chord Tracker driving the SHS-500. Chord Tracker communicates chord names to the Sonogenic over MIDI. It uses the same SysEx chord name message as the Genos/PSR series keyboards. For example, the following two messages send “Dm7” and “G7” to the Sonogenic.
F0 43 7E 02 32 0A 32 0A F7     Dm7
F0 43 7E 02 35 13 35 13 F7     G7
Chord names are displayed when the Sonogenic is in Jam Mode.
Here is Yamaha’s definition of the chord name messages as taken from the Genos Data List PDF:
F0 43 7E tt d1 d2 d3 d4 F7     Type1 (tt=02)
    11110000 F0 = Exclusive status
    01000011 43 = YAMAHA ID
    01111110 7E = Style
    00000010 02 = type 1
    0ddddddd d1 = chord root (cr)
    0ddddddd d2 = chord type (ct)
    0ddddddd d3 = bass note (bn)
    0ddddddd d4 = bass type (bt)
    11110111 F7 = End of Exclusive

    cr : Chord Root 0fffnnnn
        fff: b or #, nnnn: note(root)
        0000nnnn 0n bbb           0fff0000 x0 reserved
        0001nnnn 1n bb            0fff0001 x1 C
        0010nnnn 2n b             0fff0010 x2 D
        0011nnnn 3n natural       0fff0011 x3 E
        0100nnnn 4n #             0fff0100 x4 F
        0101nnnn 5n ##            0fff0101 x5 G
        0110nnnn 6n ###           0fff0110 x6 A
                                  0fff0111 x7 B

    ct : Chord Type 0 to 34, 127
        00000000 00 0 Maj         00010010 12 18 dim7
        00000001 01 1 Maj6        00010011 13 19 7th
        00000010 02 2 Maj7        00010100 14 20 7sus4
        00000011 03 3 Maj7(#11)   00010101 15 21 7b5
        00000100 04 4 Maj(9)      00010110 16 22 7(9)
        00000101 05 5 Maj7(9)     00010111 17 23 7(#11)
        00000110 06 6 Maj6(9)     00011000 18 24 7(13)
        00000111 07 7 aug         00011001 19 25 7(b9)
        00001000 08 8 min         00011010 1A 26 7(b13)
        00001001 09 9 min6        00011011 1B 27 7(#9)
        00001010 0A 10 min7       00011100 1C 28 Maj7aug
        00001011 0B 11 min7b5     00011101 1D 29 7aug
        00001100 0C 12 min(9)     00011110 1E 30 1+8
        00001101 0D 13 min7(9)    00011111 1F 31 1+5
        00001110 0E 14 min7(11)   00100000 20 32 sus4
        00001111 0F 15 minMaj7    00100001 21 33 1+2+5
        00010000 10 16 minMaj7(9) 00100010 22 34 cc
        00010001 11 17 dim

    bn: On Bass Note Same as Chord root; 127:N o bass chord
    bt: Bass Chord Same as Chord type; 127: No bass chord
MIDI Realtime messages
The SHS-500 Sonogenic sends the following MIDI Realtime Messages:
- Start (0xFA): Jam mode only, when play/pause is pushed while stopped
- Stop (0xFC): Jam mode only, when play/pause is pushed while playing
- Active Sense (0xFE)
- MIDI Timing Clock (0xF8)
Miscellaneous messages
The Sonogenic sends the following message when tuning is changed via the function menu:
F0 43 10 27 30 00 00 08 00 00 F7
The Sonogenic responds to the MIDI Identity Request message:
F0 7E dd 06 01 F7
It returns an Identity Reply message:
    F0 7E dd 06 02 vv ff ff mm mm ss ss ss ss F7
        vv    Manufacturer (vendor)
        ff    Family
        mm    Model
        ss    Version

    F0 7E 7F 06 02 43 00 44 23 1F 00 00 00 6F F7
                   vv ff ff mm mm ss ss ss ss
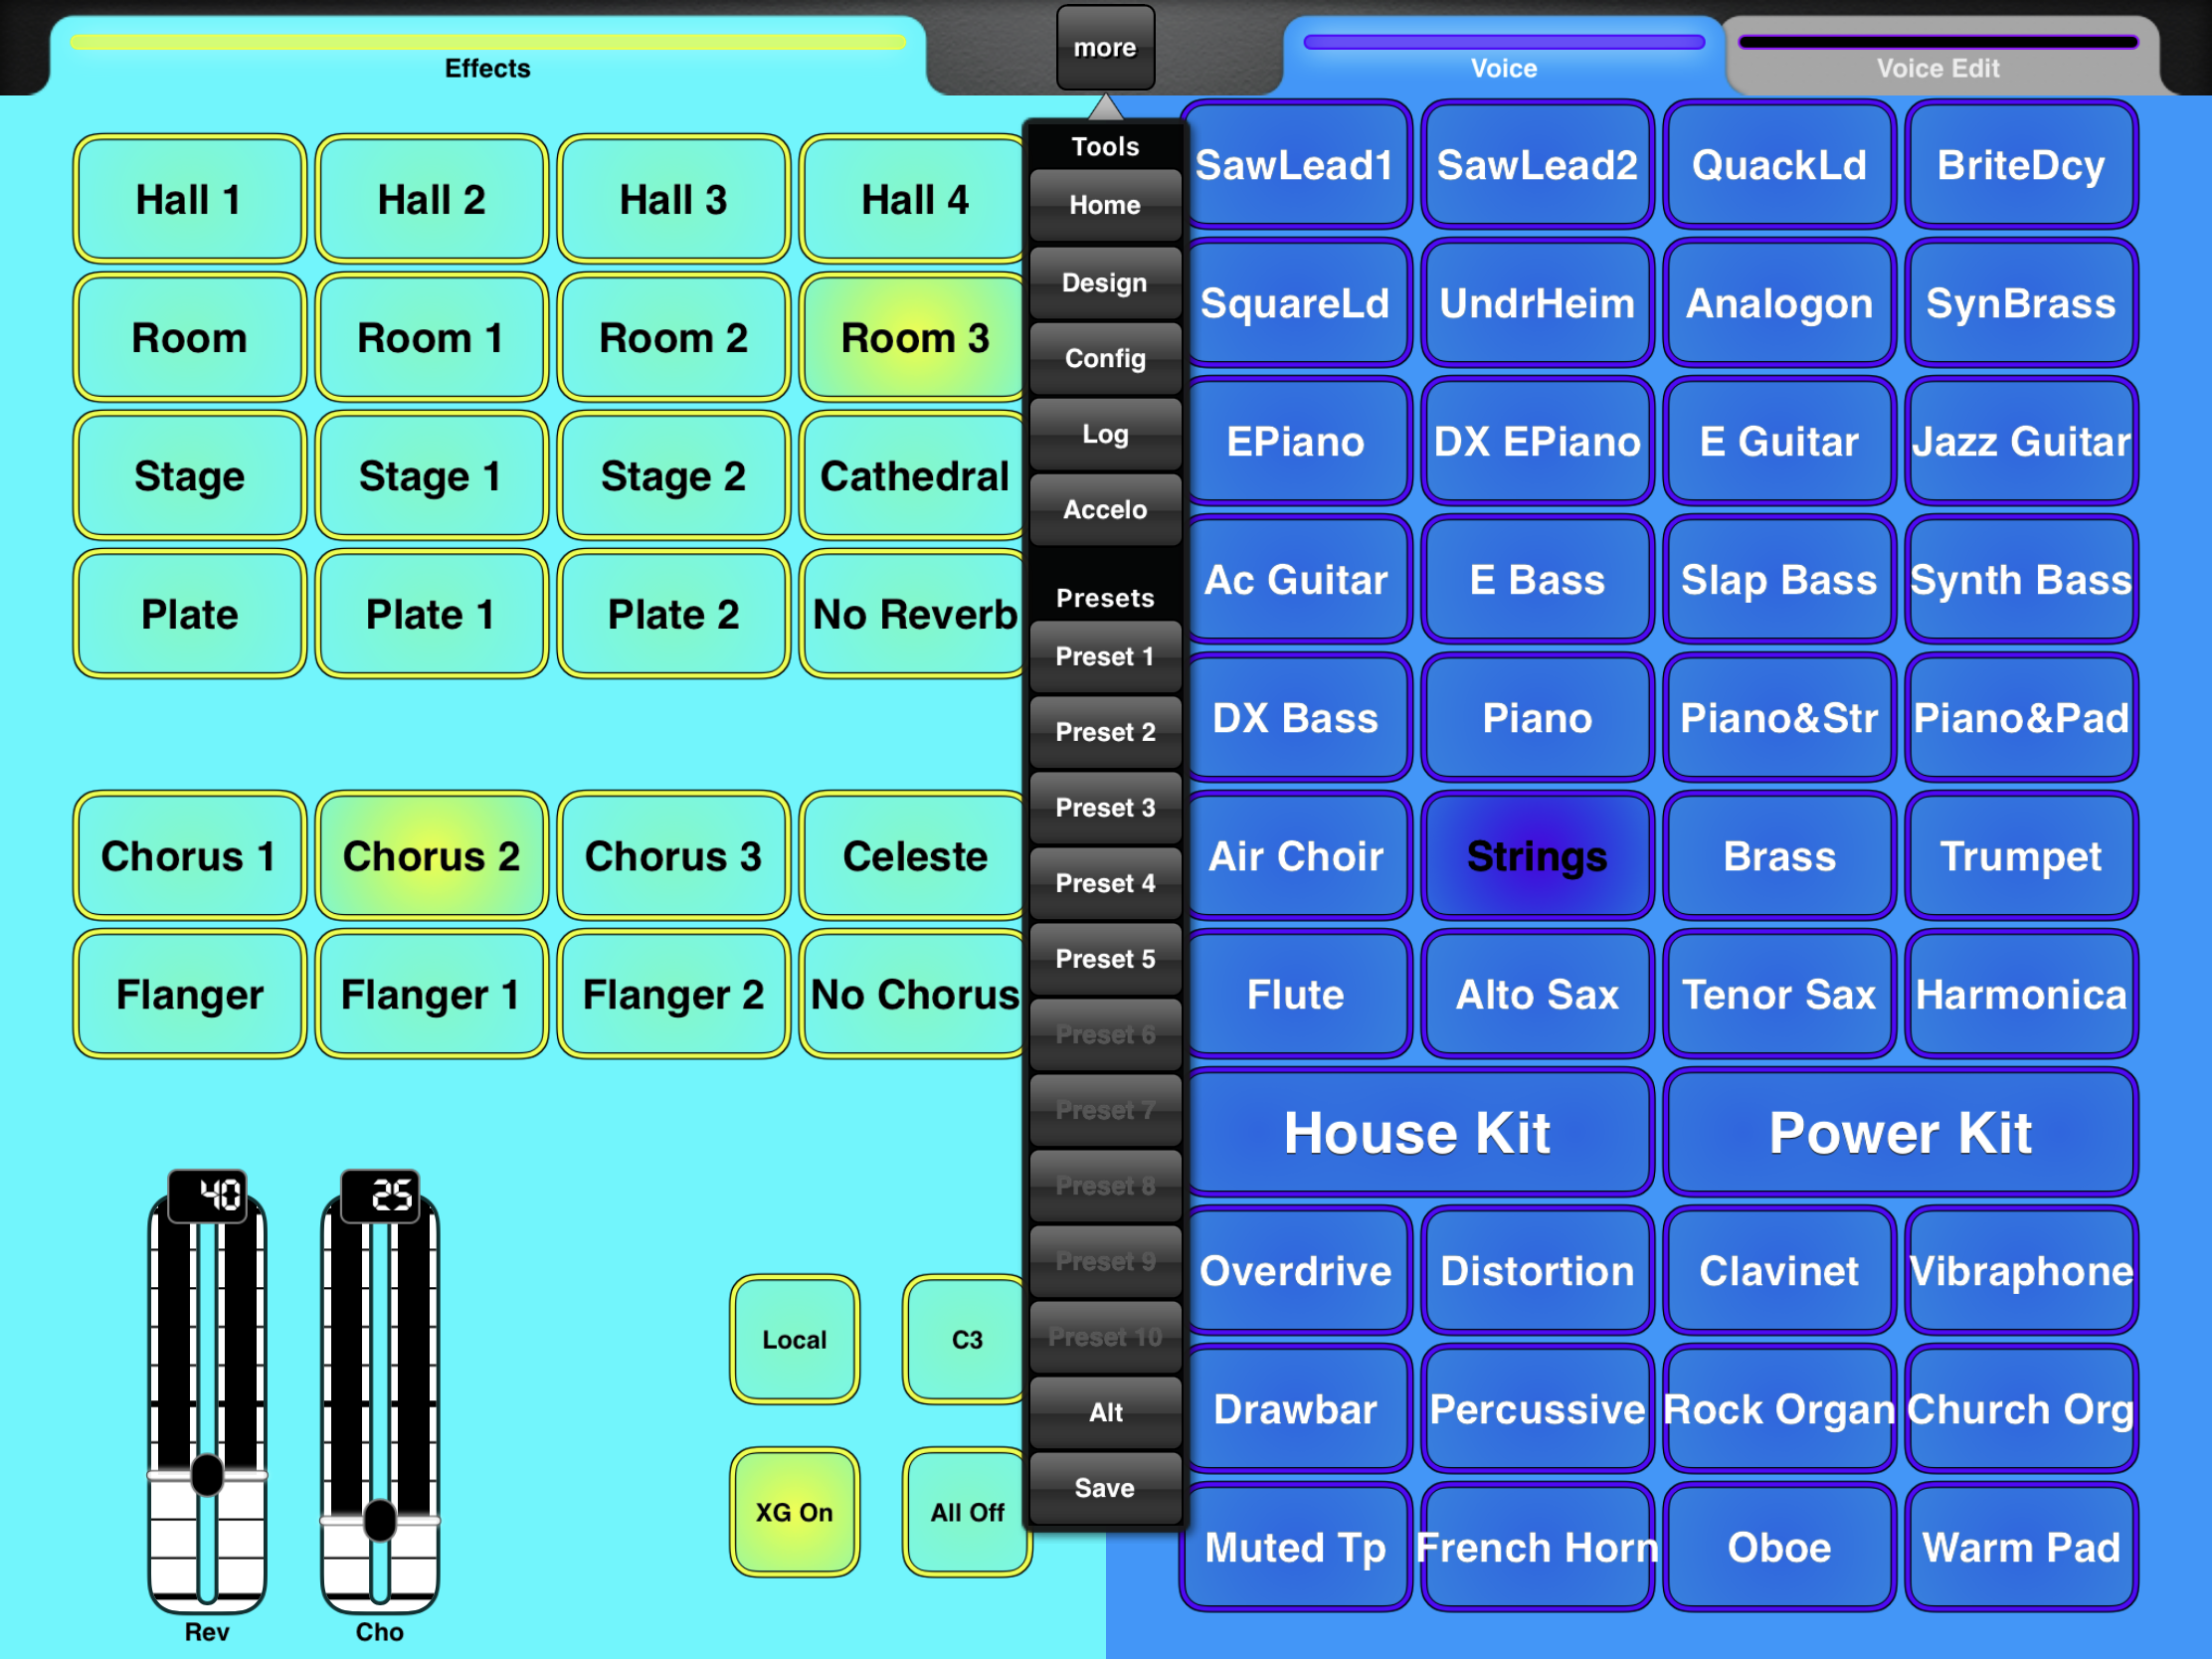
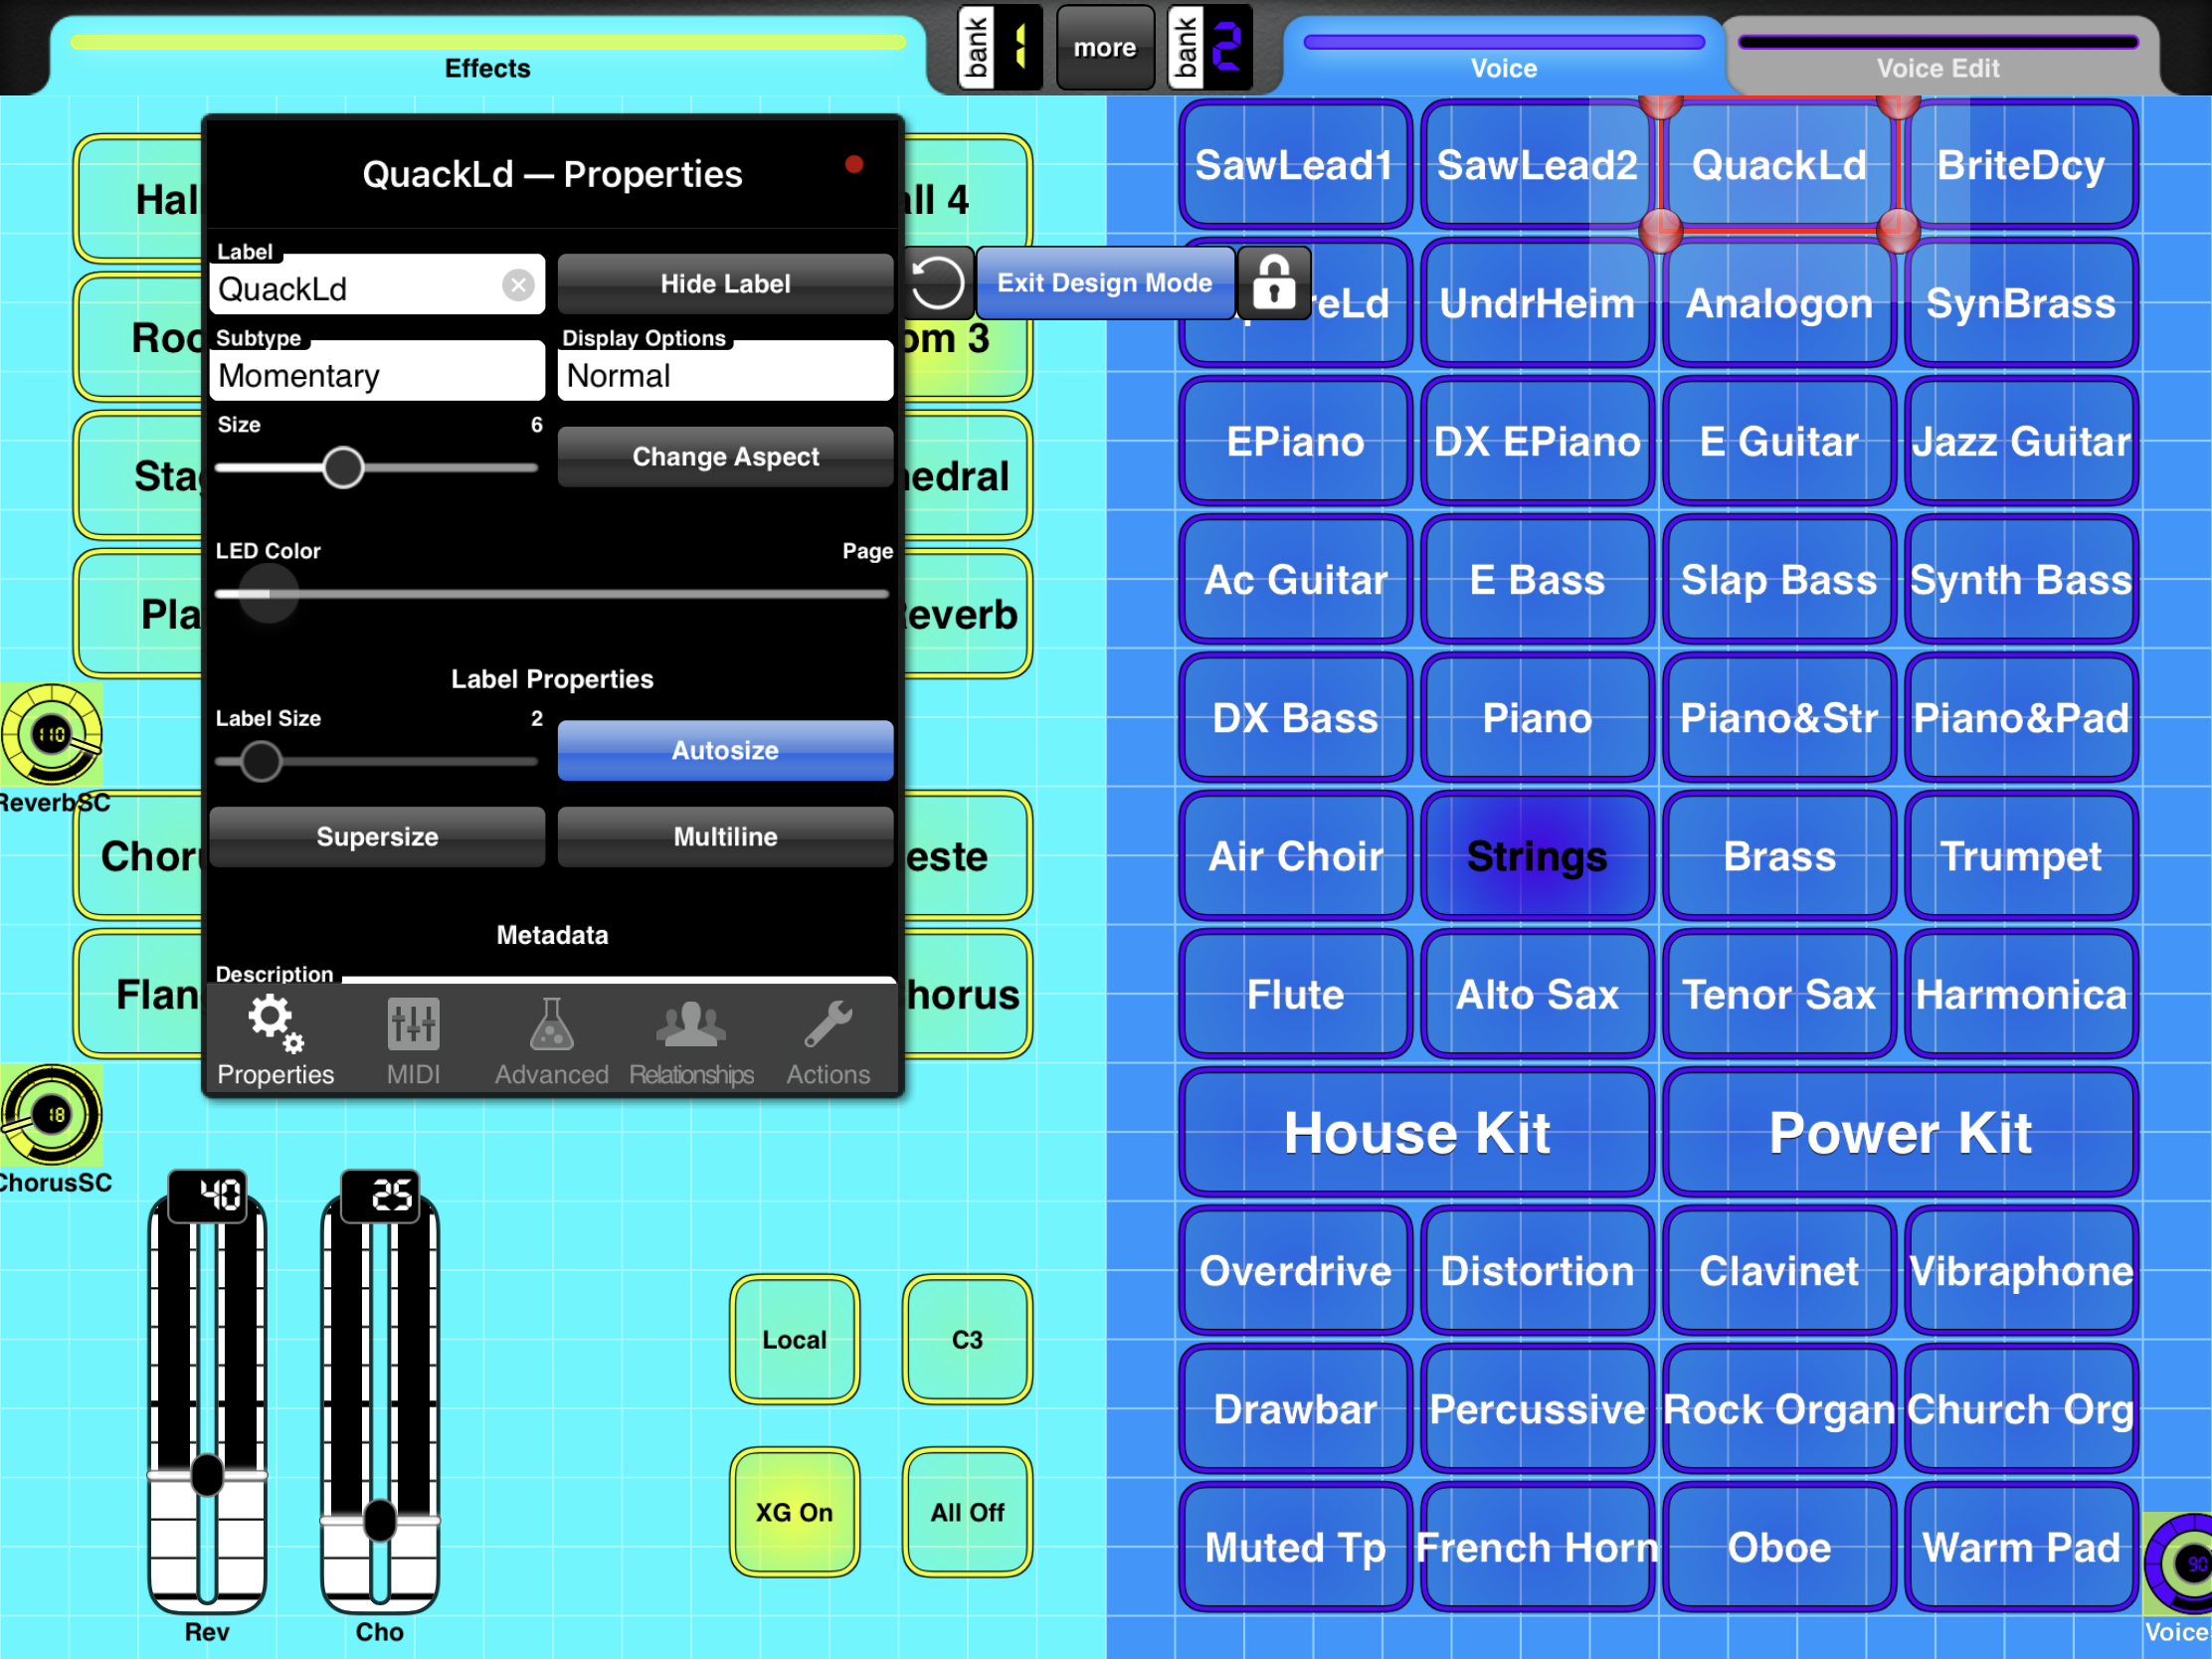
Summary
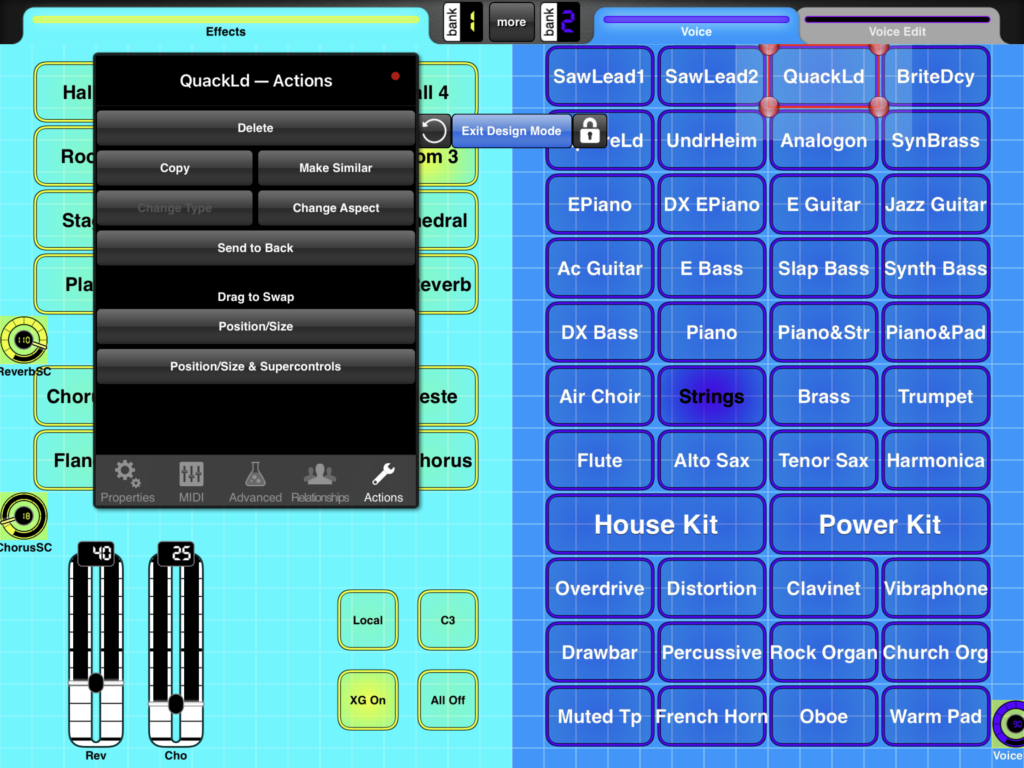
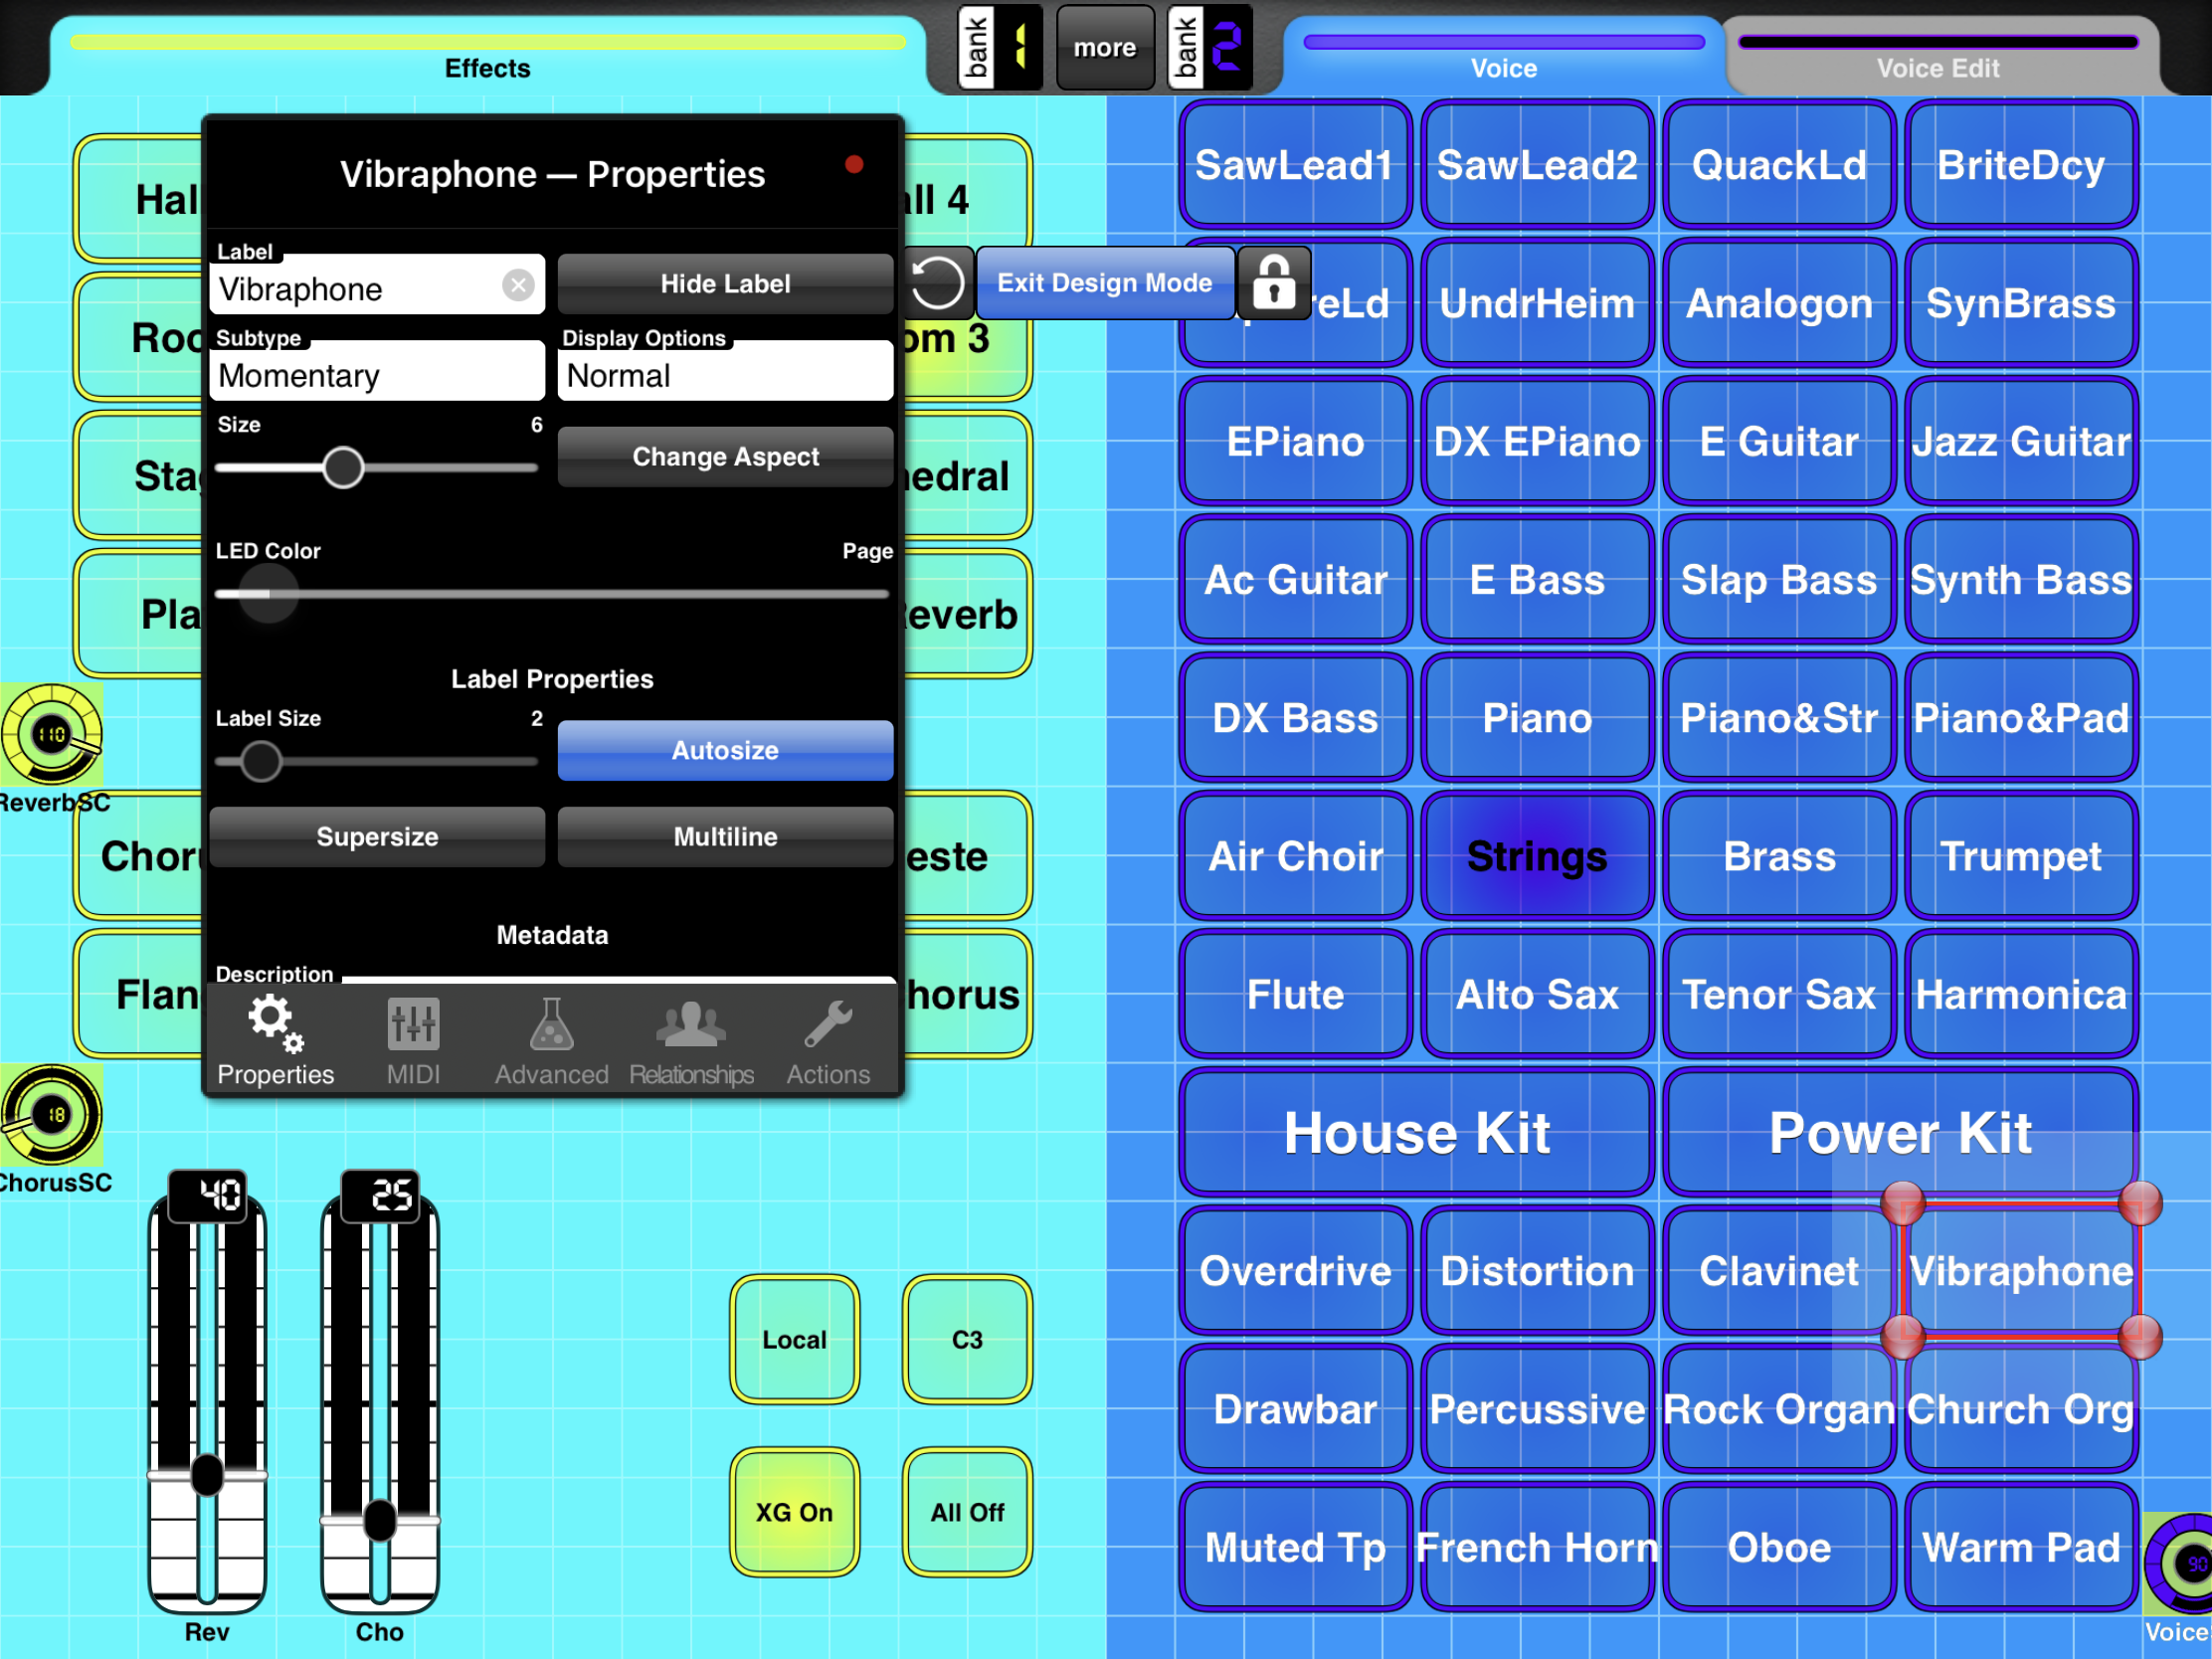
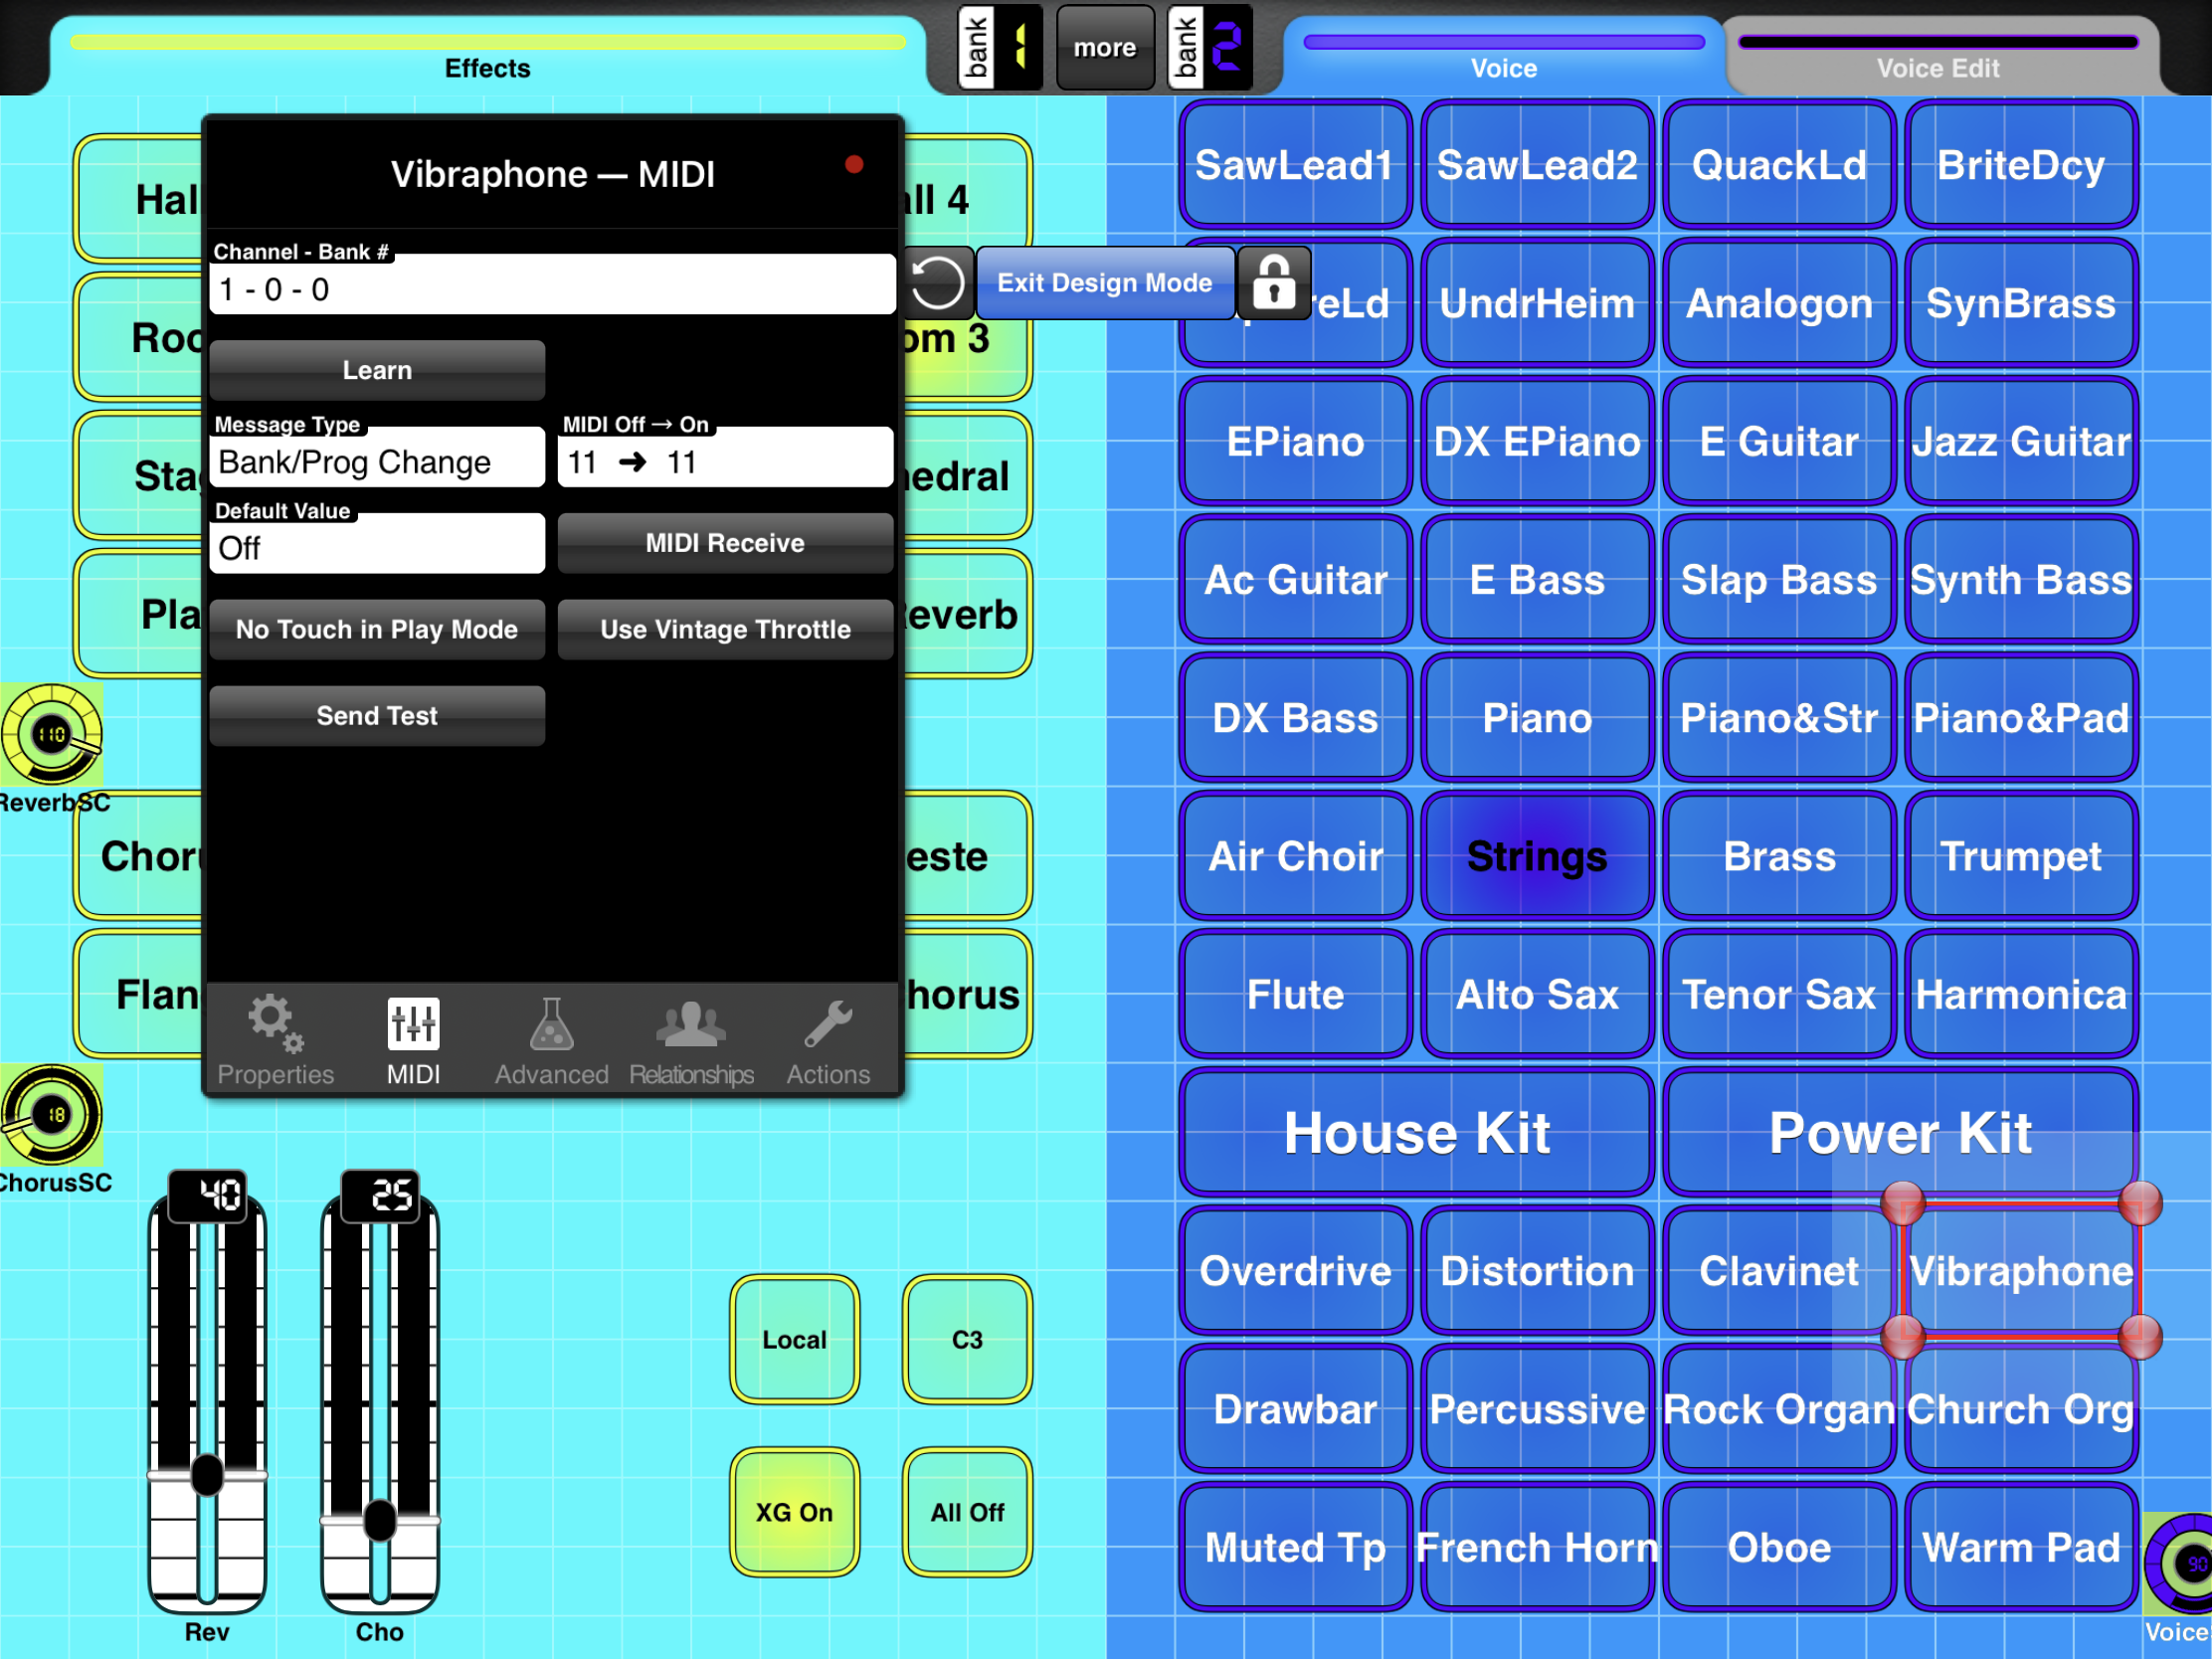
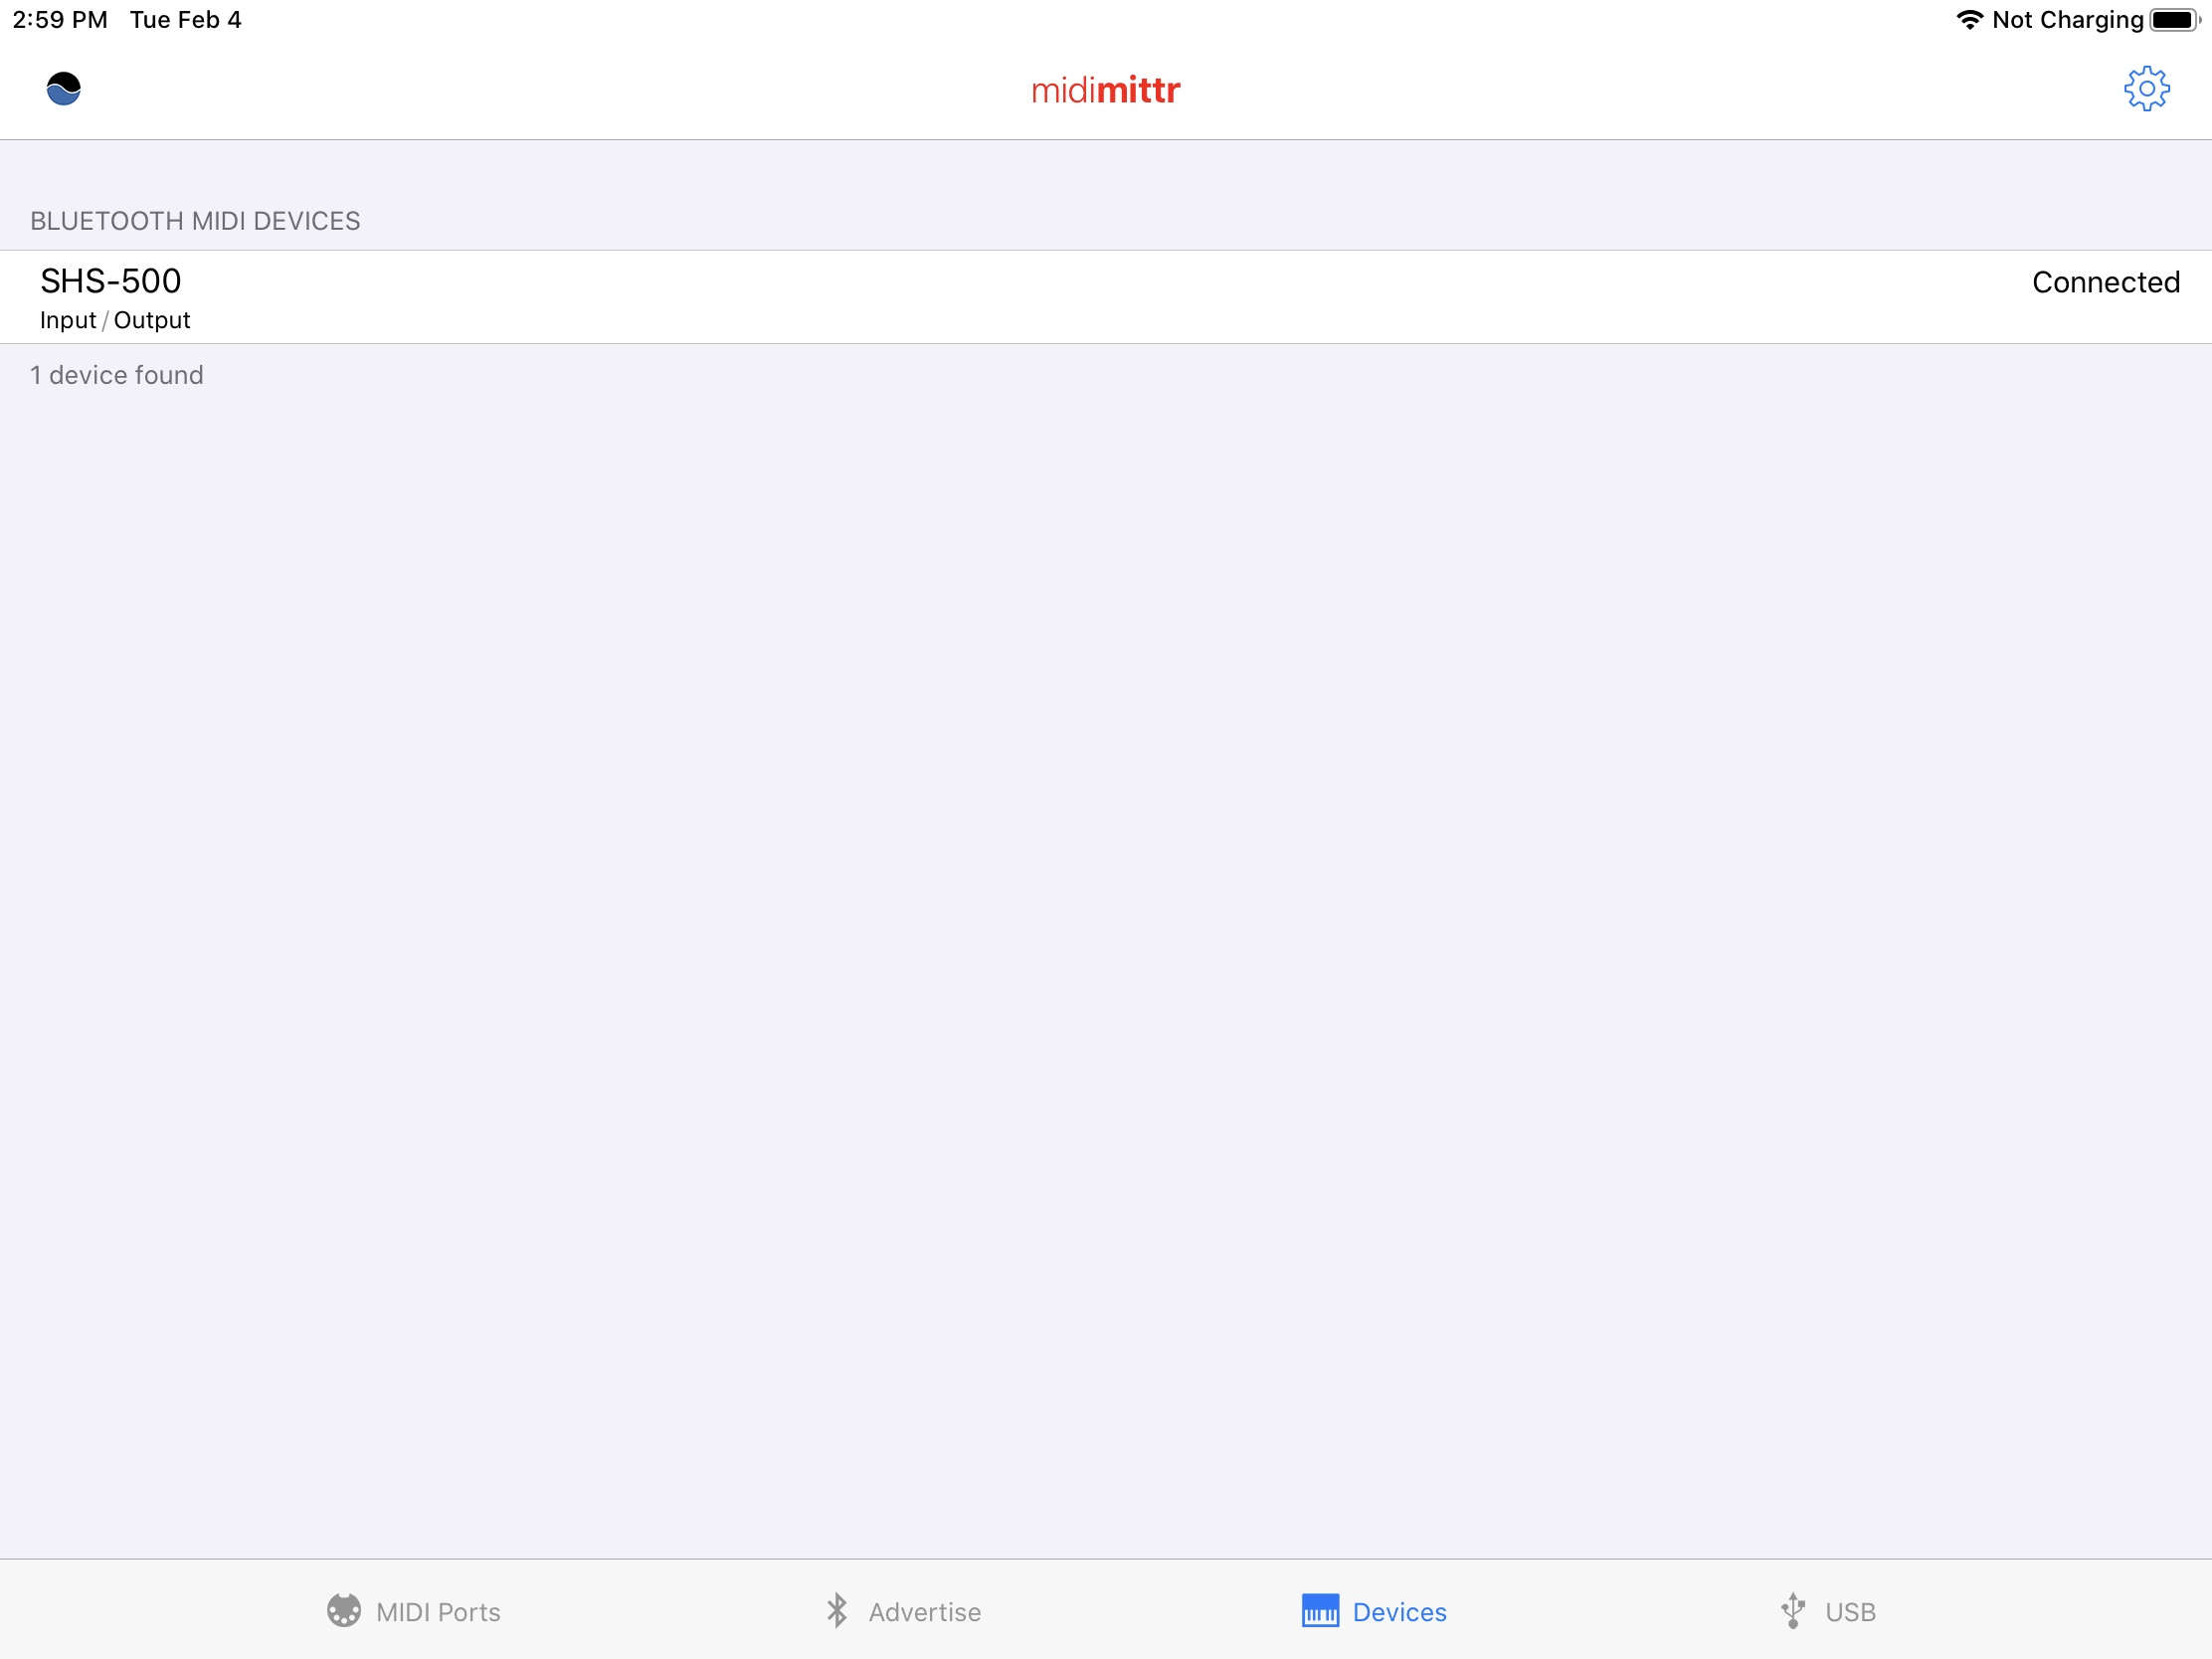
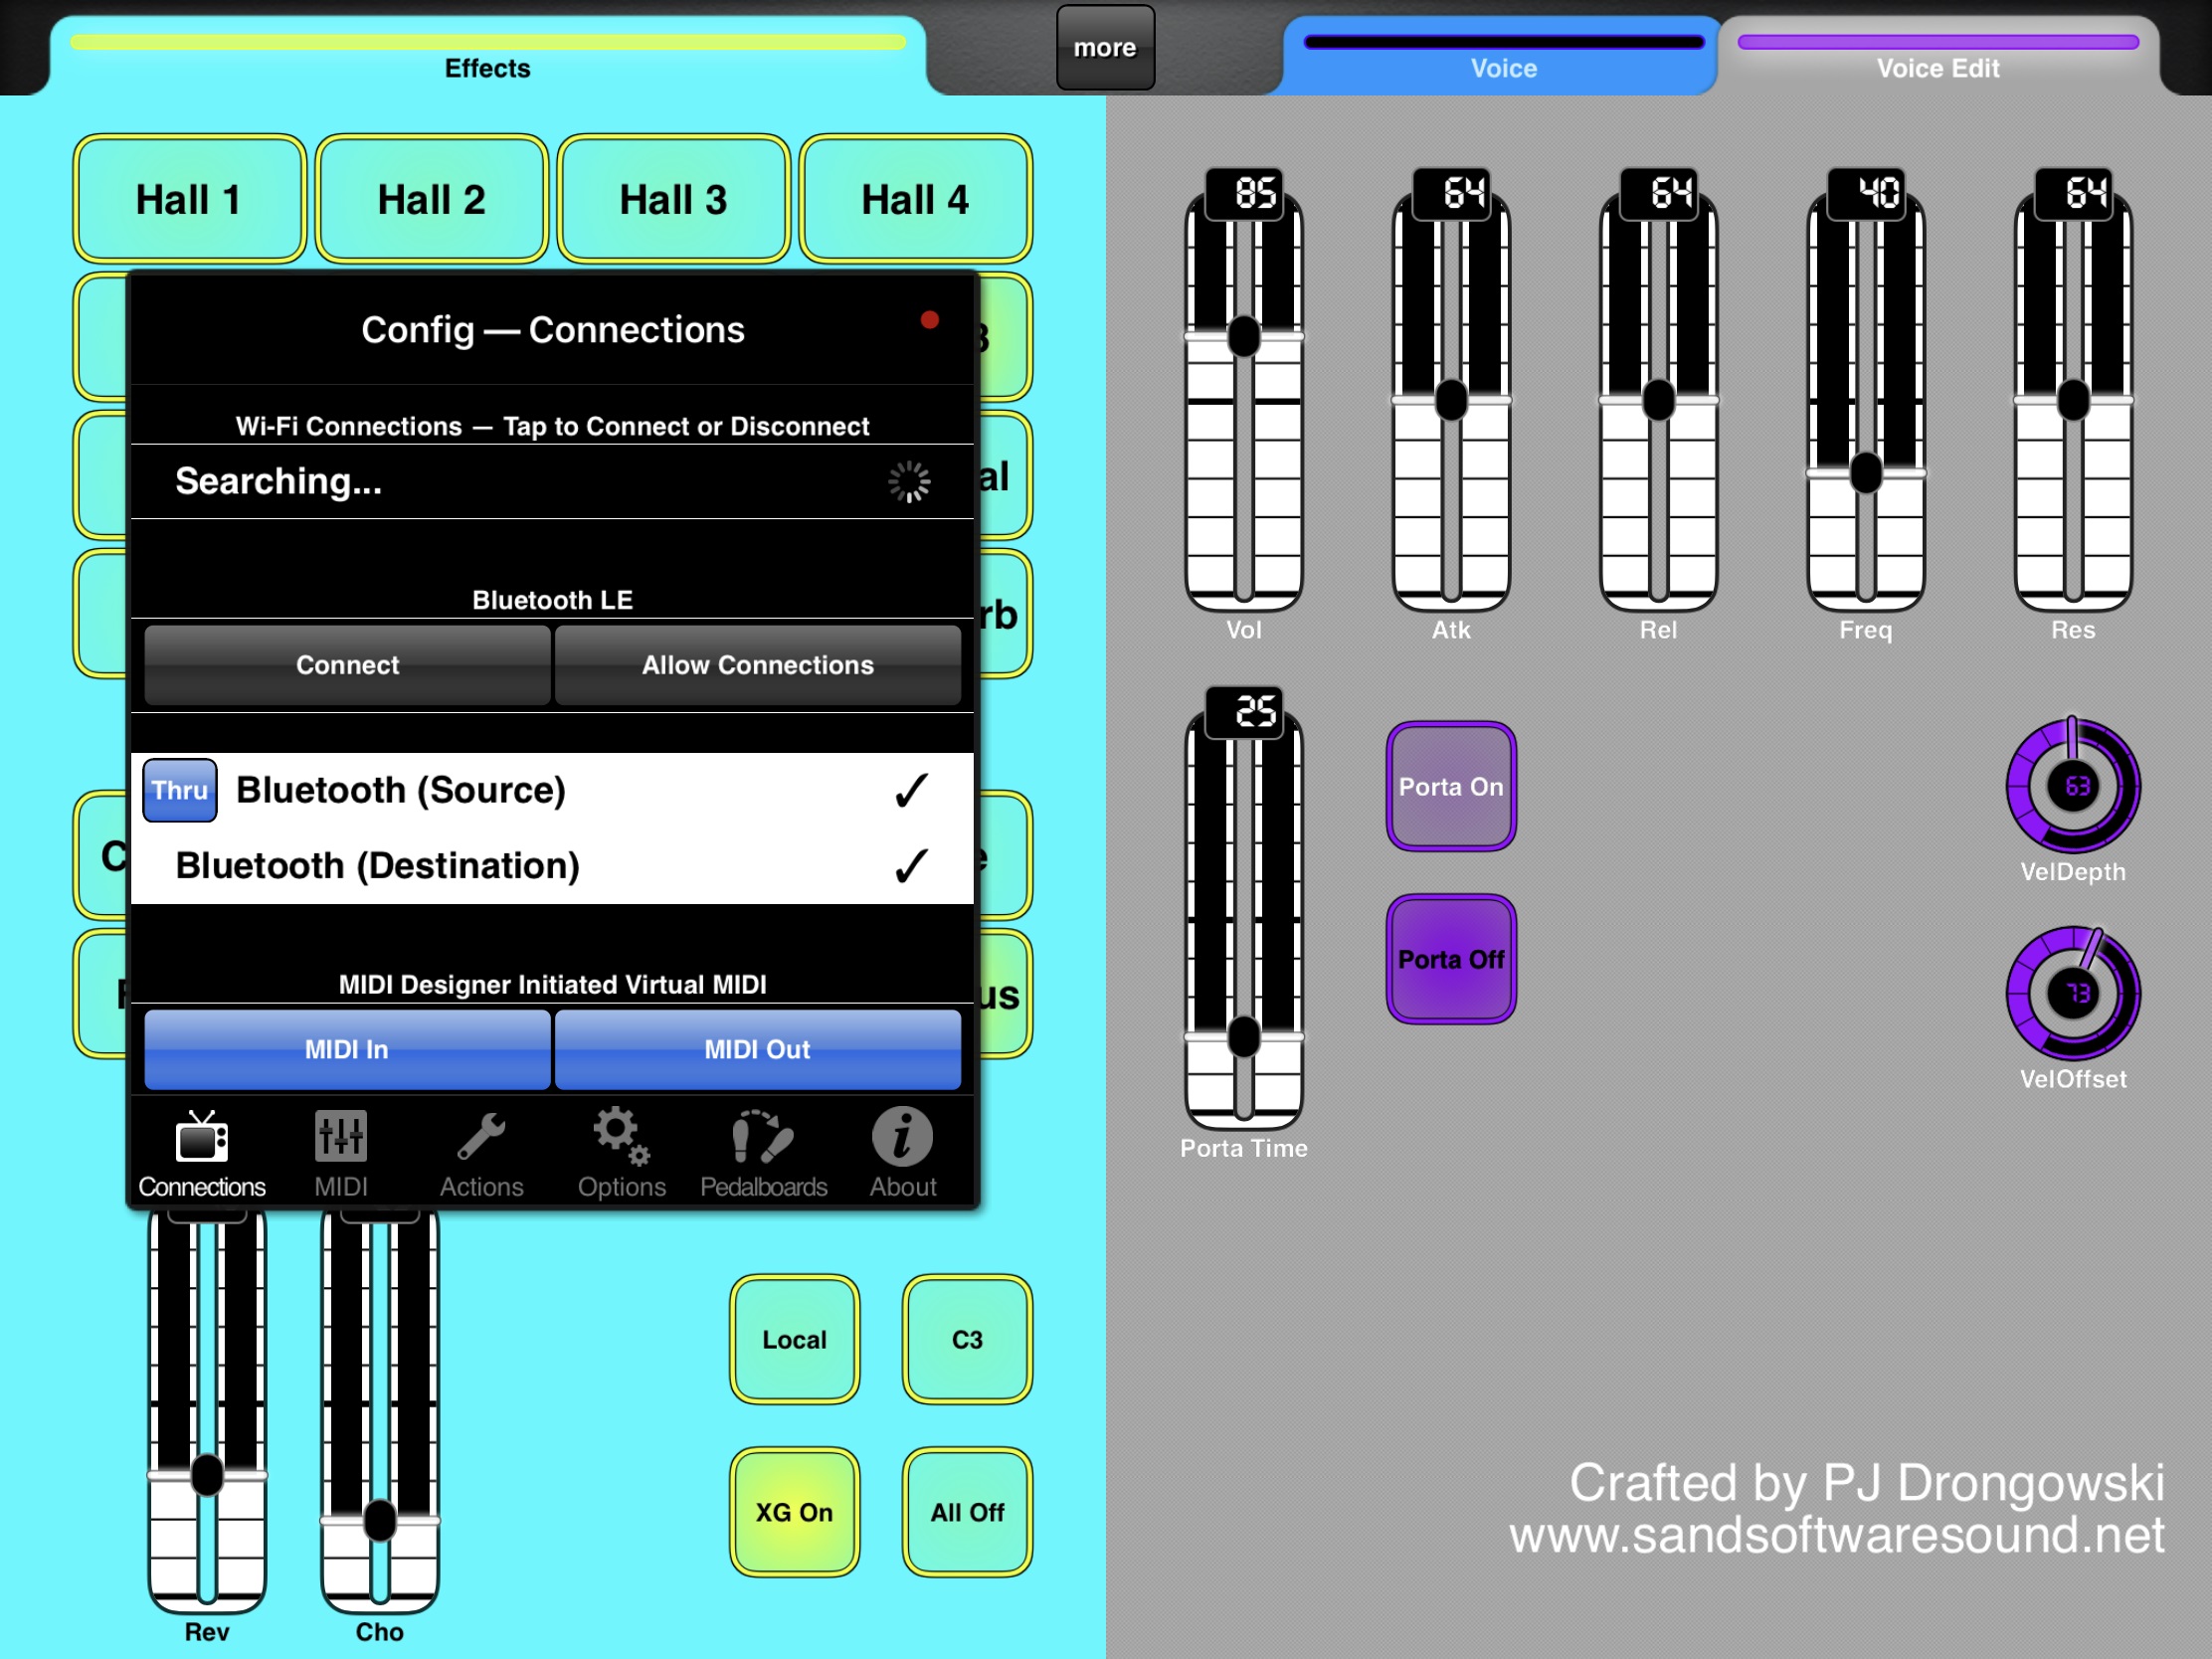
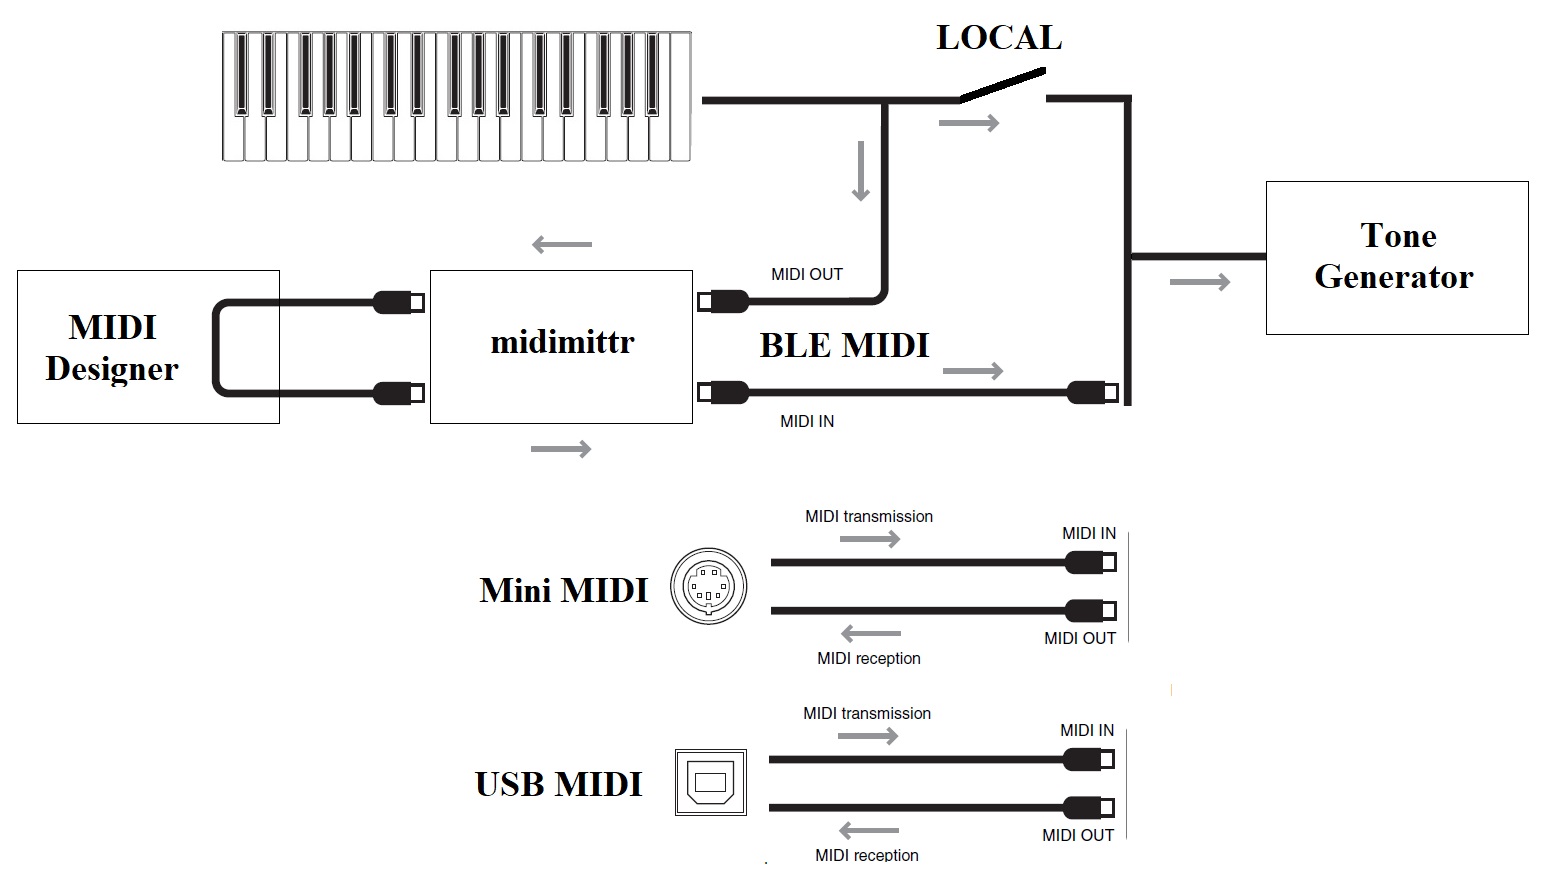
Overll, there are enough messages to be dangerous! I already have a prototype patch editor constructed in MIDI Designer. In addition to MIDI Designer, I’m running the free midimittr iPad app in order to send the Sonogenic’s note on, note off and modulation messages back to itself. midimittr merges the Sonogenic’s messages with the editing and control messages from MIDI Designer. No wires — it’s all transmitted over Bluetooth MIDI. Patches are stored and recalled using MIDI Designer presets.
So, I say, dive right in! The SHS-500 offers more than what’s document in the manuals.
Copyright © 2020 Paul J. Drongowski