
Whether it’s scientific papers or Web how-to’s, you would think that no one ever made a mistake or tried something and failed. The path to success is really crooked.
So, here is a blog post about an experiment that almost worked out.
I’ve been hoarding pipe organ samples for decades (literally). For example, some of my collected samples are from the venerable Yamaha TX16W. The TX16W samples are small enough to fit into the 1MByte expansion waveform of my TG-500. Yes, 1MByte. The 1GByte MODX expansion waveform memory looks positively enormous in comparison.
The scenario that I describe here creates a new waveform using nothing more than the Yamaha MODX user interface (UI). Back in the day, I created voices through the TG-500’s 24×2 line character display. The MODX UI is heaven in comparison. Yeah, I’m going to give Sample Robot for Montage a spin eventually. Not today.
Where to start? I started with the free “CMS Classic Organ” samples distributed by CSM Sounddesign. Thank goodness I picked up a little German years ago because the English CMS pages are under construction…
The samples are part of the “CMS Classic Organ” expansion pack (PPF) for Yamaha Genos™ — not the typical place where one would start. The samples are relatively small, the demos sounded OK, and the price was right. Four steps are needed to extract the samples:
- Find the sample files and the UVF (XML) voice description files in the Yamaha Expansion Manager pack database.
- Extract keybank information from the UVF file.
- Rename the sample files to meaningful names, e.g., “Plein_kb0_C1.raw”.
- Convert the sample files to Microsoft WAV format.
Admittedly, this is more work than the average Jane or Joe would do. But, hey, this is a learning exercise, plus a chance to dink around with Genos stuff, too.
The next preparation step is important no matter how you obtain your sample files. Make a table summarizing the keybank information:
KB#  Low High  Center  Size  LoopStart LoopEnd  WAV file
---  --- ----  ------  ----- --------- ------- ------------------
 0   C-2  D#1    C1    27627     25594   27623 Plein_kb0_C1.wav
 1    E1   B1    E1    31332     29717   31328 Plein_kb1_E1.wav
 2    C2  D#2    C2    31816     31136   31812 Plein_kb2_C2.wav
 3    E2   G2    E2    25030     24757   25026 Plein_kb3_E2.wav
 4   G#2   B2   G#2    30869     30652   30865 Plein_kb4_G#2.wav
 5    C3  D#3    C3    30744     30571   30740 Plein_kb5_C3.wav
 6    E3   G3    E3    24084     23812   24080 Plein_kb6_E3.wav
 7   G#3   B3   G#3    17917     15783   17913 Plein_kb7_G#3.wav
 8    C4  D#4    C4    20514     20172   20510 Plein_kb8_C4.wav
 9    E4   G4    E4    22128     21655   22124 Plein_kb9_CE4.wav
10   G#4   B4   G#4    24853     24424   24849 Plein_kb10_G#4.wav
11    C5  D#5    C5    26788     26615   26784 Plein_kb11_C5.wav
12    E5   G8    E5    27574     27368   27570 Plein_kb12_E5.wav
You’re gonna need this. Trust me, once you get into the guts of waveform construction, you don’t want to be puzzling out the center note, etc. The CMS samples are 41000Hz, 16-bit, mono, LINEAR16.
MODX needs looped samples. I’ve run into this issue before when creating PSR/Genos voices via Yamaha Expansion Manager (YEM). You would think that loop point data is standard in WAV. It isn’t. Good old Yamaha Tiny Wave Editor (TWE) worked for PSR/Genos, so I reached for TWE. Fortunately, TWE let’s you enter loop points numerically and I entered the loop start and end points extracted from the UVF file. [Not so crazy as I may seem after all.]
I transfered the looped sample files to a USB flash drive and inserted the flash drive into the MODX. I brought up a simple existing pipe organ Performance, Church Organ, which has two voice elements. I silenced the second element since it won’t be needed. Select the first element. Take a deep breath and touch the New Waveform button.
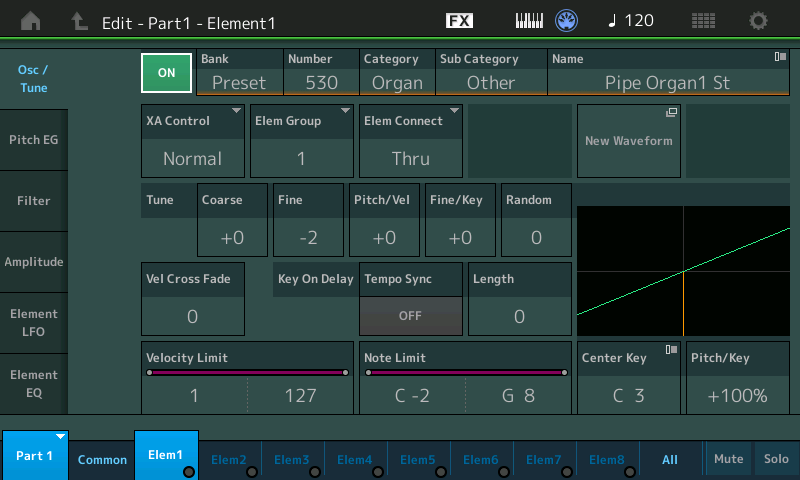
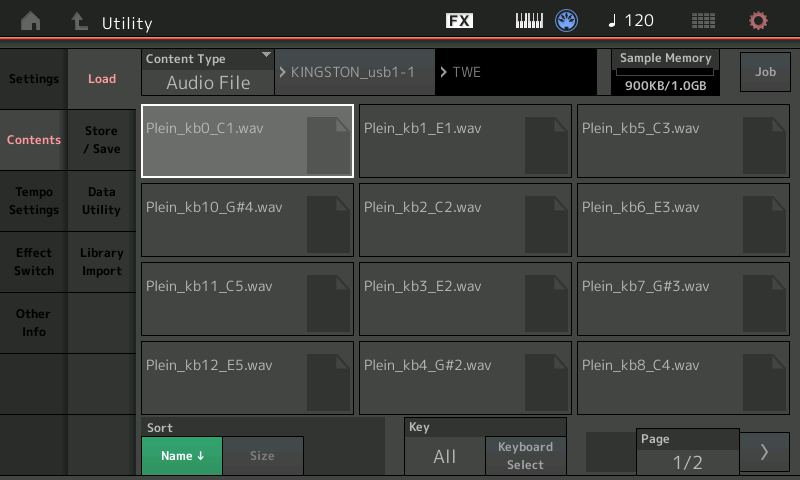
MODX displays a screen allowing you to select and load the WAV file for the first keybank. As you can see in the screenshot, you can easily get into the weeds if you haven’t come prepared with a table like the one shown above. [Click images to enlarge.]
After loading the correct file, MODX displays the keybank editing screen. Now, it’s time to enter the key range and center note information from the first row in the table. Then, touch Add Keybank, rinse and repeat twelve more times. If you make a mistake, touch the Keybank number field and scroll the existing keybanks. When all looks correct, press the EXIT button.
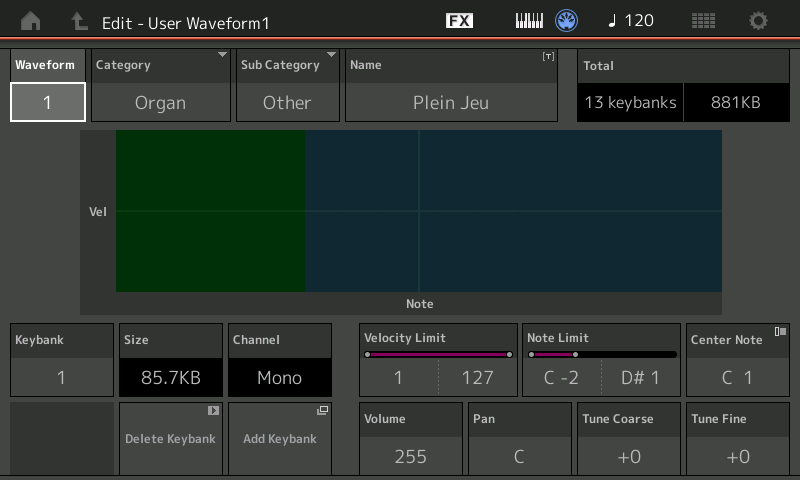
When MODX creates the waveform, it gives the new waveform the same name as the first sample file. I recommend renaming the waveform and specifying the waveform Category and Subcategory using the appropriate fields. I named the waveform “Plein Jeu,” the French name for an organ registration consisting of principal pipes. Good naming and data management will eventually pay off.
OK, so what went wrong?
- In my quest for CMS samples, I extracted voice information for a few other voices. Then, stupidly, when entering keybank information, I started with the wrong freakin’ table. I quickly realized my mistake because the center note information and what I was hearing were whack. Thank goodness for the ability to scroll through keybanks.
- The CMS loops are très short. Short pipe organ loops lose all of the nice shifting harmonic stuff that we hear from the real deal.
- The split points between keybanks are sonically rocky. This may be due to the unorthodox key layout. The center note is supposed to be the middle of the key range, not the lowest note in a range. Layout can be fixed and uneven levels can be fixed. But, I hear differences in basic tonality, too. Not good, not fixable.
- The organ voice plays back too quietly even with all of the levels max’ed out. I forgot to normalize the samples.
Lack of normalization I can fix. TWE (or any other DAW) performs normalization. The short loops, however, are a deal breaker and further effort with the CMS pipe organ samples is not worth it. I’ve got better candidates in the treasure hoard.
Throw the first pancake away
When you flop on your kiester, what do you do next?
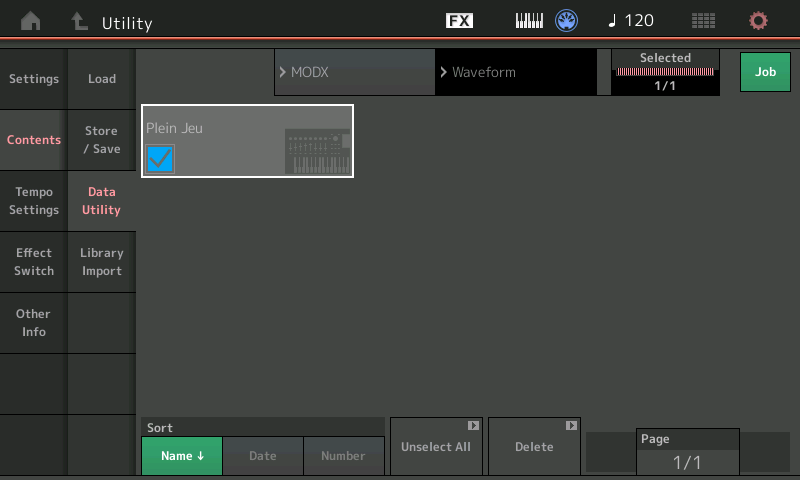
In this case, delete the waveform. Press the UTILITY front panel button and touch the Waveform folder.
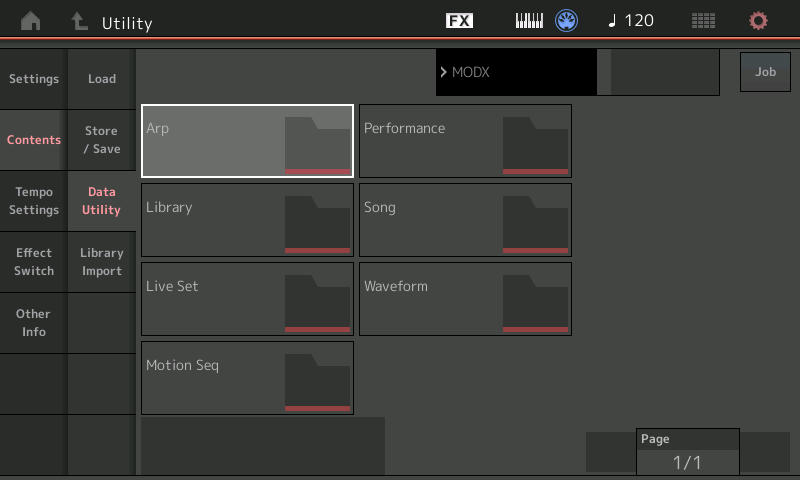
MODX displays the waveforms that you’ve created. In this example, it shows the “Plein Jeu” waveform. Touch the on-screen Job button and select the waveform to be deleted. Then, touch the Delete button.
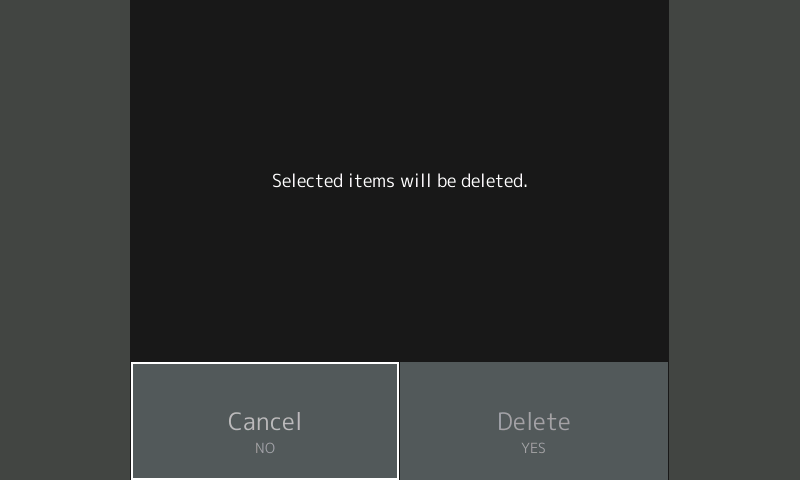
MODX display a dialog box requesting confirmation. Touch Delete and wait for the delete operation to complete.
When it’s gone, it’s gone. If you edit the parent Performance, the waveform field is empty.
Now, let’s try this again with feeling. Or at least, normalized waveforms. 🙂 Stay tuned.
Copyright © 2018 Paul J. Drongowski