
Success with the RTL-SDR Blog V3 software defined radio (SDR) inspired me to try SDR on Raspberry Pi. I pulled out the old Raspberry Pi 2, updated to the latest Raspberry Pi OS (Buster), and installed CubicSDR and GQRX.
Both CubicSDR and GQRX ran, but performance was unacceptably slow. Audio kept breaking up, possibly due to a small audio buffer and/or insufficient CPU cycles. The poor old Raspberry Pi 2 Model B (v1.1) is a 900MHz Broadcom BCM2836 SoC, a quad-core 32-bit ARM Cortex-A7 processor. The RPi 2 has 1GB of RAM. If you would like to know more about its internals, please read about the BCM2835 micro-architecture and performance analysis with PERF (Performance Events for Linux).
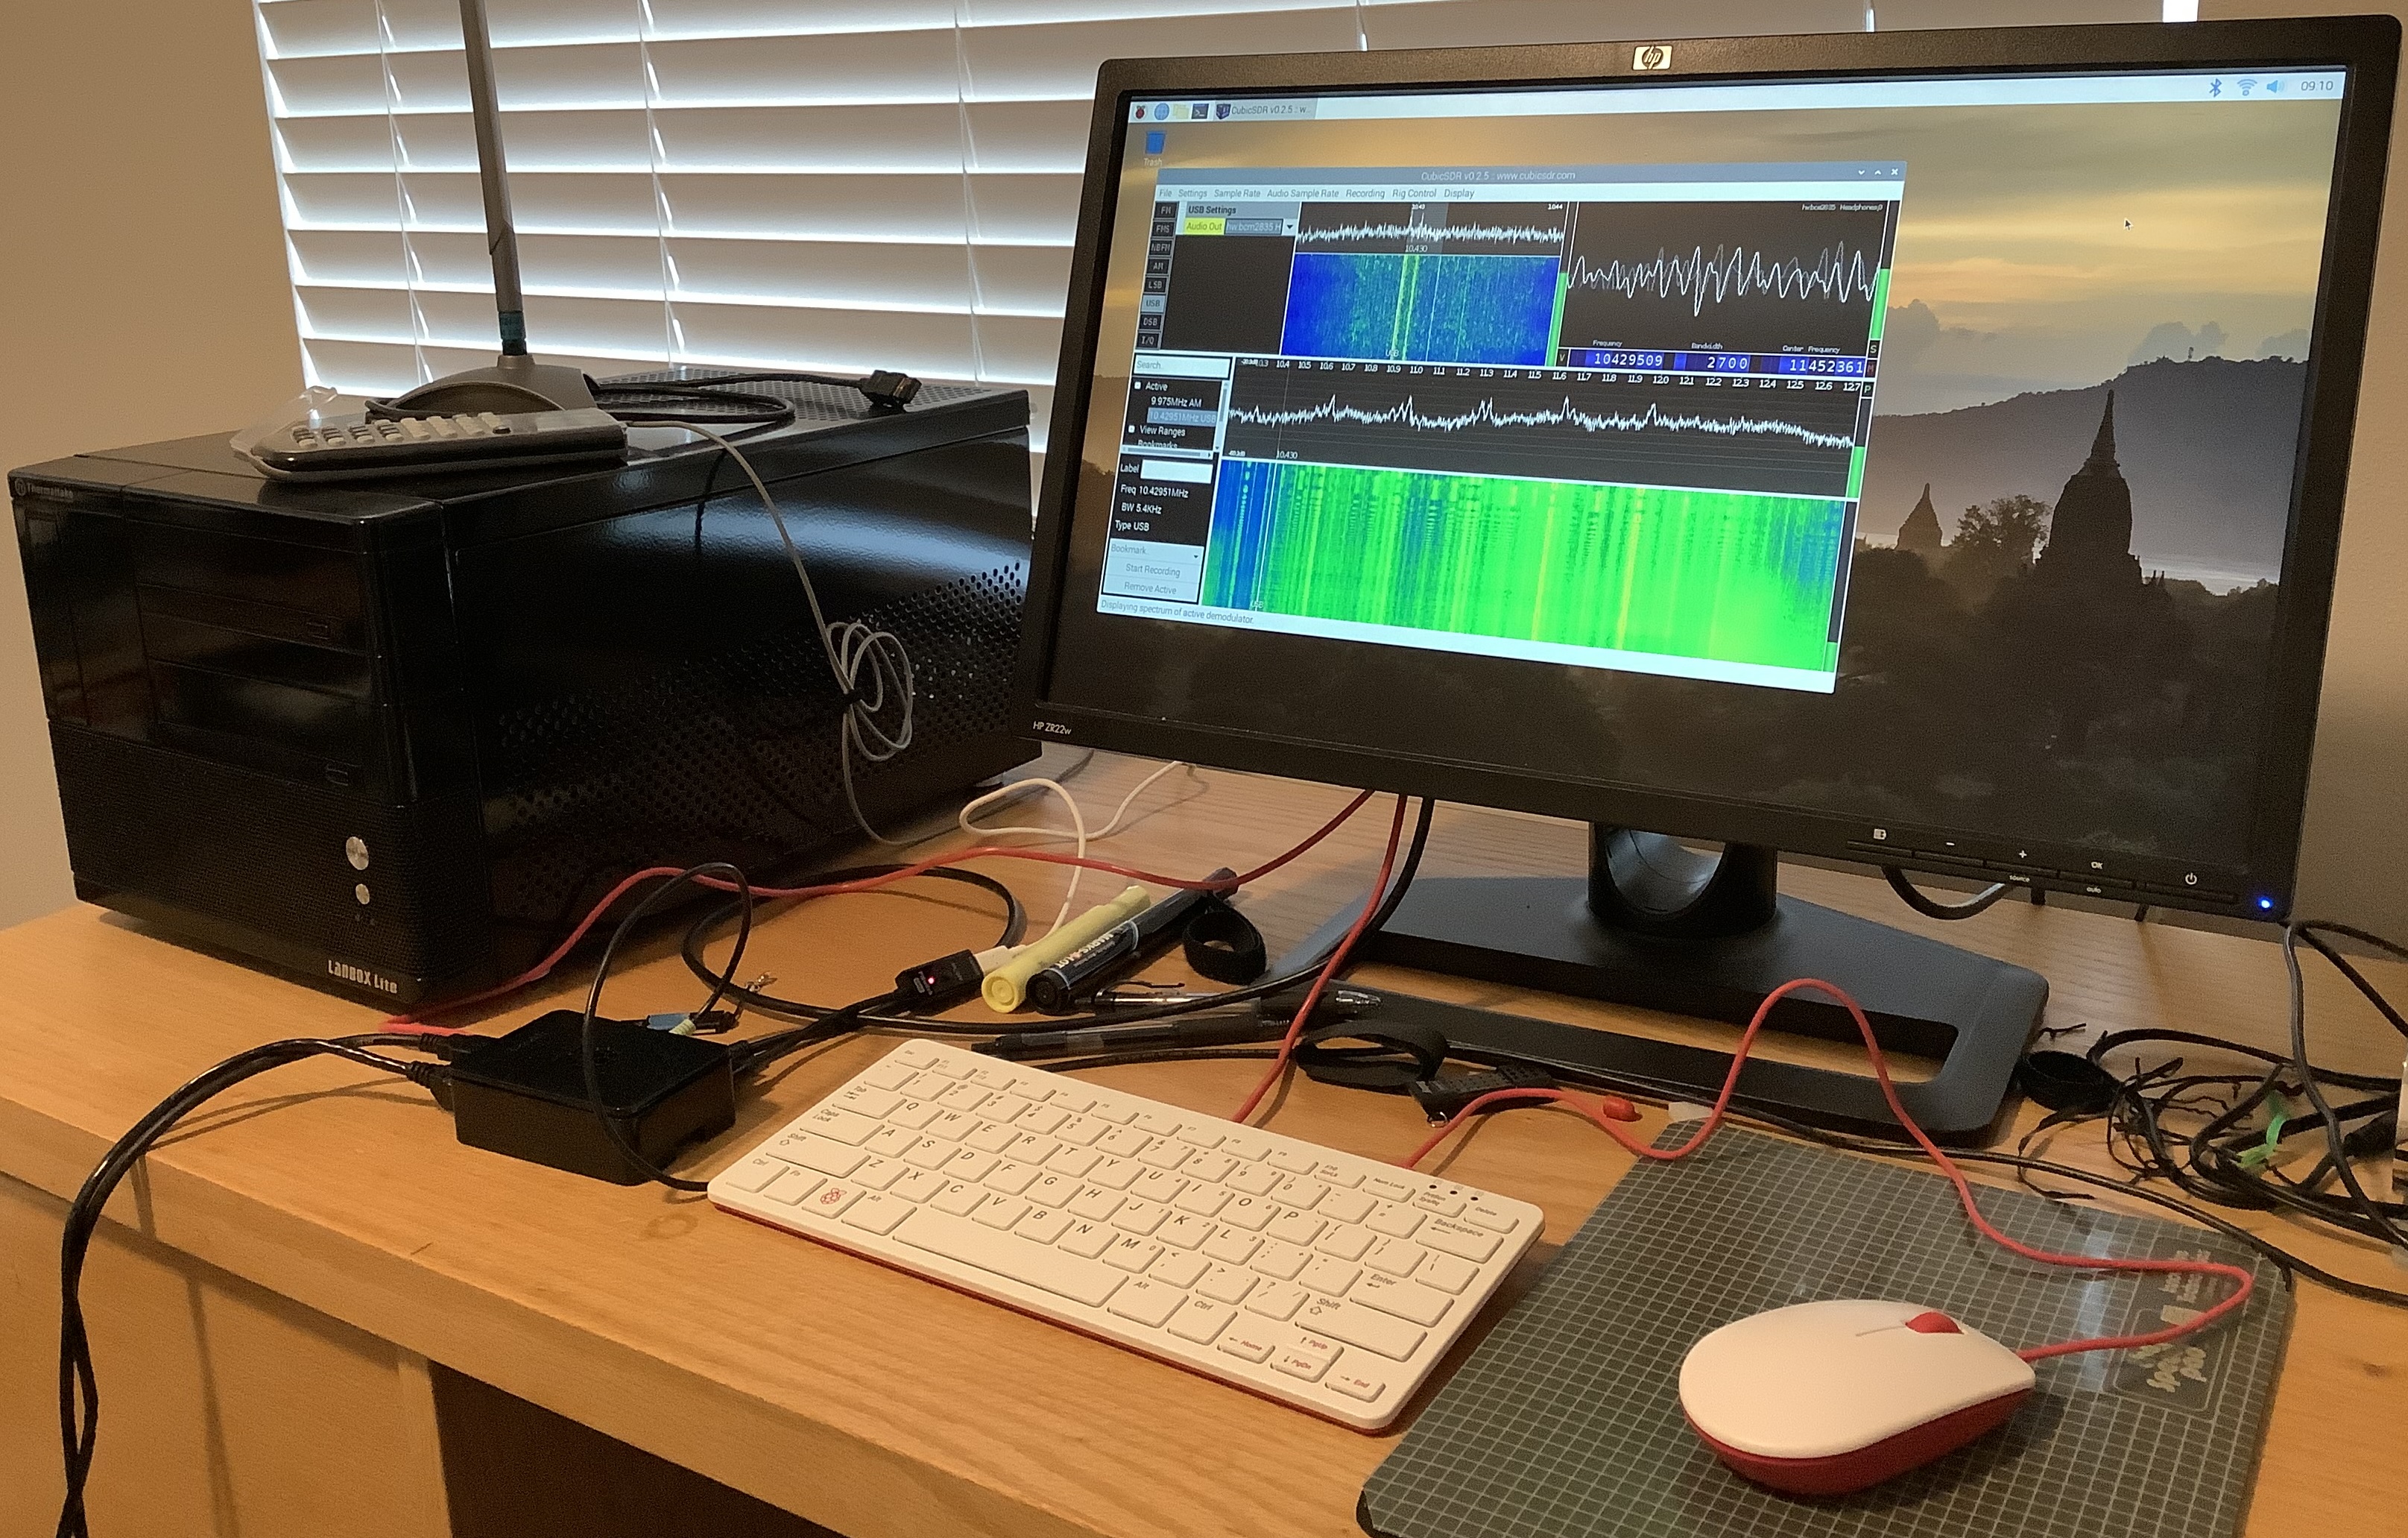
Time to upgrade! I had been meaning to retire the Black Hulk — a 2011 vintage power-sucking LANbox with a Greyhound-era dual-core AMD processor. Upgrading gives me the opportunity to try the latest Raspberry Pi 4 and gain a lot of desktop space. The image below shows my office work space including the Black Hulk and the intsy RPi 4.
I decided to accessorize a little and purchased a Raspberry Pi branded keyboard and mouse. The Raspberry Pi keyboard is a small chiclet keyboard with an internal hub. The internal hub is a welcome addition and postpones the need for an external USB hub. The keyboard has a decent enough feel. It is smaller than the Logitech which it replaces, giving me more desktop space albeit with a slightly cramped hand feel. The Raspberry Pi mouse is just OK. I like the splash of color, too, a nice break from boring black and grey.
Raspberry Pi 4 is faster without question. The desktop and web browser are snappier. RPi 4 boosts the Ethernet port to 1000 BaseT (Gigabit) and you can see it.
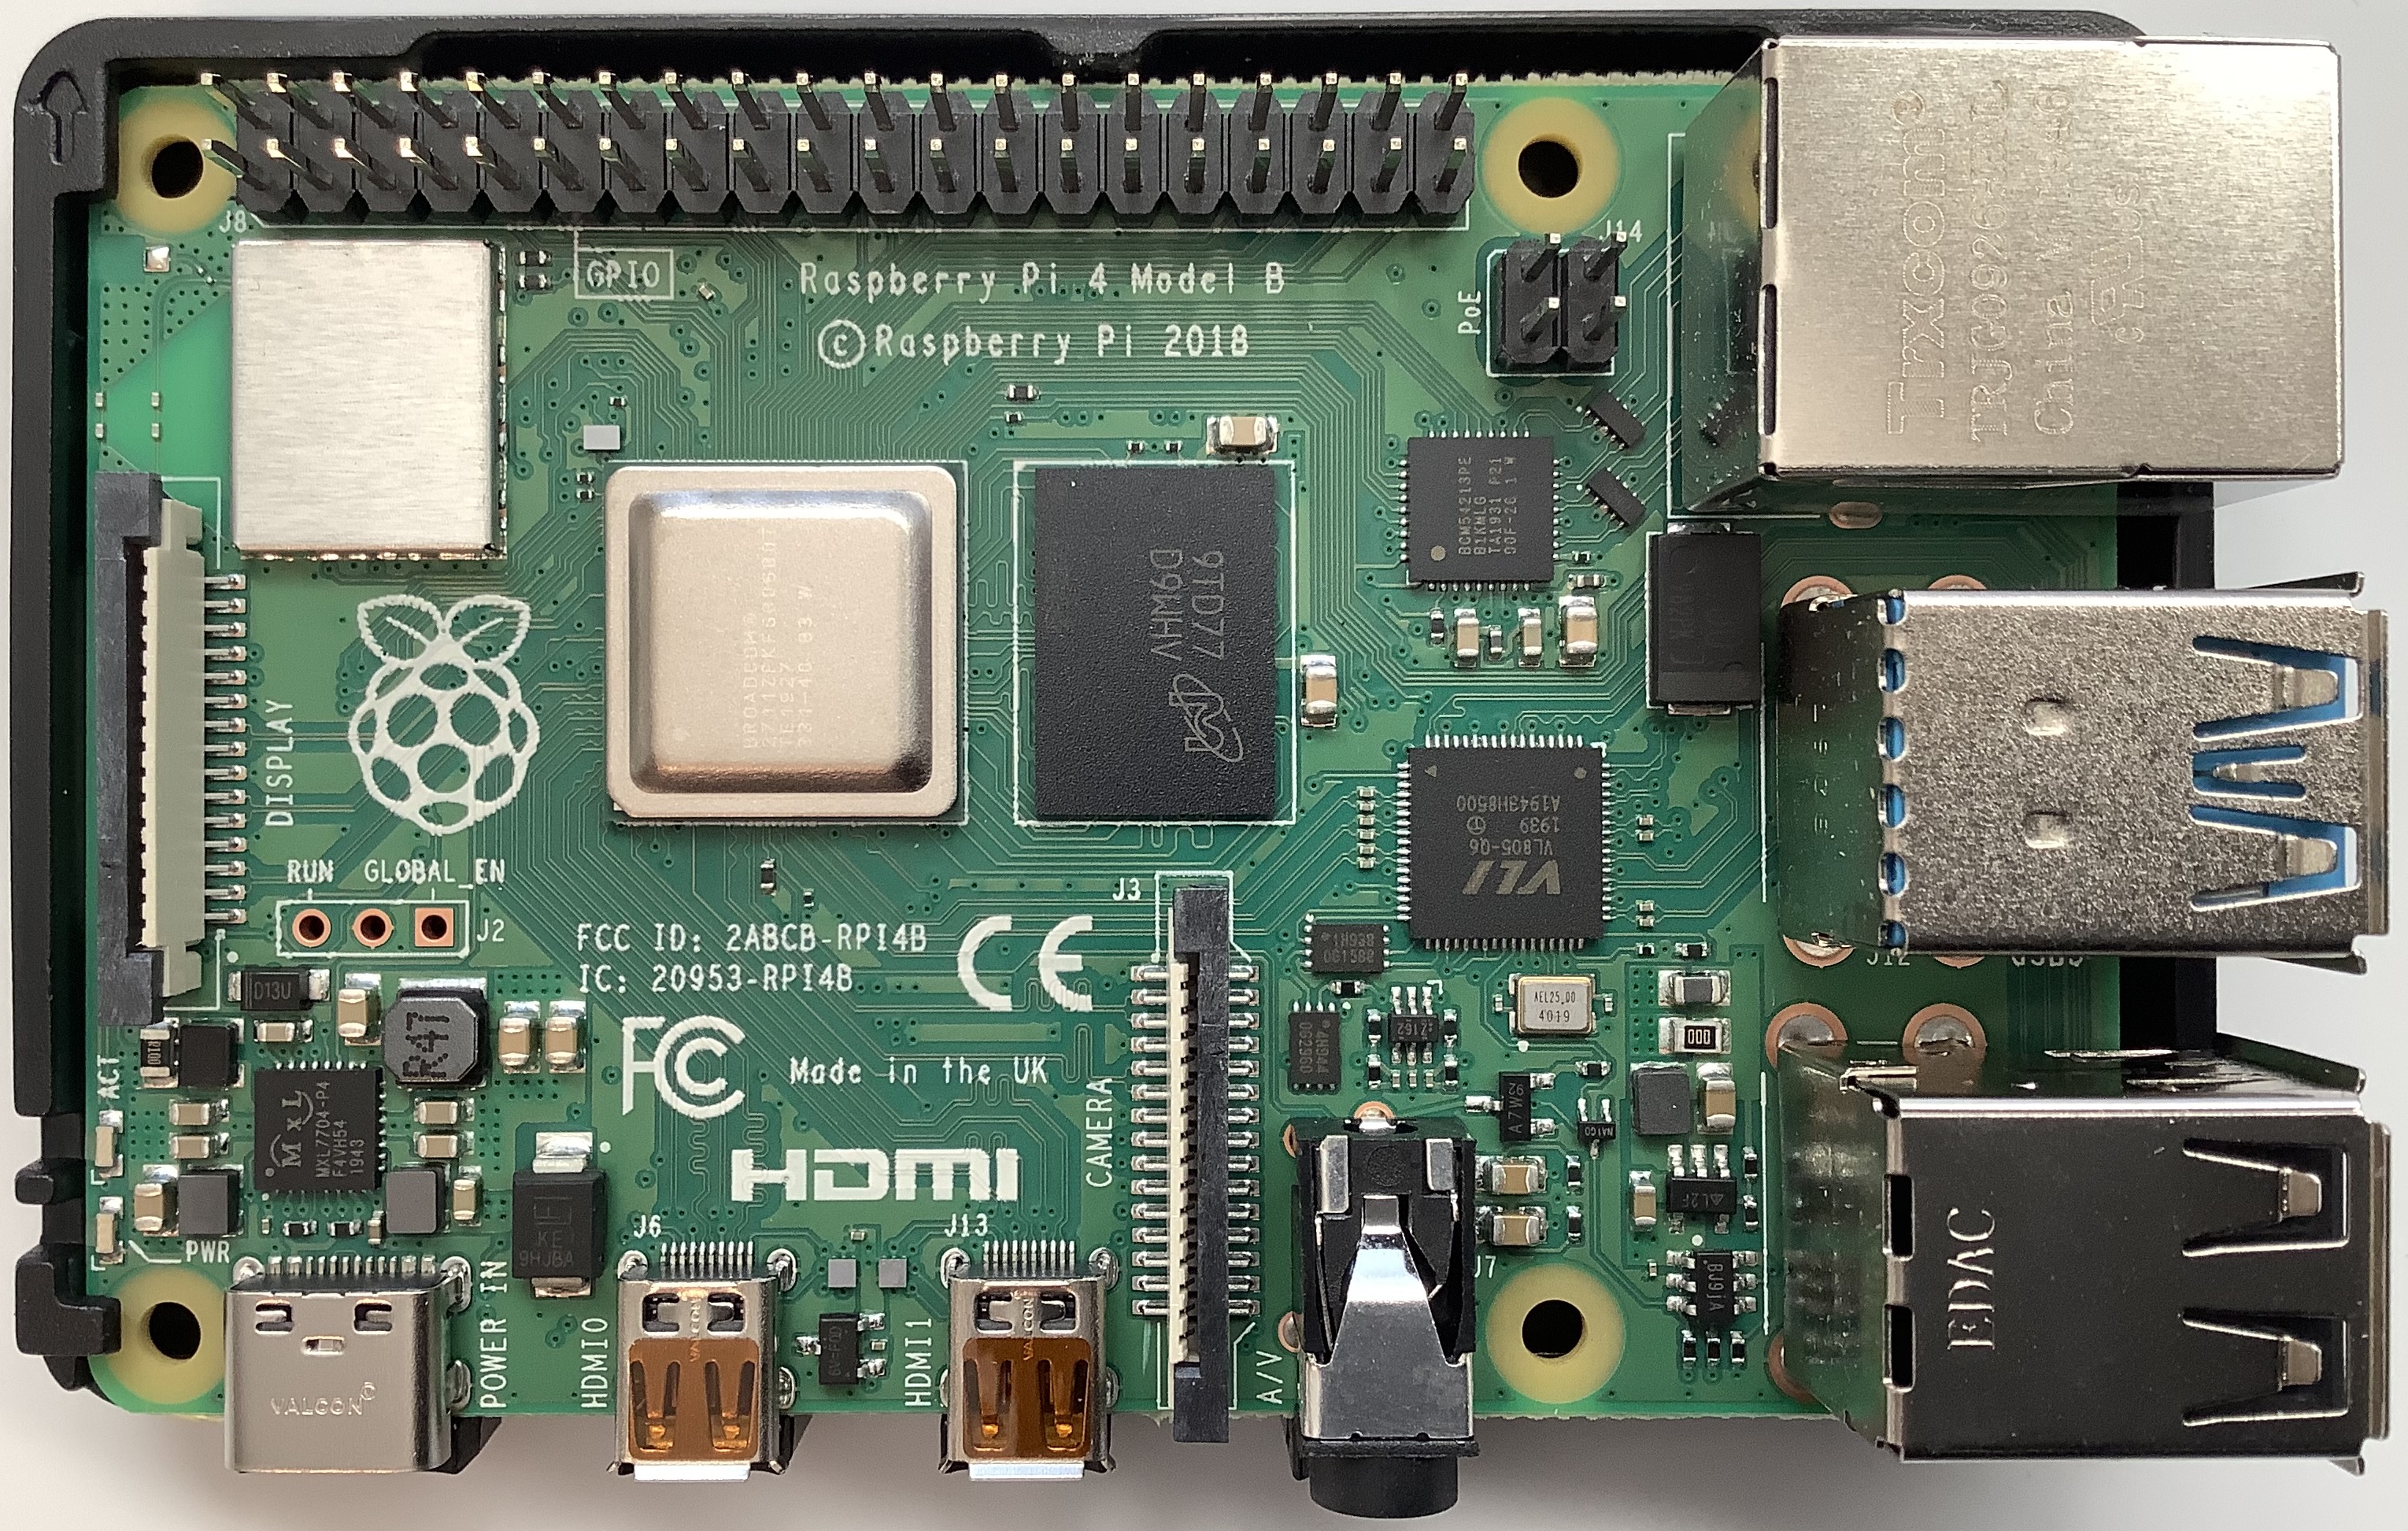
The Raspberry Pi 4 is a 1.5GHz Broadcom BCM2711, a quad-core 64-bit ARM Cortex-A72 processor. I ran an old naive matrix multiplication program and it finished in 0.6 second versus 2.6 seconds on the Raspberry Pi 2. Naturally, I’m curious about the speed-up. I hope to dig into the BCM2711 micro-architecture.
I recommend upgrading to Raspberry Pi 4 without hesitation or reservations. I bought the Canakit PI4 Starter PRO Kit at Best Buy, not wanting to wait for delivery. The kit includes an RPi 4 with 4GB RAM, black plastic case, Canakit power supply, heat sinks, cooling fan, micro HDMI cable, USB card reader, NOOBS on a 32GB MicroSD card, and a Canakit power switch (PiSwitch). It seemed like the right combination of accessories.
By the way, you might want to consider the newly announced Raspberry Pi 400. It integrates a Raspberry Pi 4 and keyboard into one very compact unit. Its price ($70USD) is hard to beat, too.
The PiSwitch sits between the USB-C power supply and the RPi4, and is a convenient desktop power ON/OFF switch. Canakit could be a little more forthcoming about proper power up and power down sequencing. When powering down, I let the monitor go to sleep before turning power off. This should give the Raspberry Pi OS time to sync and properly shut-off.
I recommend checking the connecters on your monitor before placing any kind of web order. My HP monitor does not support HDMI, doing DisplayPort, DVI-D and VGA. The Canakit cable is micro-HDMI to HDMI. I bought a mini-HDMI to DVI-D cable on-line and wound up waiting after all! No way I’m paying Best Buy prices for a cable. 🙂
Assembly is a piece of cake. The processor and case fit together without screws or other hardware. The case fit and finish is good and holds together well just by fit alone. I installed the heat sinks, but not the fan. If I run into thermal issues, I will add the fan.
I didn’t bother with the NOOBS MicroSD card as I already had Buster installed. I see the value in NOOBS for beginners who don’t want to deal with disk images and such. I will probably repurpose the NOOBS card.
The only annoyance is due to the Raspberry Pi OS package manager. The add/remove software interface shows waaaaay too much detail. I want to install CubicSDR and GQRX, but where the heck are they? Why do I have to sort through a zillion libraries, etc. when searching on “SDR”? I installed via command line apt-get — a far more convenient and direct method.
The higher processor speed and bigger RAM pay off — no more glitchy audio. After trying both CubicSDR and GQRX, I prefer CubicSDR. I didn’t have any issues configuring for HF reception in either case. You should read the documentation (!) ahead of time, however.
I hope this quick Raspberry Pi 4 rundown is helpful.
Copyright © 2020 Paul J. Drongowski