
Yesterday, we learned how to make a two voice layer and how to control one of the Parts using the Super Knob.
Today, I go over the steps to create a two Part split:
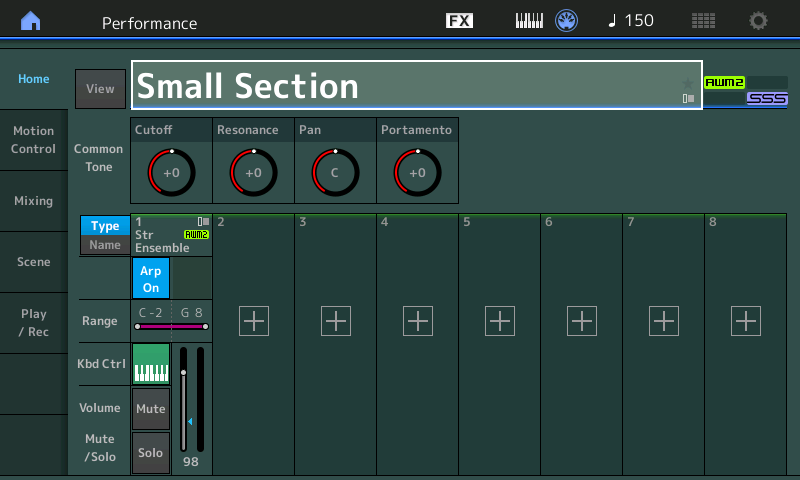
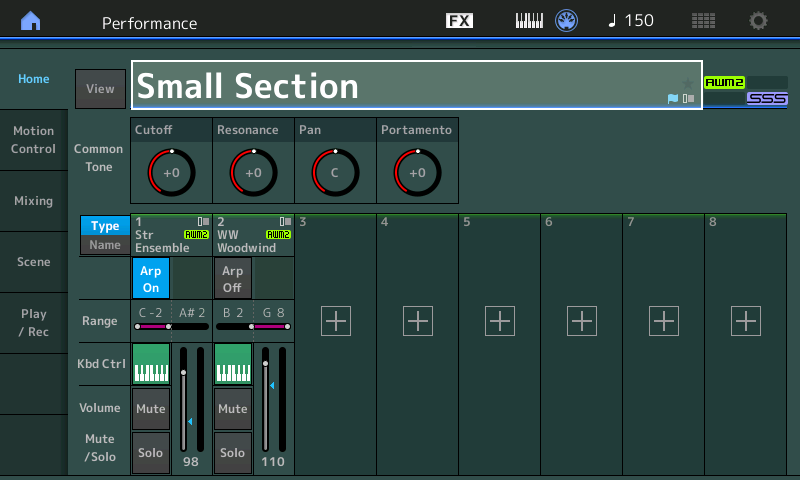
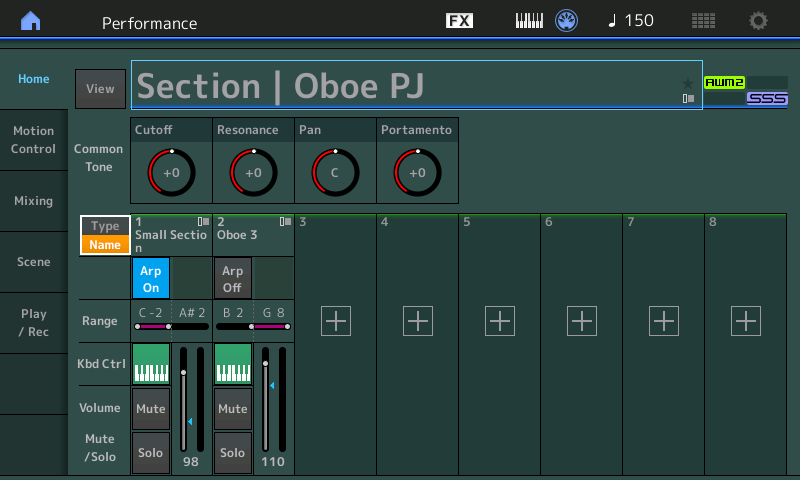
1. Press the CATEGORY button and find the Performance that will be used as the left hand voice. For this example, I chose a single-Part Performance, Small Section, from the Strings category. Press PERFORMANCE (HOME).
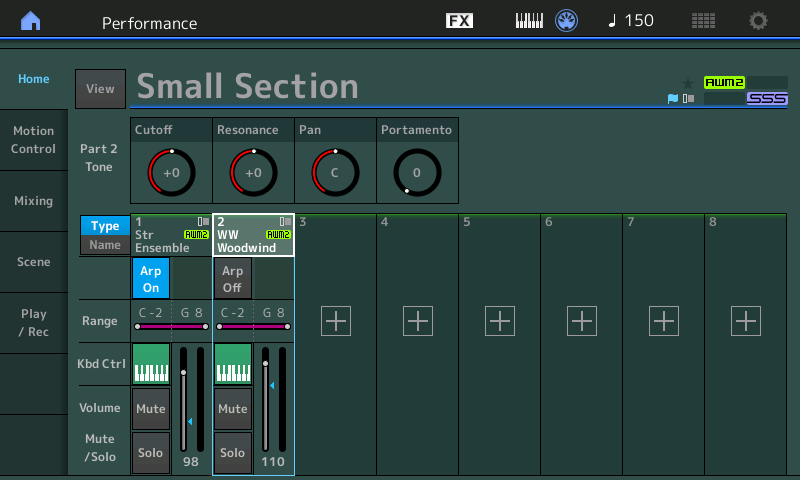
2. Touch the on-screen plus box button to add the second Part which will be used as the right hand voice. I chose Oboe 3 from the Woodwind category. Press ENTER to confirm your selection.
3. Now it’s time to set the split point. Touch the upper note limit in Part 1. MODX displays a contextual menu on the left-hand side of the screen. Touch the Keyboard menu item, which turns green when selected. Now, play the keyboard key which is the top-most key in the desired left hand zone. If you make a mistake, toch a different key. Press EXIT when finished.
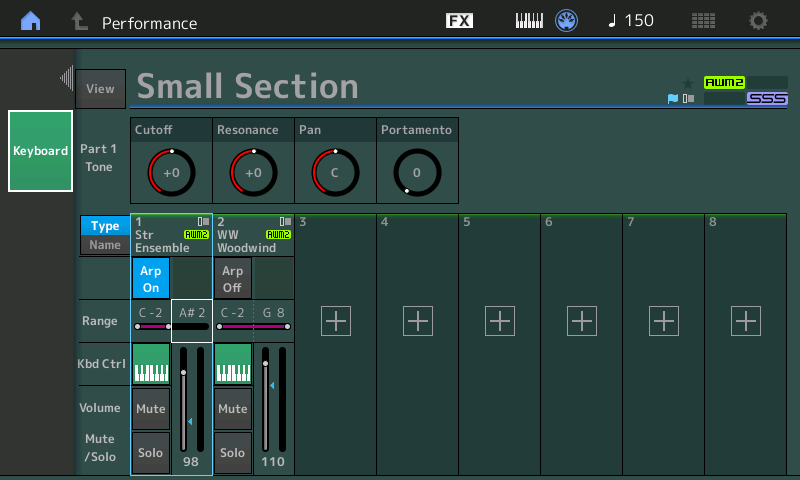
4. Notice that the upper note limit for Part 1 has been changed. The upper note limit in the example is A#2.
By the way, instead of touch the Keyboard menu item, you can set a note limit by spinning the data dial. It’s you choice.
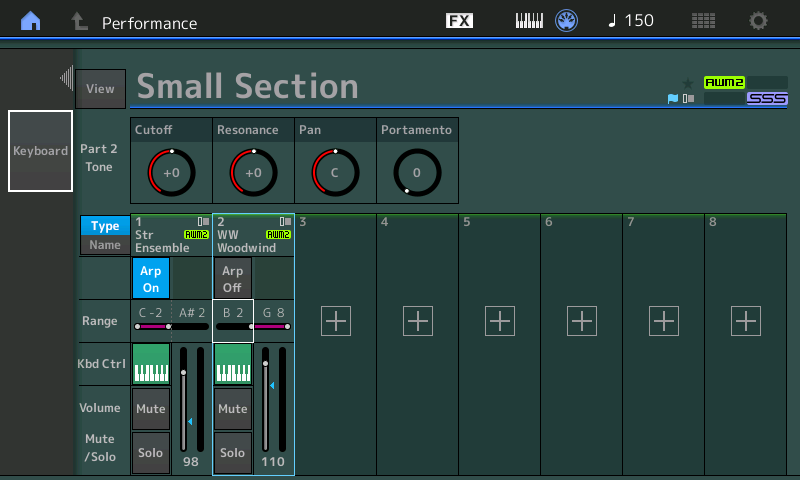
5. Now touch the lower note limit for Part 2. MODX, again, displays a contextual menu with one menu item, Keyboard. Touch the Keyboard item, turning it green (highlighted). Play the keyboard key which is the bottom-most key in the right hand zone (B2 in this example). Press exit when finished.
Play the finished Performance. You should hear the instrument change from Part 1 to Part 2 (or vice verse) as you play across the split point.
If you like the result, press the STORE button and save your new Performance.
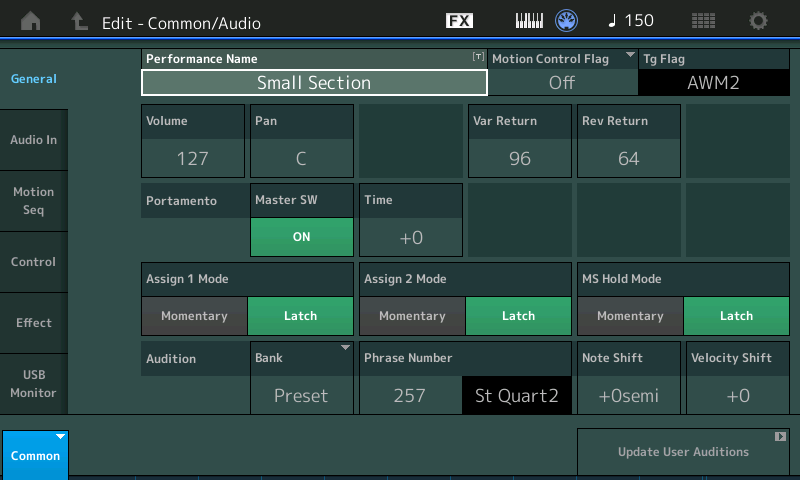
While we’re here, let’s change the reverb algorithm. The system-level reverb parameters belong to the Performance as a whole. Thus, we need to make changes in Performance edit mode.
1. Touch the Performance name to select the entire Performance. MODX highlights the box around the Performance name to indicate that the Performane is selected.
2. Press the EDIT front panel button. You should see “Edit – Common/Audio” in the upper left corner of the screen. When you see this, you’re in Performance edit mode.
3. MODX displays six tabs starting with “General,” “Audio In,” etc. Touch the Effect button. MODX displays the effect routing. The diagram is an overview of the system-level effects. If you start with the same example voices, the reverb algorithm is R3 Hall.
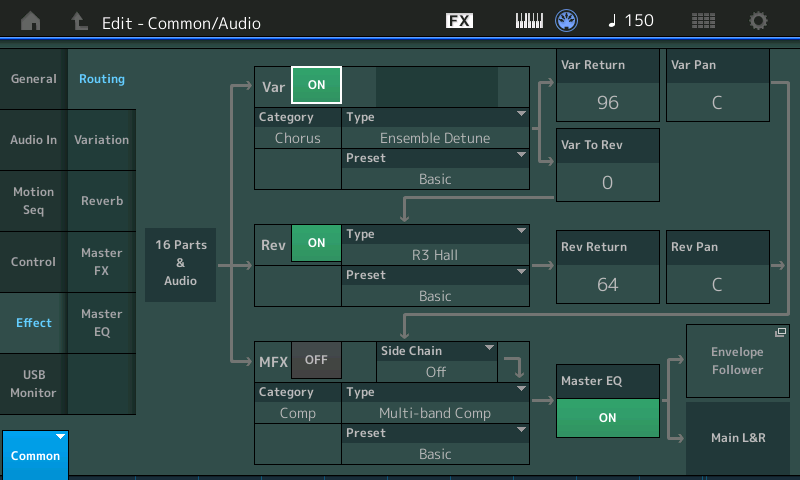
4. Touch the Reverb tab in the second column. MODX displays the chosen effect algorithm and the effect parameters.
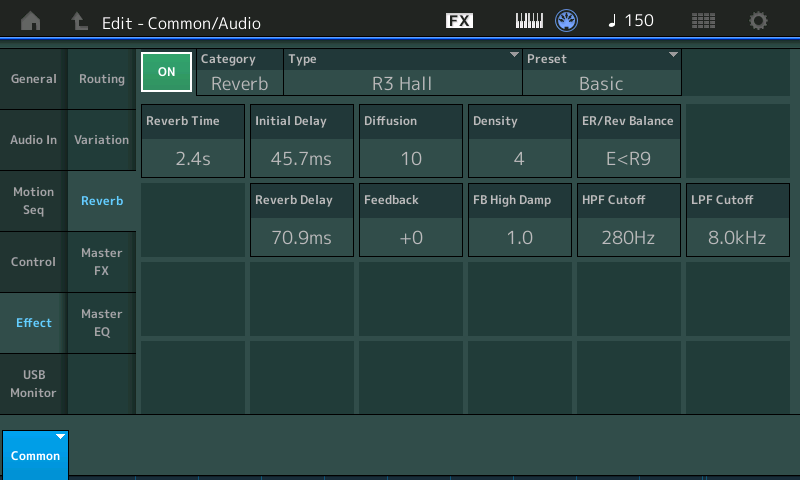
5. Touch the effect type box. MODX displays a menu of reverb algorithms. Touch HD Hall (or one of the other reverb types) to change the effect algorithm. Press the EXIT button to dismiss the menu.
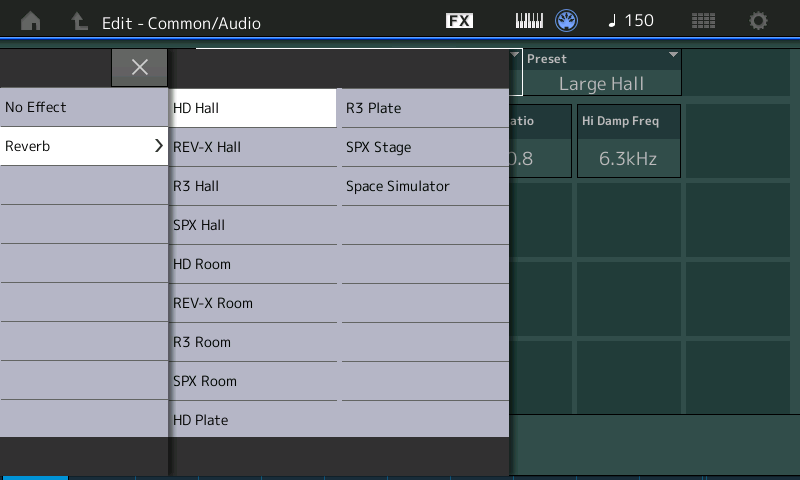
6. MODX updates the display with the newly selected reverb type and its associated effect parameters. Try a different effect preset just for fun.
7. Press the front panel EXIT button to return to Performance play mode.
If you’re really ambitious, add a layer behind the left and right hand parts. Follow my last step-by-step tutorial and control the background layer using the Super Knob.
One or two final tips. Rename your new performances. I suggest adding one or two characters that identify the performance as one of yours versus the zillions of preset performances. (I use my initials, “PJ”.) I also recommend trying the on-screen “Type” and “Name” buttons just to the left of the Parts. These buttons choose the legend displayed at the top of each Part:
- Type (highlighted in blue): Performance type (e.g., “Str Ensemble”)
- Name (highlighted in yellow): Performance name (e.g., “Small Section:
Identifying information should help you keep the Part information mentally sorted. It’s easy to get confused when building a multi-Part Performance where every part is a woodwind (i.e., the same type).
With splits and layers, you’re ready to move mountains. 🙂
ICYMI: MODX screen capture
Like Montage, the MODX has a double-secret Easter egg for capturing screen shots.
- Insert a USB flash drive into the USB TO DEVICE port.
- Press and hold the A/D INPUT ON/OFF button.
- Press and release the AUDITION button.
- Release the A/D INPUT ON/OFF button.
The MODX writes screen shots to the USB flash drive with names such as “DSNAP_0.png”.
Here’s two tips. 1. To save wear and tear on the USB TO DEVICE port, I plug a short extender cable into the port and then plug the USB flash drive into the extender cable. The cable brings the port to a place where I can easily reach it and it reduces wear on the port connector. 2. The screen capture procedure doesn’t provide any visual indication that the capture was successful or complete. Use a USB flash drive with an activity LED (e.g., the Kingston Data Traveler Elite G2). You should see the drive’s LED flash when the PNG file is written. Naturally, do not remove the drive when it is active!
Copyright © 2018 Paul J. Drongowski