Genos2 pre-game

Gotta say upfront, I don’t have a horse in the race when it comes to Yamaha Genos2 (to be announced Wednesday). Montage M8x, on the other hand, really seized my attention because it potentially could fit a real need — an 88-key piano for home. All of the Montage M extras (AN-X, big sub display, and so forth) would be gravy on the biscuits. In the end, I placed an order for a Clavinova CSP-170. [Still waiting for delivery.]

I’m quite happy with Genos (generation 1) and will be keeping it. The FSX action is pleasant and, oh, the sounds! It’s set up to my taste and needs — no good reason to change horses.

Still, I’m a technologist and I’m anxious to see how Genos2 features point to the future.

Pianos and more pianos

The Genos (gen 1) acoustic piano voices have always left players wanting, especially when compared to Montage (gen 1) and MODX. Genos has been trapped by its XG synthesis and effects architecture. Voices are limited to 8 elements making 18 element CFX an unlikely creation.

Yamaha engineers found a way to break down the 8 element limit in Montage M. A single part now may have up to 128 elements. If Yamaha incorporates the same breakthrough in Genos2 (G2), deep, detailed acoustic piano voices are possible.

The first G2 teaser video features piano slathered in reverb. I don’t think that’s an accident. Given that the lowly Yamaha DGX-670 has a great sounding CFX, it’s time for G2 to get game.

Piano Room and Smart Pianist

What are new piano voices without Yamaha Piano Room? Piano Room is the place to tweeze and tweak piano sounds to your liking. Open the piano lid, adjust brightness, etc.

Along with Piano Room, we might see Smart Pianist support for Genos2. The tablet-based Smart Pianist app provides the capabilities of Piano Room — and more. You can select voices, change settings and save everything in registrations. On the CSP series, the player can select and control auto-accompaniment styles, too. Smart Pianist brings sophisticated audio-to-chord and audio-to-score capabilities, too. Audio-to-score goes beyond the free Chord Tracker app, converting chords into honest to goodness musical notation. The musician can play from a standard chart without needing to know chord theory.

If Yamaha adds Genos2 to Smart Pianist, Genos2 will be the first (true) arranger keyboard with Smart Pianist support. This is a big deal. First released in January 2018, Smart Pianist is now a central, strategic piece in Yamaha’s digital piano ecosystem. Adding Genos2 will cement Smart Pianists role for years to come.

Whither VRM? Virtual Resonance Modeling enhances relatively static digital piano tones with body and string resonance. VRM has been slowly trickling down from high-end Clavinovas to the portable digital piano line. Will Genos2 get VRM Lite or enhanced VRM? Stay tuned.

What’s this?

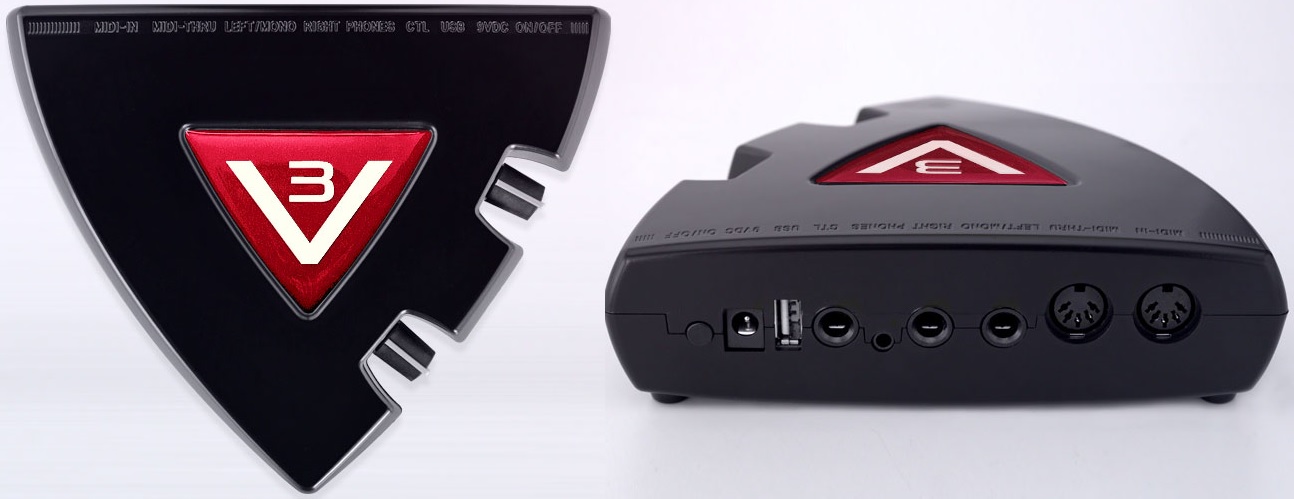
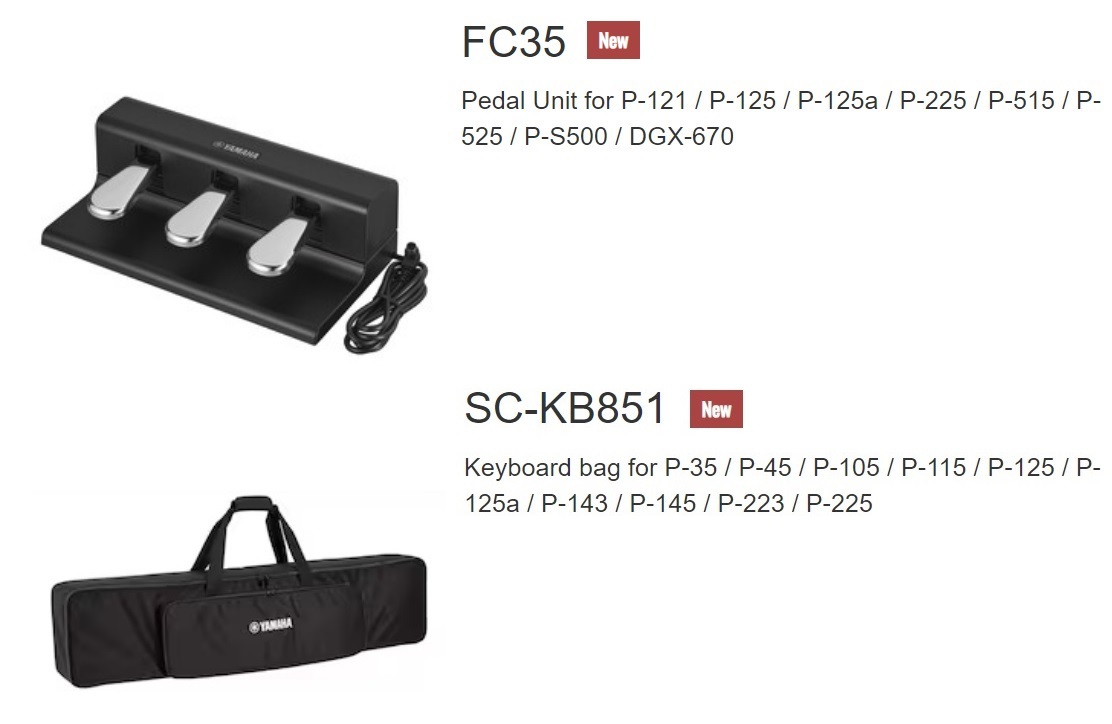
Enlarged and enhanced G2 pictures show a new connector (?) centered on the rear panel. Along with new acoustic piano voices, will we see the new FC35 triple foot pedal? The FC35 connects through a large multi-pin DIN connector. Perhaps G2’s new connector is for the triple strike pedal. We shall soon see…

Vegas at night

Rotary encoders are another big ask. The second teaser video reveals what are quite likely rotary encoders in place of standard potentiometers. The encoders are surrounded by LEDs denoting the current knob value.

Later video and pictures show LEDs alongside the G2 sliders. It would be neat if the LEDs would show the initial slider value to be manually “caught.” That capability would certainly make it easier to play the drawbars in so-called Organ Flutes mode.

Speaking of drawbars, did G2 get the VCM rotary speaker DSP algorithm?

Tilt, but not tilt-able

The main and sub displays appear to be the same size as Genos (gen 1). The G2 front panel has a few new controls. Since Yamaha needed to remold the top chassis panel, they decided to increase the tilt of the main and sub displays. This change should improve readability, especially when seated at the instrument.

Space is the place

I give Ton on the PSR Tutorial Forum credit for making a great catch.

The first video is titled “REVelation” and the third video is titled “Real ambience.” Coincidentally, there are Cubase plug-in effects with similar names. The Cubase REVerence plug-in lets you import an impulse response from disk.

These spatial reverbs and enhancements are popular creative tools. They are also memory-hungry. Did Yamaha provide bigger DSP RAM on the G2 SWP70s? Could these effect algorithms be ported to Montage M? Remember, the “Real Distortion” guitar effects appeared in Tyros 5 before that were added to Motif XF in update 1.5. Could history repeat?
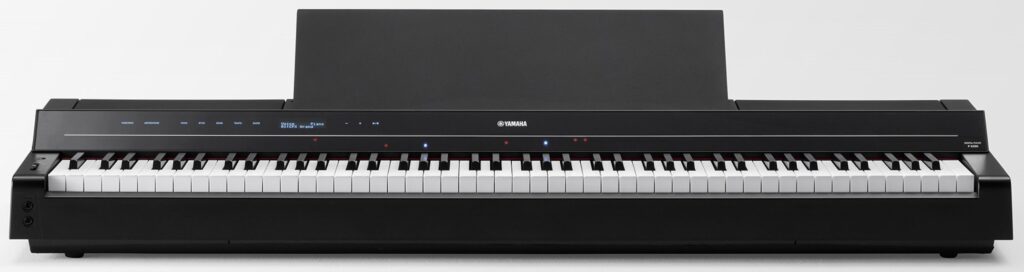
A new keybed?

Comparing the G2 chassis form against my Genos (gen 1), it looks like Yamaha have remolded the chassis bottom, too. It looks deeper, possibly to accommodate the downward tilt of the displays. Or maybe a new keybed, replacing FSX.

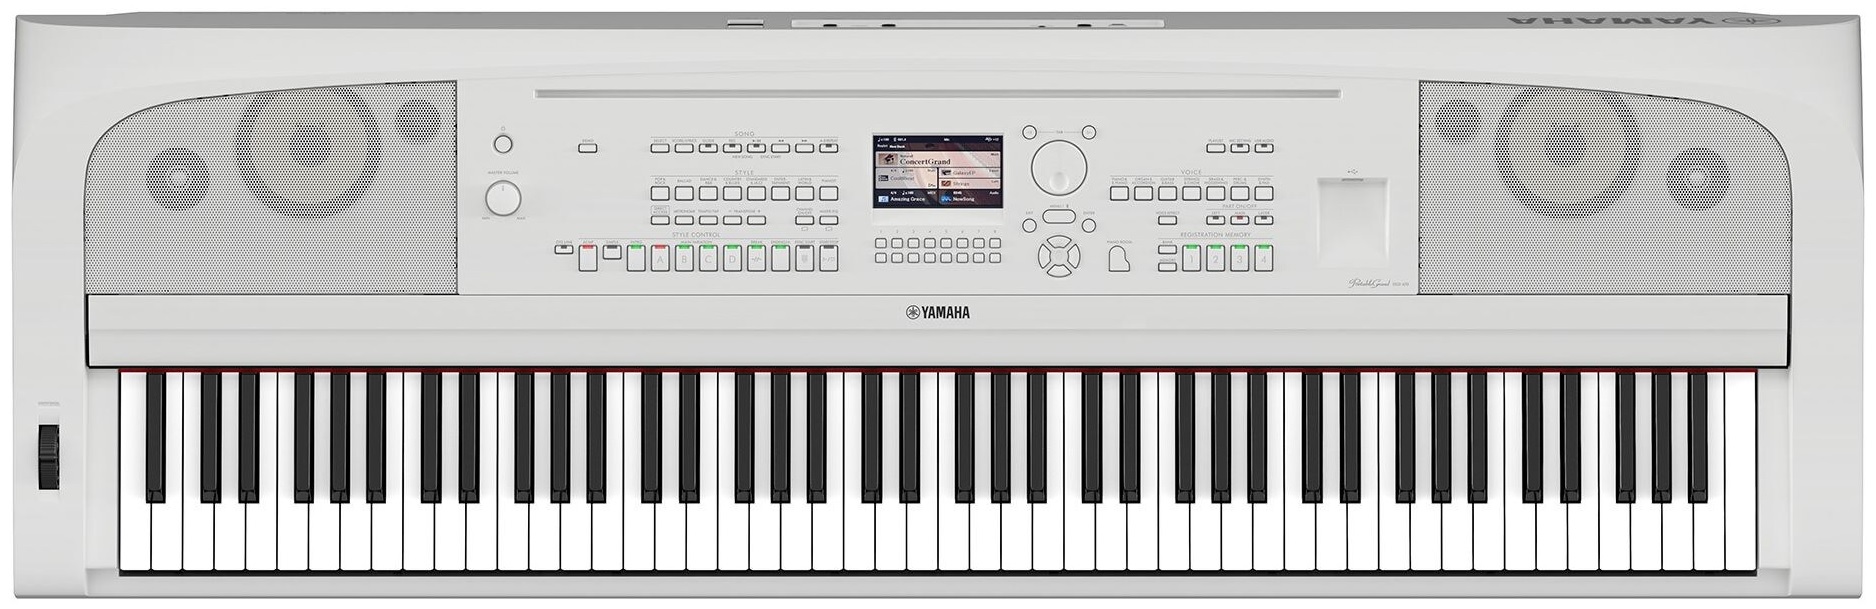
This close-up picture of the G2 keybed has been nagging me. The front face of the white keys appears taller than the FSX in front of me in the studio. The height-to-width ratio of the pictured key is about 0.52; the height-to-width ratio of an actual FSX key is 0.24. Did Yamaha develop a new keybed for Genos2?

Oh, so much is still unknown!

We can see the keys, the box, and the displays. It’s the stuff inside that we can’t see which is unknown and tantalizing. Until Wednesday! Unless some horrible, awful leak happens. 🙂

Copyright © 2023 Paul J. Drongowski

Yamaha DGX-670: Do you love me?

Yes, I played one! The pandemic has let up to the point where I can drag my old bod to music stores, again. Fortunately, I haven’t worn out my welcome with local shop owners and clerks (yet).

I don’t intend to run down the DGX-670 features in detail. The Yamaha DGX-670 has been on the market for two+ years and you can find all the details on the Yamaha Web page. Yamaha position the DGX as a “portable grand piano,” part of the “P” line of digital piano products.

And, as of late, my primary interest is in a digital piano that will help me to sharpen my piano skills. I want those skills to translate to the acoustic piano (Petrof acoustic grand) at church.

In that regard, the DGX-670 does not disappoint. The action is Graded Hammer Standard (GHS) and the main piano multi-sample is Yamaha CFX. The 670 has Yamaha’s Virtual Resonance Modeling (VRM) which “reproduces the complicated interaction between both string and soundboard resonance.” The CFX sounds very good through the in-built amplification and speaker system: 2 x 6 Watt amplifier, 2 x (12cm + 5cm) speakers. If I have one immediate slam on the DGX-670, its front panel legends are difficult to read in poor light (black model).

Yamaha DGX-670 digital piano decked out in white

In short, the DGX-670 has me asking, “Do I really need to move up to the Yamaha P-515 digital piano?” This question is more complicated than it sounds, especially when you roll the Yamaha CK88 into the analysis!

The DGX-670 street price is $850 USD versus $1,600 for the P-515. The store which hosted my adventure was prepared to discount the DGX-670 to $750 — that’s half of a P-515. That’s half of a Yamaha CK88, too ($1,500 MAP).

It comes down to personal musical goals — and desire. 🙂 Let’s take each alternative separately.

The P-515 has the Natural Wood X action with escapement (NWX) and the glorious Bösendorfer Imperial. That’s a lot to argue against. The P-515 sound system is more capable: 2 x (15W + 5W biamplified) amplifier, and 2 x (12cm x 6cm) woofer and 2 x 2.5cm dome. The DGX-670 has a very nice 4.3 inch (480 × 272 dots) LCD display that adds a splash of color to Yamaha’s drab black. The P-515 display has less resolution (128 x 64 dots) and is monochrome. [Yamaha should adopt the color display for the P-515 successor].

Those P-515 characteristics would be easy to live with. My biggest beef with the P-515, however, is the paucity and lower quality of its non-piano (AP or EP) sounds. The DGX-670 outstrips the P-515 for non-piano sounds. I quickly compared the DGX-670 voices against my once-beloved, owned and played PSR-S950. The DGX-670 is (roughly) a PSR-S950 without the Organ Flutes drawbar organ. I know these voices and would be very happy to have them in my piano instrument.

As to auto-accompaniment, the DGX-670 is “arranger lite.” It has styles and chord recognition. The styles are now represented in the Style File Format Guitar Edition (SFF GE) form. SFF GE makes the DGX-670 compatible with styles from the mid- and upper-end Yamaha arranger keyboards. A virtual ocean of styles are available at the PSR Tutorial web site as well as a growing community of DGX-670 players on the PSR Tutorial forum.

Yamaha do not say much about P-515 auto-accompaniment other than it’s bass plus drum, and that it follows chords. What is P-515’s chord recognition technique? Is it similar to full keyboard, A.I. recognition? Wish I knew more about this aspect of the P-515…

Regular visitors know that I test drove the Yamaha CK88, too. The CK88 is positioned in Yamaha’s stage keyboard product line. The sound system is comparable to the DGX-670: 2 x 6 Watt amplifier and 2 x (12cm x 6cm) speakers. The CK88 has the lower resolution (128×64 dots) monochrome display.

Piano-wise, the CK88 has the CFX multi-sample and GHS keybed. No VRM. No Bösendorfer. The CKs are well-equipped for drawbar and pipe organ. (The pipe organ multi-samples originated on Genos™.) The DGX-670 — and P-515, for that matter — are relatively deficient in the drawbar and pipe organ department. The CKs have a good selection of other non-piano voices. No Super Articulation. The CKs do not have auto-accompaniment of any kind.

So, if a player doesn’t care about drawbar organ and wants VRM, why not DGX-670 at half the price of a CK88?

At this point, I would be remiss to not mention slab weight:

    DGX-670 weight:  47.1 pounds (21.4kg) 
P-515 weight: 48.5 pounds (22.0kg)
CK88 weight: 28.8 pounds (13.1kg)

Yamaha’s engineers did a remarkable job of slimming the CK88 down to 28.8 pounds. The respectable GHS-equipped P-125 is 26 pounds and I doubt if Yamaha can design a lighter, robust, 88-key GHS keyboard.

I neglected the whole issue of connectivity and app support. Your mileage will vary. The DGX-670 does not have 5-pin DIN MIDI. That might be a deal-breaker for some folks. Smart Pianist does not presently support CK88. Look to Yamaha Soundmondo, instead.

I didn’t work the Yamaha CP88 into the analysis. After its updates, the CP88 is a virtual library of pianos! It’s also $2,600 USD (MAP), $1,000 higher than the three digital pianos in my analysis.

Finally, why did I enjoy playing the DGX-670 GHS and not so much the CK88. Yamaha swears that the GHS action is the same everywhere. If there is an external factor, perhaps it is the insane way trial pianos are set-up in stores? Often, I feel like a contortionist. (Forget reading sheet music in some settings, too.) Playing piano is, after all, a physical act.

If you enjoyed this analysis, please check out my comments about the Yamaha P-S500. I compare the P-S500 against the DGX-670.

Other reviews and comments about digital pianos:

Copyright © 2023 Paul J. Drongowski

Yamaha keyboards: Which amp (sim) is that?

While diving into overdrive and distortion effects for drawbar organ, I challenged readers to identify the real-world amplifiers on which Yamaha based its MODX (Montage, Genos) amp simulators. I took my own challenge over a cup of coffee today and made my own list of best guesses.

Yamaha introduced several new amp simulators during the 2013-2014 time-frame. They first appeared in Tyros 5 under the sobriquet “Real Distortion”. Next, they were added to Motif XF by way of the Motif XF OS1.5 update. Since then, the “Real Distortion” effect algorithms have trickled down to mid-level synthesizer and arranger keyboard products.

Without further ado, here are my best guesses:

Tweed Guy         Fender '59 Bassman Tweed (6L6GC, 4x10) 
Boutique DC Matchless DC-30 (EL84, 2x12)
US Combo Fender Twin Blackface (6L6GC, 2x12, Super Twin?)
Jazz Combo Roland JC-120 Jazz Chorus (Solid state, 2x12)
US High Gain Mesa Boogie Mark II or Mark III (6L6GC, 1x12)
British Lead Marshall Plexi Super Lead (EL34, 4x12)
British Combo Vox AC30 Top Boost (EL84, 1x12 and 2x12)
British Legend Marshall JCM 800 Lead (EL34, 4x12)
Distomp 1980s Yamaha distortion pedals (SHD-100/MBD-100)
Y-Amp Yamaha DG series guitar amplifiers and stomp
Small Stereo Fender inspired?
Multi FX Inspired by the Yamaha DG Stomp

Blake Angelos (Yamaha) wrote an early article which provides important clues. Unfortunately, the article doesn’t spill specific amplifier names.

A real Matchless DC-30 and the Boutique DC amp sim front panel

Better clues come from the faux front panel graphics on display in the Genos Mixer. These skeumorphic images resemble the actual amplifiers which inspired the amp simulators. More definitively, the control names resemble or are identical to the front panel knobs, switches and input channels of the original amps. The Fender-style graphic knobs threw me off at first, until I discovered that the first generations of Mesa/Boogie amps were housed in Fender Princetons.

There are a few inconsistencies, though. The “US Combo” clearly models Fender “blackface” amplifiers, most notably the famous Twin. The Fender Twin has a middle EQ knob, but does not have mid cut, width or sweep controls like the amp sim. Perhaps Yamaha’s software engineers replaced the single middle EQ knob with three other parameters giving great control over the mids? Or, maybe the software engineers had the Fender Super Twin in mind which has a five band EQ at fixed frequencies?

The Small Stereo Amp doesn’t claim any particular ancestor. The speaker types include Twin and Tweed, so maybe there is a Fender influence? Whatever its name, Small Stereo Amp is one of my favorites. It’s like Nando’s hot sauce; I use it anytime I want a little grunge.

The Distomp simulator is a blend of 1980s Yamaha distortion pedals. In particular, it combines controls from the SHD-100 Super Hard Distortion and MBD-100 Multi-Band Distortion pedals. Shred on, dudes.

The Y-Amp is clearly based on Yamaha’s own DG guitar amp series. The DG amplifiers are among the first digital modeling amplifiers. (Nerd note: DSP horsepower is delivered by a Yamaha proprietary DSP6 integrated circuit.) I wouldn’t be surprised if some of the DG amp sims and effect models jumped species and landed in Yamaha keyboard products, too.

Yamaha engineers often return to the same wellspring. The DG Series Amp Models (circa 2012) are:

    1) Lead 1 - Marshall 
2) Lead 2 - Soldano
3) Drive 1 - Fender Bassman
4) Drive 2 - Fender Twin
5) Crunch 1 - Vox AC30
6) Crunch 2 - Matchless
7) Clean 1 - Fender Twin Nasal Silverface
8) Clean 2 - Fender Twin Full Blackface

The list makes you go, “Hmmm?” “Soldano” brings the Soldano SLO-100 classic to mind.

Before VCM (Virtual Circuitry Modeling) there was DG’s ECM (Electric Circuit Modeling). In this vein, the Y-Amp sim offers a choice of power tube: 6L6GC, EL34, or KT66. These vacuum tubes were used in some of the most famous and collectible guitar amps:

6L6GC: Fender '59 Bassman and Twin, Ampeg B-15, Mesa/Boogie Mark I  
EL34: Marshall Plexi, DSL 100, Super Lead, Orange
KT66: Marshall JTM45 Bluesbreaker

Oddly, Y-Amp does not have an EL84 option (Vox AC30, Matchless DC-30). The KT66 is an improved version of the 6L6. The KT66 was first made in Britain by Marconi-Osram Valve Co. Ltd.

In addition to guitar amplifiers, the DG series included the DG Stomp multi-effects pedal. I can see where the DG Stomp might have inspired the MULTI FX pedal board simulation. The MULTI FX algorithm is a jack of all trades with compression, wah, distortion, phaser, delay and speaker simulation.

Hope you found this fun!

Before leaving, here is my speaker type decoder, once again, based on a little analysis and guess work.

    BS 4x12    British Stack 
AC 2x12 American Combo
AC 1x12 American Combo
AC 4x10 American Combo
BC 2x12 British Combo
AM 4x12 American Modern
YC 4x12 Yamaha Combo
JC 2x12 Jazz Chorus
OC 2x12 Orange Combo
OC 1x8 Orange Combo

Copyright © 2023 Paul J. Drongowski

God Rest Ye, Merry Gentlemen (ChordPro)

“God Rest Ye, Merry Gentlemen” by Jon Batiste, Judith Hill, and Stay Human really grooves and I wanted to get in on the fun(k). So, I started with Yamaha Chord Tracker and worked out a similar chord progression.

Wanting to hear the progression and jam on it, I wrote the progression and lyrics in Extended ChordPro:

{title: God Rest Ye, Merry Gentlemen} 
{Artist: Jon Batiste}
{Key: Cm}
{Time: 4/4}
# Style: JazzGuitarClub
{stylecode: 3878}
{Tempo: 120}

{start_accomp}

# Intro [Cm][*IA]

# Verse 1
God [Cm:2][*MA] rest ye [Bb/D:2] merry, [Eb5:2] gentle [Fm:2] men,
Let [Gm:2] nothing [Ab:2] you dis- [Gm:2] may. [G7:2][*FA]
Re- [Cm:2][*MA] member, [Bb/D:2] Christ our [Eb5:2] Sa- [Fm:2] vior was
[Gm:2] Born on [Ab:2] Christmas [Gm:2][*FA] day. [C7:2]
To [Fm:2][*MA] save us [Bb:2] all from [Eb5:2] Satan's [AbMaj7:2] pow'r when

[Eb5:2] We were [Dm:2] gone a- [Bb/D:2] stray. [Bb:2]
O [Eb5:2] Ti- [Ab:2] dings of [Dm:2] com- [Gaug:2] fort and
[Cm:2] Joy, [Fm7:2] Comfort and [Bb7][*FA] joy.
O [Eb5:2][*MA] Ti- [Ab:2] dings of [Dm:2] com- [Gaug:2][*FA] fort and

# Funky interlude

[Cm7:2][*MB] joy. [F:2] ---- [Cm7:2] ---- [F:2] ----
[Cm7:2] ---- [F:2] ---- [Cm7:2] ---- [F:2][*FB] ----

# Ending
[Cm7-9][*EA] --------

Extended ChordPro adds auto-accompaniment features to the well-known and widely used ChordPro song format. I translated the ChordPro to a Yamaha-compatible auto-accompaniment file and played it on Genos™.

In “God Rest Ye,” you’ll notice the new extensions right away. There are a few more directives like: {stylecode: 3878} and {start_accomp}. Chord symbols are enhanced with a beat count, e.g., “[Cm:2]“, placing chord changes on beats within a measure. Annotations indicate auto-accompaniment section changes. For example, “[*MA]” and “[*FA]” mean “Main section A” and “Fill in A”, respectively.

Getting to hear the progression — not just play it by hand — was a huge help. I found a few places where a minor chord was required instead of a major. Play-back encouraged me to listen critically and to find a few hipper voicings.

If you would like a copy of the Java program (cp2mid) which translates Extended ChordPro to a Yamaha auto-accompaniment Standard MIDI File, here is a pointer to the ZIP file page. If you would like more information, please see the ChordPro auto-accompaniment example and demo and my article with ideas and uses for Extended ChordPro auto-accompaniment.

Copyright © 2022 Paul J. Drongowski

ChordPro auto-accompaniment

Before we close out the year, a Christmas gift!

Last January, I developed and wrote about “cp2mid“, a Java program to convert extended ChordPro files to a Yamaha accompaniment MIDI files. cp2mid lets someone compose in extended ChordPro format and play the composition on a Yamaha arranger in an auto-accompaniment style of your own choosing. If you don’t feel like composing, just grab one of the many ChordPro songs on the Web, clean it up, translate it, and play it.

You’ve probably seen ChordPro on the interwebs. It looks like:

# A simple ChordPro example 

{title: God Rest Ye, Merry Gentlemen}

God [Cm] rest ye merry, [Cm] gentlemen,
Let [Ab] nothing you dis[G7]may.
Re [Cm] member, Christ our [Cm] Savior
Was [Ab] born on Christmas [G7] day.

Extended ChordPro adds a few new directives (the things between curly braces) and tightens up the notion of musical time in order to mark measures and place chord changes within measures.

cp2mid translates the chords and lyrics into a Standard MIDI File (SMF). The SMF contains all the magic needed to play an auto-accompaniment on a supporting Yamaha arranger keyboard. (PSR E series, unfortunately, is out of luck.)

If you would like more information, here are some links to dive into:

The first three posts are essential reading for cp2mid users. The last two posts are intended for coders and other technically inclined folks.

Oh, yeah, you’ll need the ZIP file with example songs and cp2mid Java code.

Copyright © 2022 Paul J. Drongowski

V3 Sound YAMMEX: Progress report

Here’s a quick update on my progress with the V3 Sound YAMMEX XXL sound module.

The V3 Sound XXL series are very compact, light-weight MIDI sound modules based on the Dream S.A.S. SAM5716B synthesis engine. The YAMMEX and its sister, the V3 Sound Grand Piano XXL, have hundreds of high quality voices — 3GBytes of factory samples in a 4GByte waveform memory. The modules also provide two multi-effect (MFX) pipelines which enrich the sound.

V3 Sound YAMMEX XXL expansion module

The XXL modules do not have a built-in user interface (UI) having no display or buttons for selecting voices. All sounds and effects are selected through the MIDI and USB-A ports. V3 Sound provide the tablet-based V3 Sound Control app and two comprehensive MIDI Designer UI templates. The V3 Sound Control app, unfortunately, does not support the YAMMEX. V3 Sound considers the YAMMEX as a Genos/PSR expansion only and expect users to control YAMMEX through a set of predefined voice (VCE) files and the normal Genos/PSR voice selection process.

Well, those VCE files do send MIDI Bank Select MSB, Bank Select LSB and Program Change messages. I can now assure you that these messages are enough to select YAMMEX voices even if you are not using a Genos or PSR.

Yamaha MODX Zone Master works quite well. You need to build MODX Performances consisting of external MIDI zones. Thanks to Zone Master you can select, split and layer YAMMEX voices. The trick is to assign a separate YAMMEX voice to each MIDI channel and use Zone Master channel and note ranges to affect splits and layers.

I have also successfully used the Arturia Keylab Essential with YAMMEX. It took only 15 minutes work to make a control template using Arturia’s MIDI Control Center application. I assigned eight of my favorite YAMMEX voices to the eight Keylab pads and assigned the most common MIDI continuous controllers to the knobs and sliders.

Both of these scenarios are dirt-simple involving a direct 5-pin MIDI connection. Unfortunately, Keylab Essential by itself cannot do splits and layers over 5-pin MIDI. Keylab Essential does not provide the functional equivalent of Zone Master. Keylab Essential can send on only one MIDI channel at a time and doesn’t implement the concept of key ranges (zones). Keylab Essential also restricts the number of selectable voices to what you can programmed into its key pads.

All is not lost, however, as MIDI Designer once again comes to the rescue. First, you need to make connections:

                                 iPad 
|
Keyboard controller --> iRig MIDI --> YAMMEX

The keyboard controller sends MIDI over a 5-pin cable to the iPad which, in turn, sends MIDI to the YAMMEX over a second 5-pin cable. Bonus: I successfully tested Bluetooth MIDI input from Korg Microkey Air. The iPad acts as a Bluetooth wireless interface to YAMMEX.

The iPad runs two applications: StreamByter and MIDI Designer:

    MIDI IN --> StreamByter --> MIDI Designer --> MIDI OUT

Incoming note messages are passed THRU StreamByter and MIDI Designer. StreamByter remaps (rechannelizes) the MIDI notes to three zones/streams:

    Channel 1: UPPER1 
Channel 2: UPPER2
Channel 4: LOWER

UPPER1 and UPPER2 form a two-voice layer above the split point. LOWER is a solo left-hand voice below the split point. I borrowed this simple zone structure from the Casio CT-S1000V. It’s intuitive and is quite powerful even in its simplicity.

StreamByter maps and mangles MIDI data according to user-defined rules. The rules are rather cryptic, so I refer you to the StreamByter documentation. Currently, I am using the following rules to split/layer:

    NX 00-3A = X3 
NX 3A-7F = X0
NX 3A-7F = X1 +C

Yes, the UPPER and LOWER zones have a one note overlap. I’m still experimenting and may make the overlap larger, if a bigger overlap is useful. I don’t like abrupt breaks between upper and lower zones.

Well, the rest of the work is done by MIDI Designer and my YAMMEX control template. The V3 Sound templates struck me as too complicated — the main reason why I went with “the Casio voice structure” and my own template. Here is the first prototype, work-in-progress template:

MIDI Designer template for YAMMEX (work in progress)

There are eight radio buttons to select the UPPER1, UPPER2, and LOWER voices. [Well, I need to add three more voices to LOWER, as you can see.] These are my favorite YAMMEX voices and they will let me build my most frequently used combinations. Knobs set the voice and reverb level for each zone.

The MFX controls do not function correctly at this time. I seem to be missing some magic; YAMMEX is not responding to the MIDI messages sent by the template even though the V3 Sound “factory” template sends the same darned messages! At this point, I need to ask V3 Sound for advice.

All in all, things are coming along — many successes, a few failures. That’s to be expected at this stage!

Copyright © 2022 Paul J. Drongowski


In the house: V3 Sound YAMMEX XXL

Thought I would post a quick note about the new unit under test — the V3 Sound YAMMEX XXL tone module. The YAMMEX is a member of the V3 Sound XXL family of tone modules. They all share the same triangular shape and are light as a feather:

V3 Sound YAMMEX XXL expansion tone module

The lump-in-the-middle power supply is roughly the same weight!

You might have seen and heard Piano Man Chuck demonstrate the V3 Sound Grand Piano XXL module. [Piano Man Chuck is a V3 Sound dealer, BTW.] Well, the YAMMEX has the same sound set as the Grand Piano XXL. The main differences are:

  • The MIDI bank and program change layouts are different: Grand Piano XXL for general use as an expander, YAMMEX XXL as a Genos/PSR expander.
  • Grand Piano XXL is supported by the V3 Sound Control app; the YAMMEX XXL is not.
  • Grand Piano XXL is supported by two different MIDI Designer templates; the YAMMEX is not.
  • YAMMEX XXL voices are selected using custom Genos/PSR user voices.

YAMMEX XXL arrives from the factory with a USB flash drive containing the custom user voices (VCE files) needed to select voices through Genos/PSR. It’s all described in the YAMMEX XXL manual. [Henceforth, “Yammex” means “YAMMEX XXL”.]

I found a Yammex on ebay at a price that was impossible to refuse. It would be a shame to confine Yammex to Genos duty alone, so I studied the heck out of its MIDI implementation. I also examined the VCE files available from the V3 Sound Web site. Hmmm, looks like it’s a simple matter of uttering the appropriate Bank Select MSB, Bank Select LSB and Program Change messages. We can do that!

An inquiry to V3 Sound about compatibility was answered quickly, but implied that Yammex was only for Genos/MIDI. If you know MIDI and your controller’s capabilities, and if you don’t mind a little work, Yammex definitely can do more than Genos/PSR.

I was sorely tempted by the V3 Sound XXL series because it is based on the Dream S.A.S. SAM5716B synthesis chip. After hearing the SAM2635 and its GM/GS sound set, I wanted to hear what a high-end Dream chip could do with 3GBytes of professionally produced instrument samples. Cut to the chase, V3 Sound do not disappoint especially at the price I paid.

Jeff’s Music Gear is Sweetwater!

The box arrives. I open the shipping carton and what the? The Yammex box is in fine shape, but is covered in round “Demo” labels. I instantly smell “Sweetwater”. And there’s candy, and a Sweetwater “Thank You” card. The ebay seller is Jeff’s Music Gear. After a Google, I discover that Jeff’s Music Gear is Sweetwater’s ebay consignment shop! Nice to know that I was in good hands all along.

OK, then, plug everything up using Yamaha MODX as a controller. (See my article about Yamaha MODX Zone Master.) Ooops, no flashing MIDI light and no sound. I’m already composing a message to Jeff’s when I remember this note in the Yammex manual:

No sound? The YAMMEX XXL sound expander only creates a tone when you call up a sound from the V3 folder in your keyboard’s display. Just connecting it to your keyboard is not enough.

They aren’t kidding! I select a voice through the MODX Zone Master screen and suddenly the MIDI light starts flashing and Yammex starts talking. Delete the message to Jeff’s.

One other note from the manual is helpful during bring up:

Testing MIDI connections and settings. After connecting your MIDI cable and making sure your MIDI settings are correct, select a V3 User Voice. The MIDI LED on the YAMMEX XXL should now blink with every keystroke.

I find this behavior to be a dubious design decision. The purpose of a MIDI light is to indicate MIDI reception under any condition. While troubleshooting, I connected the Yammex THRU port to MIDI-OX on a PC and verified MIDI operation. Most of V3 customers will not be that savvy…

I’ve just begun auditioning sounds and already I’m pleased. I like and prefer the Bösendorfer Imperial 290 (Vienna) over the Steinway Model D (Hamburg). I fell in love with Bösendorfer when I first touched one in 1980. The electric pianos are good although too clean and polite. The organ samples are damned good. There are two flavors: No Leslie and Leslie sampled in. Sans-Leslie voices are meant to be dirtied up by an external pedal. I’ll try the Electro-Harmonix Lester K for spin and throw some overdrive on the EPs, too.

I like the Oberheim pads — another love. The classical strings are solid. That’s as far as I’ve gotten into the sound set. I’m looking forward to hearing the rest.

As to the supplied USB flash drive, the previous customer zorched the factory VCE files. I found an X6A file instead which I recognize as a Yamaha MOXF dump file. I guess the previous customer tried Yammex with MOXF and was disappointed. Fortunately, V3 Sound provide the Genos/PSR VCE files on their Web site. The supplied drive is only 64MB. [Not really a complaint.]

Experiments to come? Once I get my faves down to 8, 16 voices or so, I’ll configure the Arturia Keylab Essential. The extra knobs and sliders will come in handy. Also, I will whip up a simplified MIDI Designer template for the Yammex. The existing templates are comprehensive — yet overwhelming. I’m thinking about a UI similar to Korg Module. Those Korg folks are definitely on to something. Simplicity is king. MIDI Designer (with StreamByter) on iPad should give me splits and layers — maybe even a wireless Bluetooth interface to Yammex? Finally, Dream multi-FX.

Copyright © 2022 Paul J. Drongowski

“P” is for “piano”: Yamaha P-S500 digital piano

While we’re distracted with “CK”, “AN”, and whatnot, Yamaha sneaks out a new P-series digital piano in Europe: the Yamaha P-S500.

Natch, you can read all about the P-S500 at Yamaha’s European web site. Physically, it’s a minimalist slab that’s designed primarily for the home or small studio market segments. Cost is about 2,100 Euro and I would expect it to retail for about $2000 USD in the States.

Yamaha P-S500 digital piano

Basic features [courtesy of Yamaha] are:

  • Compatible with Smart Pianist app installed to a smart device
  • Stream Lights feature helps you perform even if you can’t read music notation
  • Enjoy playing along with the 403 preset Songs, covering a wide range of genres from pop music to classical music
  • Audio To Score function converts your favorite audio songs into piano accompaniment scores
  • Authentic Yamaha CFX & Bösendorfer Imperial concert grand piano Voices
  • Virtual Resonance Modeling (VRM)
  • 88-note weighted GHS keyboard
  • Huge variety of 660 high-quality instrument Voices, including Super Articulation Voices
  • Built-in Auto Accompaniment features with 370 Styles
  • Microphone input and automatic Vocal Harmony

Auto-accompaniment, styles, Super Articulation voices? We’ve seen these features in the DGX series, notably, the most recent DGX-670 model. The table below compares the P-S500 against the DGX-670. The DGX-670, by the way, goes for considerably less dough: $850 USD.

                DGX-670           P-S500 
----------------- ---------------------------------
Main piano: Yamaha CFX CFX, Bösendorfer Imperial
VRM: Yes Yes
Key-off sound: Yes Yes
Action: GHS GHS
Piano Room: Yes Yes
PB wheel: Yes No
Dual/layer: Yes Yes
Split: Yes Yes
USB audio: Play/record Play/record
Bluetooth: Yes Not built-in (optional)
Amplification: 2 x 6W 2 x (20W + 6W)
Speakers: 2 x (12cm + 5cm) 2 x (12cm x 6cm oval+2.5cm dome)
Display: 480x272 color 80x16 mono LCD
Weight 47.2 pounds 48.1 pounds

Here’s the decoder ring for Yamaha acronyms: Virtual Resonance Modeling (VRM), Graded Hammer Standard (GHS), Super Articulation (SA), Cool (velocity switched), Live (stereo), Organ Flute (drawbar organ).

The P-S500 looks to be the upscale, uptown sibling of the DGX-670. At 48 pounds, I don’t think you’ll want to schlep the P-S500 out of the house very often. In terms of styles and voices, the P-S500 is superior:

                          DGX-670  P-S500 
------- ------
Total voices 601 660
VRM voices 9 13
SA voices 49 111
Natural voices 11 25
Sweet voices 26 27
Cool voices 53 47
Live voices 68 58
Organ Flute voices 0 29
Total styles 263 370
Pro styles 215 328
Session styles 19 25
Free Play styles 0 3
Pianist styles 29 13
Drum Kits 29 29

The P-S500 factory voice set includes many of my favorites. If you’re looking for a more than decent, mid-level keyboard with auto-accompaniment and a graded hammer keyboard, the P-S500 is worth a look. Versus a mid-level arranger keyboard, you’re still giving up a pitch bend wheel, multi-pads, style control buttons, MIDI record/edit, etc. If you just want to play and have a good piano experience, I’d go with the P-S500 in a heartbeat. (The DGX-670 is no slouch, either.)

There are many other differences that I’ve glossed over. So, if you’re trying to decide between DGX-670, an arranger or the P-S500, be sure to dig into the manuals and data list files. Yamaha doesn’t always make it easy to compare, especially as to your specific musical goals and use cases.

One enormous difference needs to be emphasized, however. The P-S500 front panel is utterly minimalist. If you want to exploit the P-S500 to its fullest, you must use the P-S500 with the Yamaha Smart Pianist app on a tablet (Apple or Android). In this respect, the P-S500 is more like the CSP series of digital pianos for the home. It’s like a CSP without the furniture. The CSP models have enhanced GH3X or NWX keybeds which improve the piano playing experience. Given that the Smart Pianist is almost a necessity, it’s kind of weird (cheap) to omit built-in Bluetooth.

Yamaha are certainly giving us choices!

A final, electronics nerd comment. While studying the internal design of current arranger, synth and digital piano products, the designs often seem like a deconstructed tablet connected to a keybed, tone generator and MIDI/USB interface. The digital electronics are remarkably similar. With the P-S500 and the CSP series, it’s like Yamaha said “Aw, the heck with it” and moved functionality out of the piano (arranger, synth) chassis into a stock, commercial tablet like iPad or Google Pixel tablet. I don’t think we have seen the end of this approach to instrument design…

Other reviews and comments about digital pianos:

Copyright © 2022 Paul J. Drongowski

Out Of The Shadows

I’ve been working on backing and lead instruments for the classic Del Shannon song “Keep Searchin'”.

Yamaha Genos™ is made for this tune. First off, its “ShadowedPop” style is the perfect fit for that old 1950s rock’n’roll vibe. It has just the right amount of swing and attitude.

Next, Genos has very good electric guitars for lead. Want clean Tele or Strat? Genos has them. Genos also has a suite of effects to obtain a complete, authentic guitar tone.

Yamaha arranger styles have “One Touch Settings” which are mini-registrations. Hit an OTS button and Genos will both change song section and bring up an appropriate voice. The Genos “ShadowedPop” style has two OTS mini-registrations that are worth deconstructing to see how the Yamaha sound designers got their Shadows guitar tone: “60sShadowLead” and “ShadowedGuitar”.

Of course, the “shadow” in all of these voice and style names refer to Hank Marvin and The Shadows — one of, or perhaps, THE iconic 1950’s guitar band and sound. The Shadows’ treatment felt absolutely right for the Del Shannon cover. Hank Marvin was perhaps the first English artist to pick up a Fender Strat, usually putting it through a Vox amp.

The PSR “ShadowedGuitar” voice goes back four or five years and is a standard factory preset. If your Yamaha arranger does not have “ShadowedGuitar”, choose a clean, 1960’s vintage guitar preset voice. Change the insert effect to Tempo Echo and set the insert effect send level to 30. Change the effect parameters to:

 Param#  Parameter name       Value 
------ ------------------- ------
1 Delay Time 8th
2 Feedback Level +28
3 Feedback High Damp 1.0
4 L/R Diffusion +14ms
5 Lag 0ms
10 Dry/Wet D34>W
13 EQ Low Frequency 500Hz
14 EQ Low Gain 0dB
15 EQ High Frequency 4.0kHz
16 EQ High Gain 0dB

Reverb is a big part of the 50’s vibe and you’ll need gobs of it on the guitar. Select a hall reverb and set the reverb send level to at least 50. If your arranger has it, I recommend the “Real Medium Hall+” preset. It’s one of Yamaha’s best reverbs, in my opinion.

Only Genos has the “60sShadowLead” voice voice. Fortunately, it’s easy to add a close sound-alike to your instrument. Start with “ShadowedGuitar” or a clean, 1960’s vintage guitar preset. Get into the mixer (or DSP effect page) and change the insert effect to Multi FX Vintage Echo and set the insert effect send level to 127 (if necessary). Then change the effect parameters to:

 Param#  Parameter name       Value 
------ ------------------- ------
1 Comp Sustain 2.9
2 Wah Switch Off
3 Wah Pedal 0
4 Dist Switch Clean
5 Dist Drive 5.0
6 Dist EQ Mid Boost
7 Dist Tone 3.5
8 Dist Presence 4.3
9 Output 110
11 Speaker Type Twin
12 LFO Speed 2.103Hz
13 Phaser Switch Off
14 Delay Switch Delay St
15 Delay Control 60
16 Delay Time 33

We met the Multi FX algorithm once before. This algorithm is like a virtual guitar pedal board:

Compressor -->  Wah --> Distortion --> Phaser --> Delay --> Spkr Sim 

The above parameter values dial in The Shadows’ guitar tone.

You’ll need gobs of reverb, again, to complete the scene. Choose the “Real Medium Hall+” preset and set the reverb send to at least 40.

The “60sShadowLead” OTS also configures the chorus system effect. Having listened to the overall tone with and without chorus, this step is optional. (Possibly some other style part may be affected by this change or a change to any other system-level effect including reverb.) Change the chorus type to “Celeste 1” and set the chorus send level to 12. 12 is not especially high, so you can see why this last step is optional; it’s just a little sweetener.

You might consider changing the chorus effect to tremolo (e.g., “E-Piano Tremolo”). Guitarists in the 50s and 60s didn’t have guitar pedals. (Sorry, Edge.) So, folks relied on guitar amp spring reverb and tremolo (often mislabeled “vibrato”) to get space-y effects. I still have the sound of an Ampeg Gemini going through my head. 😎

Select the “E-Piano Tremolo” effect preset, increase the AM Depth to max, and set the chorus send level to 127:

 Param#  Parameter name       Value 
------ ------------------- ------
1 LFO Frequency 5.38Hz
2 AM Depth 127
3 PM Depth 0
6 EQ Low Frequency 500Hz
7 EQ Low Gain 0dB
8 EQ High Frequency 4.0kHz
9 EQ High Gain 0dB
11 EQ Mid Frequency 2.0kHz
12 EQ Mid Gain 0.0dB
13 EQ Mid Width 1.0
14 LFO Phase Difference +39deg
15 Input Mode Mono
Return Level 127

You’re looking for that deep, “Spaghetti Western”, Ennio Morricone effect. Play the lead line an octave down. Have fun!

The EQ parameters in the tremolo algorithm make this a good guitar tone mangler — swept mid EQ with Q (width)! Mid boost or cut is right at hand.

Here are short demos (MP3) on Genos with tremolo and without tremolo. Yamaha Montage and MODX have the same effect algorithms, so you should be able to apply the same techniques on those instruments, too.

Links to a few other posts about chasing tone on Yamaha gear:

Copyright © 2022 Paul J. Drongowski

STEP EDIT → Chord Looper

Yamaha Genos and PSR-SX900 arranger workstations have a feature called “Chord Looper”. Chord Looper records your left hand chords and saves them in a memory slot. (8 slots per Chord Looper bank.) Once recorded and saved, you can play back the chord progression and play over the changes. Neat.

Obviously, one way to enter a chord progression is to play it in. Let’s say, that the chord progression is long and has jazz chords like the Coltrane changes (AKA “Giant Steps”). These changes are notoriously difficult to solo over because the changes come fast, furious, and in three different scales! On top of musical difficulty, Chord Looper does not allow edits. Make a mistake and you need to record the entire sequence over again. So, folks are looking for ways to create and edit Chord Looper progressions.

Chord Looper CLD files

Fortunately, Chord Looper let’s you import and export individual chord progressions (i.e., a slot). Chord Looper exports a progression into a file with the CLD extension. Henceforth, I will call these files “CLD files”.

A CLD file is actually a Type 0 Standard MIDI File (SMF) in disguise. You can examine (or possibly edit/create) a CLD file by renaming the extension to “MID”. Once renamed, conventional software tools (Cubase, SONAR, etc.) will recognize the renamed CLD file as a Type 0 SMF and import it.

A CLD file recorded by Chord Looper is very simple inside. It contains a sequence of Yamaha XF chord events, one event for each chord change. Here are the metadata events for a simple progression (C-Am-F-G) played in by hand:

Chord Symbol   1.1.1.0     Metadata    Chord:  C/C 
Chord Symbol 1.4.4.112 Metadata Chord: Am/A
Chord Symbol 3.1.1.34 Metadata Chord: F/F
Chord Symbol 4.1.1.40 Metadata Chord: G/G

Each event specifies the chord root, chord type and alternate root bass. That’s it! A CLD file does not contain any other kind of event (notes, controller, time signature, tempo, etc.)

Each chord is a Yamaha XF Metadata chord event. The event time is the time of the chord event, i.e., when the player changed the chord and Genos recognized the chord. In the example above, the chord was changed at the beginning of each measure (sometimes a little early, sometimes a little late).

Chord STEP EDIT to CLD

Folks on the PSR Tutorial Forum have found a few ways of creating CLD files using existing software tools. Flip over to the forums and check out some of the Chord Looper threads.

Here’s a new method!

Yamaha arrangers have long supported a basic MIDI sequencer and editor. Like many software editors, the Yamaha sequencer supports step edit, letting you enter notes, control events, etc. with precise timing. One better, the Yamaha sequencer supports Chord STEP EDIT through which one can easily enter a chord sequence from a lead sheet into a separate chord track.

Thus, it’s possible to enter a chord progression easily using STEP EDIT and save the progression in a Type 0 Standard MIDI File. Initially, the progression is stored in a special part (Cds chunk) within the SMF. DAWs and so forth ignore the special proprietary data and typically delete it when writing the file back to MIDI. This kind of Chord STEP EDIT data does not contain the Yamaha XF chord events needed by Chord Looper. If you import one of these files into Chord Looper, Chord Looper comes up empty.

Once you EXPAND the step edit chord sequence, however, the expansion process creates Yamaha XF chord metadata events along with the notes and other MIDI events for the accompaniment parts. That’s the normal compositional process anyway — step edit the chord part, expand the chord part using the selected style, and save the expanded file as a Standard MIDI File.

One fly in the ointment. The Yamaha arranger software hides file extensions. This streamlines user workflow, but it inhibits interesting experiments! So, save the expanded MIDI file to a USB flash drive, take the flash drive to a personal computer, and rename the expanded SMF. Replace the “MID” extension with “CLD”. Copy the CLD file to the flash drive and reinsert the flash drive in the arranger workstation.

Import the newly renamed CLD file into Chord Looper. Voila! Chord Looper scans the file and produces a chord progression using the embedded Yamaha XF chord events. If you export the progression as a different CLD file, the exported data includes all of the other MIDI data, e.g., notes, etc. [I wouldn’t count on Chord Looper always doing this; software subject to change by Yamaha.)

Bottom line: If you pine to create and edit Chord Looper progressions with precision, use Chord STEP EDIT to create the progression, expand the backing, save as a Standard MIDI File, replace the file extension with CLD, and import into Chord Looper. Of course, you need to rename the MID file to a CLD file using a personal computer, but that’s a small hassle. Give it a try!

I tested this procedure on Genos with the Coltrane changes. Once the progression was captured in Chord Looper, I could try different tempos and different styles. Those changes do come fast and furious indeed!

Copyright © 2022 Paul J. Drongowski