
If you mix and match your gear over MIDI, you will eventually need to send a program change message. Yesterday, I wanted to audition the sounds in my hacked Akai MPK Mini Play and needed to send a full Bank Select MSB (CC#0), Bank Select LSB (CC#32) and Program Change message sequence to the Akai MPK Mini Play.
Usually I scramble around looking for cables and hook up a MIDI controller like the Arturia Keystep or Keylab Essential. Inevitably, I scratch my head trying to remember how to send a full sequence of bank and program change messages from the controller. Maybe a trip through a PC-based control editor is required. It’s amazing that in this day and age, it is still difficult or impossible to send a full three message sequence in one go! [Grr.]
This time I said “Why not MODX?” and the best solution of all was in front of me.
The trick is to use the MODX Zone Master feature. I don’t intend to deep-dive Zone Master here and recommend the Mastering MONTAGE: Zone Master FAQ on the Yamaha Synth site. The MODX and Montage are enough alike such that the Montage tutorial applies to MODX, too.
The basic concept is simple. When Zone Master is enabled, a part in an MODX Performance can send MIDI messages over the 5-pin MIDI OUT. One needs to configure a few things before setting up a part and zone in a Performance.
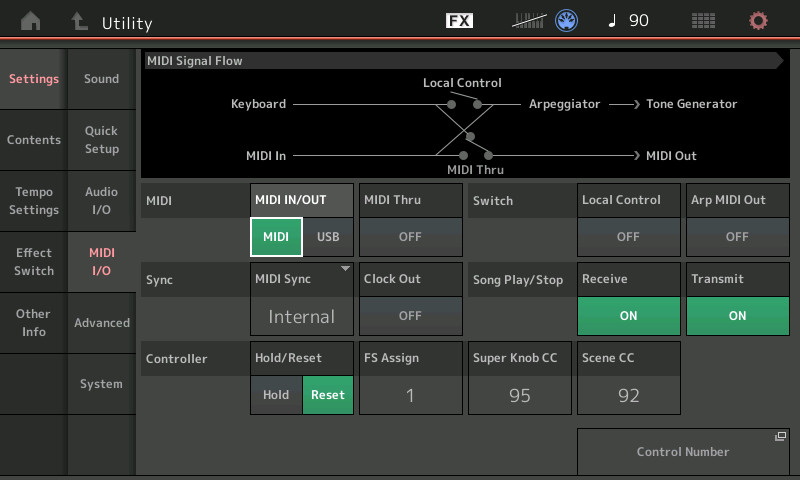
For my experiment, I hit the UTILITY button and tapped the MIDI I/O tab under Settings. There, I made two changes:
- I changed MIDI IN/OUT to MIDI in order to send MIDI messages through the 5-pin MIDI OUT. If this parameter is USB, you won’t send or see messages on the 5-pin port.
- I turned Local Control OFF. If MODX isn’t connected to a powered speaker (or whatever), this step is optional.
Don’t forget to change these settings back to what they were when you’re done. MODX remembers them across power down and you may be surprised to find a silent MODX when you turn it on again.
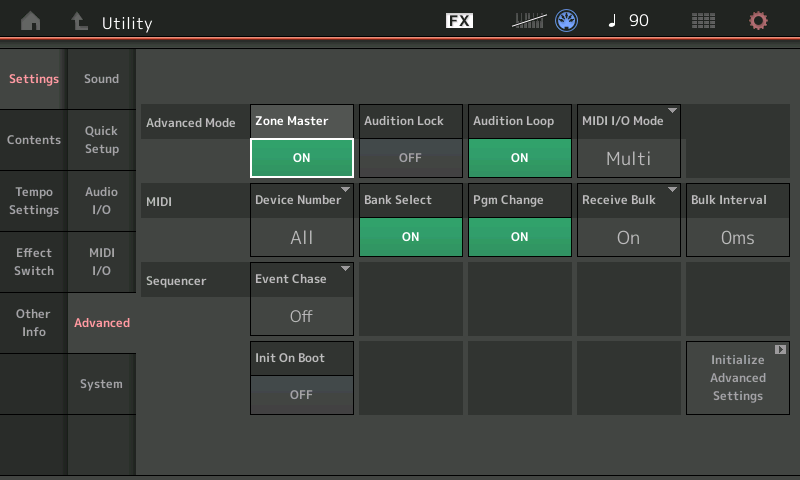
Next, tap the Advanced tab. Turn Zone Master ON. Zone Master is not enabled by default. If you don’t enable Zone Master, you will not see zone-related tabs and parameters when editing the Performance part.
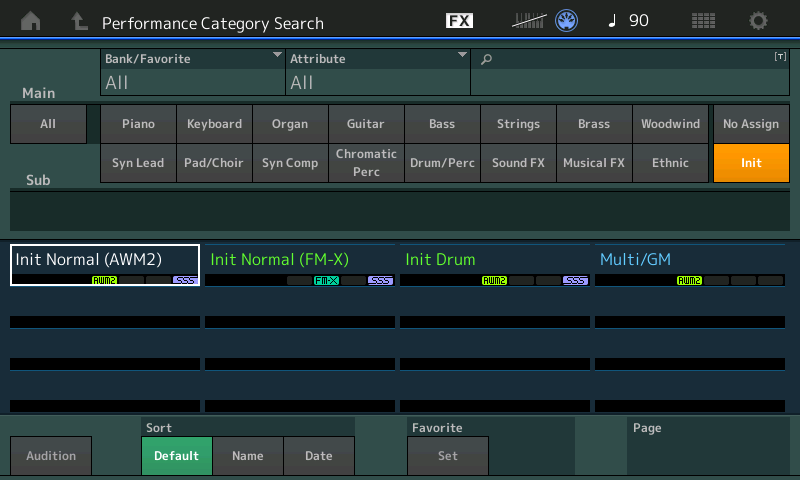
Hit the EXIT button and click CATEGORY. We’re going to create a new, empty Performance. Tap the Init category button. Then tap Init Normal (AWM2). This creates a new empty (AWM2) Performance.
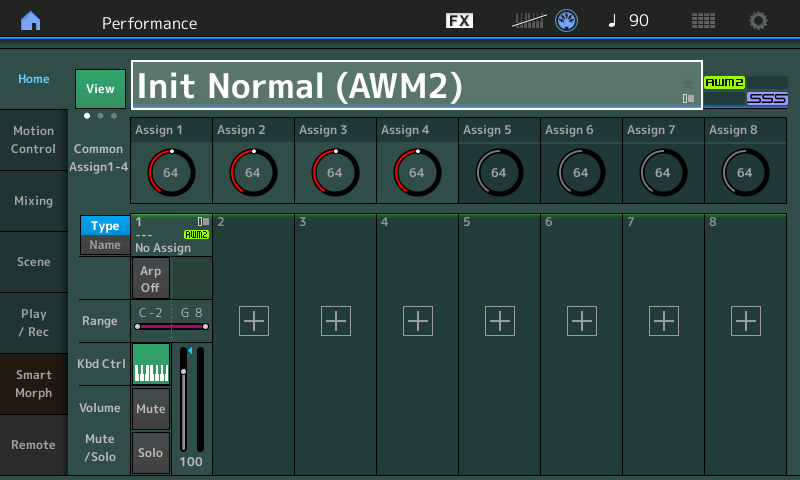
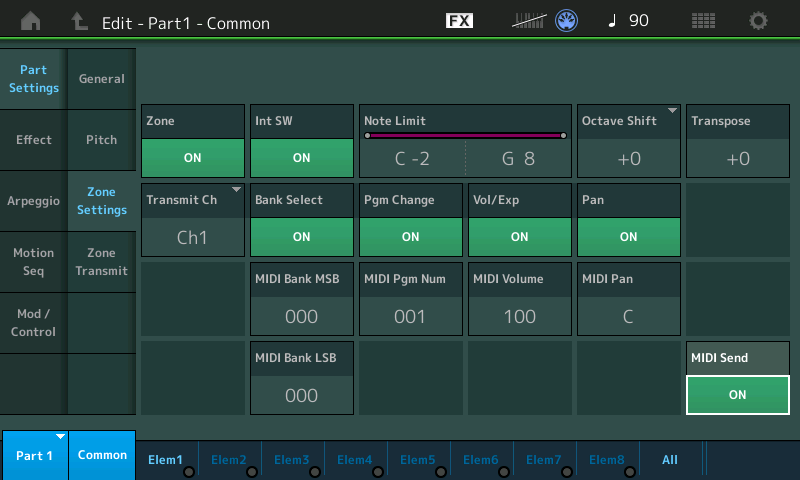
Cursor over to the part and hit the EDIT button. You should see two additional Zone Master tabs that normally aren’t displayed in Part Common Edit (i.e., when Zone Master is disabled). Tap the Zone Settings tab. Make the following changes:
- Turn Zone ON.
- Set the Transmit Channel to Channel 1 or your heart’s desire.
- Turn MIDI Send ON.
Make sure Bank Select and Program Change are enabled (ON). Now you’re ready to send bank and program change messages to the target device. You did connect your target device to the 5-pin MIDI OUT port, right?
For those of you who are building a Performance to be saved and used in the future, check out the Internal Switch (Int SW) parameter. Turn it OFF if you don’t want MODX to send messages to the internal tone generator, that is, make this a locally silent part.
Cursor over to (or tap) the MIDI Bank MSB, MIDI Bank LSB and MIDI Program Number parameters to change values. MODX sends a full three message sequence when the Program Number is changed. So, if you change Bank MSB or LSB, you must send a Program Number to send the full sequence and make the actual patch change in the target device.
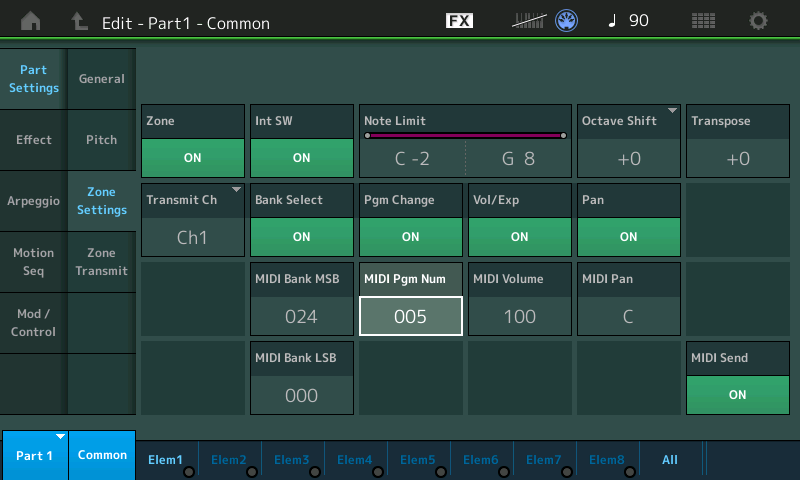
In the screenshot above, Bank MSB 24, Bank LSB 0, and Program Change 5 selects the 60’s vintage electric piano (Wurli) in the Akai MPK Mini Play tone generator. Oh, you didn’t know the MPK Mini Play had a Wurli variation? Read on, below.
Conveniently, you can send MIDI volume (CC#7) and MIDI pan (CC#10) messages from this same screen. You can mess with local Octave Shift and Transpose. Pitch bend and mod wheel messages go out, too, and you can play away and freely audition sounds in the target device/module.
Overall, I find the MODX Zone Master method an easy way to experiment with a target device or tone module. If you’re a MODX owner, give it a try!
Hacked Akai MPK Mini Play?
In case you missed it, I added 5-pin MIDI to the Akai MPK Mini Play (Mk1) and gained full access to the Dream S.A.S. SAM2635 synthesizer chip within. The mod is fairly simple and relatively risk free as far as mods go. [Please remember that any mod has risk and voids your warranty.]
The MPK Mini Mod is functioning quite well and is stable. Just remember that only one source can send MIDI messages to the SAM2635 at a time, i.e., either the MPK Mini Play host microcomputer or the 5-pin DIN MIDI IN, not both. Messages are not merged and will collide electrically, leaving the SAM2635 confused.
The Dream SAM2635 is a full Roland GS implementation, not just General MIDI. The SAM2635 offers variation sounds including different organs and electric pianos. I really need to write a short run-down and review…
MODX screen capture
Just in case you’ve forgotten the steps to capture a MODX screen, here they are:
- Insert A USB flash drive into the USB To DEVICE port on the back panel.
- Press and hold the A/D INPUT ON/OFF button.
- Press and release the AUDITION button.
- Release the A/D INPUT ON/OFF button.
Simple, eh? And so easy to forget. 🙂 The screen shots are written to the USB flash drive in PNG files.
BTW, according to my web stats, my MODX split/layer tutorial remains popular. Take a look if you’re still puzzled about splits and layers. I also have a simple MODX Super Knob example.
Copyright © 2022 Paul J. Drongowski