Korg Triton Taktile: Snap Review

The Korg Triton Taktile has a double personality. On one hand, the Triton Taktile (TT) is a MIDI controller with eight knobs, eight sliders, eight buttons, sixteen pads and a set of DAW function buttons. (These are the specs for the 49-key model, the model that I’m using.) On the other hand, it is a synthesizer with the Korg Triton classic sound engine. Right now, I’m playing the TT as a synth and I will be concentrating on the synth features.

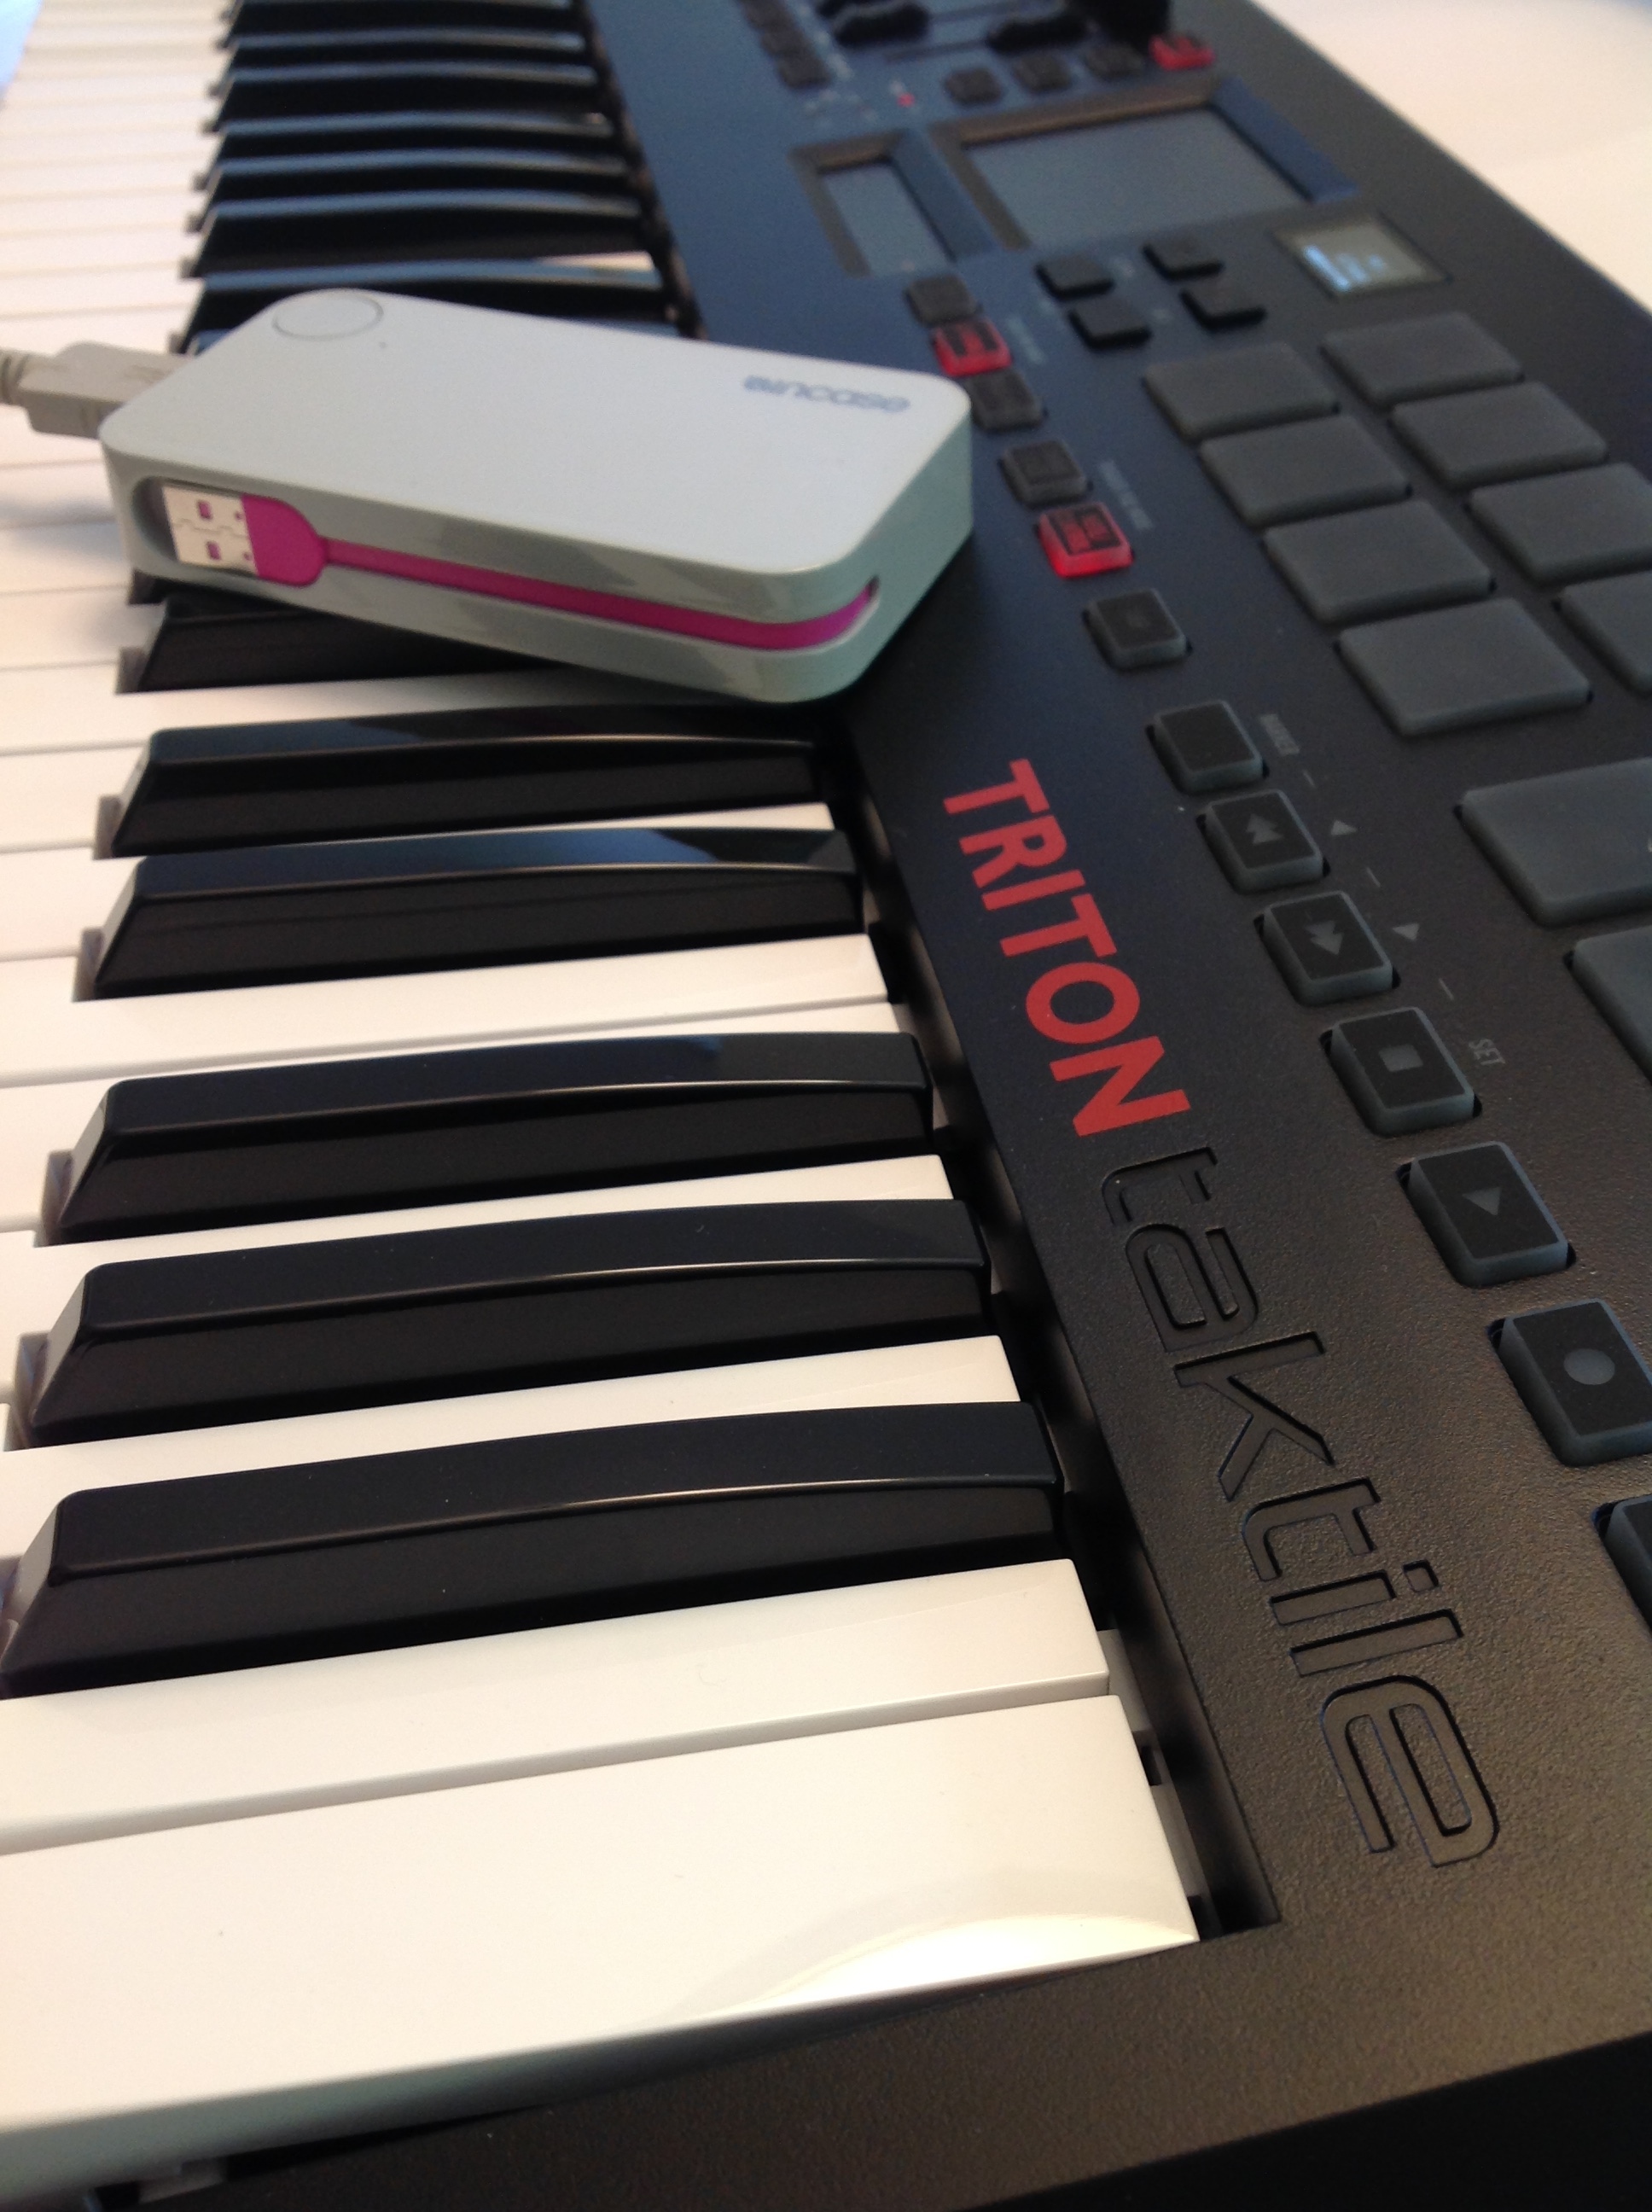
The Sound On Sound review of the Korg Taktile controller (the model without the sound engine) is very well-written and I recommend reading the SoS article for more information about the TT’s control capabilities. I will say that Korg hit my major checkmarks for a controller: a 49-key keyboard with a good action, expression pedal input, sustain pedal input, and TA-DA, a 5-pin MIDI output in addition to the USB-B connector for power and computer/tablet communications. The TT will operate on a portable, rechargeable USB power pack (minimum 5V 1A output) and that is in fact how I’m using it in the studio. The picture below shows the Triton Taktile under battery power. The TT weighs just a little bit over 8 pounds (3.8kg) and is easy on the eyes as well as the back.

TT_with_battery

The TT connects to either headphones or external amp through a 3.5mm stereo jack. All of the connections are made through a panel on the right side of the TT. The output level is sufficient for comfortable listening on Roland RH-A7 headphones, my current choice for head gear.

As you might be aware already, you don’t get a full Triton classic. The TT is not multi-timbral and it does not have combinations (“combis” or layers) and insert effects. However, you can bring up one of 512 classic programs (voices) and play your heart out! There are two system-level master effects (MFX1 and MFX2) that are appropriate for the preset voice, e.g., chorus and reverb on electric piano. The TT is strictly a preset machine as program edits cannot be stored. This hasn’t cramped my act so far, but like any of the TT’s limitations, it could be a deal-breaker. You can save your favorite preset programs into two sets of favorites (set A and set B, each set with eight slots) for quick patch selection.

Hit the dedicated SOUND button to leave controller mode and go to synth mode. The current patch number and name are shown on the nice bright OLED display. Even though the OLED display is small, it is very readable. There are three ways to select a program:

  1. Press one of the program category buttons (assignable buttons F1 to F8). The TT selects the first program in the category or the last selected program in the category. It remembers the last selected program until power-off.
  2. Use the value slider (ribbon) to scroll through the programs. Tap the “+” or “-” at either end of the slider to increment/decrement, or slide your finger along the ribbon to move quickly to a new patch.
  3. Select one of your favorite programs from either set A or set B.

It takes a little practice to get the hang of the slider. Do not take this ax to a gig and expect to select patches on the fly! I recommend setting up favorites and getting the general layout of the patches before hand. Otherwise, an embarrassing epic fail will ensue.

The keyboard feels very good for a controller in this price range. It has a little more resistance than the Yamaha MOX series, for example. I find it quite comfortable to play — it does not feel like a toy. Korg claim that it is the same action as the Krome and I have no reason to doubt them. The pitch bend and modulation wheel also have a satisfying feel. The knobs and sliders are a little bit “light” to me. I don’t have an opinion on the pads as yet.

I enjoy playing this instrument! The knobs and sliders control eight parameters: volume, cutoff, resonance, attack, delay, release, MFX1 and MFX2. Cranking the cutoff and resonance is a real visceral thrill. The two master effects, unfortunately, are very subtle and understated. The TT cries out for a multi-effects unit with distortion and other sonic manglers.

My favorite sounds are the electric pianos, drawbar organs, church organs (!), strings, and acoustic guitar. Korg strings have always had a wonderfully expressive depth and these patches do not disappoint. The electric pianos are very clean. I threw a cheap Danelectro overdrive on the output in order to realize the EP’s full funked-up potential. Oh, for a multi-effects unit, Korg!

The brass isn’t too bad, especially the horns, cornet and flugelhorn. The TT’s woodwinds are pretty naff — yuck. My musical personality is split between liturgical church music and jazz/funk/60s rock. On the church side, I’m disappointed with the oboe, clarinet and other reeds. On the pop side, I don’t often venture into synth territory. However, the HipHopLead patch is great when you feel the urge for Herbie. There are a lot of lead and pad sounds to explore and I’m sure that I’ll find a few other useful patches.

The handbook in the box is helpful, but not sufficient. Be sure to download the parameter guide and the Triton Taktile-specific MIDI implementation chart. Korg could be a little more forthcoming about the MIDI implementation considering that the Taktile series are MIDI controllers for heaven’s sake. The full list of programs is at the absolute end of the parameter guide. I always look through the list of patches for a synth/workstation when considering a purchase and this list is somewhat hidden away at the end of the parameter guide.

Bottom line, I’m happy with the Triton Taktile even when its limitations are taken into consideration. It could be the heart of a light-weight, portable, battery-powered rig and I’m exploring that potential right now.

Polyphonic Arduino synthesizer

If you’re interested in building an Arduino-based ROM-pler, this next project is for you!

One of my long term dreams is to build a low-cost 60s-style combo organ. My latest project uses an Arduino UNO as a sample playback, sound synthesis engine. Although the waveforms are taken from the old VOX Continental and Farfisa Mini Compact organs, the design and code could easily use single cycle waveforms from a vintage synth, a string machine, your first born child, whatever! The 60s combo organ project is essentially a software ROM-pler that plays back up to five waveforms at a 22,050Hz sampling rate.

The project hardware consists of an Arduino UNO and a Narbotic Instruments MidiVOX shield. The MidiVOX shield has a Microchip Technologies MCP4921 12-bit digital to analog converter (DAC) and an opto-isolated MIDI input. Although the MidiVOX is no longer in production, it’s basic circuitry is easy to recreate; several other popular audio shields use the MCP4921.

Waveforms are stored in the Arduino’s program memory (PROGMEM), just like code. Program memory is non-volatile and the waveforms are ready to go just like a pre-loaded sketch. The combo organ sketch sets up TIMER1 to generate interrupts at a 22,050Hz sample playback rate. The interrupt handler reads the next sample for each of five virtual tone generators, sums the samples together, and writes the next aggregate sample to the DAC.

MIDI communication is performed through the standard Arduino MIDI library (version 4.2). The sketch registers two callback functions via the library: a note ON handler and a note OFF handler. The MIDI note handlers configure the five virtual tone generators. The sketch’s loop() function is trivial — it merely calls the MIDI library read() function and checks a reset button on the MidiVOX shield.

We all know that Direct Digital Synthesis (DDS) — the usual approach for sample playback — is a compute intensive technique for sound synthesis. DDS dynamically shifts the pitch of a stored waveform from its root pitch (the frequency of the sampled note) to the target pitch (the frequency of the MIDI note played by the musician). DDS performs waveform pitch-shifting through phase accumulation and interpolation. Floating point arithmetic is too slow and most DDS implementations use fixed point arithmetic. Even then, the computational load is heavy.

So, how did I achieve five note polyphony? Instead of storing a single waveform at a single root pitch, my approach stores twelve waveforms — one waveform for each basic pitch in the chromatic scale. The algorithm uses integer phase increments, thereby eliminating floating or fixed point arithmetic and interpolation entirely. The approach requires more space, but is quite fast. Each sampled instrument occupies 20% of program memory, allowing up to four different instruments before running out of PROGMEM.

Here are two quick MP3 demo files: a Farfisa-type sound and a and a VOX-type sound. I created the vibrato by routing the audio signal through an inexpensive Behringer UV300 vibrato pedal.

As usual, we always publish code. Need a cheap ROM-pler? Now you’ve got one!

Update 22 July 2016: If you’re into retro, be sure to check out the Arduino lo-fi beat box project. Filled with lo-fi TR-808 goodness!

MidiVOX: An appreciation and review

They just don’t make ’em like they used to. In the case, of the Narbotic Instruments MidiVOX shield for Arduino, I really mean it!

The MidiVox is a bit of a blast from the past as Narbotic no longer manufacture and sell the MidiVOX shield kit. Major bummer. Luckily, I purchased one of these little gems from the MakerShed when the shields were available a few years ago. Narbotic kindly maintain the design information and code on their Web site.

To me, the MidiVox is a most logical combination of a MIDI IN port and a 12-bit digital-to-analog converter (DAC). The MIDI port incorporates a 6N138 optocoupler for electrical isolation and a 5-pin DIN connector. The port is connected through a “PGM/MIDI” switch to Arduino digital pin D0, also known as the serial receive (RX) pin. The PGM position connects the serial pin the usual way in order to download to the Arduino. The MIDI position connects the Arduino serial RX pin to the MIDI IN circuitry. The switch component is robust and is easily accessible when the MidiVOX is on top of the Arduino and/or other shields.

The 12-bit DAC is a Microchip Technology MCP4921. This DAC is used in several other audio shield designs including the Adafruit Wave Shield and the Nootropic Design Audio Hacker Kit. The MCP4921 connects to the Arduino SPI port through digital pins D13 (SCK), D11 (MOSI), and D9 (chip select/slave select). Conventional practice recommends using D10 as slave select (SS), but it isn’t a big deal to use D9 instead as this is mainly a software issue. Slave Select (called “chip select” in the MCP4921) chooses and enables communication with the slave device. This capability is essential when more than one device is connected to the same SPI interface as in the case of the Nootropic Audio Hacker shield.

Although it seems like a no-brainer to connect all SPI devices to the Arduino SPI pins, the Adafruit Wave Shield does not follow this approach. It connects the SD card interface to the SPI pins, but connects its MCP4921 to three ordinary digital pins. The Wave shield software bit-bangs the digital pins to transfer data to its DAC. I’m not a fan of this approach, preferring to use standard libraries instead of possibly buggy, poorly documented bit twiddling code.

The MidiVOX shield implements a 2-stage, passive filter following the DAC output. The MidiVOX sends a mono signal through an on-board trim pot into a 3.5mm audio output jack. Trim pots are usually rated for a relatively small number of operating cycles, so it’s best to set this level once and make volume adjusts at an external mixer, preamp, or whatever.

The MidiVOX shield provides a DATA LED controlled by digital pin D7. The shield also has a RESET button (momentary contact switch) connected to digital pin D6. This button is ACTIVE LOW, meaning that the button pulls D6 to ground when it is pressed. Therefore, the pin mode should be configured as INPUT_PULLUP such that D6 is pulled up internally when the button is not pressed (i.e., the momentary contact switch is open).

Construction was easy. The resistors have five color bands, but don’t let this throw you off. The construction directions give the correct color code and you can (and should!) always check resistor values with a meter before insertion and soldering. I replaced the basic header pins with “stackable headers” (two 8-pin and two 6-pin). Stackable headers provide a way to make easy external connections to the shield stack from a breadboard, etc.

The completed board is shown in the photo below. The MidiVOX is stacked on an Arduino UNO with the USB, audio and MIDI cables, and is ready to go.

MidiVox

I wrote a diagnostic sketch to check out the different parts of the MidiVOX. I wish manufacturers would provide check-out sketches instead of relying on somebody’s possibly flaky application sketch for smoke testing. If something is busted, it’s important to find it early through a directed test that isolates the failure. Fortunately, everything checked out OK the first time!

The MidiVOX diagnostic program is an Arduino sketch to check out parts of a Narbotic Instruments MidiVOX shield. Rename the “loop” functions and rebuild in order to test a particular section of the shield.

Since the MidiVOX is discontinued, we’re all out of luck if we want to get (another) one. However, I strongly recommend studying the MidiVOX design. When I first got started with Arduino and MIDI, I borrowed the MIDI IN circuitry and the low pass filter design. These are simple, solid circuits and are good basic building blocks for other designs and applications.

Where to next? My dream is to build a low-cost 60s combo organ with the era-appropriate look and sound. The organ would look like a Vox Continental with a Z-shaped chrome stand and bright red Tolex covering. It would sound like either a Farfisa or a Vox — nothing too nuanced with all of the drawbars or tabs turned on. I’d like to use a cheap and lightweight MIDI controller as the keyboard. The controller would drive a low-cost (Arduino-based?) sound generator. I’m hacking out a prototype using an Arduino UNO and the MidiVOX shield. More to come…

PERF tutorial part 3 is now on-line

Just wrapped up Part 3 of the Linux-tools PERF tutorial.

The tutorial now consists of three parts. Part 1 covers the most basic PERF commands and shows how to find program hot-spots using software performance events. Part 2 discusses hardware performance events and performance counters, and demonstrates how to measure hardware performance events using PERF counting mode. Part 2 introduces several derived performance metrics like instructions per second (IPC) and applies these metrics to the sample application programs.

Part 3 is the newest addition to the tutorial series. It builds on parts 1 and 2, showing how to use hardware performance events and counter sampling to profile an application program. Part 3 discusses sampling period and frequency, the sampling process, overhead, statistical accuracy/confidence and other practical concerns.

I hope you find the PERF tutorial to be useful in your work! Although I produced the example data on the ARM-based Raspberry Pi, the commands and techniques will also work on x86.

PERF tutorial part 2 now available

Part 2 of a three part tutorial about Linux-tools PERF is now available.

Part 1 of the series shows how to find hot execution spots in an application program. It demonstrates the basic PERF commands using software performance events such as CPU clock ticks and page faults.

Part 2 of the series — just released — introduces hardware performance counters and events. I show how to count hardware events with PERF and how to compute and apply a few basic derived measurements (e.g., instructions per cycle, cache miss rate) for analysis. Part 3 is in development and will show how to use sampling to profile a program and to isolate performance issues in code.

All three parts of the series use the same simple, easy to understand example: matrix multiplication. One version of the matrix multiplication program illustrates the impact of severe performance issues and what to look for in PERF measurements. The issues are mitigated in the second, improved version of the program. PERF measurements for the improved program are presented for comparison.

The test platform is the latest second generation Raspberry Pi 2 running Raspbian Wheezy 3.18.9-v7+. The Raspberry Pi 2 has a 900MHz quad-core ARM Cortex-A7 (ARMv7) processor with 1GByte of primary memory. Although the tutorial series demonstrates PERF on Cortex-A7, the same PERF commands and analytical techniques can be employed on other architectures like x86.

A special note for Raspberry Pi users. The current stable distribution of Raspbian Wheezy — 3.18.7-v7+ February 2015 — does not support PERF hardware events. Full PERF support was enabled in a later, intermediate release and full PERF support should be available in the next stable release of Raspbian Wheezy. In the meantime, Raspberry Pi 2 users may profile their programs using PERF software events as shown in Part 1 of the tutorial. First generation Raspberry Pi users are also restricted to software performance events.

Brave souls may try rpi-update to upgrade to the latest and possibly unstable release. I recommend waiting for the next stable release unless you really, really know what you are doing and are willing to chance an unstable kernel with potentially catastrophic consequences.

RPi2: Work in progress 1

Here’s a quick status update on working with Raspberry Pi gen 2. The installed operating system is Raspbian Wheezy 3.18.7-v7+ built on 16 February 2015.

I’m happy to report that I could profile programs using PERF software events. I’m disappointed to report that PERF does not recognize any hardware (performance counter) events. This distro has Linux-tools-3.2 installed. I uninstalled 3.2 and installed 3.18 which matches the kernel:

sudo apt-get remove Linux-tools-3.2
sudo apt-get install Linux-tools-3.18

Still no joy when attempting to use hardware events. If you want to profile your program using PERF software events, please see my current PERF tutorial about finding execution hot-spots. I tried all of the commands and, with the exception of one typo, everything still works!

I’m in the process of troubleshooting my loadable kernel module for user-space performance counter events. I’ve encountered many of the same old stumbling blocks (e.g., finding the correct headers and Module.symvers file). At the present time, the kernel will attempt to load the module, then die. I cannot tell at this stage if there is a problem in the module itself or if there is a bug in Raspbian Wheezy. In case you want to dive into module development yourself, I’ve started a permanent page for building kernel modules on RPi2.

Once again, after two+ years, I want to make a public plea for more open information about the underlying hardware and for guidance and support for end-user device driver development. Quite frankly, Broadcom plays this situation too close to the chest, especially for a computer that’s advertised as a vehicle for learning and education. The dearth of information is stifling. People still struggle to identify and download essential information (e.g., Module.symvers) for device driver development. This is not true of other major Linux distros and the Raspbian folks really need to take note! Broadcom, in particular, runs the risk of killing off the goose laying the golden eggs.

Before signing off, here is a quick PERF command cheat sheet. I recommend reading the tutorial, but if you really must peck away at the keyboard… All the best!

perf help
perf list
perf stat -e cpu-clock ./program
perf record -e cpu-clock ./program
perf record -e cpu-clock,faults .program
perf report
perf report --stdio --sort comm,dso --header
perf report --stdio --dsos=program,libc-2.13.so
perf annotate --stdio --dsos=program --symbol=function
perf annotate --stdio --dsos=program --symbol=function --no-source
perf record -e cpu-clock --freq=8000 ./program
perf evlist -F

Replace “program” with the name of your application program and replace “function” with the name of a function in your program.

Second generation RPi is here

The second generation Raspberry Pi (RPi2) is now shipping in large quantities! Given the excitement on the Web, this machine should be at least as popular as its first generation parents. Although the RPi2 model B has the same overall form factor as the first generation model B+, the designers made two substantial improvements which make the RPi2 a contender for your desktop:

  1. The single core Broadcom BCM2835 is replaced by the quad core BCM2836.
  2. Primary memory is increased to 1GByte of LPDDR2 RAM.

That’s just the face of it. Not only does the BCM2836 have four processor cores instead of one core, the cores are based on the ARMv7 architecture (Coretx-A7) including the NEON single instruction, multiple data (SIMD) instructions. The clock frequency is increased to 900MHz (from 700MHz). I’ve already begun to explore the ARMv7 micro-architecture and plan to write up a short, concise summary of its performance-related characteristics.

The BCM2836 has a different memory controller. Primary memory is no longer implemented using the Package on Package (PoP) approach. The Elpida (Micron) B8132C4PB-8D-F memory chip is mounted on the bottom of the RPi2 board (instead of the PoP piggyback).

The RPi2 sold out at Sparkfun almost immediately. Fortunately, Canakit, Element14 and Microcenter have received shipments, too. Amazon advertised the Canakit Raspberry Pi 2 Ultimate Starter Kit at a very attractive price and I immediately bought a kit. Microcenter in Cambridge had a mound of RPi2s and impatience took the best of me — I bought one. Yes, after getting the mail, I now have two.

I copied the latest Raspbian Wheezy release (16 February 2015) to a 16MByte microSD card using Win32DiskImager. The Canakit ships with NOOBS on an 8GByte card and I hope to try and report about NOOBS later. There was a little drama while bringing up Raspbian Wheezy as some relatively small, but annoying problems did crop up. Once I got past the sand traps, the new RPi2 proved to be an able performer.

Today, I copied my test software over to the RPi2. Here is a quick comparison between the older RPi model B and the new RPi2.

Platform Naïve MM Interchange MM
RPi model B gen 1 18.67 sec 6.75 sec
RPi gen 2 3.15 sec 2.42 sec

The two test cases are the naïve matrix multiplication program and the loop nest interchange matrix multiplication program. (Get the code in the source section of the web site.) Yes, that is a 6x improvement in performance for the naïve case. It’ll be fun to explore and find the reasons behind the speed-up. Fast matrix multiplication depends upon memory bandwidth and there must be some significant improvements in the memory subsystem. Naïve matrix multiplication incurs a lot of translation lookaside buffer (TLB) misses, so improvements in TLB miss handling could also contribute to the speed-up in the naïve test case.

I ditched the Epiphany Web browser as it seems to have significant bugs. The browser crashed repeatedly when loading the New York Times front page. This is unacceptable. I installed Midori, which came with the initial release of Raspbian Wheezy. The New York Times front page is a bit of a torture test. Midori loaded the page in less time than the RPi gen 1, but still felt slow and logy. I suspect that many applications will need to be compiled for ARMv7 before we end-users get the full benefit of the BCM2836. The initial result, however, is encouraging.

Well, I’ve started to reorganize the site’s menu structure in order to get ready for new content about the RPi2. I intend to retain the older articles as they remain quite relevant. More to come!

Make music with MMS on a PSR

Yamaha Mobile Music Sequencer includes features for Motif, MOX and Tyros5, but did you know that you can create music using MMS on your PSR arranger? Yes, you can!

I’m using MMS with both the Yamaha PSR-E443 and PSR-S950 and I have written up a tutorial on making music with MMS on PSR/Tyros. This article concentrates on set-up, MIDI voice selection and MIDI file export which are aspects not covered by the MMS manual. The tutorial complements the many on-line videos that demonstrate composition and mix down. In particular, I show how to use the full 128 voice General MIDI voice set in the PSR, thereby expanding your sonic palette beyond the limited range of voices built into MMS.

Enjoy and keep on keepin’ on!

Scat voice expansion pack

I’m pleased to release version 1 of my jazz scat voice expansion pack for Yamaha PSR-S950 and PSR-S750 arranger workstations. The expansion pack has five PSR voices which let you create “Take 6” style, a cappella arrangements and other kinds of jazz voice performances. Give the MP3 demo a try!

Four of the PSR voices are individual syllables: DOO, DOT, BOP and DOW. The DOO syllable is looped and let’s you create sustained chords for backing. The DOT, BOP and DOW syllables are short and provide scat-like expression. All four syllables are combined into a velocity-switched voice where you select and play one of the syllables based on how hard you strike the keys (i.e., MIDI note velocity). You will need to adjust touch response (and practice!) to get the most playable and musical result.

Here is a link to the expansion pack file. You need to download and UNZIP this file, then install the YEP file by following the directions in the Yamaha PSR-S950/PSR-S750 Owner’s Manual. See the section titled “Expanding Voices”.

I am also releasing the multi-samples that I used to create the expansion pack in case you would like to create a scat voice for your own synthesizer or software instrument. If you are curious about how I created the expansion pack voices and the samples, please see this blog post.

Both the scat voice expansion pack and the scat voice samples are released under a Creative Commons Attribution 4.0 International License.

Creative Commons License
ScatVoices and ScatVoice samples by Paul J. Drongowski are licensed under a Creative Commons Attribution 4.0 International License.

You are free to use the expansion pack voice or samples (even for commercial purposes) as long as you provide a link to http://sandsoftwaresound.net from your own web site AND/OR explicitly credit me in your creative work, e.g., “Scat samples/voice by Paul J. Drongowski”.

Sampling “scat”

In this post, I describe the process and tools that I used to capture samples for my jazz scat voice. I will eventually release the voice (for the Yamaha PSR-S950 workstation) and its samples under the Creative Commons attribution license. I’m not the best singer, so I’ve had to rely on technology as much as possible while still producing a musical result. I want to emphasize that I sang, edited and produced all of the samples and the voice patch; it is original work.

The jazz scat voice is inspired by the (in)famous “jazz voice” patch found in Roland keyboards. The Roland patch is based on samples from the Spectrasonics Vocal Planet library by Eric Persing and Robby Duke. Their work was clearly influenced by Take 6 and other contemporary a cappella artists.

My patch uses four multi-samples where each multi-sample is a particular syllable taken over 12 (or so) pitches. The multi-samples cover the natural range of the human voice from F3 to F6 where C5 is middle C. The four syllables are: DOO, DOT, BOP and DOW. The DOOs are long, looped samples that provide a musical bed or harmony. The remaining three samples are short one shots suitable for melody, punctuation and accents. The DOW syllable falls.

The basic patch design is summarized in the following table.

Syllable Type Vel low Vel high Gain
DOO Loop 1 89 0 dB
DOT One shot 90 105 -3 dB
BOP One shot 106 119 -6 dB
DOW One shot 120 127 -9 dB

The table shows the MIDI velocity range to each syllable (multi-sample). It also shows the relative gain for each syllable. The gain decreases as velocity increases in order to maintain a more consistent volume level as the keys are struck harder to trigger the one shots.

At a strategic level, the sampling production process consists of two major steps:

  1. Capture a natural voice sample for each syllable and pitch. These natural voice samples are the formants to be used in the next step.
  2. Capture a vocoded sample for each syllable and pitch while playing the appropriate formant sample through the PSR-S950 vocoder.

This process produces scat syllable sounds that are consistent, pitch accurate and in the case of the DOO syllable, loopable.

Here’s a run-down of the practical problems that motivated this approach. My voice is an untrained baritone. It cannot possibly cover the F3 to F6 range without hysterical noise and possible voice damage. As I discovered, it is nearly impossible to sing pitch accurate short syllables such as these without proper training! I needed to find a method that would give me a consistent and pitch accurate sound across the desired range of pitches. This is a greater challenge than I originally anticipated and a lot of experimentation led to the two-step method. It took about 3 weeks to find the method and then a further two weeks of production work.

Now, the details.

I used a Roland Micro-BR digital recorder to capture both natural voice and vocoded samples. This little wonder is great — easy to use, fast and above all, quiet. For natural voice, I sang into a Shure PG-81 condenser microphone feeding an ART TUBE MP preamp. The TUBE MP is a really Swiss army knife providing phantom power for the PG81, a little bit of tube warmth, and conversion from XLR to a line level audio signal. The output of the TUBE MP is connected to the Micro-BR. For vocoded voice, I connected the line level mono output of the PSR-S950 to the Micro-BR. In both cases, all Micro-BR input effects are disabled and gain staging is established before hitting the RECORD button.

Formants are captured and produced in the following way. I sang each syllable multiple times at each of the desired pitches while recording to the Micro-BR. The pitches cover the F3 to F6 range such that no resulting final sample would be transposed up more than one semi-tone and/or down two semi-tones. Transposing up or down more than these limits negatively affect sound quality (obvious sample speed-up/slow-down). The entire sampling session is converted to WAV format and then transferred to a PC where Sony Sound Forge Audio Studio is used to review the sung syllables and to select the best one at each pitch. Each selected syllable is saved in its own WAV file. The selected syllables are tuned with Celemony Melodyne. The tuned syllables are the formants for the vocoding phase.

Sony Sound Forge is a solid audio editor. I can work fast in Sound Forge and its “Copy new” function is ideal for cherry picking a recording session. In a few cases, I had to amplify a sample to compensate for low level. When singing across such a wide range of pitches, one needs to rely on electronics/software for amplification in order to avoid voice strain! For tuning, I used the trial version of Celemony Melodyne Single Track which installed with Sonar X3. Although the procedure to enable the trial period was wonky, Melodyne is a great tool and I will very likely buy a copy.

In the second major production step, the formant syllables are sent to the PSR-S950 vocoder and vocoded syllables are recorded on the Micro-BR. The S950 vocoder is not a true synth vocoder. (The Motif/MOX and Tyros vocoders are true “synth” vocoders.) The S950 vocoder is part of its vocal harmony proceesor. Its “VocoderMONO” mode is designed to let (untrained) voices sing into a microphone and impose the formants onto a rather natural sounding, pitch accurate synthetic voice sound.

My early investigation found that the PSR-S950 vocoder needs clean formants that are near the desired final pitch. By clean, I mean formants that do not overdrive the vocoder input and are relatively free of the (un)natural gurgles and what not in the sounds made by the human vocal system. (Well, my vocal system anyway.) The first major step in the overall process let me select the cleanest formants. However, attempts to sing outside one’s natural vocal range introduce gurgles and rasps at the low end and off-pitch histrionics and screeches at the high end. The first major process step choses the cleanest formants and tunes them to the desired pitches.

I loaded the formant samples into a Roland RD-300GX piano as an Audio Key set. Each formant sample is assigned to a particular key and is played by the RD-300GX when the key is struck. Basically, this arrangement gives me a simple one-shot playback engine. The output of the RD-300GX is connected to the microphone/line input of the PSR-S950 in order to drive the vocoder. The mono output of the PSR-S950 is connected to the Micro-BR.

Once everything is connected and levels are set, a little trial and error is needed to find the best formant at each desired vocoder pitch. Think of this as a dry rehearsal for the final recording. Frequently, the formant at the same desired vocoder pitch is the best choice for the vocoded sample. However, sometimes one of the nearby formants is better or produces a more consistent timbre or articulation across the multi-sample. This involves a lot of critical listening and A/B comparison, producing a list of formant and pitch pairs.

Then, it’s time to hit RECORD and capture the vocoded samples by playing the desired pitch on the S950 keyboard and playing the corresponding desired formant on the RD-300GX. Once again, the recording session is converted to WAV format, is transferred to the PC, and is separated into individual WAV files.

At this point, the DOT, BOP and DOW one shot samples are pretty much complete. The DOO samples need to be looped. For some zany reason, Sony Sound Forge Audio Studio saves loop points in Acid METADATA within a WAV file. The Yamaha voice editor does not pick up this information. After searching the Web, I discovered that loop info within a WAV file is not really standardized. Given that the target tool is from Yamaha, I decided to use Yamaha’s Tiny Wave Editor (TWE) to loop the vocoded DOW samples. This worked out pretty well as TWE’s crossfade looping eliminated some bad thumps without introducing artifacts. A lot of trial and error was still involved in choosing the loop points, however. TWE can be found for free on the Web, by the way.

The final production step is to bring all of the vocoded samples into the Yamaha Expansion Voice Editor (EVE) and produce the final voice as part of an S750/S950 expansion pack. I made five voice patches:

  1. DooLoops: DOO syllables over MIDI velocities 1 to 127
  2. GetLayeredUp: All syllables, velocity-switched
  3. DatStuff: DOT syllables over MIDI velocities 1 to 127
  4. BopOnPop: BOP syllables over MIDI velocities 1 to 127
  5. Dow2008: DOW syllables over MIDI velocities 1 to 127

The multi-samples are most easily tested and normalized individually. Plus, the DOO loops and other syllables are musically useful by themselves without velocity switching. I built the GetLayeredUp patch after testing the individual multi-samples and normalizing the volumes of the individual samples within. Choosing the patch names was really fun! (Apologizes to George Clinton.)

The Yamaha Expansion Voice Editor is a trial version for which the trial period was, ahem, adjusted. Yamaha needs to just face facts and release an official version of EVE. Zillions of S750/S950 people are already using EVE and if Yamaha is somehow trying to protect its expansion pack franchise, well, that train done left the station a looooooooooong time ago. At this point, an official EVE would enhance the PSR product ecosystem and sales.

EVE does not implement velocity levels/switching. I used V. Muller’s version of the OLE Toy binary editor to set the element velocity ranges in the GetLayeredUp patch. Thank you, V. A huge amount of effort went into the analysis of YEP files and Python coding and he deserves all of the credit.

Thanks to vocoding, the final samples have a consistent sound. They are a little bit plain Jane by themselves, however. I gave each patch a little bit of reverb (reverb send level 20). I also added the “Ensemble Detune 2” DSP effect (send level 64). This is a truly spiffy effect — a chorus without modulation that gives the impression of an ensemble of slightly detuned voices. It is exactly the kind of gloss that the scat voices need.

Although the velocity ranges in GetLayeredUp are reasonable, users should still expect to tweak the keyboard velocity sensitivity and touch response to their personal needs. For example, I need to play GetLayeredUp on the softest touch setting. Your mileage will definitely vary!

Please stay tuned for the initial release of the expansion pack and multi-samples.