Review: Akai LPK25 Mk2

Here’s a mini review for a mini keyboard!

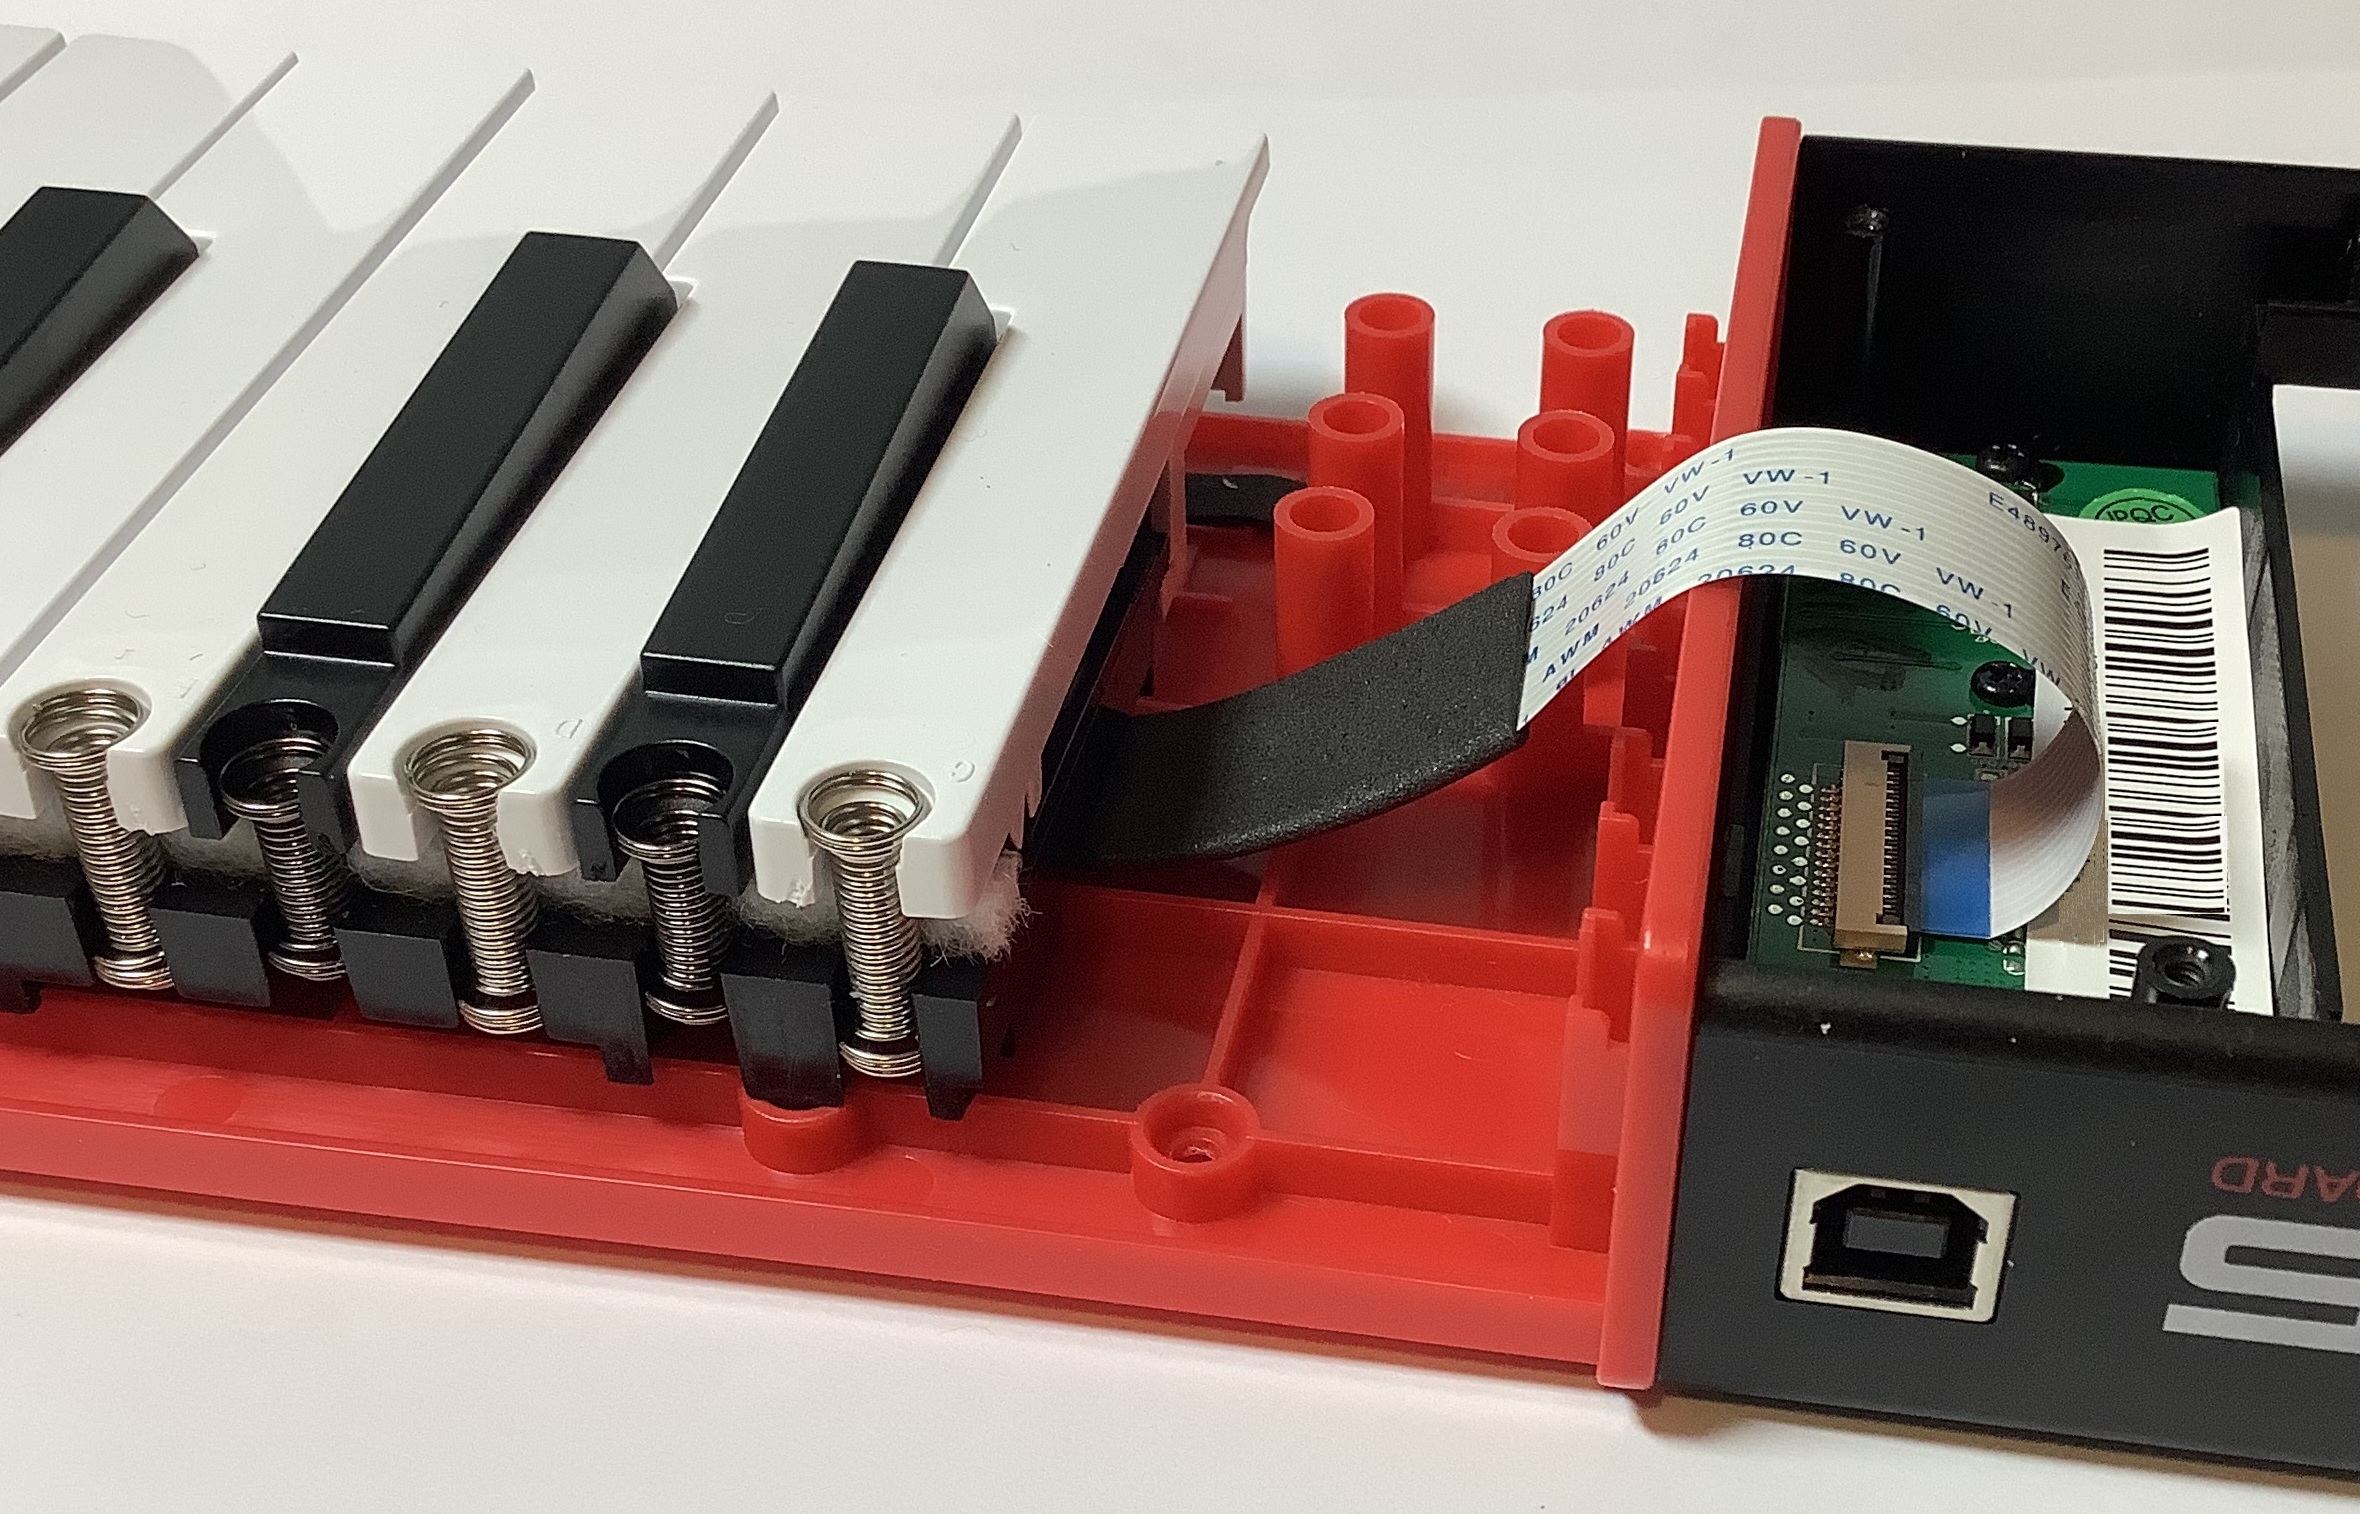
The Akai LPK25 Mk2 is proving to be quite useful. This is a surprise because I initially bought the LPK25 Mk2 as an “organ donor” for one of my other Akai MPKs. I intended to transplant its Gen2 dynamic keyboard to either the Akai MPK Mini Play Mk1 or Akai MPK Mini Mk2. Given the mounting requirements and potentially incompatible cabling, a transplant is very doubtful.

Instead, I’ve been test driving the LPK25 Mk2 with virtual instruments running with an Audio Modeling Camelot host on iPad. Connection is made through an Apple USB charge adapter since the LPK25’s only interface is a full-size USB-B device connector.

Akai LPK25 Mk2 keyboard controller

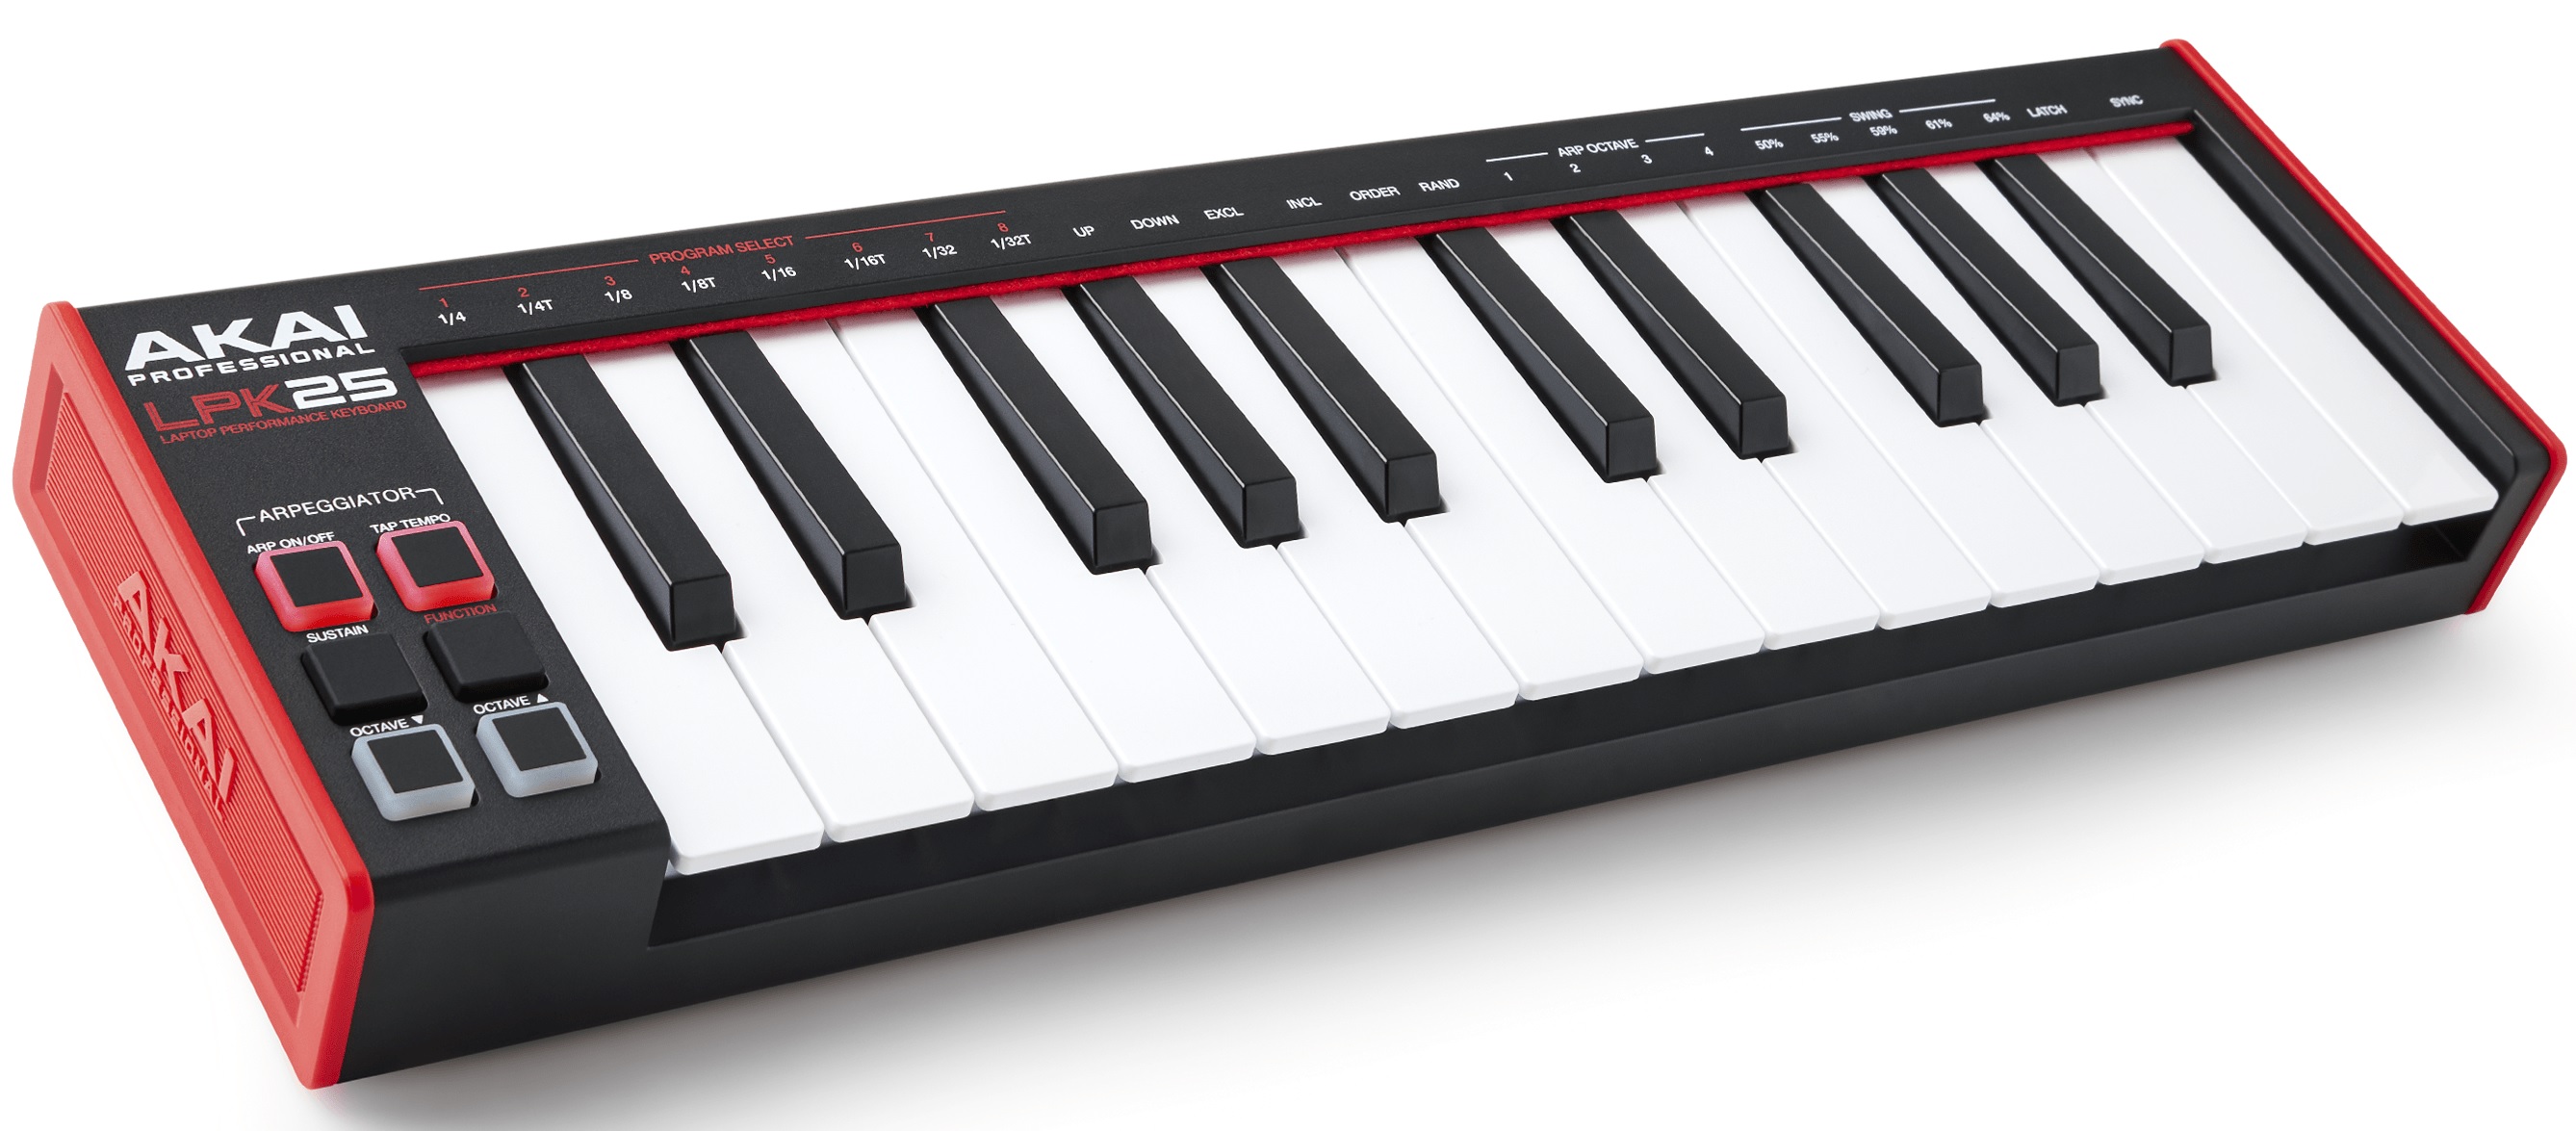
The LPK25 Mk2 is super small — barely bigger than its mini keybed. Power draw is extremely modest. You can run the LPK25 Mk2 from iPad battery using the old Apple Camera Adapter. [This was tested.] I’m using a charge adapter primarily to satisfy the CPU- and power-hungry virtual instruments. Not many mini keyboards can run on iPad battery power, tripping the infamous “attached accessory uses too much power” message followed by USB shut-down. Definitely a plus for the LPK25 Mk2.

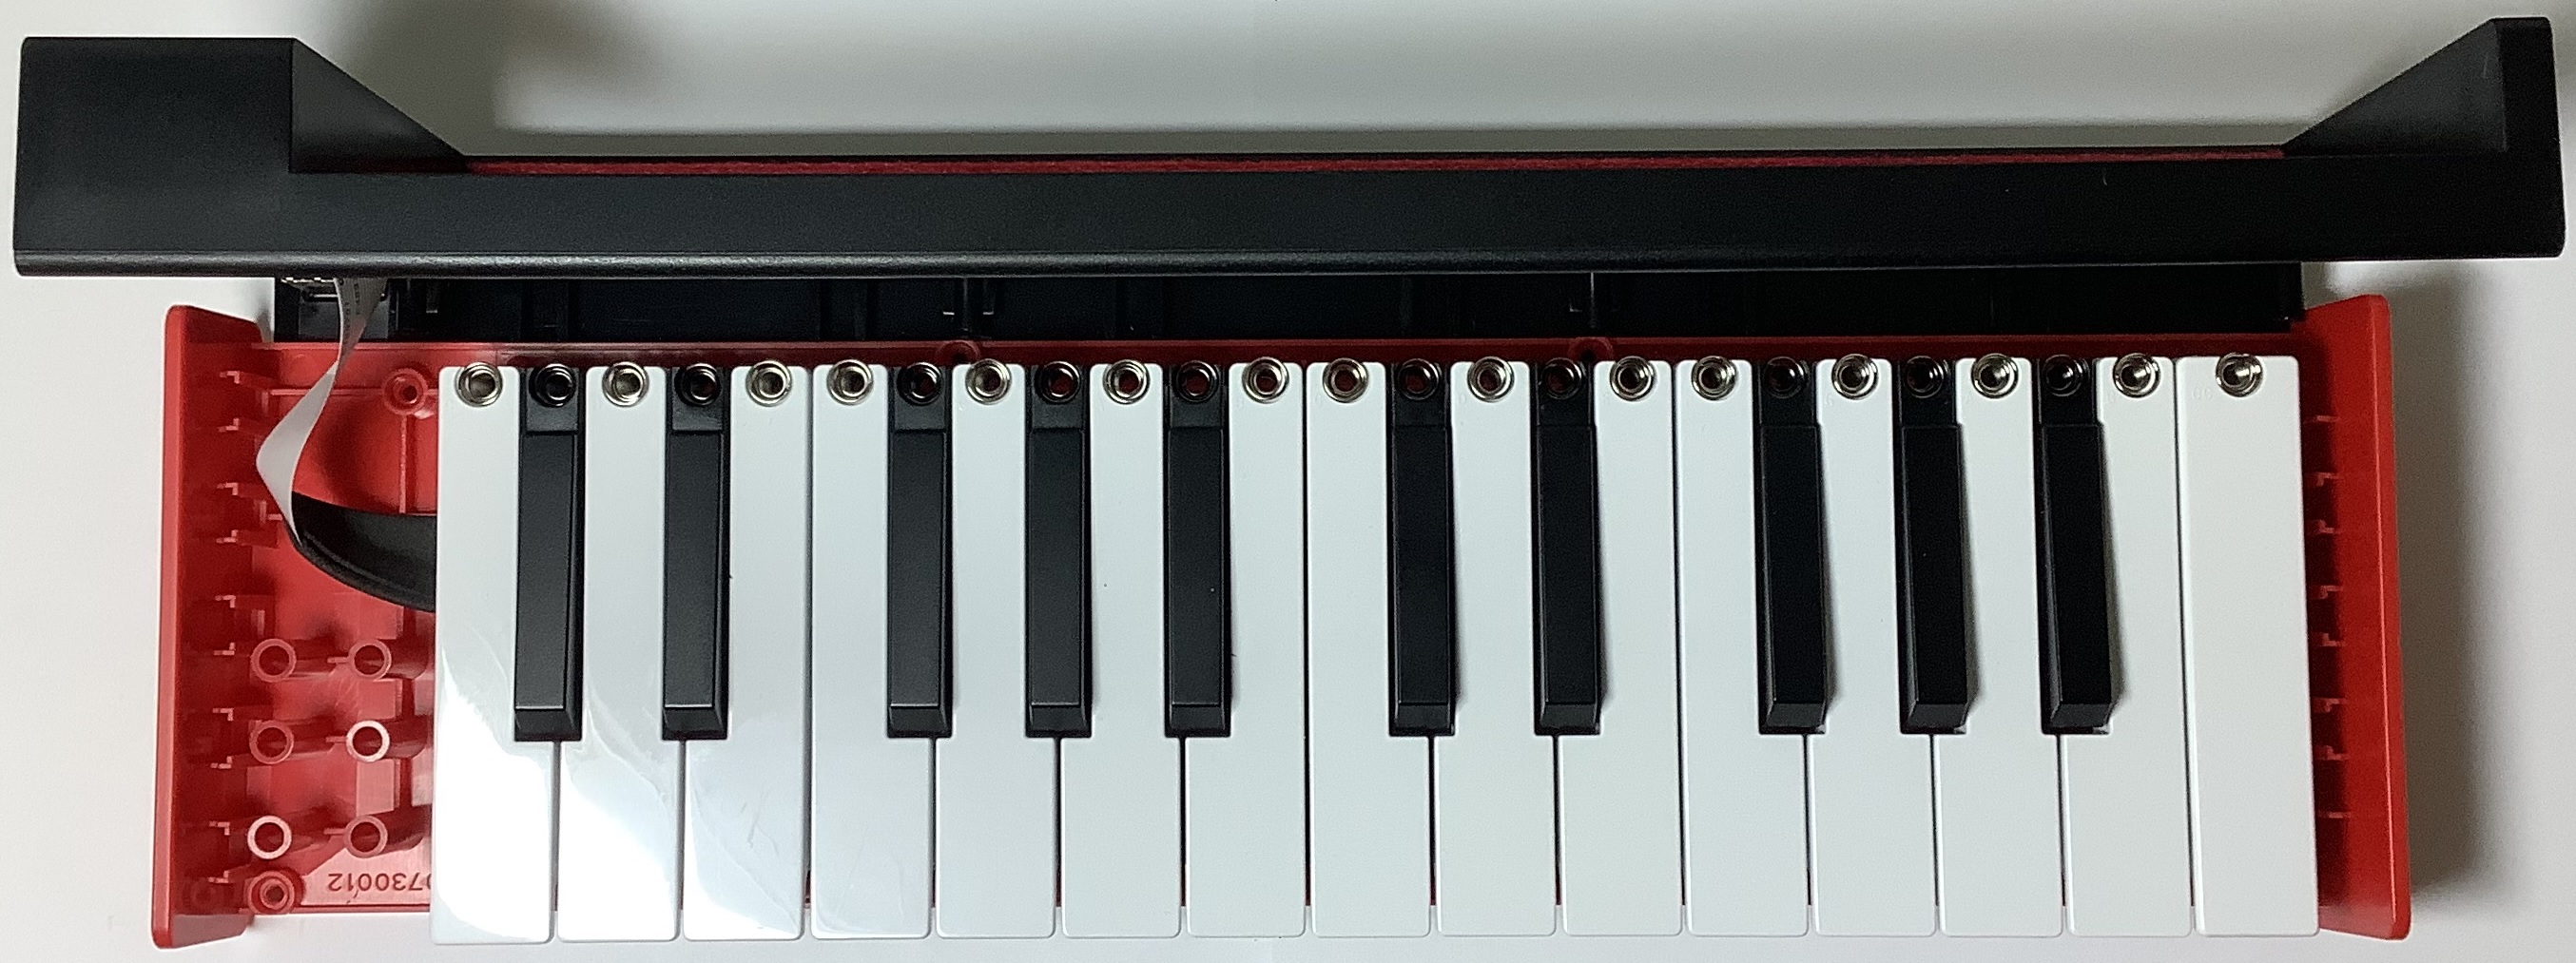
As I mentioned in my transplant article, the LPK25 Mk2 has the new Akai Gen2 dynamic keybed. The LPK25 Mk2 Gen2 keyboard is still two octaves and tiny, but it’s playable! The degree of touch sensitivity depends upon the responsiveness of the virtual instruments themselves. The LPK25 Mk2 does not have any internal touch sensitivity setting.

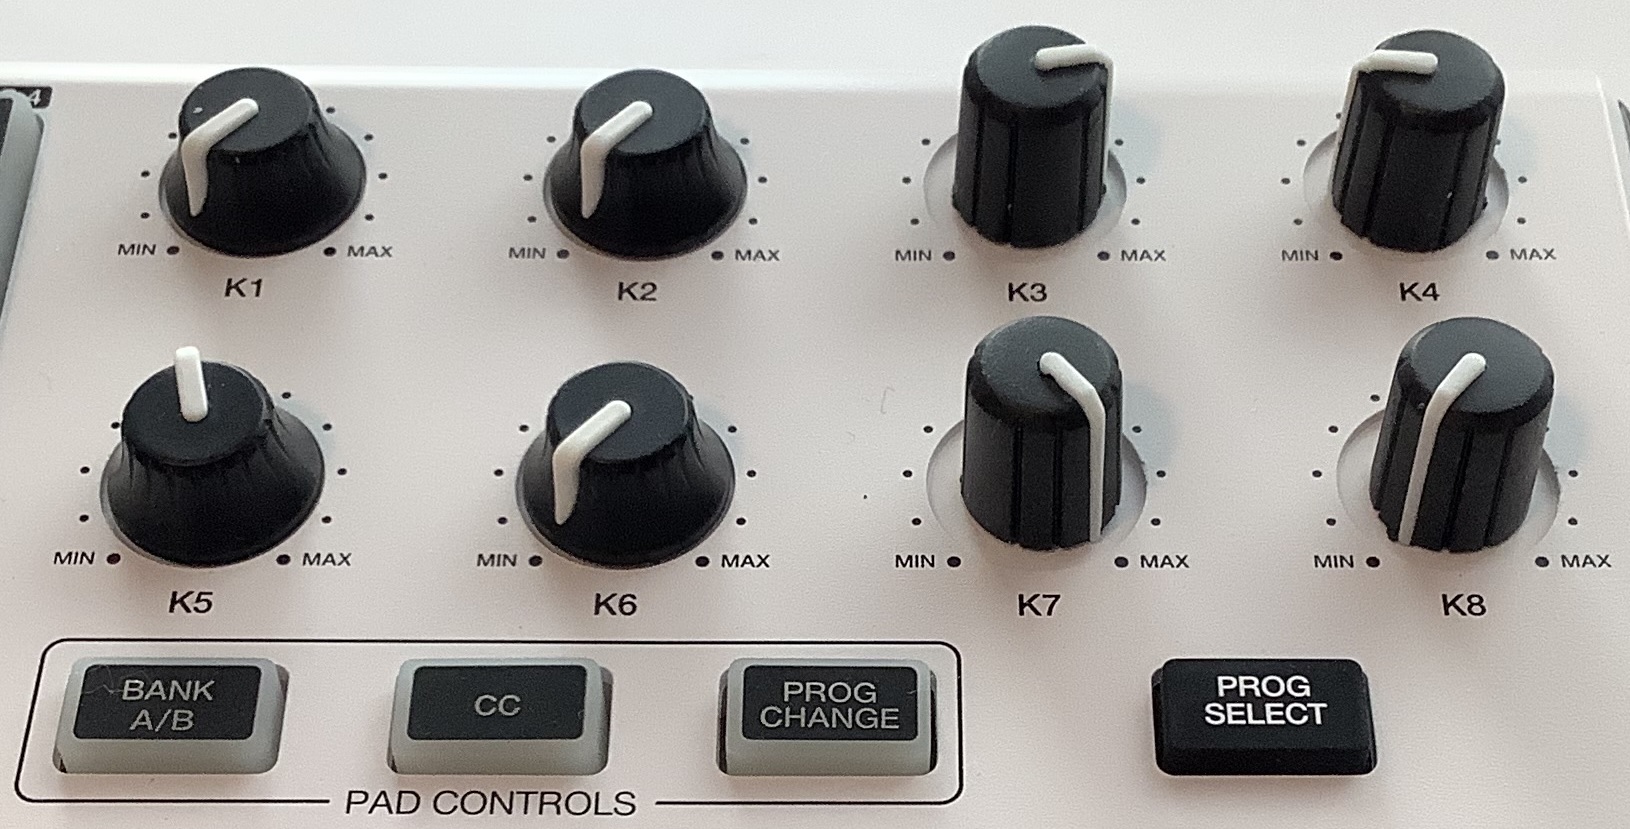
Functionality is straightforward. The LPK25 Mk2 arpeggiator borrows from the well-known (well-worn?) MPK Mini series. There isn’t much more beyond the arpeggiator: octave up and down buttons, shift, and sustain. The sustain button (CC#64) is the only way to send a MIDI CC message as there are not sustain/expression inputs, knobs, sliders, wheels, etc. Nada. The sustain button may be a lifesaver because I need some way to control rotary speaker speed in IK Multimedia B-3X.

CC#64 is all you get. The CC message number cannot be changed to anything else like CC#1 modulation. Akai missed an opportunity here as allowing this change by way of the LPK25 editor would provide a tiny skosh of configurability.

If you absolutely detest mini keys, I doubt if the LPK25 Mk2 will change your opinion. However, if you want a “lap board” and accept the limitations of 25 small keys, the LPK25 Mk2 is a candidate for consideration. It’s not much bigger than the Keith McMillen QuNexus and its mini keys are more playable than the KMI chiclets. Of course, the Akai keys don’t have tilt, aftertouch or MPE…

My dream is a tiny keyboard rig for melody lines or the occasional one-handed pad. In this respect, the LPK25 Mk2 is $40 USD well-spent (Used, B&H Photo Video). The LPK25 Mk2 is also an ultra inexpensive gateway to Akai’s MPC production suite and software ecosystem.

Copyright © 2023 Paul J. Drongowski

Inside Akai LPK25 Mk2

Akai Professional have sliced and diced its mini-controller technology in every way possible: MPK Mini Plus, MPK Mini Mk3, LPK25 Mk2, LPD8 Mk2, and more.

The latest keyboard-equipped minis — including the LPK25 Mk2 — sport a new Gen2 dynamic keybed. The original keybed (Gen1) is grudgingly tolerable and nothing to write home about. Judging from Youtube repair videos, the Gen1 keys are prone to break. So, is the Gen2 keybed a genuine improvement?

Like the game of poker, you need to flash some cash to see the cards. So too with mini keyboards. As a secondary question, I also wanted to crack a new Akai mini open and see if it’s possible to transplant a Gen2 keybed to my Akai MPK Mini Play Mk1. I needed to tear down LPK25 Mk2 to know if such a mod is remotely feasible.

An Akai LPK25 Mk2 sells for $59 USD (MAP). Since I intended to void the warranty immediately, I bought a used LPK25 Mk2 for $40 in order to save money. At the very least, I knew I would gain another license to Akai’s software bundle: MPC Beats, Velvet EP, Mini Grand and AIR Hybrid 3. Fair enough.

Before grabbing a screwdriver, I compared the LPK25 Mk2 keybed against the MPK Mini Play mk1 and MPK Mini Mk2. A little bit of trial play with the LPK25 Mk2 and I’m already convinced there is improvement. The black keys have a little bit of pleasant-to-feel texture. The keys have a nice springiness.

Truth be told, there are differences in the MPK Mini Play Mk1 keybed and the MPK Mini Mk2 White Special Edition — both “Gen1”. The Special Edition is easier to play — the keys have a lighter action and seem to strike more reliably than the Mini Play. Key texture between models is different, too.

The Gen2 keybed really is more dynamic. Playing Lounge Lizard EP, response from pianissimo to forte is relatively smooth without any nasty jumps in volume (key velocity). In comparison, inconsistent touch and volume discontinuities with the Mini Play drive me crazy! As a player, I’m sold on the Gen2 keybed and recommend Gen2 Akai minis, if you’re faced with choice.

Remove 8 screws to pop the top

Popping the LPK25 Mk2 top is easy: remove the eight screws along the perimeter of the bottom chassis plate. I first thought that the rubber pad in the upper right corner (looking at the bottom) might cover a screw hole. It does not. Leave the rubber pad alone. Please. In the image above, I parked the screws where they need to be removed. The ten screws (5 x 2) arrayed further toward the middle of the plate mount the keybed assembly to the bottom plate.

Akai LPK25 Mk2 under the hood

With the top removed, one quickly discovers that Gen2 is not hype. Gen1 and Gen2 keybeds are significantly different. Gen1 keys are secured at their tops by screws. (See one of the many MPK repair videos for details.) Gen1 keys flex when they are struck and they return as the plastic flexes back to its original position. This is why Gen1 keys often break. Flex and return weakens the plastic.

Akai Gen2 dynamic keybed is sprung

Gen2 keys are individually sprung — with real springs! When a Gen2 key is struck, its spring is stretched. The key returns when the spring collapses to its original coiled state. The Akai Gen2 design is similar, in this respect, to the Arturia Keystep key design. The Akai Gen2 keys should be a lot more reliable in the long run, in addition to being nicer to play. Gen2 has padding to eliminate clunks and thumps, too.

Yep, I’m sold on the Akai Gen2 dynamic keybed. But, can a Gen2 keybed be transplanted to a Gen1 instrument?

Doubtful. At best, it’s not a slam dunk. The Gen2 keybed is mounted to the bottom plate. Gen1 instruments have no such mounting holes as the Gen1 keys are screwed directly to the bottom plate. (There are two 12-key subassemblies plus the high C key.)

Then there is the ribbon cable connection to fret about. Are the signals compatible? Are the connectors compatible? I don’t know at this point. The LPK25 Mk2 cable dresses to the left while MPK Mini cable dresses toward the top. One idea to explore is mixing and matching pieces such as transplanting a Gen1 contact printed circuit board (PCB) into a Gen2 keybed assembly. Given the way the Gen2 keybed mounts from the bottom, I doubt if one can replace the Gen2 contact PCB with a Gen1 contact PCB. Oh, well, only out $40. 🙂

There you have the nickel tour. If you’re buying, go for the Akai Gen2 dynamic keybed. If you’re thinking about a transplant, buy and mod at your own risk.

Copyright © 2023 Paul J. Drongowski

Akai MPK Mini beauty products

Well, at first, I was going to strip it for parts. Then I changed my mind.

My original plan was to mod and customize an Akai MPK Mini Play (Mk1), making it a stand-alone synthesizer. As to cosmetics, I wanted to jazz it up with colorful knobs and a reverse white-on-black keybed. I would either find replacement keys or I would buy an Akai MPK Mini White Edition (Mk2), bust it down, and swap in the white-on-black keybed.

Hopes were dashed when I discovered the limitations of the MPK Mini Play’s implementation. Akai’s firmware blocks full access to the Dream S.A.S. SAM2635 synthesizer. I made a MIDI IN/OUT mod, letting me communicate with the Dream through 5-pin DIN MIDI. My original goal of a stand-alone synth, though, went down the tubes.

While the mod was playing out, I bought an Akai MPK Mini White Edition (Mk2) on ebay, ostensibly, for parts. BTW, if you’re looking for an MPK Mini, there are scads of them available on ebay for much less than retail. [If you’re OK with used.]

Gratefully, the previous owner had not registered the MPK Mini and I was able to download Akai’s software bundle. I installed MPC Beats — Akai’s MPC-style DAW — and the five expansion packs included in the bundle. I gave MPC Beats a try. Lo and behold, it was a lot of fun! I found the MPK Mini to be a better companion for MPC Beats than the MPK Mini Play. Suddenly, all desire to strip the White Edition was lost.

Now I want to keep using the MPK Mini (Mk2) as an MPC Beats controller and treat the MPK Mini Play as a MIDI module. Time to beautify the White Edition. [Spared from the chopping block.]

As to appearance and use, my one major quibble is the short, skirted knobs on both the MPK Mini and MPK Mini Play. I find these knobs hard to grab — more appropriate for small hands than my mitts.

Adafruit knobs versus original Akai MPK Mini knobs

Short knobs mean short pot shafts. Due to the short potentiometer shafts and the front panel recess around the pots, any old knob will not due. Casting around on the Web, I found two candidate knobs at Adafruit:

  • Adafruit #5093 Slim rubber rotary encoder knob, 11.5mm by 14.5mm D-shaft
  • Adafruit #5532 Red micro potentiometer knob (4 pack)

The red knobs are part of a multi-colored family. If red isn’t your fancy, try blue, black, white, cream, green, etc. Individually, both knob types are about $.70 USD per knob — not bad. Adafruit’s shipping is a tad high (one pound weight minimum charge) and you should look around for a few other things to buy in the same order. If you’re thinking about a 5-pin MIDI mod, I suggest the Adafruit MIDI FeatherWing Kit.

First up, is the Adafruit #5093. These knobs are only available in black. They are rubber and have a very nice feel. They only fit D-shaft potentiometers (or encoders) and are not appropriate for knurled or round shafts. The rubber knobs just barely cover the panel holes, but should keep out dust.

Akai knobs (left) versus Adafruit rubber knobs (right)

The pointers are well-placed and hit the min and max positions exactly. The rubber knobs are twice as tall as the factory knobs and are easy to grab. They are just snug enough on the pot shaft and can be removed without much force. I like these knobs and recommend them. Buy ten and get a price break.

I tried a few different Yamaha knobs on the MPK Minis. Forget it. The pointers don’t align with the min and max positions. Avoid knobs where the inner opening or set screw is too high above the bottom. Such knobs will float above the darned short Akai shafts.

Next up, is the Adafruit micro pot knob family. I bought red, black, blue, white and cream. The cream knobs look especially handsome. Unfortunately, cream clashes with the White Edition. Better to go with bright white (which match the sharp keys) or best to go full contrast and a splash of color, red.

The micro pot knobs have a very small set screw. Adafruit recommend a 2mm hex wrench, but the 1.5mm hex wrench in my Craftsman set is the better fit. This set screw is freaking small! Fortunately, the set screw is down low enough to hit the flat face of the rather short D-shaft.

Akai knobs (left) versus Adafruit micro pot knobs (right)

The red knobs look great. The pointers align properly with min and max. The knobs are twice as tall as the factory knobs. The only down-side is the set screw. If you intend to open and close the MPK Mini case frequently, go with the rubber knobs. You will get tired for loosening and tightening the set screws on the micro pot knobs.

New knobs are a quick, inexpensive way to brighten up a front panel from dreary black. Tall knobs are easier to grab, too. There you have it.

Copyright © 2022 Paul J. Drongowski