Vocaloid keyboard announced

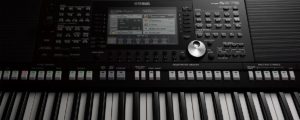
At long last, Yamaha have announced their Vocaloid™ keyboard, the VKB-100. The VKB-100 is a keytar design similar to the prototype shown at the “Two Yamahas, One Passion” exhibition at Roppongi Hills, Tokyo, July 3-5, 2015.

More details will be released in December 2017. However, this much is known:

  • Lyrics are entered using a dedicated application for smart phones and tablets via Bluetooth.
  • VY1 is the built-in default singing voice.
  • Up to 4 Vocaloid singers can be added using the application.
  • Four Vocaloid voices will be available: Hatsune Miku, Megpoid (GUMI), Aria on the Planets (IA), and Yuzuki Yukari.
  • Melody is played by the right hand while the left hand adds expression and navigates through the lyrics.
  • A speaker is built-in making the VKB-100 a self-contained instrument.

The VKB-100 was demonstrated at the Yamaha exhibition booth at the “Magical Mirai” conference held at the Makuhari Messe, September 1-3, 2017. Price is TBD.

VY1 is a female Japanese voice developed by Yamaha for its own products. VY1 does not have an avatar or character like other Vocaloid singers. This makes sense for Yamaha as they can freely incorporate VY1 in products without playing royalties or other intellectual property (IP) concerns.

The Vocaloid keyboard has had a long evolution, going through five iterations. The first three models did not use preloaded lyrics. Instead, the musician entered katakana with the left hand while playing the melody with the right hand. This proved to be too awkward and Yamaha moved to preloaded lyrics. The left hand controls on the neck add expression using pitch and mod wheels. The left hand also navigates through the lyrics as the musician “sings” via the instrument. The current lyrics are shown in a display just to the left of the keyboard where the musician can see them.

Yamaha will release more information on the Vocaloid keyboard site.

If you want to get started with Vocaloid and don’t want to spend a lot of Yen (or dollars), check out the Gakken NSX-39 Pocket Miku. Pocket Miku is a stylophone that plays preloaded Japanese lyrics. The NSX-39 also functions as a USB MIDI module with a General MIDI sound set within a Yamaha XG voice and effects architecture.

Be sure to read my Pocket Miku review and browse the resource links available at the bottom of the review page.

Copyright © 2017 Paul J. Drongowski

Vox VX50KB keyboard amplifier

With all of the new Korg keyboards, I missed the announcement of the Vox VX50KB keyboard amplifier. The VX50KB is part of the new Vox VX50 series of amplifiers. All the amps in the series have a street price of $229.99 and are currently shipping.

The VX50KB is a three channel keyboard amplifier that drives 50 Watts into an 8 inch, two-way coaxial speaker. Like the new Continental, the VX50KB warms up the sound with Nutube. Weight is an easy to wrangle 9 pounds (4.1 kg).

In the keyboard realm especially, sound quality depends upon the speaker and cabinet as a system. The VX50KB design is a bass reflex structure.

I’ll defer any judgement about sound quality until I hear one in action. Fat, deep organ tones quickly reveal any bass flatulence as well as the speaker’s ability to move air in the low frequency range. Oddly enough, mid-rangy French horns reveal flatulence, too. Strings are good for testing “boxiness” or “graniness.” If you want to hear grain, just listen to any amplifier in Roland’s KC series. The KC tweeters are inadequate.

September 1st goes to Korg

September 1st.

While rumors of Yamaha GENOS abound and Roland prepare to redefine the future (again), Korg drop:

Holy smokes! Normally this much excitement is reserved for Winter NAMM. Everybody wants a piece of Christmas season sales!

The KROSS 2 is an update of the KROSS synthesizer workstation. Not to be outdone by the Yamaha MX update, Korg has added two colors: dark blue and a limited edition red marble. The KROSS 2 boasts increased polyphony (from the previous 80 voices to 120 voices) and more preset sounds (from the previous 809 presets to 1,075 presets). There is a new stand, too.

The PA700 and PA1000 are updates on the PA600 and PA900 arrangers. You could kind of see the update coming as prices dropped on the PA600 and PA900 in recent months. The instruments have a new, maroon-ish color. Exapnsion memory is increased (PA1000: 600MB, PA700: 256MB). In addition to new voices and styles, the PA1000 update includes interactive KAOSS FX. KORG’s advertising is promoting the color touch panel and songbook, both of which are strong differentiators for the Korg line.

The big news is the Vox-branded Continental. It’s much more than an organ and includes acoustic piano, electric piano, drawbar organ, COMPACT organ (AKA Farfisa), strings, brass and more. Other notable features are the semi-weighted waterfall keyboard and Nutube valve drive. This puts the Connie in square competition with the Nord Electro 5d. The price is Nord-class, too: about $1,999 USD for the 61-key model. (There’s a 73-key model, too, $2,199 street.)

Aesthetically, the Connie has the old Vox color, but the narrower (and much lighter!) body looks chopped. The stand is not nearly as elegant as the old “S” stand. Nonetheless, it’s great to see a manufacturer take a crack at the old classic!

Copyright © 2017 Paul J. Drongowski

Montage tidbits

Martin Harris. Now, there’s a person who loves his job!

Even though the camera work is a little shaky, I recommend the Montage demonstration by Martin Harris of Yamaha.

Martin’s demo concentrates on acoustic and electric pianos, section and solo strings, brass, Irish whistle and pads — all from a cinematic perspective. Not much EDM here.

I like Martin’s demonstrations because he adds information about sample and voice development. Even though he calls it a “whistle stop tour,” it’s more like a tour of the world. Yamaha have traveled the world to sample the best instruments and players. Here are a few examples as mentioned by Martin:

  • Section and solo strings: Seattle
  • Brass: Los Angeles (L.A. horns)
  • Classical men’s choir: Germany
  • Classical boy’s choir: Estonia
  • Flamenco guitar: Madrid
  • Brazilian percussion: Sao Paulo
  • Turkish percussion: Istanbul
  • Iranian percussion: Tehran
  • Middle Eastern percussion: Bahrain
  • Irish whistle: Ireland

Before people complain about the cost of a top-of-the-line keyboard like the Montage or Tyros, they really should take the cost and time of sampling and voice development into account!

The Montage CFX grand piano is all new sampling. Martin stated the compressed total waveform size as 300 Mbytes, approaching 1 GBytes uncompressed. At demo time (April 2016), the Montage CFX was the biggest sampled piano in the Yamaha line. The Rhodes and Wurlitzer electric pianos are also new sampling.

Guitars also got an update. Martin and Gibson steel guitars were sampled. The sampled Telecaster is a $60,000, 1957 vintage Tele. Martin mention how, in the past, Yamaha removed the dirt from samples. Today they leave in some of the idiosynracies, charm and character.

If you enjoyed Martin’s demo, here are a few blog posts to check out. Last April, I made a list of new waveforms in the Montage vs. the Motif XF. I also wrote a thought piece about waveform memory size and sample development.

New sound development, including sampling, is a continual, on-going process at Yamaha. In an era when waveform memory is relatively big and inexpensive, sound developers need to work overtime in order to fill available memory space. I think the limiting factor now is the amount of time and human resources available to produce new samples and to program new expressive voices.

Copyright © 2017 Paul J. Drongowski

Reface MIDI pin-out

The Yamaha Reface series keyboards have a small DIN-6 connector that carries both MIDI IN and MIDI OUT signals. The keyboards ship with an adapter that converts DIN-6 to two standard 5-pin DIN connectors. Plug in the adapter cable, connect with standard MIDI cables, and you’re good to go.

A few people on the Yamaha Synth site inquired about the Reface MIDI pin-out. Their questions piqued my curiosity leading to a dive into Yamaha service manuals. The results are posted below along with some essential background information about MIDI signaling.

Use this information at your own risk. That goes for anything on my site!

Although I’ve assembled many boards and kits, I make horrible cables. I much prefer to use commercial MIDI adapters and cables. Life is too short to debug and repair shoddy, unreliable cables. Plug and play solutions are the most flexible; you never know when you’ll need a different configuration of female sockets and male plugs. Adapters like the Yamaha Reface adapter are the most flexible, reliable solution although they are product specific.

The Yamaha part number for the Reface MIDI adapter cable (MD6P-DIN) is ZP893500. If you are a USA customer, you can order the cable on-line from Yamaha 24×7. Last I checked, the cable is also available from the on-line retailer Full Compass. I’ve ordered from both Full Compass and Yamaha 24×7 in the past and they both get a thumbs up.

MIDI background information

If you’re going to do anything with MIDI hardware or software, I strongly recommend becoming a member of the MIDI Association. Please take a look at the MIDI circuit reference design:

This is the original electrical specification diagram. It’s good enough to understand MIDI operation. The original circuit has been superceded by version 1.1 which includes important additions for 3.3 Volt operation and reduced radio frequency interference (RFI). Register to become a member and download the new reference circuit.

As the MIDI specification notes, “The MIDI circuit is a 5mA current loop; logical 0 is current ON.” The MIDI sender and the MIDI receiver are optically isolated. The sender (MIDI OUT) controls an LED embedded within the receiver’s opto-isolator (MIDI IN).

The DIN connector on the MIDI OUT side has the following pins:

  • Pin 1: No connection (NC)
  • Pin 2: Ground
  • Pin 3: No connection (NC)
  • Pin 4: Connected to +5V (3.3V) through a current limiting resistor
  • Pin 5: Serial data output (UART TX)

The DIN connector on the MIDI IN side has the following pins:

  • Pin 1: No connection (NC)
  • Pin 2: No connection (NC)
  • Pin 3: No connection (NC)
  • Pin 4: LED anode (+)
  • Pin 5: LED cathode (-)

Pin 2 may optionally be connected to ground through a capacitor. Please see the current MIDI specification for more info. (Become a member!)

The goal is to turn the opto-isolator LED ON and OFF. The LED polarity (direction of current flow) is important. The MIDI sender turns the electrical current ON and OFF, that is, it turns the LED ON and OFF. This action sends a serial stream of bits from the sender to the receiver.

While writing, it occurred to me — the MIDI Association never formally named these signals. Thus, you get my names like “the thingy connected to the anode of the LED.”

Example: PSR-S910

The following diagram is the MIDI IN and MIDI OUT circuit within the Yamaha PSR-S910 arranger workstation. [Click on the image to enlarge.] I went back to this older product because it uses a transistor pair on the MIDI OUT side, just like the Reface series. That should make it easier to match up the MIDI signals with the Reface DIN-6 pins. Recent products employ a logic gate instead of a transistor pair to switch current through the MIDI loop.

Please note that the S950 MIDI signals are exactly what we expect knowing the MIDI reference design. The “extra stuff” suppresses RFI among other things.

Example: Reface CS

The diagram below depicts the Reface CS MIDI interface circuit (with a few edits for brevity and format). The Reface circuit is similar to the S910 circuit.

Here are the MIDI signals at the Reface DIN-6 pins:

  • Pin 1: MIDI IN, Ground via decoupling capacitor
  • Pin 2: MIDI OUT, Ground
  • Pin 3: MIDI IN, LED cathode (-)
  • Pin 4: MIDI OUT, TX serial data
  • Pin 5: MIDI IN, LED anode (+)
  • Pin 6: MIDI OUT, pull-up to 3.3V

Please note the DIN-6 pin numbering, position and connector orientation!

Now, let’s match up the Reface DIN-6 pins to regular MIDI DIN-5 pins. The MIDI IN match ups are:

       MIDI IN      MIDI IN
    Reface DIN-6   MIDI DIN-5      Function
    ------------  ------------   -------------
                     Pin 1       No connection
        Pin 1        Pin 2       Ground via decoupling capacitor
                     Pin 3       No connection
        Pin 5        Pin 4       LED anode (+)
        Pin 3        Pin 5       LED cathode (-)

I put the MIDI DIN-5 pin numbers in ascending order. The MIDI OUT match ups are:

      MIDI OUT      MIDI OUT
    Reface DIN-6   MIDI DIN-5      Function
    ------------  ------------   -------------
                     Pin 1       No connection
        Pin 2        Pin 2       Ground
                     Pin 3       No connection
        Pin 6        Pin 4       Pull-up to 3.3V
        Pin 4        Pin 5       TX serial data

At this point, I suggest grabbing your Reface MIDI adapter cable and tracing the DIN-6 to DIN-5 connections with a continuity checker. This is the best way to come to grips with the real-world connections and signal/pin positions.

Copyright © 2017 Paul J. Drongowski
Reface and PSR-S910 diagrams are Copyright © Yamaha Corporation

Pocket Miku: Module review

So far, I’ve posted several articles with resources for the Yamaha NSX-1 eVocaloid integrated circuit and the Gakken Pocket Miku (NSX-39), which is based on the NSX-1 chip. (See the bottom of this page for links.) This post pulls the pieces together.

Pocket Miku is both a vocal stylophone and a Yamaha XG architecture General MIDI (GM) module. There are plenty of Pocket Miku stylophone demos on the Web, so I will concentrate on Pocket Miku as a module.

Pocket Miku connects to your PC, mobile device or whatever over USB. The module implements sixteen MIDI channels where channel one is always assigned to the Miku eVocaloid voice and channels 2 to 16 are regular MIDI voices. As I said, the module follows the XG architecture and you can play with virtually all of the common XG features. The NSX-1 within Pocket Miku includes a fairly decent DSP effects processor in addition to chorus and reverb. The DSP effect algorithms include chorus, reverb, distortion, modulation effects, rotary speaker and a lot more. Thus, Pocket Miku is much more than a garden variety General MIDI module.

My test set up is simple: Pocket Miku, a USB cable, a Windows 7 PC, Cakewalk SONAR and a MIDI controller. Pocket Miku’s audio out goes to a pair of Mackie MR5 Mk3 monitors. The MP3 files included with this post were recorded direct using a Roland MicroBR recorder with no added external effects.

The first demo track is a bit of a spontaneous experiment. “What happens if I take a standard XG MIDI file and sling it at Pocket Miku?” The test MIDI file is “Smooth Operator” from Yamaha Musicsoft. Channel 1 is the vocal melody, so we’re off to a fast start right out of the gate.

One needs to put Pocket Miku into NSX-1 compatibility mode. Simultaneously pressing the U + VOLUME UP + VOLUME DOWN buttons changes Pocket Miku to NSX-1 compatibility mode. (Pocket Miku responds with a high hat sound.) Compatibility mode turns off the NSX-39 SysEx implementation and passes everything to the NSX-1 without interpetation or interference. This gets the best results when using Pocket Miku as a MIDI module.

Here is the MP3 Smooth Operator demo. I made only one change to the MIDI file. Unmodified, Miku’s voice is high enough to shatter glass. Yikes! I transposed MIDI channel 1 down one octave. Much better. Pocket Miku is singing whatever the default (Japanese) lyrics are at start-up. It’s possible to send lyrics to Pocket Miku using SysEx messages embedded in the MIDI file. Too much effort for a spontaneous experiment, so what you hear is what you get.

Depending upon your expectations about General MIDI sound sets, you’ll either groan or think “not bad for $40 USD.” Miku does not challenge Sade.

One overall problem with Pocket Miku is its rather noisy audio signal. I don’t think you can fault the NSX-1 chip or the digital-to-analog converter (DAC). (The DAC, by the way, is embedded in the ARM architecture system on a chip (SOC) that controls the NSX-1.) The engineers who laid out the NSX-39 circuit board put the USB port right next to the audio jack. Bad idea! This is an example where board layout can absolutely murder audio quality. Bottom line: Pocket Miku puts out quite a hiss.

The second demo is a little more elaborate. As a starting point, I used a simple downtempo track assembled from Equinox Sounds Total Midi clips. The backing track consists of electric piano, acoustic bass, lead synth and drums — all General MIDI. Since GM doesn’t offer voice variations, there’s not a lot of flexibility here.

I created an (almost) tempo-sync’ed tremolo for the electric piano by drawing expression controller events (CC#11). My hope was to exploit the DSP unit for some kind of interesting vocal effect. However, everything I tried on the vocal was over-the-top or inappropriate. (Yes, you can apply pitch change via DSP to get vocal harmony.) Thus, Miku’s voice is heard unadulterated. I eventually wound up wasting the DSP on a few minor — and crummy — rhythm track effects.

I created four lyrical phrases:

A summer day           Natsu no hi
f0 43 79 09 00 50 10 6e 20 61 2c 74 73 20 4d 2c 6e 20 6f 2c 43 20 69 00 f7

Your face              Anata no kao
f0 43 79 09 00 50 10 61 2c 6e 20 61 2c 74 20 61 2c 6e 20 6f 2c 6b 20 61 2c 6f 00 f7

A beautiful smile      Utsukushi egao
f0 43 79 09 00 50 10 4d 2c 74 73 20 4d 2c 6b 20 4d 2c 53 20 69 2c 65 2c 67 20 61 2c 6f 00 f7

A song for you         Anata no tame no uta
f0 43 79 09 00 50 10 61 2c 6e 20 61 2c 74 20 61 2c 6e 20 6f 2c 74 20 61 2c 6d 20 65 2c 6e 20 6f 2c 4d 2c 74 20 61 00 f7

The Japanese lyrics were generated by Google Translate. I hope Miku isn’t singing anything profane or obscene. 🙂

I did not create the SysEx messages by hand! I used the Aides Technology translation app. Aides Technology is the developer of the Switch Science NSX-1 Arduino shield. The application converts a katakana phrase to an NSX-1 System Exclusive (SysEx) message. Once converted, I copied each HEX SysEx message from the Aides Tech page and pasted them into SONAR.

Finally, the fun part! I improvised the Miku vocal, playing the part on a Korg Triton Taktile controller. What you hear in the MP3 Pocket Miku demo is one complete take. The first vocal section is without vibrato and the second vocal section is with vibrato added to long, held notes. I added vibrato manually by drawing modulation (CC#1) events in SONAR, but I could have ridden the modulation wheel while improving instead.

The overall process is more intuitive than the full Vocaloid editor where essentially everything is drawn. Yamaha could simplify the process still further by providing an app or plug-in to translate and load English (Japanese) lyrics directly to an embedded NSX-1 or DAW. This would eliminate a few manual steps.

Overall, pre-loaded lyrics coupled with realtime performance makes for a more engaging and immediate musical experience than working with the full Vocaloid editor. If Yamaha is thinking about an eVocaloid performance instrument, this is the way to go!

The pre-loaded lyric approach beats one early attempt at realtime Vocaloid performance as shown in this You Tube video. In the video, the musician plays the melody with the right hand and enters katakana with the left hand. I would much rather add modulation and navigate through the lyrics with the left hand. This is the approach taken for the Vocaloid keytar shown on the Yamaha web site.

Here is a list of my blog posts about Pocket Miku and the Yamaha NSX-1:

I hope that my experience will help you to explore Pocket Miku and the Yamaha NSX-1 on your own!

Before leaving this topic, I would like to pose a speculative question. Is the mystery keyboard design shown below a realtime eVocaloid instrument? (Yamaha U.S. Patent number D778,342)

The E-to-F keyboard just happens to coincide with the range of the human voice. Hmmmm?

Copyright © 2017 Paul J. Drongowski

Yamaha CSP pianos: First take

Yamaha just announced the Clavinova CSP series of digital pianos. There are two models: CSP-150 and CSP-170. The main differences between the 170 and 150 are keyboard action (NWX and GH3X, respectively) and sound system (2 x 45W and 2 x 30W, respectively). USA MSRP list prices are $5,399 to $5,999, and $3,999 to $4,599 USD.

These are not stage pianos. They are “furniture” pianos which complement and fit below the existing CLP line.

Here’s my imagined notion of the product pitch meeting:

Digital piano meets arranger meets Rock Band. Let’s say that you don’t have much (any) musical training, but you want to play along with Katy Perry. Sit down at the CSP with your smart device, install the Smart Pianist app and connect via Bluetooth. Call up “Roar” in the app and get a simple musical score. Start the song, follow the LEDs above the keys and play along with the audio. The app stays in sync with the audio and highlights the notes to be played on each beat. So, if you learned a little bit about reading music, you’re good to go.

Sorry, a little bit more than an elevator pitch, but this is first draft writing! 🙂

That is CSP in a nutshell. The CSP is a first-rate piano and it has a decent collection of non-piano voices and arranger styles. The CSP even includes the Hammond-ish “organ flutes” drawbar organ voices. So, if you want to jam out with electric guitar, you’re set. If you want to play chords with your left hand and freestyle it, the CSP is ready.

If you’re looking for a full arranger workstation, though, you’re missing some features. No pitch bend wheel, no mod wheel, no multipads, no accompaniment section (MAIN, FILL, …) buttons. No voice editing; all voices are preset.

And hey, there’s no display either! The Smart Pianist app is your gateway to the CSP feature set. You can select from a few voices and styles using the FUNCTION button and the piano keyboard, but you need the app to make full use of the CSP. Eliminating the CLP’s touch panel, lights and switches takes a lot of cost out of the product, achieving a more affordable price point.

I could see the CSP appealing to churches as well as home players given the quality of the piano and acoustic voices. Flipping the ON switch and playing piano is just what a lot of liturgical music ministers want. The more tech savvy will dig in. Pastors will appreciate the lower price of the CSP line.

From the perspective of an arranger guy, the CSP represents a shift away from the standard arranger. For decades, people want to play with their favorite pop tunes. In order to use a conventional arranger (no matter what brand), the musician must find a suitable style and the musician must have the musical skill to play a chord with the left hand, even if it’s just the root note of the chord. Often the accompaniment doesn’t really “sound like the record” and the player feels disappointed, unskilled and depressed. Shucks, I feel this way whenever I make another attempt at playing guitar and at least I can read music!

The CSP is a new paradigm that addresses these concerns. First, the (budding) musician plays with the actual recording. Next, the app generates a simplified musical score — no need to chase after sheet music. The score matches the actual audio and the app leads the player through the score in sync with the audio. Finally, the CSP’s guide lights make a game of playing the notes in the simplified score.

We’ve already seen apps from Yamaha with some of these features. Chord Tracker analyzes a song from your audio music library and generates a chord chart. Kittar breaks a song down into musical phrases that can be repeated, transposed and slowed down for practice. The Smart Pianist app includes Chord Tracker functionality and takes it to another level producing a two stave piano score.

Notice that I said “a score” not “the score.” Yamaha’s audio analysis only needs to be good enough to produce a simple left hand part and the melody. It does not need to generate the full score for a piece of music. Plus, there are likely to be legal copyright issues with the generation of a full score. (A derivative work?)

Still, this is an impressive technical feat and is the culmination of years of research in music analysis. Yamaha have invested heavily in music analysis and hold many patents. Here are a few examples:

  • U.S. Patent 9,378,719: Technique for analyzing rhythm structure of music audio data, June 28, 2016
  • Patent 9,117,432: Apparatus and method for detecting chords, August 25, 2015
  • U.S. Patent 9,053,696: Searching for a tone data set based on a degree of similarity to a rhythm pattern, June 9, 2015
  • U.S. Patent 9,006,551: Musical performance-related information output device, April 14, 2015
  • Patent 9,275,616: Associating musical score image data and logical musical score data, March 1, 2016
  • U.S. Patent 9,142,203: Music data generation based on text-format chord chart, September 22, 2015

The last patent is not music analysis per se. It may be one of several patents covering technology that we will see in the next Yamaha top of the line (TOTL) arranger workstation.

I think we will be seeing more features based on music analysis. Yamaha’s stated mission is to make products that delight customers and to provide features that are not easily copied by competitors. Yamaha have staked out a strong patent position in this area let alone climbing over the steep technological barrier posed by musical analysis of audio.

Copyright © 2017 Paul J. Drongowski

Roland GO:KEYS – First impressions

I’m happy to write what may be the first end-user review of the Roland GO:KEYS.

The GO:KEYS is one of two new entry-level keyboards from Roland. The GO:KEYS has a street price (MAP) of $299 USD and is intended to inspire new keyboard players without a big out-of-pocket outlay.

The hook is the five zone, Loop Mix mode. The 61 keys are separated into 5 one octave zones: Drum, Bass, Part A, Part B and Part X. Each key in a zone triggers a two measure musical loop that repeats until the zone-specific STOP key is struck. The Drum and Bass zone lay down the basic groove while Part A and Part B add the harmonic bread and butter, like electric piano comping or a string pad. Part X adds variation with up to four phrase subgroups. Only one phrase can play in a zone at a time.

The preceding paragraph takes more time to read than it takes to set up a backing track. When you have the band grooving, you can switch to regular keyboard mode and solo to your heart’s content. Whenever you feel like it, you can switch back to Loop Mix mode and move the band to a different place.

There are twelve different Loop Mix Sets. Each set is a scale-compatible collection of Loop Mix phrases. The twelve style names suggest the musical genres and the target audience for GO:KEYS. No polkas. The Sets are modern sounding, however, I can’t speak to the authenticity of the EDM styles. The FUNK set sounds more like funky smooth jazz — no JB, no George Clinton, here.

However, don’t let that stop you. Please watch the GO:KEYS videos that Roland has posted on Youtube. (Search “Roland GO:KEYS”.) You’ll quickly decide if the GO:KEYS is for you or not. I certainly have had a lot of fun jamming away.

Many aspects of the GO:KEYS are well-thought out. It’s clear that the developers tried to play their own creation and added a number of convenience features like using the touch strip to step through the Function menu. The GO:KEYS can remember previous settings across power-off and it remembers the last patch selected in each of the eight categories (piano, organ, strings, brass, drum, bass, synth and FX/guitar).

Recording and playback are fairly rudimentary. Don’t expect a workstation at this price point! You can record an improvised backing and save it to a song file. Thanks to USB, the song file, etc. can be saved to a PC or Mac through the back-up function. The PC or Mac treat the GO:KEYS like a flash drive. You copy the back-up folder to the PC/Mac and you’re done. The directions in the user manual are simple and accurate, so I won’t go into those details here.

Windows 7 recognized the GO:KEYS when I plugged it in. Windows installed the Microsoft generic USB audio driver. Windows didn’t try to install the flash driver until I attempted the first back-up. The driver installation at first appeared to fail. When I unplugged and replugged the GO:KEYS, everything was fine and the GO:KEYS drive appeared in Windows Explorer.

My GO:KEYS arrived with version 1.04 of its software installed. There is a version 1.05 update on the Roland support site. Roland’s on-line directions are simple and accurate. The update to 1.05 went smooth.

The GO:KEYS sound set is a real bright spot. The standard “panel” voices are taken from the successful JUNO-DS series. In fact, I auditioned these voices by trying them out on a JUNO-DS88 before ordering the GO:KEYS. The GO:KEYS voices sound very similar, especially when you send the GO:KEYS through decent monitors. The built-in speakers are OK, but again, don’t expect super high quality in an inexpensive keyboard. The GO:KEYS is perfectly respectable through the Mackie MR5 mk3 monitors on my desktop.

Here are the sonic highlights:

  • The electric pianos are really strong. Many voices have tasty, appropriate effects (e.g., phaser) applied. If you need acoustic piano, try GO:PIANO instead.
  • There are a slew of synth leads and basses. I’m in love with Spooky Lead which is a classic fusion, R&B tone.
  • Organs are typically Roland — OK, but not tachycardia-inducing.
  • The strings are also typically Roland — darned good.
  • Acoustic sounds — few as they are — are decent. I like Soft Tb and Ambi Tp. Other acoustic sounds may be found in the GM2 sound set. (Don’t forget to enable them in the settings!) The woodwinds are surprisingly good for GM2.

I haven’t dug too deeply into the rest, but the voices triggered by the phrases sound good and are well-chosen. Clearly, the JUNO-DS is the original source.

At this price level, the GO:KEYS is a preset-only machine — no voice editing. The most you get is the ability to set the reverb level. Even the reverb type is fixed (a nice hall). There are decent multi-effects under the hood as heard in the electric piano and clavinet voices. Alas, everything is preset and fixed. Roland would still like to sell you a JUNO-DS.

The GO:KEYS includes a full General MIDI 2 (GM2) sound set. It sounds like an improved set over the much older RD-300GX for which I have produced many GM2 Standard MIDI Files (SMF). I have not tested GM2 compatibility. Roland are very careful about this and have not advertised full compatibility. This is not much of an issue for me as I have plenty of sequencing resources on hand already.

The GO:KEYS does not have conventional pitch bend or modulation wheels. The touch panel has two strips that apply pitch bend or filter/roll effects. The adjacent FUNC button selects the mode. The filter and roll are applied to everything, so you get a DJ-like effect that rolls the rhythm or squishes frequencies. Pitch bend mode also seems to include modulation. I hear the rotary speaker change speed on some organ voices. Unfortunately, attempts to change rotary speed also bend the pitch.

Hey, Roland! I regard this behavior as a bug. The documentation is really loose about what these touch strips do. In the next update, please make one strip pitch bend only and make the other strip modulation only. Punters everywhere will thank you!

The GO:KEYS is very light weight coming in under nine pounds. Power is supplied by either the included adapter (5.9V, 2A) or six AA batteries. The voltage rating is a little odd, 5.9V. I wonder if it’s OK to use a more common 6V adapter provided that the current rating is sufficient?

The GO:KEYS has two slots to accomodate a music rest, but doesn’t come with a music rest. The GO:PIANO bundle includes a music rest, not the GOKEYS. I want to use the GO:KEYS at rehearsals and will call Roland to see if I can buy a music rest. Of course, the Yamaha music rests that I have on hand do not fit the slots and cannot be easily adapted. (Arg. Put the Dremel tool away.)

As you might think, the keybed is not super stellar at $299 street. The keys are piano size and shape with a nice texturing (not plastic-y smooth). The keys don’t feel too bad although it’s more difficult to palm swipe piano-shaped keys with an edge.

Key response is OK, but not as good as a more expensive instrument. (Full disclosure, I played a $3,000 Yamaha Montage last night.) One key is a little dead and its response is quirky. I’ve encountered the same problem with a single key on the otherwise superb Arturia Keystep, too. It’s hard to make a keyboard at this price point that provides high quality and reliability. Even though the GO:KEYS’ case feels sturdy, I wouldn’t gig this machine too hard. You get what you pay for.

Overall, I’m pleased with the GO:KEYS. It’s a good starter keyboard and it looks (and sounds) to be a decent portable rehearsal instrument. The GO:KEYS is an attractive alternative to Yamaha and Casio products in the same price bracket. Definitely worth a look and a listen.

Update: After writing this review, I sequenced a GO:KEYS demo track in Ableton Live. The defective key became worse and I returned the GO:KEYS. Please read about my experience and listen to the demo track.

Copyright © 2017 Paul J. Drongowski

Ableton Live: 2 books, head2head

I’m ramping up my Ableton Live skills. Being somewhat old fashioned, I like to have a good print manual or guide by my side. Recently, I had a chance to compare two books, both worthy of recommendation:

  • Ableton Live 9 Power! The Comprehensive Guide by Jon Margulies (publisher: Cengage Learning, 2014)
  • Ableton Live 9: Create, Produce, Perform by Keith Robinson (publisher: Focal Press, 2014)

Each book is quite comprehensive and a little bit behind the latest version 9 features. (The hazards of print.) I don’t think you can go wrong with either book, but here are a few comments that might guide your choice.

Both volumes go through the Session and Arrangement views, tracks, scenes, clips, automation and warping in great detail. These topics are bread and butter. Here, I favor the book by Keith Robinson. Keith better describes how Live fits into the composition or production process. This context provides a bit of “Why” not just “How.” One on-line reviewer didn’t like this approach, but I appreciate it. For example, I didn’t how or why I would want to translate my tracks from the linear Arrangement view back to the Session view. Now I get the to-and-fro of Live as a tool.

Both books give you the complete rundown (circa 2014) on Live’s instruments, chaining and audio effects. For these topics, I give the book by Jon Margulies the edge. Jon does a better job describing the individual controls. His treatment of MIDI effects, in particular, is more thorough.

Both books cover MIDI control. Neither book has anything to say about using a Novation Launchpad. Push (version 1) barely wins much more than a mention. Both volumes need to be updated for the Ableton Push 2.

Jon Margulies’ book has a short chapter on using Live for live performance. Much of this chapter is devoted to track preparation and warping, material which is better covered by Keith Robinson’s book. Just having a chapter on performance isn’t reason enough to shy away from Keith Robinson’s book even if you intend to use Live mainly for performance, however.

Keith’s book uses color screenshots throughout. It’s easier to understand certain kinds of figures when they are presented in color. Please consider scans of an Arrangement view taken from each book.

The difference is striking and doesn’t need further comment!

In the end, I decided to buy Ableton Live 9: Create, Produce, Perform by Keith Robinson. I definitely prefered the use of color illustrations and his exposition placing Live within the writing process.

Music Expo Boston 2017

Saturday was a glorious warm day in Boston — perfect for a trip to Cambridge and Music Expo Boston. Music Expo is a series of mini-conferences produced in association with Sound On Sound magazine. Boston is fortunate to have Music Expo this year along with Miami and San Francisco. Loic Maestracci is the main organizer and he did he bang up job. The iZotope development labs and studios were the local host and venue.

Music Expo has an informal workshop feel to it. Even the more “formal” presentations had a friendly, laidback vibe with people freely getting into Q&A. Several companies had exhibits which were hands-on. (More about this later.) For example, Ableton had three Push 2 systems on hand where you could sit and try one out with the guidance of the booth staff.

Two session tracks and the exhibits ran in parallel, so one needed to pick and choose carefully. If I leave anyone out from this review, apologies — there was just too much going on at once.

My day got started with a fine performance by Elyssa Nicole Fontes and Megazoid. Elyssa is a composer and vocalist who uses backing tracks to perform. The staff had made a decision to move Elyssa and Megazoid to a more accomodating studio, so Elyssa had to fill dead air while the techs brought up her gear and tracks. This goes to show that artists always need to be prepared to handle tech issues in front of a live audience. Elyssa handled the situation with poise and aplomb. It also gave the attendees a chance to ask many questions about her technique, gear, mix, etc.

I then dropped by the Arturia booth to say “Hello.” The Arturia team certainly showed how to travel light with various ‘steps, a laptop and a MiniBrute. That MiniBrute is too cool for school and tiny! I’m glad that I visited the booth early because they seemed quite busy throughout the day.

Next stop was the Yamaha booth. “Booth” is not quite the right word as Yamaha were ensconced in a recording studio. They were demonstrating their latest — the MX88, Montage and Reface — with the MX88 and Montage routed through Yamaha HS8s and a sub. And joy of joy, the demonstrator was Phil Clendeninn! Like most studios, this one had a comfy couch in the back, so I kicked back while Phil ran through 30+ minutes of the best of Montage. Among other sounds, he desconstructed the Seattle Strings performance. The violins are far more realistic and expressive than the MOX patch which I am now using for exposed lines. Oh, I am so ready for this.

Highlight of the day number one: I finally had a chance to meet and chat with Phil. Phil is better known as “Bad Mister” (yes, the dude can play) who has written many useful, informative Motif and Montage guides and has answered zillions of questions on the Yamaha synth site and on the langouring Motifator site.

We covered a lot of ground. When I mentioned Yamaha arrangers, his response was “Oh, ho, you just wait!!” BTW, having done booth duty at SIGGRAPH and elsewhere, I’m amazed at the amount of energy and enthusiasm that Phil brings, and brings, and brings. It’s very hard to maintain that kind of level.

While we were conversing, I finally had a chance to try a Yamaha Reface YC. Of all the Reface, the YC could still win my heart thanks to Vox and Farfisa nostalgia. I always wanted a Continental as a kid, but had to settle for a Mini Deluxe Compact. (More well-kept vintage gear which I wish that I still had.)

I mentioned to Phil that I hadn’t been able to play a YC since launch despite efforts to find one in Boston, Seattle, and Lord knows where else. He acknowledged that this is a problem in this day and age of Internet sales. He ran through a list of concerns that a physical retailer would have: physical security to keep demo units from developing legs, knowledgable staff, etc. He thought that the lack of knowledgable staff also hurts mid- to high-end arranger sales in North America. Sometimes musicians need to be shown what an instrument can do in order to make a sale. The array of buttons on a modern arranger or synth can be intimidating and you don’t often know where to dive in.

From my point of view, there is only one nationwide brick and mortar music store in the U.S., Guitar Center, and unfortunately, knowledgeable keyboard staff are few and far between. I had a flashback to AMD days and the brick and mortar dominance of Best Buy in the computer, laptop, tablet space. It’s difficult to sell and support technogically complicated products to end users. (Please keep this thought.)

With a crush of people coming in, I bade Phil farewell and stopped at the Q Up Arts booth. Q Up Arts were demonstrating the California Keys (for N.I. Kontakt) — a sampled Fazioli 10ft grand. California Keys is cleverly packaged and I won’t spoil the surprise.

Highlight of the day number two: My wide-ranging conversation with Douglas Morton of Q Up Arts. To those in the know, Douglas is a talented, veteran sound developer and artist. I used a number of Q Up Arts products back in the day when samples were provided on audio CDs. (And dinosaurs roamed the Earth.) We began discussing the good old days of audio editing, vintage computer gear, Douglas’s work for the Salt Lake City Aquarium, ending with cross-country skiing in Utah. Douglas lives in two gorgeous locations: Dana Point, CA and Park City, UT. (Been to both and once lived in SLC myself.)

One of the subjects that we touched on was how to bring up the next generation of players on new software and gear. (Familiar theme now, huh?) Youtube videos only go so far; it’s got to be hands on. I quickly thought back to my experience in the morning at the Ableton booth. Push 2 is a spiffy product. That display, c’est magnifique! The Push 2 user interface, however, is not as immediately intuitive as the Novation Launchpad, for example. Thank goodness there was an Ableton staff member on hand to guide me. (Shades of gramps with a smart phone. 🙂 )

Douglas thought that an educational tour of high school and college music labs might be part of the solution. I thought of Living Computers Museum+Labs in Seattle. Education is where Living Computers could ace the synth exhibits at the Museum of Pop Culture, also in Seattle. (MoPOP was formerly known as the “EMP Musuem” and is another Paul Allen venture.) The MoPOP synth exhibits, at least when I visited a few years ago, didn’t offer much in the way of guidance and weren’t inspirational. Living Computers, however, have enthusiastic staff, labs and an educational outreach mission.

Lunchtime and I was able to hear Decap deconstruct his track See You Out There. Decap is a West Coast hip hop music producer (Talib Kweli, Snoop Dogg, Ne-Yo, and Tim Kile). I enjoyed his presentation very much while unwinding and eating lunch in the iZotope cafeteria. Coffee was provided, gratefully, as I had left the house early to drive to the MBTA subway stop. Decent coffee at that.

One big take-away from Decap is the need for playfulness and persistence. His tracks grow from ten minutes of sheer inspiration through four or more days of perspiration as he experiments and shapes it. His experience fits with my current personal philosophy. Put the phone (or tablet) down, start playing and stick with it. Stop pining after the next new tool. You probably have everything that you need already. Just get on with it! Be spontaneous, playful, and take advantage of happy accidents.

Cakewalk demonstrated a prototype virtual reality (VR) system for clip-based composition. You navigate a 3D space where you are surrounded by instruments and virtual pads that select and control clips. Reflecting on the experience today, I think they have a solid technology demonstrator. I give them my computer science respect for getting their system up and running. Cakewalk still need to find the killer hook that makes you want to pull out your credit card though. Surround sound development? It’s early days yet and I wish them the best.

Next session was a panel discussion about “D.I.Y. in the Recording Studio: Building and Maintaining your Analog Gear.” The panel consisted of six folks who are hands on engineers and producers. Great advice from all although I have a small quibble with making one’s own cables. I make terrible cables! I’d rather build a kit to gain electronics experience than fighting crappy home-built cables while performing or making a track. That’s just me.

The panelists spoke about how they got started. It struck me that all of the panelists got started by playing with electronics even if early experiments didn’t work out so well. Just do it! The notion of playful, enthusiastic, self-directed learning is totally at odds with today’s mania for educational accountability and teaching to the test. What is happening to the creative dimension of engineering and the arts in this country? Engineers and artists are bright, intelligent people and we seem to be actively stifling early enthusiasm. Arg!

At that point in the day, I had to call it quits and head home. It takes a while to get home from Cambridge and I didn’t want to get too strung out. What a glorious day walking in Cambridge. Kendall Square looks like “Science City” in a futuristic sci-fi movie with all of its computer and bio labs. The trains were a little crowded with very colorful people heading to and from Boston Pride. A great day all around.

My conversations and experiences convinced me of the value of Music Expo. Youtube videos, e-mail, texts, etc. are not enough. You need to rub shoulders with other kindred souls, converse, handle gear, ask questions, hear other people’s questions, get answers, be guided. NAMM is not the right venue. Music Expo Boston had it right: friendly, personal and interactive.

Copyright © 2017 Paul J. Drongowski