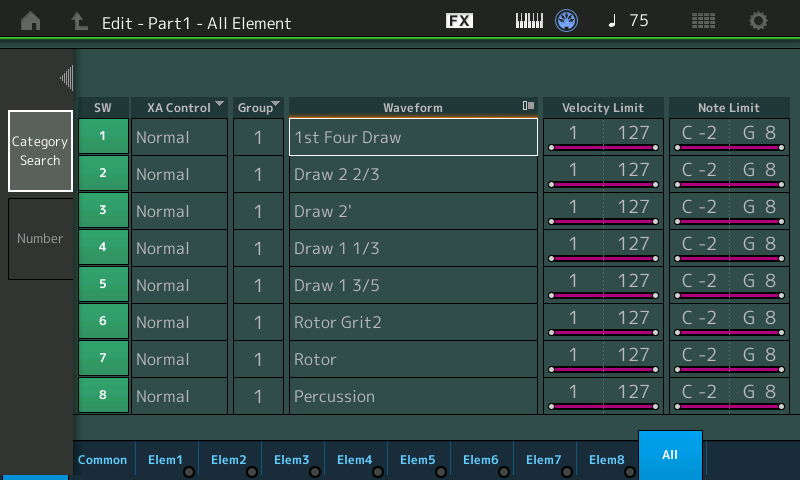
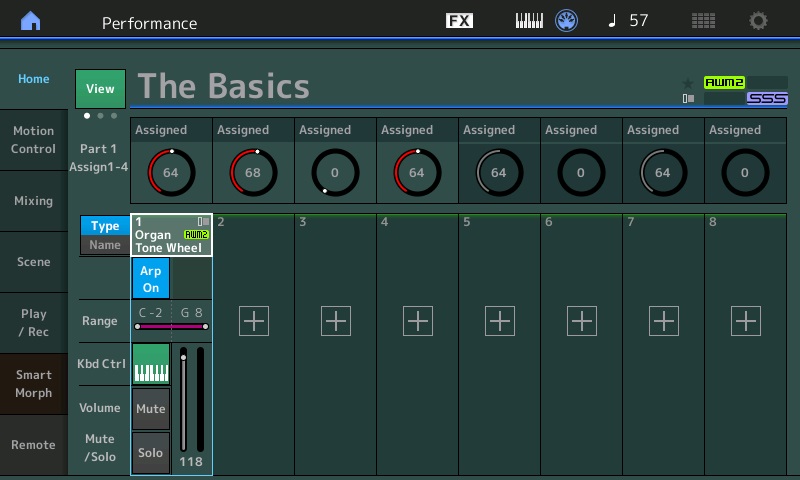
So far on our tour of MODX (Montage) drawbar organ tech, I’ve discussed drawbar control and drawbar waveforms. Convincing overdrive and distortion are essential to an authentic drawbar organ sound (B-3 plus Leslie). Technically, the overdrive (or distortion) is produced by the tube electronics in a Leslie rotary speaker. We synthesizer types must use amp and speaker simulators to produce overdrive or distortion.
Engineers are creatures of habit. After browsing a zillion MODX and Genos organ voices, I noticed that Yamaha engineers kept returning to the same effect algorithms albeit with slightly different parameter values:
    MODX Algorithm    Genos Algorithm    Characteristics
    ---------------   ---------------    ----------------------
    BRITISH COMBO     BRITISH COMBO      Vox combo amp
    MULTI FX          MULTI FX           Pedal board
    AMP SIMULATOR 1   V DISTORTION       Vintage amp
    AMP SIMULATOR 2   STEREO AMP SIM     Vintage stereo amp
    SMALL STEREO      SMALL STEREO DIST  Stereo amp and speaker sim
The MULTI FX pedal board simulator includes the SMALL STEREO (DIST) algorithm. Check out Blake’s article about guitar effects.
Roadmap
We need a roadmap before driving into the weeds.
Usually, overdrive is configured as a MODX (Montage) insert effect. Once you navigate to the effects routing page (or one of the insert effect pages), you can change the effect type (algorithm) and/or effect parameters. Yamaha documentation refers to “effect types”; I use the word “algorithm” instead because we are selecting an algorithm (code) along with its parameters.
Yamaha provide several different distortion, overdrive and amp simulator algorithms. As if that isn’t enough choice, sometimes the kind of overdrive (or distortion) can be chosen by a parameter (e.g., tube, transistor, etc.) In some cases, we can choose the speaker cabinet (e.g., 2×12), too.
Why are there so many choices? If you follow the guitar pedal market, you would ask “Why are there so many distortion pedals?” Like anything else in sound and music, there are many varieties of distortion or overdrive. Some are warm (tubes), some are bright (transistor), and so forth. The trick is to use your ears and find the most appropriate kind of distortion, overdrive or amp type for the sound you want to obtain. Guitarists call this ephemeral quality “tone”.
I’ve cataloged several detailed examples in the next section. These are starting points for experimentation. If you don’t know where to start, choose something and start tweaking! If you can’t get your tone, change the kind of distortion effect if the selected algorithm allows, or move on to a different effect algorithm.
An effect algorithm is a mathematical model of a real-world device. Each algorithm simulates one or more real-world distortion, overdrive, amplifier and/or speaker cabinet effects. The models mimic an audio signal hitting a component like a tube, transistor or a mic’ed speaker cabinet. The amount of distortion usually increases when the incoming audio signal is stronger, i.e., the input level or gain (sometimes called “drive”) is turned up. The input signal drives the simulated device or component harder.
One thing to keep in mind — increasing input level (gain) also increases the output level. When you increase the gain (drive), you must decrease the output level lest you cause nasty digital distortion in the outgoing digital audio stream. Digital distortion (digital clipping) sounds unnatural and is not desirable.
Warning
Increasing drive also raises the volume of the outgoing audio, sometimes to painful levels! Keep volume low when experimenting with high drive. Protect you ears.
Most of the algorithms provide a parameter controlling the Wet/Dry mix. You’ll see settings like “D15>W”. The wet/dry value range is:
D63>W to (D=W) to D<W63
This determines the balance between the direct, unprocessed signal (dry) and the processed sound (wet). At dead center, “(D=W)”, the wet and dry signals are equal. Move to either side to pass more of the dry sound or wet/effected sound.
The details and examples
The BRITISH COMBO effect algorithm (Vox AC30) is a Yamaha favorite. In the table below, the first settings are taken from the MODX “All Bar None” Performance, and the second and third settings are from the Genos “ClassicJazz” and “RockOrgan JS” voices, respectively.
                            MODX         Genos        Genos
    ## Parameters       All Bar None  ClassicJazz  RockOrgan JS
    -- ---------------  ------------  -----------  ------------
     1 Mode                Bright        Bright      Top Boost
     2 Normal              5.8           3.6         4.0
     3 Brilliant           6.0           5.4         6.0
     4 Bass                4.4           5.0         4.4
     5
     6 Treble              6.0           6.2         6.0
     7 Cut                 0.6           0.0         0.6
     8
     9 Output Level        69            126         71
    10
    11 Speaker Type        AC 4x10       AC 1x12     AC 4x10
    12 Speaker Air         2             2           0
    13 Mic Position        Center        Center      Center
The parameters “Normal” and “Brilliant” dial in the distortion.
Here’s the rotary speaker settings for two Genos drawbar organ voices. Both voices use the Genos V DISTORTION effects algorithm. The equivalent MODX algorithm is AMP SIMULATOR 1.
                           Genos           Genos
    ## Parameters       WhiterBars JS  RotaryDriveOrg
    -- ---------------  -------------  --------------
     1 Overdrive         28%             24%
     2 Device            Vintage Tube    Transistor
     3 Speaker Type      Stack           Twin
     4 Presence          4               10
     5 Output Level      88%             100%
    10 Dry/Wet           D40>W           D26>W
The first voice simulates a tube preamp and the second voice simulates a transistor preamp. Tube amps have a warmer sound than transistor amps.
MODX does not have all of the Genos distortion algorithms. MODX implements the latest and greatest algorithms while Genos (Tyros and PSR) retain many legacy algorithms for backward compatibility. The table below shows the settings for the STEREO AMP SIMULATOR used by the “ClassicBars JS” voice.
                              Genos           MODX
    ## Parameters         ClassicBars JS  The Jazz Organ
    -- -----------------  --------------  --------------
     1 Drive                  0               15
     2 Amp Type               Stack           Tube
     3 LPF Cutoff Frequency   8.0kHz          5.0kHz
     4 Output Level           114             112
    10 Dry/Wet                D24>W           D17>W
    11 Edge (Clip Curve)      0               n/a
The nearest equivalent MODX algorithm is AMP SIMULATOR 2. The parameters are the same except “Edge (Clip Curve)” is missing on MODX. Still, I would give these parameter values a try on MODX.
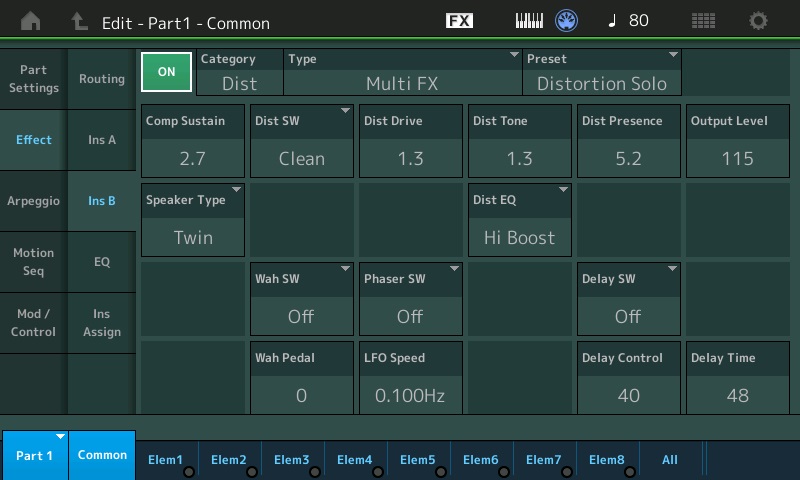
The MULTI FX algorithm simulates a guitar pedal board. The input signal hits a simple compressor (sustain) which drives a distortion block (Dist). The phaser and wah blocks are turned OFF in the examples below.
MODX Performance: More Shade
MODX Algorithm: MULTI FX MODX Preset: Distortion Solo
                              MODX           MODX
    ## Parameters         More Shade  8.8.8.8.6.2.2.0.0
    -- -----------------  ----------  -----------------
     1 Comp. Sustain      2.3               2.7
     2 Wah SW             Off               Off
     3 Wah Pedal          0                 0
     4 Dist SW            Clean             Clean
     5 Dist Drive         2.1               1.3
     6 Dist EQ            High Boost        High Boost
     7 Dist Tone          0.8               1.3
     8 Dist Presence      6.0               5.2
     9 Output Level       108               115
    10
    11 Speaker Type       Twin              Twin
    12 LFO Speed          0.1Hz             0.1Hz
    13 Phaser SW          Off               Off
    14 Delay SW           Echo1 St          Off
    15 Delay Ctrl         40                40
    16 Delay Time         48                48
The “More Shade” Performance adds a stereo echo effect using the delay block. MULTI FX is a super handy algorithm and I’ve discussed its use with organ and electric piano before.
Yamaha CK- and YC-series
The table below summarized the YC- and CK-series rotary and distortion insert effects.
    YC61 rotary effects
        Rtr A          Standard rotary speaker for organ
        Rtr B          Rotary speaker connected to a transistor
                       preamplifier with strong distortion
        Lead           Guitar amp (bass of high sound
                       pressure and sharp treble)
        Crunch         Guitar amp (crunch sound)
        Double         Guitar amp (bright sound)
        Case           Speaker amp for vintage electric piano
    CK61 drive (rotary) effects
        Rotary A       Standard rotary speaker for organ
        Rotary B       Rotary speaker connected to a transistor
                       preamplifier with strong distortion
        O.Drive        Warm distortion (overdrive)
        Dist           Hard rock distortion
        Comp           Compressor controlled by a single knob
    YC61 and CK61 insert effects
        British Combo  Crunch distortion (Vox AC30 Top Boost)
        British Lead   Hard rock type distortion (Marshall Plexi)
        Small Stereo   Stereo distortion
I’ll let you guess as to which Yamaha algorithms are (re)used. If you want to re-create the CK sound on MODX (Montage), have at it!
Copyright © 2023 Paul J. Drongowski