Anavi Macropad8 for MIDI control

Every now and again, ya need a simple, small device to send MIDI commands. The V3 Sound Yammex XXL sound module is one such use case. It requires full Bank Select plus Program Change message sequences to select a voice. You’d be surprised at how many MIDI controllers are incapable of sending a full three message selection sequence! [This is one of my pet peeves about some MIDI controllers,]

So-called “macro keypads” are one possible solution. Typically, macro keypads are used by gamers to send repeated, complicated key sequences. [Hadoken!] The trick is getting the macro keypad to send MIDI instead of ASCII or whatever.

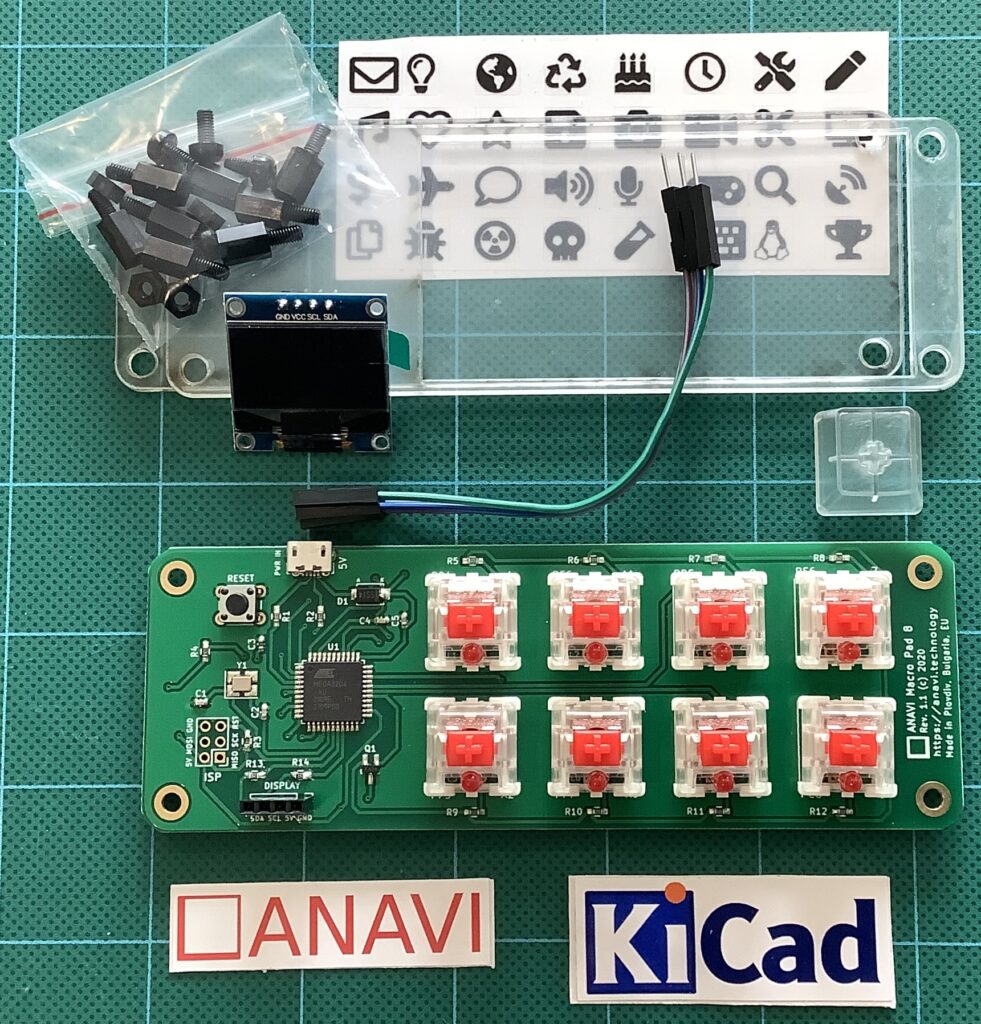
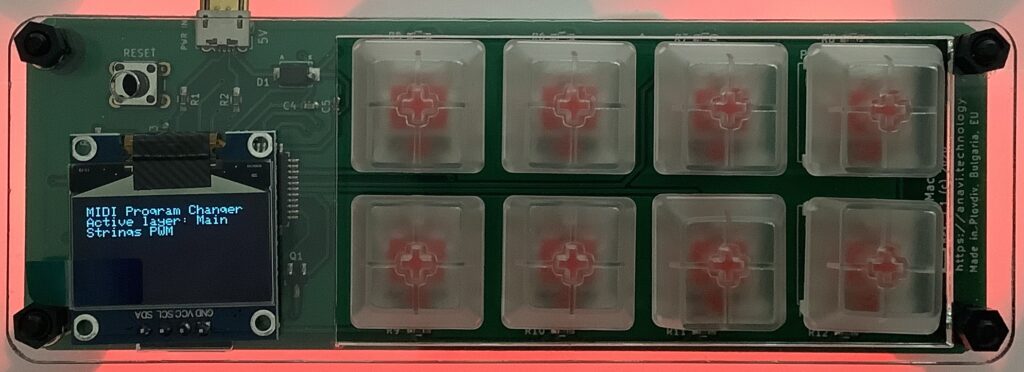
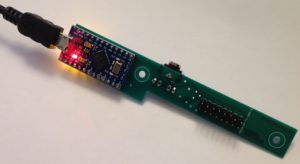
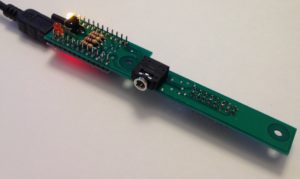
I did a search last year and found the Anavi Macropad8. The Macropad8 has eight keys, a micro USB connector and an optional OLED display. I planned to plug it into the USB host port on the Yammex module and send voice selection messages to it over USB — while the Yammex 5-pin MIDI IN port handles notes from a brain-damaged MIDI keyboard controller.

Anavi’s fulfillment via Tindy.com was really fast. Then, I let the Macropad8 languish for almost a full year. Until now.

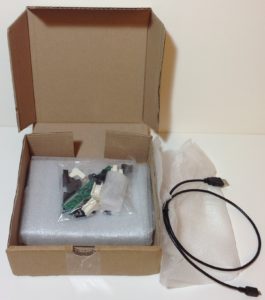
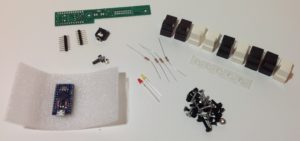
First off, I like the Anavi Macropad8 hardware. I bought the Developer Kit which requires some minor assembly. It’s no more complicated than assembling a KORG NTS-1 or NTS-2. Unlike the KORGs, the Macropad8 does not fully enclose the electronics. Still, the final assembly is decently robust. The OLED is probably the most vulnerable component as it sits on top of the plexi top cover. I’m good with this for home use.

After assembly, I wrangled with the QMK (Quantum Mechanical Keyboard) development environment. I figured a few bytes here and there, and the Macropad8 should be good to go. Ha! Two gigabytes of development environment later, I was ready to run the QMK compiler and flash software. Yikes, that is bloated. QMK downloads with the default keymap definitions, etc. for every QMK-compatible macro keypad known to man, woman and dog.

Plus, QMK is, at best, user-hostile for QMK n00bs. Even figuring out where source code goes is an adventure game. Then, the default Macropad8 keymap is too large to flash. QMK doesn’t offer any real hints about reducing code size and one is quickly in the deep water. I turned off tap dancing, N-key rollover and backlighting in order to get the code size down.

Fortunately, there is the shell of an “advanced” MIDI keymap.c file in the documentation from which I did extensive copy and modify. You’ll need to dive into the MIDI library source code to suss out the MIDI API. The API is complete, but it is undocumented.

At long last I had a QMK app ready to go. The concept of operation is pretty simple — respond to key codes and send Bank Select MSB, Bank Select LSB and Program Change for each key press. User code runs in the middle of an infinite loop provided by the QMK infrastructure. QMK calls process_record_user() when a key code is ready for processing. If the OLED is enabled, QMK calls oled_task_user(), so your code can update (redraw) the display.

I did a quick check out with MIDI-OX to make sure the MIDI messages were being sent correctly. The Macropad8 exposes two USB ports — one to send characters to the keyboard stream and one to send MIDI. Fortunately, both Windows (MIDI-OK) and the Yammex immediately recognized the MIDI port.

Hooked up to Yammex, the Macropad8 worked as expected. I couldn’t get the arrangement to glitch even once while practicing. Overall, I would call Anavi Macropad8 a success and I recommend it.

The Macropad8 can run Arduino sketches, too. My back-up plan, in case QMK failed, was to program the Macropad8 as an Arduino (Leonardo). As an Arduino, the Macropad8 makes a neat application-specific system. I wish there was direct hardware access to the Arduino pins, but that would push Macropad8 into a different product direction entirely. Would make an interesting hack, anyway…

I noticed that newer Anavi products have moved to the Raspberry Pi RP2040 Pico. So, exercise care when ordering if you want a Microchip ATmega32U4 microcontroller.

Copyright © 2024 Paul J. Drongowski

Roland and Korg make candy

Superbooth 2022 is underway — candy for everyone!

Roland

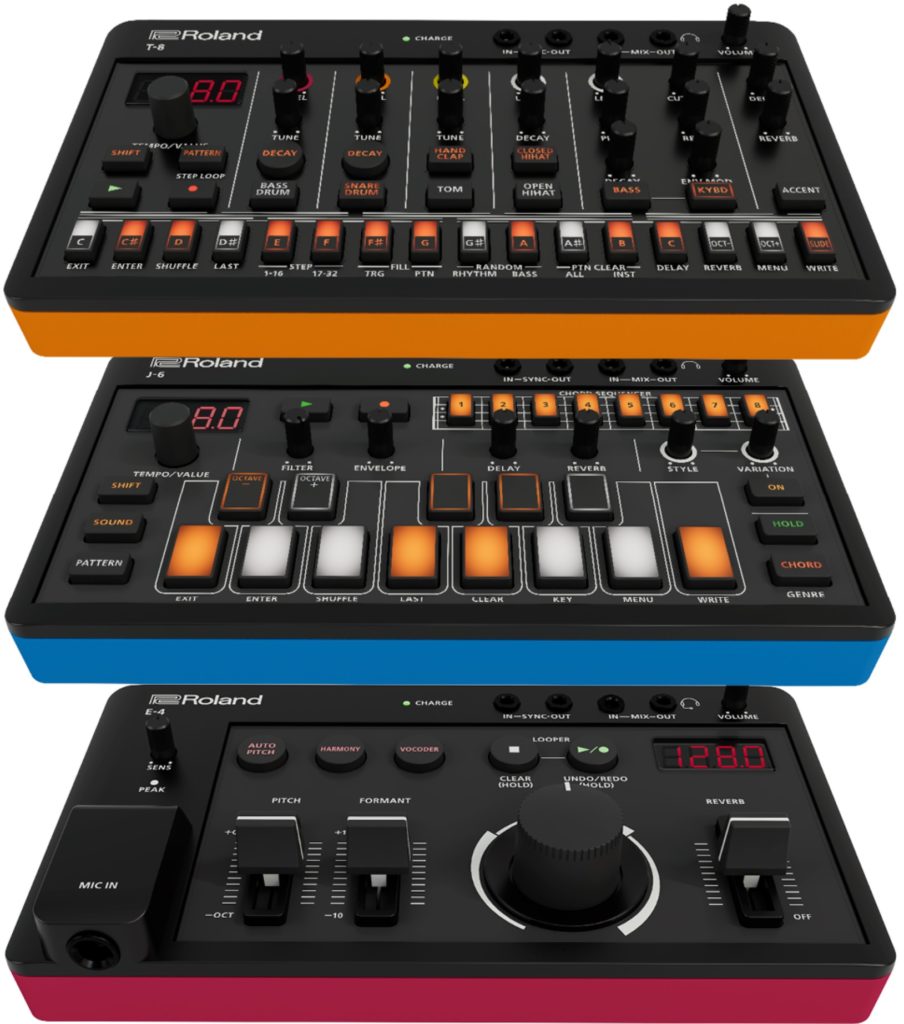
Roland’s new Aira Compact modules are a license to print money. Korg have successfully mined the low-cost, small module field with its Volca series. Now Roland have joined the fun. (“Aira” is pronounced “eye-ra”. OK.) These suckers are tiny!

Roland Aira Compact: T-8, J-6, E-4

There are three initial modules in the range:

  • T-8 Beat Machine
  • J-6 Chord Synthesizer
  • E-4 Voice Tweaker

I recommend Roland’s overview video. All of the modules have a built-in Li-ion battery (4.5 hour estimated operational time) charged via the micro-USB port. Throw in MIDI and SYNC, too, through mini-jacks.

Roland are smart to capitalize on their reputation in drum machines. The T-8 is a seven track machine: six rhythm tracks plus a TB-303 bass track.

The J-6 has a host of in-built chords and chord patterns organized into “Genres.” The interface seems to be well-thought out, especially for those less interested in theory and actually jamming black and whites. The J-6 has a 4-voice Analog Circuit Behavior (ACB) Juno-60 synth engine. The J-6 can be played from an external controller.

The E-4 Voice Tweaker is designed for voice mangling, but one should be able to run either signals into it, too.

The modules are hitting the street at $200 each. Somehow these kinds of modules find a way onto the studio. Almost by themselves…

Korg

As cute and colorful as the Rolands may be, The new Korg NTS-2 is at the top of my short-list.

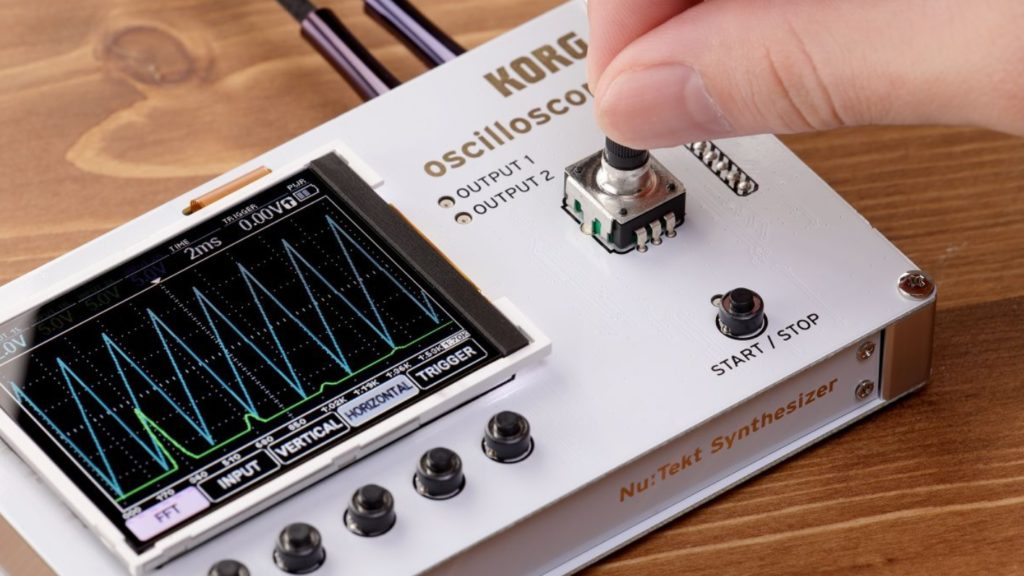
The Korg NTS-2 joins the NTS-1 mono synth in the Nu:Tekt product line. The NTS-2 is an attractive looking four channel oscilloscope. Punters are complaining about the price — $230 USD — but the this is a nicely featured oscilloscope plus tuner, plus FFT, plus spectrum analyzer. The NTS-2 has dual waveform generators which can act as add-on synth oscillators or LFOs. There’s some real development cost behind this thang.

Korg NTS-2 Oscilloscope

In terms of function, screen size and build quality, it beats my Gabotronics Xminilab Portable. The NTS-2 has a larger color screen and five soft function buttons. I’ve never been very successful with the Gabotronics as a stand-alone test instrument, so I’m hoping for better out of the NTS-2.

Unlike the NTS-1, the NTS-2 OSC can run on two AAA batteries (estimated two hours of operational time).

The NTS-2 will be bundled with a book: “Patch & Tweak With Korg” by Kim Bjørn (BJOOKS). The bundle is stamped “Limited Edition,” so Korg may eventually release NTS-2 on its own. Other books in the Patch & Tweak series cost about $45 USD. Maybe the NTS-2 alone will run $180?

Another consideration is test leads and probes. Korg assume the NTS-2 will be connected into your rig with patch cables. Korg do not mention probes, so if you need in-circuit measurements, you’re on your own. (Minor bummer.)

Copyright © 2022 Paul J. Drongowski

Combo organ: Top octave emulation

Given the scarcity of combo organ top octave generator ICs, what’s a hack supposed to do? Emulate!

I posed a “bar bet” against myself — can I emulate a top octave generator chip with an Arduino? The Arduino is a bit slow and I wasn’t sure if it would be fast enough for the task. Good thing I didn’t best against it…

If you browse the Web, you’ll find other solutions. I chose Arduino UNO out of laziness — the IDE is already set-up on my PC and the hardware and software are easy to use. Plus, I have UNOs to spare. Ultimately, one can always cobble together a barebones solution consisting of an ATMEGA328P, a 16MHz crystal and a few discrete components, if small size is an issue.

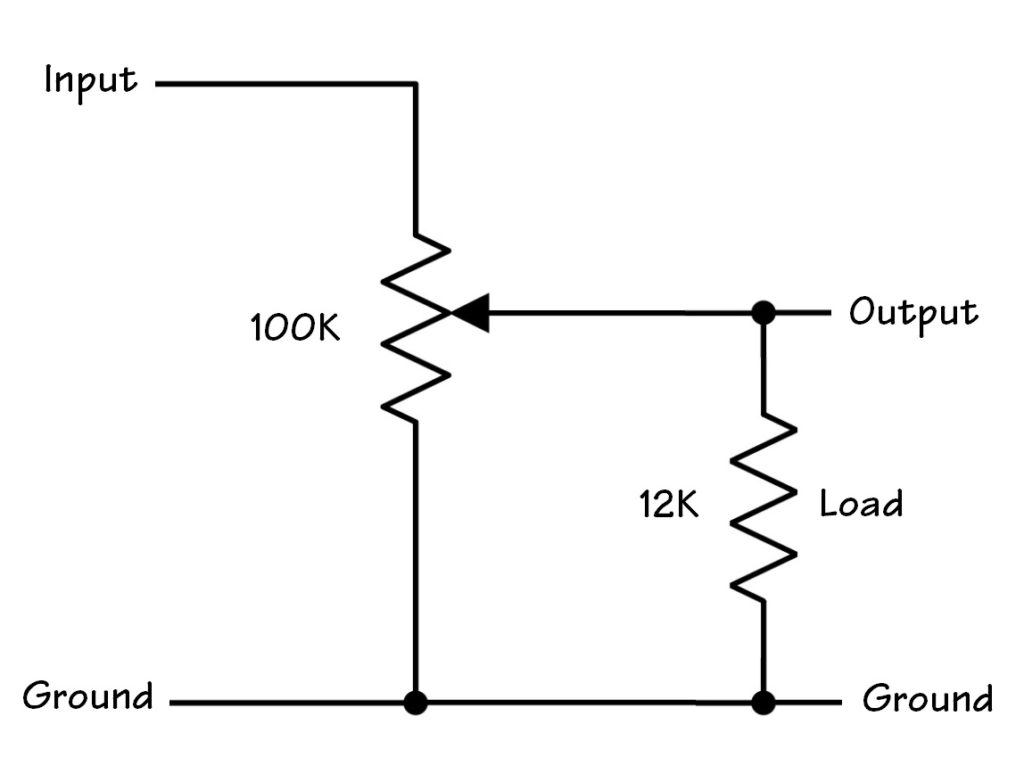
A simple passive volume control

There’s not much ancilliary hardware required. A few jumper wires bring out ground and audio signals from the UNO. I passed the audio through a trim pot volume circuit in order to knock the 5 Volt signal down to something more acceptable for a line level input. The trim pot feeds a Sparkfun 3.5mm phone break-out board which is connected to the LINE IN of a powered speaker.

That’s it for the test rig. The rest is software.

I assigned a “root” pitch to Arduino digital pins D2 to D13:

#define CnatPin 13 
#define BnatPin 12
#define AshpPin 11
#define AnatPin 10
#define GshpPin 9
#define GnatPin 8
#define FshpPin 7
#define FnatPin 6
#define EnatPin 5
#define DshpPin 4
#define DnatPin 3
#define CshpPin 2

Thankfully, the Arduino has just enough available pins to do the job while avoiding pins D1 and D0. D1 (TX) and D0 (RX) carry the serial port signals and it’s best to let them do that job alone.

My basic thought algorithm-wise was to implement 12 divide-down counters (one per root pitch) that decrement during each trip through a non-terminating loop. Each counter is (pre-)loaded with the unique divisor which produces its assigned root pitch. Whenever a counter hits zero, the code flips the corresponding digital output pin. If the loop is fast enough, we should hear an audio frequency square wave at the corresponding digital output. This approach is (probably) similar to the actual guts of the Mostek MK50240 top octave generator chip, except that the MK50240 counters operate in parallel.

Each root pitch needs:

  • A digital output pin
  • A note count variable
  • A divisor
  • A state variable to remember if the output is currently 0 or 1

For the highest pitch, C natural, we need declarations:

    #define CnatPin 13 

byte CnatCount ;

#define CNAT (123)

byte CnatState ;

and count down code to be placed within the loop body:

    if (--CnatCount == 0) { 
digitalWrite(CnatPin, (CnatState ^= 0x01)) ;
CnatCount = CNAT ;
}

These are the basic elements of the solution. The rest of the pitches follow the same pattern.

Now, for the fun — making the loop fast enough to be practical. This was a bit of a journey!

First off, I tried the MK50240 divisor values which require at least 9 bits for representation. Using INT (16-bit) counter variables, everything worked, but the final note frequencies were too low — not much “top” in top octave. I cut the divisor values in two, switched to BYTE (8-bit) counter variables, and doubled the output frequencies. Yes, AVR (Arduino) BYTE arithmetic is roughly twice as fast as INT arithmetic. That was the first lesson learned.

The next lesson had to do with how the counters were stored (register vs. memory). If I were writing the code in assembler language, I would have stored all of the counters in AVR CPU registers. (AVR has 32 CPU registers, after all.) Register storage would provide the fastest counter access and arithmetic. However, this is where C language and the Arduino setup()/loop() structure fight us.

Ultimately, I put all code into setup() and ditched loop(). I declared all twelve counters as register BYTE variables in setup():

    register byte CnatCount ; 
register byte BnatCount ;
register byte AshpCount ;
register byte AnatCount ;
register byte GshpCount ;
register byte GnatCount ;
register byte FshpCount ;
register byte FnatCount ;
register byte EnatCount ;
register byte DshpCount ;
register byte DnatCount ;
register byte CshpCount ;

The compiler allocated the counter variables to AVR CPU registers. This enhancement doubled the output frequencies, again. Now we’re into top octave territory!

The third and final lesson was tuning. The Mostek MK50240 is driven by a crystal-controlled 2000.240 kHz master clock. The emulated “master clock” is determined by the speed of the non-terminating loop (cycling at the so-called “loop frequency”):

    for (;;) { 
if (--CnatCount == 0) {
digitalWrite(CnatPin, (CnatState ^= 0x01)) ;
CnatCount = CNAT ;
}

...

delaySum = delaySum + 1 ;
}

My original plan was to tune all twelve pitches by changing the speed of the non-terminating loop. I discovered that such timing was too sensitive to code generation to be controllable and reliable. The biggest delay that I could add to the non-terminating loop was “delaySum = delaySum + 1 ;“. In the end, I manually tuned the individual note divisors.

A fine point: I chose the divisors to achieve a wide resolution in 8 bits. Eight bits is “close enough for rock and roll,” but not really enough for accurate tuning.

As usual, the path to the solution was zig-zaggy and not straight. Here is a ZIP file with all of the code and my working notes. I included source code for the intermediate experiments so you can re-trace my steps. Have fun!

Copyright © 2021 Paul J. Drongowski

Crumar D9U: Electro 2 Sketch (Part 5)

Finally, after all of the testing, the first Crumar D9U Drawbar Controller application sketch! The sketch below changes the drawbar settings for the Nord Electro 2. The Arduino on board the D9U sends a complete snapshot of all nine drawbar settings to the Electro 2 at start-up and whenever the tactile switch is depressed. Thereafter, it sends a MIDI message to the Electro 2 whenever a slider (drawbar) is changed.

The sketch drives only the Electro 2 upper drawbars. If you need the lower drawbars, too, you can follow Crumar’s example sketch and extend my sketch.

The sketch does not use the Arduino MIDI library because we only need to send simple MIDI continuous control (CC) messages. It’s easy enough to write the necessary code ourselves.

I encountered an Arduino compiler toolchain issue while developing the sketch. I wasn’t able to initialize snapCount in the setup() function. I’ll work around this issue in future sketches and you should back-port the fix. It’s not the first time that I’ve run into an Arduino toolchain bug…

The program logic is quite simple. There are three helper functions: sendNoteOn(), sendNoteOff(), and sendMidiCC(). The sketch uses only the third function which sends a MIDI continuous control message through the Serial1 port, i.e., the Arduino Leonardo TX pin.

The setup() function initializes the digital pins and global variables, and calls sendSnapshot() to scan the analog pins, sending a MIDI CC message for each drawbar. The idea is to sync the Electro 2 with the D9U when the D9U is turned on. You should select an organ voice on the Electro 2 before turning on the D9U in order to take advantage of this feature.

The loop() function goes round and round. If the tactile switch is depressed, the sketch takes a snapshot of the analog pins (sliders) and sends a MIDI CC message for each slider (drawbar). The variable snapCount debounces the tactile switch input, preventing a flood of MIDI CC messages to MIDI OUT and the Electro 2.

After checking the tactile switch, the loop() function delays for a short time and then calls checkSliders(). The function checkSliders() keeps a copy of the most recent slider values. When it detects a change, it saves the new slider value and sends a MIDI CC message with the new value. The Electro 2 accepts drawbar values over the range from 0 to 127.

It’s rather gratifying to attach the Crumar D9U to the Electro 2 and watch the Electro’s drawbar status lights change in sync with the D9U drawbars. Cool. Fun to play, too.

If you have a Nord Electro 2 and a D9U, enjoy the sketch!

Copyright © 2018 Paul J. Drongowski

/*
 * Electro2.ino: Crumar D9U sketch for Nord Electro 2
 */

/*
 * Author:  P.J. Drongowski
 * Address: http://sandsoftwaresound.net/
 * Date:    12 December 2018
 * Version: 1.0
 *
 * A simple sketch to control the Nord Electro 2 with the
 * Crumar D9U Drawbar Controller. This sketch controls
 * the upper drawbars, but could be extended to control
 * the lower drawbars. See the Crumar sketch for
 * inspiration!
 *
 * We assume a direct 5-pin MIDI connection from the
 * D9U to the Electro 2. Since direct MIDI is so simple,
 * the sketch does not use the Arduino MIDI library.
 * MIDI bytes are sent using Serial1.write().
 *
 * Send on MIDI CC messages on MIDI channel 0.
 *
 * Electro 2 MIDI continuous controllers (CC) are:
 *    Parameter       Upper CC#  Lower CC#
 *    --------------  ---------  ---------
 *    16' drawbar         16        70
 *    5 1/3' drawbar      17        71
 *    8' drawbar          18        72
 *    4' drawbar          19        73
 *    2 2/3' drawbar      20        74
 *    2' drawbar          21        75
 *    1 3/5' drawbar      22        76
 *    1 1/3' drawbar      23        77
 *    1' drawbar          24        78

 */

// Pin definitions
#define LED_RED    15
#define LED_GREEN  16
#define BUTTON     5

// Analog pin map
#define NUMBER_OF_SLIDERS 9
int AnalogPinMap[NUMBER_OF_SLIDERS] = {
  A0, A1, A2, A3, A6, A7, A8, A9, A10
} ;

// Drawbar to MIDI CC# map
int MidiCCMap[NUMBER_OF_SLIDERS] = {
  16, 17, 18, 19, 20, 21, 22, 23, 24
} ;

// Global variables
int sliders[NUMBER_OF_SLIDERS] ;
#define SNAP_COUNT  (200)
int snapCount = SNAP_COUNT ;

// MIDI channel
#define CHANNEL 0

// Bias offset for incoming slider values [unused]
#define BIAS 32

void sendNoteOn(byte pitch, byte velocity) {
  Serial1.write(0x90 | CHANNEL) ;
  Serial1.write(pitch) ;
  Serial1.write(velocity) ;
}

void sendNoteOff(byte pitch) {
  Serial1.write(0x80 | CHANNEL) ;
  Serial1.write(pitch) ;
  Serial1.write(0) ;
}

void sendMidiCC(byte cc, byte value) {
  Serial1.write(0xB0 | CHANNEL) ;
  Serial1.write(cc) ;
  Serial1.write(value) ;
}

// Take a snapshot of the current slider state and
// send MIDI CC for all sliders. Electro 2 CC value range
// is 0 to 127.
void sendSnapshot() {
  int newValue = 0 ;
  for (int i = 0 ; i < NUMBER_OF_SLIDERS ; i++) {
    newValue = (analogRead(AnalogPinMap[i]) & 0x3FF) / 8 ;
    sliders[i] = newValue ;
    sendMidiCC(MidiCCMap[i], newValue) ;
  }
}

// Check the sliders for movement (changes). When a change
// is detected, send a MIDI CC message. Nord Electro CC
// values range from 0 to 127.
void checkSliders() {
  int newValue = 0 ;
  for (int i = 0 ; i < NUMBER_OF_SLIDERS ; i++) {
    newValue = (analogRead(AnalogPinMap[i]) & 0x3FF) / 8 ;
    if (sliders[i] != newValue) {
      sliders[i] = newValue ;
      // Send MIDI CC message when the value changes
      sendMidiCC(MidiCCMap[i], newValue) ;
    }
  }
}
 
void setup() {
  // Set up pins
  pinMode(BUTTON, INPUT_PULLUP) ;
  pinMode(LED_RED, OUTPUT) ;
  pinMode(LED_GREEN, OUTPUT) ;

  // Set up Serial1 for MIDI via TX and RX (31,250 baud)
  Serial1.begin(31250) ;

  // Initialize the button debounce count
  // Send an initial snapshot. This operation initializes
  // the current slider values, too.
  sendSnapshot() ;
}

void loop() {
  if ((digitalRead(BUTTON) == LOW) && (snapCount <= 0))
  {
    // Take and send a snapshot of the sliders
    sendSnapshot() ;
    snapCount = SNAP_COUNT ;
  } else {
    snapCount-- ;
  }

  delay(1) ;
  checkSliders() ;
}

Crumar D9U: Testing MIDI (Part 4)

Apologies for the delay between posts. It isn’t for lack of enthusiasm for the Crumar D9U Drawbar Controller. It’s preparation for the approaching holidays.

Today’s post is another aspect of unit testing — MIDI. The D9U has a 3.5mm MIDI OUT jack. The MIDI signals conform to the MIDI “Type B” pin-out for 3.5mm jacks. The Type B pin-out is:

    DIN      3.5mm
    -----    --------------------
    Pin 4    Tip (Current Source)
    Pin 5    Ring (Current Sink)
    Pin 2    Sleeve (Shield) 

Type B is used by Arturia, Novation, and 1010Music.

I must note that the MIDI “Type A” pin-out is going to be the standard going forward. Unfortunately, the MIDI Association didn’t get ahead of manufacturers when they began using 3.5mm jacks. For reference, the Type A pin-out is:

    DIN      3.5mm
    -----    --------------------
    Pin 4    Ring (Current Source)
    Pin 5    Tip (Current Sink)
    Pin 2    Sleeve (Shield) 

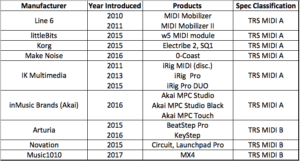
Type A is used by Akai Pro, IK Multimedia, Korg, Line 6, littleBits, and Make Noise. I found the chart below to be quite helpful in running down an appropriate adapter cable. (Source: MIDI Association 3.5mm stereo TRS to MIDI 5-pin DIN cables)

Thanks to all of the Christmas prep, I didn’t miss a step while waiting for the 1010Music adapter to arrive. (It’s Advent after all.) I detest making cables and the 1010Music adapter is reasonably priced.

I also got down to work on a MIDI test sketch for the D9U. (Code appears at the end of this post.) The sketch does not use the Arduino MIDI library because it simply sends MIDI note ON and note OFF messages through the MIDI port.

If you’re new to Arduino Leonard — the D9U’s Pro Micro is a Leonardo — you may not know that Leonard has two serial ports: Serial and Serial1. The first port, Serial is dedicated to USB communications. The second port, Serial1, is dedicated to the digital RX and TX pins, similar to Arduino UNO, et al. The naming convention sometimes confuses coders who are new to Leonardo. In our case, when we want to send MIDI, we use the Serial1 port, which must be configured for the MIDI baud rate, 31,250Hz.

The sketch repeatedly sends MIDI note ON and OFF messages such that you should hear a steady series of staccato notes when the MIDI message stream is sent to a tone generator. In my case, I connected the D9U to my trusty Yamaha QY70 sequencer and tone module.

Here’s another little twist. Leonardo is equipped with two additional LEDs: TXLED and RXLED. These LEDs flash when there is transmit and receive activity (respectively) on the USB port. The test sketch does not use the USB port (Serial), so the TXLED and RXLED are ours to play with. The four macros:

    TXLED0 ;      RXLED0 ;
    TXLED1 ;      RXLED1 ;

control the LEDs. If you compile the sketch on a regular Arduino (e.g., UNO), these macros will be flagged as undefined symbols.

Extra credit

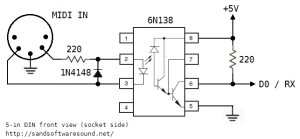
While wading through the Type A vs. Type B nonsense, I did a few simple experiments with the D9U’s MIDI port. For example, you can check the signal levels using a digital multimeter. DIN pin 2 should read as 0 Volts (ground) while DIN pin 4 should be +5 Volts. DIN pin 5 is the data pin which pulls the MIDI current loop to ground. Please remember that MIDI is a current loop where:

  • Logic 1 → High → no current flow → Opto-isolator LED off → MIDI receiver sees High, logic ‘1’ (data bits, stop bit or idle)
  • Logic 0 → Low → current loop flow rarr; Opto-isolator LED on → MIDI receiver sees Low, logic ‘0’ (data bits, start bit)

Thanks, Wikipedia.

The sender (MIDI OUT) turns an LED on and off in the receiver (MIDI IN). The LED is part of an opto-isolator which provides electrical isolation between the sender and the receiver.

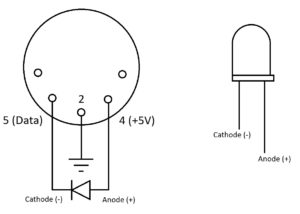
So, if you want to check out MIDI signals at the pins, all you need is an LED and a current limiting resistor (e.g., 330 ohms) in series in the current loop. The LED lights when connected in the direction of positive current flow. Here are my handwritten notes.

David Battino would be proud. David loves to add flashing LED eyes to Japanese movie monster toys and more. One of these days I’ll put all of those Godzillas in our basement toy chest to work. 🙂

Copyright © 2018 Paul J. Drongowski

/*
 * MidiTest.ino: Crumar D9U MIDI and slider test
 */

/*
 * Author:  P.J. Drongowski
 * Address: http://sandsoftwaresound.net/
 * Date:    11 December 2018
 * Version: 1.0
 *
 * This test reads the current slider values. If there is a
 * change, it prints the current slider values to the Arduino
 * serial port. Watch the values change in the IDE's Serial
 * Monitor. The incoming slider values are biased so that
 * values range reliably from 0 to 8. (Leonarkdo's Serial
 * port is dedicated to USB communications.
 *
 * Additionally, send MIDI note ON and note OFF messages to
 * the Serial1 port. On Leonardo, Serial1 communicates via
 * the TX and RX pins.
 */

// Pin definitions
#define LED_RED    15
#define LED_GREEN  16
#define BUTTON     5

// Analog pin map
#define NUMBER_OF_SLIDERS 9
int AnalogPinMap[NUMBER_OF_SLIDERS] = {
  A0, A1, A2, A3, A6, A7, A8, A9, A10
} ;

// Global variables
int colorMode = 0 ;
int ledMode = 0 ;
int noteState = 0 ;
int sliders[NUMBER_OF_SLIDERS] ;

// Bias offset for incoming slider values
#define BIAS 32

void sendNoteOn() {
  Serial1.write(0x90) ;
  Serial1.write(36) ;
  Serial1.write(100) ;
}

void sendNoteOff() {
  Serial1.write(0x90) ;
  Serial1.write(36) ;
  Serial1.write(0) ;
}

void changeColors() {
  if (colorMode) {
    digitalWrite(LED_RED, LOW) ;
    digitalWrite(LED_GREEN, HIGH) ;
  } else {
    digitalWrite(LED_RED, HIGH) ;
    digitalWrite(LED_GREEN, LOW) ;
  }
}

void printSliders() {
  for (int i = 0 ; i < NUMBER_OF_SLIDERS ; i++) {
    Serial.print(sliders[i]) ;
    Serial.print(" ") ;
  }
  Serial.println("") ;
}

void checkSliders() {
  int changeFlag = 0 ;
  int newValue = 0 ;
  for (int i = 0 ; i < NUMBER_OF_SLIDERS ; i++) {
    newValue = (analogRead(AnalogPinMap[i]) + BIAS ) / 128 ;
    if (sliders[i] != newValue) {
      changeFlag = 1 ; 
      sliders[i] = newValue ;
    }
  }
  if (changeFlag != 0) {
    // If a change was made, print current slider values
    printSliders() ;
  }
}
 
void setup() {
  // Set up pins
  pinMode(BUTTON, INPUT_PULLUP) ;
  pinMode(LED_RED, OUTPUT) ;
  pinMode(LED_GREEN, OUTPUT) ;

  // Set up Serial1 for MIDI via TX and RX (31,250 baud)
  Serial1.begin(31250) ;

  colorMode = 0 ;
  noteState = 0 ;

  for (int i = 0 ; i < NUMBER_OF_SLIDERS ; i++) {
    sliders[i] = -1 ;
  }
}

void loop() {
  if (digitalRead(BUTTON) == LOW) {
    colorMode = 0 ;
  } else {
    colorMode = 1 ;
  }

  // Make the TX and RX LEDs flash in sync with the notes.
  // The TX and RX LEDs are Leonardo only. Remove the code
  // below when compiling for Arduino UNO, etc.
  if (ledMode) {
    ledMode = 0 ;
    TXLED1 ;
    RXLED0 ;    
  } else {
    ledMode = 1 ;
    TXLED0 ;
    RXLED1 ;
  }
  
  if (noteState != 0) {
    sendNoteOn() ;
    noteState = 0 ;
  } else {
    sendNoteOff() ;
    noteState = 1 ;
  }

  delay(100) ;
  changeColors() ;
  checkSliders() ;
}

Crumar D9U: What went wrong? (Day 3)

People who build stuff are optimists. Even just a little.

After slaving over a hot soldering iron (or bit of code), there comes the moment of truth. Of course, we all hope and believe that everything will run just fine when power is turned on.

Thus, I was a little bit bummed when I ran my drawbar test sketch (Arduino program) and saw that the second drawbar was unresponsive.

Hey, PJ, how did you debug and fix this thing?

First and foremost, I want to emphasize the importance of diagnostic tests. My test sketch told me conclusively that the second drawbar was busted. The test not only said, “Houston, we have a problem,” but the test also told me where to look for the problem — the second drawbar. Explicit testing is much better than trying to test and debug hardware with the application sketch itself, i.e., the sample sketch provided by Crumar.

Knowing that the second drawbar was bunged, I whipped out my digital multimeter and did a few simple electrical tests. I usually assume good components, but it was easy to check the second slide pot. Yep, the meter read out the expected resistance. Then I did quick continuity and resistance checks back to the appropriate Arduino analog pin. Thank heavens for the sample sketch because I quickly worked out the pin map (Arduino Pro Micro):

          TX o    o RAW
          RX o    o GND
         GND o    o RST
         GND o    o VCC
         SDA o    o A3    Draw4
         SCL o    o A2    Draw3
  Draw5   A6 o    o A1    Draw2  <---
             o    o A0    Draw1
  Draw6   A7 o    o SCLK
             o    o MISO
  Draw7   A8 o    o MOSI
  Draw8   A9 o    o A10   Draw9

I numbered the drawbars (left to right) starting with one. The Crumar schematics numbers the drawbars from zero. [Oh, well.]

This was a good time to check the batteries in the multimeter. Whoops, 2017. Good, fair or poor, I replaced the batteries with fresh ones.

I didn't find anything out of the ordinary, so I began the usual prayer, "Dear Lord, I hope I didn't blowed up the chip." I did not relish the thought of replacing the Arduino Pro Micro -- all 24 pins of it.

My soldering skills are good, but not perfect. Plus, the large holes and the excessive amount of solder consumed by the slide pot leads immediately made me suspect a bad soldering joint.

In order to test this theory, I tried jumpering the voltage from the first drawbar slider to the Arduino A1 pin while watching the sketch's output in the IDE Serial Monitor. Perhaps an internal pull-up (or something) didn't change the A1 signal or the output from the sketch.

Then it was time to play "which of these isn't like the others" with the multimeter and with the power on. Ah-ha. The voltage at the SIGN #2 pad did not change when sliding the pot to a new position. The rest of the SIGN pads responded correctly. Not conclusive evidence for a bad solder joint, but more hope than a blown up Arduino.

The next step was to fire up the iron and retouch the pot leads for the second drawbar. It takes longer for the iron to heat up than to do the touch up. Damn, these leads suck down solder.

After letting things cool, I plugged the Arduino back in and voila, the second drawbar now responds correctly. Thank you, test sketch.

When testing pot resistance, I noted some variability in resistance across the 9 pots. I hope the variability doesn't affect behavior when I get down to transmitting MIDI values. Maybe everything will act like a well-worn B3? Sometimes higher resistance is due to a marginal solder joint, but I'm not anxious to touch up every pot connection lest I introduce a worse problem. More testing ahead.

If you landed here, check out Day One in this series of blog posts about the Crumar D9U Drawbar Controller kit.

Copyright © 2018 Paul J. Drongowski

Crumar D9U: Slip slidin’ (day 2)

Today I completed most of the remaining assembly of the Crumar D9U Drawbar Controller. The work entailed:

  1. Combining the Arduino control board and the main PCB.
  2. Installing the drawbar slide pots on the bottom of the chassis.
  3. Soldering the main PCB to the slide pots and soldering the DIL connections to the Arduino control board.
  4. Installing colored plastic caps on the drawbars.

Overall, the work went well. Here’s a few observations and tips.

  • When the instructions say make the DIL flat and straight on the control board, they really mean it! The receiving holes on the main PCB are quite small and if that DIL isn’t straight, good luck. Even with a straight DIL, it took some finagling to pass the pins through the holes.
  • The control board and main PCB are joined by two long-ish bolts with spacers between the boards. The nuts are really tight. You will not be able to hold the nuts in place with fingers alone. I used needle nose pliers to hold the nuts while turning the bolts. Be careful not to damage the Arduino when using the pliers. I did bend a pin.
  • Experience with the main PCB and the slider pins was similar although these holes are larger and more accommodating. Gently straighten any bent pins.
  • Speaking of large holes, crimp the pot leads against the main PCB pads to make good electrical contact. These holes eat solder like crazy. You should rely on the solder to maintain electrical contact, not to be the electrical bridge itself.
  • The colored caps fit OK, but you will need to use a far bit of force to drive the screws into the caps for a firm result. The white knobs still have a tiny amount of play, but I was afraid to over-tighten the screws and strip the plastic.

The D9U is built like a warship although the tight fit of nuts and screws makes for a slightly stressful assembly job.

I forget to suggest one tip in yesterday’s blog post. If you have a breadboard available, it makes a nice jig for installing DILs and other components that you need to keep straight. Push the DIL into the breadboard, lay the board on top, and then solder away. I usually try to tack one or two corners first and then check for straightness, etc. If the DIL ain’t straight, it’s a lot easier to remove the tack from two pins (using a solder sucker or braided copper tape) than to remove solder from all 16 pins!

See my first blog post about the D9U for pictures of the pieces and parts in the kit.

Slider test sketch

Here is the code for a quick slider test. It prints the slider values to the Arduino IDE’s Serial Monitor. This sketch is already earning its keep — the second drawbar slider is not changing. The other eight sliders are changing just fine. I have some hardware debugging to do!

/*
 * SliderTest.ino: Crumar D9U initial test
 */

/*
 * Author:  P.J. Drongowski
 * Address: http://sandsoftwaresound.net/
 * Date:    7 December 2018
 * Version: 1.0
 *
 * This test reads the current slider values. If there is a
 * change, it prints the current slider values to the Arduino
 * serial port. Watch the values change in the IDE's Serial
 * Monitor.
 */

// Pin definitions
#define LED_RED    15
#define LED_GREEN  16
#define BUTTON     5

// Analog pin map
#define NUMBER_OF_SLIDERS 9
int AnalogPinMap[NUMBER_OF_SLIDERS] = {
  A0, A1, A2, A3, A6, A7, A8, A9, A10
} ;

// Global variables
int colorMode = 0 ;
int sliders[NUMBER_OF_SLIDERS] ;

void changeColors() {
  if (colorMode) {
    digitalWrite(LED_RED, LOW) ;
    digitalWrite(LED_GREEN, HIGH) ;
  } else {
    digitalWrite(LED_RED, HIGH) ;
    digitalWrite(LED_GREEN, LOW) ;
  }
}

void printSliders() {
  for (int i = 0 ; i < NUMBER_OF_SLIDERS ; i++) {
    Serial.print(sliders[i]) ;
    Serial.print(" ") ;
  }
  Serial.println("") ;
}

void checkSliders() {
  int changeFlag = 0 ;
  int newValue = 0 ;
  for (int i = 0 ; i < NUMBER_OF_SLIDERS ; i++) {
    newValue = analogRead(AnalogPinMap[i]) / 128 ;
    if (sliders[i] != newValue) {
      changeFlag = 1 ; 
      sliders[i] = newValue ;
    }
  }
  if (changeFlag != 0) {
    // If a change was made, print current slider values
    printSliders() ;
  }
}
 
void setup() {
  // Set up pins
  pinMode(BUTTON, INPUT_PULLUP) ;
  pinMode(LED_RED, OUTPUT) ;
  pinMode(LED_GREEN, OUTPUT) ;

  colorMode = 0 ;

  for (int i = 0 ; i < NUMBER_OF_SLIDERS ; i++) {
    sliders[i] = -1 ;
  }
}

void loop() {
  if (digitalRead(BUTTON) == LOW)
  {
    colorMode = 0 ;
  } else {
    colorMode = 1 ;
  }

  delay(100) ;
  changeColors() ;
  checkSliders() ;
}

Copyright © 2018 Paul J. Drongowski

Crumar D9U: Day one

This time of year, the Sun is low in the sky and its morning rays shine bright in the dining room, AKA my downstairs work area. The morning sunlight is perfect for close-in soldering.

I started to assemble the Crumar D9U Drawbar Controller today. Wow, the pads are small, so if you’re following my lead and building the D9U kit, be sure to use a small soldering tip and low wattage iron.

Assembly instructions and schematic are available on the Crumar D9U Web page.

Here’s a few quick observations.

  • One needs to bend the resistor leads quite close to the resistor body in order to fit them to the PCB holes. Be prepared for close work. Snip the leads as you go; don’t try to snip everything at the end. The pad spacing is that small.
  • The assembly instructions note the correct placement (polarity) of the LEDs. Please also note that the short lead is also denoted by a flat edge along the side of the LED plastic. Be double sure of polarity.
  • The DIL strip as shipped is actually two 1×8 strips. I prefer DIL when possible, so I substituted a 2×8 DIL from my component larder. It is much easier to mount a DIL than two 1x8s. I use a small bit of masking tape (painter’s tape) to hold the DIL in place until I can tack one or two pins.
  • Fortunately, the SIL terminals were pre-installed on the Arduino Pro Micro. Sometimes ya lose and sometimes ya win!
  • Crimp component leads to hold components against the PCB before soldering. This helps electrical contact between the leads and the PCB as well as holding the components in place while soldering.

Check the solder joints using a magnifying glass. Each joint should be nice and shiny. The morning sun helps — a lot.

DIY coders: Read this!

If you intend to write your own code, be sure to read the description of the sample Arduino script. You’ll find this info at the end of the assembly instructions. Be sure to read the fine print!

The sample script uses the USBMidi library and turns the D9U into a MIDI class-compliant USB controller.If you compile and download the script to the Arduino, Windows (or MacOS) will henceforth recognize the D9U as a MIDI device, not an Arduino.

Further complicating things, that tactile switch is not a reset switch. In order to reset the Arduino, you must short the reset pin to ground as shown in the instructions. Reset gives you a short window in which to download a new Arduino script.

Man, I’m glad that I read this now. I do not intend to use the D9U as a MIDI class-compliant device. I want to use it as a 5-pin MIDI controller. Plus, I know that I need to construct custom scripts for the Yamaha Genos/PSR and MODX. Development always involves trial and error (AKA “implementation and testing”). I don’t want to constantly reset the Arduino just to download a new script.

The lights are on

Once I assembled the Arduino control board, I downloaded the latest Arduino Integrated Development Environment (IDE v1.8.8) and wrote a quick test script. (See code below.) The script toggles the LEDs on and off using the tactile switch. Yep, the Arduino is an “Arduino Leonardo” board.

Next stop: Mounting the control board and the drawbars.

BTW, I’m not sure about the description of the MIDI 3.5mm jack cable wiring (“Type B”) as described in the instructions. Clearly, I’ll have to come to grips with the pin-out RSN.

Copyright © 2018 Paul J. Drongowski

/*
 * InitialTest.ino: Crumar D9U initial test
 */

/*
 * Author:  P.J. Drongowski
 * Address: http://sandsoftwaresound.net/
 * Date:    6 December 2018
 * Version: 1.0
 */

// Pin definitions
#define LED_RED    15
#define LED_GREEN  16
#define BUTTON     5

// Global variables
int colorMode = 0 ;

void changeColors()
{
  if (colorMode) {
    digitalWrite(LED_RED, LOW) ;
    digitalWrite(LED_GREEN, HIGH) ;
  } else {
    digitalWrite(LED_RED, HIGH) ;
    digitalWrite(LED_GREEN, LOW) ;
  }
}
 
 void setup() {
  // Set up pins
  pinMode(BUTTON, INPUT_PULLUP) ;
  pinMode(LED_RED, OUTPUT) ;
  pinMode(LED_GREEN, OUTPUT) ;

  colorMode = 0 ;
}

void loop() {
  if (digitalRead(BUTTON) == LOW)
  {
    colorMode = 0 ;
  } else {
    colorMode = 1 ;
  }

  delay(1000) ;
  changeColors() ;
}

Crumar D9U in the house!

When I saw the Crumar D9U Drawbar Controller, I knew “Man, I have got to get one of these.” Und, I did.

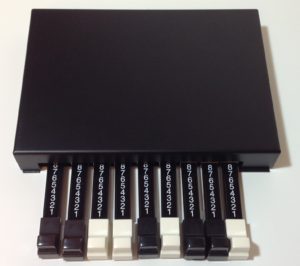
In short, the D9U is an Arduino-based drawbar controller done right. It has nine real drawbars, a MIDI OUT mini-jack and is USB powered through the Arduino Pro Micro which provides the brains. Because it’s Arduino, it’s programmable. Yes, you can, will and should write your own sketches.

If you’re interested, I recommend downloading the ZIP file on the Crumar D9U page. The ZIP file contains assembly instructions, a sketch to get your coding started, and a schematic. The assembly instructions are top-notch.

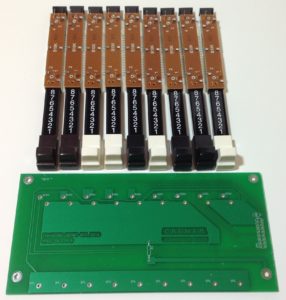
I haven’t assembled the D9U yet, but here is a mock-up to show you what it will eventually look like. [Click on images to enlarge.]

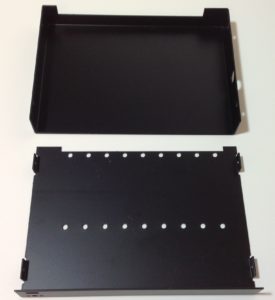
Best yet, the entire unit is housed in a very sturdy metal case.

One of the biggest challenges in DIY is building or finding a suitable case for the finished project. The D9U case is hefty and gig-worthy. Honest to goodness, the case, the drawbars and the knobs are enough to justify an order (and the price).

I placed my order through My Rig Shop, which is located in Italy. Not to worry, fulfillment was excellent and took only a few days — quite good for an international order.

The pictures below show you just what you’ll get if you order the D9U kit.

If you don’t feel up to assembling the D9U, My Rig Shop also sells a fully assembled unit (at a higher price, of course).

Please stay tuned! I’ve been itching to build and the D9U arrived at just the right moment. Yamaha Genos™/PSR and Yamaha MODX will require custom sketches, but that is still far down the road. First, I need an up-and-running D9U.

The other big questions is “Where am I going to put the D9U when I play?” First things first.

Copyright © 2018 Paul J. Drongowski

Welcome CS teachers and students!

[Be sure to visit Living Computers in Seattle. SIGCSE 2017 attendees are admitted free during the conference. I visited the museum today and it was a lot of fun! K-12 teachers will enjoy the hands on exhibits.]

The annual ACM Special Interest Group on Computer Science Education (SIGCSE 2017) Technical Symposium is next week (March 8 – 11) in Seattle, Washington. The symposium brings together educators at all levels (K-12 and higher ed) to exchange and discuss the latest methods, practices and results in computer science education.

I don’t often advertise it, but the Sand, Software, Sound site has many resources for educators and students alike. You can browse these resources by clicking on one of the WordPress topic buttons (Raspberry Pi, PERF, Courseware, etc.) above. You can also search for a topic or choose from one of the categories listed in the right sidebar.

Here are a few highlights.

I taught many computer-related subjects during my career and have posted course notes, slides and old projects. The four main sections are:

  • CS2 data structures: Undergraduate data structures course suitable for advanced placement students.
  • Computer design: Undergraduate computer architecture and design which uses a multi-level modeling approach.
  • VLSI systems: Graduate course on VLSI architecture, design and circuits which is suitable for undergraduate seniors.
  • Topics in computer architecture: Material for a special topics seminar about computer architecture (somewhat historical).

Please feel free to dig through these materials and make use of them.

Software and hardware performance analysis formed a major thread throughout my professional life. I recommend reading my series of tutorials on the Linux PERF tool set for software performance analysis:

The ARM11 microarchitecture summary is background material for the PERF tutorial. Program profiling is a good way to bring computer architecture to life and to teach students how to analyze and assess the execution speed of their programs.

There are two additional tutorials and getting started guides for teachers and students working on Raspberry Pi:

Music technology and computer-based music-making have been two of my chief interests over the years. The Arduino section of the site has several of my past projects using the Arduino for music-making. You should also check out my recent blog posts about the littleBits synth modules and littleBits Arduino. Please click on the tags and links at the bottom of each post in order to chase down material.

You might also enjoy my tutorial on software synthesizers for Linux and Raspberry Pi. The tutorial is a getting started guide for musicians of all stripes — music teachers and students are certainly welcome, too!