Kawai MP11: Digital electronics

Let’s take a brief look at the electronics inside the Kawai MP11 digital piano.

The Kawai MP11 is a pro-level 88-key stage piano with Grand Feel wooden key action and triple sensor detection. The MP11 has 40 voices total including Kawai concert and studio acoustic pianos, electric pianos and the usual motley crew of non-piano voices. Acoustic pianos are enhanced by Kawai’s Harmonic Imaging™ XL technology. 23 different kinds of effect can be applied. Electric piano gets special treatment with five amp simulators: Suitcase, Marshall stack, Jazz Chorus, Bassman and Leslie. The MP11 Virtual Technician allows control of tonal character, stereo width, string resonance, etc.

The MP11 has pitch bend and mod wheels, key set-ups (zones), assignable knobs, and many other features that make it suitable as a controller. It also has sought-after features like built-in power supply (no wall wart), 5-pin MIDI, XLR audio OUT.

That’s one respectable stage piano!

Having crawled through many service manuals before, the internals are not too surprising. There is one main digital electronics board surrounded by several peripheral boards for the LCD (128×64), USB interface, front panel gizmos, audio amplification, and various external connections. There are separate boards for handling AC main power.

Kawaii MP11 block diagram [Kawai service manual]

I’m most interested in the on-board compute and, thus, I will focus on the main logic board. Like other high-end digital synthesis products (e.g., Yamaha Montage), there are multiple hardware processors. The MP11 has three main processors:

  • Main CPU (MPU): Renesas SH7203
  • Tone Generator (TG): unspecified by the service manual
  • Effects (DSP): unspecified

Unfortunately, the Kawai service manual does not provide a detailed schematic or electrical parts list. Thus, the TG and DSP type are unspecified by the service manual. The DAC and ADC are unspecified, too. A fourth processor, Renesas 8-bit MPU M38K07M4, handles USB to HOST duties.

The MPU is the well-known Renesas SH7203, a 32-bit microcontroller incorporating an SH2A FPU RISC core. There are two external clocks: 48MHz and 16.5MHz. The 48MHz oscillator is probably the USB clock. The 16.5MHz clock is multiplied internally according to the software-configured frequency control register. The SH7203 can operate up to 200MHz internally.

The MPU has two 32 MByte SDRAMs (type unspecified), for 64 MBytes total. The MPU shares a 4 MByte flash ROM with the TG and DSP processors. Data moves in 16-bit words.

An arty, notional Kawai K023-FP IC [Kawai]

The tone generator, TG, has a 33.8688MHz external clock. The clock is an even multiple of 44.100kHz, the outgoing sample frequency. I suspect that the DAC and ADC employ the standard I2S serial communication protocol for digital audio. Thus, TG has 768 clock cycles to knock out a single N-bit sample to go to the DSP effect unit or the DAC.

Tear down videos such as the Kawai CN23 disassembly reveal Kawai proprietary tone generation integrated circuits (IC). The IC in the CN23, for example, is a massive, 208-pin beast!

TG has a small working SRAM (512MB, 8-bit data path, type unspecified). TG has two dedicated flash ROM devices (type unspecified) for TG program and waveform (sample) storage: 256 MBytes and 64 MBytes. Waveform data moves on 16-bit paths.

This MP11 repair video shows a large custom IC: Kawai K023-FP. There is another custom IC on the main logic board. Which one is sh7203? TG? DSP? It’s clear that Kawai design their own ICs.

The DSP unit has a relatively leisurely 6MHz clock. The DSP unit receives digital audio from the TG and returns it to TG, DSP does not have a direct connection to the DAC.

The MP11 has a LINE IN for external audio. The LINE IN is buffered and then converted to digital audio by the ADC (type unspecified). The digital audio stream goes to TG where it is mixed digitally with synthesized audio.

Armed with other tear down videos and resources on the Web, I’ll try to identify these unspecified MP11 components.

  • Main CPU: Renesas 72030W200FP (package QFN-240, 240 pins)
  • MPU SDRAM: Elite Semiconductor Memory Technology ESMT M12L25616A-6T 256Mbit SDRAM organized as 16M x 16-bit words
  • TG: Kawai K023-FP identified in another Kawai service manual as “Sound Source/Touch LSI”
  • Flash ROM: Generic NOR flash organized as N x 16-bit words (e.g., Spansion S29GL01GP12TFI020); Flash ROM ICs have Kawai labels identifying pre-loaded content
  • TG SDRAM: Infineon CY7C1049DV33 4Mbit fast async SRAM organized as 512K x 8-bit bytes
  • DSP: Texas Instruments TMS320VC5507 Fixed-point Digital Signal Processor

As to DAC, Kawai have used the Asahi Kasei AKM 4490EQ 32-bit DAC and Texas Instruments PCM1795 in previous products. I wonder how Kawai have coped while AKM recover from their factory fire? Perhaps they are using the ESS Technology ES9028Q2M 32-bit DAC instead?

If you see a photo of the Kawai KEP-339 main board, you are probably looking at the top side only. Please keep in mind that the bottom side is also populated. You will find the TI TMS320 DSP on the bottom side.

Folks are always surprised by the modest compute resources in digital keyboards. They expect to see giga Hertz clock speeds, gobs of memory and solid state storage devices (SSD). Synth engines are so-called embedded systems, not desktop workstations or laptops. The digital electronics need to run cool without heavy heatsinks and fans. In order to achieve power/heat goals, clock rates are low and basic memory interfaces are employed instead of PC busses such as SATA.

Hope this short tour is informative!

Copyright © 2023 Paul J. Drongowski

Digital piano: Tear the roof off

Long-term readers know that my mind will eventually turn to tear-downs and electronics. So it goes with digital pianos.

Thanks to the Piano World Forum, I found two links of interest to deep divers.

Inside Yamaha P-515

First up is a long-ish Yamaha P-515 repair video. I’ve got to say, tearing down a P-515 is not for the faint-hearted. We owe Late Night DIY much gratitude for taking the challenge.

I’d loved to include some screensnaps here, but Late Night’s camera work is a little shaky. (Dude shot the video after a late night gig.) Here is a list of things to watch for:

  • 5:14: Particle board base.
  • 6:57: The AJACK board with external connectors.
  • 7:51: The keybed.
  • 8:17: Rubber contact strips.
  • 9:47: Contact PCB traces.
  • 11:10: Key removal.
  • 24:11: Speaker box.
  • 25:16: AJACK, again. DM board is underneath.
  • 27:07: Top of speaker box.

These camera shots should give you a pretty good tour of the insides without going through the whole disassembly and repair narrative.

Disassembly tips: Take pictures while ripping things apart. Mark holes on printed circuit boards. Do not put screws and other hardware in speaker cones!

A few observations. First, look at the size of the particle board base! The wood base provides strength and rigidity for the NWX keybed. The base must weight at least ten pounds. Think about that when hefting your P-515 around.

The AJACK printed circuit board (PCB) has all of the MIDI and audio connectors. The main PCB — the digital logic (DM) mainboard — is underneath the AJACK. I dearly wish we had pictures (top and bottom) of the DM mainboard.

The rubber contact strips beneath the keys have three nubby buttons for each key. The nubby buttons make contact with the PCB contact traces (those squiggly squares). This is the so-called “triple sensor.” Other than three contacts instead of two, the basic hardware tech ain’t different from digital synths. The hardware “sensor” isn’t that sophisticated as all of the smarts are in the scanning software.

The speaker box is cool. I wouldn’t be surprised to see it inside of P-S500, too. Yamaha reuses components to cut costs and spare parts inventory.

The speaker box and NWX key designs are probably patented. I am surprised that the Piano World folks haven’t exploited the U.S. PTO patent database…

Inside Yamaha CLP-685

Several posts on Piano World Forum cite this look into the Yamaha CLP-685.

More than a look, this is one of the most gutsy tear-downs that I’ve seen. Guy buys an expensive CLP-685 and literally takes it apart out of curiosity. I usually play with my toys before taking them apart and I rarely take apart anything over $100 USD retail. That’s some Chinese chutzpah!

This article has a lot of terrific pictures (some a little blurry, unfortunately). There are good close-up pictures of the tan power supply boards and the DMH main digital electronics board.

Yamaha CLP-685 digital piano main board (DMH)

I wish the DMH board legends were legible and I wish that we had a picture of the other side, too. Plain as day is a Yamaha SWX09 (YH621A0) integrated circuit. The SWX09 integrates the main CPU, tone generation and digital effects onto a single chip. I’ll be thinking about this more in days to come, especially the “empty” board real estate. The SWX09 has nearby companions. The Winbond W9864G6KH-6 4M by 16-bit 166MHz SDRAM is DSP working memory for the SWX09. The two labeled ICs are wave ROM. The rest of the components are mounted on the bottom of the board. We see only the components mounted on the top side of the board.

A Yamaha GrandTouch key

The Piano World Forum folk are positively obsessed with key design and action. Yamaha describe the CLP-685 keybed thus:

GrandTouch keyboard: Wooden keys (white only), synthetic ebony and ivory key tops, escapement

I see a lot of plastic, a metal weight, and a little decorative wood. I’m not hung up on wood vs. plastic as even Einstein would say “Dead mass is dead mass.” If it plays good, why worry? The only concern I have about anything is long-term durability (e.g., those rubber contact strips and dirt).

Hope other musical electronics nerds have found this exposition interesting. 🙂

Copyright © 2023 Paul J. Drongowski

Yamaha DGX-670: Do you love me?

Yes, I played one! The pandemic has let up to the point where I can drag my old bod to music stores, again. Fortunately, I haven’t worn out my welcome with local shop owners and clerks (yet).

I don’t intend to run down the DGX-670 features in detail. The Yamaha DGX-670 has been on the market for two+ years and you can find all the details on the Yamaha Web page. Yamaha position the DGX as a “portable grand piano,” part of the “P” line of digital piano products.

And, as of late, my primary interest is in a digital piano that will help me to sharpen my piano skills. I want those skills to translate to the acoustic piano (Petrof acoustic grand) at church.

In that regard, the DGX-670 does not disappoint. The action is Graded Hammer Standard (GHS) and the main piano multi-sample is Yamaha CFX. The 670 has Yamaha’s Virtual Resonance Modeling (VRM) which “reproduces the complicated interaction between both string and soundboard resonance.” The CFX sounds very good through the in-built amplification and speaker system: 2 x 6 Watt amplifier, 2 x (12cm + 5cm) speakers. If I have one immediate slam on the DGX-670, its front panel legends are difficult to read in poor light (black model).

Yamaha DGX-670 digital piano decked out in white

In short, the DGX-670 has me asking, “Do I really need to move up to the Yamaha P-515 digital piano?” This question is more complicated than it sounds, especially when you roll the Yamaha CK88 into the analysis!

The DGX-670 street price is $850 USD versus $1,600 for the P-515. The store which hosted my adventure was prepared to discount the DGX-670 to $750 — that’s half of a P-515. That’s half of a Yamaha CK88, too ($1,500 MAP).

It comes down to personal musical goals — and desire. 🙂 Let’s take each alternative separately.

The P-515 has the Natural Wood X action with escapement (NWX) and the glorious Bösendorfer Imperial. That’s a lot to argue against. The P-515 sound system is more capable: 2 x (15W + 5W biamplified) amplifier, and 2 x (12cm x 6cm) woofer and 2 x 2.5cm dome. The DGX-670 has a very nice 4.3 inch (480 × 272 dots) LCD display that adds a splash of color to Yamaha’s drab black. The P-515 display has less resolution (128 x 64 dots) and is monochrome. [Yamaha should adopt the color display for the P-515 successor].

Those P-515 characteristics would be easy to live with. My biggest beef with the P-515, however, is the paucity and lower quality of its non-piano (AP or EP) sounds. The DGX-670 outstrips the P-515 for non-piano sounds. I quickly compared the DGX-670 voices against my once-beloved, owned and played PSR-S950. The DGX-670 is (roughly) a PSR-S950 without the Organ Flutes drawbar organ. I know these voices and would be very happy to have them in my piano instrument.

As to auto-accompaniment, the DGX-670 is “arranger lite.” It has styles and chord recognition. The styles are now represented in the Style File Format Guitar Edition (SFF GE) form. SFF GE makes the DGX-670 compatible with styles from the mid- and upper-end Yamaha arranger keyboards. A virtual ocean of styles are available at the PSR Tutorial web site as well as a growing community of DGX-670 players on the PSR Tutorial forum.

Yamaha do not say much about P-515 auto-accompaniment other than it’s bass plus drum, and that it follows chords. What is P-515’s chord recognition technique? Is it similar to full keyboard, A.I. recognition? Wish I knew more about this aspect of the P-515…

Regular visitors know that I test drove the Yamaha CK88, too. The CK88 is positioned in Yamaha’s stage keyboard product line. The sound system is comparable to the DGX-670: 2 x 6 Watt amplifier and 2 x (12cm x 6cm) speakers. The CK88 has the lower resolution (128×64 dots) monochrome display.

Piano-wise, the CK88 has the CFX multi-sample and GHS keybed. No VRM. No Bösendorfer. The CKs are well-equipped for drawbar and pipe organ. (The pipe organ multi-samples originated on Genos™.) The DGX-670 — and P-515, for that matter — are relatively deficient in the drawbar and pipe organ department. The CKs have a good selection of other non-piano voices. No Super Articulation. The CKs do not have auto-accompaniment of any kind.

So, if a player doesn’t care about drawbar organ and wants VRM, why not DGX-670 at half the price of a CK88?

At this point, I would be remiss to not mention slab weight:

    DGX-670 weight:  47.1 pounds (21.4kg) 
P-515 weight: 48.5 pounds (22.0kg)
CK88 weight: 28.8 pounds (13.1kg)

Yamaha’s engineers did a remarkable job of slimming the CK88 down to 28.8 pounds. The respectable GHS-equipped P-125 is 26 pounds and I doubt if Yamaha can design a lighter, robust, 88-key GHS keyboard.

I neglected the whole issue of connectivity and app support. Your mileage will vary. The DGX-670 does not have 5-pin DIN MIDI. That might be a deal-breaker for some folks. Smart Pianist does not presently support CK88. Look to Yamaha Soundmondo, instead.

I didn’t work the Yamaha CP88 into the analysis. After its updates, the CP88 is a virtual library of pianos! It’s also $2,600 USD (MAP), $1,000 higher than the three digital pianos in my analysis.

Finally, why did I enjoy playing the DGX-670 GHS and not so much the CK88. Yamaha swears that the GHS action is the same everywhere. If there is an external factor, perhaps it is the insane way trial pianos are set-up in stores? Often, I feel like a contortionist. (Forget reading sheet music in some settings, too.) Playing piano is, after all, a physical act.

If you enjoyed this analysis, please check out my comments about the Yamaha P-S500. I compare the P-S500 against the DGX-670.

Other reviews and comments about digital pianos:

Copyright © 2023 Paul J. Drongowski

MODX: Overdrive slight return (part 4)

Today’s post is part of a short series of articles relating to MODX drawbar organ sound:

I’m trying to recreate the experience of playing the new Yamaha CK keyboards with MODX. A bird in the hand is worth two in the bush…

I received a few comments and ideas that are worth passing along. All of the basic principles and sonic DNA are applicable to Genos and PSR, I might add.

First up, what makes a good overdrive or distortion? My colleague Uli is pursuing a similar investigation and he is using an Electro Harmonix Lester K as a reference. Using a reference sound is a super idea.

So, I dug into my old bag of tricks — literally. I have four different references on hand:

  • ART Tube MP
  • Electro Harmonix Lester K
  • Behringer GDI21 guitar preamp
  • Fender Super Champ xD modeling guitar amp

As yet, I haven’t tried the Super Champ xD because it is a solid state and tube hybrid. I will need to find a way to isolate the effect of the 12AX7/6V6 power stage. That experiment will likely require high volume and there’s only so much my poor ears can take! [Be sure to protect your ears.]

I bought the ART Tube MP mic preamp a zillion years ago. Tube MPs are still inexpensive going for roughly $100 USD. I used the Tube MP to warm up the sound of my old Nord Electro 2, trying to file the edge off of its digital sound.

The Tube MP is really intended as a mic preamp having a 12AX7 vacuum tube gain stage. If you crank up the gain, you can hit the 12AX7 pretty hard and get gobs of distortion. The Tube MP distortion gradually increases with gain and is warm and smooth. By “smooth”, I mean distortion which is not grainy or fizzy. To me, grainy distortion has an uneven clickiness to it, like a fast-ticking geiger counter instead of an old analog TV receiving the sounds of the universe. [Really.]

That said, the Lester K overdrive — a digital simulation — is not bad. The Lester K overdrive gets good reviews and deservedly so. The Lester K overdrive has a pleasing smoothness.

The Behringer GDI21 is sometimes disparaged as a copy of the Tech21 SansAmp. Compare schematics and you will find differences. The GDI21 uses a pair of JFETs to simulate a tube preamp (12AX7).

Both GDI21 and SansAmp emulate the input stage and power amp effects of a guitar amp. There are lots of variations to dial in, but you pretty much get three flavors: Fender Tweed, Mesa/Boogie high-gain and British lead. Maybe the GDI21 is authentic on guitar, but I didn’t care for its sound when applied to drawbar organ. The Tube MP and Lester K are better references, IMHO.

Given all that, what is my favorite MODX (Genos) amp sim (or whatever) for overdrive? Here are my top three picks:

  • SMALL STEREO (Preset: Overdrive)
  • US COMBO (Preset: Rich clean)
  • BRITISH LEAD (Preset: Dirty)

Judging from its distortion parameters, the SMALL STEREO is part of the MULTI FX pedal board chain. Thus, if you want to slap pedal effects on a drawbar organ, MULTI FX is a good way to go, giving you a pedal or two for free along with the amp sim. Uli is experimenting with chorus, too, and is giving MULTI FX a try.

The presets mentioned above are just starting points. Check out other settings in Part 3.

I grew up with the sound of 1960s Fender and that’s probably why I have a fondness for the US COMBO. I always wanted a Fender Twin Reverb (or Bassman) as a kid. Well, THAT dream never came true. [Might as well add a Vox Continental to the list of broken dreams, too.] 🙂 Twin and Bassman amps were the weapons of choice for combo organ back in the day.

The BRITISH LEAD conjures the sound of Wakeman, Emerson and others. Nuf said.

Have fun, tweak and don’t forget to boogie.

Copyright © 2023 Paul J. Drongowski
Yamaha Stagepas 100/100BTR

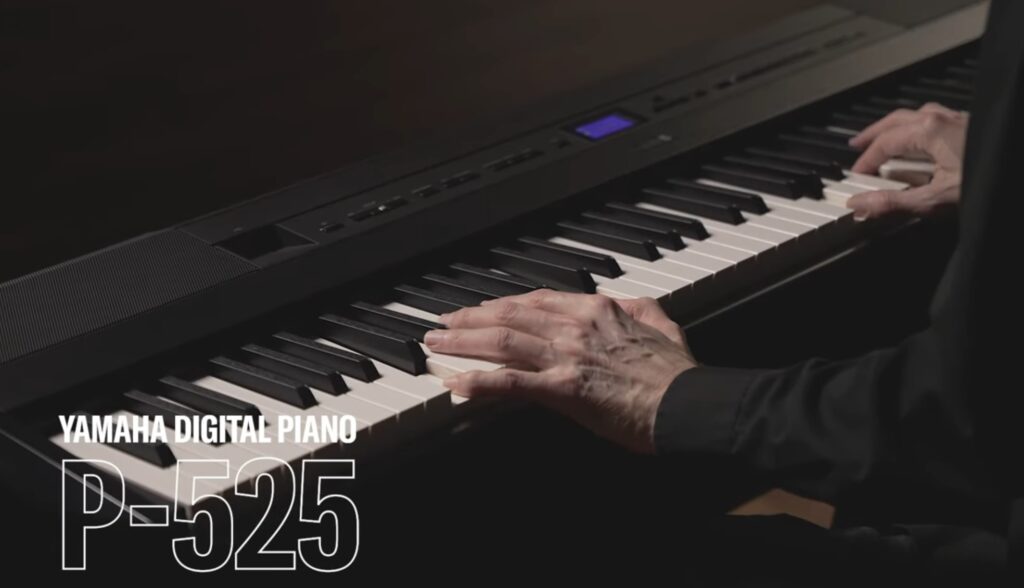
Yamaha have announced the Stagepas 100/100BTR Portable PA System. The 100BTR model has a built-in lithium-ion battery pack. It’s a good size and weight for busking or stage monitoring. The straight stuff:

  • 100W Class-D amplifier
  • 6.5″ woofer plus 1.4″ tweeter
  • Frequency response: 70 Hz – 20 kHz
  • Coverage area: 90º H x 90º V
  • 3 channel mixer, each with level control
  • 2 band EQ (low/high shelving)
  • 2 x mono MIC/LINE inputs (Neutrik) plus 1 3.5mm LINE input
  • Bluetooth for audio streaming
  • XLR output for chaining
  • 24V DC input (center positive) power supply
  • Lithium-ion battery
  • 6 hour battery life
  • Height: 12.3″ (310mm)
  • Width: 9.5″ (239mm)
  • Depth: 8.5″ (215mm)
  • Weight: 12.1 pounds / 5.5kg (100BTR)

Check out the other details.

Yamaha Stagepas 100 imitating Gojira (ゴジラ)

The base does triple duty: carry handle, tilt-back and stand mount.

Get yourself a new Yamaha Piaggero and start busking! Doesn’t solve the bathroom during break problem, tho’.

Still waiting for USA pricing…

Copyright © 2023 Paul J. Drongowski

Yamaha Piaggero NP-15 and NP-35

The new Yamaha Piaggero digital pianos aren’t in the same sonic league as the Yamaha P-515, but they’re a lot easier to carry. The Yamaha Smart Pianist app supports both instruments.

                  NP-35              NP-15 
----------------- -----------------
Keys 76 keys 61 keys
Action Graded soft touch Natural touch
Main piano CFIIIS CFIIIS
Tone gen AWM stereo AWM stereo
Polyphony 64 64
Tones 15 tones 15 tones
Reverb 6 types 6 types
Sound boost Yes Yes
Dual layer Yes Yes
MIDI record 1 track 1 track
Amplifier 2 x 6W 2 x 2.5W
Speakers 2 x (12cm x 8cm) 2 x (12cm x 8cm)
USB to HOST MIDI/audio MIDI/audio
Sustain pedal 1/4" jack 1/4" jack
Phones/OUTPUT 1/4" jack 1/4" jack
Batteries 6 x AA 6 x AA
Size (inches) 41.4W 4.1H 10.2D 49.6W 4.1H 10.2D
Weight 13.2 lb (6.0kg) 11.5 (5.2kg)

Two voices can be layered; no split. The keybed does double-duty playing notes and acting as a function button when METRONOME is held down. Hold METRONOME and DEMO together and you can adjust a whole slew of other things (tuning, transpose, audio loopback, etc.)

Yamaha Piaggero NP-15 (top) and NP-35 (bottom)

The NP-35 has a higher spec: Graded soft touch keys (vs. natural touch) and a more powerful 6W per side amplifier (vs. 2.5W per side). Yamaha describe “graded soft touch” as “heavier in the lower register and gradually lighter in touch as you go up to the higher register.”

Both instruments have the same tones: Concert Grand, Mellow Grand, Bright Grand, DX E.Piano, Stage E. Piano, Vintage E.Piano, Organ Principal, Organ Tutti, Jazz Organ, Harpsichord 8′, Harpsichord 8’+4′, Vibraphone, Strings, Strings Pad and Synth Pad.

Reverb types are Hall 1, Hall 2, Hall 3, Cathedral, Room and Stage. Chorus types are Chorus 2, Chorus 4 and Tremolo.

Both instruments do MIDI and audio over USB. If you want to do Bluetooth, you will need to buy a UD-BT01 USB to HOST Blueooth adapter. The instruments do not transfer audio over Bluetooth. (So sayeth the fine print.)

I haven’t seen prices (yet), but I would expect the new models to sell in the same range as the models they are replacing ($250 to $350 USD street).

NP-35 versus NP-32

So, what’s new?

At first glance, not too much seems to have changed. Same polyphony (64), keys are the same, simple front panel. The new speakers are slightly larger; the amplifier spec is the same.

Check under the hood and Yamaha have clearly done a lot of work. The voice offerings have gotten a significant upgrade: 3 acoustic pianos (vs. 2), 3 electric pianos (vs. 2), a new jazz organ and two new pad voices. Decent! Reverb got a small bump from four types to six. Yamaha explicitly identify the main acoustic piano as CFIIIS — perhaps an upgraded multi-sample from the earlier models?

The older models were supported by Yamaha’s Digital Piano Controller app. The new models are now part of the Smart Pianist family. That’s a big deal because NP-15/NP-35 customers are assured of updates to come.

USB connectivity is greatly enhanced. USB passes audio as well as MIDI. Yamaha are slowly upgrading their entry-level keyboards with an “USB Audio Recording/Interface” compatible with their Rec’n’Share app:

“Connect a compatible Yamaha instrument to your smart phone/tablet to simultaneously record video from your phone’s camera, stereo digital audio from your instrument and stereo backing tracks from your music library. After recording, use the app’s editing functions to trim and balance the tracks.” [Yamaha]

Unless you’re an ultra cost-sensitive customer and want to buy an older model at blow-out prices, the NP-15/NP-35 feature upgrades are worth the extra money.

Copyright © 2023 Paul J. Drongowski
Yamaha P-515: I played one

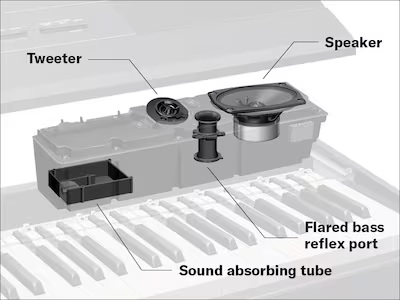
I’ve been toying with the idea of a digital piano at home in order to improve my meager piano skills. Too many years of organ, synths and lead sheets have let my piano skills go to seed. I want an instrument that provides a comfortable transition to the acoustic grand at the church. [After trying the P-515, I played the Petrof grand at church and the P-515 experience translates very well.]

I always like Yamaha’s top of the P-series line (P-150, P-200 and beyond). The flagship piano slabs are just portable enough (45 pound-ish), have built-in speakers, and decent action. The built-in speakers are good for practice and pass along physical vibrations as though you’re seated behind the real thing.

Yamaha P-515 digital piano

The latest model in this venerable line is the P-515. In terms of features, comparing the P-515 to the P-150 is like comparing an electronics-rich BMW to a 1990s Toyota. The P-515 communicates to the outside world through 5-pn MIDI, USB, Bluetooth, WiFi and good ole analog audio. The P-515 has MIDI and audio recording similar to a contemporary arranger. I’ve gotten a lot of mileage out of Genos quick and multi-track recording; P-515 is not too far behind. And, the Smart Pianist™ app keeps getting better and better.

Yamaha NWX (natural wood with escapement)

Then there is the keybed action. Yamaha equipped the P-515 with the NWX natural wood with escapement keybed formerly available only in the Clavinova line. The NWX is a solid step up from GHS. The only thing GHS has over NWX is lighter weight. After playing NWX, forget GHS.

The great stuff

If all you want is great acoustic piano from a $1,600 (USD) digital instrument, buy this. The P-515 has all of the acoustic sweeteners missing from Genos, Montage (MODX), CK, and even the current CP stage piano. The P-515 sound engine implements Virtual Resonance Modeling (VRM): damper resonance, string resonance, Aliquot resonance and body resonance.

Playing this piano satisfies thanks to the NWX action and excellent hand, key, ear connection. The CFX is very good and the Bösendorfer is even better. I prefer the darker sound of the Bösendorfer over the CFX, but still!

The electric pianos are not bad. The Rhodes might be a little too laid back and the Wurli might be a little too aggressive. However, you can get sweet tones out of this machine.

The not so great stuff

After picking me up with the piano sounds, Yamaha disappointed me with many of the non-piano voices. After playing Genos and MODX (Montage), I know that Yamaha can do better. Yamaha’s new stage piano series (CP and YC) have raised my expectations of secondary, non-piano voices.

Quite frankly, I find the string, pad and organ voices to be dated. The string voices are bad and not up to current standards. The dark pad seems useable in church; I cannot think of using the light pad in liturgical music.

The jazz organ sounds are long in the tooth and the pipe organ voices have been around a long time. The organ principal voice is useable. The “Phantom of the Opera” tutti is not generally useful in church. Further, Bach’s Toccata and Fugue in D Minor is not a simple piece and I wonder how many home players really use this voice? The newer CLPs have added “Grand Jeu and pipe organ flute registrations. That’s a good move and I hope they are added to the next iteration of the P-515.

Yamaha and everybody else in the home piano space needs to drop the crap choir voices. [There, I said it.] These sounds are clichéd and utterly useless. Harpsichord is on the bubble, too. There are better uses for waveform ROM.

The P-series non-piano sounds need a drastic update. Yamaha engineers need to break out of their product silos, walk over to the synth group or whoever, and ask, “Hey, what are your absolutely go-to sounds?” and adopt them. My suggestion: Cop Seattle strings, VP soft, and Genos pipe organs. Ditch a few harpsichords and add more clav or EP.

Is it hopeless?

Not entirely. The P-515 has an XG sound set. Yes, XG is dated, too, but it is comprehensive. The P-515 user interface requires a little menu-diving to find the XG sounds. The P-515 does not have a way to store your set-ups directly on the keyboard — another minus. The Smart Pianist app comes to the rescue, letting you create and store set-ups.

Yamaha, maybe add a few on-board memory storage locations in the next iteration of the flagship model? While we’re talking improvements, 1.4 Megabytes of internal memory is absurdly small, too. In this day and age, potential customers will think this a typo or a joke.

If you absolutely require a wider range of non-piano sounds, then Yamaha’s CP or YC series stage pianos may be the answer. Of course, you will spend more money.

        MAP 
Model Price CFX Bösen VRM Keybed
----- ----- --- ----- --- --------------------------------
CK88 $1500 Y N N GHS graded hammer
P-515 $1600 Y Y Y NWX Natural Wood escapement (X)
CP88 $2600 Y Y N NW-GH Natural Wood Graded Hammer
YC88 $3150 Y N N NW-GH3 Natural Wood Graded Hammer

The CK88’s GHS keybed is out of the NW league. The price is attractive, though, and a little bit lower than P-515, so I included the CK88 for comparison. The CP88 and YC88 lose VRM and the YC88 loses the Bösendorfer, too. The P-515 is positioned in Yamaha’s piano family (simple front panel and Smart Pianist) while the other instruments are positioned in the stage keyboard family (interactive, intuitive front panel and in-built patch memory),

You put your money down and make your choice.

Conclusion

I really want to end on an upbeat note. So, again, if all you want or need are great acoustic piano tones, buy this. With its connectivity options, I can rely on MODX or Genos for non-piano voices [at home, anyway].

As much as I want a P-515, I likely will wait for its successor. P-515 was released in 2018 and it’s due for an update. Yamaha, please?

Other reviews and comments about digital pianos:

Copyright © 2023 Paul J. Drongowski
Yamaha keyboards: Which amp (sim) is that?

While diving into overdrive and distortion effects for drawbar organ, I challenged readers to identify the real-world amplifiers on which Yamaha based its MODX (Montage, Genos) amp simulators. I took my own challenge over a cup of coffee today and made my own list of best guesses.

Yamaha introduced several new amp simulators during the 2013-2014 time-frame. They first appeared in Tyros 5 under the sobriquet “Real Distortion”. Next, they were added to Motif XF by way of the Motif XF OS1.5 update. Since then, the “Real Distortion” effect algorithms have trickled down to mid-level synthesizer and arranger keyboard products.

Without further ado, here are my best guesses:

Tweed Guy         Fender '59 Bassman Tweed (6L6GC, 4x10) 
Boutique DC Matchless DC-30 (EL84, 2x12)
US Combo Fender Twin Blackface (6L6GC, 2x12, Super Twin?)
Jazz Combo Roland JC-120 Jazz Chorus (Solid state, 2x12)
US High Gain Mesa Boogie Mark II or Mark III (6L6GC, 1x12)
British Lead Marshall Plexi Super Lead (EL34, 4x12)
British Combo Vox AC30 Top Boost (EL84, 1x12 and 2x12)
British Legend Marshall JCM 800 Lead (EL34, 4x12)
Distomp 1980s Yamaha distortion pedals (SHD-100/MBD-100)
Y-Amp Yamaha DG series guitar amplifiers and stomp
Small Stereo Fender inspired?
Multi FX Inspired by the Yamaha DG Stomp

Blake Angelos (Yamaha) wrote an early article which provides important clues. Unfortunately, the article doesn’t spill specific amplifier names.

A real Matchless DC-30 and the Boutique DC amp sim front panel

Better clues come from the faux front panel graphics on display in the Genos Mixer. These skeumorphic images resemble the actual amplifiers which inspired the amp simulators. More definitively, the control names resemble or are identical to the front panel knobs, switches and input channels of the original amps. The Fender-style graphic knobs threw me off at first, until I discovered that the first generations of Mesa/Boogie amps were housed in Fender Princetons.

There are a few inconsistencies, though. The “US Combo” clearly models Fender “blackface” amplifiers, most notably the famous Twin. The Fender Twin has a middle EQ knob, but does not have mid cut, width or sweep controls like the amp sim. Perhaps Yamaha’s software engineers replaced the single middle EQ knob with three other parameters giving great control over the mids? Or, maybe the software engineers had the Fender Super Twin in mind which has a five band EQ at fixed frequencies?

The Small Stereo Amp doesn’t claim any particular ancestor. The speaker types include Twin and Tweed, so maybe there is a Fender influence? Whatever its name, Small Stereo Amp is one of my favorites. It’s like Nando’s hot sauce; I use it anytime I want a little grunge.

The Distomp simulator is a blend of 1980s Yamaha distortion pedals. In particular, it combines controls from the SHD-100 Super Hard Distortion and MBD-100 Multi-Band Distortion pedals. Shred on, dudes.

The Y-Amp is clearly based on Yamaha’s own DG guitar amp series. The DG amplifiers are among the first digital modeling amplifiers. (Nerd note: DSP horsepower is delivered by a Yamaha proprietary DSP6 integrated circuit.) I wouldn’t be surprised if some of the DG amp sims and effect models jumped species and landed in Yamaha keyboard products, too.

Yamaha engineers often return to the same wellspring. The DG Series Amp Models (circa 2012) are:

    1) Lead 1 - Marshall 
2) Lead 2 - Soldano
3) Drive 1 - Fender Bassman
4) Drive 2 - Fender Twin
5) Crunch 1 - Vox AC30
6) Crunch 2 - Matchless
7) Clean 1 - Fender Twin Nasal Silverface
8) Clean 2 - Fender Twin Full Blackface

The list makes you go, “Hmmm?” “Soldano” brings the Soldano SLO-100 classic to mind.

Before VCM (Virtual Circuitry Modeling) there was DG’s ECM (Electric Circuit Modeling). In this vein, the Y-Amp sim offers a choice of power tube: 6L6GC, EL34, or KT66. These vacuum tubes were used in some of the most famous and collectible guitar amps:

6L6GC: Fender '59 Bassman and Twin, Ampeg B-15, Mesa/Boogie Mark I  
EL34: Marshall Plexi, DSL 100, Super Lead, Orange
KT66: Marshall JTM45 Bluesbreaker

Oddly, Y-Amp does not have an EL84 option (Vox AC30, Matchless DC-30). The KT66 is an improved version of the 6L6. The KT66 was first made in Britain by Marconi-Osram Valve Co. Ltd.

In addition to guitar amplifiers, the DG series included the DG Stomp multi-effects pedal. I can see where the DG Stomp might have inspired the MULTI FX pedal board simulation. The MULTI FX algorithm is a jack of all trades with compression, wah, distortion, phaser, delay and speaker simulation.

Hope you found this fun!

Before leaving, here is my speaker type decoder, once again, based on a little analysis and guess work.

    BS 4x12    British Stack 
AC 2x12 American Combo
AC 1x12 American Combo
AC 4x10 American Combo
BC 2x12 British Combo
AM 4x12 American Modern
YC 4x12 Yamaha Combo
JC 2x12 Jazz Chorus
OC 2x12 Orange Combo
OC 1x8 Orange Combo

Copyright © 2023 Paul J. Drongowski

MODX: Drawbar overdrive (part 3)

So far on our tour of MODX (Montage) drawbar organ tech, I’ve discussed drawbar control and drawbar waveforms. Convincing overdrive and distortion are essential to an authentic drawbar organ sound (B-3 plus Leslie). Technically, the overdrive (or distortion) is produced by the tube electronics in a Leslie rotary speaker. We synthesizer types must use amp and speaker simulators to produce overdrive or distortion.

Engineers are creatures of habit. After browsing a zillion MODX and Genos organ voices, I noticed that Yamaha engineers kept returning to the same effect algorithms albeit with slightly different parameter values:

    MODX Algorithm    Genos Algorithm    Characteristics 
--------------- --------------- ----------------------
BRITISH COMBO BRITISH COMBO Vox combo amp
MULTI FX MULTI FX Pedal board
AMP SIMULATOR 1 V DISTORTION Vintage amp
AMP SIMULATOR 2 STEREO AMP SIM Vintage stereo amp
SMALL STEREO SMALL STEREO DIST Stereo amp and speaker sim

The MULTI FX pedal board simulator includes the SMALL STEREO (DIST) algorithm. Check out Blake’s article about guitar effects.

Roadmap

We need a roadmap before driving into the weeds.

Usually, overdrive is configured as a MODX (Montage) insert effect. Once you navigate to the effects routing page (or one of the insert effect pages), you can change the effect type (algorithm) and/or effect parameters. Yamaha documentation refers to “effect types”; I use the word “algorithm” instead because we are selecting an algorithm (code) along with its parameters.

MODX/Montage MULTI FX insert effect

Yamaha provide several different distortion, overdrive and amp simulator algorithms. As if that isn’t enough choice, sometimes the kind of overdrive (or distortion) can be chosen by a parameter (e.g., tube, transistor, etc.) In some cases, we can choose the speaker cabinet (e.g., 2×12), too.

Why are there so many choices? If you follow the guitar pedal market, you would ask “Why are there so many distortion pedals?” Like anything else in sound and music, there are many varieties of distortion or overdrive. Some are warm (tubes), some are bright (transistor), and so forth. The trick is to use your ears and find the most appropriate kind of distortion, overdrive or amp type for the sound you want to obtain. Guitarists call this ephemeral quality “tone”.

I’ve cataloged several detailed examples in the next section. These are starting points for experimentation. If you don’t know where to start, choose something and start tweaking! If you can’t get your tone, change the kind of distortion effect if the selected algorithm allows, or move on to a different effect algorithm.

An effect algorithm is a mathematical model of a real-world device. Each algorithm simulates one or more real-world distortion, overdrive, amplifier and/or speaker cabinet effects. The models mimic an audio signal hitting a component like a tube, transistor or a mic’ed speaker cabinet. The amount of distortion usually increases when the incoming audio signal is stronger, i.e., the input level or gain (sometimes called “drive”) is turned up. The input signal drives the simulated device or component harder.

One thing to keep in mind — increasing input level (gain) also increases the output level. When you increase the gain (drive), you must decrease the output level lest you cause nasty digital distortion in the outgoing digital audio stream. Digital distortion (digital clipping) sounds unnatural and is not desirable.

Warning

Increasing drive also raises the volume of the outgoing audio, sometimes to painful levels! Keep volume low when experimenting with high drive. Protect you ears.

Most of the algorithms provide a parameter controlling the Wet/Dry mix. You’ll see settings like “D15>W”. The wet/dry value range is:

     D63>W to (D=W) to D<W63 

This determines the balance between the direct, unprocessed signal (dry) and the processed sound (wet). At dead center, “(D=W)”, the wet and dry signals are equal. Move to either side to pass more of the dry sound or wet/effected sound.

The details and examples

The BRITISH COMBO effect algorithm (Vox AC30) is a Yamaha favorite. In the table below, the first settings are taken from the MODX “All Bar None” Performance, and the second and third settings are from the Genos “ClassicJazz” and “RockOrgan JS” voices, respectively.

                            MODX         Genos        Genos 
## Parameters All Bar None ClassicJazz RockOrgan JS
-- --------------- ------------ ----------- ------------
1 Mode Bright Bright Top Boost
2 Normal 5.8 3.6 4.0
3 Brilliant 6.0 5.4 6.0
4 Bass 4.4 5.0 4.4
5
6 Treble 6.0 6.2 6.0
7 Cut 0.6 0.0 0.6
8
9 Output Level 69 126 71
10
11 Speaker Type AC 4x10 AC 1x12 AC 4x10
12 Speaker Air 2 2 0
13 Mic Position Center Center Center

The parameters “Normal” and “Brilliant” dial in the distortion.

Here’s the rotary speaker settings for two Genos drawbar organ voices. Both voices use the Genos V DISTORTION effects algorithm. The equivalent MODX algorithm is AMP SIMULATOR 1.

                           Genos           Genos 
## Parameters WhiterBars JS RotaryDriveOrg
-- --------------- ------------- --------------
1 Overdrive 28% 24%
2 Device Vintage Tube Transistor
3 Speaker Type Stack Twin
4 Presence 4 10
5 Output Level 88% 100%
10 Dry/Wet D40>W D26>W

The first voice simulates a tube preamp and the second voice simulates a transistor preamp. Tube amps have a warmer sound than transistor amps.

MODX does not have all of the Genos distortion algorithms. MODX implements the latest and greatest algorithms while Genos (Tyros and PSR) retain many legacy algorithms for backward compatibility. The table below shows the settings for the STEREO AMP SIMULATOR used by the “ClassicBars JS” voice.

                              Genos           MODX 
## Parameters ClassicBars JS The Jazz Organ
-- ----------------- -------------- --------------
1 Drive 0 15
2 Amp Type Stack Tube
3 LPF Cutoff Frequency 8.0kHz 5.0kHz
4 Output Level 114 112
10 Dry/Wet D24>W D17>W
11 Edge (Clip Curve) 0 n/a

The nearest equivalent MODX algorithm is AMP SIMULATOR 2. The parameters are the same except “Edge (Clip Curve)” is missing on MODX. Still, I would give these parameter values a try on MODX.

The MULTI FX algorithm simulates a guitar pedal board. The input signal hits a simple compressor (sustain) which drives a distortion block (Dist). The phaser and wah blocks are turned OFF in the examples below.

MODX Performance: More Shade 
MODX Algorithm: MULTI FX MODX Preset: Distortion Solo
MODX MODX
## Parameters More Shade 8.8.8.8.6.2.2.0.0
-- ----------------- ---------- -----------------
1 Comp. Sustain 2.3 2.7
2 Wah SW Off Off
3 Wah Pedal 0 0
4 Dist SW Clean Clean
5 Dist Drive 2.1 1.3
6 Dist EQ High Boost High Boost
7 Dist Tone 0.8 1.3
8 Dist Presence 6.0 5.2
9 Output Level 108 115
10
11 Speaker Type Twin Twin
12 LFO Speed 0.1Hz 0.1Hz
13 Phaser SW Off Off
14 Delay SW Echo1 St Off
15 Delay Ctrl 40 40
16 Delay Time 48 48

The “More Shade” Performance adds a stereo echo effect using the delay block. MULTI FX is a super handy algorithm and I’ve discussed its use with organ and electric piano before.

Yamaha CK- and YC-series

The table below summarized the YC- and CK-series rotary and distortion insert effects.

    YC61 rotary effects 
Rtr A Standard rotary speaker for organ
Rtr B Rotary speaker connected to a transistor
preamplifier with strong distortion
Lead Guitar amp (bass of high sound
pressure and sharp treble)
Crunch Guitar amp (crunch sound)
Double Guitar amp (bright sound)
Case Speaker amp for vintage electric piano
CK61 drive (rotary) effects
Rotary A Standard rotary speaker for organ
Rotary B Rotary speaker connected to a transistor
preamplifier with strong distortion
O.Drive Warm distortion (overdrive)
Dist Hard rock distortion
Comp Compressor controlled by a single knob
YC61 and CK61 insert effects
British Combo Crunch distortion (Vox AC30 Top Boost)
British Lead Hard rock type distortion (Marshall Plexi)
Small Stereo Stereo distortion

I’ll let you guess as to which Yamaha algorithms are (re)used. If you want to re-create the CK sound on MODX (Montage), have at it!

Copyright © 2023 Paul J. Drongowski

MODX: Drawbar waveforms (part 2)

Last time, we looked at the drawbar programming in MODX Performance “The Basics”. The first five voice Elements are each assigned a single drawbar waveform: 16′, 5 1/3′, 8′, 4′ and 2′.

A lot of folks (me!) frequently build on a foundation like pulling the first three or four drawbars and then pull higher bars while playing. Thus, assigning individual drawbars seems a little wasteful in these kinds of registrations, when the foundation doesn’t change. Fortunately, MODX (Montage) provide waveforms for typical drawbar foundations:

    Wave#  Waveform name            Registration? 
----- ---------------------- -------------
441 Rock Chorus Vibrato
442 Rock Percussion
443 Rock2 65 5444 644
446 Jazz w/Percussion
448 Jazz 78 6600 000
451 Full Draw 88 8888 888
454 Swish
456 Bow 87 4323 468
457 Bow Chorus Vibrato
458 Gospel 87 6000 568
459 Soul 80 0050 578
460 1st Four Draw 88 8800 000
479 Draw 1+3 80 8000 000
482 Draw 2+4 08 0800 000
485 Draw Even
488 Draw Odd

The MODX data list PDF has the complete list of waveforms, including the slightly detuned and offset variations. I tried to guess the registrations and please take my guesses with a grain of salt! [See Genos/PSR organ registrations.]

MODX Performance “Vib Chorus AF1” is as simple as you can get:

    Performance: Vib Chorus AF1 
El# Waveform Level Pan Coarse XA Control
--- ------------------ ----- --- ------ ----------
1 Bow 100 C 0 A.SW Off
2 Bow Chorus Vibrato 102 C 0 A.SW1 On

It consists of two Elements. “Bow” refers to the overall shape of the drawbars with the lowest and highest drawbars pulled out the farthest. You might hear this registration in a gospel music or soul setting.

The Elements depend on the state of the ASSIGN 1 front panel button. The Extended Articulation (XA) control parameter chooses the first Element when the A.SW switches are OFF and chooses the second Element when the A.SW1 switch is ON. This configuration conserves polyphony and Elements sparingly. You can add or disable chorus/vibrato (C/V) by pressing the ASSIGN 1 switch. The C/V is sampled into the “Bow Chorus Vibrato” waveform and you do not have the option of selecting V1, C1, etc. Unlike real world Hammond, C/V is added (or removed) only on new notes played after switching. It’s not an independent effect unit.

You could use “Vib Chorus AF1” as the basis for new Performances that switch between drawbar registrations. Why not switch between “Jazz” and “Jazz w/Percussion”, for example? Simply change Element 1 to the “Jazz” waveform and change Element 2 to the “Jazz w/Percussion” waveform.

Here are the Element assignments for another simple Performance, “Draw Control”:

    Performance: Draw Control 
El# Waveform Level Pan Coarse XA Control
--- ------------------ ----- --- ------ ----------
1 Draw 1+3 100 C 0 Normal
2 Draw 2+4 67 C 0 Normal
3 Draw Even 0 C 0 Normal
4 Draw Odd 0 C 0 Normal

You can go from quiet to shoutin’ with this one! For extra credit, learn how to add rotor grit and rotor whistle Elements in order to sweeten the pot. [Hint: Learn how to copy Elements with SHIFT+EDIT.]

New waveforms in Montage/MODX

There are several new drawbar organ waveforms in Montage (MODX) which don’t get mentioned very often. These waveforms have the Leslie speaker effect sampled in:

Wave#  Waveform Name        Performance         Registration? 
----- ------------------- -------------- -------------
495 Tonewheel1 Fast Whiter Bars 68 8600 000
496 Tonewheel1 Slow
497 Tonewheel2 Fast All Bar None 88 8888 888
498 Tonewheel2 Slow
499 Tonewheel3 Fast L The Jazz Organ, Groove Organ
500 Tonewheel3 Fast R
501 Tonewheel3 Fast St
502 Tonewheel3 Slow L
503 Tonewheel3 Slow R
504 Tonewheel3 Slow St
505 Tonewheel4 Fast 88 8888 888
506 Tonewheel5 Fast Rich Bars 63 8457 530
507 Tonewheel6 Fast

Sampled-in Leslie doesn’t get much love because the effect cannot be modified and the switch from slow speed to fast is abrupt — no acceleration ramp between the two speeds.

The first three sets of tonewheel waveforms cover the three most common registrations: 1. Whiter Shade Of Pale, 2. full drawbars, and 3. jazz organ a la Jimmy Smith and Groove Holmes. If you want to try them out, I took note of the MODX Performances built on these tonewheel sample sets.

I believe these tonewheel waveforms are used in the Genos™ “joystick (JS)” voices: “WhiterBars JS”, and “AllBarsOut JS” and “JazzRotary JS”. The ears don’t lie. Tonewheel4, 5 and 6 are probably in the Genos ROM somewhere, too. No time for an Easter egg hunt today. 🙂

Here is what you will see if you look inside of these Performances:

Performance: The Jazz Organ 
El# Waveform Level Pan Coarse
--- ------------------ ----- --- ------
1 Tonewheel 3 Slow L 115 L63 0
2 Tonewheel 3 Slow R 115 R63 0
3 Tonewheel 3 Fast L 0 L63 0
4 Tonewheel 3 Fast L 0 R63 0
5 Draw 16' Of 32 C +20
6 Rotor Whistle 0 C +17
7 Rotor Grit 1 0 C 0
8 Draw 4' Of 0 C 0

Performance: Whiter Bars
El# Waveform Level Pan Coarse XA Control
--- ---------------- ----- --- ------ ----------
1 Tonewheel 1 Slow 127 C 0
2 Tonewheel 1 Fast 0 C 0
3 Draw 16' Of 23 C +20 Key off - Rel key click
4 Rotor Whistle 0 C +17
5 Rotor Grit 1 0 C 0
6 Draw 4' Of 127 C 0 Assign SW #1 - Percussion

Performance: All Bar None
El# Waveform Level Pan Coarse XA Control
--- ---------------- ----- --- ------ ----------
1 Tonewheel 2 Slow 127 C 0
2 Tonewheel 2 Fast 0 C 0
3 Draw 16' Of 32 C +20 Key Off - Rel key click
4 Rotor Whistle 5 C +17

Example performance

I set out to build a new Performance, “8888+”, using a few of the ideas that I outlined above. The new Performance puts the “1st Four Draw” waveform in the first Element and places four individual drawbar waveforms into Elements 2 through 5:

    Performance: 8888+ 
El# Waveform Level Pan Coarse
--- ------------------ ----- --- ------
1 1st Four Draw 127 C 0
2 Draw 2 2/3 0 C 0
3 Draw 2' 0 C 0
4 Draw 1 1/3 0 C 0
5 Draw 1 3/5 0 C 0
6 Rotor Grit 2 70 C -24
7 Rotor 127 C -17
8 Percussion 0 C -7

Elements 6 and 7 add rotor noise. Element 8 handles percussion.

I didn’t build “8888+” from scratch. I started out with the Performance “More Shade” and modified it, following the basic editing procedure which I outlined in my last post.

MODX “8888+” All Elements

In the MODX All table, tap the name of the waveform that you want to change in order to select it. MODX (Montage) displays two buttons on the left-hand side of the display. Tap the “Category Search” button.

MODX Waveform (category) search

MODX displays waht looks like a category search page. Instead of Performances, this category search displays and searches waveforms. You can scroll through the waveform or type in the name of the waveform that you’d like to find. Select a waveform and press the ENTER button.

I followed his basic procedure for each of the first five Elements. Yeah, the 1 1/3 and 1 3/5 drawbars are not in the usual order, but I want to have 1 1/3 in the first group of sliders. I’m more likely to pull that drawbar than 1 3/5.

If you ride the sliders and noodle around, the individual drawbar sounds will be louder than the “1st Four Draw” sound. We need to rebalance the choir so that no individual drawbar will sound out-of-place with its peers.

MODX Performance 8888+ first Element AEG

In order to balance the bars, I visited the Amplitude EG page for drawbars 1 through five. The picture above is the Amplitude EG page for the first Element, “1st Four Draw”. Please notice the envelope Levels: Initial, Attack. Decay1 and Decay2. Attack, Decay1 and Decay2 levels are the maximum, 127. That’s good. We want the “1st Four Draw” waveform at the maximum output level.


MODX Performance 8888+ second Element (2 2/3) AEG

The next screen capture shows the Amplitude EG for the “Draw 2 2/3” Element. I reduced the four envelope levels. Attack, Decay1 and Decay2 levels are 70, which will make the “Draw 2 2/3” blend into the overall drawbar choir. I programmed Elements 3, 4 and 5 in the same way. If 70 doesn’t sound/feel right to you, dial in a different level!


MODX Performance 8888+ sixth Element (rotor noise) AEG

I also adjusted the envelope levels for Elements 6, 7, and 8. In the case of 6 (above) and 7, lower envelope levels prevent outrageously loud rotor noise if I accidently push the sliders up for 6 and 7. This can happen in the heat of battle when I’m concentrating on the music and not watching my hands on the sliders. 🙂 Similarly, I set the envelope levels for Element 8, percussion, to obtain soft percussion when its slider is all the way up.

I hope this discussion encourages experiments of your own. I also hope that you are becoming more comfortable with MODX (Montage) editing.

Copyright © 2023 Paul J. Drongowski