Beware, this post is going to bury you in numbers. 🙂
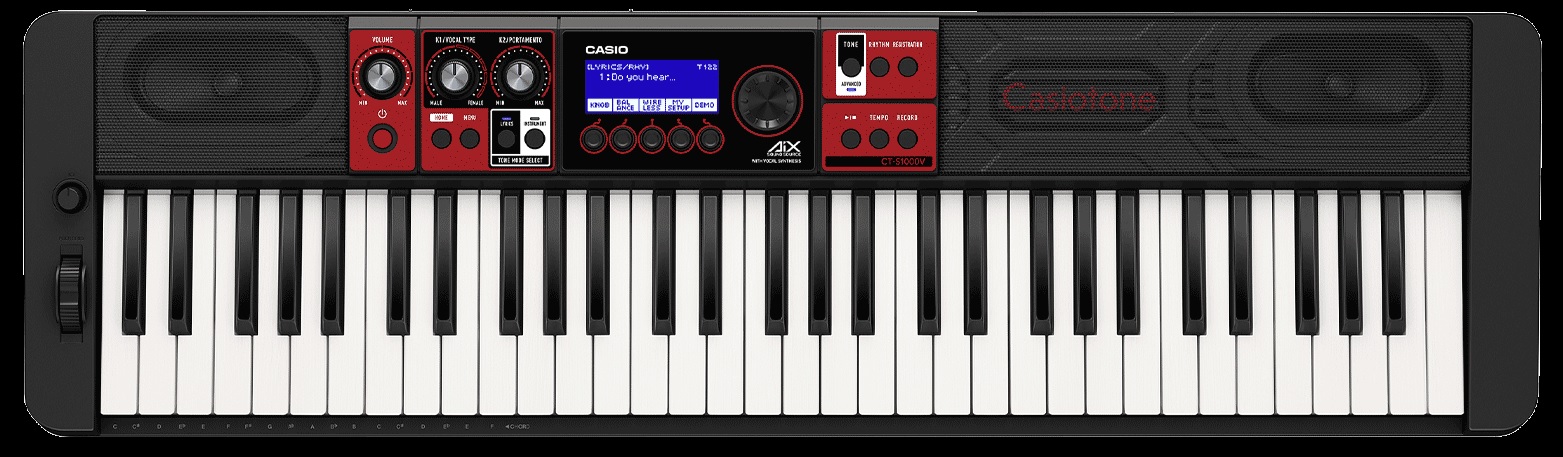
I’ve been investigating master equalization in the Casio CT-S1000V. The CT-S500 has the same master EQ, so everything discussed here applies to the CT-S500, too.
The CT-S1000V master EQ is a four band, semi-parameteric equalizer. The four bands are: LOW, MID1, MID2, and HIGH. It’s possible to create and store a USER setting. The edit page let’s you set the center frequency and gain for each of the four bands. You cannot set the band quality factor, Q, which determines the bandwidth spread.
The CT-S1000V provides ten master EQ presets with suggestive names. Casio, unfortunately, do not publish the center frequencies and gains for the presets. Listening to each preset, one thinks “Yeah, that’s bright,” or whatever. Details are missing in action, however.
One can assign LOW, MID1, MID2, and HIGH gain levels to a knob. Thanks to the knob edit function, it’s possible to suss out the gain level for each band within a preset. After much button pushing and knob twiddling, here are the gain levels (dB) for each preset:
                LOW  MID1  MID2  HIGH
                ---  ----  ----  ----
    Standard      0    0     0     0
    Loudness     +3   +6    +1    +7
    Treble +      0    0    +4    +6
    Bass +       +3   +4     0     0
    Mellow       -3    0     0    -8
    Bright       -4    0    +6    +4
    Rock         +3   +2    -6    +6
    Jazz         +3    0    +6     0
    Dance        +3   +4    +2    +8
    Classic      -2   +6    +2     0
As to the band frequencies, we turn to the published table of master EQ frequencies:
    LOW frequency range      50Hz to 800Hz
    MID1 frequency range    100Hz to 8.0kHz
    MID2 frequency range    100Hz to 8.0kHz
    HIGH frequency range   2.0kHz to 16.0kHz
That’s enough to get into the right ballpark.
Yamaha XG Multi EQ
Never content, I worked out a table for Yamaha XG Multi EQ. Multi EQ is an optional master EQ in the Yamaha XG effects chain. Multi EQ is fully parameteric and has five bands: LOW, LOW-MID, MID, HIGH-MID, and HIGH. The LOW and HIGH bands support a peak mode, but are usually configured for shelving.
Multi EQ has five presets: Flat, Jazz, Pops, Rock and Concert (AKA “Classic”).
           Flat          Jazz            Pops          Rock          Concert
      -------------  -------------  -------------  -------------  -------------
        Freq  Q  dB    Freq  Q  dB    Freq  Q  dB    Freq  Q  dB    Freq  Q  dB
      -------------  -------------  -------------  -------------  -------------
Low     80Hz      0    50Hz     -6   125Hz     +4   125Hz     +7    80Hz     +3
L-mid  500Hz 0.7  0   125Hz 0.3 +2   315Hz 2.0 -4   200Hz 0.7 +4   315Hz 0.7 +4
Mid   1.0kHz 0.7  0   900Hz 0.3 +4  1.0kHz 0.7 +3  1.2kHz 0.5 -4  1.0kHz 0.5  0
H-mid 4.0kHz 0.7  0  3.2kHz 0.5 -4  2.0kHz 2.0 -4  2.2kHz 1.0 +4  6.3kHz 0.7 +2
High  8.0kHz      0  6.3kHz     -6  5.0kHz     +6  6.3kHz     +2  8.0kHz     -3
None of the Q’s are high, so the peaks/curves are rather gentle. [I wish there was an easy way to plot the curves for each preset.]
Of course, you can plug these settings into the CT-S1000V and merrily tweak away.
Yamaha Genos Master EQ
The Yamaha Genos™ Master EQ is an eight band, parametric equalizer. The Low and High bands are shelving.
Yamaha Genos provides five presets: Flat, Mellow, Bright, Loudness and Powerful:
           Flat          Mellow         Bright        Loudness       Powerful
      -------------  -------------  -------------  -------------  -------------
        Freq  Q  dB    Freq  Q  dB    Freq  Q  dB    Freq  Q  dB    Freq  Q  dB
      -------------  -------------  -------------  -------------  -------------
Low     80Hz     0     80Hz      0   100Hz      0   100Hz     +1   140Hz     +3
1      250Hz 0.7 0    250Hz 0.7  0   250Hz 0.7 -1   250Hz 1.2 +1   315Hz 0.5 +2
2      500Hz 0.7 0    500Hz 0.7  0   500Hz 0.7 -1   450Hz 1.0 -2   560Hz 1.5 +2
3      630Hz 0.7 0    800Hz 1.0 +1   800Hz 0.7 -2   630Hz 0.5 -1   800Hz 0.5 +2
4      800Hz 0.7 0   1.8kHz 0.5 -1  1.0kHz 0.7  0  1.0kHz 1.3  0  1.6kHz 1.2 +1
5     1.0kHz 0.7 0   3.6kHz 1.0 -2  1.6kHz 1.7 +2  3.6kHz 1.0 +1  3.6kHz 1.6 +1
6     4.0kHz 0.7 0   6.3kHz 1.3 -2  4.0kHz 0.7 +1  6.3kHz 0.8 +1  5.6kHz 1.4 +2
High  8.0kHz     0   9.0kHz     -1  7.0kHz     +3  8.0kHz     +2 10.0kHz     +2
The settings match the names. Mellow knocks down the highs. Bright cuts the lows and boosts the highs. Loudness is a bathtub boosting both lows and highs. Powerful kicks all bands up a notch.
If I find a way to discover the CT-S1000V band frequencies, I will update its table. In the meantime, have fun!
Copyright © 2022 Paul J. Drongowski