Could this be it?

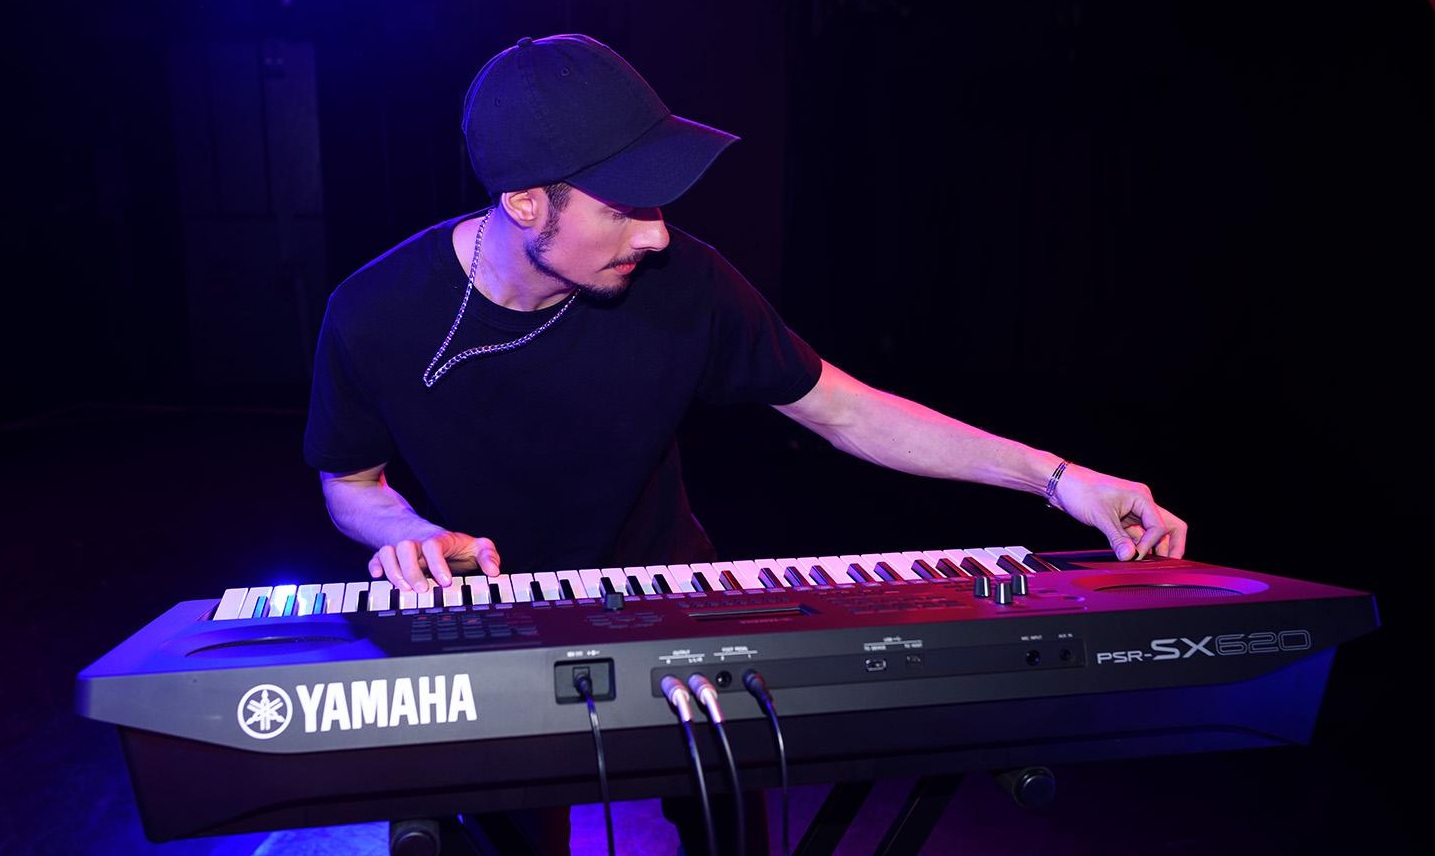
The long wait for the Yamaha PSR-SX620 is nearly over.

Is this the long awaited PSR-SX620?

I am still awaiting official specs — aren’t we all! Here’s a few teasers while you wait:

  • New internal bass reflex port and enlarged internal sound box
  • Over 1,000 instrument voices and 450 preset styles
  • Bluetooth audio streaming
  • Assignable Live Control knobs and joystick controller
  • Chord looper
  • Style Section Reset (to align with downbeat)
  • Color LCD screen [Update: Probably not a touchscreen]
  • Music rest
  • PA300C power adapter
  • MSRP: $1,499, MAP: $1,199

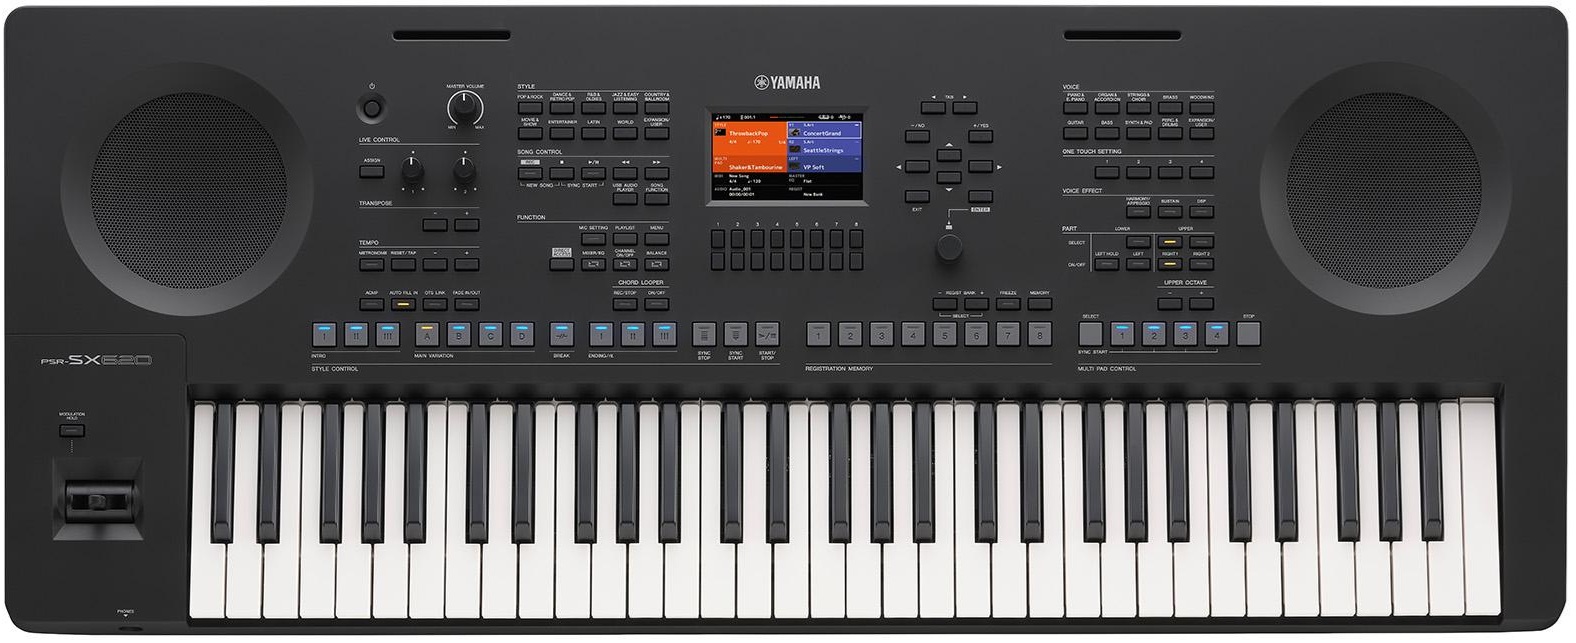
Some form of these pictures have made the rounds on the Interwebs. I resisted posting anything until now because the early leaked pictures are, well, unflattering. The front panel is a departure from previous 600-level models and the speaker grill is very different. Many of us felt (and still feel) that the leaked image was AI-generated.

Top view

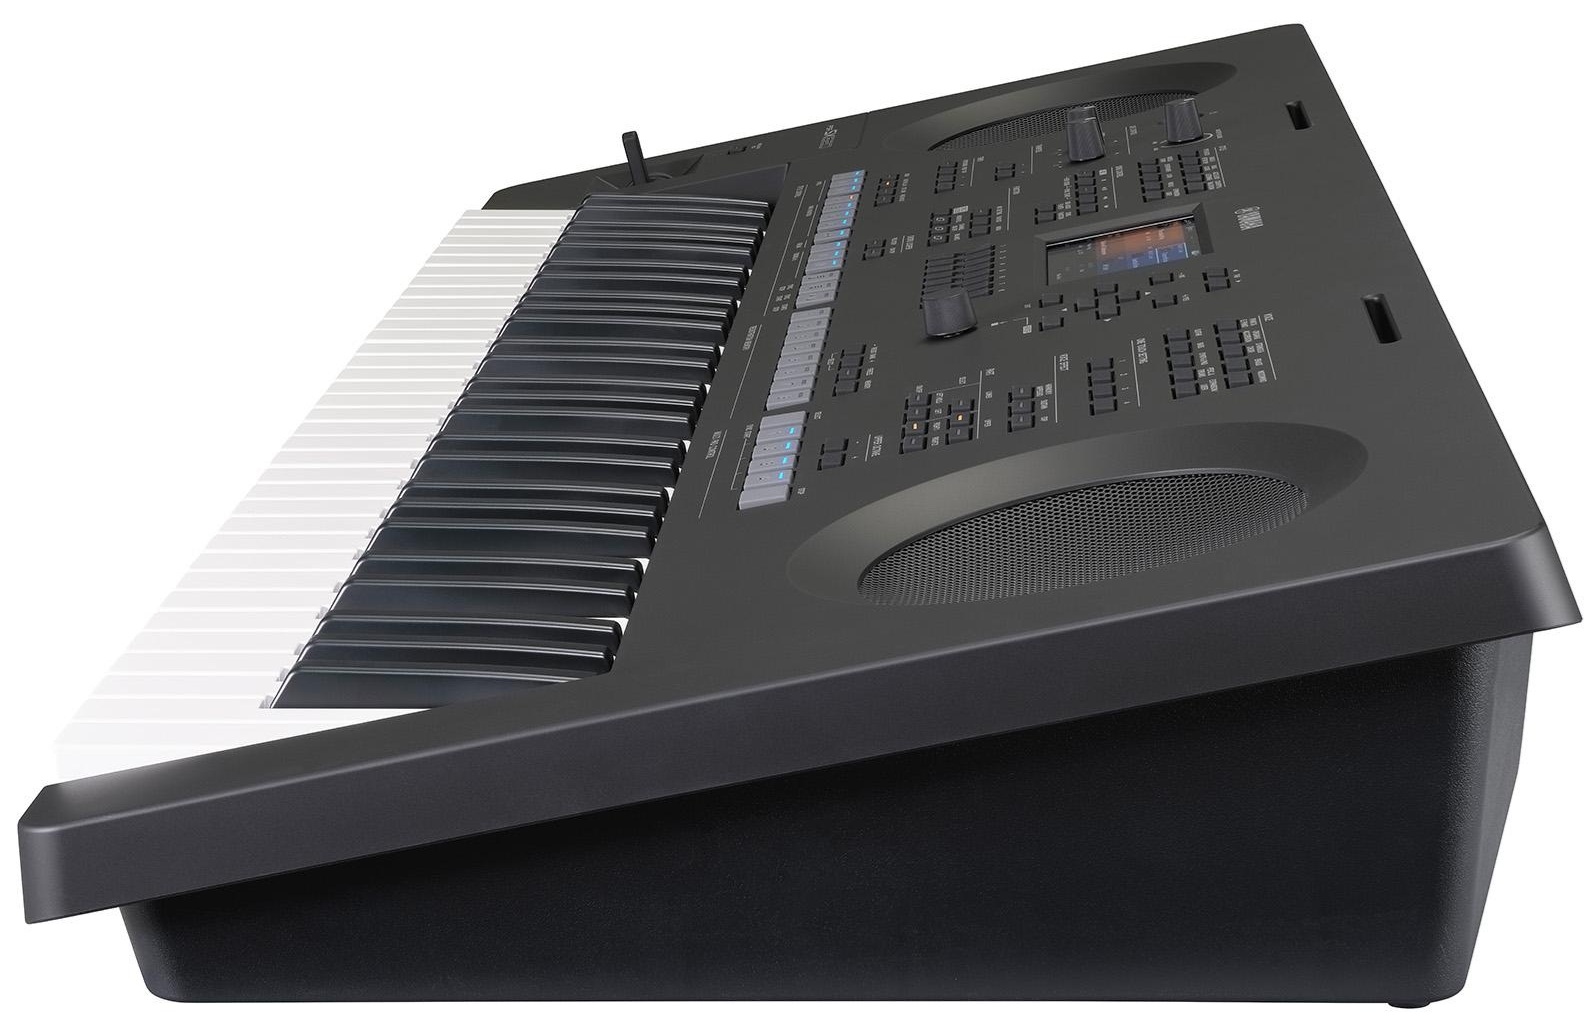
The new bass reflex and speaker box designs may explain the shift in industrial design. The SX620 looks bigger than previous models.

Side view

I recommend keeping an eye on the Yamaha Musician’s web site and forum. [They broke the story first. Congrats!] For sure, more discussion will follow especially once Yamaha make an official announcement and release the PSR-SX620 documentation. I always look to the Data List first for new voices, styles and effects.

Rear view

When it comes to unofficial information, one must be very careful and be prepared to have a red embarrassed face. It is sooo easy to fake up an image of a new keyboard. Always, always, beware.

Copyright © 2026 Paul J. Drongowski

Trim construction kit with Ableton Live

In my last post, I described the process of trimming audio stems for use on the Teenage Engineering EP-40 Riddim. The general procedure is:

  • Create a new project and set its tempo.
  • Import the audio stems (files) into time-aligned tracks.
  • Tweak the tempo to improve alignment.
  • Set loop points, listen and adjust.
  • Select the loop regions.
  • Trim and/or split to isolate the regions across all tracks.
  • Export the isolated regions to individual WAV files.

I demonstrated this process in action using (Cakewalk) SONAR Home Studio. Parenthetically, I thought that the same process could be applied in Ableton Live.

Well, I took my own challenge and finished off a construction set using Live. The audio loops and stems are part of the Renegade Audio (RA) Dub Invasion construction kit. Dub Invasion is Number 10 in the Renegade Audio Launch Pad series. Dub Invasion is 289MB of goodness and I had barely scratched its surface because manual trimming in Sound Forge Audio Studio is too slow and tedious. Sounds like the perfect test case for trimming via Live.

Just to be clear, I’m running Ableton Live Intro version 12.4.3. You don’t need the full Live Suite. The ubiquitous Lite version may be good enough, too, but I haven’t tested the same procedure with Lite. Lite comes bundled (free!) with many hardware products, so you may already have a Lite license.

Working with loops and one-shots in Live is a breeze. First, I created a new Live Set (project) and set the tempo 125 BPM. Then I dragged loops and one shots into Live’s Session View — you know, the place where you launch clips. Dub Invasions WAV loop and one-shot files are (generally) time-aligned at the beginning. Remix stems are aligned to the beginning of the (stem) song. If you’re going to snag audio from a stem, you will need to do a little more trimming.

Once you have the loops and one-shots pulled in, give them a try and see if they fit together. That’s the great thing about Live. It’s also fun to trigger clips and get ideas for how you might arrange them on the EP-40 Riddim. I needed to reduce the published BPM (125 BPM) by half (62.5 BPM) to get the right feel.

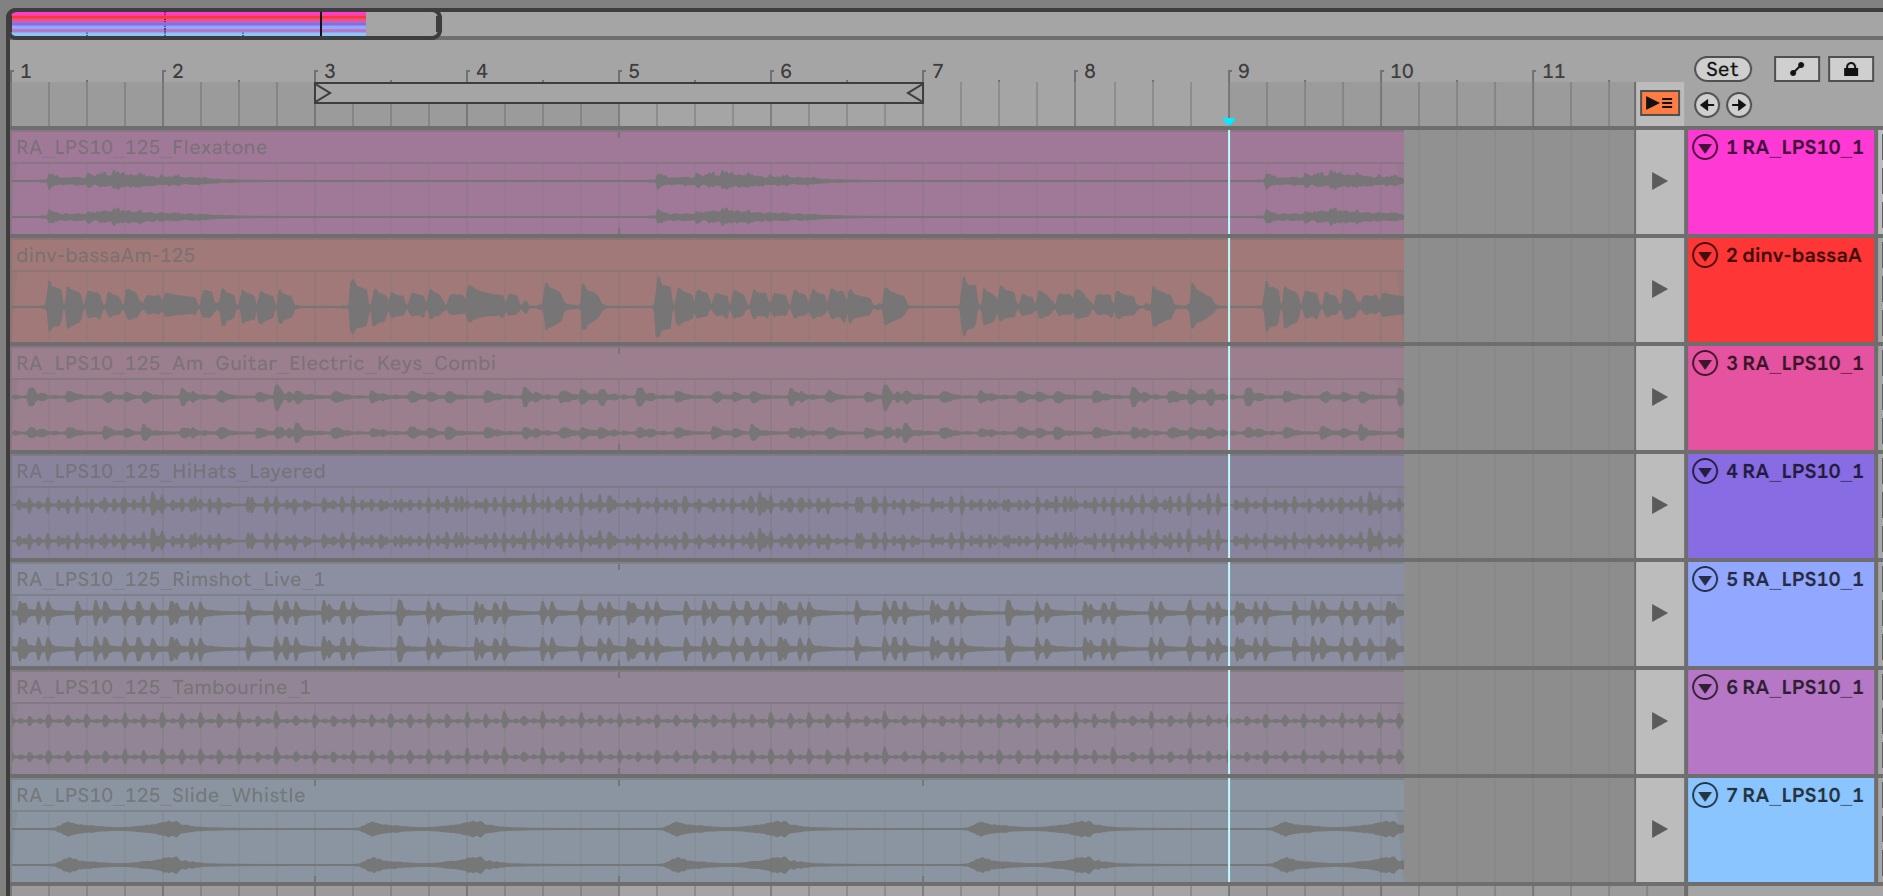
Audio loops in Ableton Live Intro

Next, I armed several loops in the Session View and switched to the Arrangement View. The Arrangement View displays typical DAW tracks (horizontal lanes). Then, hit record. Live will play the armed clips and record audio into the lanes. I ran off about ten measures of audio with the intention of trimming to eight bars (or less).

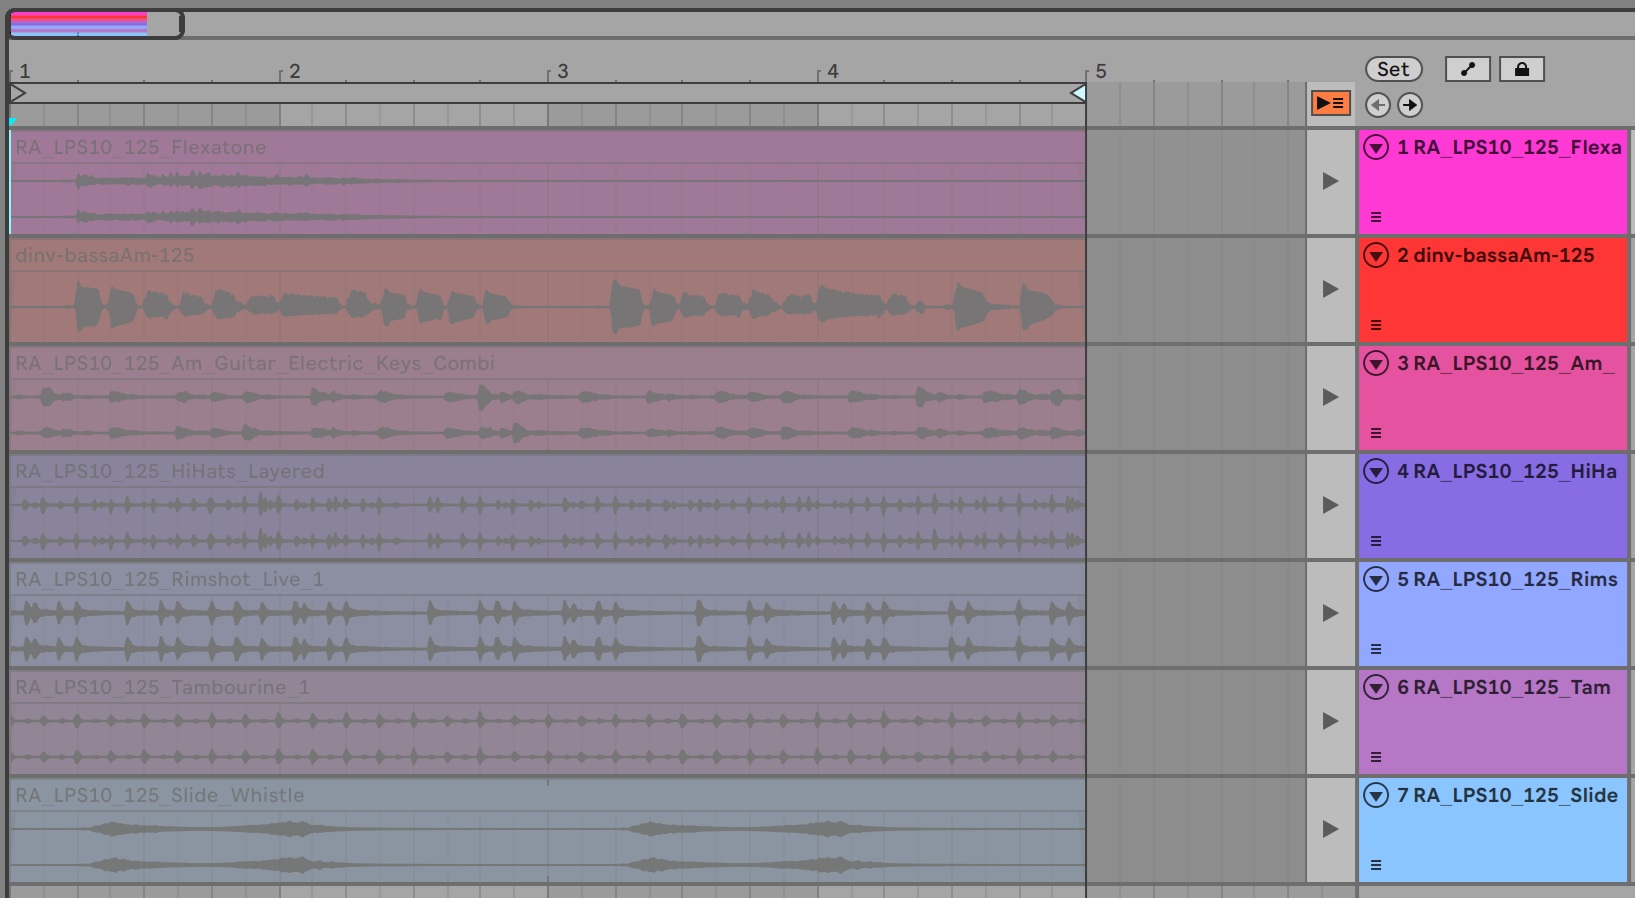
Loops trimmed and ready for export

With audio in the lanes, I created a loop by moving the start and stop braces in the time-line. Play the loop, listen and adjust. Keep in mind that longer loops require more memory. Be parsimonious.

It may be sloppy style, but I used the selection braces to choose measures that I wanted to delete from the end of the clips. I moved the braces to the beginning and end of the unwanted measures (time), selected all of the tracks, and deleted the selected time period. Then I re-adjusted the braces to select the loop/one-shot audio to be exported.

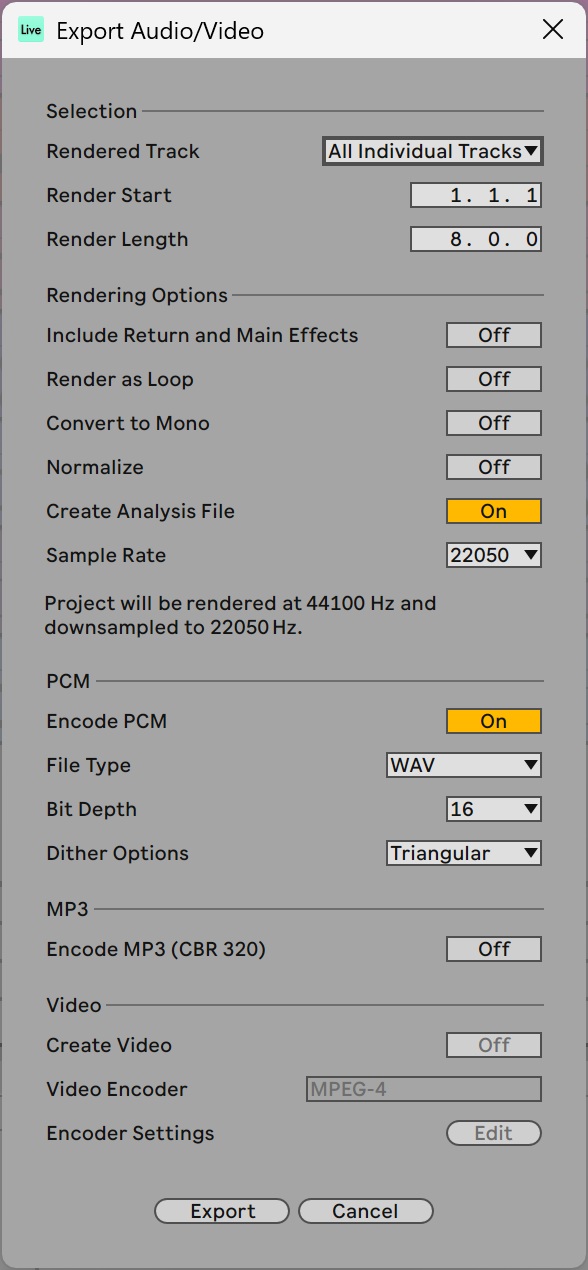
Ableton Live export options

As hinted, choose “Export Audio/Video…” in the File menu. Live pops up a dialog box where you set export options. I chose to render “All Individual Tracks”. That option produces one WAV file for each track. Set the starting point and render length. Set the sample rate (22,050Hz), file type (WAV) and bit depth (16). Optionally, you can create a Live Analysis File (ASD), too.

Click the Export button and navigate to the destination directory. Click the Save button and Live writes a WAV file for each track in the specified audio format.

Working in Live is faster than SONAR and much faster than manual editing individual files in Sound Forge. Going forward, I will be using Live.

Teenage Engineering sale

Here’s a time-sensitive reward for reading this far. Teenage Engineering is having a sale (30% off) until August 7, 2026. Browse to the Teenage Engineering site for details and the (secret) discount code. I ain’t telling.

If you would like to support the Yamaha Musician’s Forum, the Forum’s partner Thomann is participating in the sale. Make your purchase through the Forum and give the Forum a boost.

EP-40 Riddim PDFs

Don’t forget about my EP-40 Riddim PDFs. I swizzled and condensed parts of the on-line guide. Just recently added are two PDFs for the EP-136 K.O. Sidekick: basic operation and effects.

Copyright © Paul J. Drongowski

Add a construction kit to EP-40 Riddim

At some point, you will want to add new content to your Teenage Engineering EP-40 Riddim. I bought my EP-40 as a loop machine. I like interacting with it — bringing layers in and out, blasting a siren, adding FX, etc.

My favorite reggae and dub loop producer is Dubmatix (artist Jesse King). Dubmatix produces sound libraries for Renegade Audio, which can be found on Loopmasters and other on-line retailers.

Dubmatix has been super-generous over the years releasing free taster and gift packs. Keep an eye on the Dubmatix web site or get on the Dubmatix mailing list.

I like to pay back generosity and have purchased several Dubmatix sample packs. I also have a zillion taster packs which are a good way to dip your toe in the water before buying.

Today, I want to show how I processed and imported the Renegade Audio Dub Yard Funk taster pack into EP-40. Dub Yard Funk is volume 40 in the reasonably-priced Dub Pack series. A Dub Pack is a construction kit with the instrument parts broken into pre-trimmed loops and sounds. Loop duration runs from 10 seconds up to a minute, depending upon title.

It’s like Dub Packs are made for the EP-40 Riddim, except for loop size. Out of the carton, the EP-40 is stuffed with 92MBytes of factory content and eight artist songs. That leaves 36MBytes free for your own content and one project (number nine). [Someday I will explore project and sample management after getting the nerve to delete factory-installed artist projects.] Thus, we gonna need to do some trimmin’ and squeezin’ to get Dub Pack loops into EP-40.

Instead of diving into a full 250MByte Dub Pack and swimming around, I downloaded the Dub Yard Funk taster pack from Loopmasters. That way you can follow along and experiment on your own. Plus, I like the sound of this pack! It’s easier to do monkey-work when you like what you’re hearing. 🙂

The Dub Yard Funk taster pack contains twelve WAV files:

RA_DYF_77_Abm_Bass_Gtr_Main.wav
RA_DYF_77_Abm_Gtr_Music_Combo_3.wav
RA_DYF_77_Abm_Gtr_Music_Combo_Echo_2.wav
RA_DYF_77_Abm_Guitar_Wah.wav
RA_DYF_77_Abm_Keys_Skank_Combo_2.wav
RA_DYF_77_Abm_Melodica_Skank.wav
RA_DYF_77_Abm_Vox_2.wav
RA_DYF_77_Full_Drum.wav
RA_DYF_77_Mixed_1.wav
RA_DYF_77_Mixed_Perc_6.wav
RA_DYF_77_Perc_Flexatone.wav
RA_DYF_77_Tops_2.wav

Each file is 12.9MB in size with a 29 second duration. Clearly, these ain’t gonna fit into my EP-40’s free space (36MB). Sample format is 44,100Hz, 24-bit stereo. Going lo-fi will squeeze things down.

Listening to the full drums or skanks, for example, one realizes that there is a lot of redundancy here. Fortunately, the audio is aligned across files and it is possible to select and trim loop-length excerpts across all of the files.

Here’s how to do a quick chop-job in SONAR. (Yes, it’s ancient Cakewalk Home Studio, again.) First, set the project tempo (77BPM). The correct project tempo makes it easier to snatch two or four bar loops. Next, drag each file into an SONAR audio track. I decided not to include the full mix, RA_DYF_77_Mixed_1.wav, because we can and will layer the individual pieces/parts interactively on the EP-40 in Live State. Tweak the project tempo to fine-tune time alignment to the start of each measure.

The next few steps use SONAR’s audio clip capabilities. Turn on looping and choose loop start and end points. Press play and listen for glitches. Tweeze the project tempo (or loop points) if you must. When everything sounds good, select all of the tracks loop bars. Go into the Edit menu and choose Split. Enable the Split At Selection option and click OK.
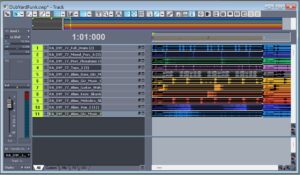
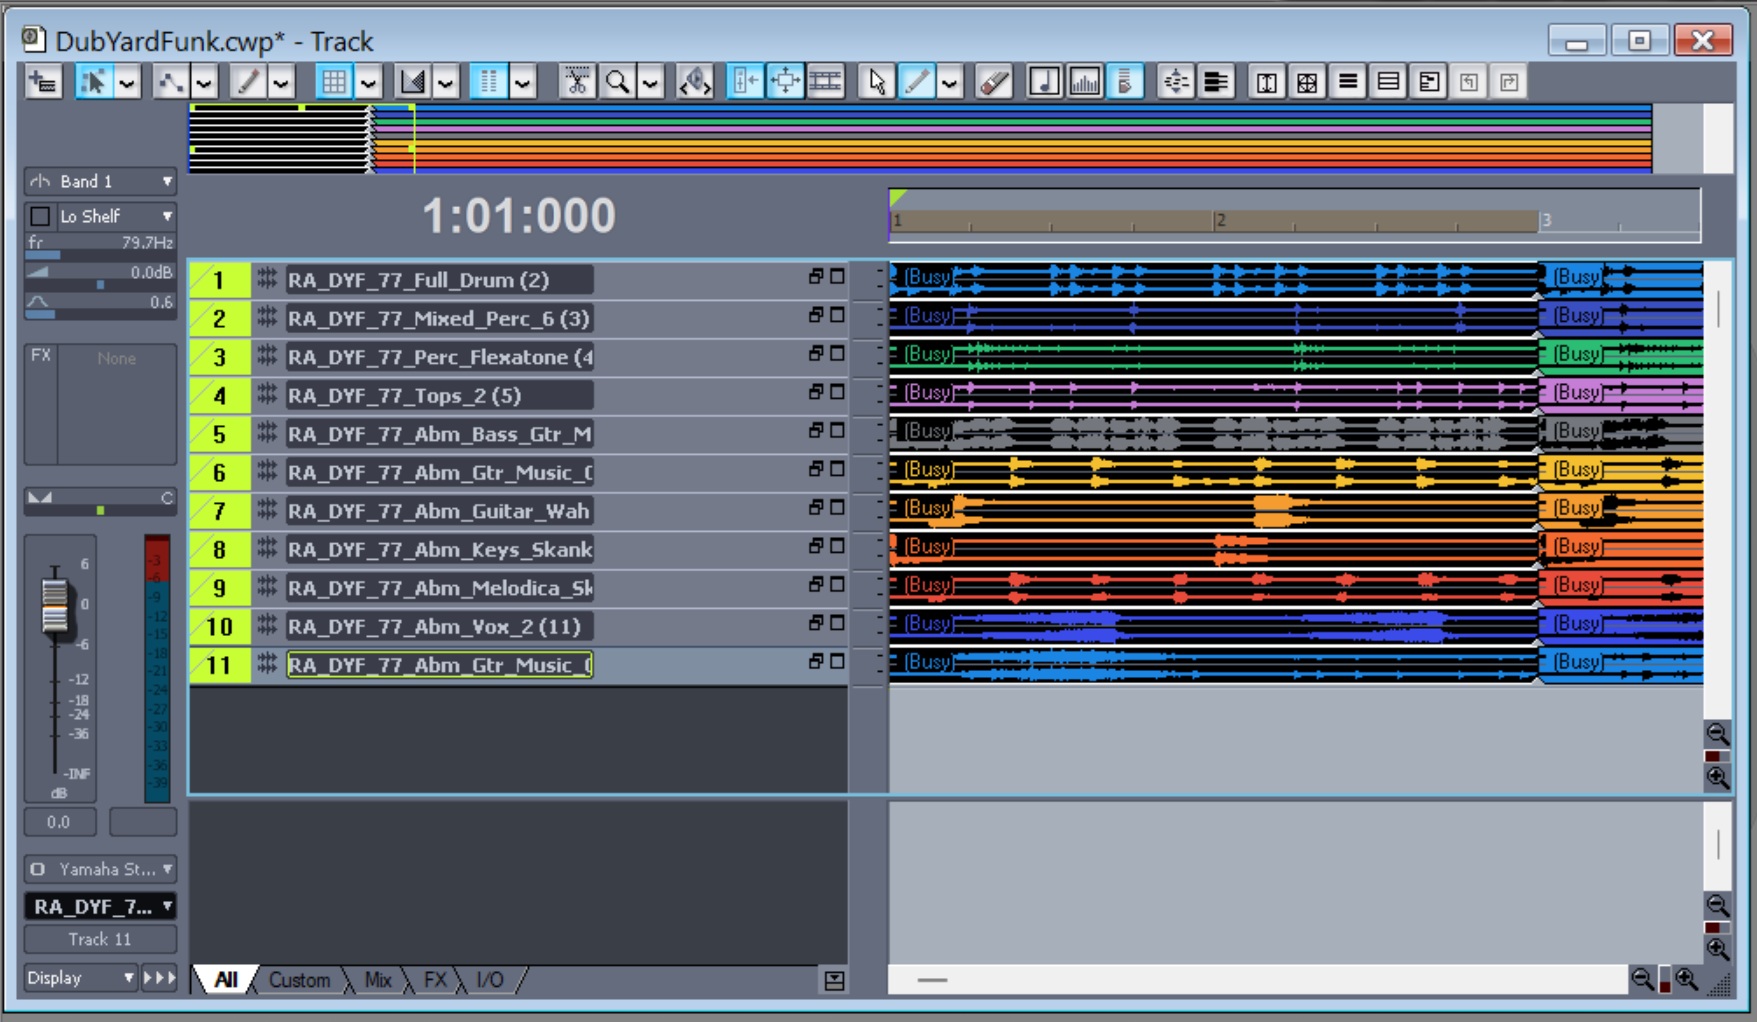
SONAR clips ready for export

At this point, you should have a four bar clip for each stem as shown in the track screenshot. Go to the File menu and choose Export > Audio. Under Source Category, choose Tracks from the drop-down list. Choose the target audio format. I went with 20,250Hz, 16-bit stereo in order to reduce file size. Enter a short identifier (e.g., “tt”) in the file name field to make SONAR happy and click Export. SONAR should now write eleven (or whatever) WAV files where each WAV file is a four-bar clip in the specified audio format.

I got the following files. What did you get?

tt-RA_DYF_77_Abm_Bass_Gtr_Main (6)-5.wav
tt-RA_DYF_77_Abm_Gtr_Music_Combo_3 (7)-6.wav
tt-RA_DYF_77_Abm_Gtr_Music_Combo_Echo_2 (12)-11.wav
tt-RA_DYF_77_Abm_Guitar_Wah (8)-7.wav
tt-RA_DYF_77_Abm_Keys_Skank_Combo_2 (9)-8.wav
tt-RA_DYF_77_Abm_Melodica_Skank (10)-9.wav
tt-RA_DYF_77_Abm_Vox_2 (11)-10.wav
tt-RA_DYF_77_Full_Drum (2)-1.wav
tt-RA_DYF_77_Mixed_Perc_6 (3)-2.wav
tt-RA_DYF_77_Perc_Flexatone (4)-3.wav
tt-RA_DYF_77_Tops_2 (5)-4.wav

SONAR appended “tt” at the front of every file (clip) name. These names are way too long for the Teenage Engineering Sample Tool, so I renamed them to:

    dyf-bassAbm-77.wav  dyf-echoAbm-77.wav  
    dyf-combAbm-77.wav  dyf-flex-77.wav     
    dyf-drum-77.wav     dyf-keysAbm-77.wav  
    dyf-meloAbm-77.wav  dyf-vox2Abm-77.wav
    dyf-perc-77.wav     dyf-wahAbm-77.wav
    dyf-tops-77.wav

I renamed the files using a short batch file. [Windows.] I found out — the hard way — that the EP Sample Tool likes sample names 16 characters or shorter. My names are 14 characters or less (excluding the “.wav” extension). The output files are much smaller: 540KB or roughly 6MB for all eleven files. That’ll fit!

I did the chop job with SONAR. Your DAW probably has similar features. [Note to self: try Ableton Live Intro.] The basic procedure is:

  • Create a new project and set its tempo.
  • Import the audio stems (files) into time-aligned tracks.
  • Tweak the tempo to improve alignment.
  • Set loop points, listen and adjust.
  • Select the loop regions.
  • Trim and/or split to isolate the regions across all tracks.
  • Export the isolated regions to individual WAV files.

I suggest studying DAW features to select, trim and export audio stems en masse. It took reading, trial and error to get things going in SONAR.

By the way, I’ve tried editing and trimming audio files individually to produce fixed-length loops (i.e., all loops have the same length (N samples)). The above method is much faster and less labor-intensive because you can operate on multiple stems/loops in one swack.

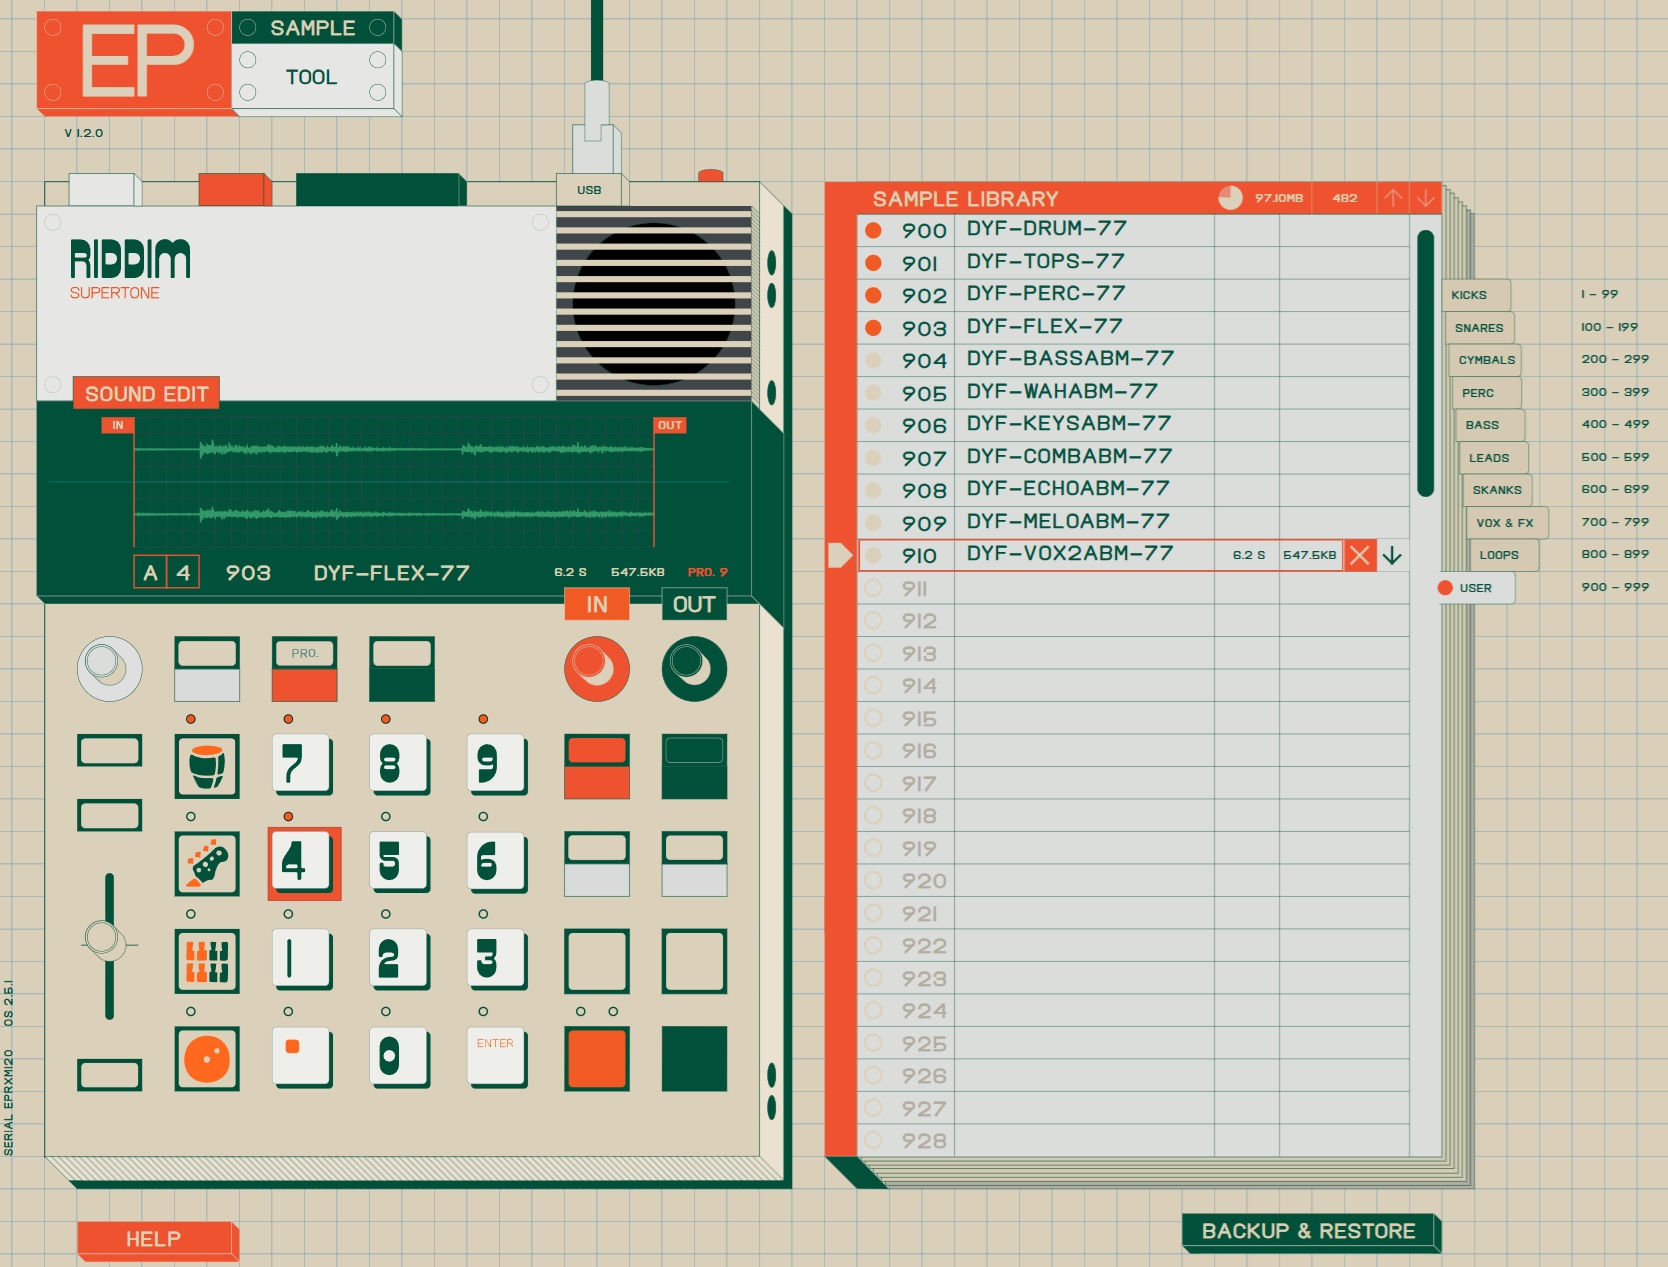
The final step is to import the loop files into the EP-40 ecosphere. Connect an EP-40 to your computer and fire up the Teenage Engineering Sample Tool in your web browser. (The browser must support Web MIDI.) If you get an alert box saying “teenage.engineering wants to control and reprogram your MIDI device”, click the Allow button. The app searches for your EP-40 (make sure it’s ON!) and displays the familiar tabbed directory of its samples.
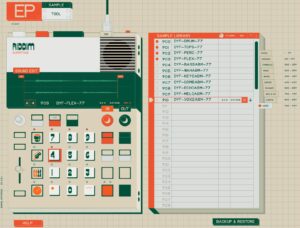
Dub Yard Funk on board the EP-40

Now it’s time to drag the clip WAV files to the EP-40. Once the sample files are in the directory, you can assign each sample to a pad by dragging it from the directory to a pad. You will need to get into Sound Edit and set the pad play mode to one-shot, key, legato or loop. [See my EP-40 PDF cheat sheets.]

Give it a try! Dubmatix taster packs are good for learning and practice. Be sure to buy the full packs and keep Dubmatix mixing!

Copyright © 2026 Paul J. Drongowski

Get yer EP-40 Riddim PDFs

Rastaman! Rockers! I have not forgotten the Teenage Engineering EP-40 Riddim.

While messing with construction kits (again), I got frustrated with the on-line EP-40 guide. Like many people, I want a guide on my own machine, preferably in PDF. Even better, a guide on paper right next to the Riddim.

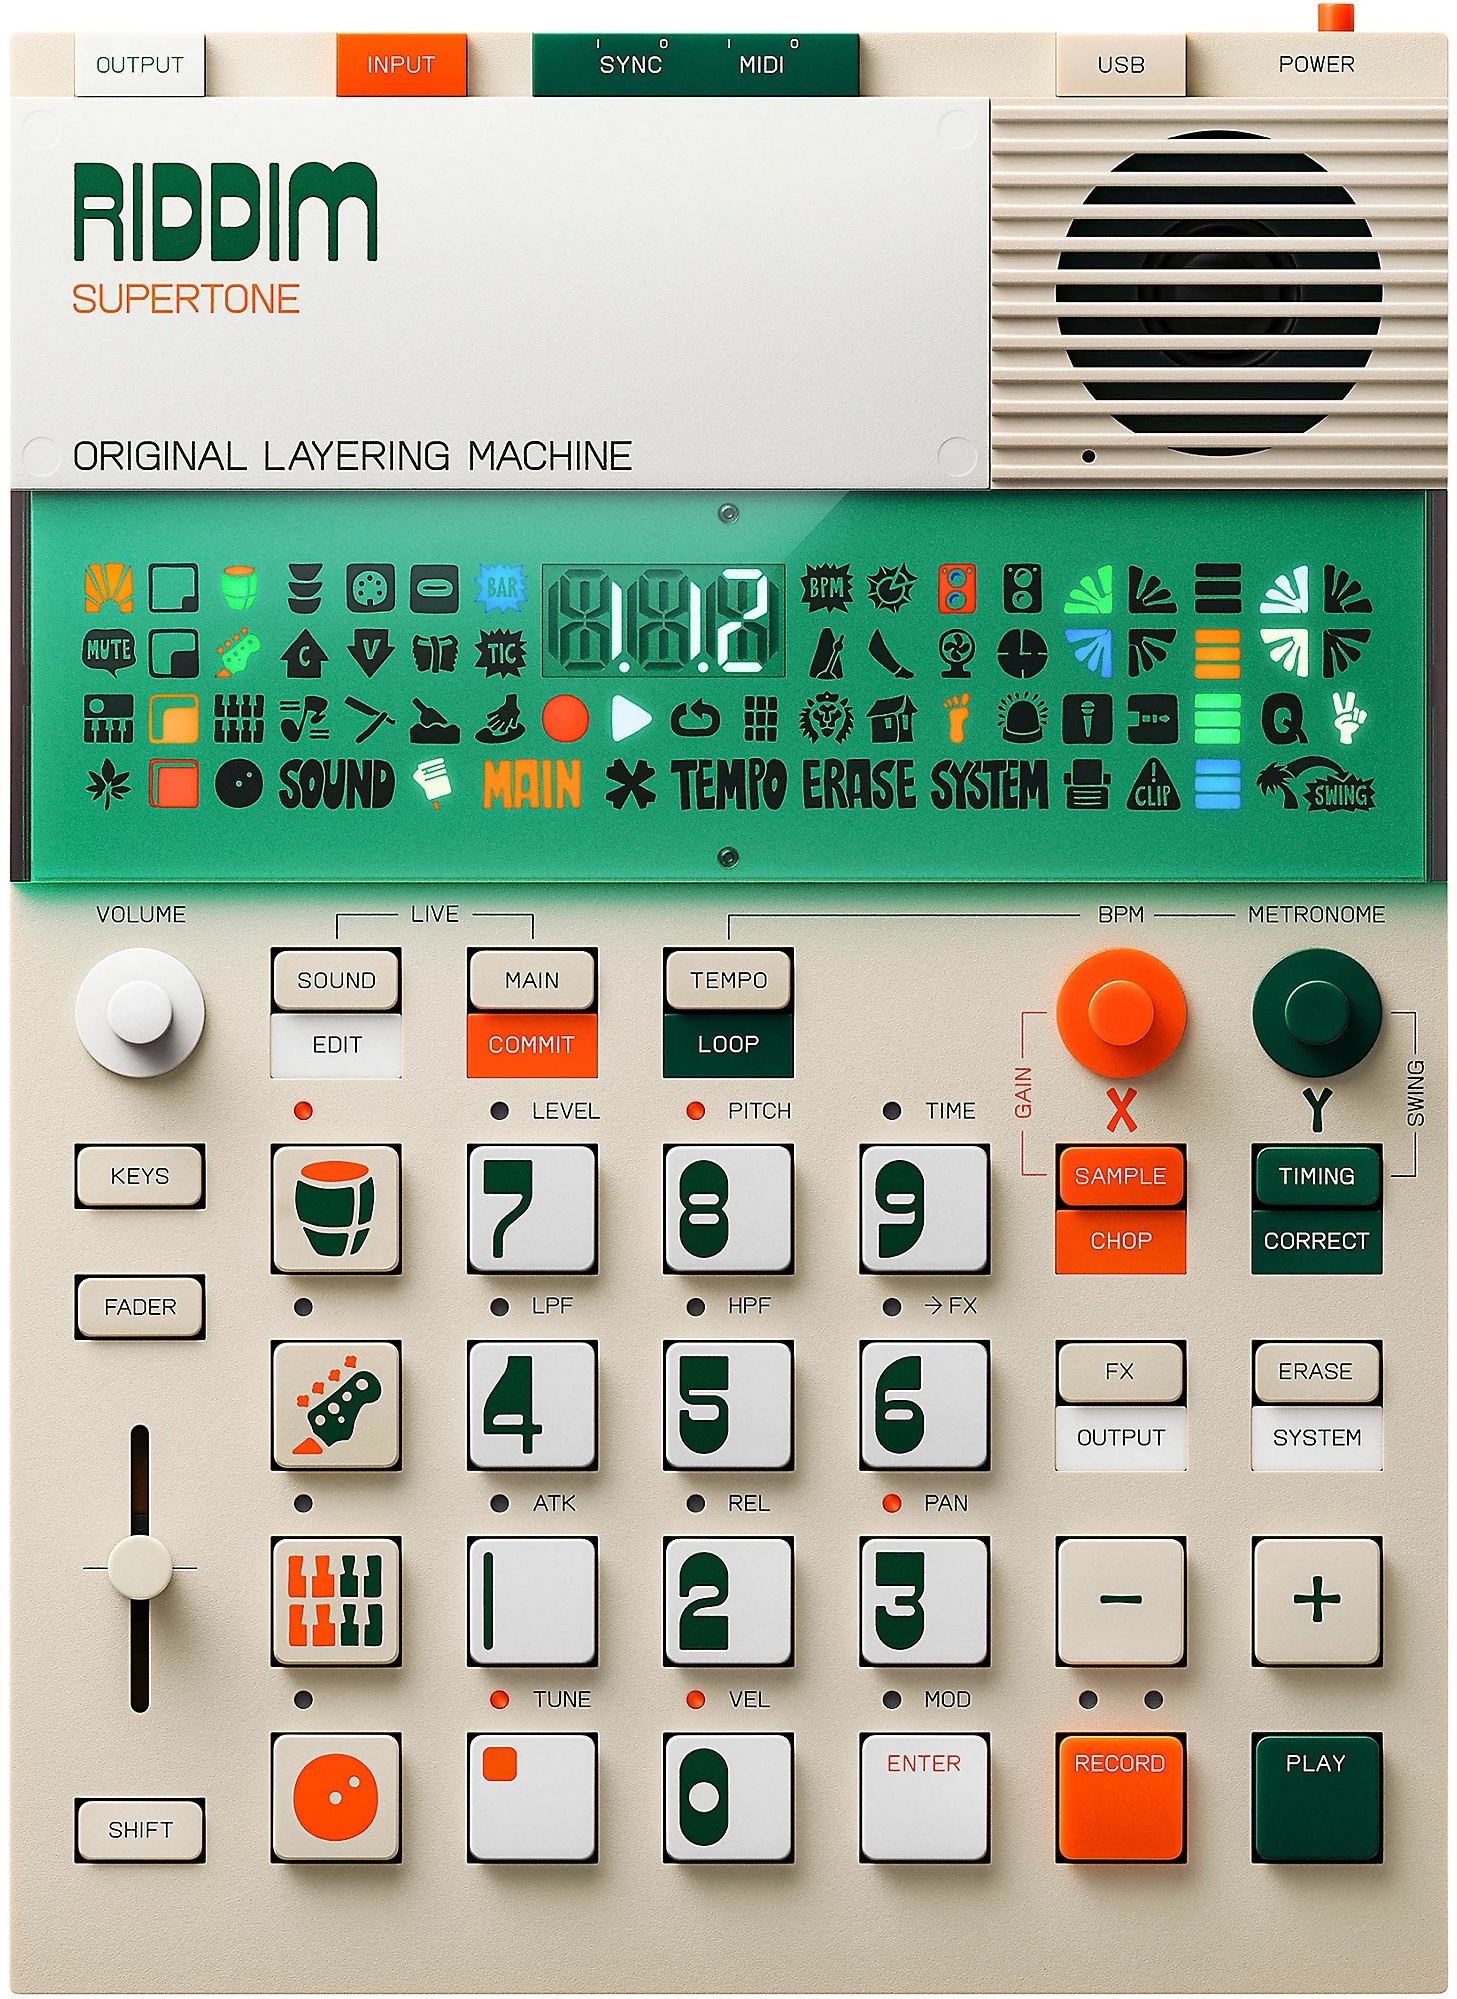
Teenage Engineering EP-40 Riddim

Necessity is the mother of invention. I rolled up my sleeves and created six PDFs. Each PDF concentrates on a particular aspect of the EP-40. The on-line guide has sooo much white space, I managed to pack a lot of detail into each PDF by squeezing it down. I swizzled the on-line guide to focus on layering and playing loops, and the Supertone synth. If I get into beat making with the EP-40, I will make more PDFS about sequencing.

I’m sharing these PDFs:

These PDFs are not comprehensive, so please do not give up on the on-line EP-40 guide. As I said above, they won’t give you much help sequencing or using MIDI/SYNC, for example.

Now the somewhat disappointing news. I created the PDFs from screenshots, not text. Thus, the PDFs are not searchable. I opted for more PDFs with at most two pages per file. You should be able to narrow your interest to a particular PDF and should be able to scan quickly through its two pages. Sorry ’bout the lack of text search.

All of the PDFs display text and diagrams on a solid white background. I tried to make the text and diagrams as readable as possible on paper when printed.

The EP-40 OS 2.5 update adds several substantial features.

  • USB audio
  • Reversing samples
  • Selectable sampling rate (26,250Hz, 32,000Hz, 46,875Hz)
  • Longer MONO samples (up to 40 seconds)
  • Equal length AUTOCHOP
  • Arpeggio (one-shot or legato type samples)

Working with Yamaha SEQTRAK and Teenage Engineering Riddim, wow, they are very different machines. Unless you intend to buy both, choose wisely, padawan.

Copyright © 2026 Paul J. Drongowski
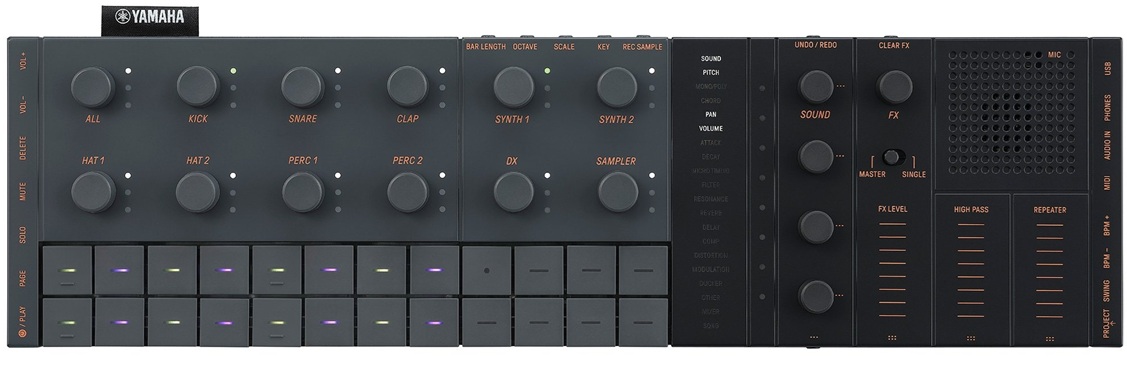
AN200 patterns converted to Seqtrak

After rummaging through the AN200 crate, I cherry-picked eight favorite patterns and converted them to Yamaha Seqtrak. Yamaha Seqtrak doesn’t have an AN synthesis engine, so you only get a close approximation. Still, why not?

Converting Yamaha’s AN200 patterns to Seqtrak is labor intensive. As I noted in my AN200 crate digging article, the AN200 has four tracks: Synth, Rhythm 1, Rhythm 2 and Rhythm 3. The Synth track is the easiest to deal with. It contains MIDI notes and no continuous control messages. That’s pretty raw and kind of disappointing (no automation tricks). The biggest conversion issue is finding a suitable Seqtrak voice — a voice with dynamism and life — to replace the AN voice.

The rhythm tracks are truly a bear to convert. The AN200 doesn’t have drum kits in the sense of a conventional Yamaha synth. Rather, the rhythm tracks contain notes that hit a vocabulary of AN200 percussion instruments, bass notes, found sounds and whatnot. A single AN200 rhythm track might contain only high hats, if you’re lucky. Often, a rhythm track contains patterns for several percussion instruments and you need to find a way to explode the track into individual Seqtrak drum tracks. Ouch.

The AN200 Owner’s Manual has a table listing the instrument for each MIDI note number. If you are going to do conversions yourself, you must have this table!

I did all the MIDI whacking in (ancient) Cakewalk SONAR Home Studio (circa 2006). Once I had the individual SONAR tracks set up, I exported the individual instrument patterns to MIDI files. SONAR is cool that way — just drag the pattern clips and drop them into a directory. SONAR writes the clips as Standard MIDI Files (SMF).

With individual SMF patterns in hand, activity shifts to the Yamaha Seqtrak app. First thing is to assign Seqtrak voices to the drum and synth tracks. Sometimes I spend too much time finding the ideal voice only to change the voice later. Better to make initial picks quickly and get on with the fun stuff.

After choosing voices and creating the project, it’s time to import patterns. You need to crack open the pattern editor for each track one at a time and drag the appropriate MIDI file into the pattern box.

This is where you may hit a major issue — time alignment. During export, SONAR truncates the outgoing MIDI clip to the first MIDI event in the clip. Seqtrak imports from the beginning of the MIDI file and uh-oh, what was aligned in the original pattern is no longer aligned with the first beat. I got into the habit of adding a super-quiet (velocity 1) note to the start of clips without a pattern note on the one. The quiet note forces SONAR to create a properly aligned clip during export. [I said conversion is work, didn’t I?]

Finally, you get to the funner stuff — tempo, effects, automation and all that. The Seqtrak mixer is really spiffy with just one gotcha. If you change a track voice, be aware that Seqtrak will change the effect send levels to those stored with the new voice. You will need to restore the reverb send level, for example. This is kind of a pain.

There is another thing that might drive you mad. Seqtrak tries to be helpful by saving your project on start-up and shut-down. [Read the manual.] Soon you will have multiple back-ups for the project. Back-ups are dated, but don’t display a creation time. Thus, you won’t know which project back-up is the latest one.

If you export a project from the app, look out for a garbage character before the file extension dot in the file name. You won’t see it, but it’s there. ZIP and other applications will find the garbage character in the file name and complain in some irrational way.

Once again, what do we have for our guests? All of the pieces and parts are in this ZIP file (27MB). You’ll find the original AN200 patterns, MP3 demos, Seqtrak projects, and working notes (README.TXT, etc.)

Before leaving, here is a brief MP3 demo. You’ll hear eight converted AN200 patterns in the following order: ElecHop, Funky, Jazzwonka, Mushroom, Naja, Tribal, TribeGathr and Trippin. Enjoy!

Copyright © 2026 Paul J. Drongowski