
My do-it-yourself MIDI interface for littleBits Arduino probably isn’t for everyone. Constructing the DIY interface requires circuit layout skills and not everyone wants to whip up a board from scratch and a schematic.
Fortunately, there are a couple of alternatives: the Olimex SHIELD-MIDI and the Sparkfun MIDI Shield. I don’t have any direct experience with the Olimex, but I have built and used the Sparkfun MIDI Shield (Sparkfun product number DEV-12898) and the now retired MIDI Breakout Board. The Olimex SHIELD-MIDI is very similar to the retired breakout board. In this post, I show how to hookup the Sparkfun MIDI Breakout Board to the littleBits Arduino. The wiring is the same for the Sparkfun MIDI Shield. That’s the neat thing about the standard Arduino form factor.
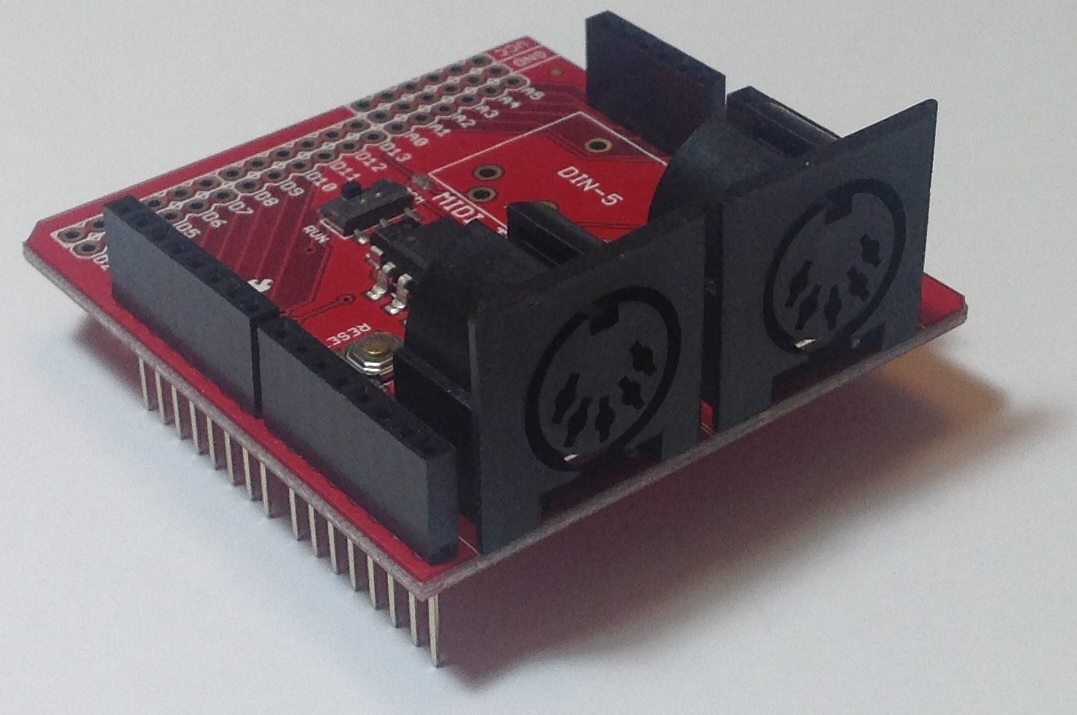
I would demonstrate with a Sparkfun MIDI Shield, but all of my MIDI Shields are customized in some way! The Sparkfun MIDI Breakout Board is basically the same as the MIDI Shield except that it doesn’t have the potentiometers and tactile switches. The image below is a picture of the Sparkfun MIDI Breakout board. (Click on the image to get higher resolution.) The two 5-pin DIN connectors are the MIDI IN and MIDI OUT ports. The long pins extending below the breakout board plug into a standard Arduino like an UNO or Leonardo.
The Sparkfun MIDI breakout board (or shield) arrives as a kit, so you still need to do some assembly. Sparkfun has already installed and soldered the tough stuff like the optoisolator, resistors and so forth. The MIDI Shield is a good beginner’s kit because the components to be installed are large and easy to solder. If you skip installing the potentiometers and tactile switches, the job is even easier!
You might want to add an Arduino Stackable Header Kit (PRT-10007), however. With the header kit, you’ll be able to interconnect using standard jumper wires. Once the headers are installed, no further soldering is necessary. Just plug the jumpers into the headers and play. Mistakes are easier to correct with jumper wires, too.
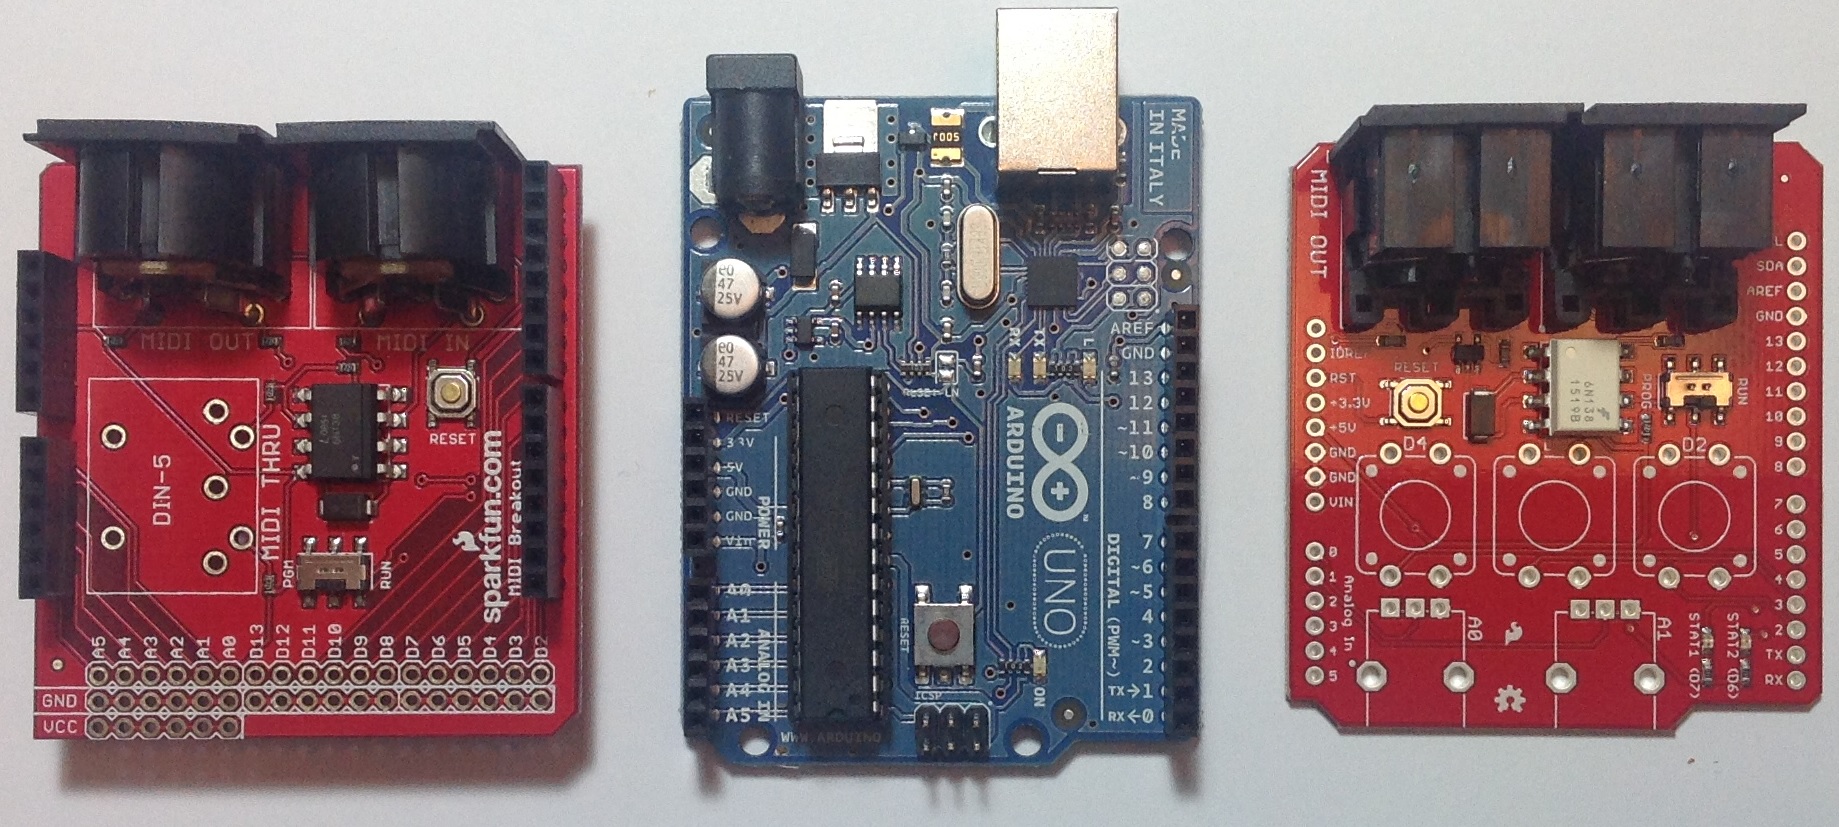
Here is the top-view of the MIDI breakout board, an Arduino UNO processor board and a Sparkfun MIDI Shield. Click the image for higher resolution. You’ll want to take a closer look at the three boards in order to see the signal name associated with each header pin. (You can really zoom in if you download the image and load it into a paint program.)
The breakout board has a position for a MIDI THRU connector. This position is empty as the headers would block the opening of the 5-pin DIN connector. We don’t need the THRU port, so this isn’t a deal-breaker.
As I mentioned before, the long pins extending below the headers normally plug into a standard Arduino processor board (e.g., UNO or Leonardo). Each header pin effectively mirrors the electrical signals of the underlying Arduino board. So, in order to hookup to the littleBits Arduino, we just need to connect the appropriate Arduino board signals to the corresponding bitSnaps on the littleBits Arduino. That’s why you really want to zoom in and see the signal names. The board labels tell us where to plug in jumper wires.
We need four connections:
- +5 Volts: Red wire
- Ground: Black wire
- RX (digital pin D0): Yellow wire
- TX (digital pin D1): Blue wire
Our old high school shop teacher would yell at us if we didn’t use the right color wire for power, ground, etc. I will say, different wire colors make it easier to check and debug wiring!
So, how do we make connections to the littleBits Arduino? I used two littleBits proto modules: one proto module for the MIDI input side and one proto module for the MIDI output side. The other end of each jumper terminates in a screw connector on a proto module. Please see the image below. (Click to enlarge.)
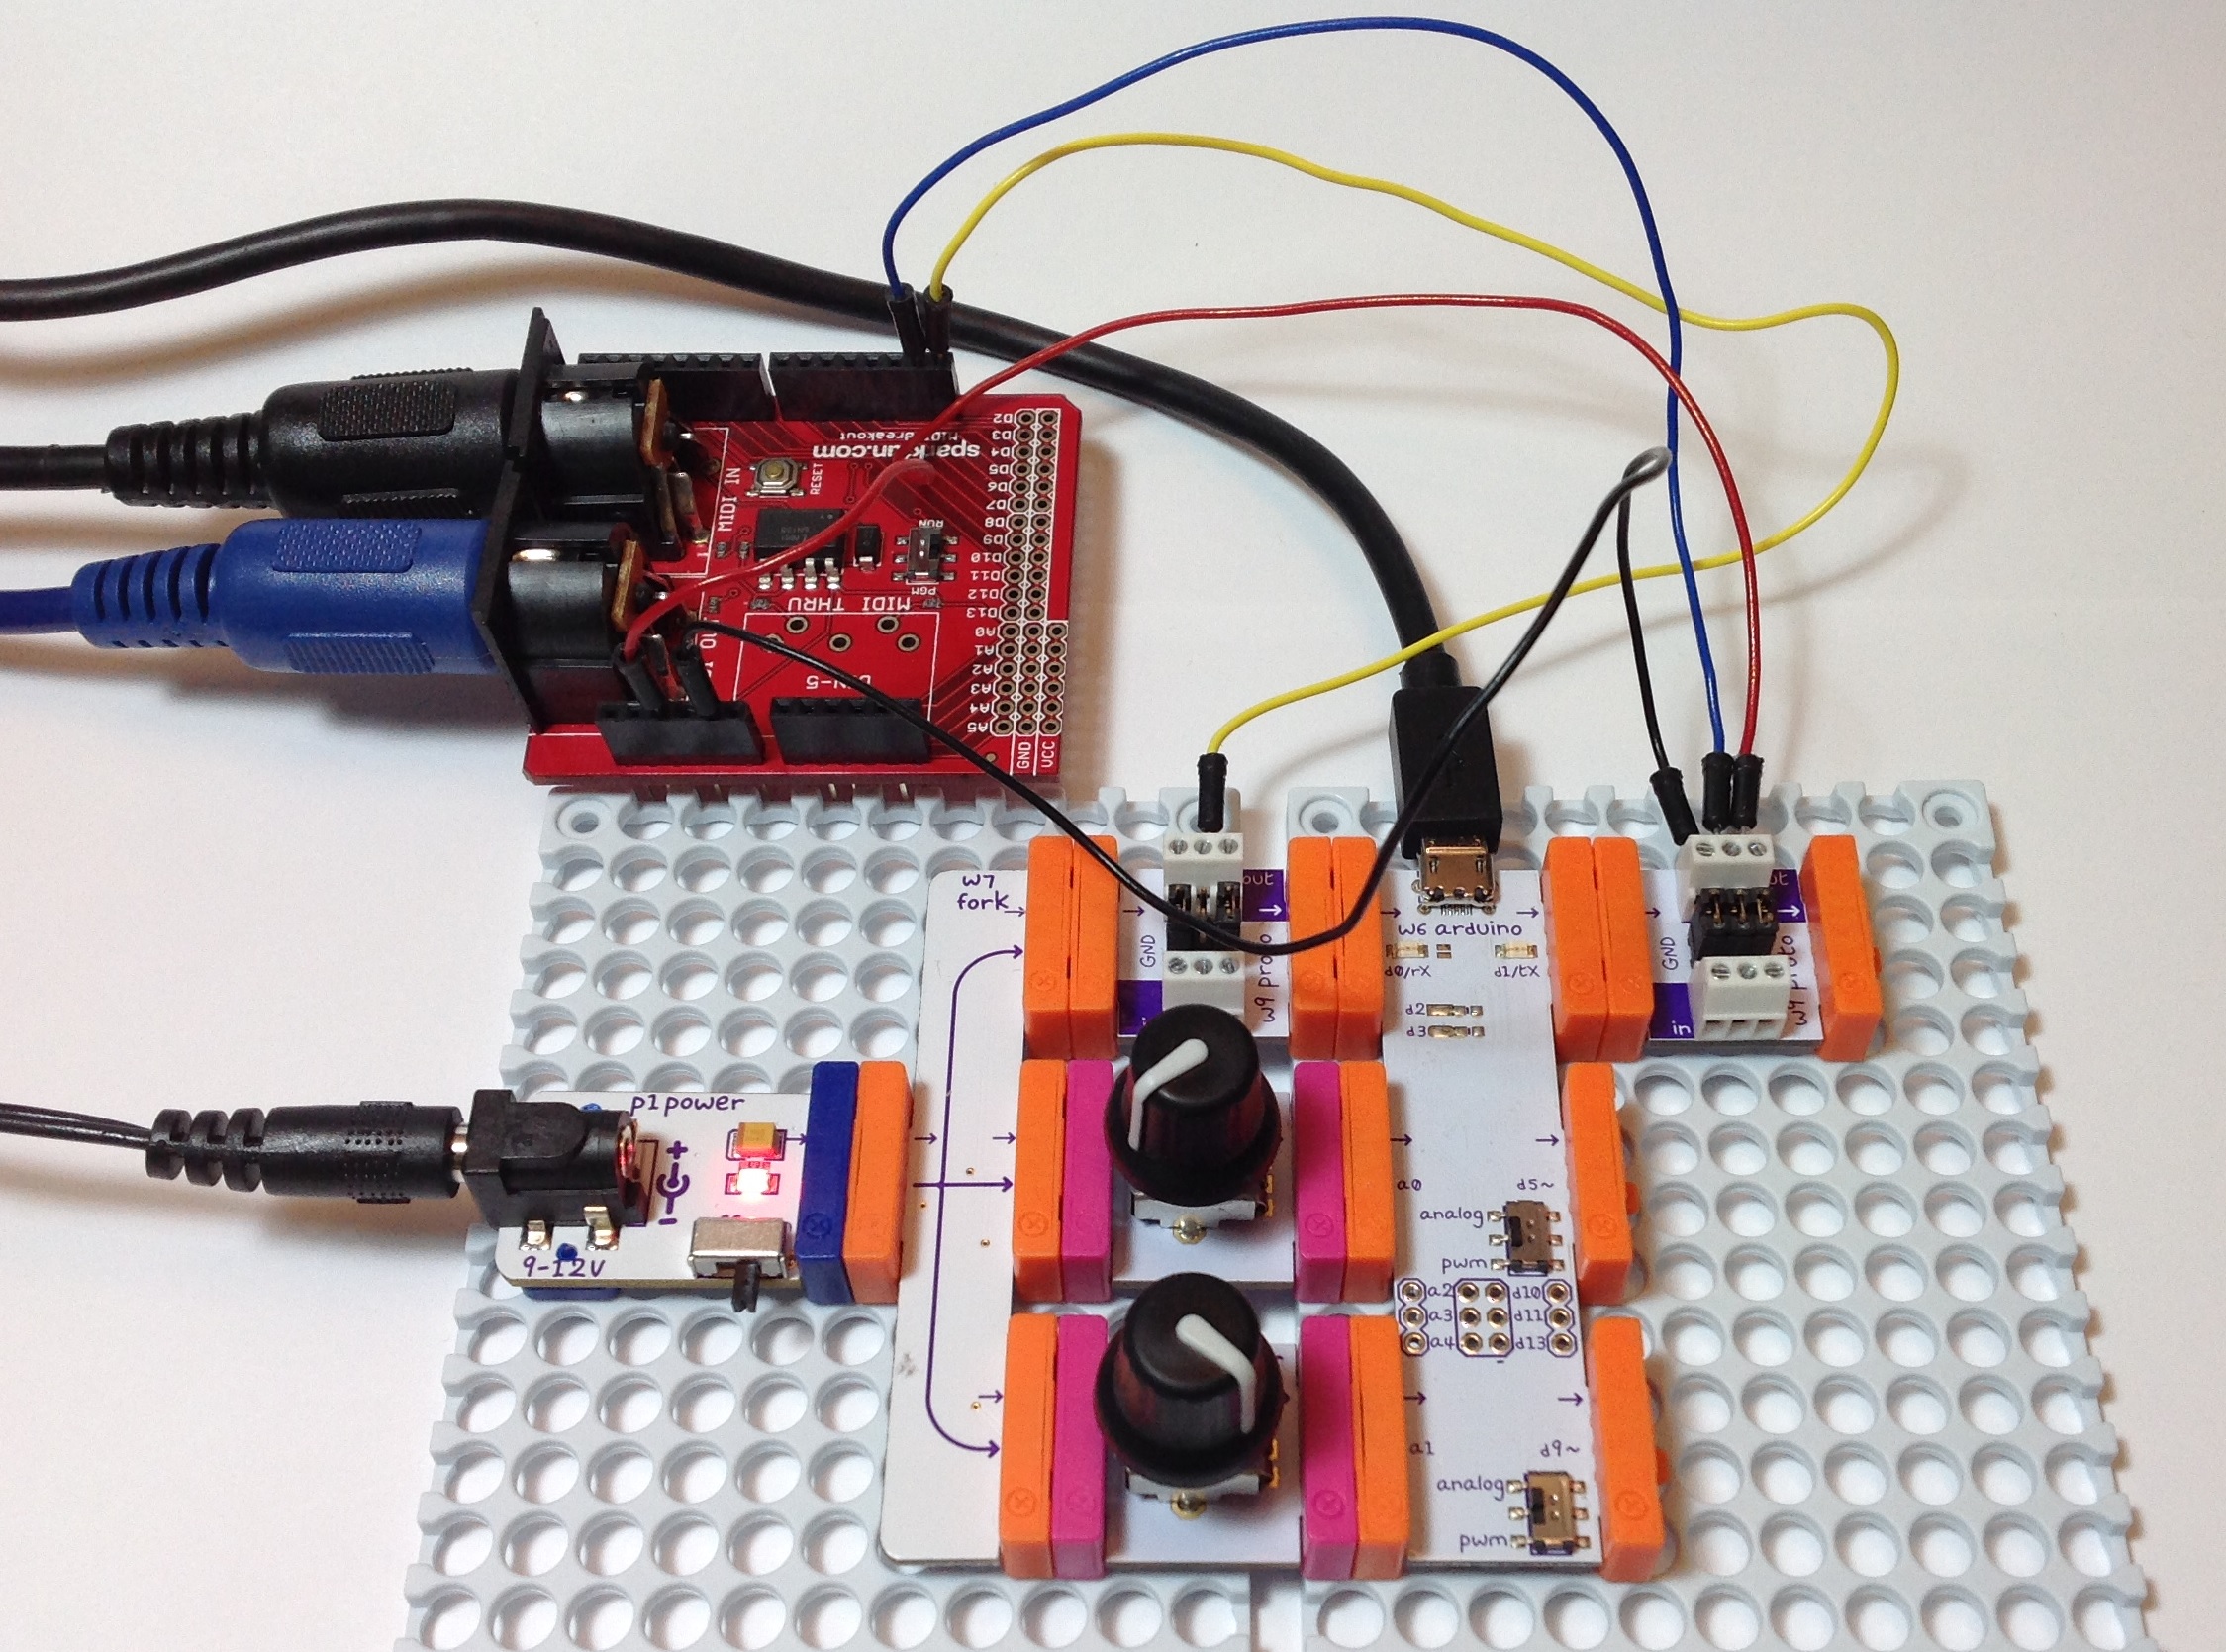
RX is connected to RX, TX to TX, +5 Volts to +5 Volts, and Ground to Ground. The MIDI IN goes to the Arduino’s RX pin and the the Arduino’s TX pin goes to MIDI OUT.
You must configure the jumpers on each proto module. The MIDI OUT side is easy; just leave all three jumpers installed. One the MIDI IN side, remove the center jumper on the proto module. This breaks the connection from the proto board input to the proto board output. You must remove this jumper or the input signal will interfere with the incoming MIDI data.
Once all of the connections are made, you’ll need sketches to test the connections. Please see my article about testing an Arduino MIDI interface. The article describes a simple testing process. The article also has links to a simple MIDI sequencer sketch and the source code for a MIDI IN to MIDI OUT sketch. The MIDI sequencer sketch checks the MIDI OUT side. Once you know the MIDI OUT is good, then the MIDI IN to MIDI OUT sketch checks the MIDI IN side. (The sketch echoes MIDI IN to MIDI OUT.)
That’s it! You should now have your 5-pin MIDI equipment talking with the littleBits Arduino. If this project has bolstered your confidence with hardware — and I hope that it has — then please take a look at the DIY 5-pin MIDI interface project.