A Keyboard Corner member asked what people did for keyboard amplification before PA. Man, that question really kicked off some memories.
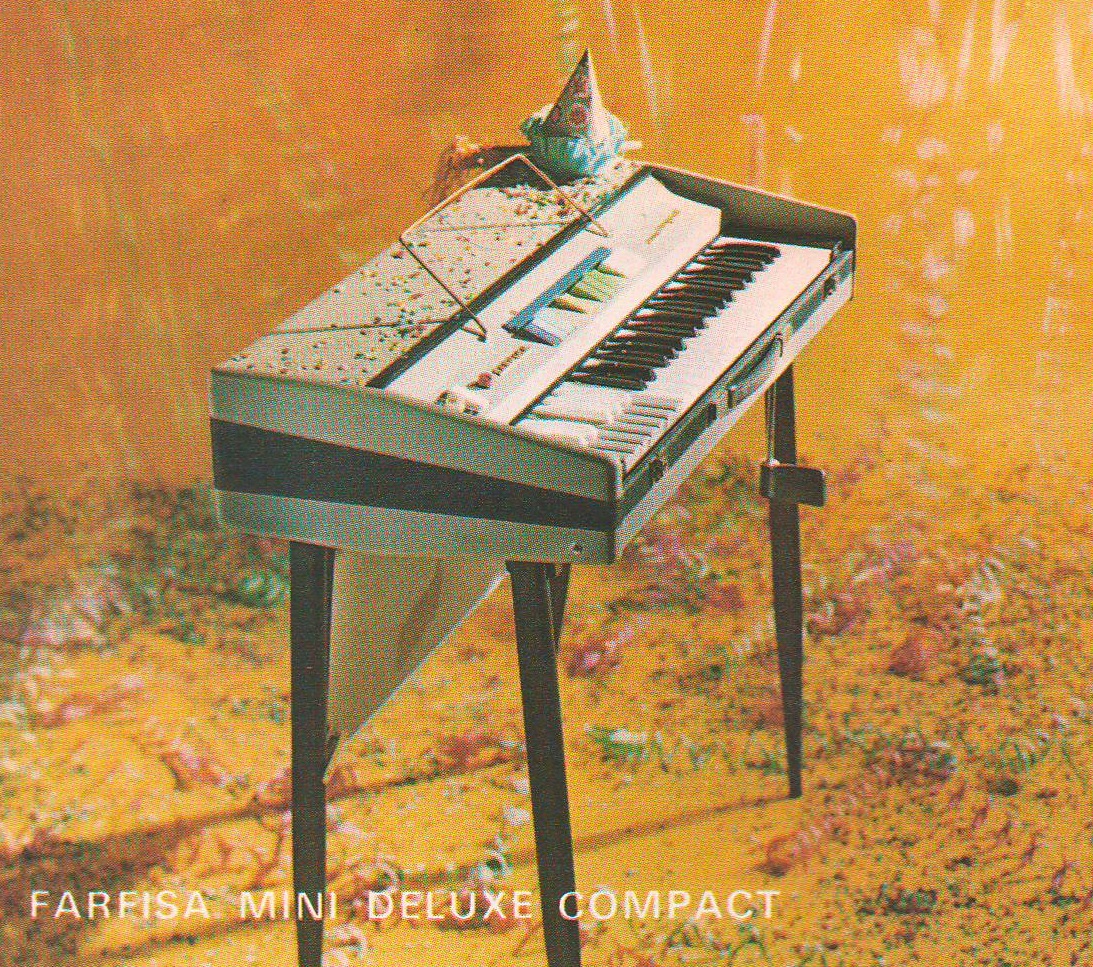
Back in the day (1966), I played a Farfisa Mini Compact Deluxe through an Ampeg SB-12 bass amp. It was all I could afford. Mom and Dad lent me the money and I mopped floors at the local donut shop to pay them back. The shop had a wooden floor that was impregnated with grease. I still can’t face donuts to this day. 🙂
The Portaflex was pretty cool with its flip top. The amp was mounted to a covered board which acted as a base for the head and, when flipped over, it became the cabinet cover. The clamps held the base/cover board in place and did double-duty as the speaker connections to the cabinet.
Ampeg SB-12 bass amplifier
The SB-12 had a 12″ Jensen speaker powered by a 25 Watt tube amp. It weighed 47 pounds — the first of a long line of heavy schleps.
Being the 1960s, of course, that wasn’t enough. Since I started playing with electronics and DIY at an early age, I tried my hand at an extension cabinet. I somehow came into a 15″ JBL speaker with a small tear in the cone. Impedance be damned, I just hooked it up in parallel with the Jensen via the clamps. Before building a cabinet, I would carry the JBL around in a suitcase which doubled as a “cabinet.” (!) The tear in the cone lent more bad-itude. [Why fizzy digital distortion doesn’t cut the mustard.]
In the R&B band, the guitars and vocals went through matching Ampeg guitar amps (probably Gemini’s). Only the top local bands could really afford PA for vocals (typically Fenders). Nobody put instruments through PA. The bass player had a Guild ThunderBass amp with that funky head. The bass player was quite good and laid down decent grooves. Can’t remember too much about the psychedelic band…
My failed experiments at extension and PA speaker cabs wound up as end-of-gig props. When we saw The Who trash their gear, we thought “What the heck!” I’d pull one of the legs off of the Farf and ram it through one of the prop cabinets.
My dream rig would have been a Vox Continental through a Fender Twin Reverb or Fender Super Reverb. I copped the Fender tilt-back idea and built a tilt-back stand for the SB-12. That got the speaker pointing up toward my ears.
Both the Connie and the Fenders were out of my financial reach. It took me three years to pay back my folks. By then, I had to sell the whole rig in order to make the college tuition nut. Given the rigors of college math, physics and computer science, it was the end of playing for quite a while. I can’t believe how much a vintage SB-12 fetches on the market these days!
The Farfisa Mini Compact Deluxe left me with no delusions about 1960s electronics. I tried tuning the F# oscillator and bunged the tuning coil. That was an unnecessary repair expense. That’s why I’m happy as a clam to play the Yamaha Reface YC today. The YC does a good job nailing the Farfisa and Vox.
A few other memories stick out like playing music fairs on stage/demo gear with the psychedelic band. One stage was incredibly small and I had a horn driver literally right in my ear. We played Doors, Steppenwolf, Vanilla Fudge, etc. at phenomenally loud volume, attracting every biker within earshot. They loved us. I think I still suffer hearing loss from those jobs.
Before signing off, I want to plug “Classic Keys: Keyboard Sounds That Launched Rock Music” by Alan Lenhoff and David Robertson. I received a copy yesterday and gave it a quick browse. The photography is excellent and the example gear is in tip-top shape. The book is long on history — less on playing technique and artistis, so some may be disappointed. Discount and used copies are coming onto the market and you may be able to save a few bucks if you can’t pony up the full $60USD. Recommended.
The Sonogenic lacks three critical features that one finds in a typical desktop synth:
Although the Sonogenic has 28 great voices and two drum kits built-in, it lacks many important instruments like organ, double reeds, tuned percussion and soft synth pads.
Internal voices cannot be edited, e.g., attack, filter cutoff and so forth cannot be adjusted.
The chorus and reverb types are preselected and cannot be changed.
Edits and changes cannot be stored into and recalled from user memory slots.
This is the ideal situation for a tablet-based app.
MIDI Designer is an iPad-based tool which supports creation and use of MIDI voice editors and controllers called “layouts.” Users have built and shared layouts for many popular synths. Now, I’m pleased to add the SHS-500 Sonogenic layout. With this layout, you can play the General MIDI (GM) voices, change reverb and chorus types, edit General MIDI (GM) voices and save all of your work in MIDI Designer presets. If you turn Sonogenic LOCAL sound generation on, you can layer an internal voice with a GM voice.
This post describes the Sonogenic layout. I recommend reading my post about MIDI Designer to Sonogenic communications (MIDI flow) first. It will help you to understand the relationship between the SHS-500 and the MIDI Designer Sonogenic layout. The write-up may even inspire a new way of using MIDI Designer with Sonogenic.
One thing that’s nice about MIDI Designer and layouts — you can customize them. So, if you want to modify my layout, don’t hesitate. First, though, you should read my post describing Sonogenic’s MIDI implementation. Then you will know more about the MIDI messages behind the layout’s controls.
Click this link to download my Sonogenic layout for MIDI Designer. Use iTunes file sharing to install the layout in MIDI Designer. I plan to upload the Sonogenic layout to the MIDI Designer web site.
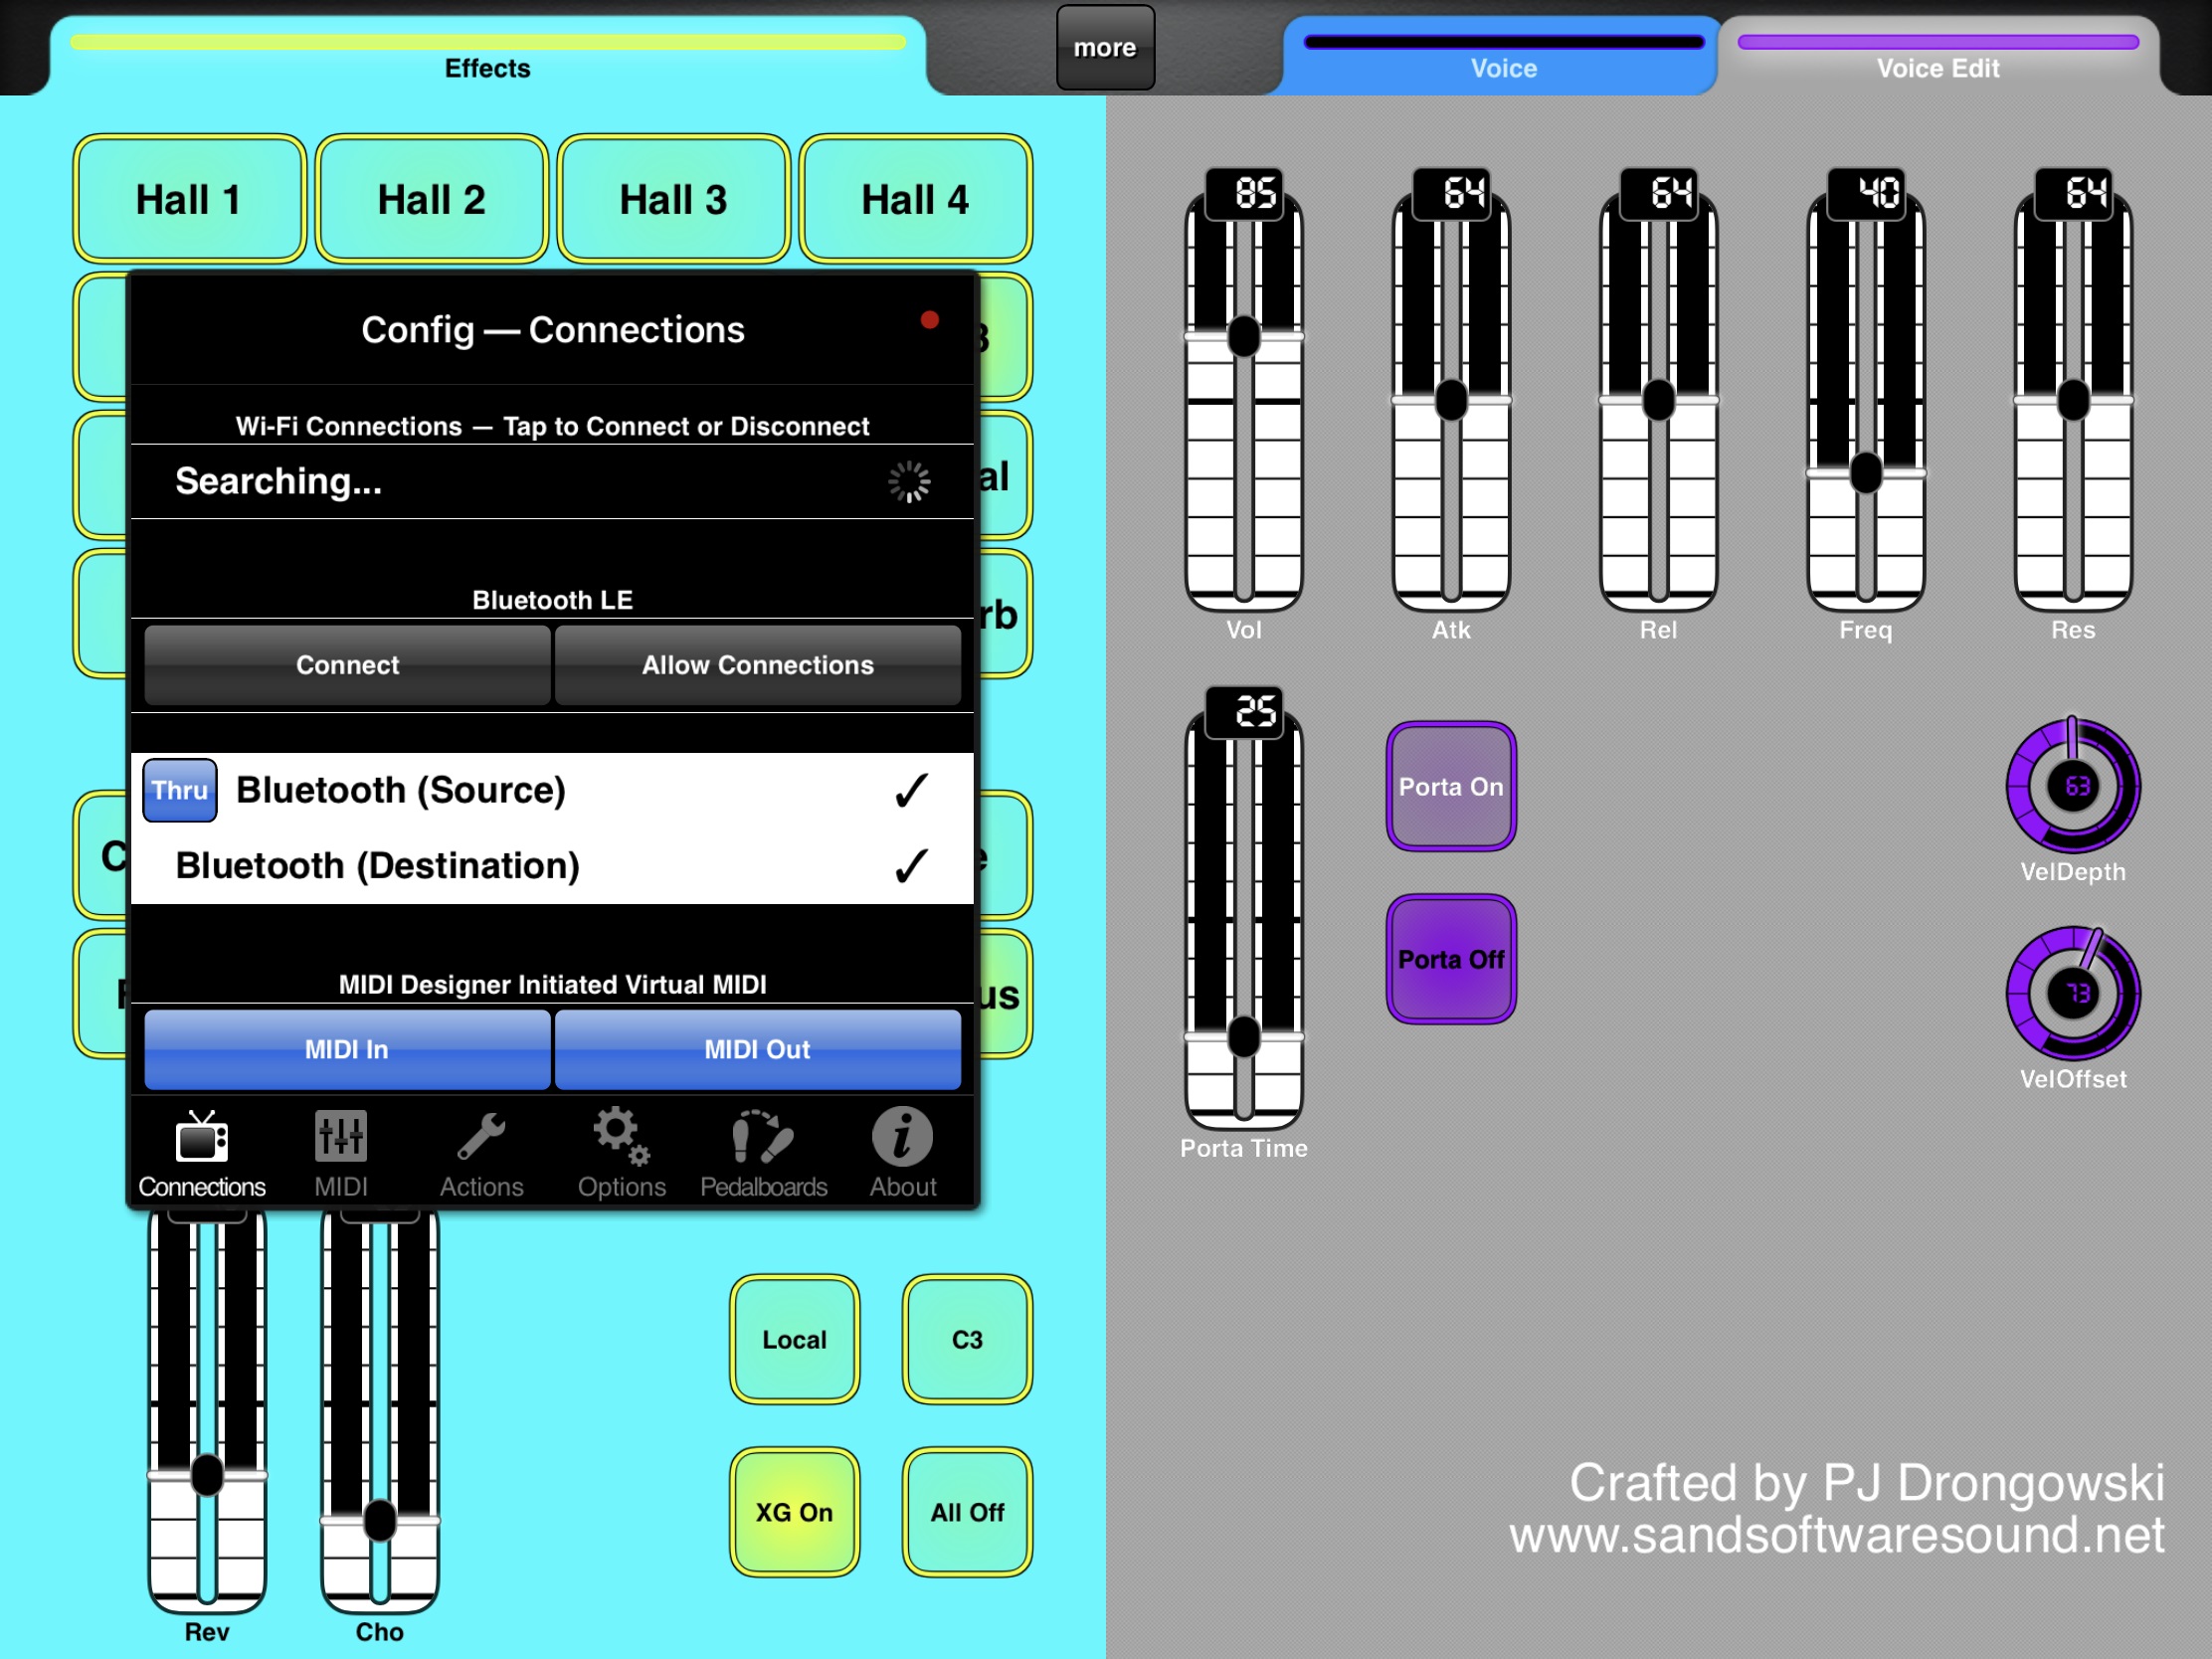
Connection
Although you could connect by USB or 5-pin MIDI, the Sonogenic, MIDI Designer and Bluetooth MIDI are made for each other.
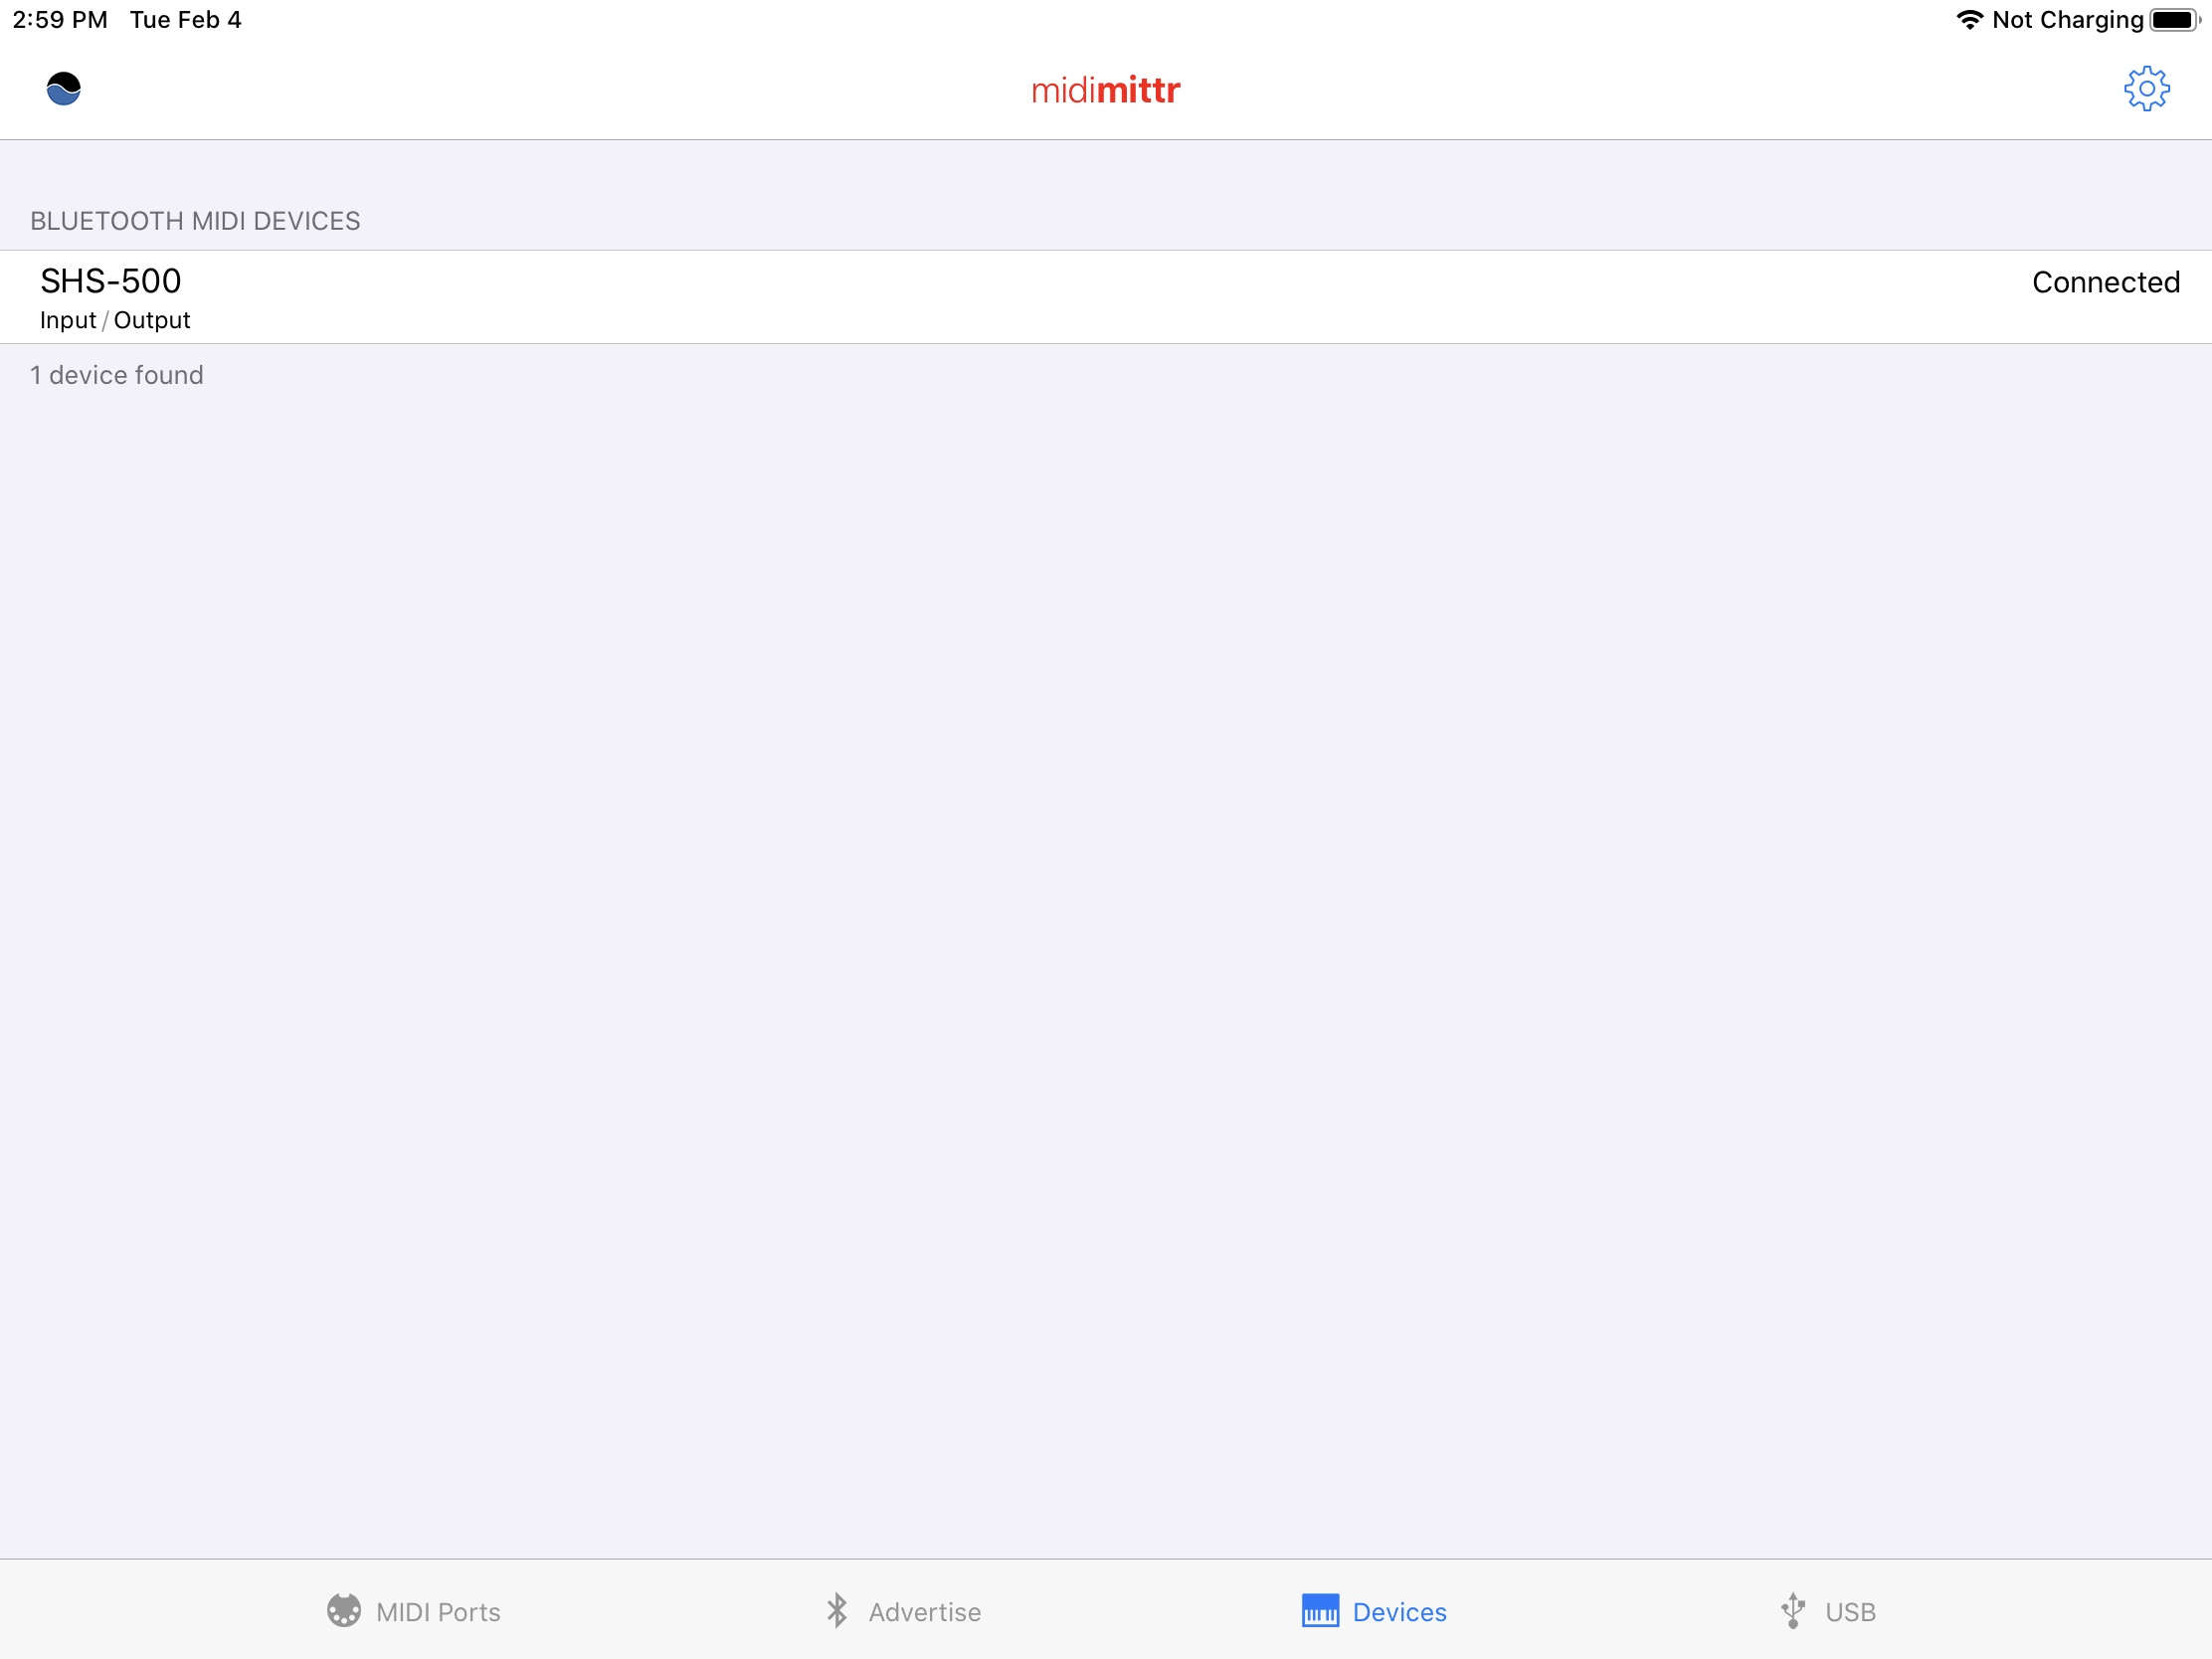
midimittr Bluetooth connection to Sonogenic
First, launch the free midimittr app which acts as a bridge between Sonogenic, Bluetooth MIDI and MIDI Designer. midimitter lets MIDI Designer echo Sonogenic’s MIDI note on/off, modulation and pitch bend messages back to the Sonogenic. You should turn Sonogenic LOCAL off unless you intend to layer a Sonogenic voice with a GM voice.
MIDI Designer connection
Next, launch MIDI Designer and make connections to midimittr as shown in the screenshot above. Then load the Sonogenic layout into MIDI Designer. You should be ready to go at this point.
Voices and effects
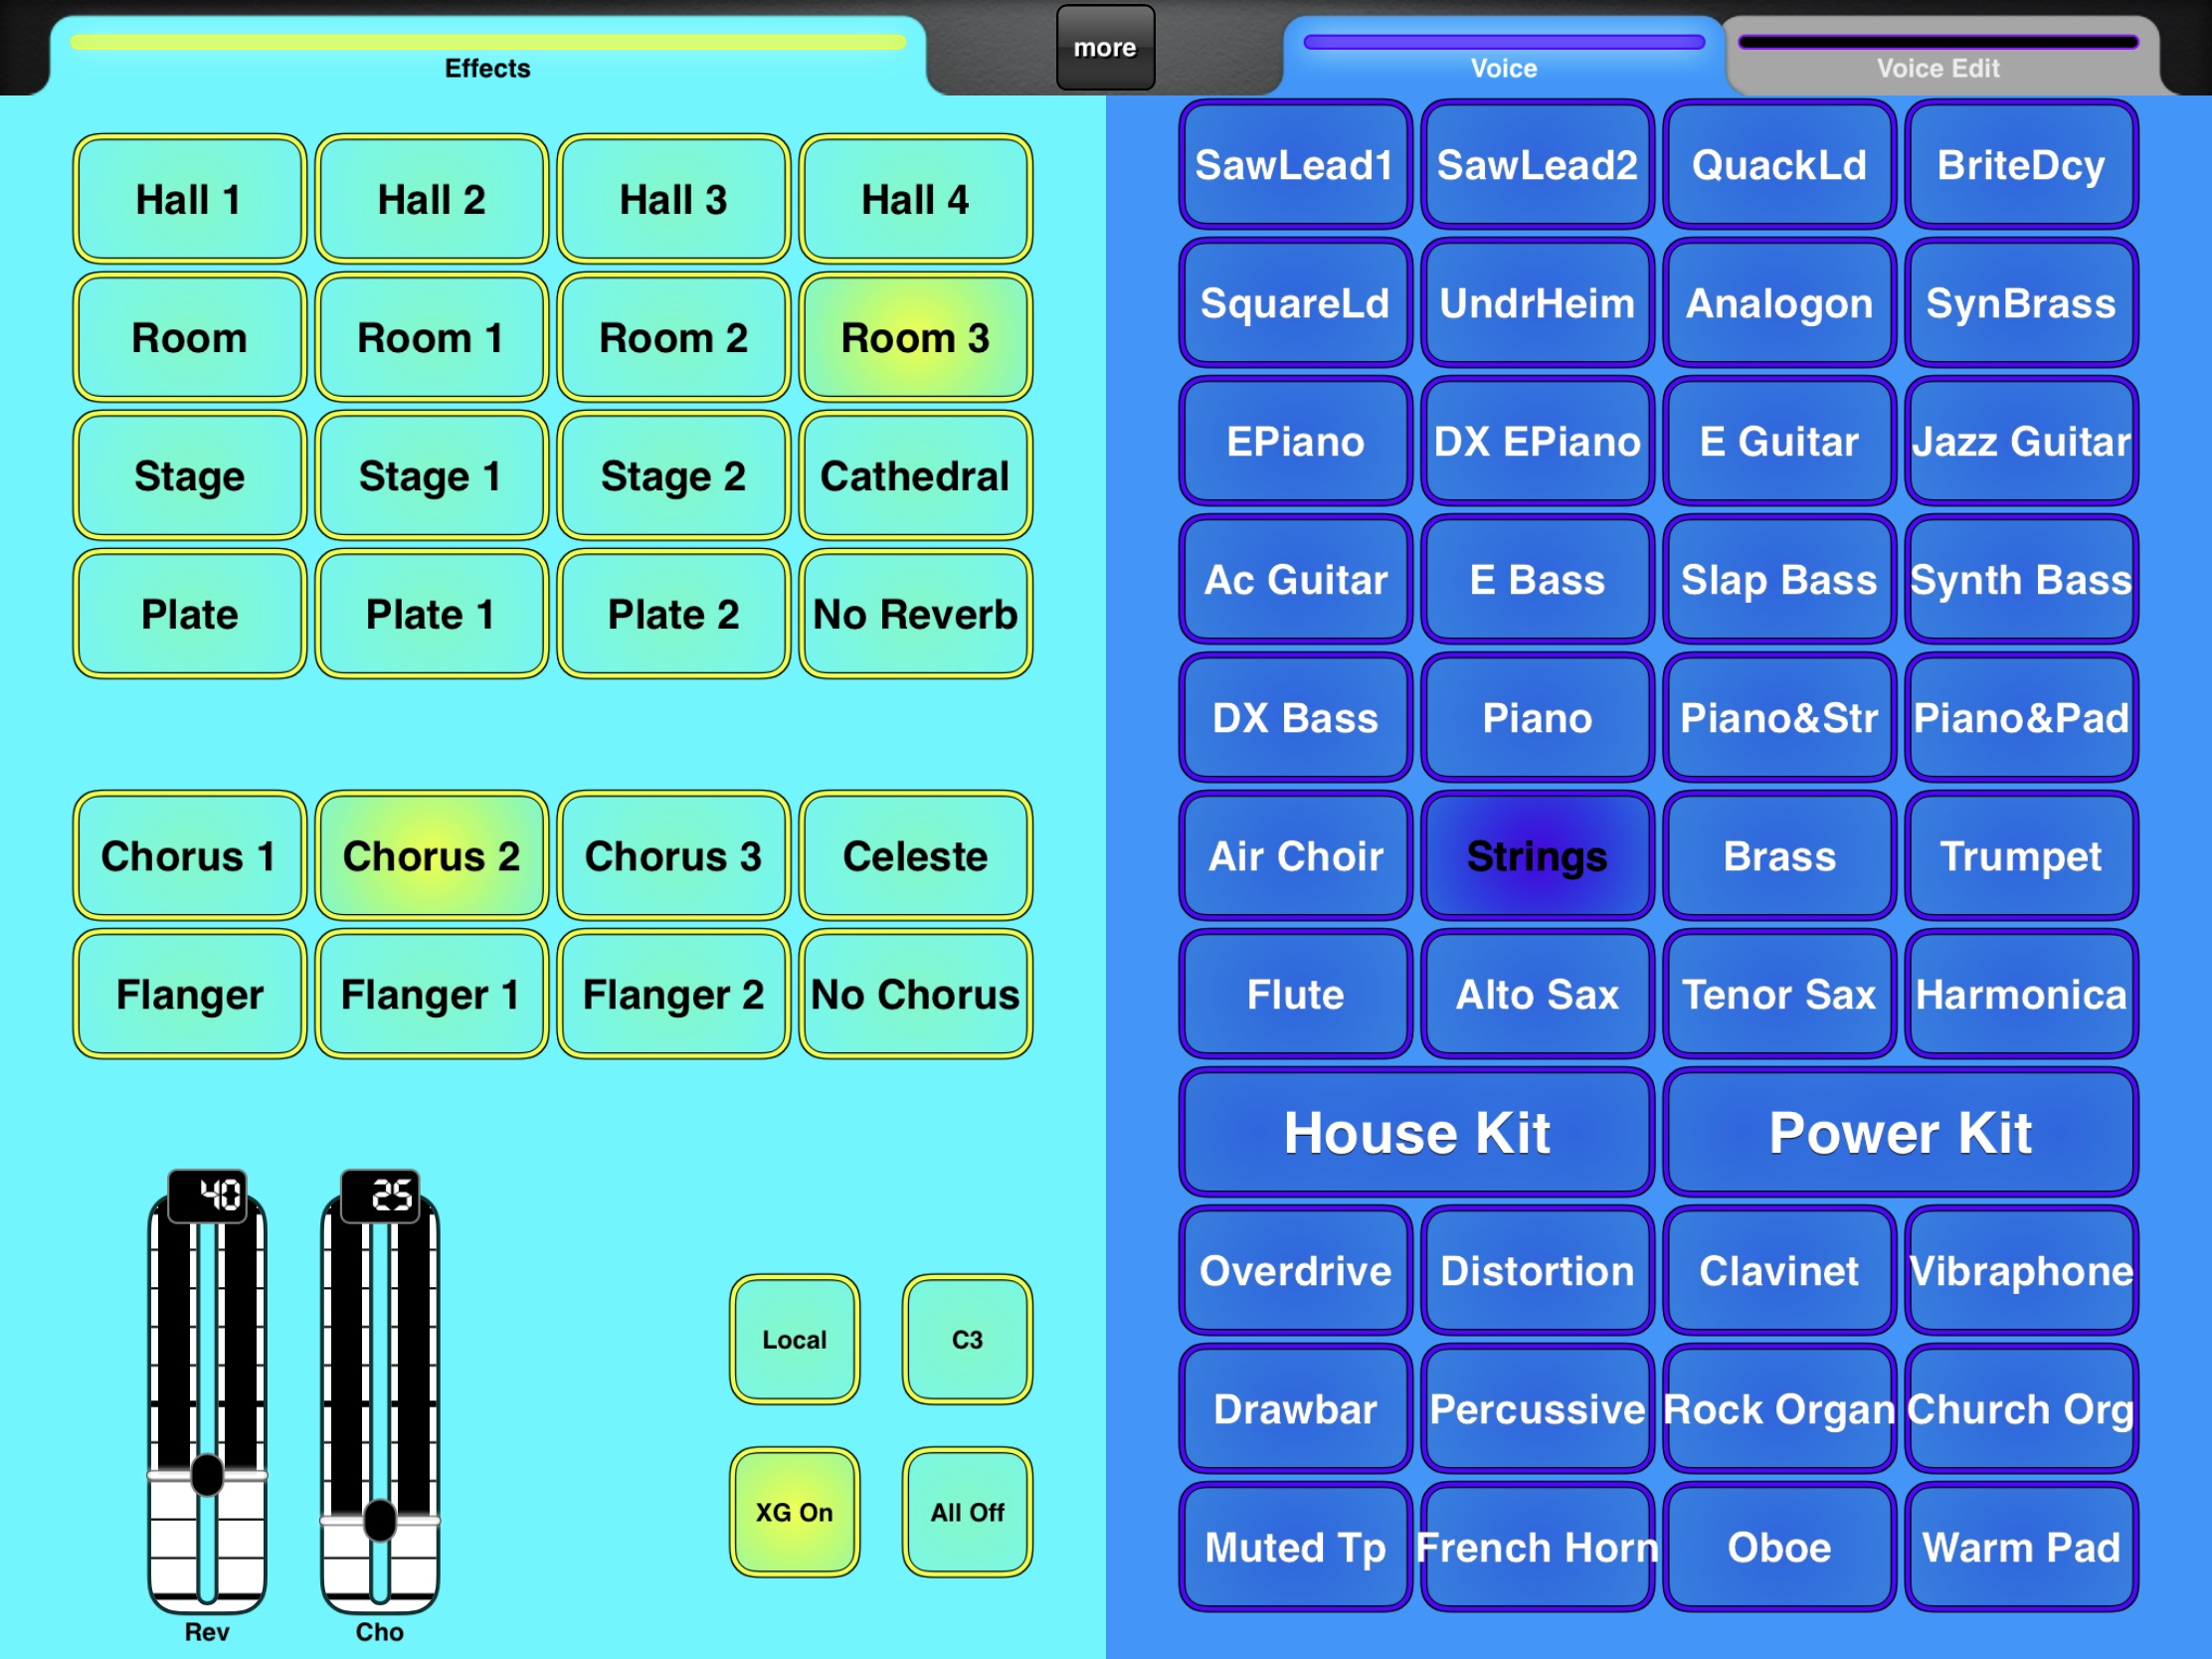
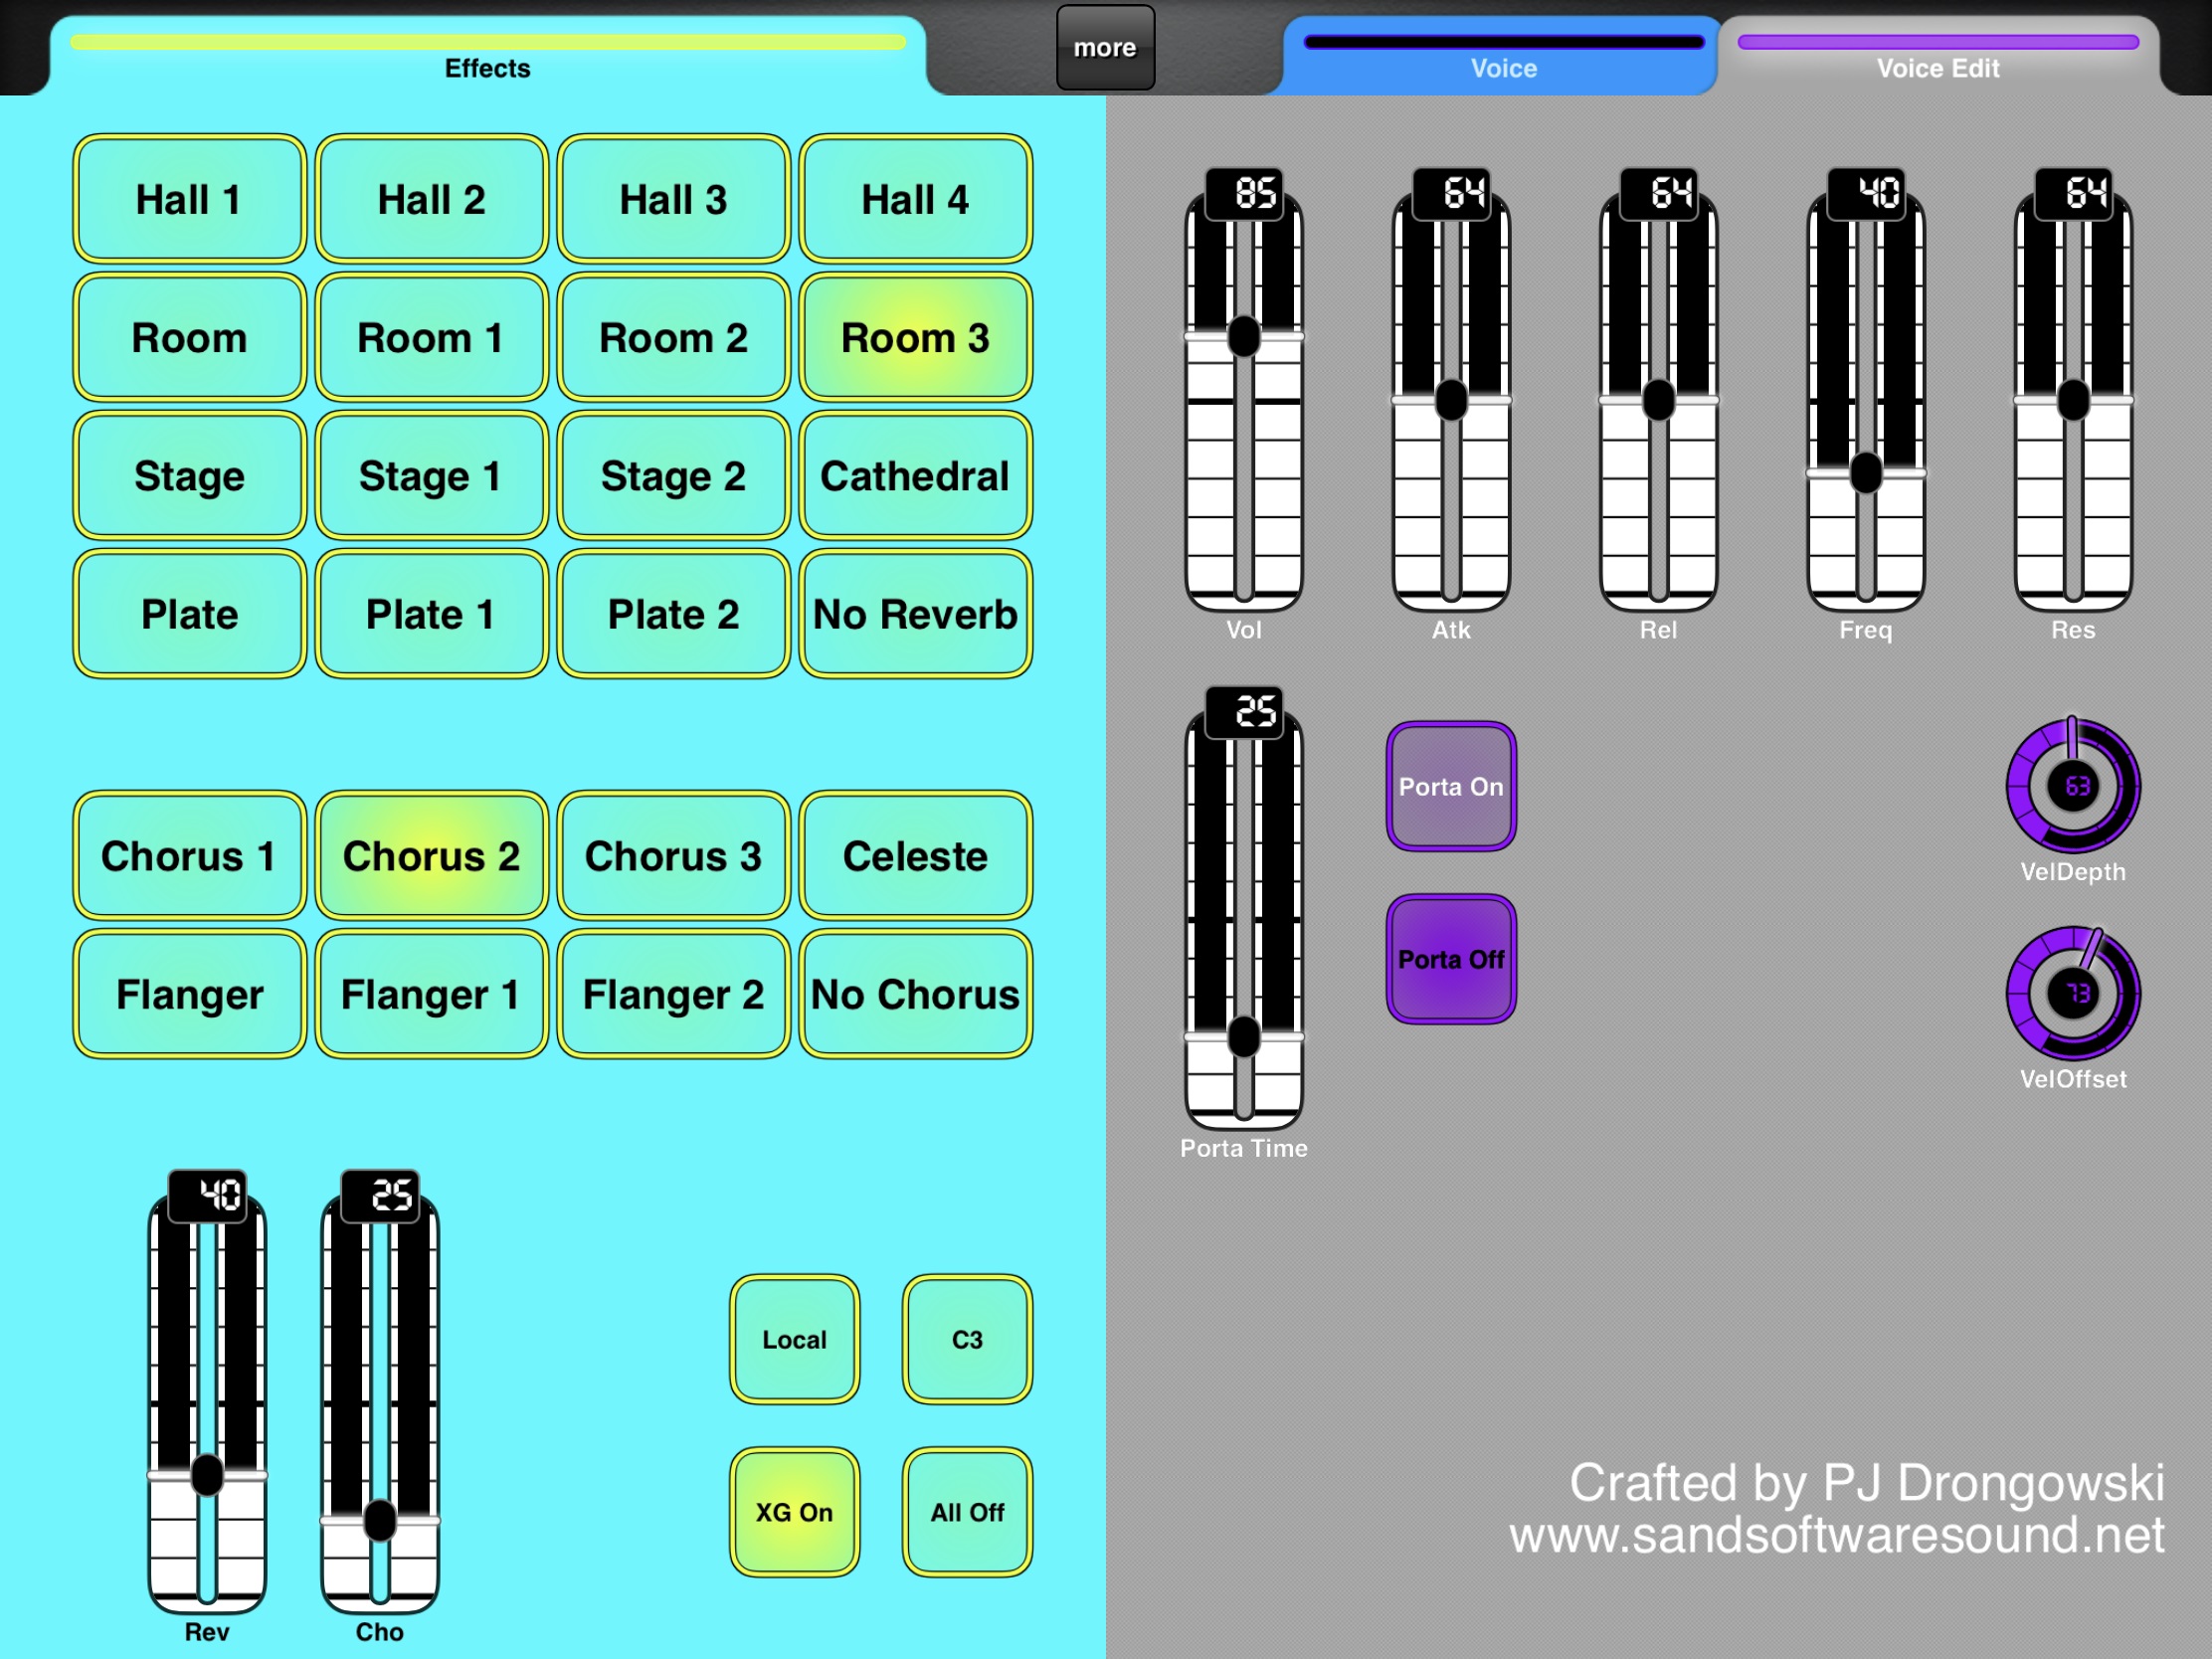
The Sonogenic layout is separated into three tabs: Effects, Voice and Voice Edit. (See the screenshot below.) Effect-related controls are on the left-hand side of the screen and voice-related controls (tabbed pages) are on the right-hand side.
Effect and voice selection
Selecting a GM voice
The Sonogenic has a strict division between its keyboard sound and the General MIDI sounds over MIDI. You can think of the keyboard sound and GM sounds as two distinct tone generators, each with their own controls. The keyboard sound is selected and controlled through the Sonogenic front panel. The GM sound(s) is selected and controlled by the MIDI Designer layout.
The Voice page has an array of voice buttons. The 28 buttons at the top of the page select one of the preset “panel” voices. The two large buttons in the middle select one of the two preset panel drum kits. The buttons at the bottom of the page select a voice from the General MIDI sound set.
Please note: if you select a panel voice on the Voice page, you are changing the current General MIDI sound. The Sonogenic keyboard sound remains the same. The separation may seem artifical, but it lets us layer two sounds: the keyboard sound and a General MIDI sound.
The Sonogenic panel voices are generally better-sounding than the equivalent GM voice. The layout provides direct access to the panel voices while providing 12 buttons which can be customized for your own favorite GM voices. Of course, you’ll need to learn how to edit the GM buttons…
Effects
The large buttons on the Effects page choose the current reverb and chorus type. Like the voice buttons, the reverb and chorus effect type buttons are “radio buttons,” i.e., you can select only one effect type at a time within the reverb group or chorus group.
The reverb (Rev) and chorus (Cho) sliders adjust the reverb and chorus level for the General MIDI sound. [By the way, the GM voice and its effect levels are on MIDI channel 1.] Change the amount of reverb or chorus effect here. The sliders do not affect the keyboard sound — only the GM sound.
Changing the chorus and reverb type also affects the keyboard sound because the chorus and reverb units are shared by the keyboard sound and the GM tone generator. Reverb and chorus level only affect the GM sound [MIDI channel 1].
The four small buttons are utility buttons:
XG On: Sends an XG System reset to the GM tone generator. This resets the voice (acoustic piano) and all internal MIDI controller values.
Local: Turns Sonogenic LOCAL CONTROL on and off.
All Off: Turns off all notes which may be sounding — a panic button.
C3: Plays the MIDI note C3. Good for testing edits and changes.
Use the XG On button sparingly. The GM tone generator and layout do not automatically re-synchronize with each other.
Voice editing
The Voice Edit page is where you adjust basic voice characteristics like volume (Vol), attack time (Atk), release time (Rel), filter frequency (Freq) and filter resonance (Res). You can spruce things up with these controls. The attack, release, frequency and resonance controls behave like “quick edit” controls, that is, they are offsets from the preset voice parameter values. The middle position (64) specifies a zero offset leaving the original value unchanged. Higher values add an offset and lower values subtract an offset. So, if you want to increase attack time, move the attack slider up. If you want to shorten attack time, move the attack slider down.
Effects and Voice Edit pages
Portamento adds a glide between notes. Press “Porta On” to turn portamento on and press “Porta Off” to turn portamento off. The portamento time slider (Porta Time) sets the glide time.
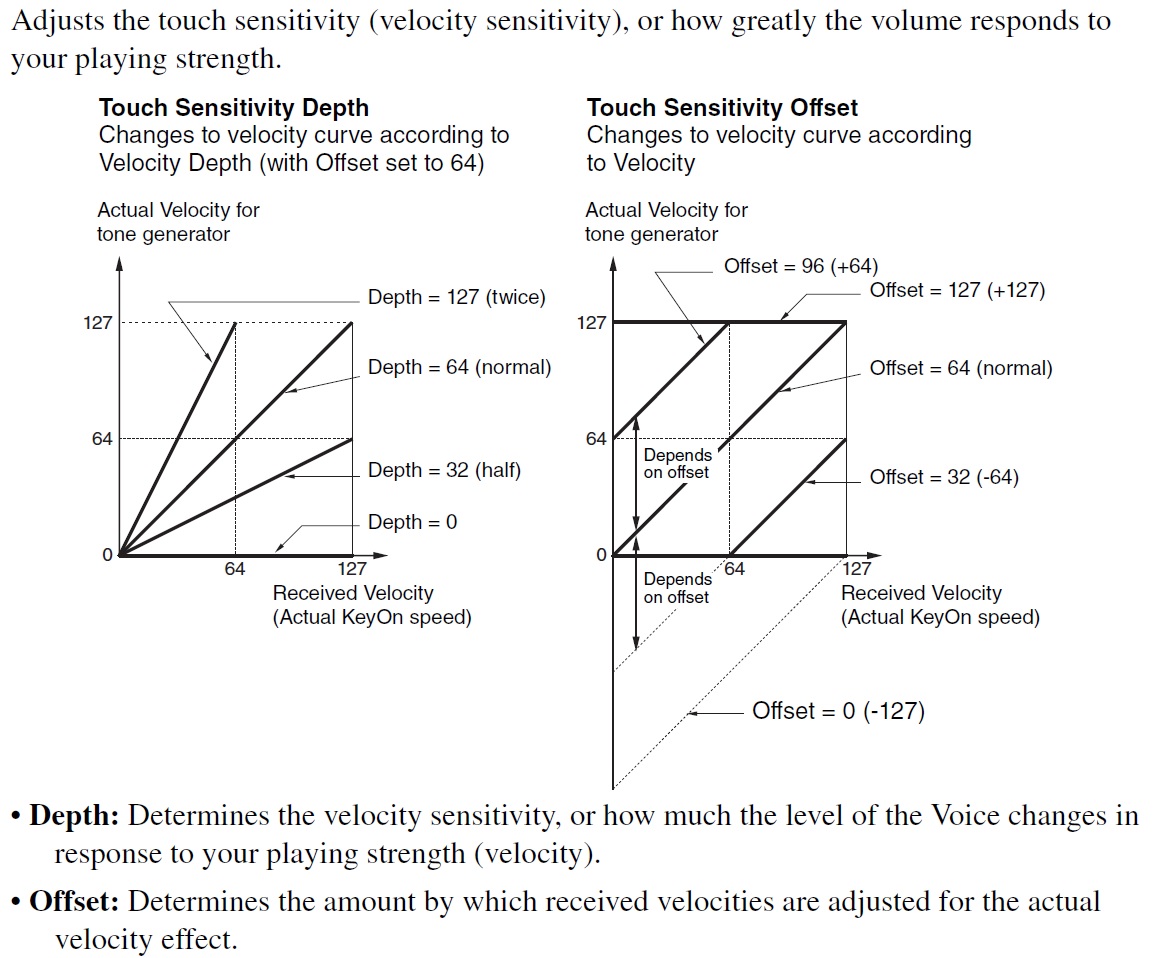
The velocity sensitivity knobs change how the voice responds to MIDI note velocity (touch). The two voice parameters are:
Velocity Sense Depth (VelDepth)
Velocity Sense Offset (VelOffset)
Please see Yamaha’s explanation in the figure below.
Velocity Sense Depth and Offset
Organ voices, in particular, should not respond to velocity, i.e., a note is either on or off. To achieve this kind of touch response, set velocity sense depth to zero and set velocity sense offset to a value in the range 110 to 127.
The keyboard voices have a default volume which is louder than the General MIDI voices. You may need to set the volume slider (Vol) above 100 in order to get a better balance (mix) between panel and GM voices.
MIDI Designer presets
MIDI Designer itself implements preset storage and recall. A MIDI Designer preset is a snapshot of all the current values in a layout. Here’s a typical usage scenario:
Select a voice.
Select and adjust chorus and reverb effects.
Tweak the voice (e.g., change filter cutoff, etc.)
Save the finished voice as a MIDI Designer preset.
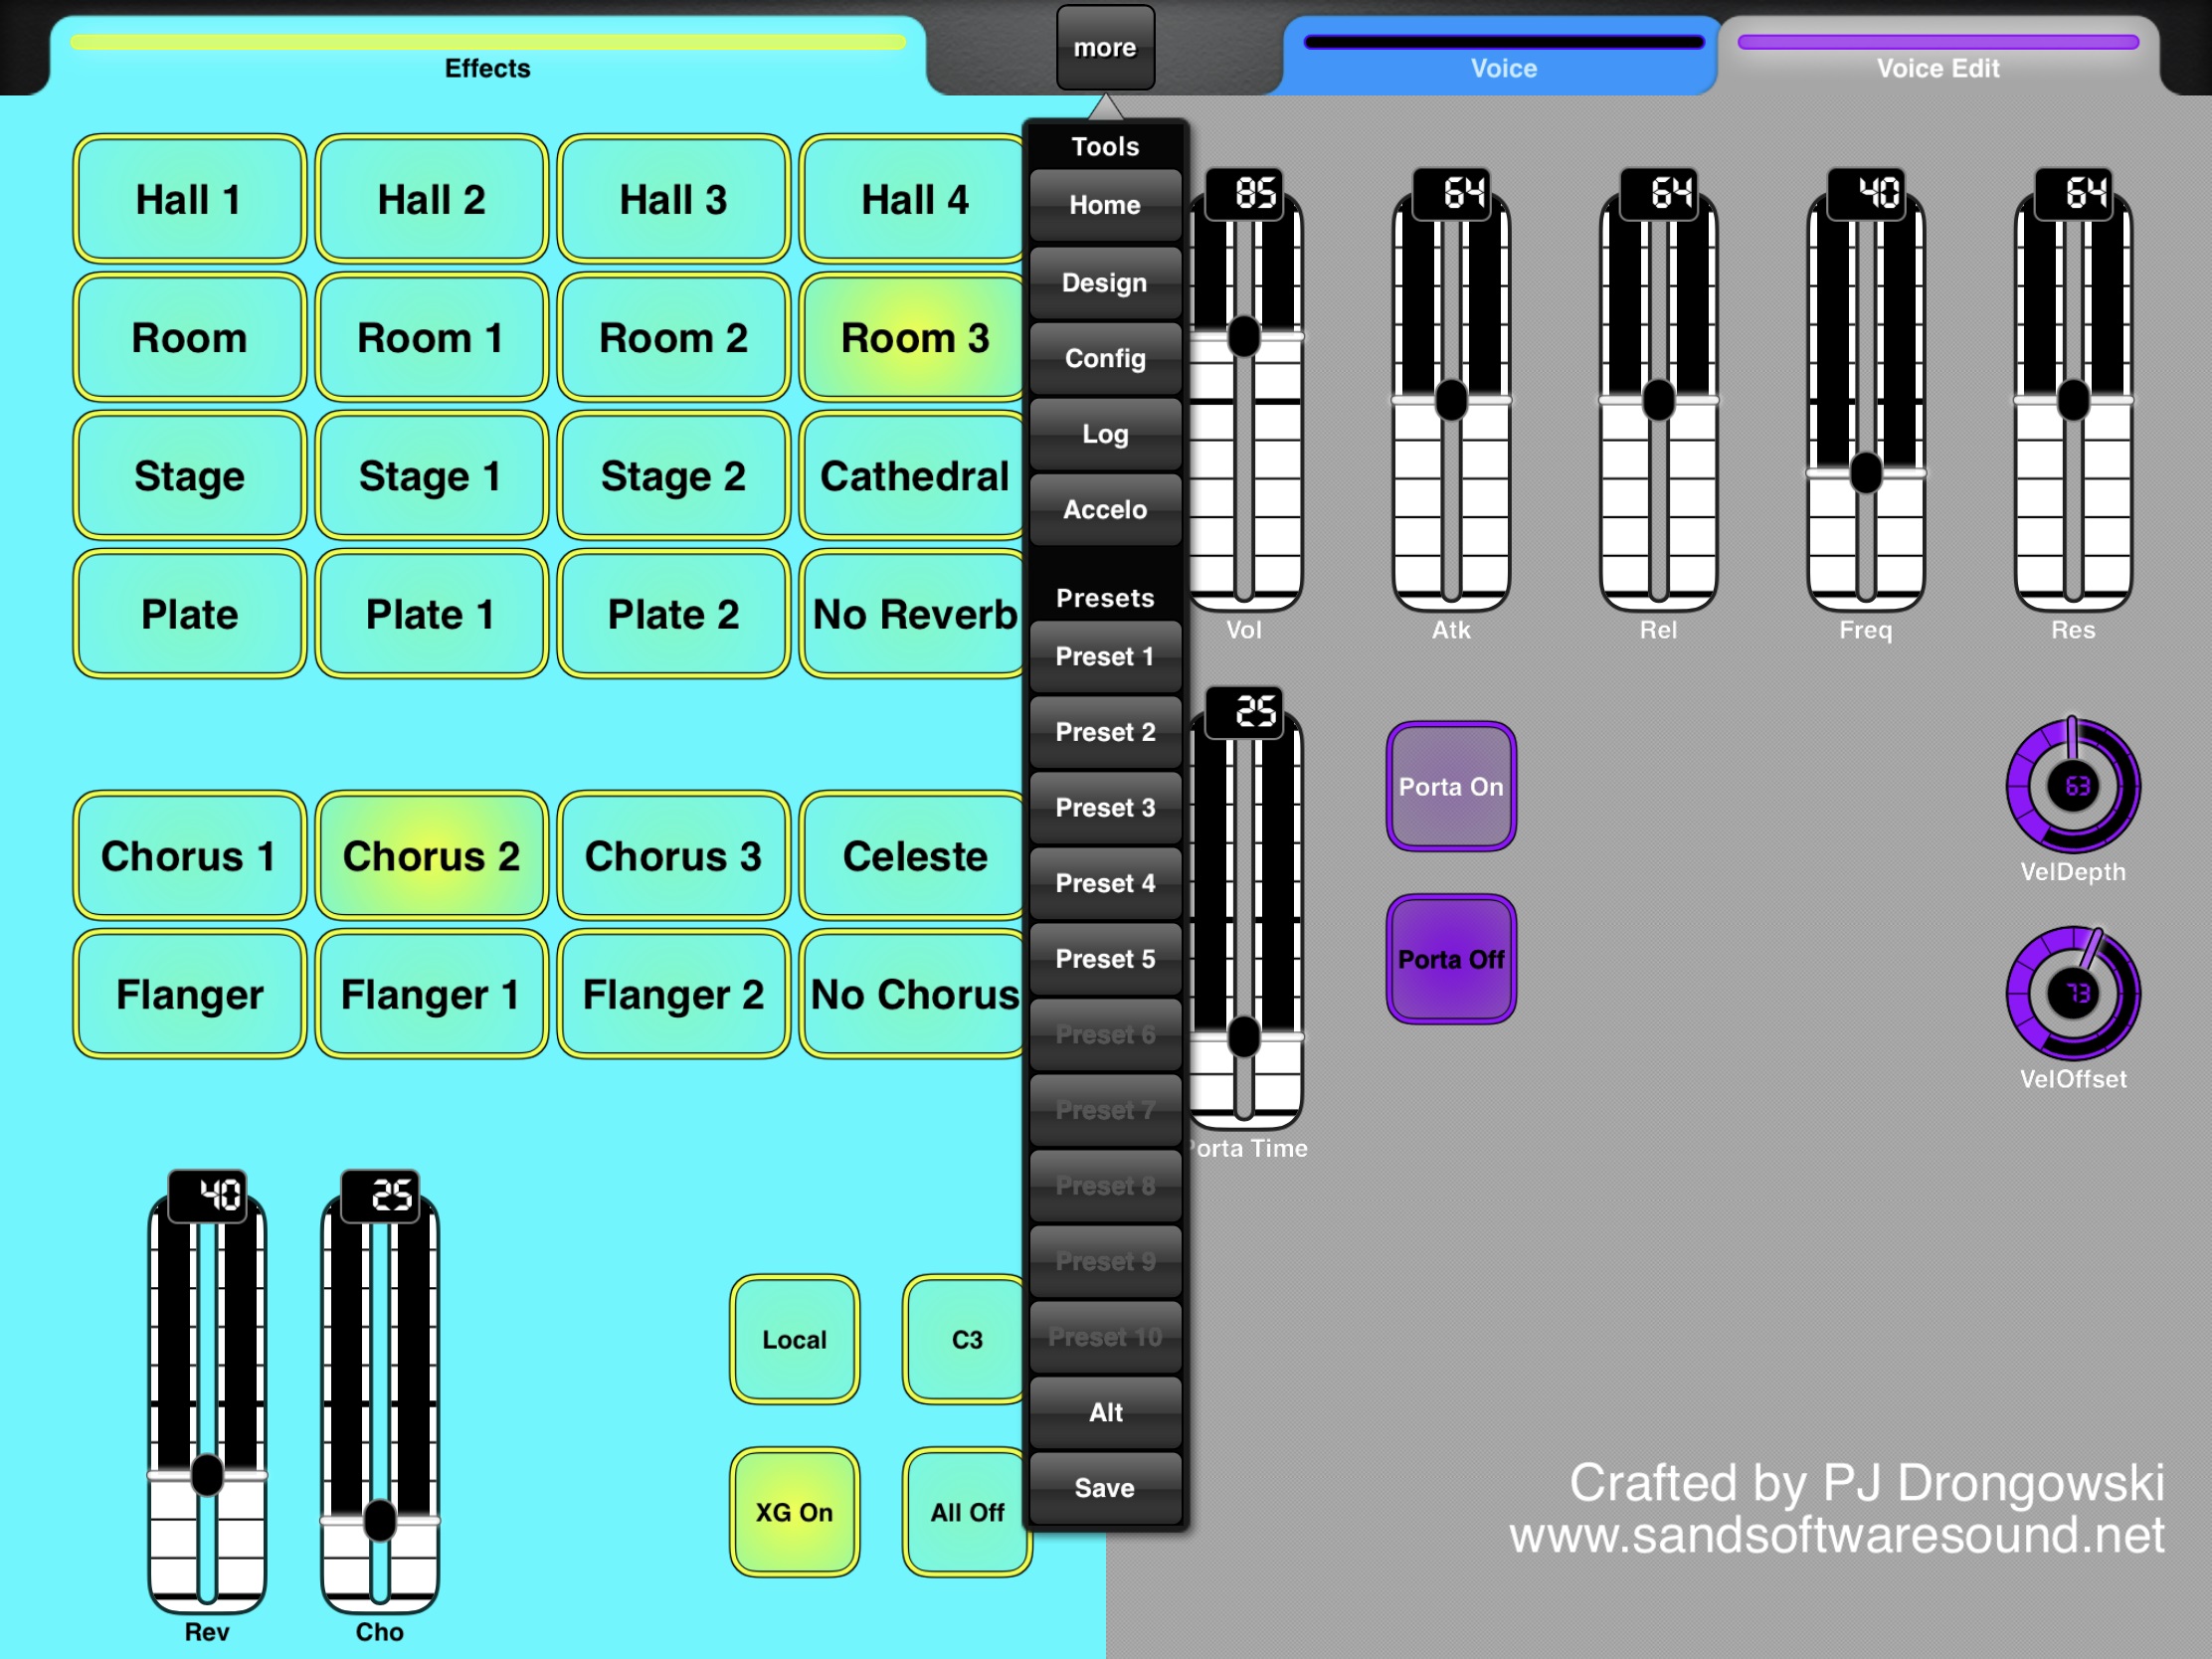
It’s easy to save a preset. Press the more button, press the “Save” button at the bottom of the drop-down menu, and then press one of the ten preset buttons. To recall a preset, simply press more followed by the desired preset button.
MIDI Designer has two groups of presets: regular and alternative. There are ten preset slots in each group, so you get twenty presets total. The Alt button selects the alternative group.
Potential issue: Portamento sometimes stays on (or off) after selecting a preset that changes portamento state. [I’m still investigating.]
Limitations
I experimented with several other controls of the kind normally found on a desktop synth. Unfortunately, the SHS-500 MIDI implementation is rather limited. Here are some known shortcomings:
Transpose and note shift
DSP effect control
Mono and poly mode selection
Should I make any progress with these deficiencies, I will issue an update.
If you have watched the Korg video assembly instructions, you know that there isn’t much to the actual assembly process. The printed circuit boards (PCBs) are fully populated, tested and ready to go. All you need to do is to break the boards down, to stick on and connect the ribbon controller, and to insert and tighten a few screws.
Assembled Korg NTS-1 Digital Synthesizer Kit
Overall, the assembly process took about 40 minutes. I kept an iPad with the assembly instructions nearby, pausing the video at the end of each major step. Assembly was easy and if a small modest amount of labor keeps the kit cost low, I’m all for it!
Here’s a few short comments.
Breaking the boards apart was the step that I feared most. One needs to be firm when snapping boards apart at the seems, but no major issues with flex. Be bold!
Those silver screws are tiny!
Inserting the ribbon controller cable was the biggest issue. The locking tabs were closed and I didn’t suss the direction in which they slide. (They slide in the same direction as the cable, not perpendicular to it.) Thus, I used needle nose pliers to insert the ribbon cable, using more force than necessary.
Keep the tiny screwdriver. You may need to fix your eyeglasses some day. 🙂
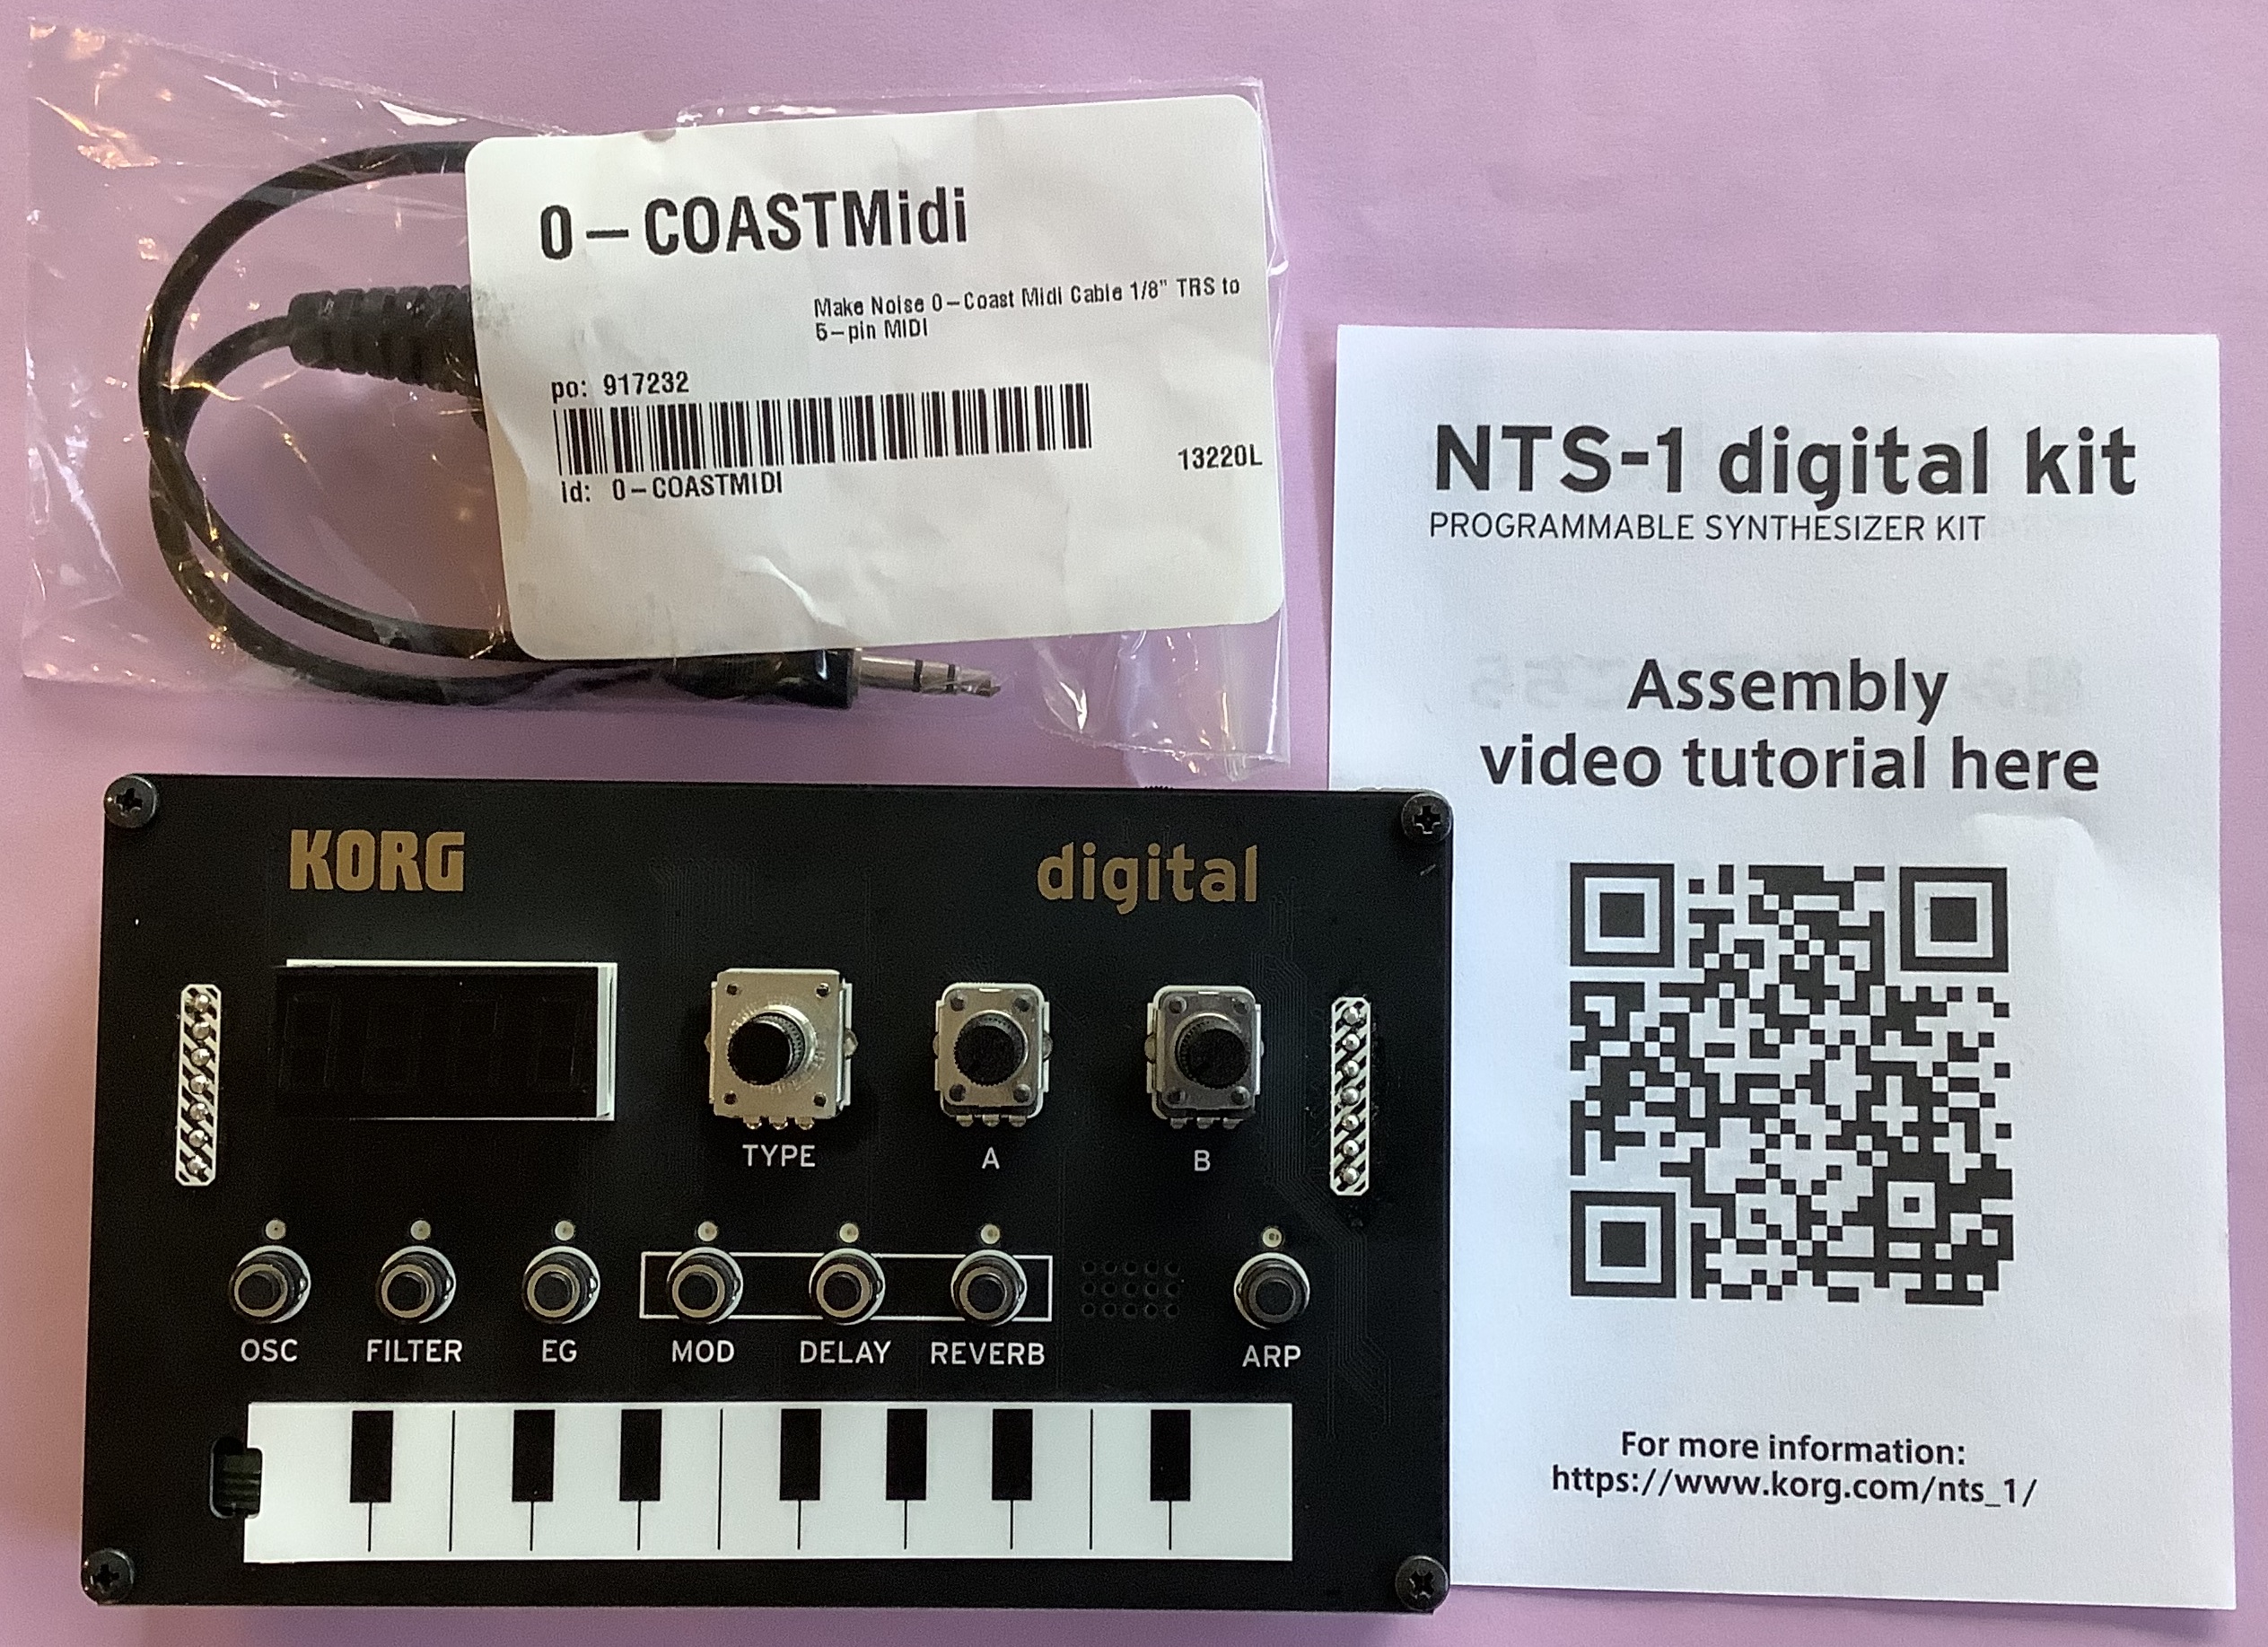
Once everything was assembled, I rushed upstairs and connected the NTS-1 to the Yamaha SHS-500 Sonogenic. When I bought the NTS-1 from Sweetwater, their site recommended the Make Noise O-Coast 5-pin to 3.5mm TRS adapter cable as an add-on accessory. Fortunately, I went for it and didn’t have to search through storage bins looking for an appropriate adapter. The MIDI cabling looks baroque with a 5-pin MIDI adapter on each end.
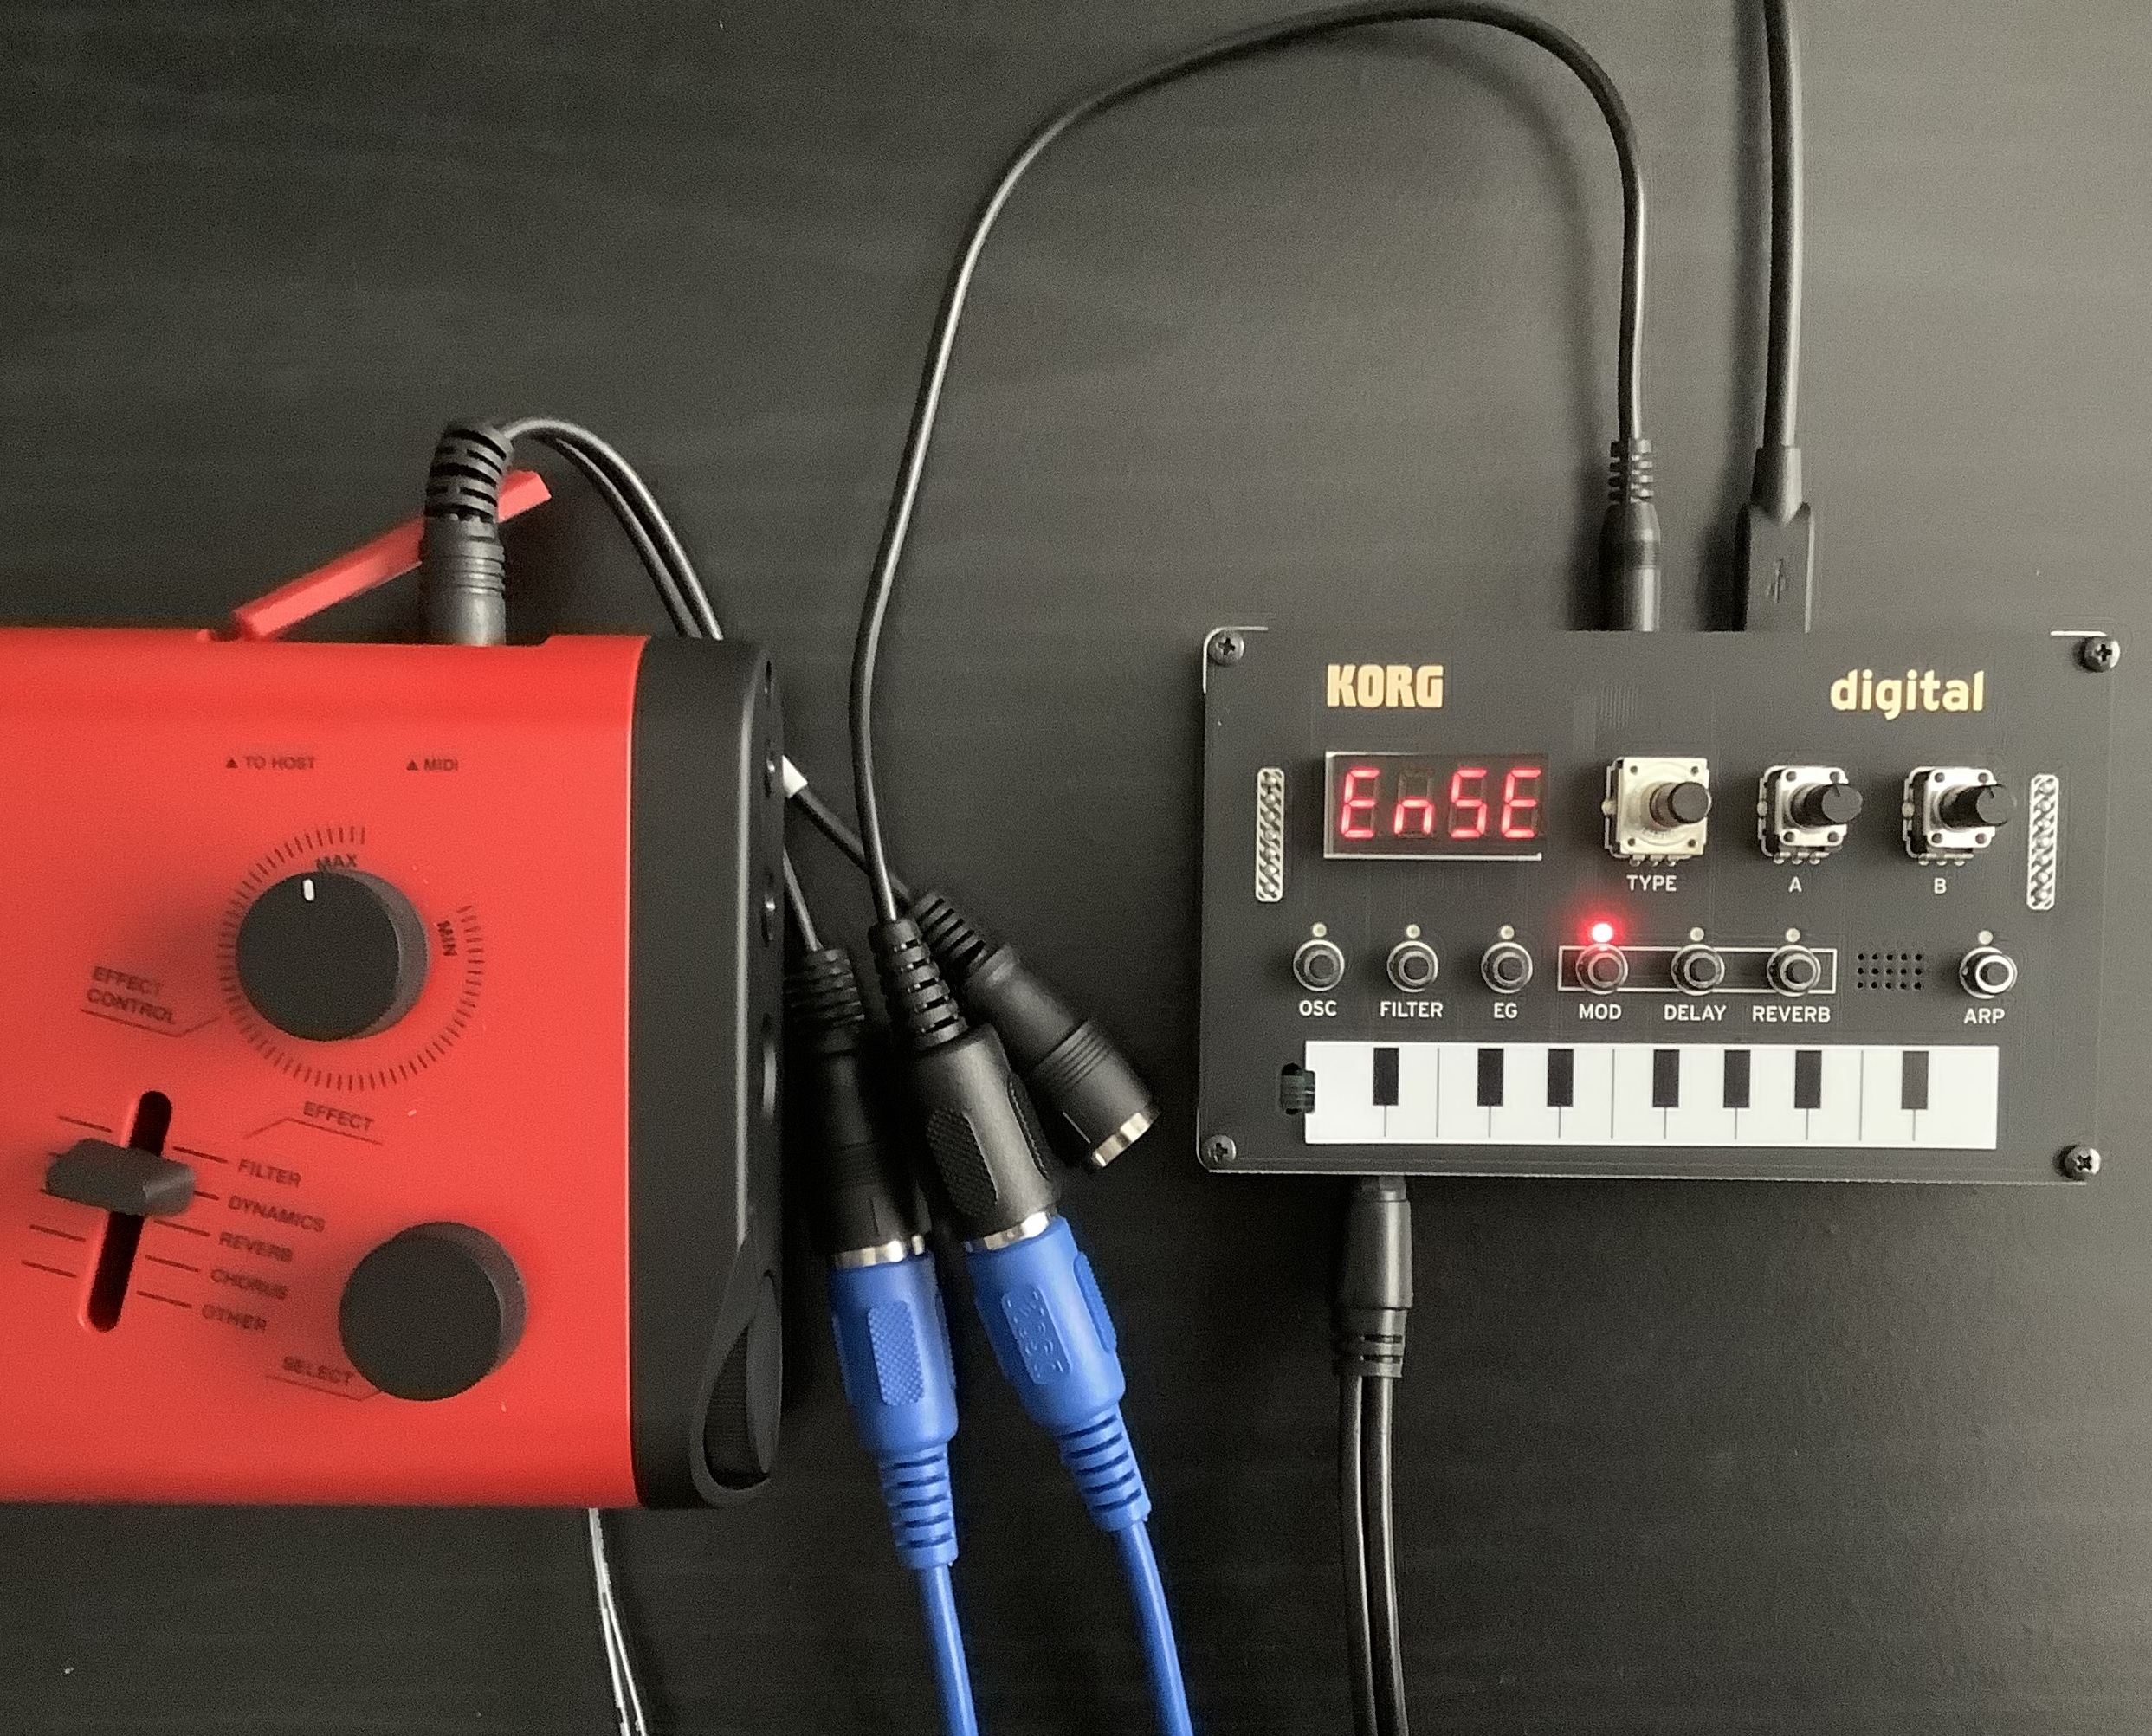
Sonogenic to NTS-1 over 5-pin MIDI
The wiring rat’s nest makes me wish for a wireless solution. Someone needs to invent a Bluetooth MIDI board that 1. plugs into a USB-B device connector and 2. connects to an advertising Bluetooth MIDI peripheral. With the current state of things, most (all?) devices act as a peripheral, assuming that they will connect to a central tablet-based application. Currently, there isn’t a general way to replace a 5-pin cable with a Bluetooth MIDI link (i.e., you can’t connect a keyboard to a keyboard!)
It’s ugly, but everything worked! The NTS-1 is a single oscillator, monophonic synthesizer. Its user interface is easy to navigate. I soon had the classic Chameleon synth bass dialed in. The single oscillator by itself sounds a little bit thin, but the Ensemble effect is a good thickener.
The filter is decent, especially the 4-pole low pass filter (LPF). It isn’t difficult to push the filter hard into ringing self-oscillation. It truly is a shame that the external audio input bypasses the filter. I would love to put the Sonogenic’s signal through the filter.
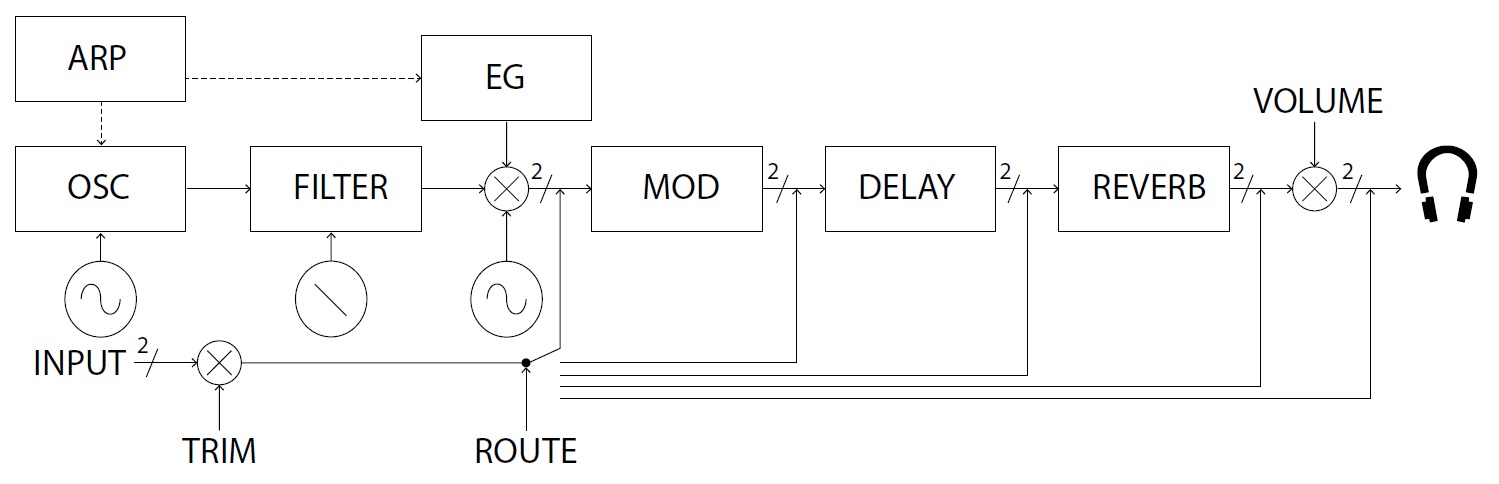
Korg NTS-1 signal flow
My final experiment for the day involved connecting the NTS-1 to my iPad Air 3. Immediately, I got the dreaded:
Cannot use assessory. NTS-1 digital kit: This accessory requires too much power.
Oddly, the iPad Air 3 continued to power the NTS-1, just killing data communication. The NTS-1 specifications claim 500mA or less power consumption. So, what the what, Apple?
I was hoping to unlock a few more instruments in Korg Module. I guess that experiment will wait for another day.