Montage tidbits

Martin Harris. Now, there’s a person who loves his job!

Even though the camera work is a little shaky, I recommend the Montage demonstration by Martin Harris of Yamaha.

Martin’s demo concentrates on acoustic and electric pianos, section and solo strings, brass, Irish whistle and pads — all from a cinematic perspective. Not much EDM here.

I like Martin’s demonstrations because he adds information about sample and voice development. Even though he calls it a “whistle stop tour,” it’s more like a tour of the world. Yamaha have traveled the world to sample the best instruments and players. Here are a few examples as mentioned by Martin:

  • Section and solo strings: Seattle
  • Brass: Los Angeles (L.A. horns)
  • Classical men’s choir: Germany
  • Classical boy’s choir: Estonia
  • Flamenco guitar: Madrid
  • Brazilian percussion: Sao Paulo
  • Turkish percussion: Istanbul
  • Iranian percussion: Tehran
  • Middle Eastern percussion: Bahrain
  • Irish whistle: Ireland

Before people complain about the cost of a top-of-the-line keyboard like the Montage or Tyros, they really should take the cost and time of sampling and voice development into account!

The Montage CFX grand piano is all new sampling. Martin stated the compressed total waveform size as 300 Mbytes, approaching 1 GBytes uncompressed. At demo time (April 2016), the Montage CFX was the biggest sampled piano in the Yamaha line. The Rhodes and Wurlitzer electric pianos are also new sampling.

Guitars also got an update. Martin and Gibson steel guitars were sampled. The sampled Telecaster is a $60,000, 1957 vintage Tele. Martin mention how, in the past, Yamaha removed the dirt from samples. Today they leave in some of the idiosynracies, charm and character.

If you enjoyed Martin’s demo, here are a few blog posts to check out. Last April, I made a list of new waveforms in the Montage vs. the Motif XF. I also wrote a thought piece about waveform memory size and sample development.

New sound development, including sampling, is a continual, on-going process at Yamaha. In an era when waveform memory is relatively big and inexpensive, sound developers need to work overtime in order to fill available memory space. I think the limiting factor now is the amount of time and human resources available to produce new samples and to program new expressive voices.

Copyright © 2017 Paul J. Drongowski

Reface MIDI pin-out

The Yamaha Reface series keyboards have a small DIN-6 connector that carries both MIDI IN and MIDI OUT signals. The keyboards ship with an adapter that converts DIN-6 to two standard 5-pin DIN connectors. Plug in the adapter cable, connect with standard MIDI cables, and you’re good to go.

A few people on the Yamaha Synth site inquired about the Reface MIDI pin-out. Their questions piqued my curiosity leading to a dive into Yamaha service manuals. The results are posted below along with some essential background information about MIDI signaling.

Use this information at your own risk. That goes for anything on my site!

Although I’ve assembled many boards and kits, I make horrible cables. I much prefer to use commercial MIDI adapters and cables. Life is too short to debug and repair shoddy, unreliable cables. Plug and play solutions are the most flexible; you never know when you’ll need a different configuration of female sockets and male plugs. Adapters like the Yamaha Reface adapter are the most flexible, reliable solution although they are product specific.

The Yamaha part number for the Reface MIDI adapter cable (MD6P-DIN) is ZP893500. If you are a USA customer, you can order the cable on-line from Yamaha 24×7. Last I checked, the cable is also available from the on-line retailer Full Compass. I’ve ordered from both Full Compass and Yamaha 24×7 in the past and they both get a thumbs up.

MIDI background information

If you’re going to do anything with MIDI hardware or software, I strongly recommend becoming a member of the MIDI Association. Please take a look at the MIDI circuit reference design:

This is the original electrical specification diagram. It’s good enough to understand MIDI operation. The original circuit has been superceded by version 1.1 which includes important additions for 3.3 Volt operation and reduced radio frequency interference (RFI). Register to become a member and download the new reference circuit.

As the MIDI specification notes, “The MIDI circuit is a 5mA current loop; logical 0 is current ON.” The MIDI sender and the MIDI receiver are optically isolated. The sender (MIDI OUT) controls an LED embedded within the receiver’s opto-isolator (MIDI IN).

The DIN connector on the MIDI OUT side has the following pins:

  • Pin 1: No connection (NC)
  • Pin 2: Ground
  • Pin 3: No connection (NC)
  • Pin 4: Connected to +5V (3.3V) through a current limiting resistor
  • Pin 5: Serial data output (UART TX)

The DIN connector on the MIDI IN side has the following pins:

  • Pin 1: No connection (NC)
  • Pin 2: No connection (NC)
  • Pin 3: No connection (NC)
  • Pin 4: LED anode (+)
  • Pin 5: LED cathode (-)

Pin 2 may optionally be connected to ground through a capacitor. Please see the current MIDI specification for more info. (Become a member!)

The goal is to turn the opto-isolator LED ON and OFF. The LED polarity (direction of current flow) is important. The MIDI sender turns the electrical current ON and OFF, that is, it turns the LED ON and OFF. This action sends a serial stream of bits from the sender to the receiver.

While writing, it occurred to me — the MIDI Association never formally named these signals. Thus, you get my names like “the thingy connected to the anode of the LED.”

Example: PSR-S910

The following diagram is the MIDI IN and MIDI OUT circuit within the Yamaha PSR-S910 arranger workstation. [Click on the image to enlarge.] I went back to this older product because it uses a transistor pair on the MIDI OUT side, just like the Reface series. That should make it easier to match up the MIDI signals with the Reface DIN-6 pins. Recent products employ a logic gate instead of a transistor pair to switch current through the MIDI loop.

Please note that the S950 MIDI signals are exactly what we expect knowing the MIDI reference design. The “extra stuff” suppresses RFI among other things.

Example: Reface CS

The diagram below depicts the Reface CS MIDI interface circuit (with a few edits for brevity and format). The Reface circuit is similar to the S910 circuit.

Here are the MIDI signals at the Reface DIN-6 pins:

  • Pin 1: MIDI IN, Ground via decoupling capacitor
  • Pin 2: MIDI OUT, Ground
  • Pin 3: MIDI IN, LED cathode (-)
  • Pin 4: MIDI OUT, TX serial data
  • Pin 5: MIDI IN, LED anode (+)
  • Pin 6: MIDI OUT, pull-up to 3.3V

Please note the DIN-6 pin numbering, position and connector orientation!

Now, let’s match up the Reface DIN-6 pins to regular MIDI DIN-5 pins. The MIDI IN match ups are:

       MIDI IN      MIDI IN
    Reface DIN-6   MIDI DIN-5      Function
    ------------  ------------   -------------
                     Pin 1       No connection
        Pin 1        Pin 2       Ground via decoupling capacitor
                     Pin 3       No connection
        Pin 5        Pin 4       LED anode (+)
        Pin 3        Pin 5       LED cathode (-)

I put the MIDI DIN-5 pin numbers in ascending order. The MIDI OUT match ups are:

      MIDI OUT      MIDI OUT
    Reface DIN-6   MIDI DIN-5      Function
    ------------  ------------   -------------
                     Pin 1       No connection
        Pin 2        Pin 2       Ground
                     Pin 3       No connection
        Pin 6        Pin 4       Pull-up to 3.3V
        Pin 4        Pin 5       TX serial data

At this point, I suggest grabbing your Reface MIDI adapter cable and tracing the DIN-6 to DIN-5 connections with a continuity checker. This is the best way to come to grips with the real-world connections and signal/pin positions.

Copyright © 2017 Paul J. Drongowski
Reface and PSR-S910 diagrams are Copyright © Yamaha Corporation

Pocket Miku: Module review

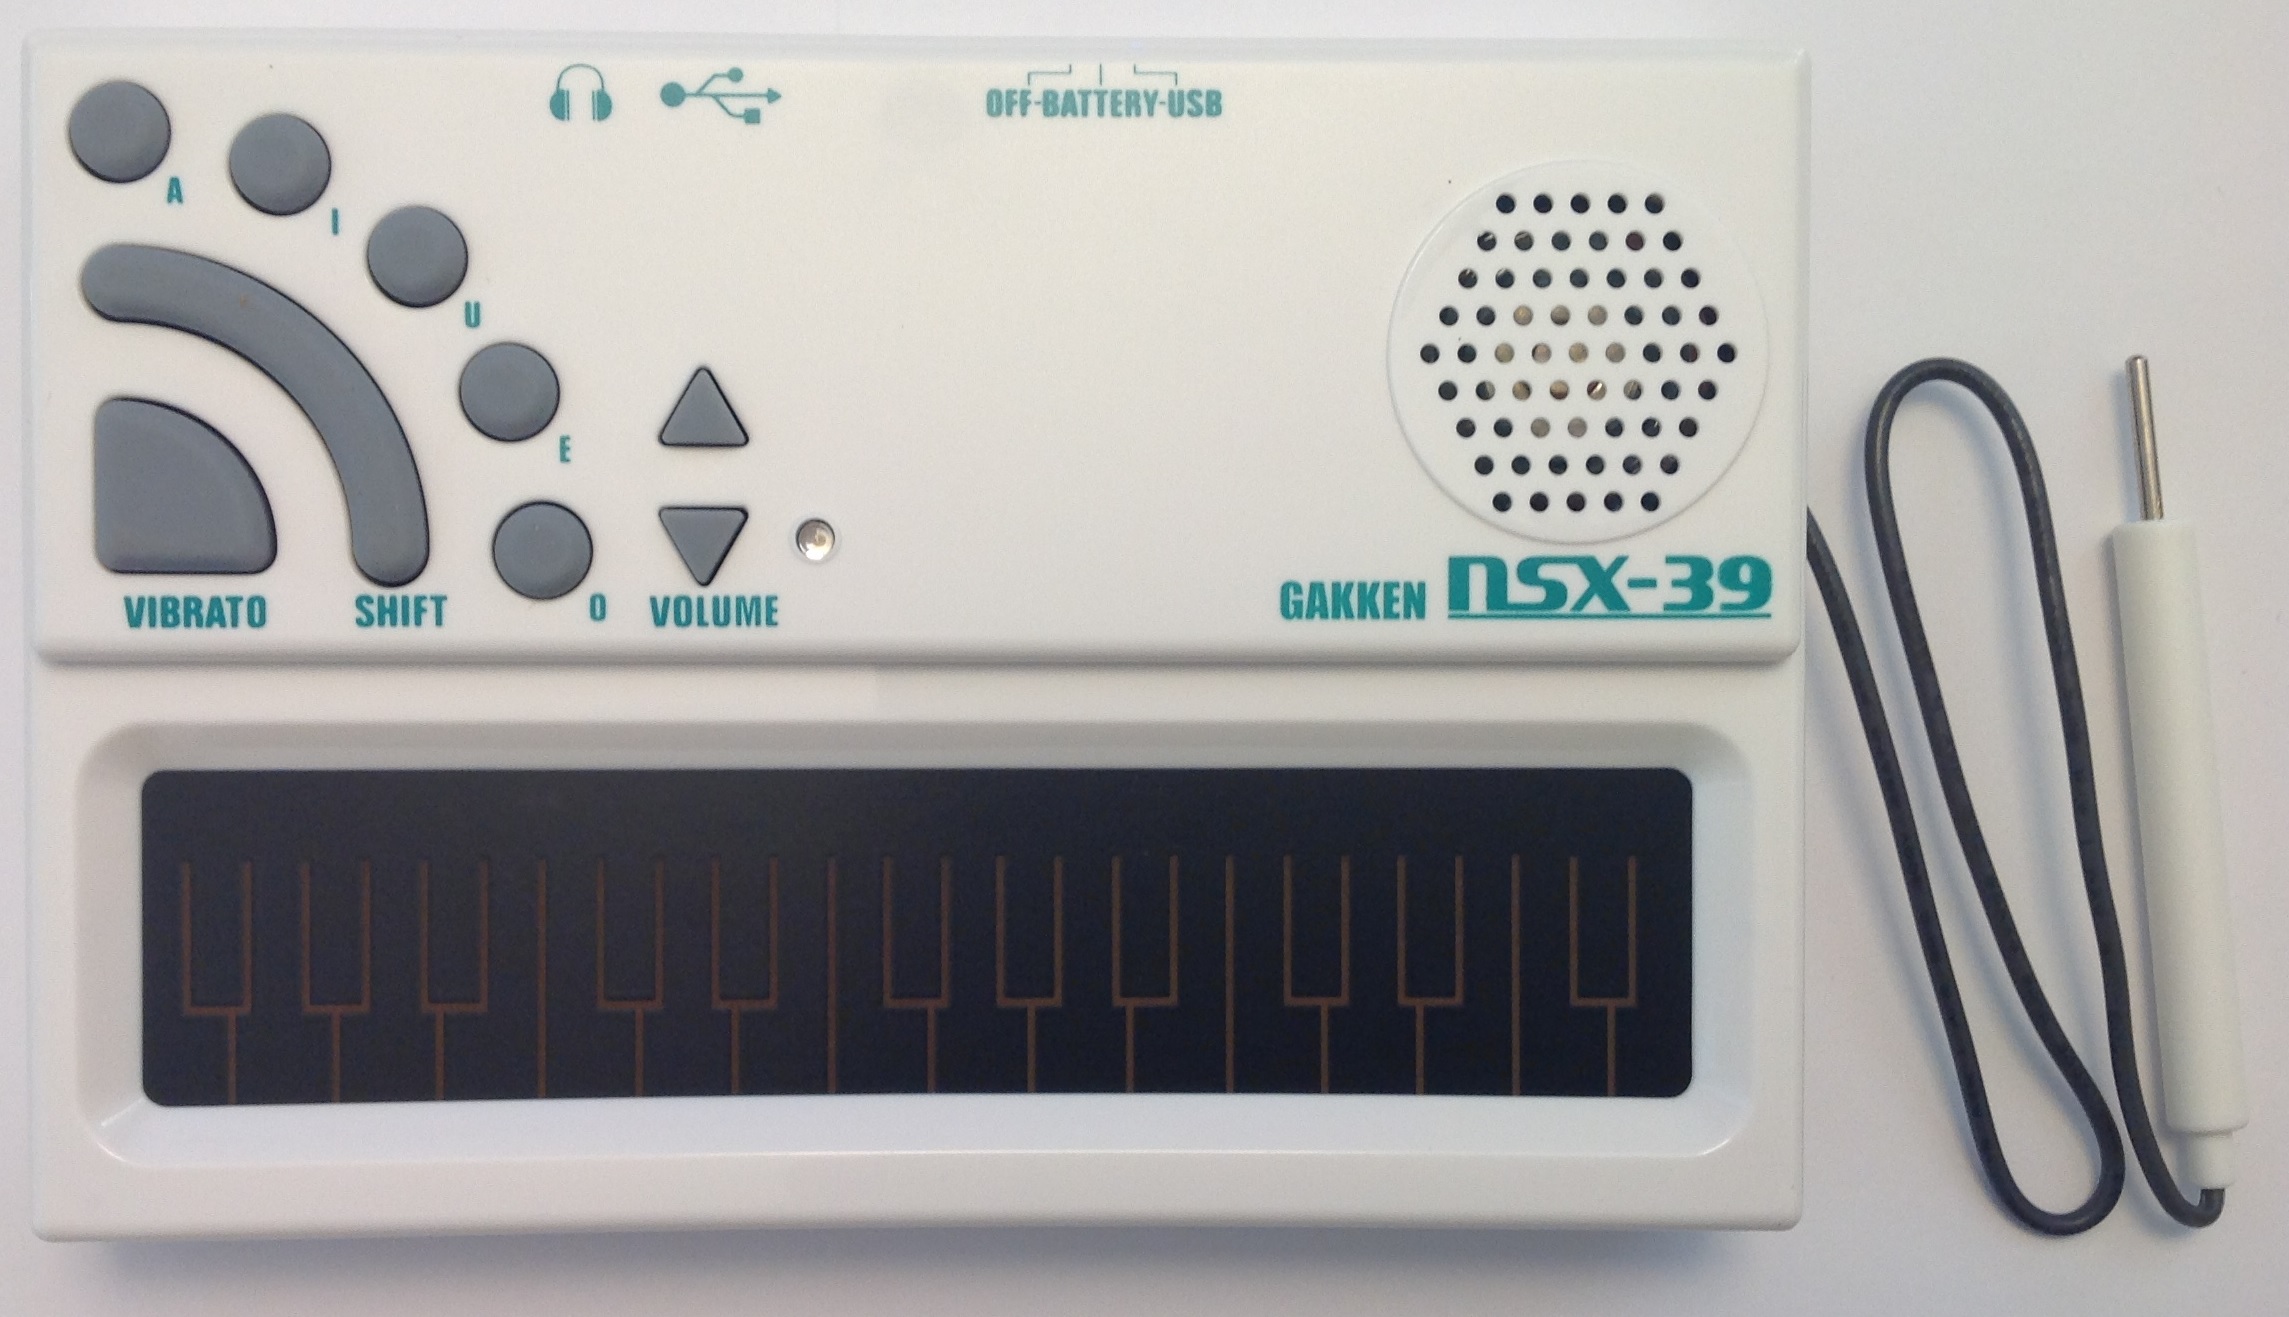
So far, I’ve posted several articles with resources for the Yamaha NSX-1 eVocaloid integrated circuit and the Gakken Pocket Miku (NSX-39), which is based on the NSX-1 chip. (See the bottom of this page for links.) This post pulls the pieces together.

Pocket Miku is both a vocal stylophone and a Yamaha XG architecture General MIDI (GM) module. There are plenty of Pocket Miku stylophone demos on the Web, so I will concentrate on Pocket Miku as a module.

Pocket Miku connects to your PC, mobile device or whatever over USB. The module implements sixteen MIDI channels where channel one is always assigned to the Miku eVocaloid voice and channels 2 to 16 are regular MIDI voices. As I said, the module follows the XG architecture and you can play with virtually all of the common XG features. The NSX-1 within Pocket Miku includes a fairly decent DSP effects processor in addition to chorus and reverb. The DSP effect algorithms include chorus, reverb, distortion, modulation effects, rotary speaker and a lot more. Thus, Pocket Miku is much more than a garden variety General MIDI module.

My test set up is simple: Pocket Miku, a USB cable, a Windows 7 PC, Cakewalk SONAR and a MIDI controller. Pocket Miku’s audio out goes to a pair of Mackie MR5 Mk3 monitors. The MP3 files included with this post were recorded direct using a Roland MicroBR recorder with no added external effects.

The first demo track is a bit of a spontaneous experiment. “What happens if I take a standard XG MIDI file and sling it at Pocket Miku?” The test MIDI file is “Smooth Operator” from Yamaha Musicsoft. Channel 1 is the vocal melody, so we’re off to a fast start right out of the gate.

One needs to put Pocket Miku into NSX-1 compatibility mode. Simultaneously pressing the U + VOLUME UP + VOLUME DOWN buttons changes Pocket Miku to NSX-1 compatibility mode. (Pocket Miku responds with a high hat sound.) Compatibility mode turns off the NSX-39 SysEx implementation and passes everything to the NSX-1 without interpetation or interference. This gets the best results when using Pocket Miku as a MIDI module.

Here is the MP3 Smooth Operator demo. I made only one change to the MIDI file. Unmodified, Miku’s voice is high enough to shatter glass. Yikes! I transposed MIDI channel 1 down one octave. Much better. Pocket Miku is singing whatever the default (Japanese) lyrics are at start-up. It’s possible to send lyrics to Pocket Miku using SysEx messages embedded in the MIDI file. Too much effort for a spontaneous experiment, so what you hear is what you get.

Depending upon your expectations about General MIDI sound sets, you’ll either groan or think “not bad for $40 USD.” Miku does not challenge Sade.

One overall problem with Pocket Miku is its rather noisy audio signal. I don’t think you can fault the NSX-1 chip or the digital-to-analog converter (DAC). (The DAC, by the way, is embedded in the ARM architecture system on a chip (SOC) that controls the NSX-1.) The engineers who laid out the NSX-39 circuit board put the USB port right next to the audio jack. Bad idea! This is an example where board layout can absolutely murder audio quality. Bottom line: Pocket Miku puts out quite a hiss.

The second demo is a little more elaborate. As a starting point, I used a simple downtempo track assembled from Equinox Sounds Total Midi clips. The backing track consists of electric piano, acoustic bass, lead synth and drums — all General MIDI. Since GM doesn’t offer voice variations, there’s not a lot of flexibility here.

I created an (almost) tempo-sync’ed tremolo for the electric piano by drawing expression controller events (CC#11). My hope was to exploit the DSP unit for some kind of interesting vocal effect. However, everything I tried on the vocal was over-the-top or inappropriate. (Yes, you can apply pitch change via DSP to get vocal harmony.) Thus, Miku’s voice is heard unadulterated. I eventually wound up wasting the DSP on a few minor — and crummy — rhythm track effects.

I created four lyrical phrases:

A summer day           Natsu no hi
f0 43 79 09 00 50 10 6e 20 61 2c 74 73 20 4d 2c 6e 20 6f 2c 43 20 69 00 f7

Your face              Anata no kao
f0 43 79 09 00 50 10 61 2c 6e 20 61 2c 74 20 61 2c 6e 20 6f 2c 6b 20 61 2c 6f 00 f7

A beautiful smile      Utsukushi egao
f0 43 79 09 00 50 10 4d 2c 74 73 20 4d 2c 6b 20 4d 2c 53 20 69 2c 65 2c 67 20 61 2c 6f 00 f7

A song for you         Anata no tame no uta
f0 43 79 09 00 50 10 61 2c 6e 20 61 2c 74 20 61 2c 6e 20 6f 2c 74 20 61 2c 6d 20 65 2c 6e 20 6f 2c 4d 2c 74 20 61 00 f7

The Japanese lyrics were generated by Google Translate. I hope Miku isn’t singing anything profane or obscene. 🙂

I did not create the SysEx messages by hand! I used the Aides Technology translation app. Aides Technology is the developer of the Switch Science NSX-1 Arduino shield. The application converts a katakana phrase to an NSX-1 System Exclusive (SysEx) message. Once converted, I copied each HEX SysEx message from the Aides Tech page and pasted them into SONAR.

Finally, the fun part! I improvised the Miku vocal, playing the part on a Korg Triton Taktile controller. What you hear in the MP3 Pocket Miku demo is one complete take. The first vocal section is without vibrato and the second vocal section is with vibrato added to long, held notes. I added vibrato manually by drawing modulation (CC#1) events in SONAR, but I could have ridden the modulation wheel while improving instead.

The overall process is more intuitive than the full Vocaloid editor where essentially everything is drawn. Yamaha could simplify the process still further by providing an app or plug-in to translate and load English (Japanese) lyrics directly to an embedded NSX-1 or DAW. This would eliminate a few manual steps.

Overall, pre-loaded lyrics coupled with realtime performance makes for a more engaging and immediate musical experience than working with the full Vocaloid editor. If Yamaha is thinking about an eVocaloid performance instrument, this is the way to go!

The pre-loaded lyric approach beats one early attempt at realtime Vocaloid performance as shown in this You Tube video. In the video, the musician plays the melody with the right hand and enters katakana with the left hand. I would much rather add modulation and navigate through the lyrics with the left hand. This is the approach taken for the Vocaloid keytar shown on the Yamaha web site.

Here is a list of my blog posts about Pocket Miku and the Yamaha NSX-1:

I hope that my experience will help you to explore Pocket Miku and the Yamaha NSX-1 on your own!

Before leaving this topic, I would like to pose a speculative question. Is the mystery keyboard design shown below a realtime eVocaloid instrument? (Yamaha U.S. Patent number D778,342)

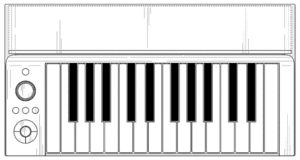
The E-to-F keyboard just happens to coincide with the range of the human voice. Hmmmm?

Copyright © 2017 Paul J. Drongowski

Yamaha CSP pianos: First take

Yamaha just announced the Clavinova CSP series of digital pianos. There are two models: CSP-150 and CSP-170. The main differences between the 170 and 150 are keyboard action (NWX and GH3X, respectively) and sound system (2 x 45W and 2 x 30W, respectively). USA MSRP list prices are $5,399 to $5,999, and $3,999 to $4,599 USD.

These are not stage pianos. They are “furniture” pianos which complement and fit below the existing CLP line.

Here’s my imagined notion of the product pitch meeting:

Digital piano meets arranger meets Rock Band. Let’s say that you don’t have much (any) musical training, but you want to play along with Katy Perry. Sit down at the CSP with your smart device, install the Smart Pianist app and connect via Bluetooth. Call up “Roar” in the app and get a simple musical score. Start the song, follow the LEDs above the keys and play along with the audio. The app stays in sync with the audio and highlights the notes to be played on each beat. So, if you learned a little bit about reading music, you’re good to go.

Sorry, a little bit more than an elevator pitch, but this is first draft writing! 🙂

That is CSP in a nutshell. The CSP is a first-rate piano and it has a decent collection of non-piano voices and arranger styles. The CSP even includes the Hammond-ish “organ flutes” drawbar organ voices. So, if you want to jam out with electric guitar, you’re set. If you want to play chords with your left hand and freestyle it, the CSP is ready.

If you’re looking for a full arranger workstation, though, you’re missing some features. No pitch bend wheel, no mod wheel, no multipads, no accompaniment section (MAIN, FILL, …) buttons. No voice editing; all voices are preset.

And hey, there’s no display either! The Smart Pianist app is your gateway to the CSP feature set. You can select from a few voices and styles using the FUNCTION button and the piano keyboard, but you need the app to make full use of the CSP. Eliminating the CLP’s touch panel, lights and switches takes a lot of cost out of the product, achieving a more affordable price point.

I could see the CSP appealing to churches as well as home players given the quality of the piano and acoustic voices. Flipping the ON switch and playing piano is just what a lot of liturgical music ministers want. The more tech savvy will dig in. Pastors will appreciate the lower price of the CSP line.

From the perspective of an arranger guy, the CSP represents a shift away from the standard arranger. For decades, people want to play with their favorite pop tunes. In order to use a conventional arranger (no matter what brand), the musician must find a suitable style and the musician must have the musical skill to play a chord with the left hand, even if it’s just the root note of the chord. Often the accompaniment doesn’t really “sound like the record” and the player feels disappointed, unskilled and depressed. Shucks, I feel this way whenever I make another attempt at playing guitar and at least I can read music!

The CSP is a new paradigm that addresses these concerns. First, the (budding) musician plays with the actual recording. Next, the app generates a simplified musical score — no need to chase after sheet music. The score matches the actual audio and the app leads the player through the score in sync with the audio. Finally, the CSP’s guide lights make a game of playing the notes in the simplified score.

We’ve already seen apps from Yamaha with some of these features. Chord Tracker analyzes a song from your audio music library and generates a chord chart. Kittar breaks a song down into musical phrases that can be repeated, transposed and slowed down for practice. The Smart Pianist app includes Chord Tracker functionality and takes it to another level producing a two stave piano score.

Notice that I said “a score” not “the score.” Yamaha’s audio analysis only needs to be good enough to produce a simple left hand part and the melody. It does not need to generate the full score for a piece of music. Plus, there are likely to be legal copyright issues with the generation of a full score. (A derivative work?)

Still, this is an impressive technical feat and is the culmination of years of research in music analysis. Yamaha have invested heavily in music analysis and hold many patents. Here are a few examples:

  • U.S. Patent 9,378,719: Technique for analyzing rhythm structure of music audio data, June 28, 2016
  • Patent 9,117,432: Apparatus and method for detecting chords, August 25, 2015
  • U.S. Patent 9,053,696: Searching for a tone data set based on a degree of similarity to a rhythm pattern, June 9, 2015
  • U.S. Patent 9,006,551: Musical performance-related information output device, April 14, 2015
  • Patent 9,275,616: Associating musical score image data and logical musical score data, March 1, 2016
  • U.S. Patent 9,142,203: Music data generation based on text-format chord chart, September 22, 2015

The last patent is not music analysis per se. It may be one of several patents covering technology that we will see in the next Yamaha top of the line (TOTL) arranger workstation.

I think we will be seeing more features based on music analysis. Yamaha’s stated mission is to make products that delight customers and to provide features that are not easily copied by competitors. Yamaha have staked out a strong patent position in this area let alone climbing over the steep technological barrier posed by musical analysis of audio.

Copyright © 2017 Paul J. Drongowski