MODX: Going to the library

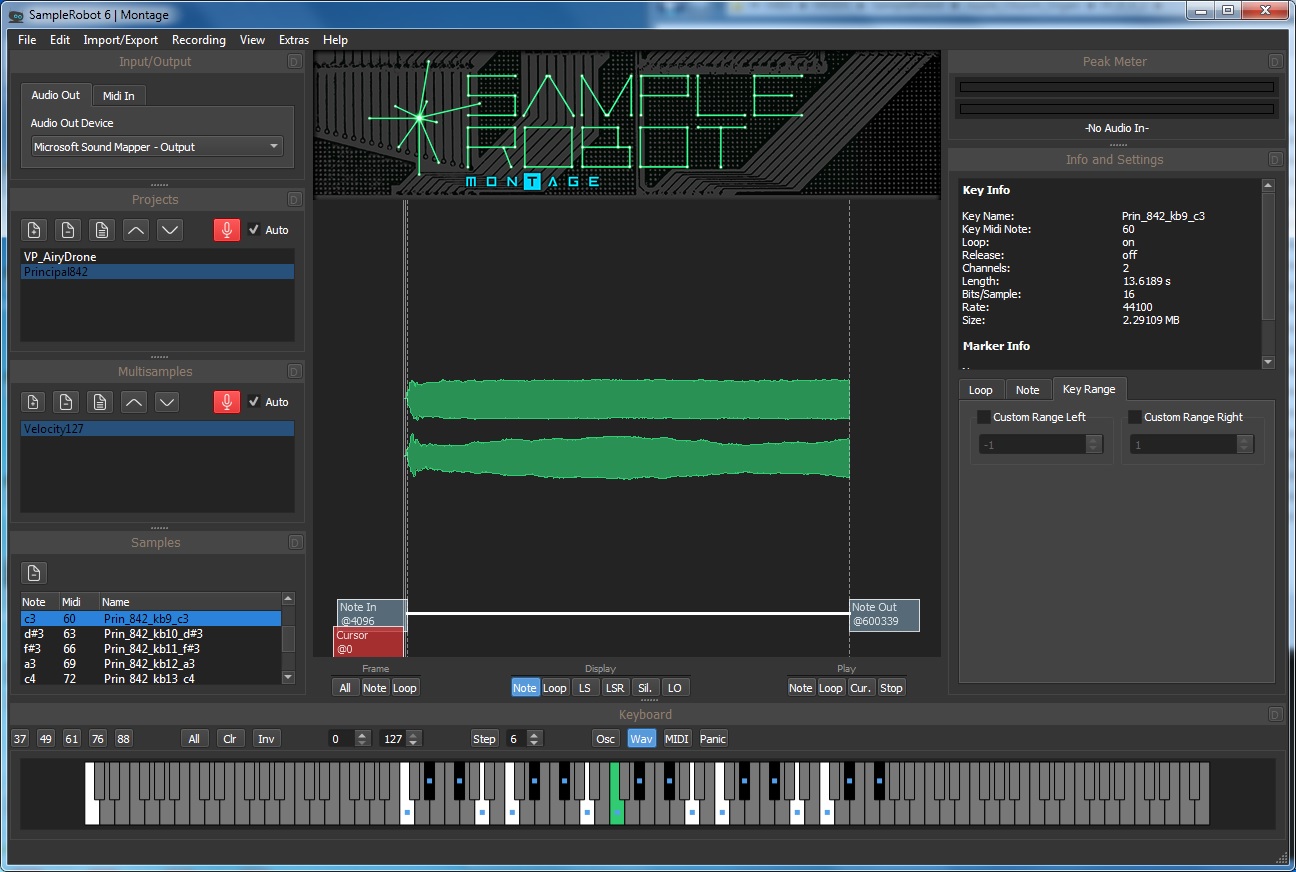
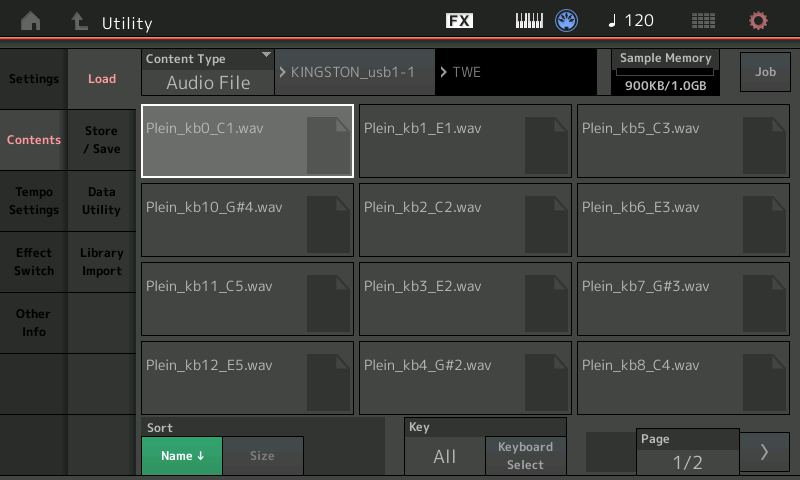
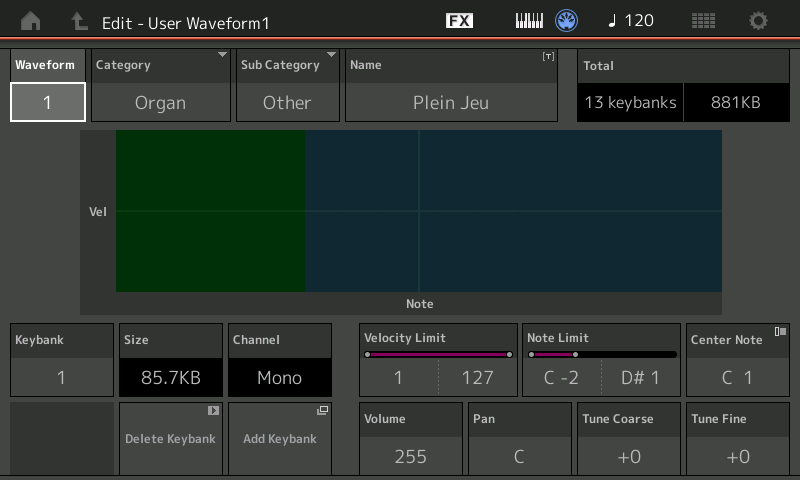
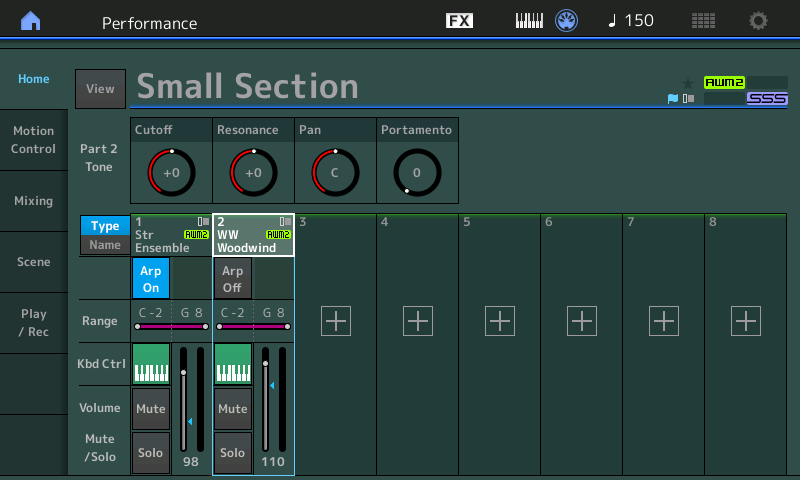
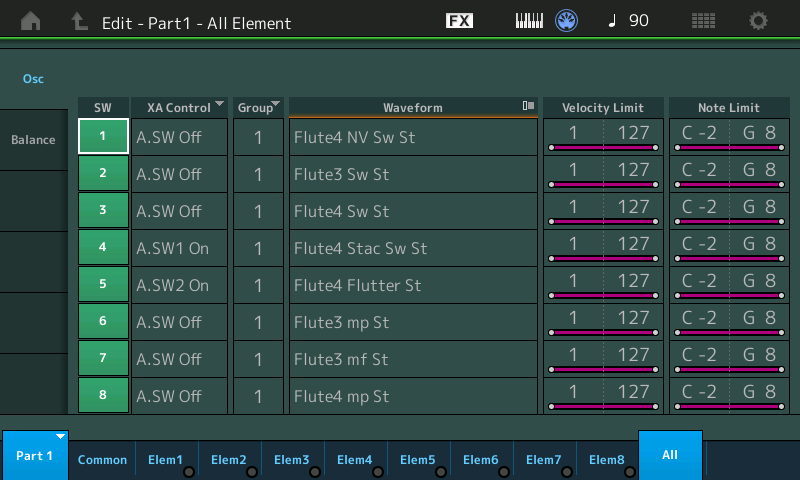
After resolving yesterday’s Sample Robot teething issues, I pulled together two new sampled pipe organ voices. Each voice is stored into its own MODX Library file as exported by Sample Robot for Montage (SRM).

At this point, I realized that libraries and voices are going to stack up quickly. So, I dipped into a few on-line resources:

Essentially, a MODX (or Montage) Library is a way to bundle up related Performances, waveforms, arpeggios and other data into a single package. Bundling makes it easy to save, distribute, and load Performance-related data.

Page 23 of the MODX Reference Manual contains a diagram depicting the contents of USER Memory and the relationship of USER Memory to USB flash drive file types like USER files and LIBRARY files. This diagram and its accompanying text is meaningful to engineers, but is somewhat confusing to a regular user who wants to get a job done! Diagram aside, it’s worth noting that there are two main file types that are important to our data management: USER files and LIBRARY files. Each file type has its own file name extension:

                  Montage  MODX
                  -------  ----
    USER file        .X7U  .X8U
    LIBRARY file     .X7L  .X8L

Yamaha have continued their practice of bumping the file format version number with each new generation of synth. Thus, the MODX USER file extension is “.X8U” versus Montage’s “.X7U”. I won’t distract you with compatibility details except to note that MODX can load Montage USER and LIBRARY files. Good thing since Sample Robot exports Montage USER and LIBRARY files (.X7U and .X7L).

There are two primary file operations:

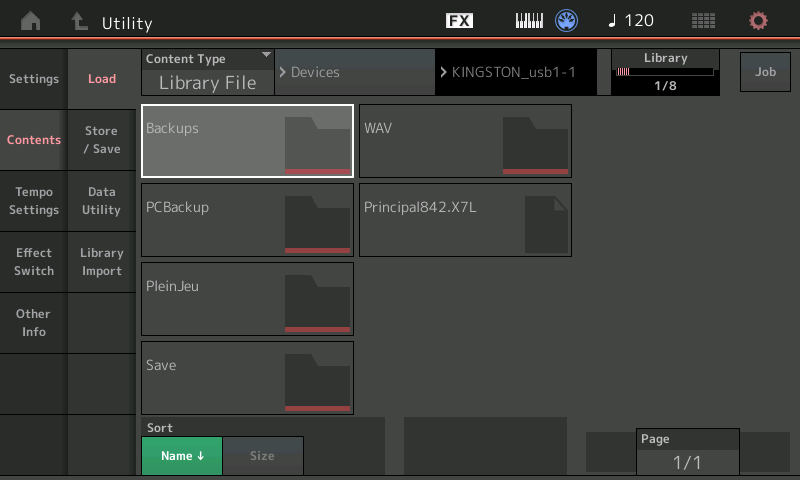
    LOAD: [UTILITY] → [Contents] → [Load]
    STORE/SAVE: Press [STORE] button, or 
                [UTILITY] → [Contents] → [Store/Save]

I think of USER Memory as working storage that holds my most frequently used Performances (and other stuff). It’s important to stay backed up, especially when working with a new keyboard. I back up daily, writing USER memory to a USER file. It’s not that the data is so important — I can’t afford lost time. Lost data is lost time.

A USER file contains:

    User Performance (640 max)
    User Arpeggio (256 max)
    User Motion Sequence
    User Curve
    User Live Set
    User Micro Tuning
    User Waveform
    Utility Settings
    Quick Setup
    User Audition Phrase

That’s pretty much the whole ball of wax from USER Memory — a complete snapshot.

A LIBRARY file is similar to a USER file. A LIBRARY file contains:

    Performance (640 max)
    Arpeggio (256 max)
    Motion Sequence
    Curve
    Live Set
    Micro Tuning
    Waveform
    Audition Phrase

A Library doesn’t contain Utility Settings or Quick Setup data. You wouldn’t want a Library to disturb these settings when it’s loaded.

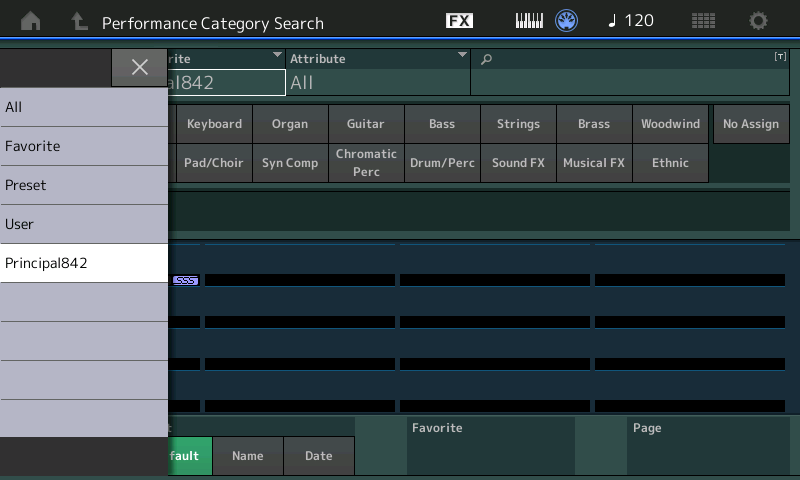
What’s a little confusing about the USER Memory diagram is that it shows (eight) Libraries as part of USER Memory. Maybe it’s better to think of USER Memory as “Internal Memory”. By the way, some writers refer to this memory as “read only,” kind of, sort of. The correct term is “non-volatile,” i.e., memory contents aren’t lost when power is turned off. This terminology gets around writer-ly semantic problems. Internal memory can be read and written. It just doesn’t lose its mind when power is removed.

A LIBRARY file, since it’s a file, can be loaded and saved. During a load operation, the contents of a library is written (stored) into one of the eight available library slots in USER Memory. The contents of the USER Performances, etc. in USER Memory are not over-written. From my point of view, this is great because I don’t want anything messing with my work! We can, however, save User data to a LIBRARY file.

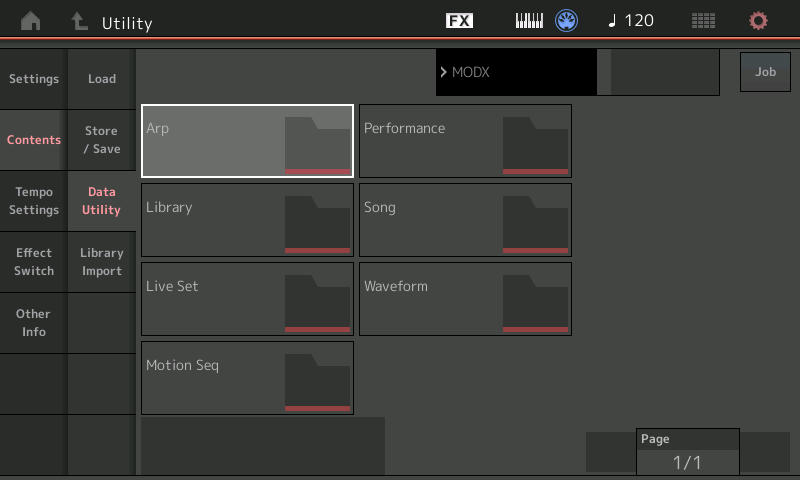
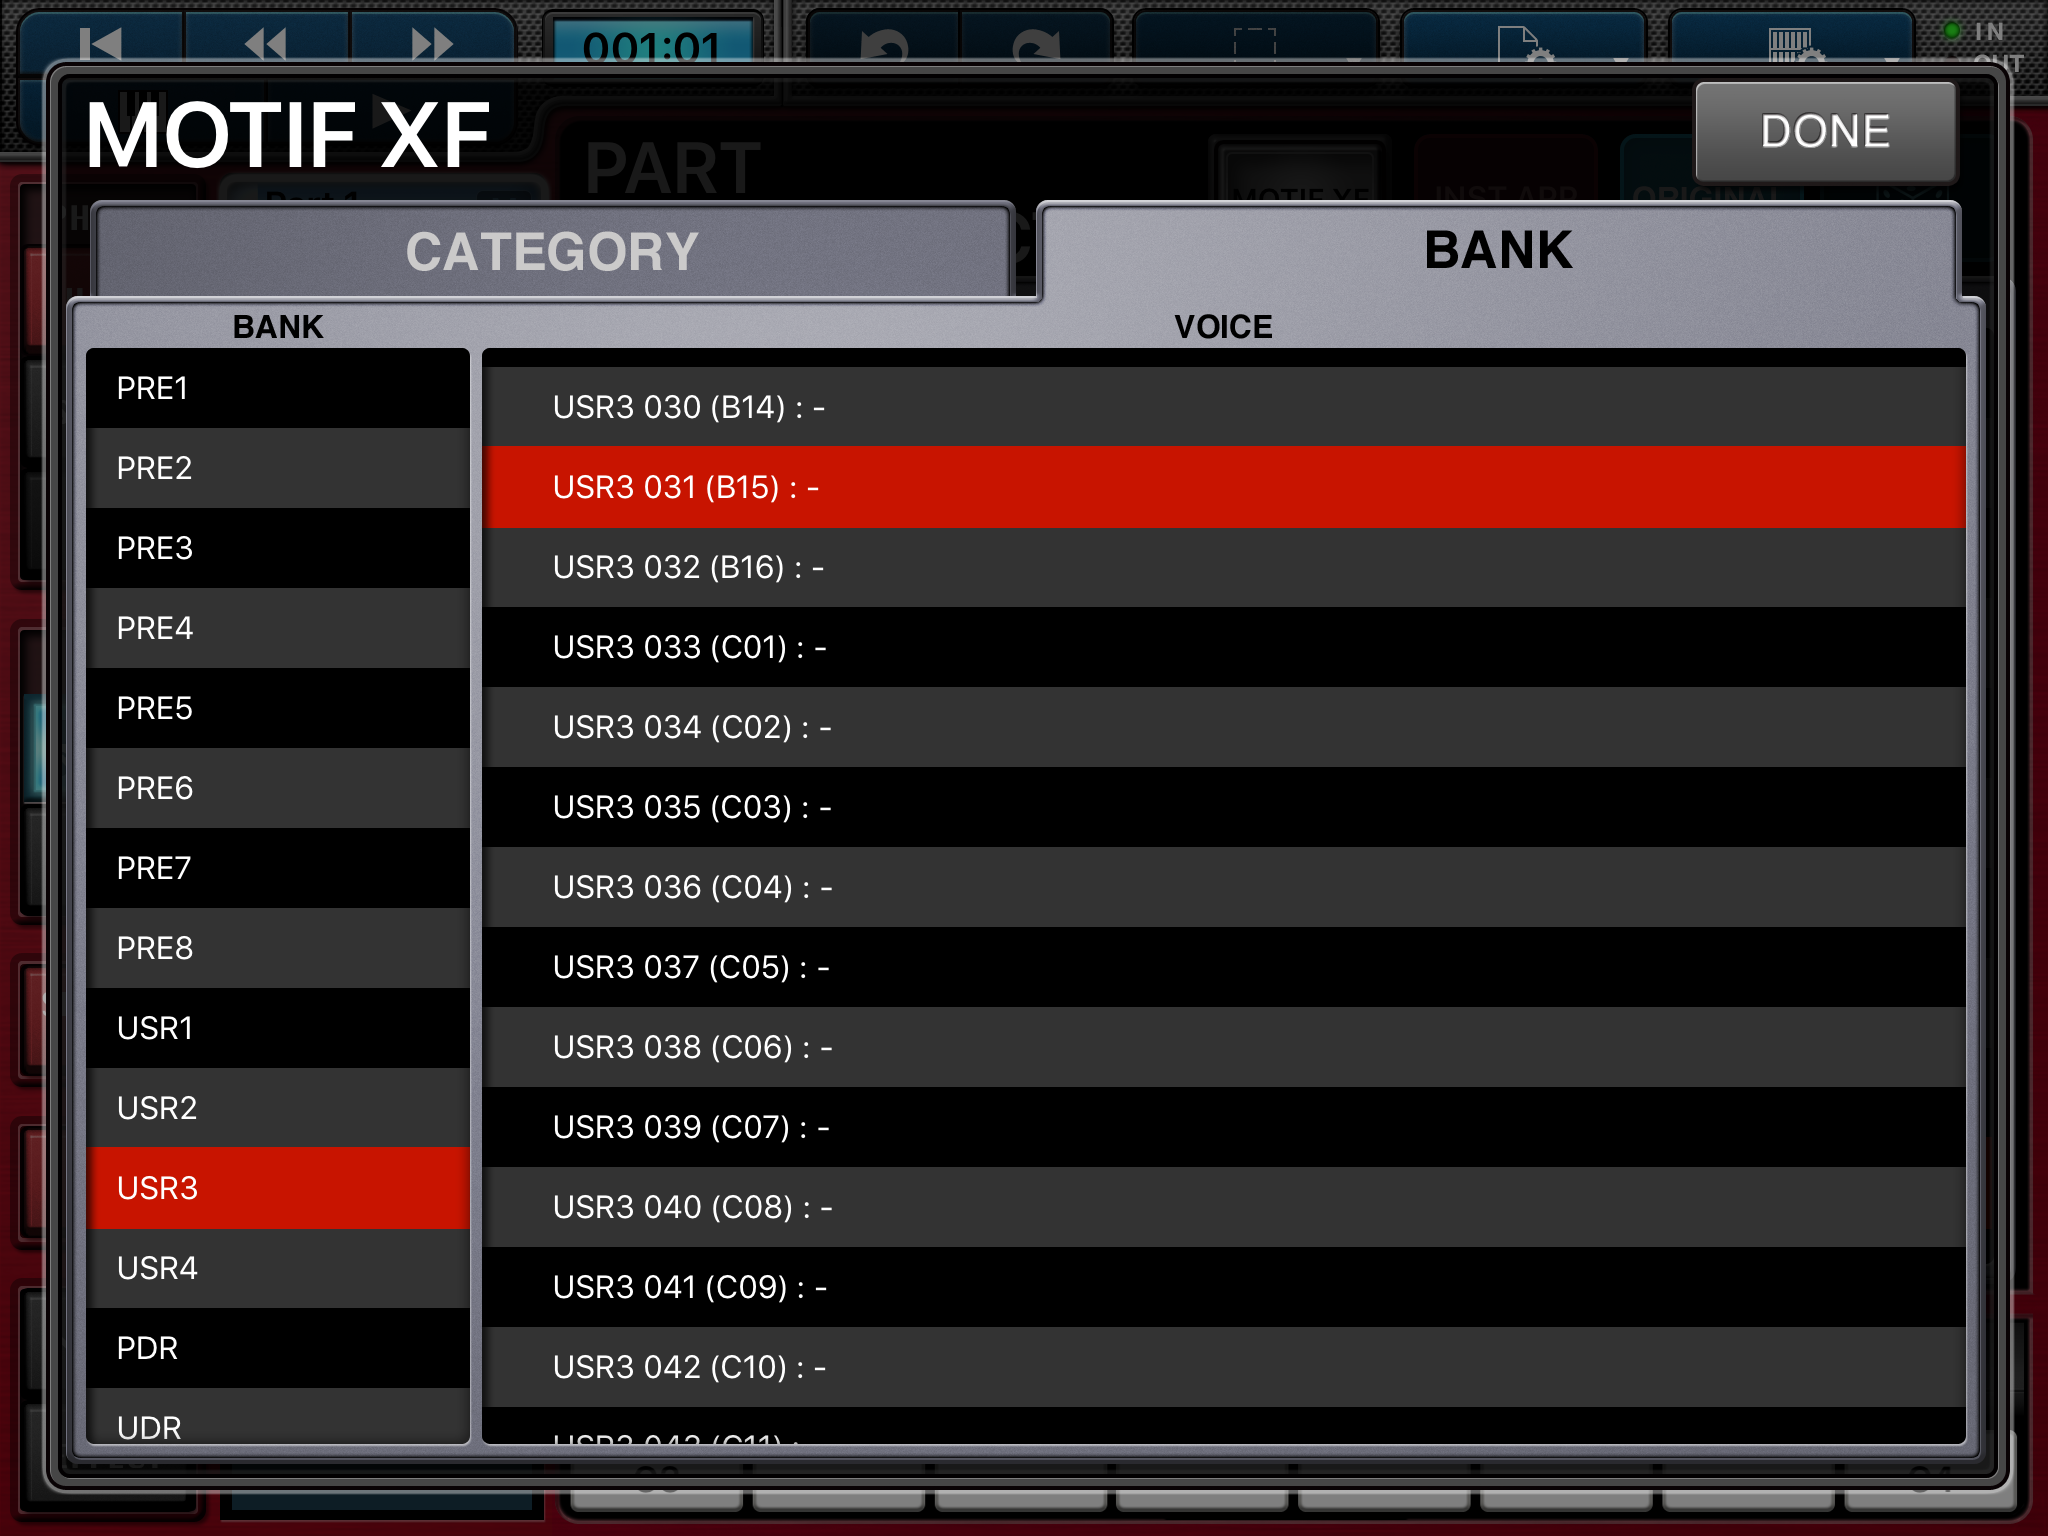
The final piece of the puzzle is how to bring selected pieces of a memory-resident Library into USER Memory. That’s where Library import comes into play:

    [UTILITY] → [Contents] → [Library Import]

The Import to User Bank operation:

Copies the selected Performance in the User Bank. User Waveforms and User Arpeggio which are used in the selected Performance are copied to the User Bank as well. This button is displayed only when any of the Performances is selected.

Reading this last sentence from the MODX Reference Manual rang a bell in my head.

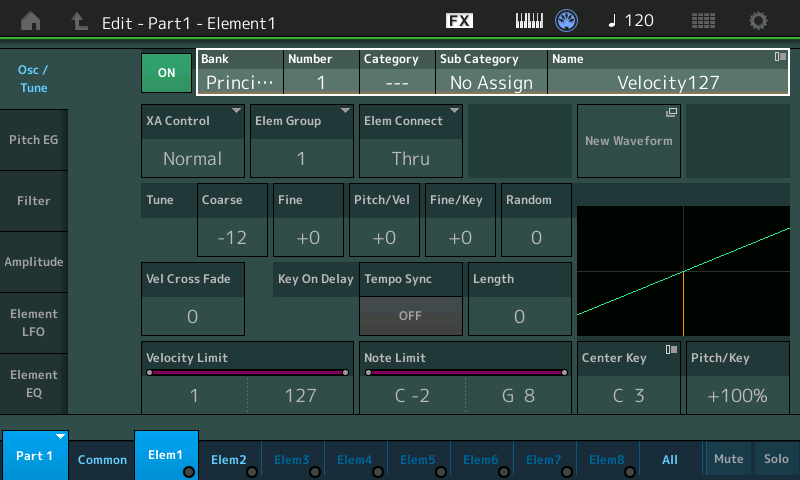
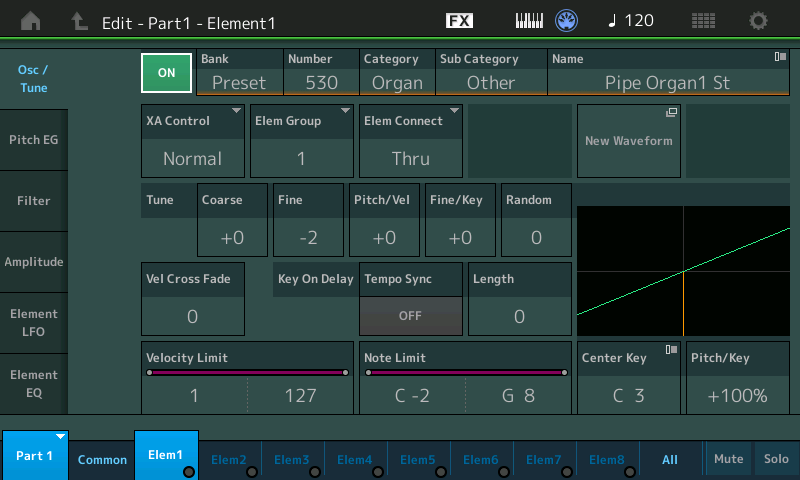
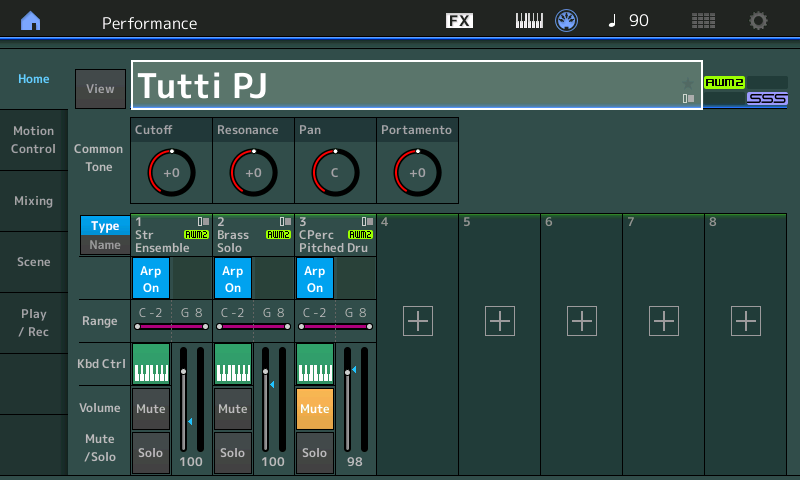
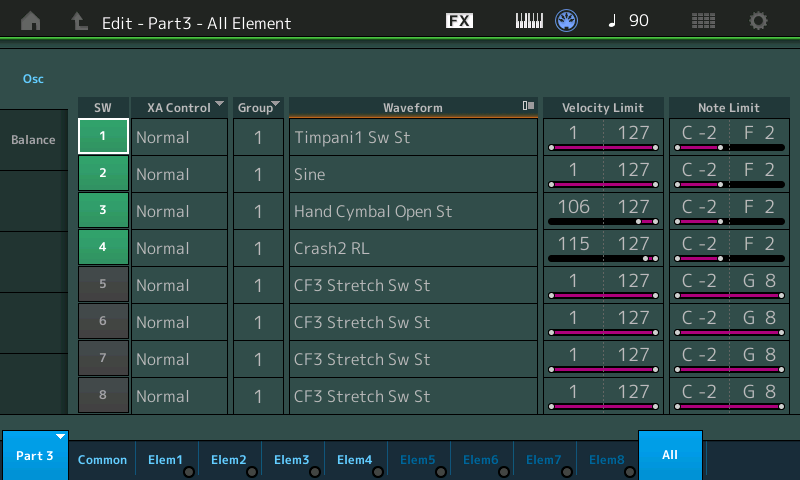
When I auditioned my first attempt at a pipe organ voice, I loaded the library generated by Sample Robot, but did not import the Performance. I even created a User Performance that referred to the new waveform and it played perfectly. However, was the new waveform really in USER Memory? No. I deleted the Library from USER Memory and the waveform disappeared, too. The User Performance which once referred to the waveform did not sound anymore. Edit revealed an empty space in the voice Element which once referred to the new waveform.

Actually, this is quite good behavior. In order to quickly audition new waveforms produced by Sample Robot, I just need to load the Library file with the new waveform. If I don’t like the sound, I can easily destroy the evidence by deleting the library from its slot in USER Memory. If I like the sound, then I can import the performance from the library to the USER Bank and build on top of the new waveform.

I’m glad that I undertook this experiment before going further. I want to keep the Principal 8′, 4′, 2′ waveform and Performance, and I want to audition any new waveforms without disturbing my earlier work. With load, save and import in mind, I think I see the way forward.

Copyright © 2018 Paul J. Drongowski

Here are a few helpful notes from the YamahaSynth.com site. Special thanks for to Phil Clendeninn and Jason!

A Library file can be loaded without overwriting your USER AREA. A Library file can install data into one of eight LIBRARY locations in your Montage/MODX.

When you place something in a Library location it’s there with everything it needs to be played (just like your Preset data always has everything it needs). But, you can rewrite this, later, if you change your mind or wish to add to it!

To create a LIBRARY you must assemble what you wish to place in that Library into your USER area. From the USER area you can SAVE as a “Library File” — this creates a .X7L file on your USB stick. Once you have that file, you can then install it to one of 8 Library locations.

You can then audition the sounds, decide which ones you think are “keepers”. The ones you want to keep you can IMPORT to USER. Why would you want to import them into USER? Because you assemble the data that you want to keep and then create your own custom library.

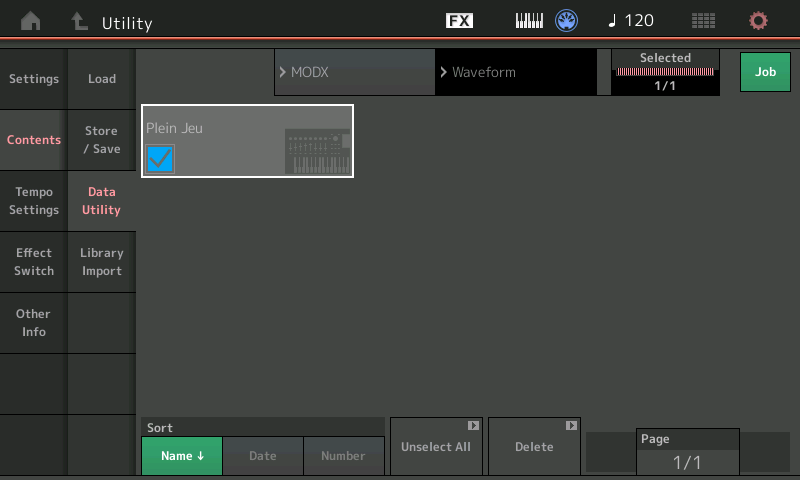
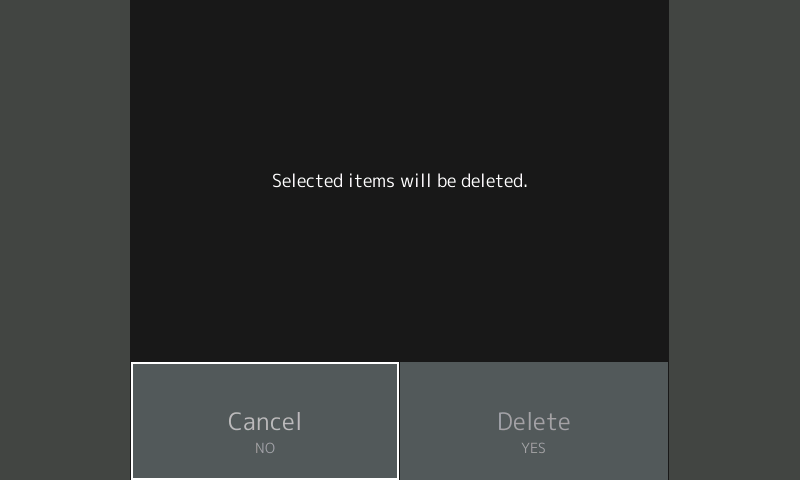
You can delete unwanted Libraries by entering the Library folder, select an item, tap “Delete”.

You can assemble data from a Library by using the “Import Library” function (Montage version 1.10 and later): UTILITY → Contents → Library Import

Each library can only be changed in its entirety. You cannot delete individual performances within a library – you can only delete the
entire library. You cannot add one Performance to an existing library. Libraries can only be installed, deleted, or created. Libraries cannot be edited on MODX.

The Library Banks contain the Performances you have added as Libraries. The Library Banks are initially empty. (A Library can be added by importing a library file.)

  1. Install library to a library slot (the one you want to add to)
  2. Backup then clear the user area so it is empty
  3. Create the one user Performance you want to add to the library (eventually) in the user area. The user area now has one Performance you want to add to the installed library.
  4. Import the entire Library you installed in step 1 to the user area. The act of “import” does not overwrite the user area. It will make sure all necessary content in the library, including custom waveforms, are copied (imported) into the user area.
  5. Create a new library from the user area. This new library will be the original one plus the one (in this example) user Performance you wanted to add.
  6. Delete the previous library
  7. Install the new library

Sample Robot: Quick feedback

I’m deep into the next phase of my experiments with SKYLIFE Sample Robot — automatically sampling a pipe organ voice from Yamaha Genos™

Two mundane, yet important observations:

  • The license allows up to 3 simultaneous installs — quite generous.
  • Sample Robot is 64-bit only. (?)

I intended to install Sample Robot on my “upstairs” PC. The upstairs PC is equipped with a basic analog-to-digital converter (ADC) and digital-to-analog converter (DAC), a Behringer UCA202. Yes, I know, it’s kind of low-brow, but I don’t do enough sampling, etc. to splash out for an expensive converter. The upstairs rig is always ready to go, including its E-MU MIDI2x2 interface. It all sits right next to Genos. A quick cable up and we should be ready.

Or not. The upstairs PC runs Windows 7 32-bit. The copy of Sample Robot which Yamaha Musicsoft dealt to me insists on 64-bit Windows 7. BTW, I couldn’t find this requirement (or any detailed platform requirements) on the Sample Robot web site or in the Sample Robot manual. I think it’s 64-bits or the highway…

“If the mountain will not come to Muhammad, then Muhammad must go to the mountain.” Drag Genos, UCA202, and a handful of cables downstairs to Windows 7 64-bit and Sample Robot.

With everything moved and cabled, it’s finally time to fire up Sample Robot. Thank goodness for its start-up wizard because it definitely takes you through every essential setting which must be made. The wizard leads up to its final screen which has a button to start sampling. Great. except what about setting levels?

Here the road gets a bit rough. First, I noticed that Sample Robots meter is twitching as though it’s getting schmutz on the audio input or at least a dirty sample stream from the UCA202 ADC. I’ll be darned if I can find a way to monitor the incoming sample stream through the box, i.e., route the incoming stream to Sample Robot’s audio output in order to hear incoming audio on the monitors.

Worse, I didn’t even know that Genos was playing the wrong voice! Genos has two 5-pin MIDI ports: Port A IN/OUT and Port B IN/OUT. By default, Port A is associated with the SONG channels and Port B is associated with the keyboard (tone generator) itself. I needed port B, and of course, was plugged into Port A.

How did I work through these issues? First, I turned off Sample Robot’s Auto-gain feature. “Use the Force, Luke.” I feel much better hitting the ADC with a known sensible level for starters. I can always enable Auto-gain later on.

Next, I had to get some aural feedback. I reduced the amount of time each sample is taken to two seconds. With such a short time, I could quickly capture half-a-dozen samples, stop capture, and playback each individual sample for quality assurance. This is how I finally discovered the Port A/Port B wrong voice problem.

With Genos properly configured, I started to hear pipe organ instead of cheesy GM piano. This afternoon, I intend to capture a full set of short samples and QA them before acquiring full length (12 second) samples and looping them. Better to wait 60 seconds instead of six minutes; shorten that feedback loop!

Now, I think I can move ahead. But, please, oh please, where is the Monitor function in Sample Robot? To its credit, Sample Robot does what it says on the tin (modulo 64-bitness). More to come.

MODX: Get started with Sample Robot

In my last post, I created a new Yamaha MODX Performance from a handful of WAV files. The new Performance had shortcomings, mainly due to short loops in the samples themselves. I tossed the first one away. What the heck — it’s only bits. 🙂

Last time, I did all of the work on the MODX itself through its user interface (UI). My experience was generally good, but I had to enter a lot of detail directly into the UI. Today, I’m moving on to Sample Robot for Montage with hopes of making the job easier.

Sample Robot by SKYLIFE is a spiffy tool for copping sounds from old keyboards or any other sound source. Yamaha formed a parnership with SKYLIFE resulting in Sample Robot for Montage, a version of Sample Robot that is tailor-made for Montage (and MODX).

Even though Sample Robot for Montage — which I will refer to as “SRM” — has the ability to capture multisamples automatically from MIDI keyboards, it has two other capabilities of immediate interest and purpose:

  1. SRM can import WAV/AIFF files into a multisample.
  2. SRM exports the finished result as a Montage User file (X7U) or a Montage Library file (X7L). MODX loads both of these file types.

Thus, SRM looks to be and is a promising path for creating new MODX Performances from existing WAV/AIFF files.

At this point, I must admit that I’m still getting my head around the Montage/MODX library concept. [This subject receives scant space in the documentation, unfortunately.] Thanks to Phil’s tutorials on YamahaSynth.com, I grok their basic purpose — to bundle related Performances, waveforms, arpeggios, etc. into an easily distributed and imported package. I have much to learn about this subject especially how to exploit Montage/MODX libraries for data management during sound development. More about this some day.

Sample Robot for Montage: Set-up

I downloaded SRM from the Yamaha Musicsoft site. SRM is free to Montage (and, apparently, MODX owners) until March 2019. I can’t argue with the price!

The download is a ZIP file containing both the Windows and Macintosh versions of SRM. The Musicsoft site provides a Yamaha code number and a serial number, both of which are required for activation. Rikki don’t lose that number. 🙂

Install is easy — just click through the installation wizard. The Windows installer is about 200MBytes, the bulk of which are example projects.

You will be asked to activate after launching SRM for the first time. Enter all of the magic numbers. SRM starts up with a preloaded example. I peeked and poked at the example for a little while and quickly discovered that an audio device wasn’t assigned. I eventually settled on “Microsoft Sound Mapper – Output”. Unfortunately, Windows 7 ran that damnable audiodg (Audio Device Graph Isolation) process, taking a long time to complete. Further, I had to restart SRM before getting audio through the monitors. I can’t fault SRM for this. Microsoft? Hello, it’s 2018?

Upon start-up, SRM displays a wizard leading you through the task of setting essential project characteristics like sample rate and such. In a moment of hubris, I cancelled the wizard the first time through and found the app to be somewhat inert. Me-thinks SRM needs to initialize its environment and clicking through the start-up wizard at least once does the trick.

SRM: The warm-up

I strongly recommend a quick read through the SRM manual for no other reason than to become familiar with its concepts and terminology. The terminology is fairly standard, but it differs a bit from Montage/MODX terminology. For example, it appears that your SRM “multisamples” will become Yamaha waveforms and inherit multisample names. This is where familiarity will breed expertise, I expect.

I also suggest taking a tour around the SRM user interface. The “Info and Settings” pane is a property inspector that shows important properties for the selected project, multisample or sample. Then, check out the virtual keyboard. With a two button mouse, left clicking/holding a key plays the sample associated with the note. (Notes with a blue box marker have a sample assigned.) Right clicking a key selects the sample associated with the key.

The Osc, Wav, MIDI and Panic radio buttons seem to choose what the virtual keyboard sends and does. Try Osc and you’ll hear a pure reference tone at the selected pitch — a good feature when working with pitched multisamples. I don’t know about you, but my sense of pitch goes all whack after 30 minutes or so of intense work.

Today’s protein on the plate

I dug another old chestnut out of my hoard of pipe organ samples. Apple’s Symphony Orchestra Jam Pack (a blast from the past, eh?) has several mighty fine church organ patches. Even though it’s Garageband, the church organ is an EXS24 virtual instrument. If you know where to look, you can find the samples and you can play/inspect the virtual instrument in Logic via EXS24.

Apple licensed pretty decent samples. I once tried to determine their original source and vaguely remember Sonic Reality. Others thought VSL lite (circa 2003). Association with Garageband unfairly cheapened their reputation.

The samples are taken from three principal ranks (8′, 4′ and 2′) in unison. Without deep diving organ registration, a voice consisting of principals is good for hymn accompaniment. [Principals, BTW, are the metal pipes that give a pipe organ its distinctive timbre.] Thanks to the even footages, there aren’t a lot of weird harmonics to clutter up the sound.

A Dave Stewart moment. Many synthesizer pipe organ patches are reedy. They want to impress the buyer with bombast (i.e., “Phantom of the Opera” AKA Bach’s Toccata and Fugue in D minor). Reeds and strings are inappropriate for hymn accompaniment. Flutes, sometimes. Pure tones, pure tones.

Here is a table summarizing the sample files:

KB#  Low  High  Center  File
---  ---  ----  ------  -----------------------
 1   C-2   C#1      C1  Prin_842_kb1_c1.aif
 2    D1    E1     D#1  Prin_842_kb2_d#1.aif
 3    F1    G1     F#1  Prin_842_kb3_f#1.aif
 4   G#1   A#1      A1  Prin_842_kb4_a1.aif
 5    B1   C#2      C2  Prin_842_kb5_c2.aif
 6    D2    E2     D#2  Prin_842_kb6_d#2.aif
 7    F2    G2     F#2  Prin_842_kb7_f#2.aif
 8   G#2   A#2      A2  Prin_842_kb8_a2.aif
 9    B2   C#3      C3  Prin_842_kb9_c3.aif
10    D3    E3     D#3  Prin_842_kb10_d#3.aif
11    F3    G3     F#3  Prin_842_kb11_f#3.aif
12   G#3   A#3      A3  Prin_842_kb12_a3.aif
13    B3   C#4      C4  Prin_842_kb13_c4.aif
14    D4    E4     D#4  Prin_842_kb14_d#4.aif
15    F4    G4     F#4  Prin_842_kb15_f#4.aif
16   G#4   A#4      A4  Prin_842_kb16_a4.aif
17    B4   C#5      C5  Prin_842_kb17_c5.aif
18    D5    E5     D#5  Prin_842_kb18_d#5.aif
19    F5    G8     F#5  Prin_842_kb19_f#5.aif

The note names (numbers) follow the Yamaha convention. This information was taken from Logic EXS24.

I did a little bit of prep work. I renamed the AIF files, putting the center note into standard form. I checked the samples in Yamaha Tiny Wave Editor (TWE) to see if they were looped. (They were.) I normalized the samples using TWE. Turns out, SRM can normalize and I could have accomplished this task in SRM instead.

The Apple samples are decent:

  • Stereo, 44100Hz, 16-bit
  • Nice long samples (12 to 19 seconds each)
  • Long loops, no audible bumps

This one has the potential to be a keeper.

SRM: Doing the business

Time to get down to business. I created a new project named “Principal842”. Please see the screenshot below. [Click images to enlarge.] I like SRM’s “Battle Zone” visual theme; it’s one of the few games that I still relate to.

Drop into the “Import/Export” menu, select the AIF files, click the Import button, and what the?

Admittedly, what came next were my most frustrating moments. I either imported one individual sample file or just the last sample file in the selected list. Arg! Long story short, it came down to finding the right combination of import settings.

The default Copy setting is “Copy to filenames’s Root Key (if available), else to filename’s Root Key”. Grammar issue aside (“filenames'” is grammatically correct), I tried “Copy to filenames’s Root Key” with success.

The first screenshot shows the state of the project after a successful import. The samples are laid out correctly across the keyboard as derived from the sample file names. Further, SRM did a smashing job with the keybank ranges.

With everything in order, dive into import/export and select Montage Library (X7L) format for export. I went with X7L instead of X7U (User format) because I didn’t want to overwrite my User area. Yes, I’m thoroughly backed up, but why take a chance. I also wanted to get my feet wet with libraries.

I copied the X7L file to a USB flash drive, inserted the flash drive into MODX and loaded the library file. The X7L Library file is sizeable due to the waveform inside. The library file has the name “Principal842”, same as the SRM project. The Library appears in Category Search under that name. SRM generated a basic Performance, too.

I tried the basic Performance and was satisfied with the raw material. I then dove into the left-over husk of yesterday’s abandoned experiment. The husk (Performance) began life as the “Church Organ” preset voice. I changed its waveform to the new one and made a few tweaks here and there. Voila! A decent pipe organ voice suitable for hymn accompaniment.

Sometimes a new waveform requires polish. The sample levels may be uneven across the keyboard or a sample may be out of tune. The MODX UI is well up to the job allowing tweaks for level and fine pitch.

I wanted to post the finished project. However, given the commercial origin of the samples (Apple), I don’t want to violate intellectual property (IP) rights. Instead, here’s a quick MPEG-4 demo (m4a).

Copyright © 2018 Paul J. Drongowski

MODX: Creating a new waveform

Whether it’s scientific papers or Web how-to’s, you would think that no one ever made a mistake or tried something and failed. The path to success is really crooked.

So, here is a blog post about an experiment that almost worked out.

I’ve been hoarding pipe organ samples for decades (literally). For example, some of my collected samples are from the venerable Yamaha TX16W. The TX16W samples are small enough to fit into the 1MByte expansion waveform of my TG-500. Yes, 1MByte. The 1GByte MODX expansion waveform memory looks positively enormous in comparison.

The scenario that I describe here creates a new waveform using nothing more than the Yamaha MODX user interface (UI). Back in the day, I created voices through the TG-500’s 24×2 line character display. The MODX UI is heaven in comparison. Yeah, I’m going to give Sample Robot for Montage a spin eventually. Not today.

Where to start? I started with the free “CMS Classic Organ” samples distributed by CSM Sounddesign. Thank goodness I picked up a little German years ago because the English CMS pages are under construction…

The samples are part of the “CMS Classic Organ” expansion pack (PPF) for Yamaha Genos™ — not the typical place where one would start. The samples are relatively small, the demos sounded OK, and the price was right. Four steps are needed to extract the samples:

  1. Find the sample files and the UVF (XML) voice description files in the Yamaha Expansion Manager pack database.
  2. Extract keybank information from the UVF file.
  3. Rename the sample files to meaningful names, e.g., “Plein_kb0_C1.raw”.
  4. Convert the sample files to Microsoft WAV format.

Admittedly, this is more work than the average Jane or Joe would do. But, hey, this is a learning exercise, plus a chance to dink around with Genos stuff, too.

The next preparation step is important no matter how you obtain your sample files. Make a table summarizing the keybank information:

KB#  Low High  Center  Size  LoopStart LoopEnd  WAV file
---  --- ----  ------  ----- --------- ------- ------------------
 0   C-2  D#1    C1    27627     25594   27623 Plein_kb0_C1.wav
 1    E1   B1    E1    31332     29717   31328 Plein_kb1_E1.wav
 2    C2  D#2    C2    31816     31136   31812 Plein_kb2_C2.wav
 3    E2   G2    E2    25030     24757   25026 Plein_kb3_E2.wav
 4   G#2   B2   G#2    30869     30652   30865 Plein_kb4_G#2.wav
 5    C3  D#3    C3    30744     30571   30740 Plein_kb5_C3.wav
 6    E3   G3    E3    24084     23812   24080 Plein_kb6_E3.wav
 7   G#3   B3   G#3    17917     15783   17913 Plein_kb7_G#3.wav
 8    C4  D#4    C4    20514     20172   20510 Plein_kb8_C4.wav
 9    E4   G4    E4    22128     21655   22124 Plein_kb9_CE4.wav
10   G#4   B4   G#4    24853     24424   24849 Plein_kb10_G#4.wav
11    C5  D#5    C5    26788     26615   26784 Plein_kb11_C5.wav
12    E5   G8    E5    27574     27368   27570 Plein_kb12_E5.wav

You’re gonna need this. Trust me, once you get into the guts of waveform construction, you don’t want to be puzzling out the center note, etc. The CMS samples are 41000Hz, 16-bit, mono, LINEAR16.

MODX needs looped samples. I’ve run into this issue before when creating PSR/Genos voices via Yamaha Expansion Manager (YEM). You would think that loop point data is standard in WAV. It isn’t. Good old Yamaha Tiny Wave Editor (TWE) worked for PSR/Genos, so I reached for TWE. Fortunately, TWE let’s you enter loop points numerically and I entered the loop start and end points extracted from the UVF file. [Not so crazy as I may seem after all.]

I transfered the looped sample files to a USB flash drive and inserted the flash drive into the MODX. I brought up a simple existing pipe organ Performance, Church Organ, which has two voice elements. I silenced the second element since it won’t be needed. Select the first element. Take a deep breath and touch the New Waveform button.

MODX displays a screen allowing you to select and load the WAV file for the first keybank. As you can see in the screenshot, you can easily get into the weeds if you haven’t come prepared with a table like the one shown above. [Click images to enlarge.]

After loading the correct file, MODX displays the keybank editing screen. Now, it’s time to enter the key range and center note information from the first row in the table. Then, touch Add Keybank, rinse and repeat twelve more times. If you make a mistake, touch the Keybank number field and scroll the existing keybanks. When all looks correct, press the EXIT button.

When MODX creates the waveform, it gives the new waveform the same name as the first sample file. I recommend renaming the waveform and specifying the waveform Category and Subcategory using the appropriate fields. I named the waveform “Plein Jeu,” the French name for an organ registration consisting of principal pipes. Good naming and data management will eventually pay off.

OK, so what went wrong?

  1. In my quest for CMS samples, I extracted voice information for a few other voices. Then, stupidly, when entering keybank information, I started with the wrong freakin’ table. I quickly realized my mistake because the center note information and what I was hearing were whack. Thank goodness for the ability to scroll through keybanks.
  2. The CMS loops are très short. Short pipe organ loops lose all of the nice shifting harmonic stuff that we hear from the real deal.
  3. The split points between keybanks are sonically rocky. This may be due to the unorthodox key layout. The center note is supposed to be the middle of the key range, not the lowest note in a range. Layout can be fixed and uneven levels can be fixed. But, I hear differences in basic tonality, too. Not good, not fixable.
  4. The organ voice plays back too quietly even with all of the levels max’ed out. I forgot to normalize the samples.

Lack of normalization I can fix. TWE (or any other DAW) performs normalization. The short loops, however, are a deal breaker and further effort with the CMS pipe organ samples is not worth it. I’ve got better candidates in the treasure hoard.

Throw the first pancake away

When you flop on your kiester, what do you do next?

In this case, delete the waveform. Press the UTILITY front panel button and touch the Waveform folder.

MODX displays the waveforms that you’ve created. In this example, it shows the “Plein Jeu” waveform. Touch the on-screen Job button and select the waveform to be deleted. Then, touch the Delete button.

MODX display a dialog box requesting confirmation. Touch Delete and wait for the delete operation to complete.

When it’s gone, it’s gone. If you edit the parent Performance, the waveform field is empty.

Now, let’s try this again with feeling. Or at least, normalized waveforms. 🙂 Stay tuned.

Copyright © 2018 Paul J. Drongowski

MODX: Select Performance from MMS

Between shopping for Halloween candy and the dentist, there’s just enough time for a few quick experiments with Yamaha MODX and Mobile Music Sequencer (MMS).

I’ve explored MMS MIDI messages in earlier blog posts. MMS transmits MIDI messages that by and large conform to the Yamaha XG voice and effects architecture. The MMS software synth engine resembles an XG tone generator albeit with a smaller and somewhat unique voice set.

MMS is capable of driving Motif XS/XF, MOX/MOXF and MX synthesizers with voice change messages. It can also drive Tyros 5, and with a few limitations, Genos and PSR arranger workstations.

The experiment de jour is sending Motif XF voice change messages MMS to MODX. On the face of it, this may seem absurd because the Montage/MODX and Motif XF have radically different patch (Performance) assignments. However, a MIDI program change message sequence,

  1. Bank Select MSB (CC#0)
  2. Bank Select LSB (CC#32)
  3. Program Change

is a program change message sequence no matter what the target is. The trick is to send meaningful program change messages which achieve an intentional result.

Thus, the first question is “What Motif XF patch changes can MMS send?” In order to find out, we need to tell MMS that we intend to communicate with a Motif XF. Navigate to the SYSTEM > MIDI PORT screen and touch the HARDWARE button. Select Motif XF from the list of potential targets. Then, return to the phrase view. [Click images to enlarge.]

Next, we must disable Voice Link. Create a new MMS project with Voice Link disabled. With Voice Link disabled, MMS will not set a part voice automatically when it loads a phrase.

We will send patch change messages manually. Select an MMS part and touch the PART VOICE SELECT button. In the center near the top of the PART VOICE SELECT screen, you should see a button labelled “MOTIF XF”. Tap the button.

Now, you should see the hardware voice selection screen with “MOTIF XF” in the upper left hand corner. Touch the BANK tab.

We need to know and understand how the Motif XF bank and voice numbers relate to the MODX (and Montage) presets. Here is a correspondence table:

Motif XF bank MSB LSB MODX Single-Part Preset Group
PRE1 63 0 Group 1
PRE2 63 1 Group 2
PRE3 63 2 Group 3
PRE4 63 3 Group 4
PRE5 63 4 Group 5
PRE6 63 5 Group 6
PRE7 63 6 Group 7
PRE8 63 7 Group 8
USR1 63 8 Group 9
USR2 63 9 Group 10
USR3 63 10 Group 11
USR4 63 11 Group 12
PDR 63 32
UDR 63 40
GM 0 0 GM
GMDR 127 0 GMDR

The MODX information is taken from the table on page 184 of the MODX Data List PDF. These are the Motif XF banks supported by MMS. There are a few more (e.g., Mixing Voice), but those banks are not supported by MMS. If they ain’t supported by MMS, fuggedaboutit.

Please take note of these important observations and/or limitations:

  • All program change messages (except the General MIDI stuff) send bank select value 63. We only can select single-part MODX Performances.
  • MMS cannot send bank messages for all MODX presets. MODX recognizes bank LSB values for preset Performances in the range [0:31]. (We’re not considering User Performances, etc. here.)
  • We have full access to the regular General MIDI (GM) voices and drum kit.
  • We need to ignore Motif XF voice names and concentrate on the MMS bank and preset number only. Ignore voice identifiers like “A07”, too. They have no meaning in the MODX world.

Bottom line: If the MSB and LSB for a MODX Performance doesn’t fall into the range given by the table, we cannot select the MODX Performance from MMS.

Maybe, pretty please, Yamaha will update MMS for Montage, MODX and Genos?

The second big question is “How do we find the Bank Select MSB, Bank Select LSB and Program Change number for a MODX Performance?” Fortunately, the answer is easy. Select a Performance by touching its name. MODX displays a contextual menu on the left hand side of the screen. Touch the Property button. MODX displays the needed Performance properties as shown in the screenshot below. This is the property information for the single-part Performance Flute Legato.

I noted a small bug (version 1.10). MODX should display “63” for preset Performances, not “64”.

Back in MMS, if we want to select Flute Legato on the MODX, we need to select the USR3 bank (MSB 63, LSB 10) and “USR3 039” (Program Change 39).

Try Tenor Soft Legato (MSB 63, LSB 10, Program Change 31). Notice that the Performance name at the top of the MODX screen does not change. Touch the Name button to display the Performance name for each Part. Aha! The Performance name for the Part is “Tenor Soft Legato”, and yep, it’s playing a saxophone.

Fun, fun, fun. If you select an MMS part which does not yet have a corresponding MODX Part and change the MMS part, MODX creates a new Part in the Performance. Handy.

Drum kits

The drum kit situation is a glass half-full.

First, the good news. MMS can select 47 drum kits as listed in the table below.

MMS/Motif XF MSB LSB PC# Kit
PRE6 011 63 5 11 Real Drums Kit
PRE6 012 63 5 12 Real Drums Kit 2
PRE6 013 63 5 13 New Oak Custom Kit
PRE6 014 63 5 14 New Maple Custom Kit
PRE6 015 63 5 15 Beachwood Snare Kit
PRE6 016 63 5 16 Beachwood Snare Kit 2
PRE6 017 63 5 17 Real Brushes Kit
PRE6 018 63 5 18 Jazz Brushes Kit
PRE6 019 63 5 19 Jazz Sticks Kit
PRE6 020 63 5 20 D’elo Kit
PRE6 021 63 5 21 T’s EDM Kit
PRE6 022 63 5 22 T’s EDM Kit 2
PRE6 023 63 5 23 T’s Hip Hop Kit
PRE6 024 63 5 24 T’s Hip Hop Kit 2
PRE6 025 63 5 25 Trap Kit
PRE6 026 63 5 26 Trap Kit 2
PRE6 027 63 5 27 Downtempo Hip Hop Kit
PRE6 028 63 5 28 EDM Kit
PRE6 029 63 5 29 House Techno Kit
PRE6 030 63 5 30 House Techno Kit 2
PRE6 031 63 5 31 Electro Kit
PRE6 032 63 5 32 Electro Kit 2
PRE6 033 63 5 33 DUB Kit
PRE6 034 63 5 34 DUB Kit 2
PRE6 035 63 5 35 European EDM Kit 1
PRE6 036 63 5 36 European EDM Kit 2
PRE6 037 63 5 37 Dancefloor Kit
PRE6 038 63 5 38 Dancefloor Kit 2
PRE6 039 63 5 39 Psychodelic Dub Kit
PRE6 040 63 5 40 Brachial Kit
PRE6 041 63 5 41 Epic Kit
PRE6 042 63 5 42 Arab Mixed Kit 2
PRE6 043 63 5 43 Iranian Mix Kit
PRE6 044 63 5 44 Modern Rock Kit 2
PRE6 045 63 5 45 Brazil Kit 1
PRE6 046 63 5 46 Brazil Kit 2
PRE6 047 63 5 47 Turkish St Kit
PRE6 048 63 5 48 New Arabic Kit 1
PRE6 049 63 5 49 New Arabic Kit 2
PRE6 058 63 5 58 Highland Snares

There’s some really great stuff in there. Brachial blows me away!

Unfortunately, the eight zone (“8Z”) kits and many of the bread-and-butter kits like Power Standard Kit are out of reach. The 8Z kits need LSB 13 and the bread-and-butter kits need LSB 16. I’m bummed because I can’t get to my personal favorite, Break Kit. Its MIDI select values are MSB:63, LSB:16, PC#:54.

Hopefully, Yamaha will update Mobile Music Sequencer and we will get access to all of the MODX (Montage) Performances.

In case you’re wondering, I connected my iPad to MODX using the Apple Camera Connection Kit and a relatively ancient IK Multimedia iRig MIDI (5-pin) interface.

Copyright © 2018 Paul J. Drongowski

Yamaha MODX: Creating a split

Yesterday, we learned how to make a two voice layer and how to control one of the Parts using the Super Knob.

Today, I go over the steps to create a two Part split:

1. Press the CATEGORY button and find the Performance that will be used as the left hand voice. For this example, I chose a single-Part Performance, Small Section, from the Strings category. Press PERFORMANCE (HOME).

2. Touch the on-screen plus box button to add the second Part which will be used as the right hand voice. I chose Oboe 3 from the Woodwind category. Press ENTER to confirm your selection.

3. Now it’s time to set the split point. Touch the upper note limit in Part 1. MODX displays a contextual menu on the left-hand side of the screen. Touch the Keyboard menu item, which turns green when selected. Now, play the keyboard key which is the top-most key in the desired left hand zone. If you make a mistake, toch a different key. Press EXIT when finished.

4. Notice that the upper note limit for Part 1 has been changed. The upper note limit in the example is A#2.

By the way, instead of touch the Keyboard menu item, you can set a note limit by spinning the data dial. It’s you choice.

5. Now touch the lower note limit for Part 2. MODX, again, displays a contextual menu with one menu item, Keyboard. Touch the Keyboard item, turning it green (highlighted). Play the keyboard key which is the bottom-most key in the right hand zone (B2 in this example). Press exit when finished.

Play the finished Performance. You should hear the instrument change from Part 1 to Part 2 (or vice verse) as you play across the split point.

If you like the result, press the STORE button and save your new Performance.

While we’re here, let’s change the reverb algorithm. The system-level reverb parameters belong to the Performance as a whole. Thus, we need to make changes in Performance edit mode.

1. Touch the Performance name to select the entire Performance. MODX highlights the box around the Performance name to indicate that the Performane is selected.

2. Press the EDIT front panel button. You should see “Edit – Common/Audio” in the upper left corner of the screen. When you see this, you’re in Performance edit mode.

3. MODX displays six tabs starting with “General,” “Audio In,” etc. Touch the Effect button. MODX displays the effect routing. The diagram is an overview of the system-level effects. If you start with the same example voices, the reverb algorithm is R3 Hall.

4. Touch the Reverb tab in the second column. MODX displays the chosen effect algorithm and the effect parameters.

5. Touch the effect type box. MODX displays a menu of reverb algorithms. Touch HD Hall (or one of the other reverb types) to change the effect algorithm. Press the EXIT button to dismiss the menu.

6. MODX updates the display with the newly selected reverb type and its associated effect parameters. Try a different effect preset just for fun.

7. Press the front panel EXIT button to return to Performance play mode.

If you’re really ambitious, add a layer behind the left and right hand parts. Follow my last step-by-step tutorial and control the background layer using the Super Knob.

One or two final tips. Rename your new performances. I suggest adding one or two characters that identify the performance as one of yours versus the zillions of preset performances. (I use my initials, “PJ”.) I also recommend trying the on-screen “Type” and “Name” buttons just to the left of the Parts. These buttons choose the legend displayed at the top of each Part:

  • Type (highlighted in blue): Performance type (e.g., “Str Ensemble”)
  • Name (highlighted in yellow): Performance name (e.g., “Small Section:

Identifying information should help you keep the Part information mentally sorted. It’s easy to get confused when building a multi-Part Performance where every part is a woodwind (i.e., the same type).

With splits and layers, you’re ready to move mountains. 🙂

ICYMI: MODX screen capture

Like Montage, the MODX has a double-secret Easter egg for capturing screen shots.

  1. Insert a USB flash drive into the USB TO DEVICE port.
  2. Press and hold the A/D INPUT ON/OFF button.
  3. Press and release the AUDITION button.
  4. Release the A/D INPUT ON/OFF button.

The MODX writes screen shots to the USB flash drive with names such as “DSNAP_0.png”.

Here’s two tips. 1. To save wear and tear on the USB TO DEVICE port, I plug a short extender cable into the port and then plug the USB flash drive into the extender cable. The cable brings the port to a place where I can easily reach it and it reduces wear on the port connector. 2. The screen capture procedure doesn’t provide any visual indication that the capture was successful or complete. Use a USB flash drive with an activity LED (e.g., the Kingston Data Traveler Elite G2). You should see the drive’s LED flash when the PNG file is written. Naturally, do not remove the drive when it is active!

Copyright © 2018 Paul J. Drongowski

Easy MODX Super Knob example

I recommend watching one of the MODX tutorial videos recorded by Yamaha’s Blake Angelos. After getting through the usual preliminaries, Blake shows how to create a simple piano and synth pad layer with Super Knob control.

Back on the job, I had a saying when I or another team member got overly enthusiastic during design and implementation. “Let’s build just one of these and get it working. See how it goes. Then, scale up.”

I watched one of Blake’s tutorials (e.g., Kraft Music) and wrote down a few notes. His tutorial is ten minutes well spent; just build one of these. Here are ten steps to Super Knob nirvana.

1. Press the CATEGORY front panel button to find the old Full Concert Grand Performance. Full Concert Grand has only one part. This keeps the demo simple.

2. Press the PERFORMANCE button to go to the home screen. You should see the piano in Part 1. [Click images to enlarge.]

3. Press the on-screen plus box in Part 2 to add the synth pad. MODX displays the CATEGORY search screen where you should navigate to VP Soft in the Strings category. Or, your favorite single part pad! Press the ENTER button to make your selection. MODX displays two parts: grand piano in Part 1 and pad in Part 2.

4. Touch Part 2 to select it. (You may find it easier to navigate to Part 2 using the cursor buttons; I do.)

5. Press the EDIT front panel button to go into Part Edit. You should see “Edit – Part2 – Common” at the top of the screen.

6. Touch the Volume parameter and dial it down to zero. This silences the pad part, which we will put under Super Knob control.

7. Notice that the CONTROL ASSIGN front panel button is lit (turned on). When any controllable parameter is selected on the screen, the CONTROL ASSIGN button will light up.

8. Press the CONTROL ASSIGN button. MODX displays a screen (dialog box) asking you to assign a source controller to the selected destination parameter. In this case, the destination parameter is Part 2 Volume.

9. Turn the Super Knob. This gesture assigns the Super Knob to Part 2 Volume. MODX displays the Control Assign information for the Super Knob. Just like learn mode in a DAW or physical MIDI controller.

10. Press the EXIT front panel button. Play and turn the Super Knob. You should hear the pad volume increase or decrease as you turn the Super Knob. Watch the on-screen assignable knobs change state along with the Super Knob.

If you like the result, press the front panel STORE button to save your brand new Performance.

Easy. One thing to keep in mind is that there are two levels of MODX editing: Performance and Part. Some parameters belong to the Performance and other parameters beong to a Part. The distinction is very similar to the old Motif/MOX Performance and Voice modes although MODX is modeless. MODX stores everything in a unified Performance, but you do need to be conscious of editing at the Performance level versus editing at the Part level.

Copyright © 2018 Paul J. Drongowski

MODX Performance: Latin Flutist

To better understand voice programming, you’ll need to know a few of the abbreviations which appear in waveform names:

Abbreviation Meaning
Stac Staccato (detached)
Of Offset (start after attack)
St Stereo
L Left
R Right
Sw Velocity switched
NV No vibrato

Yamaha have never published an official key for their waveform naming convention, so this is my best educated guess. (Thanks to Phil at YamahaSynth.com for his insights.)

A MODX waveform contains one or more samples laid out in one or more keybanks. The keybanks specify basic trigger conditions for a sample: what range of notes (e.g., C-2 to G8) and what velocity range (e.g., 1 to 127). “Switched” waveforms implement two or more velocity ranges. The Flute4 family of waveforms, for example, offers four different levels: pp, mp, mf, and ff. The switched Flute4 Sw St waveform combines these individual variants into one velocity switched waveform.

Stereo waveforms are so marked (“St”); assume a mono waveform unless explicitly identified as stereo. The left (“L”) and right (“R”) waveforms are the left and right channels of a single sound. In old gear (pre-Montage and pre-Genos), tone generation (TG) channels are mono and two elements (TG channels) are needed to play back stereo. The new tone generator in Montage, MODX and Genos has stereo tone generation channels.

Acoustic instrument samples usually start with the attack portion of the sound followed by the body (and possibly, release). “Offset” means that playback is started at some offset from the beginning, usually after the attack portion. When a musician plays a legato line, the individual note attacks are de-emphasized. Offset waveforms are normally used to simulate legato.

Staccato (and pizzicato) are short samples with a strong attack. These waveforms sound like one-shots without much sustain (i.e., a long body).

Musicians playing real acoustic instruments often add vibrato in the same way that a vocalist adds vibrato. Waveforms for acoustic instruments often have the vibrato “sampled in,” i.e., the player added vibrato when the sound was digitally sampled. Non-vibrato waveforms are marked “NV.”

Finally, you’ll sometimes see “+” and “-” waveforms. These are variants which are slightly detuned sharp and flat, respectively.

Performance: Latin Flutist

All of this may seem like a lot to keep in mind, but in practice, it’s pretty simple. Let’s take a look at the voice programming for Latin Flutist. First, select Latin Flutist, tap the first Part (WW Flute) and hit the Edit button. You’ll see the Common voice parameters. Tap the “All” button in the lower right corner of the screen. MODX displays a table summarizes the active voice elements. (Don’t be a afraid to check out the “Balance” tab, too.)

The “Osc” tab provides much valuable information about the voice elements and how the voice behaves when it is played. The first four elements handle regular (non-legato) notes while the elements 5 through 7 handle the legato case. (Element 8 is not used and is turned off.)

Let’s take the regular (non-legato) case first. The first four elements depend upon the state of the assignable switches in addition to velocity and note range. Note range is not so important here because all elements respond across the full range of the keyboard (C-2 to G8). Elements 2 to 4 are potentially active when both assignable switches are off (A.SW Off). Element 3 triggers when the velocity of the incoming note is between 1 and 80, inclusively. Element 2 triggers when the velocity is between 81 and 127. Each element plays a different waveform giving the intended note a different character depending upon its velocity. Element 4 is a sweetener, triggering when a note is struck hard (velocity between 103 and 127, inclusively). Element 4 adds a stacatto “spit” to hard struck notes.

Whew, this is much harder to say than it is to actually understand or play. 🙂

Elements 5 to 7 handle legato notes. XA control is Legato. If you experiment with Latin Flutist, you’ll notice that the A.SW 1 On case (element 1) takes precedence over Element 7.

Legato notes with velocity 1 to 109 trigger element 7. Element 6 adds a staccato spit for hard struck legato notes. Element 5 is really fun because it adds a flutter tongue for hard struck legato notes. Try to trigger this case. You’ll notice that the second note in the legato sequence must be struck firmly in order to get the spit and flutter tongue. This last case is very similar to one of the Genos Jazz Flute articulations.

The Genos Jazz Flute is a Super Articulation 2 (SArt2) voice. In addition to legato and flutter, the Jazz Flute has wonderful scoop (bend up) and fall (bend down) articulations. One negative. The legato gesture needed to trigger the flutter articulation requires a firm, very deliberate strike on the second key in the legato sequence. I just about have to drill the key through the keybed when touch is set to NORMAL! On Genos, the only recourse is to set touch response to SOFT or EASY; you cannot reprogram the voice’s velocity threshold.

At this point, I hope you can see that the Osc table gives valuable clues about how the Performance can be played, i.e., how to invoke certain specific articulations. Also, if you have trouble hitting keys hard enough to trigger certain articulations, you could lower the velocity threshold for hard struck notes. (A quick fix, of course, is to use the “Soft” or “Wide” Velocity Curves — no edits required.)

Long-time readers know that I often create and post tables like:

El# Waveform          VLow VHigh  NLow NHigh  Level  XA
--- ----------------- ---- -----  ---- -----  -----  ---------
 1  Flute4 NV Sw St      1   127   C-2    G8    117  A.SW1 On
 2  Flute4 Sw St        81   127   C-2    G8    117  A.SW1 Off
 3  Flute3 Sw St         1    80   C-2    G8    127  A.SW1 Off
 4  Flute4 Stac Sw St  103   127   C-2    G8    124  A.SW1 Off
 5  Flute4 Flutter Sw  110   127   C-2    G8    120  Legato
 6  Flute4 Stac Sw St  102   127   C-2    G8    127  Legato
 7  Flute4 Sw St         1   109   C-2    G8    117  Legato

Usually I have to dig for this voice data. The MODX Osc and Balance tables put this critical information right up front. Thank you!

Performance: Concert Flute

Quickly, here is the basic programming information for the MODX Concert Flute Performance. [Click images to enlarge.]

Please note the element 5, 6 and 7 amplitude levels — zero! These element levels are under Super Knob control. Give this Performance a try and you’ll see and hear what I mean.

El# Waveform          VLow VHigh  NLow NHigh  Level Pan  XA
--- ----------------- ---- -----  ---- -----  ----- ---  ---------
 1  Flute4 NV Sw St      1   127   C-2    G8    103  C   A.SW Off
 2  Flute3 Sw St         1   127   C-2    G8      0  C   A.SW Off
 3  Flute4 Sw St         1   127   C-2    G8      0  C   A.SW Off
 4  Flute4 Stac Sw St    1   127   C-2    G8    111  C   A.SW1 On
 5  Flute4 Flutter Sw    1   127   C-2    G8    108  C   A.SW2 On
 6  Flute3 mp St         1   127   C-2    G8      0 L28  A.SW Off
 7  Flute3 mf St         1   127   C-2    G8      0 R28  A.SW Off
 8  Flute4 mp St         1   127   C-2    G8      0  C   A.SW Off

The Super Knob dials up the level for elements 6, 7, and 8 via assignable knobs 2, 3, and 4. The Super Knob also increases the reverb send level via assignable knob 1. Watch the on-screen assignable knobs while turning the Super Knob. You’ll see what it means when people call the Super Knob a “macro control knob.”

The assignable knob and Super Knob programming is a bit complicated and I’ll save further deconstruction of Concert Flute for a future blog post.

Copyright © 2018 Paul J. Drongowski

Paul Allen: 1953-2018

To be sure, you’ll find many obits for Paul Allen, who died on Monday, October 15, 2018. I’d like to take a moment to reflect on his work and life. Sure, he struck it rich with Microsoft, but he quickly turned to philanthropy after an early bout with cancer. Disease and the Grim Reaper have a way of centering and focusing one’s life and work.

Should you visit the Seattle area, in particular, you’ll see many examples of his charitable work. In addition to “serious” philanthropy, Paul Allen didn’t forget the arts, including pop culture. Most folks know the Museum of Pop Culture, Mr. Allen’s deep interest in rock’n’roll, and his status as a collector.

Collector, indeed. As a dedicated nerd, he created the Living Computer Museum in Seattle to house and preserve computing artifacts. The Museum essentially started out as his personal collection. Its mission has expanded to education and education outreach as reflected in its current name, Living Computers Museums + Labs.

I’ve been fortunate enough to visit Living Computers several times and have enjoyed every visit. I’m a committed preservationist myself and have donated half-a-ton of vintage computers, textbooks, manuals and software to the Museum, courtesy of Mr. Allen’s investment in this worthy venture.

So, let’s take a minute and a breath to reflect and re-center ourselves. Thanks, Mr. Allen.

MODX Theatre Orchestra

Today’s project is reconstructing one of my favorite voices stolen from Genos/PSR: TheatreOrchestra. This voice first appeared in Tyros 3, using waveforms that are roughly contemporaneous with Motif XS (MOX).

The following table summarizes the eight voice elements in TheatreOrchestra. The voice parameters are pulled from the Genos UVF file for the voice.

Element  Low  High Low  High    Vol  Shift  Waveform
-------  ---  ---- ---  ----  -----  -----  -----------------------
   0      C3   G8    1   127   -7.9      0  Flute2 Soft St L (5623)
   1      C3   G8    1   127   -9.8     12  Flute2 Soft St L (5623)
   2      C3   G8    1   127  -12.0      0  [Flute] (4951)
   3     C-2  F#3    1   127   -3.0    -12  Bassoon Hard (5626)
   4      E3   G8    1   127   -6.0    -12  Oboe2 Med V3 (5627)
   5      C5   G8    1   127  -21.4     24  [Glocken] (5124)
   6     C-2   G8    1    68   -9.0      0  p (5248)
   7     C-2   G8   69   127   -9.0      0  f (5249)

The volume (element levels) look a little bit curious and I conjecture that element levels are set relative to 0dB. We’ll need to convert these levels to the range [0:127] with 127 corresponding to 0dB. Naturally, we’ll let our ears be the ultimate judge.

The overall sound is dominated by the woodwinds: 3 flute elements, bassoon and oboe. The bassoon and oboe are transposed down one octave. This imparts a unique reedy character to the sound. However, the lower notes (left hand) get somewhat murky, so in the final voice, I leave the bassoon and oboe in their natural ranges to either side of middle C (approximately).

The string component is not strongly stated. Any old string ensemble would do. The waveform names in the UVF files are not super informative although I suspect use of the OrchStrgs waveforms which were introduced in Tyros 3 and Motif XS.

The glockenspiel adds a nice chime to the high end. The glock always sounds in the original Genos/PSR voice, becoming rather tiresome after a while. I prefer to switch the glock in and out. Also, piccolo is a good alternative, again, being switched in and out.

The next table summarized the eight voice elements in Theatre, a similar voice that I constructed for the MOX6.

Element   Low  High Low  High  Level  Shift  Waveform
-------  ----  ---- ---  ----  -----  -----  ----------------
   1       C2   G8    1   127     90      0  Flute2 Soft St
   2       C2   G8    1   127     80     12  Flute2 Med St
   3       C3   G8    1   127     40    -12  Flute Non-Vib Of
   4      C-2   B2    1   127    100      0  Contrabass R
   5       C3   G8    1   127     50      0  Solo Combi St
   6       C3   G8    1   127     80     24  Glockenspiel  AF2
   7       B2   G8    1   127     65     24  Piccolo       AF1
   8      A#2   G8    1   127    100      0  Oboe 1

The piccolo and glockenspiel are controlled by the Assignable Function buttons AF1 and AF2, respectively. The corresponding element sounds when an AF1 and/or AF2 button is enabled (turned on).

Contrabass and the Motif XS/MOX string Solo Combi replace the string ensemble. The contrabass lends a nice bottom to hold down the bass. It should be played sparsely in the left hand (i.e., no close clusters).

Finally, here is the TheatreOrch voice for MODX. On MOX, I tended to work exclusively in voice mode. MODX is modeless and all programming is made in a Performance. Thus, on MODX, I comp’ed several Performances into a single TheatreOrch Performance, then tweaked the individual Parts. [Click images to enlarge.]

Although Performances are the first class citizens, I still dove into the Parts to make changes at the element level. The string Part is based on the Almighty Performance; I changed the waveforms to OrchStrgs Soft St and OrchStrgs Med St, splitting the patch into two velocity ranges: 1 to 68 and 69 to 127.

The new glockenspiel and piccolo waveforms are much better than Motif XS (MOX). The old glock sounded like a not very well cared for, used instrument bought in a pawn shop. The new glock rings nicely. A sweet alternative is the FM Glockenspiel. If I wasn’t such a traditionalist (!), I would have used it. Maybe in a future variation?

The flute Part (Part 1) is based on the 2 Flutes Performance. I employed older Performances for the oboe and bassoon, too. Since this voice is a blend, detailed isn’t too important and older, simpler voice programming doesn’t cut into polyphony as much as the newer detailed Performance. I prefer the new Performance for exposed solos when high quality is needed and polyphony is not likely to be an issue.

Instead of AF1 and AF2, I created four scenes. Scene 1 mutes both the glock and piccolo, Scene 2 enables the piccolo, Scene 3 enables the glock, and Scene 4 enables both the piccolo and glock. The MODX Scene buttons are close at hand and are an easy gesture away when making changes. The MODX assignable buttons, A.SW1 and A.SW2, are a longer reach.

As I work with MODX, I realize that I need to think more about building block Performances which can be combined (comp’ed) into bigger Performances. For example, it might have been better to start with 2 Oboes & Bassoon in one Part instead of separate oboe and bassoon in two Parts. Similarly, it might have been better to start with Wood Winds + Strings, which combines flutes and strings. By cutting two parts, I could have implemented the voice in four Parts, thereby making Seamless Sound Switching (SSS) possible. I may try this approach as a learning exercise.

Hope you enjoyed this brief dive into MODX Performance programming.

Copyright © 2018 Paul J. Drongowski

Bonus voice: Tutti

Let’s take a quick look at another interesting voice from arranger-land: Tutti. Tutti is a string and horn layer with Timpani in the left hand. High velocity left hand notes trigger a crash cymbal, too.

The following table summarizes the Genos voice programming.

El#  Low  High Low  High    Vol  Pan  Waveform
---  ---  ---- ---  ----  -----  ---  ------------------------
 0   C-2    G8   1   127  -25.9   -1  (4081)  Allegro Strings
 1   C-2    G8   1   127  -25.9    1  (4082)  Allegro Strings
 2   C-2    G8   1   127  -22.9    0  (4102)  French Horn
 3   C-2    F1   1   127  -14.6    0  (4222)  Timpani
 4   C-2    F1 106   127  -20.6    0  (4223)  Crash cymbal

I constructed a similar voice for MOX:

El#  Low  High Low  High    Vol  Pan  Waveform
---  ---  ---- ---  ----  -----  ---  -----------------------
 1   C-2   G8    1   127    105  L63  508  OrchStrgs Soft L
 2   C-2   G8    1   127    105  R63  511  OrchStrgs Soft R
 3   C-2   G8    1   127     90    0  621  French Horn St
 4   C-2   B1    1   127    127    0  137  Timpani Sw St        AF1 ON
 5   C-2   B1  106   127     85    0  2479 Hand Cymbal Open St  AF1 ON
 6   C-2   B2    1   127    101    0       Snare Drum           AF2 ON

     AF1 ON: Enable element 4 Timpani and element 5 Hand Cymbal
     AF2 ON: Enable element 6 Snare Drum

The timpani and hand cymbal are enabled when Assignable Function button 1 (AF1) is on. I added a snare drum hit which is enabled by AF2.

The screenshots below are a quick attempt to implement Tutti on MODX. I haven’t quite figured out the snare drum yet. First world problem: I love the Highland Snares kit and would like to use all of them!