Review: Yamaha PSS-A50

Before taking a screwdriver and soldering iron to the A50 (Ahem), I’d better write a short review first. 🙂

The Yamaha PSS series keyboards are inexpensive, entry-level instruments which are super lightweight, battery powered, portable and fun. The PSS line is like a small group of fantasy characters where each character has its own super-powers.

  • PSS-E30: A musical game keyboard for younger kids.
  • PSS-F30: “Honey, I shrunk the arranger” keyboard for people who want to play songs with an accompaniment.
  • PSS-A50: A phrase-based music machine which records and speaks MIDI over USB to your DAW or other computer- or table-based music applications.

Last year, I reviewed the Yamaha PSS-E30 Remie and passed it along to our grandson as a Christmas gift. Remie is suitable for young kids, but even Mom and Dad have fun with the musical games.

Yamaha PSS-A50 keyboard [Click to enlarge]

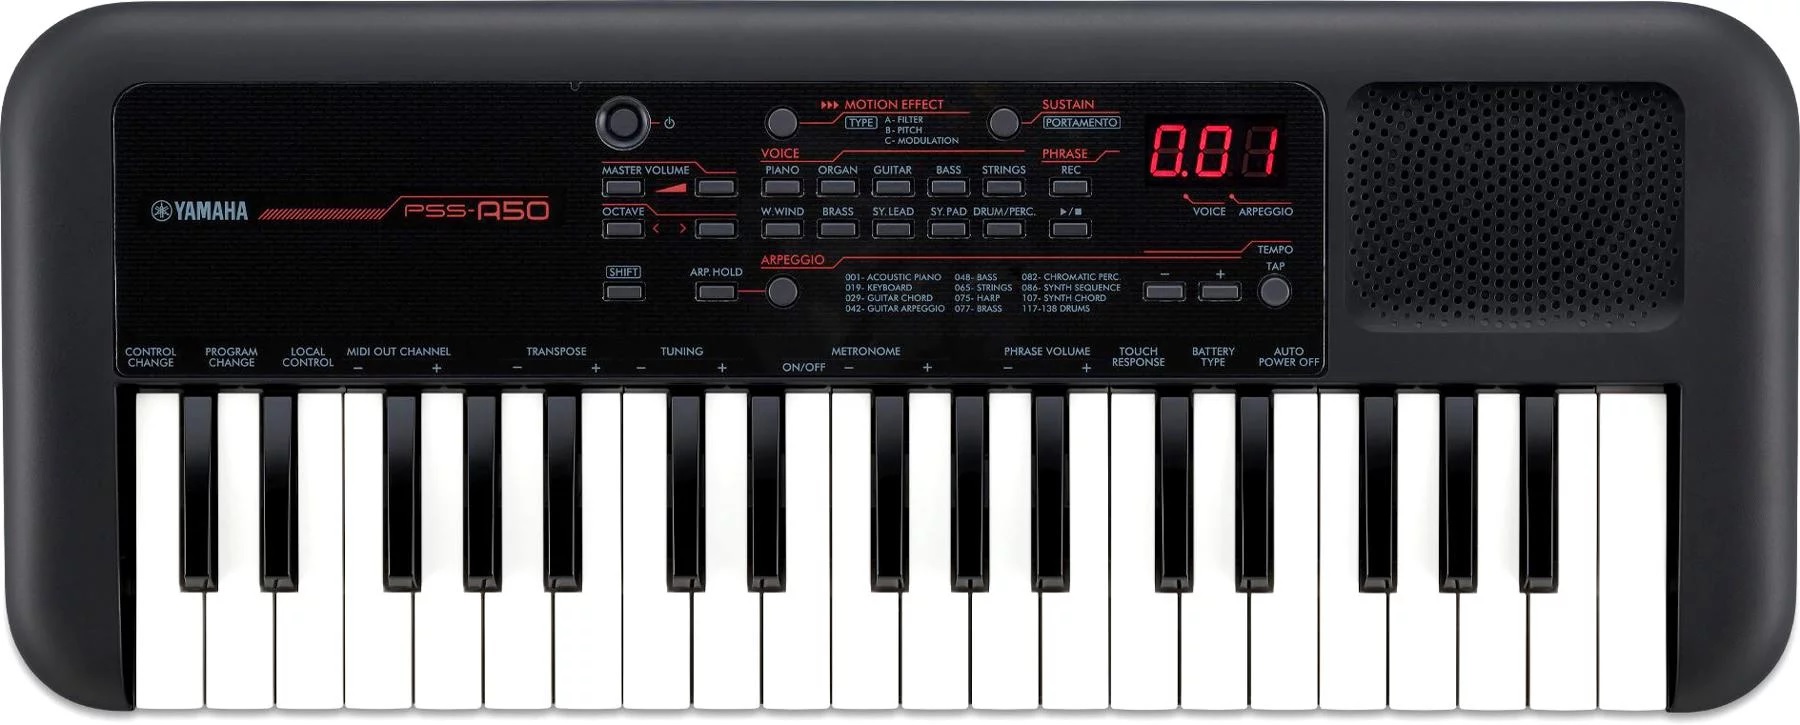
The PSS-A50 (henceforth “A50”) is aimed at people who want more flexibility than the fixed accompaniment styles in the PSS-F30. The A50 has 138 musical phrases — “arpeggios” in Yamaha-speak — that drive an in-built arpeggiator. Twenty-two arpeggios are drum patterns; the rest of the arpeggios are melodic, covering both instrument-specific riffs (strums, bass lines, chord comps) and general purpose phrases like up/down broken chords, etc.

Experienced Yamaha players have seen these arpeggios before. In fact, the A50 reminds me of the Yamaha Synth Arp & Drum Pad iOS application. Without getting into the details, you select a voice, select an arpeggio (“arp”), enable the arp, hit record, and go. If you check out Yamaha’s YouTube tutorials, you’ll see how easy it is to get started.

At this point, I suggest watching Keen On Keys excellent video. It covers all the basics, a brief teardown, and more. I won’t go into such details here. (This chap did a terrific job!) I learned quite a lot from this video including basic “how to use it” information.

Oh, how I long for such reviews in Electronic Music (once Keyboard mag), once again. Ken Hughes, where are you? After reading one of those old product reviews, you actually knew a little about playing the instrument. Now, pfffft!

The sounds

Let’s get down to brass tacks. Like Remie, you won’t get Yamahas top sounds. Shucks, it’s only $100 USD (street price).

Truth be told, even though I regarded the A50 as a candidate for mod projects, I wasn’t too wild about the sounds that I heard in on-line demos. I was hesitant to buy one. Once I got the A50 under my fingers, however, I warmed up.

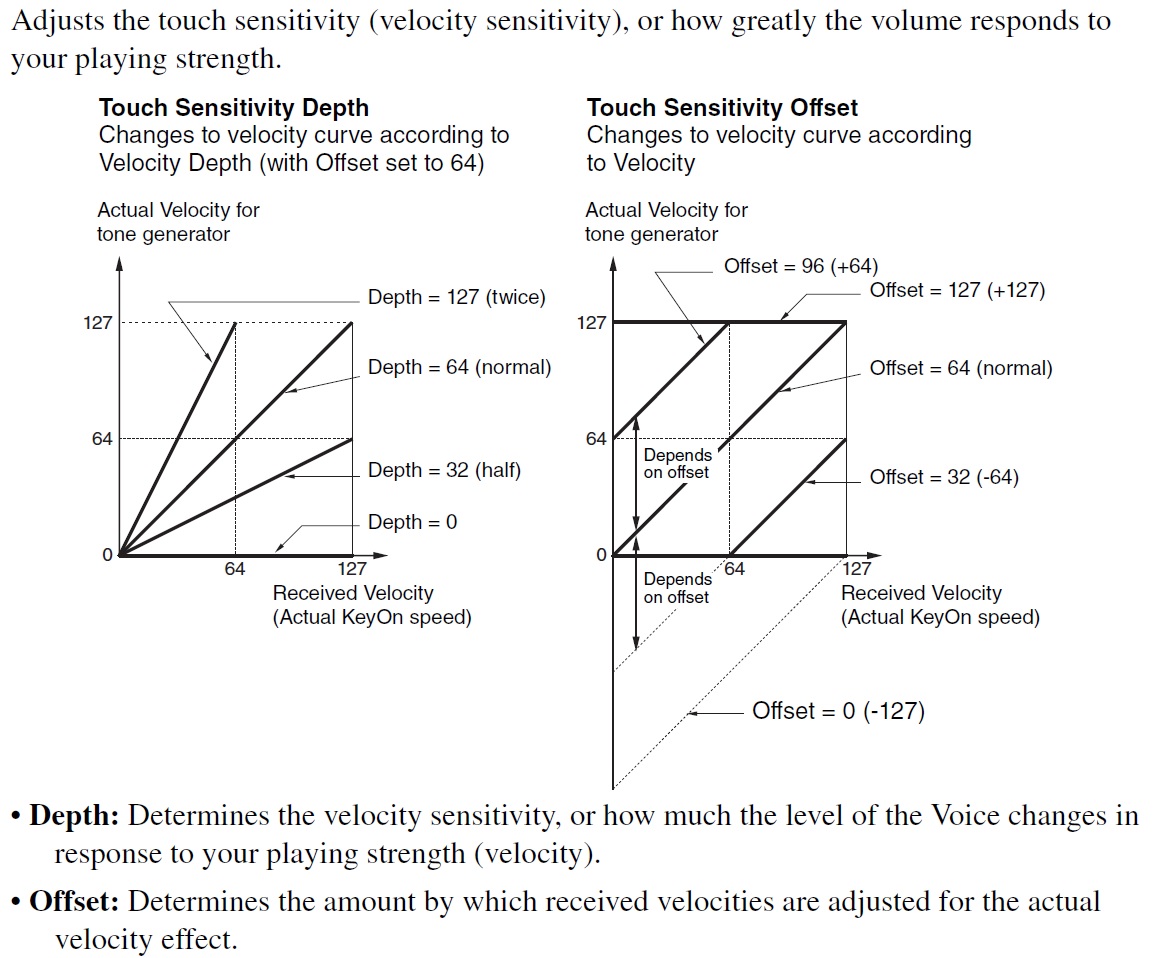
Basically, the A50 and Remie samples and synth engine are at the same level. The A50 adds touch sensitivity and that, I suspect, makes the difference. Sure, the piano (for example) is uni-dimensional and you can hear it play the same sample louder or softer depending upon strike velocity. The overall effect is more musical, however. Weird how that works?!

The A50 audio OUT is mono. Reverb seems to be the only system effect. Even Yamaha’s cheapest chip implementations have chorus, so it may take a little MIDI magic to unlock that door. The whole sound can be sweetened by out-board effects like maybe a guitar pedal (e.g., TC Electronic Hall of Fame reverb) or a spatializer. I slung an A50 beat through the Korg Volca Mix stereo width and compression effects and got a rather nice result. The Volca Mix Hi/Lo Cut let me isolate the tops and kick, too. I strongly recommend adding external effects.

The A50 motion effects let you juice up your performances. I’m still exploring the motion effects and I’m glad to have them. The motion effects add a way to vary the sound during performance, avoiding a uni-dimensional sound. You get filter fun, pitch bends, slicing and all sorts of sonic mayhem. A few effect types would be good for Hawaiian pedal steel. 🙂 It would be nice to leave the auto wah ON in order to play two-handed funk — a small quibble.

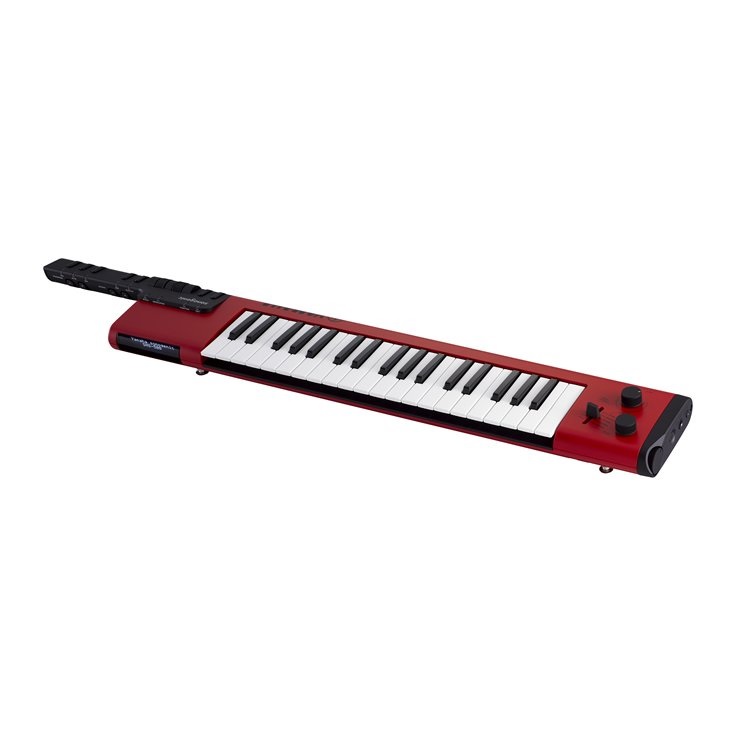
The A50 size, features and price invite comparison against the Yamaha SHS-300 and SHS-500 Sonogenic. Unless you really want the keytar format, I don’t see the value in the SHS-300 versus the A50. I will bet dollars to donuts that the SHS-300 is based on the same chip and samples as the A50. Personally, phrase recording is more fun and creative than a pretend, low-budget, cheap build keytar. Speaker quality is probably a wash between the two and the A50 puts out 1.5W versus 0.7W.

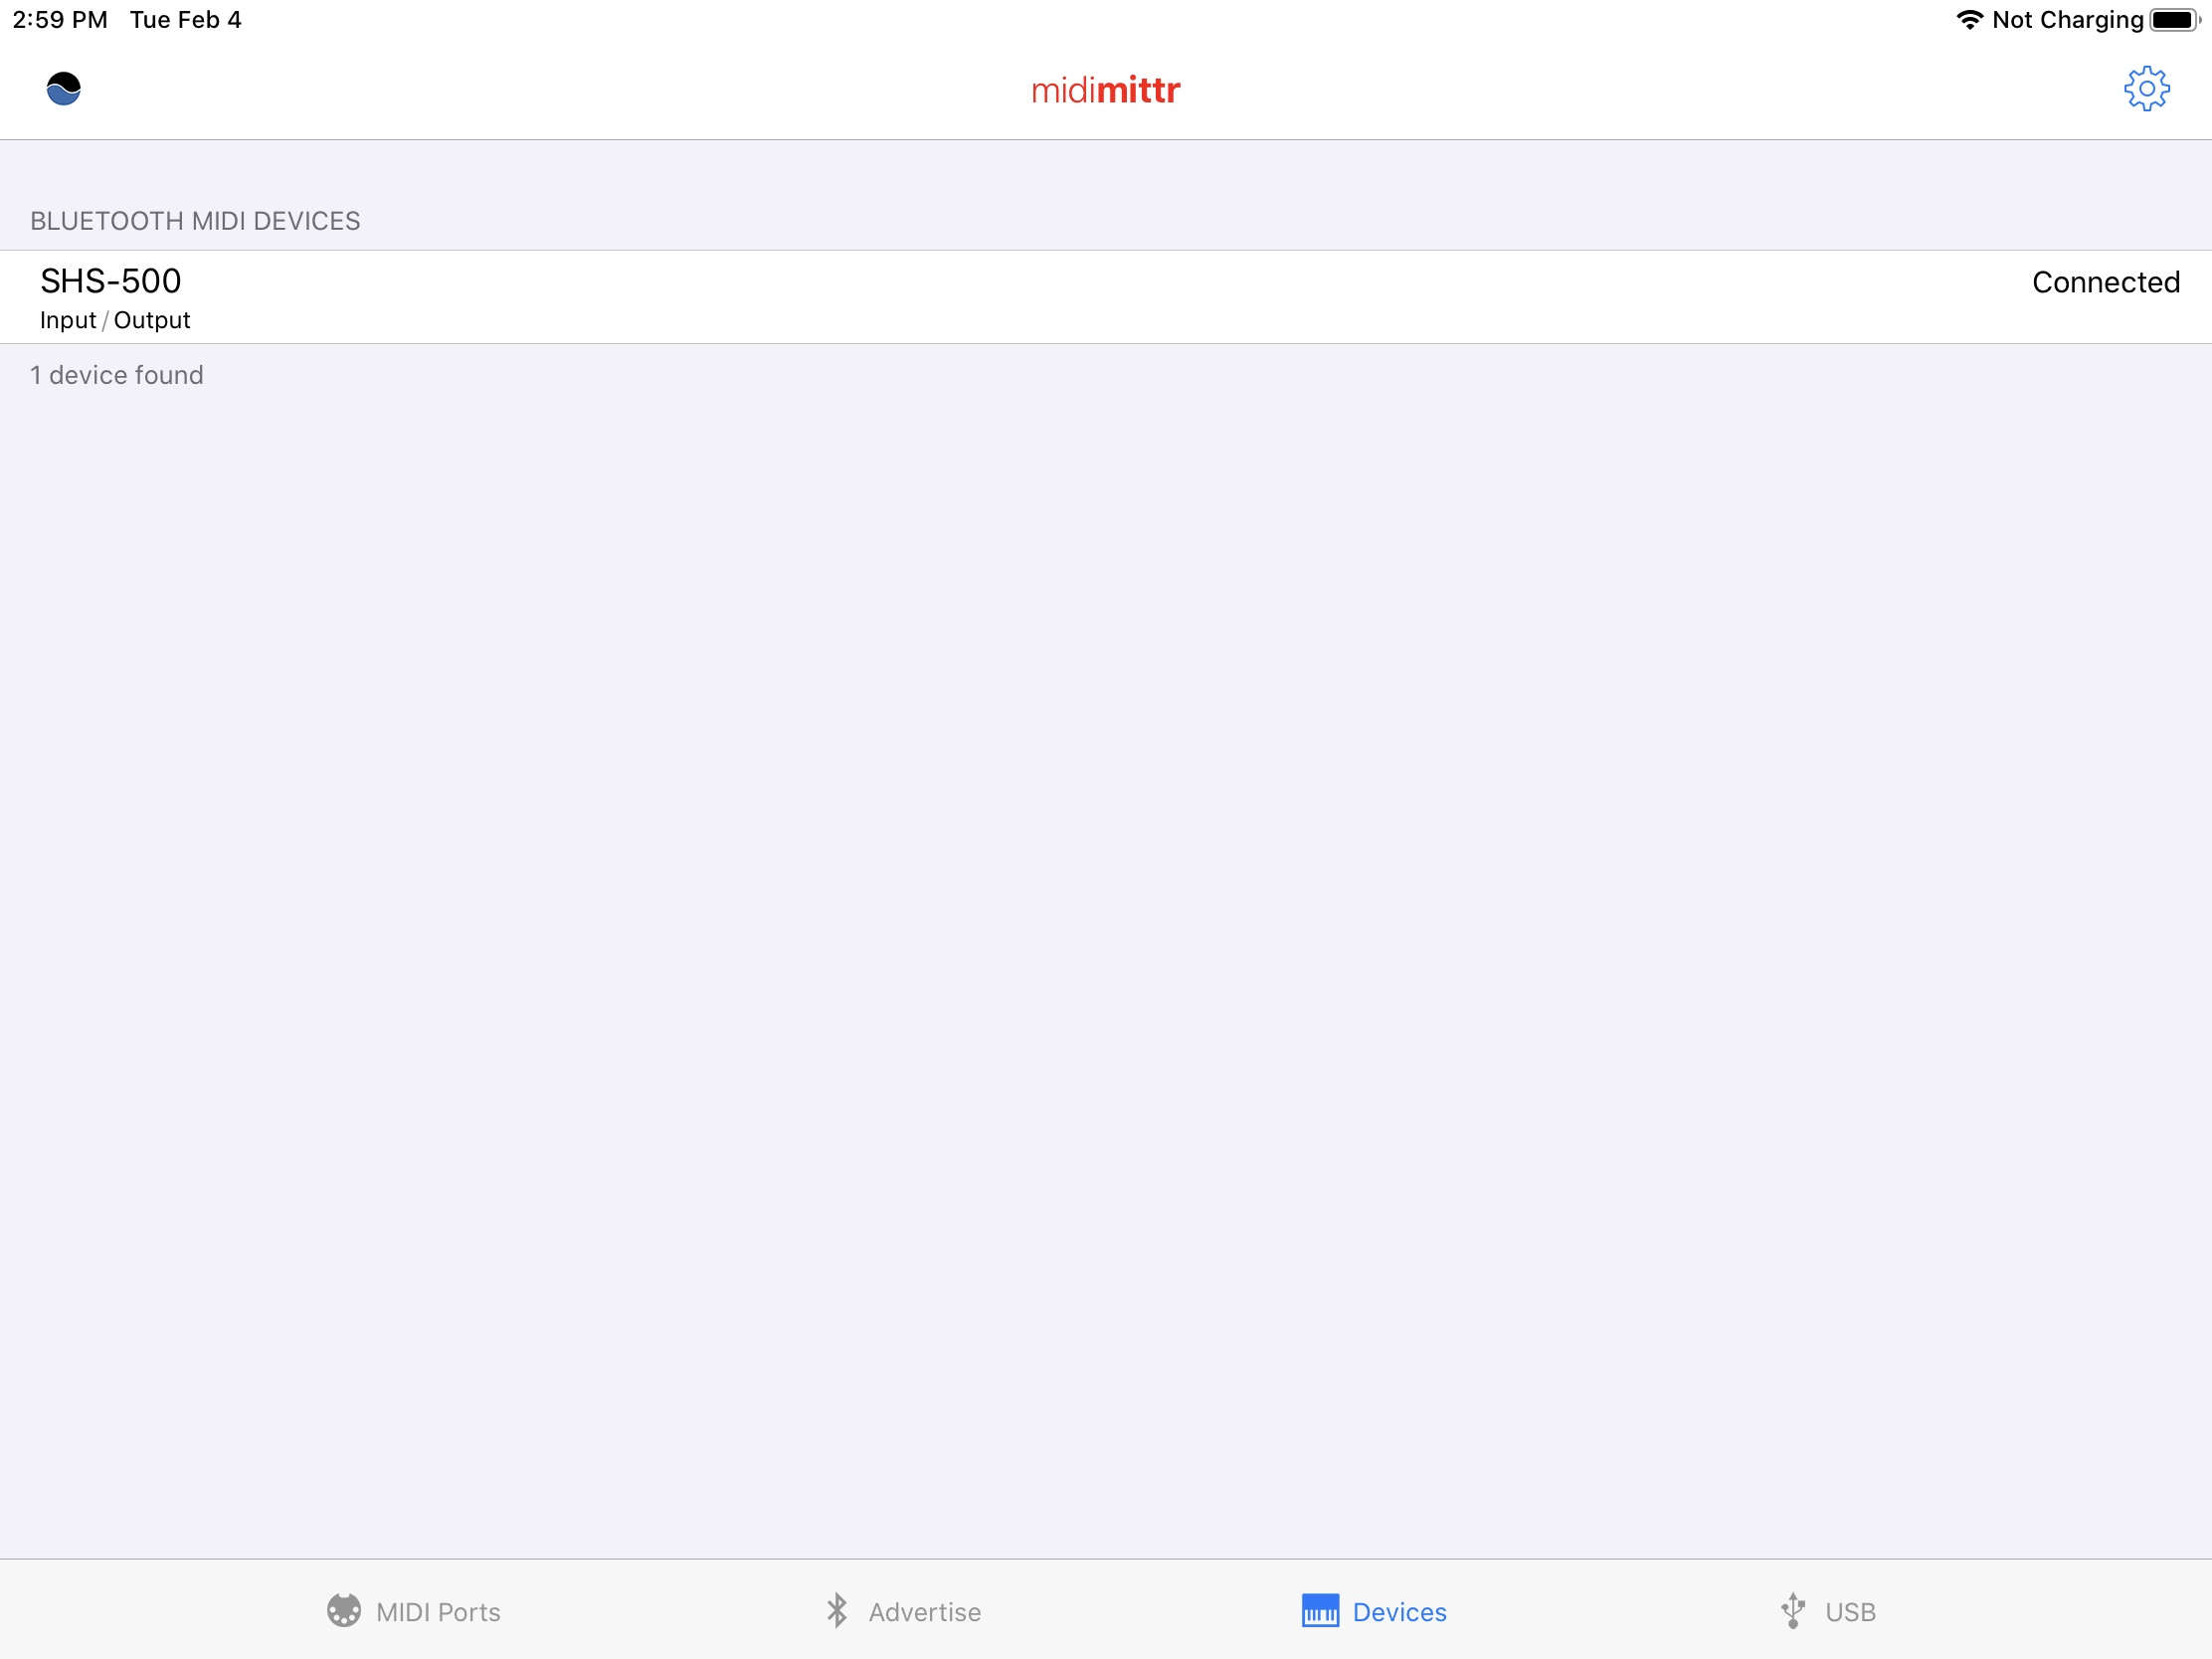
The A50 against the SHS-500 is another story. The SHS-500 voices are definitely better quality. Although the SHS-500 LINE OUT is mono, you can look to its PHONE OUT for stereo. The SHS-500 has PSR E-series DSP effects, three forms of MIDI (USB, 5-pin, and Bluetooth), a General MIDI sound set (available via MIDI only), and jam mode integration with Chord Tracker. The SHS-500 beats the A50 on sound. On the other hand, I prefer the A50’s speaker versus the SHS-500. Of course, the SHS-500 is mainly for playing and doesn’t have an arpeggiator or recorder.

Build quality

One big factor is build quality. The SHS-500 is a solid instrument. The SHS-300 and A50 are cheap. Even though Yamaha specs call out “37 HQ (High Quality) mini keys” for all three keyboards, only the SHS-500 is up to the same quality as the Yamaha Reface series. Yamaha marketing may claim otherwise, but you can feel the difference. The Reface and SHS-500 will stand up to abuse — the SHS-300 and A50, not so much.

As to A50 build quality, the electronic boards and cabling look up to snuff. EMI shielding is absent. Audio quality on battery power or external USB power adapter is good and is reasonably quiet. Powered by my HP desktop, the A50 is susceptible to digital schmutz and produces loud noise through its audio out. One could put blame on the desktop, but nearly all computer switching power supplies are dreadfully noisy. USB powered instruments need better filtering on USB power rails.

In use

I want to use the A50 as a looper: put down a rhythm line and a bass, then jam. It takes a little bit of practice to make glitch-free loops. I wish the A50 applied “measure quantize” to recordings, that is, trim recordings to a clean measure timing boundary. Right now, you have to turn off recording by feel and hope you get it right.

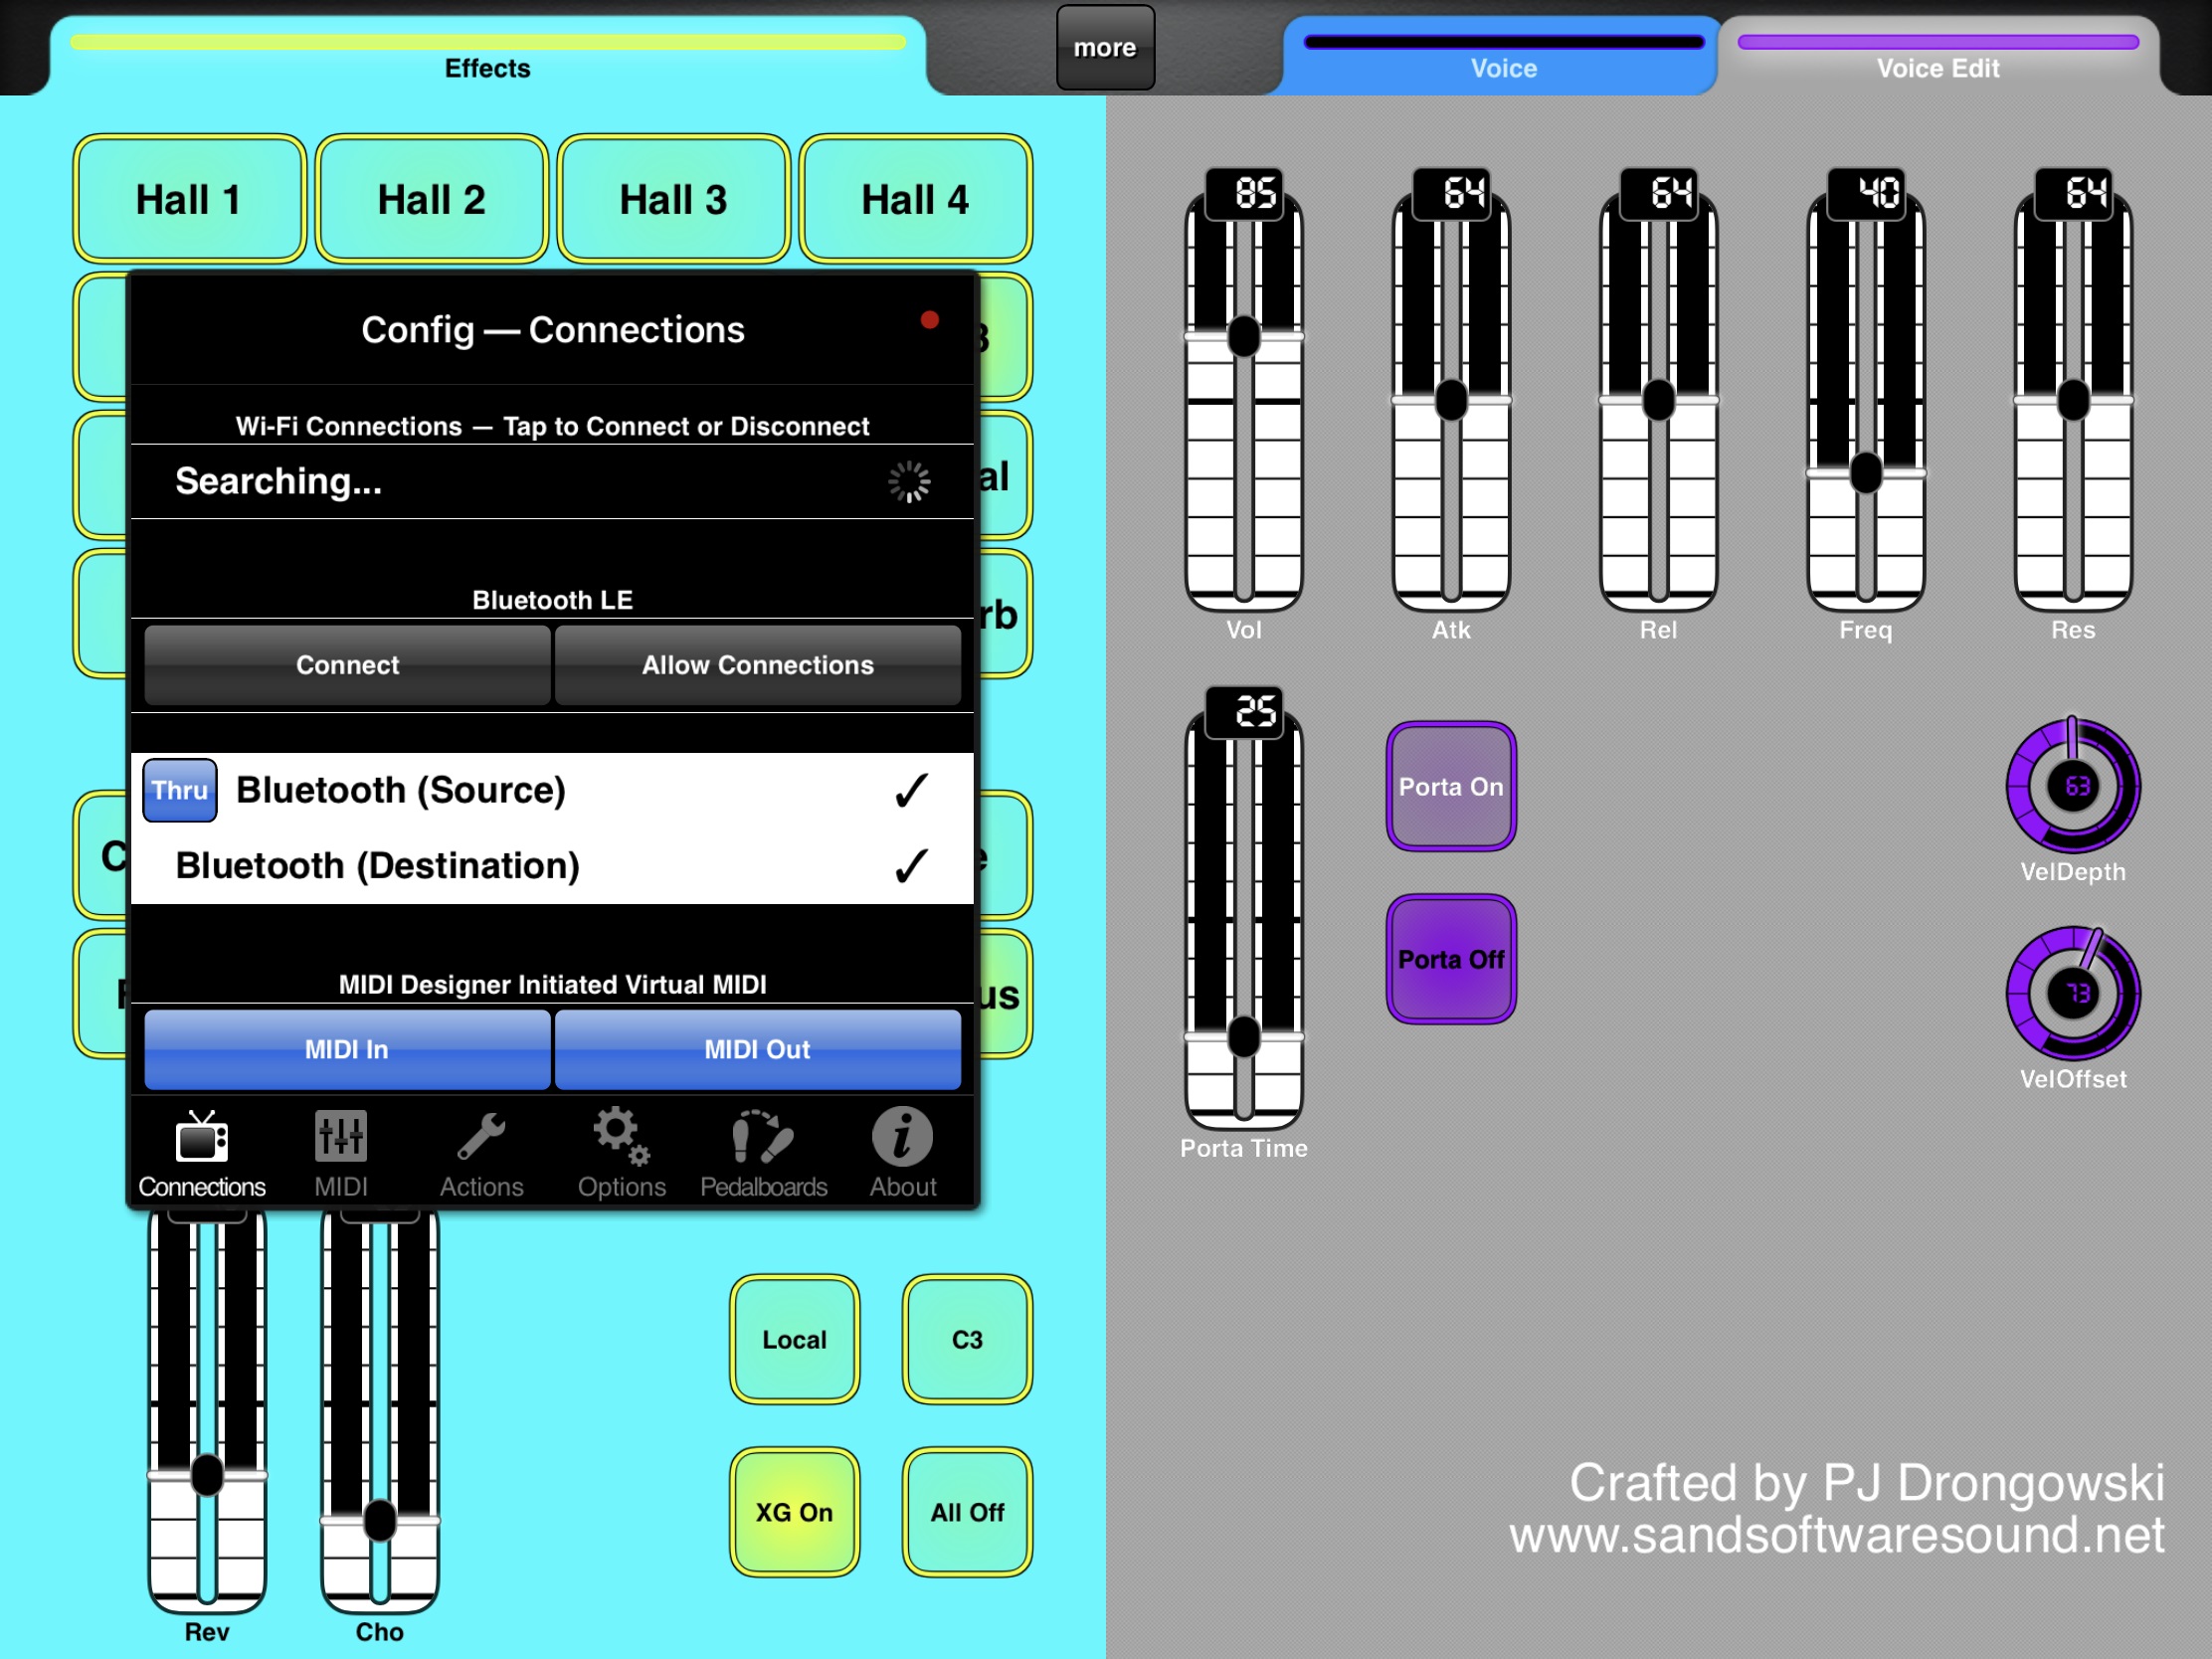
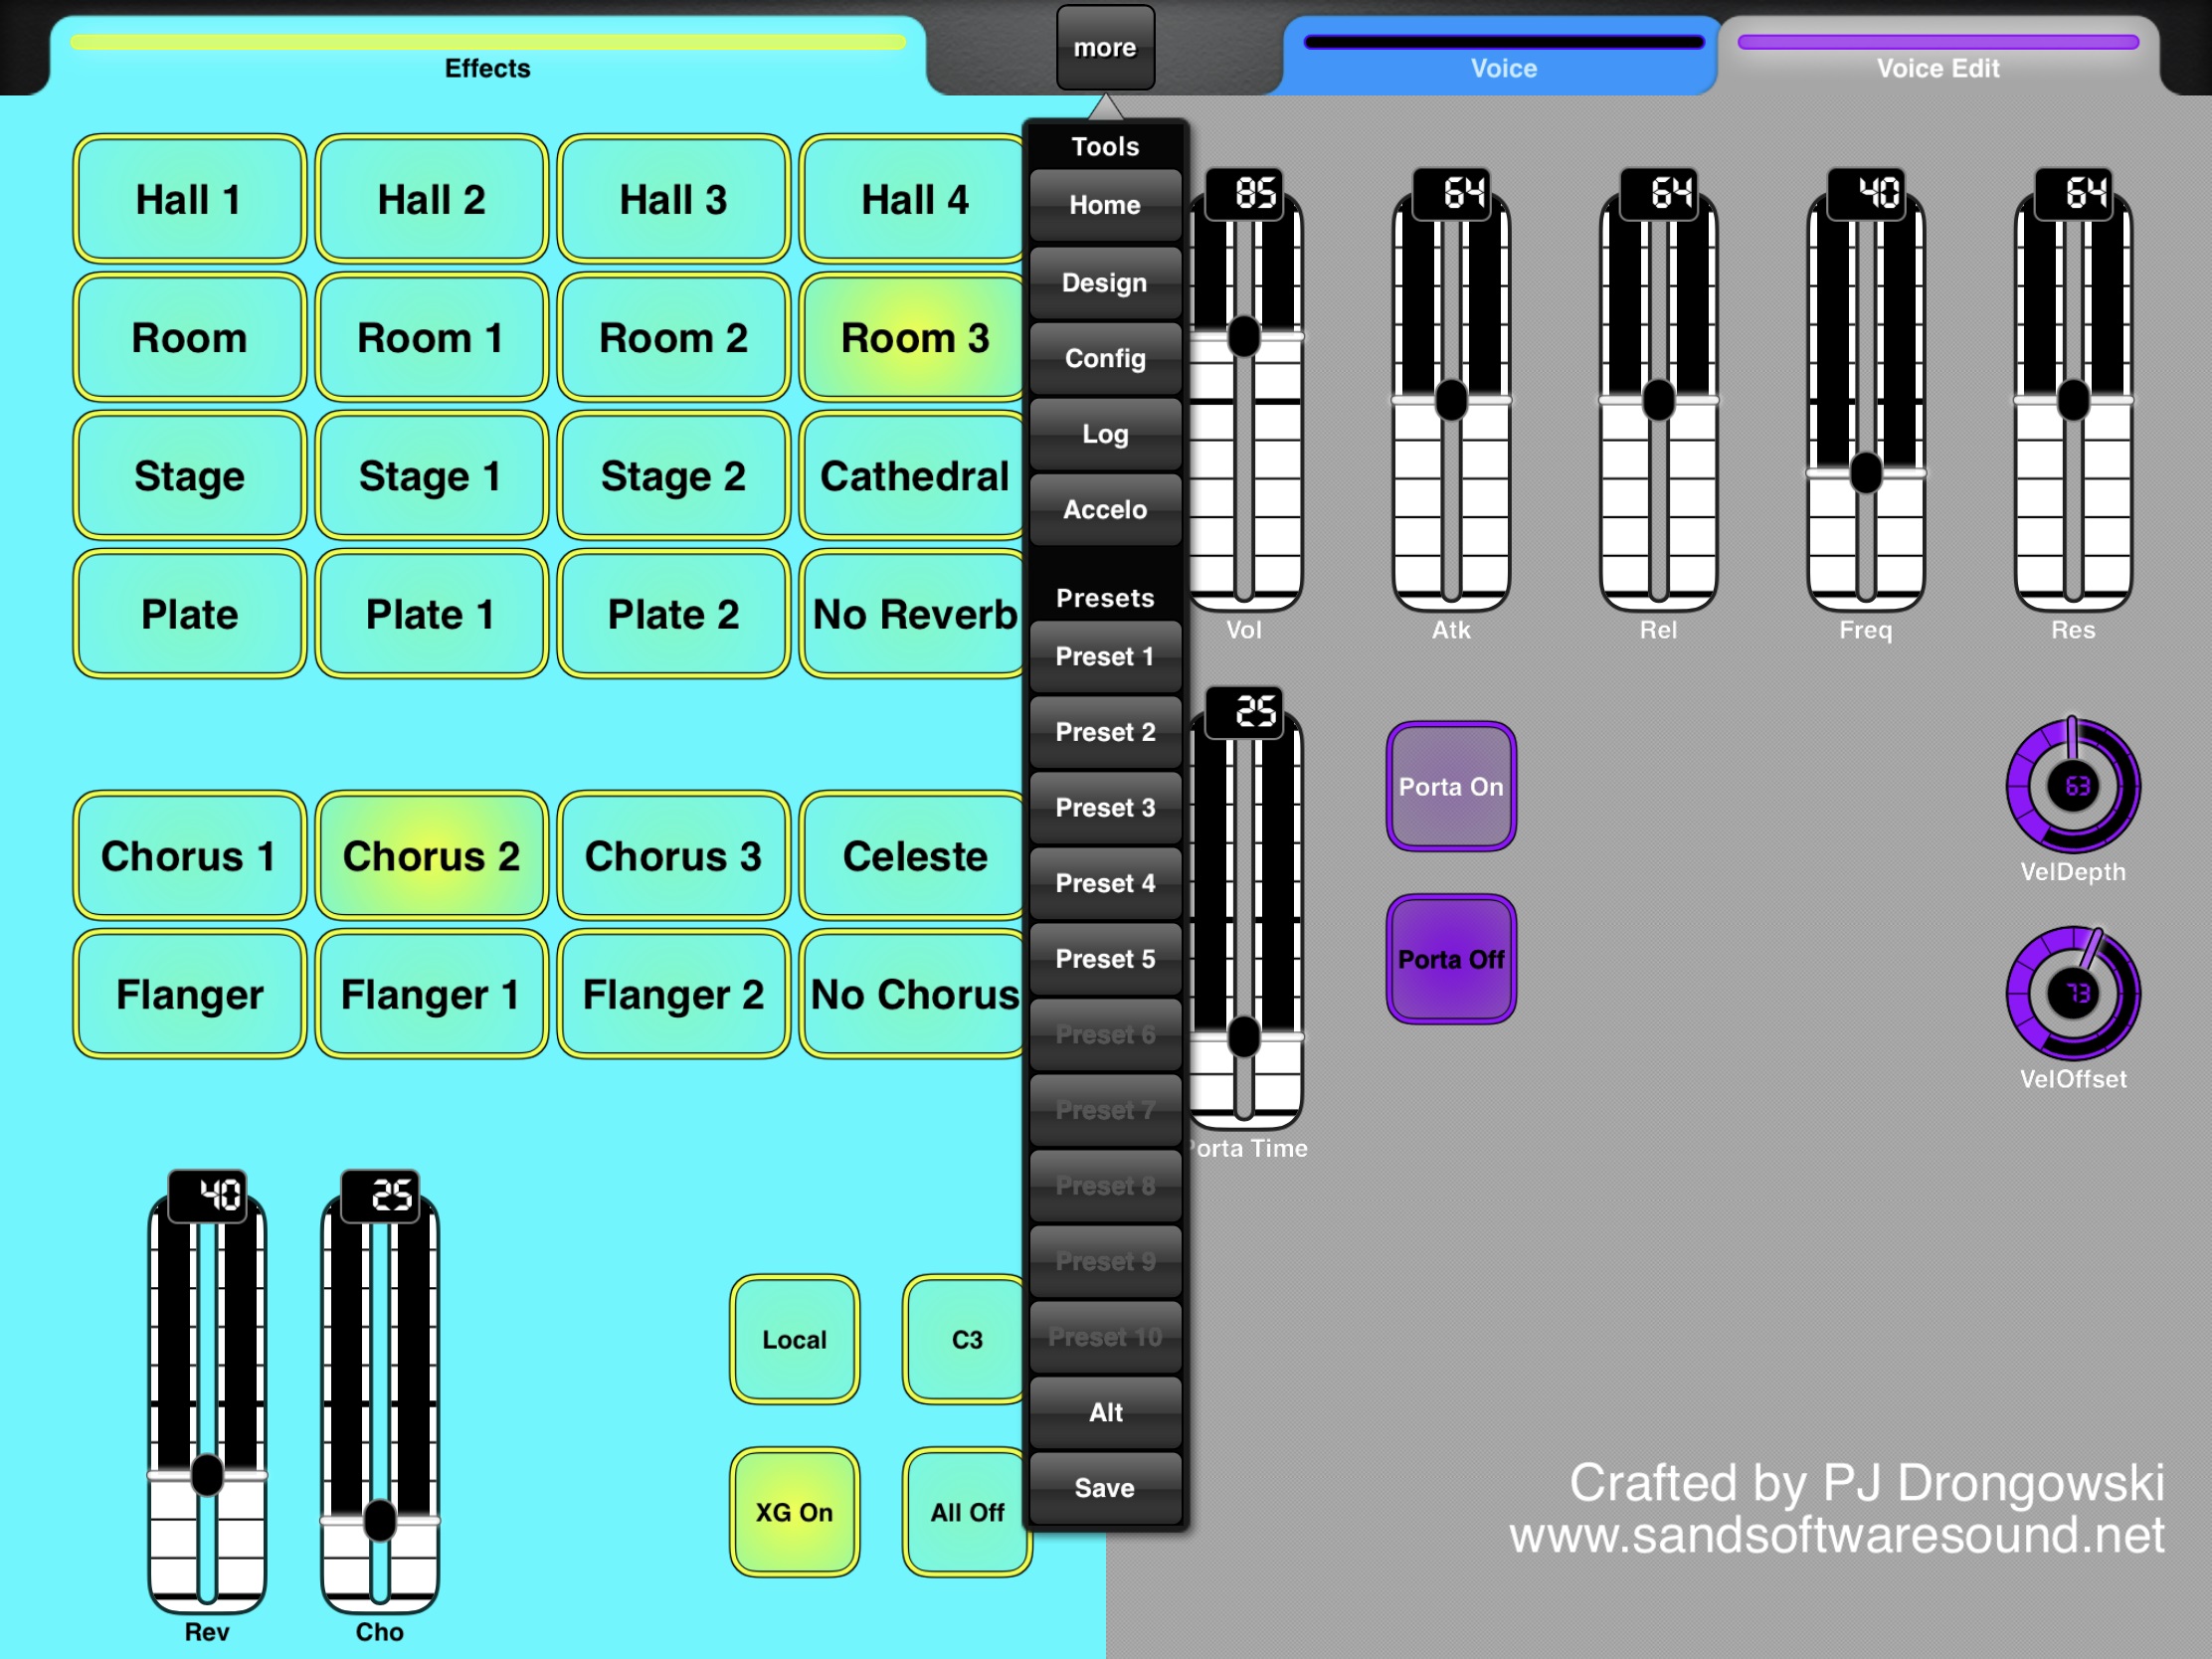
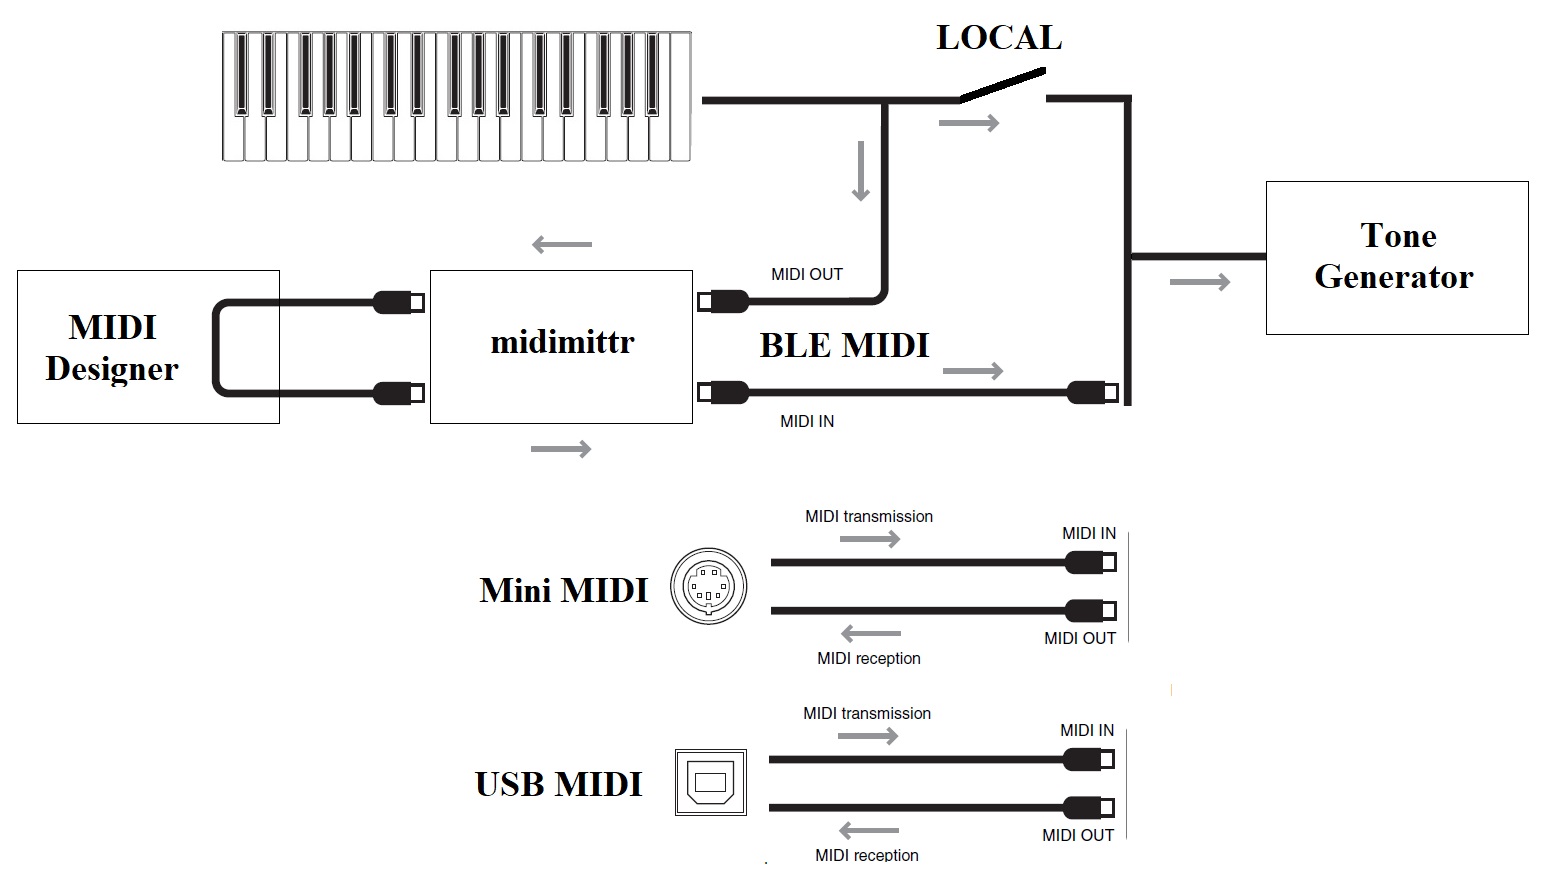
While horsing around with MIDI (another subject for another day), I noticed that the A50 has four parts, each on its own MIDI channel:

  • Keyboard voice: Live, real time performance (Default: channel 1)
  • Arpeggio sequence: Live, real time arpeggiation (Default: channel 2)
  • Recorded keyboard: Recorded keyboard performance (Default: channel 3)
  • Recorded arpeggio sequence: Recorded arpeggio (Default: channel 4)

Hmmm, this makes me wonder if I can layer up to four parts? So far, I can layer 3 distinct musical parts. The fourth part is still elusive.

The main problem is no overdub. It is possible to record two parts at once: arpeggio plus keyboard performance. Thus, you can lay down a drum pattern (arpeggio) and a bass line (by hand). Then, loop the playback and play over the top. Seems like I should be able to add a live arpeggio to the stack.

Anyhow, I found this video (“Yamaha PSS A50 – Jazz Multi Track”) to be instructive. The trick is to get the arpeggio going, select a different instrument, arm record, and play on the first beat. Here is the procedure:

  1. Select drum voice (e.g., voice 39).
  2. Turn the arpeggiator ON.
  3. Select the arpeggio type (e.g., arpeggio 125).
  4. Hold a key to start the arpeggiator.
  5. Press ARP.HOLD to keep the drum pattern running.
  6. Select a bass voice (e.g., voice 14).
  7. Press REC to arm recording.
  8. Play the bass line over the drum pattern. Start playing in time with the drum pattern.
  9. Press REC to stop recording.
  10. Turn the arpeggiator OFF.
  11. Select a piano voice (e.g., voice 2).
  12. Press SHIFT+PLAY to start a looping playback.
  13. Jam over the playback.
  14. Press STOP to stop playback.

Recording doesn’t start until you begin to play the bass line. That locks the bass to the drum pattern. You need to stop recording just before the next loop iteration begins.

If you need some jazzy chords, try: GM7/E, Fm7/B, FM7/D, Em7/A (also notated as Em9, Bm11, Dm9, Am11).

Doggone it, seems like I should be able to layer live arpeggiator into that mix! I’ll keep trying.

Update: Practice makes perfect. Yes, you can get four lines going. I recorded drum and electric piano following the procedure above. With the recorded parts playing, I started a looping bass arpeggio. Finally, I solo’d over the three running parts. Neat, and as complex as you might want for a little practice jam.

Questions

As I begin to explore the A50 MIDI implementation, there are a number of unanswered questions. First and foremost, can I save and restore recorded MIDI data? Does the A50 respond to SysEx messages for reverb and chorus type? Can I drive the A50 with the old Synth Arp and Drum Pad application and make use of its range of arpeggios? Can I load my own simple backing tracks into the A50’s recorder memory?

The final word

After my initial reluctance, I’m glad that I bought the PSS-A50. Apparently, some folks aren’t so happy as A50s turn up as Open Box items quite frequently. Even though $100 is not much, you can save a few extra bucks if you’re willing to buy an open box item. Given the build quality, you might not want to chance it, tho’.

The A50 does not have a full General MIDI sound set. The sound set is close enough for rock and roll, however. Here is an MP3 of the A50 in action (Traffic’s Feelin’ Alright). Wish I could play that piano solo at the end …

Interested in more PSS-A50 content? Check out these posts:

Copyright © 2021 Paul J. Drongowski

Customizing the Sonogenic voice editor

Back to the Yamaha SHS-500 Sonogenic voice editor…

Thanks to Brent at Keyboard Corner for suggesting a different set of default voices in my MIDI Designer-based Sonogenic voice editor. Back when I released the editor, I was hoping that folks could customize the user interface, changing or adding their own buttons and controls. Brent downloaded the editor, got everything running, and hit a roadblock with MIDI Designer. That’s understandable because I doubt if anyone can dive right into MIDI Designer as easily as diving into the menu of a synth.

So, smart guy, how do you change bank select and program change? Here’s a sequence of screen shots that may help. [Not so easy a year later, is it? 🙂 ]

MIDI Designer ordinarily runs in its operational mode, that is, the buttons, sliders and other controls are live and send MIDI. In order to make changes, one needs to enter Design Mode (edit mode). With the Sonogenic voice editor loaded, tap the More menu button, then tap the Design button under “Tools”.

MIDI Designer More menu

You should see a floating button widget saying “Exit Design Mode”. If you see that, you’ll know that you’re in Design Mode.

MIDI Designer button (control) properties in Design Mode

Tap a button or other control to select it. MIDI Designer outlines the selected button (or control) in red. Double tap the button (or control) to display and change its properties.

In this case, I double tapped the “QuackLd” button. If you want to name the button something else, tap the “Label” field and change the button name.

Button MIDI properties

To send a different MIDI message, tap the MIDI icon in the lower left corner of the Properties dialog box. MIDI Designer should display the control’s MIDI properties. The Sonogenic QuackLd voice has the following bank select and program change values:

  • Bank select MSB: 0
  • Bank select LSB: 112
  • Program change: 84

Values for the other SHS-500 preset voices are listed in the Yamaha Sonogenic SHS-500 Reference Manual.

Tap the “MIDI Off → On” field to edit the program change value. Tap the “Channel – Bank #” field to change the MIDI channel, bank select MSB value and bank select LSB value. You should probably leave the channel value alone.

MIDI Designer channel and bank select dialog box

The “Channel, Bank MSB, LSB” dialog box displays three spinning number dials (kind of like a slot machine) where the first column is MIDI channel, the second column is bank select MSB and the third column is bank select LSB. Spin the dials to get the setting you want. Tap the return arrow in the upper left corner when you’re finished. To leave a dialog box, just tap a blank area in the user interface background.

MIDI Designer actions

Tapping the Actions icon in the lower right corner of the Properties dialog box displays MIDI Designer actions. Use the “Delete” action to delete the control. Use “Copy” and “Make Similar” to copy the control.

General MIDI voice example

The buttons for the Sonogenic General MIDI (GM) voices are similar. Here, I selected and double tapped the “Vibraphone” button.

General MIDI voice selection properties

Again, tapping the MIDI icon in the dialog box displays the MIDI message properties for the button. The GM voices adhere to the GM standard program change values. However, you must send zero for both bank select MSB and LSB to properly switch the Sonogenic.

Tap the Exit Design Mode button to leave Design Mode. Then test your changes with the Sonogenic. Also, you probably should save the modified MIDI Designer interface following the directions in my original article.

Hopefully, this tutorial is enough to get you started with customization!

Copyright © 2021 Paul J. Drongowski

Review: Roland Micro Cube GX for keyboard

You’ll find plenty of rave on-line reviews for the Roland Micro Cube GX — the go-to battery-powered practice amp for guitar.You won’t find a review covering the Micro Cube GX as a portable keyboard practice amp — until now.

Here’s a quick rundown (from the Roland site):

  • Compact guitar amp with a 5 inch (12cm) custom-designed speaker
  • 3 Watt rated output power
  • Eight COSM amp tones, including the ultra-heavy EXTREME amp
  • Eight DSP effects, including HEAVY OCTAVE and dedicated DELAY/REVERB with spring emulation
  • MEMORY function for saving favorite amp and effects settings
  • i-CUBE LINK jack provides audio interfacing with Apple’s iPhone, iPad, and iPod touch
  • Free CUBE JAM app for iOS
  • Chromatic tuner built in
  • Runs on battery power (6xAA) or supplied AC adapter; carrying strap included
  • 6 pounds (2.7kg)

I haven’t tried the Roland CUBE JAM application yet, so I’ll be concentrating on the amplifier itself. The included 3.5mm cable is the usual 4 conductor affair although it’s rather short. Roland also includes the AC adapter.

I’ve been searching for a good portable, battery-powered keyboard rig for quite some time. On the keyboard side, the line-up includes Yamaha Reface YC, Yamaha SHS-500 Sonogenic and Korg MicroKorg XL+. Although the YC and Sonogenic have built-in speakers, their sound quality is decidedly inadequate and poor quality. The MicroKorg XL+ doesn’t have built-in speakers. All three keyboards have mini-keys and are battery-powered.

To this point, I’ve been using a JBL Charge 2 Bluetooth speaker.The JBL has solid bass, but its output volume is easily overwhelmed during living room jams. It’s been a good side-kick, but I found myself wanting.

Roland Micro Cube GX and Yamaha SHS-500 Sonogenic

So, the latest addition is the Roland Micro Cube GX. Without comments from fellow keyboard players, buying the GX was a risk. Guitar amps are notoriously voiced for electric (or acoustic) guitar tone. Like the GX, you’ll typically find amp and cabinet simulators that help a guitar player chase their “tone.” The GX, however, includes a “MIC” amp type in addition to the usual 3.5mm stereo AUX input. Fortunately, my intuition was correct and the “MIC” setting does not add too much coloration.

Of course, there is some compromise in sound quality. The amp puts out 3W max through a 5 inch speaker (no coaxial or separate tweeter). Needless to say, you don’t hear much high frequency “air.” The GX cabinet does have a forward-facing bass port, producing acceptable bass even with B-3 organ. No, you will not go full Keith Emerson or Jon Lord with this set-up. 🙂 I first tested the GX with Yamaha MODX and found the B-3 to be acceptable.

Volume-wise, yes, you can get loud — too loud for your bedroom or ear-health. Bass heavy sounds can get buzzy. For clean acoustic instruments, I recommend the “MIC” amp setting. The reverb is pleasant enough and adds depth to my normally dry live patches. The delay is a nice alternative to the reverb ranging from reverb-like echo to explicit (non-tempo synch’ed) repeats.

I find the Sonogenic/Micro Cube GX combination to be the most fun. The SHS-500 has DSP effects, but they are rather tentative, as if Yamaha is afraid to offend anyone. That’s where the GX makes a good companion for the Sonogenic. Feel free to dial in the Jazz Chorus amp with the jazz guitar patch or a British stack with electric guitar. Or, try any of the modulation effects on the Sonogenic’s electric piano. Working with the GX is a far more intuitive and rewarding experience than the built-in Sonogenic DSP effects. You can cover Steely Dan EP to Clapton with this rig!

I have to call out the Heavy Octave and Spring reverb effects. You’ll find them at the right-most position of the modulation (EFX) and delay/reverb knobs, respectively. You can think of them as “going up to eleven.” The spring reverb is decent and you can throw the Heavy Octave onto just about anything to thicken up the sound.

Overall build quality is good. The Micro Cube GX feels solid. A metal grill protects the speaker. The knobs have a pleasant resistance and don’t feel cheap. The only not-so-robust feature is the battery compartment and its cover. As long as you avoid heavy abuse, you should be OK.

For the money, $160USD, it’s a decent sounding, inexpensive package. Given the physical cabinet, output power and speaker size, one should adjust expectations. However, if you’re a keyboardist and need a light, portable, battery-powered amp, the Roland Micro Cube GX is worth a try.

Copyright © 2020 Paul J. Drongowski

Sonogenic voice editor

The Yamaha SHS-500 Sonogenic is a good sounding syntheizer which lets you jam along with ChordTracker songs. The SHS-500 includes a General MIDI Level 1 multi-timbral tone generator that is accessible over MIDI (Bluetooth, 5-pin or USB). Yamaha doesn’t promote the General MIDI capability, but it’s there!

Update: I added a post showing how to customize the Sonogenic voice editor user interface.

The Sonogenic lacks three critical features that one finds in a typical desktop synth:

  1. Although the Sonogenic has 28 great voices and two drum kits built-in, it lacks many important instruments like organ, double reeds, tuned percussion and soft synth pads.
  2. Internal voices cannot be edited, e.g., attack, filter cutoff and so forth cannot be adjusted.
  3. The chorus and reverb types are preselected and cannot be changed.
  4. Edits and changes cannot be stored into and recalled from user memory slots.

This is the ideal situation for a tablet-based app.

MIDI Designer is an iPad-based tool which supports creation and use of MIDI voice editors and controllers called “layouts.” Users have built and shared layouts for many popular synths. Now, I’m pleased to add the SHS-500 Sonogenic layout. With this layout, you can play the General MIDI (GM) voices, change reverb and chorus types, edit General MIDI (GM) voices and save all of your work in MIDI Designer presets. If you turn Sonogenic LOCAL sound generation on, you can layer an internal voice with a GM voice.

This post describes the Sonogenic layout. I recommend reading my post about MIDI Designer to Sonogenic communications (MIDI flow) first. It will help you to understand the relationship between the SHS-500 and the MIDI Designer Sonogenic layout. The write-up may even inspire a new way of using MIDI Designer with Sonogenic.

One thing that’s nice about MIDI Designer and layouts — you can customize them. So, if you want to modify my layout, don’t hesitate. First, though, you should read my post describing Sonogenic’s MIDI implementation. Then you will know more about the MIDI messages behind the layout’s controls.

Click this link to download my Sonogenic layout for MIDI Designer. Use iTunes file sharing to install the layout in MIDI Designer. I plan to upload the Sonogenic layout to the MIDI Designer web site.

Connection

Although you could connect by USB or 5-pin MIDI, the Sonogenic, MIDI Designer and Bluetooth MIDI are made for each other.

midimittr Bluetooth connection to Sonogenic

First, launch the free midimittr app which acts as a bridge between Sonogenic, Bluetooth MIDI and MIDI Designer. midimitter lets MIDI Designer echo Sonogenic’s MIDI note on/off, modulation and pitch bend messages back to the Sonogenic. You should turn Sonogenic LOCAL off unless you intend to layer a Sonogenic voice with a GM voice.

MIDI Designer connection

Next, launch MIDI Designer and make connections to midimittr as shown in the screenshot above. Then load the Sonogenic layout into MIDI Designer. You should be ready to go at this point.

Voices and effects

The Sonogenic layout is separated into three tabs: Effects, Voice and Voice Edit. (See the screenshot below.) Effect-related controls are on the left-hand side of the screen and voice-related controls (tabbed pages) are on the right-hand side.

Effect and voice selection

Selecting a GM voice

The Sonogenic has a strict division between its keyboard sound and the General MIDI sounds over MIDI. You can think of the keyboard sound and GM sounds as two distinct tone generators, each with their own controls. The keyboard sound is selected and controlled through the Sonogenic front panel. The GM sound(s) is selected and controlled by the MIDI Designer layout.

The Voice page has an array of voice buttons. The 28 buttons at the top of the page select one of the preset “panel” voices. The two large buttons in the middle select one of the two preset panel drum kits. The buttons at the bottom of the page select a voice from the General MIDI sound set.

Please note: if you select a panel voice on the Voice page, you are changing the current General MIDI sound. The Sonogenic keyboard sound remains the same. The separation may seem artifical, but it lets us layer two sounds: the keyboard sound and a General MIDI sound.

The Sonogenic panel voices are generally better-sounding than the equivalent GM voice. The layout provides direct access to the panel voices while providing 12 buttons which can be customized for your own favorite GM voices. Of course, you’ll need to learn how to edit the GM buttons…

Effects

The large buttons on the Effects page choose the current reverb and chorus type. Like the voice buttons, the reverb and chorus effect type buttons are “radio buttons,” i.e., you can select only one effect type at a time within the reverb group or chorus group.

The reverb (Rev) and chorus (Cho) sliders adjust the reverb and chorus level for the General MIDI sound. [By the way, the GM voice and its effect levels are on MIDI channel 1.] Change the amount of reverb or chorus effect here. The sliders do not affect the keyboard sound — only the GM sound.

Changing the chorus and reverb type also affects the keyboard sound because the chorus and reverb units are shared by the keyboard sound and the GM tone generator. Reverb and chorus level only affect the GM sound [MIDI channel 1].

The four small buttons are utility buttons:

  1. XG On: Sends an XG System reset to the GM tone generator. This resets the voice (acoustic piano) and all internal MIDI controller values.
  2. Local: Turns Sonogenic LOCAL CONTROL on and off.
  3. All Off: Turns off all notes which may be sounding — a panic button.
  4. C3: Plays the MIDI note C3. Good for testing edits and changes.

Use the XG On button sparingly. The GM tone generator and layout do not automatically re-synchronize with each other.

Voice editing

The Voice Edit page is where you adjust basic voice characteristics like volume (Vol), attack time (Atk), release time (Rel), filter frequency (Freq) and filter resonance (Res). You can spruce things up with these controls. The attack, release, frequency and resonance controls behave like “quick edit” controls, that is, they are offsets from the preset voice parameter values. The middle position (64) specifies a zero offset leaving the original value unchanged. Higher values add an offset and lower values subtract an offset. So, if you want to increase attack time, move the attack slider up. If you want to shorten attack time, move the attack slider down.

Effects and Voice Edit pages

Portamento adds a glide between notes. Press “Porta On” to turn portamento on and press “Porta Off” to turn portamento off. The portamento time slider (Porta Time) sets the glide time.

The velocity sensitivity knobs change how the voice responds to MIDI note velocity (touch). The two voice parameters are:

  1. Velocity Sense Depth (VelDepth)
  2. Velocity Sense Offset (VelOffset)

Please see Yamaha’s explanation in the figure below.

Velocity Sense Depth and Offset

Organ voices, in particular, should not respond to velocity, i.e., a note is either on or off. To achieve this kind of touch response, set velocity sense depth to zero and set velocity sense offset to a value in the range 110 to 127.

The keyboard voices have a default volume which is louder than the General MIDI voices. You may need to set the volume slider (Vol) above 100 in order to get a better balance (mix) between panel and GM voices.

MIDI Designer presets

MIDI Designer itself implements preset storage and recall. A MIDI Designer preset is a snapshot of all the current values in a layout. Here’s a typical usage scenario:

  1. Select a voice.
  2. Select and adjust chorus and reverb effects.
  3. Tweak the voice (e.g., change filter cutoff, etc.)
  4. Save the finished voice as a MIDI Designer preset.

It’s easy to save a preset. Press the more button, press the “Save” button at the bottom of the drop-down menu, and then press one of the ten preset buttons. To recall a preset, simply press more followed by the desired preset button.

MIDI Designer has two groups of presets: regular and alternative. There are ten preset slots in each group, so you get twenty presets total. The Alt button selects the alternative group.

Potential issue: Portamento sometimes stays on (or off) after selecting a preset that changes portamento state. [I’m still investigating.]

Limitations

I experimented with several other controls of the kind normally found on a desktop synth. Unfortunately, the SHS-500 MIDI implementation is rather limited. Here are some known shortcomings:

  • Transpose and note shift
  • DSP effect control
  • Mono and poly mode selection

Should I make any progress with these deficiencies, I will issue an update.

Copyright © 2020 Paul J. Drongowski

Sonogenic UI MIDI flow

My Yamaha SHS-500 Sonogenic user interface (UI) is coming along quite well and is nearly complete. Before presenting the UI itself, I want to explain the overall concept of operation from the MIDI perspective.

The diagram below shows the flow of MIDI messages between the Sonogenic and the apps running on the iPad. The iPad and Sonogenic exchange MIDI messages over Bluetooth MIDI (BLE MIDI).

MIDI message flow

The two iPad apps are MIDI Designer and midimittr. Although MIDI Designer is Bluetooth MIDI capable, it is not able to echo incoming MIDI note on, note off and modulation messages back to the Sonogenic. For that, we need the (free) midimittr app. midimittr is launched first and makes the connection to the Sonogenic. In Bluetooth terms, midimittr is the “Central” and the Sonogenic is the “Peripheral.” MIDI Designer is launched after midimittr and virtual MIDI connections in and out are made to midimittr. THRU is turned on.

Thus, midimittr acts as a bi-directional pipe for incoming and outgoing MIDI messages (i.e., incoming and outgoing with respect to MIDI Designer.) MIDI Designer along with midimittr forms a MIDI loop-back.

Back in the Sonogenic, keyboard and modulation control messages are sent to the MIDI OUT link and, under the control of the LOCAL ON/OFF switch, are sent to the Tone Generator. If LOCAL is ON, keyboard messages are sent to the Tone Generator. If LOCAL is OFF, keyboard messages only go out on MIDI and no sound is initiated.

In this design, the Sonogenic transmits outgoing MIDI messages on channel 1. MIDI Designer also sends its messages on channel 1. The net effect of the loop-back is to merge messages sent by the Sonogenic with messages sent by MIDI Designer.

The incoming MIDI message stream always goes to the Tone Generator. Along this path, the Tone Generator implements a General MIDI Level 1, 16-channel synthesizer. All channel 1 messages are recognized and interpreted by the Tone Generator whether they originated within the Sonogenic or MIDI Designer.

The incoming MIDI messages and the keyboard messages (when LOCAL is ON) are received by the Tone Generator via two separate and independent ports.

  • The keyboard port is not one of the 16 MIDI channels. Panel voice selection and DSP effect control are available through this port. No General MIDI control is possible through this port.
  • The General MIDI message port handles all 16 channels including channel 1 which carries the merged messages from the Sonogenic loop-back and MIDI Designer. General MIDI messages cannot change the panel voice or DSP effect.

Now you can see why MIDI Designer loops Sonogenic MIDI messages back to the tone generator. And, you can see why there are certain limitations.

However, we do gain one advantage by having two such independent tone generator ports. If LOCAL is turned ON, you can layer a panel voice (selected on the Sonogenic) with a GM voice (selected in MIDI Designer). Want a phat stacked synth? You got it. Want to layer EPiano over strings? You got it.

The MIDI Designer UI lets you select and edit General MIDI voices. You can also select among all of the available chorus and reverb types. Thanks to MIDI Designer’s preset capability, you can save and recall the edited voices. The Sonogenic does not have patch editing or patch storage.

I hope this explanation is helpful. Soon, I will dive into the MIDI Designer interface.

Copyright © 2020 Paul J. Drongowski

SHS-500 Sonogenic MIDI

The Yamaha SHS-500 Sonogenic has hidden (undocumented) MIDI abilities! This post covers “What mother didn’t tell you.” I’m working on a MIDI Designer-based user interface for the SHS-500 and spent time exploring its MIDI implementation. Here’s the results.

For those who are “tl:dr”, The MIDI implementation is similar to (based on?) the Yamaha PSR-E463/-EW410. If you continue reading, you’ll learn a few new things about the E-series models, too.

General MIDI tone generation

The big news, of course, is the built-in General MIDI Level 1 tone generator. You can use the SHS-500 as a full 16-channel, multi-timbral General MIDI (GM) sound source (GM System On/Reset):

    F0 7E 7F 09 01 F7

You can also enable and select the panel voices by putting the Sonogenic into its ultra-light XG mode (XG System On):

    F0 43 10 4C 00 00 7E 00 F7

I won’t reproduce the GM voice table here nor the list of SHS-500 panel voices. Consult the SHS-500 Reference Manual for the bank select and program change values needed for panel voice selection.

Chorus and reverb effects

Like the E463/EW410, the Sonogenic implements a smattering of basic chorus and reverb effect types. Reverb type is selected by a MIDI message of the form:

    F0 43 10 4C 02 01 00 MSB LSB F7

The reverb types are:

                MSB  LSB  SysEx                        
--- --- -----------------------------
No effect 0 0
Hall 1 1 0 F0 43 10 4C 02 01 00 01 00 F7
Hall 4 * 1 1 0 01
Hall 2 1 16 01 10
Hall 3 1 17 01 11
Cathedral * 1 23 01 17
Room 2 0 02 00
Room 3 * 2 7 02 07
Room 1 2 17 02 11
Room 2 2 19 02 13
Stage 3 0 03 00
Stage 1 3 16 03 10
Stage 2 3 17 03 11
Plate 4 0 04 00
Plate 1 4 16 04 10
Plate 2 4 17 04 11

Please note the three reverbs added in the E463 (Hall 4, Cathedral, Room 3).

Chorus type is selected using a MIDI message of the form:

    F0 43 10 4C 02 01 20 MSB LSB F7

The chorus effect types are:

             MSB  LSB  SysEx 
--- --- -----------------------------
No Effect 0 0
Chorus 3 65 0 F0 43 10 4C 02 01 20 41 00 F7
Chorus 2 65 2 41 02
Celeste 66 0 42 00
Chorus 1 66 17 42 11
Flanger 67 0 43 00
Flanger 1 67 8 43 08
Flanger 2 67 17 43 11

Unfortunately, Yamaha have not given us a way to select the DSP effect type. The Sonogenic does not implement CC#94 which is needed to control variation send when the variation effect is configured in system mode. I performed many experiments trying to enable the DSP effect as an insertion effect, failing all attempts. Yamaha’s MIDI set-up (for SMFs) on the E463 does not contain DSP configuration. So, I think we’re hosed when it comes to DSP effects via MIDI.

I couldn’t find a way to change the Master EQ through MIDI.

MIDI Continuous Controllers

The SHS-500 Sonogenic implements the following MIDI Continuous Controller (CC) messages:

 CC#  Function / purpose
--- -----------------------------------------------
0 Bank Select (MSB)
1 Modulation
5 Portamento Time
6 Data Entry (MSB)
7 Main volume (channel volume)
10 Pan 11 Expression 32 Bank Select (LSB)
38 Data Entry (LSB)
64 Sustain (Off: 0 to 63, On: 64 to 127)
65 Portamento On/Off (Off: 0 to 63, On: 64 to 127)
71 Resonance
72 Release Time
73 Attack Time
74 Cutoff Frequency
84 Portamento Control (amount of portamento)
91 Reverb depth (Effect 1 Depth)
93 Chorus depth (Effect 3 Depth)
96 RPN/NRPN data increment
97 RPN/NRPN data decrement
100 Registered Parameter Number (RPN) LSB
101 Registered Parameter Number (RPN) MSB
120 All Sound Off
121 Reset All Controllers
122 Local On/Off switch (Off: 0 to 63, On: 64 to 127)
123 All Notes Off
124 Omni Off
125 Omni On
126 Mono (0 to 16)
127 Poly

These CC channel messages are pretty standard. Without deep diving, note that CC#91 and CC#93 set the reverb depth and chorus depth, respectively. It’s still possible to have a lot of fun with CC#71, CC#72, CC#73, and CC#74 for voice editing. However, you’ll have to find a way to save your edits since the Sonogenic doesn’t have any user patch memory. I’m hoping to edit and save patches through my MIDI Designer user interface.

Sadly, there isn’t a way to control vibrato. It would be nice to control vibrato rate and depth, but what you hear is what you get. The best one can do is to control vibrato depth via CC#1 modulation.

Registered Parameter Numbers

The Sonogenic implements the General MIDI Registered Parameter Numbers (RPNs):

RPN MSB  RPN LSB  Function / purpose 
------- ------- -------------------------------------
0 0 Pitch Bend Range
0 1 Fine Tuning
0 2 Coarse Tuning
0 5 Modulation Sensitivity

I tested only coarse tuning as a means to achieve transpose.

No Non-Registered Parameter Numbers (NRPN) are supported.

Utility messages

The PSR-E463 MIDI Reference lists a few “utility” messages:

  • MIDI Master Volume
  • MIDI Master Tuning
  • Local ON/OFF

I tested Local ON/OFF and the Sonogenic responds to it. (The SHS-500 MIDI implementation chart shows this message as recognized).

None of the General MIDI Level 2 messages are implemented, e.g., Master Coarse Tuning. Thus, options for transpose (note shift) are limited.

XG extensions

I spent a fair bit of time searching for Yamaha XG extensions. Almost all XG extensions are ignored except velocity sense control:

Velocity Sense Depth (Part: 1, Default: 64)
F0 43 10 4C 08 00 0C vv F7
Velocity Sense Offset (Part: 1, Default: 64)
F0 43 10 4C 08 00 0C vv F7

I’m glad velocity sens control is supported. Organ voices, in particular, do not respond to key touch. If you want to turn off touch response in a MIDI channel, try:

    Velocity Sense Depth: 0 
Velocity Sense Offset: 115 to 127

Both parameters default to 64 (Hex 0x40).

Based upon my analysis of E463 song set-up messages, the Sonogenic is likely to support XG Scale Tune messages.

Display chord name

You’ve probably seen demonstrations of Chord Tracker driving the SHS-500. Chord Tracker communicates chord names to the Sonogenic over MIDI. It uses the same SysEx chord name message as the Genos/PSR series keyboards. For example, the following two messages send “Dm7” and “G7” to the Sonogenic.

F0 43 7E 02 32 0A 32 0A F7     Dm7
F0 43 7E 02 35 13 35 13 F7 G7

Chord names are displayed when the Sonogenic is in Jam Mode.

Here is Yamaha’s definition of the chord name messages as taken from the Genos Data List PDF:

F0 43 7E tt d1 d2 d3 d4 F7     Type1 (tt=02) 
11110000 F0 = Exclusive status
01000011 43 = YAMAHA ID
01111110 7E = Style
00000010 02 = type 1
0ddddddd d1 = chord root (cr)
0ddddddd d2 = chord type (ct)
0ddddddd d3 = bass note (bn)
0ddddddd d4 = bass type (bt)
11110111 F7 = End of Exclusive

cr : Chord Root 0fffnnnn
fff: b or #, nnnn: note(root)
0000nnnn 0n bbb 0fff0000 x0 reserved
0001nnnn 1n bb 0fff0001 x1 C
0010nnnn 2n b 0fff0010 x2 D
0011nnnn 3n natural 0fff0011 x3 E
0100nnnn 4n # 0fff0100 x4 F
0101nnnn 5n ## 0fff0101 x5 G
0110nnnn 6n ### 0fff0110 x6 A
0fff0111 x7 B

ct : Chord Type 0 to 34, 127
00000000 00 0 Maj 00010010 12 18 dim7
00000001 01 1 Maj6 00010011 13 19 7th
00000010 02 2 Maj7 00010100 14 20 7sus4
00000011 03 3 Maj7(#11) 00010101 15 21 7b5
00000100 04 4 Maj(9) 00010110 16 22 7(9)
00000101 05 5 Maj7(9) 00010111 17 23 7(#11)
00000110 06 6 Maj6(9) 00011000 18 24 7(13)
00000111 07 7 aug 00011001 19 25 7(b9)
00001000 08 8 min 00011010 1A 26 7(b13)
00001001 09 9 min6 00011011 1B 27 7(#9)
00001010 0A 10 min7 00011100 1C 28 Maj7aug
00001011 0B 11 min7b5 00011101 1D 29 7aug
00001100 0C 12 min(9) 00011110 1E 30 1+8
00001101 0D 13 min7(9) 00011111 1F 31 1+5
00001110 0E 14 min7(11) 00100000 20 32 sus4
00001111 0F 15 minMaj7 00100001 21 33 1+2+5
00010000 10 16 minMaj7(9) 00100010 22 34 cc
00010001 11 17 dim

bn: On Bass Note Same as Chord root; 127:N o bass chord
bt: Bass Chord Same as Chord type; 127: No bass chord

MIDI Realtime messages

The SHS-500 Sonogenic sends the following MIDI Realtime Messages:

  • Start (0xFA): Jam mode only, when play/pause is pushed while stopped
  • Stop (0xFC): Jam mode only, when play/pause is pushed while playing
  • Active Sense (0xFE)
  • MIDI Timing Clock (0xF8)

Miscellaneous messages

The Sonogenic sends the following message when tuning is changed via the function menu:

    F0 43 10 27 30 00 00 08 00 00 F7

The Sonogenic responds to the MIDI Identity Request message:

    F0 7E dd 06 01 F7

It returns an Identity Reply message:

    F0 7E dd 06 02 vv ff ff mm mm ss ss ss ss F7
vv Manufacturer (vendor)
ff Family
mm Model
ss Version

F0 7E 7F 06 02 43 00 44 23 1F 00 00 00 6F F7
vv ff ff mm mm ss ss ss ss

Summary

Overll, there are enough messages to be dangerous! I already have a prototype patch editor constructed in MIDI Designer. In addition to MIDI Designer, I’m running the free midimittr iPad app in order to send the Sonogenic’s note on, note off and modulation messages back to itself. midimittr merges the Sonogenic’s messages with the editing and control messages from MIDI Designer. No wires — it’s all transmitted over Bluetooth MIDI. Patches are stored and recalled using MIDI Designer presets.

So, I say, dive right in! The SHS-500 offers more than what’s document in the manuals.

Copyright © 2020 Paul J. Drongowski

Sonogenic: General MIDI

After jamming with the Yamaha SHS-500 Sonogenic, I’m glad that I chose it over the Yamaha PSS-A50. Sure, the A50 could be fun, but the Sonogenic panel voices are definitely step up from the A50. The Rhodes electric piano sounds great and I’m warming to the synth voices like Analogon — good for classic R&B, soul and funk. I love the mellow jazz guitar, too. One minor gripe so far. When I play the Sonogenic in my lap, it tends to slide and get away from my hands where as Reface YC stays put.

For brevity, I will refer to the SHS-500 as the “Sonogenic” in this post. Yamaha also makes the SHS-300 Sonogenic. The SHS-300 is not as robust as the model 500 and has a smaller set of decidedly lower quality voices. The model 300 is at home with its peers in the PSS family like the PSS-E30 Remie.

I make light of my obsessive pre-purchase analysis, but one observation paid off. The Sonogenic Owner’s Manual mentions “General MIDI System Level 1” compatibility on page 8 and includes GM compatibility in the product specifications. Yamaha don’t make such claims lightly and I wasn’t disappointed.

The SHS-500 has a 16 channel General MIDI tone generator built in! I successfully played back General MIDI (GM) compatible Standard MIDI Files (SMF) through the Sonogenic. (DAW: An old version of Sonar.) Missing organ, oboe or vibraphone? You can find them in the GM sound set. The SHS-500 responds to the GM System On System Exclusive (SysEx) message:

    F0 7E 7F 09 01 F7

which puts the Sonogenic MIDI interface into General MIDI mode. The Sonogenic GM tone module accepts MIDI messages from the currently selected MIDI interface: USB MIDI, wired DIN MIDI and Bluetooth MIDI.

You’re not limited to just the GM sound set over MIDI. You can also select one of the 28 panel voices (or 2 drum kits). You’ll need to embed an XG System On SysEx message at the beginning of the song file:

    F0 43 10 4C 00 00 7E 00 F7

This message makes the SHS-500 respond to MIDI bank select messages as well as program change messages. For example, if the song sends:

    Bank Select MSB: 104
Bank Select LSB: 0
Program Change: 27

on MIDI channel 1, for example, then the tone generator will use the rather decent Jazz Guitar panel voice instead of the GM jazz guitar.

This is all good news, of course. However, there are limitations:

  • The GM sound set is available only over MIDI. You cannot select and play a GM voice via the front panel.
  • GM voices cannot be processed by the DSP effect. Thus, you cannot add a rotary speaker effect to a GM voice.
  • You cannot change the front panel voice or DSP effect via MIDI. Incoming MIDI messages affect the GM tone generator only.

The Sonogenic control architecture has inherited the quirkiness of the PSR E-series. That is, keyboard control and MIDI control are quite separate and independent.

There is some hope, however. Let’s say that you really want to play the General MIDI drawbar organ voice (MSB:0, LSB:0, PC1: 17). You can loop MIDI from the Sonogenic through an external sequencer and return the MIDI to the Sonogenic. First, you’ll need to turn LOCAL control OFF through the Sonogenic’s FUNCTION menu. Then, you need make (virtual) incoming and outgoing connections to the sequence — the equivalent of two standard MIDI cables connecting the Sonogenic with the sequencer. Then, you can select the GM drawbar organ voice on the Sonogenic’s MIDI channel (default channel one) and play the organ voice using the Sonogenic keyboard. It’s a roundabout trip, but it works.

I’m experimenting with other options like using an iPad app to loop MIDI messages back to the Sonogenic and to select panel or GM voices.

Be forewarned. The Sonogenic panel voices are significantly louder than the General MIDI voices. I haven’t decided (yet) if this is an inherent flaw nor have I found a way to boost the GM voices.

Even though Yamaha promote Chord Tracker for Sonogenic, don’t count MIDI out. The Sonogenic has a solid GM tone generator on board and you can use it to compose and/or play back MIDI songs from an external sequencer.

One final tip, if you put the Sonogenic in Jam Mode, Yamaha-specific chord name SysEx messages tell the Sonogenic to display a chord name. By placing chord name events in the MIDI song, you can jam along just like Chord Tracker only the accompaniment is coming from a MIDI sequencer instead of an audio track.

I hope to write a short summary of the MIDI messages recognized and interpreted by the SHS-500 Sonogenic. The basic synthesis engine is similar to the Yamaha PSR-E463 and PSR-EW410, minus the XGLite sound set. C’mon back!

Copyright © 2020 Paul J. Drongowski

SHS-500: Snap review

After analyzing the Yamaha SHS-500 Sonogenic from every possible angle (even the service manual!), I finally got one. On-line retailers are currently flooded with post-Christmas returns and bargains can be had. And so it was.

First, I must compliment Sweetwater for their prompt service and excellent packing. The SHS-500 was double-boxed. (The inner box was Yamaha’s original packing carton.) The unit is in excellent condition, matching Sweetwater’s assessment of its condition. Even though the inner carton has a big “DEMO” sticker on it, the Sonogenic is “like new.” Money saved and well-spent.

Since the Sonogenic was a demo, the initial settings are probably not factory. Thus, your out-of-the-box experience may be a little different than mine. I loaded the battery compartment with six AA batteries and turned it on.

Yamaha SHS-500 Sonogenic in fire-engine red

The internal speaker is not going to impress anyone. Sound quality is at roughly the same level as Reface and I never warmed to that. I’ll be playing the Sonogenic through either headphones, my trusty, portable JBL Charge 2 or a powered monitor. Sonogenic has a master EQ and it’s important to set it appropriately. My unit was set to “Line Out” and the sound through the speaker was weak. Changing to the “Speaker” EQ setting was much better. Be sure to change back to “Line Out” when connecting to an external powered monitor. (Or “Boost,” or “Mild”.)

The SHS-500 is quite solid in the hands — much better build quality than the new PSS series or the SHS-300. Key feel is comparable to Reface. After playing the Sonogenic, the PSS keys have a cheaper feel. Yes, you get what you pay for. The SHS-500 is like a Reface keytar.

Natch, the first thing was quick tour of the sounds. Every panel voice has a DSP effect. (See the table below for default assignments.) Sound quality is on-par with good PSR E-series voices and in a few cases, S-series. The SHS-500 is not a Genos. 🙂 However, the SHS-500 is better than PSS by far.

 SHS-500            Bank  Bank
Voice MSB LSB PC# Default effect
----------------- ---- ---- --- --------------
Saw Lead 1 104 20 91 LPF
Saw Lead 2 0 104 82 Flanger
Quack Lead 0 112 85 DSP Chrs
Bright Decay 104 21 85 Phaser
Square Lead 0 112 81 Phaser
Under Heim 104 51 88 DSP Chrs
Analogon 104 52 82 Flanger
Synth Brass 0 113 64 DSP Chrs
Electric Piano 104 28 5 Phaser
DX Electric Piano 0 112 6 DSP Chrs
Electric Guitar 104 3 31 Dist.2
Jazz Guitar 104 0 27 DSP Chrs
Acoustic Guitar 0 117 26 LPF
Electric Bass 104 6 34 LPF
Slap Bass 0 112 37 DSP Chrs
Synth Bass 0 112 39 Phaser
DX Bass 0 118 40 LPF
Piano 0 112 2 DSP Chrs
Piano & Strings 104 39 1 DSP Chrs
Piano & Pad 104 40 1 DSP Chrs
Air Choir 0 112 55 LPF
Strings 0 116 49 DSP Chrs
Brass 0 117 63 DSP Chrs
Trumpet 0 115 57 HPF
Flute 0 115 74 LPF
Alto Sax 104 2 66 LPF
Tenor Sax 104 3 67 LPF
Harmonica 0 112 23 Tremolo
House Kit 127 0 65 LPF
Power Kit 127 0 88 LPF

The House Kit has the same program selection numbers as the House Kit in the PSR-E463 and PSR-EW410. These instruments and the SHS-500 are the only ones with this “House Kit.” Go figure.

My favorite voices are the Electric Piano, Jazz Guitar, Electric Bass, Synth Bass, Piano & Pad, Strings, Flute, Tenor Sax and Harmonica. Electric Piano with the Tremolo DSP effect is nice. Can’t wait to try these out with my backing tracks. Here’s a few more snap opinions.

  • I’ve never been that excited by the PSR synth voices although Quack Lead, Under Heim and Analogon can be fun. Drop Quack Lead down an octave or two for an alternative synth bass.
  • The electric guitar is OK and the DSP distortion effect is welcome versus a static sampled overdriven guitar. However, the DSP effect is not up to the PSR S-series, Genos or MODX, that’s for sure. It’s an early Yamaha algorithm.
  • The main piano is bright — think “house.” The piano in the layered voices is warmer.
  • The tenor sax needs to be played stylistically. The low end gets into baritone territory — a plus.
  • The harmonica is decent enough to go a little Jon Batiste or Stevie with the thing.
  • A few of the voices (e.g., flute, tenor sax) have vibrato sampled in. If you’re a PSR-type person, you’ll recognize these as “Sweet!”
  • The LPF is a bit of a let-down. One can hear changes due to cut-off, but a certain dynamic aspect is missing.

The DSP effects sound a little over-done. It’s easy enough to strip the effect off by dialing it out with the Effect Control knob. One might get tired of doing this after every voice change, which is why I want to experiment with MIDI Designer as a graphical front end for the Sonogenic.

In addition to the default DSP effect, the Sonogenic sets the octave which is appropriate (in some sound designer’s view) for the instrument. Change the voice and you change the octave, too. Depending upon the scenario, this could be a drag. There isn’t a way to go directly to a voice; you need to spin the Select knob and step through the voices — another motivation for a MIDI Designer front-end.

Jack positions all seem well thought out. The USB and MIDI DIN connector are hidden behind a rubbery cover. The MIDI DIN connector is the same as the Reface connector and takes the same breakout adapter to produce 5-pin IN and OUT.

The audio Line Out is mono. (Yes, mono, according to the Service Manual.) The headphone output is stereo. If you need stereo, give the headphone output a try. Dunno if the waveforms or effects are stereo, but the stereo signals are sent to the headphone jack. (The DAC is an AK4430ET, BTW.)

The SHS-500 includes a PA-130 power adapter. I have a PA-150 plugged in at all times and it works just fine with the SHS. The PA-150 supplies the same voltage and has a higher amp rating. All good.

Overall, the Sonogenic SHS-500 is worth the (reduced) price. Will I take it to rehearsals? Heck, yeah! It’s a shame that Yamaha left at least one organ patch out of the voice set. There is enough here for those weeks when organ is not in the church gig spotlight. Almost wish the SHS-500 and Reface YC were combined into the same ax…

Copyright © 2020 Paul J. Drongowski

SHS-500 Sonogenic voices

With Yamaha PSS-E30 Remie at hand, I’m still comparison shopping the PSS series against the Yamaha SHS-500 Sonogenic. The Sonogenic has better build quality, has 5-pin MIDI as well as MIDI over USB/Bluetooth, and integrates with Chord Tracker.

Then there is the issue of sound quality. Remie and the rest of the PSS series (PSS-F30 and PSS-A50) have only one main DSP effect: reverb. With the exception of the A50’s motion effects, there aren’t the means to tweak sounds.

As to preset voices, I would love to play Remie and Sonogenic side by side. However, in this day and age when brick and mortar stores do not stock inventory or demo units, that’s impossible. Gosh, I ordered Remie from the UK — I live in the big Seattle USA metro area — with the intention of gifting it to our grandson. (A good excuse. 🙂 ) The PSS series keyboards are so inexpensive that even an impulsive purchase is justifiable. I still haven’t seen a Sonogenic alive in the wild and don’t have hand-on experience with it (yet).

First some tech-head stuff. Remie has 32 voice polyphony and my teardown shows that it is based on the tiny Yamaha SWLL (YMW-830) system-on-a-chip (SOC). It stores its program and waveforms on a 2MByte ROM. Right away, I expect Remie’s sound quality to be compromised with respect to the current PSR E-series.

The current PSR E-series is based on the proprietary Yamaha SWX03 processor. The SWX03 is a much larger SOC with external RAM, ROM, digital to analog conversion (DAC), analog to digital conversion (ADC), and LCD display interface. The program/wave memory is 32MBytes (Spansion S29GL256) much larger than Remie. The SWX03 supports 48 voice polyphony and 10 DSP effects in addition to the usual PSR E-series reverb and chorus. Thus, I expect better sound quality from the E-series.

The SHS-500 also has 48 voice polyphony and 10 DSP effects. These characteristics alone make a strong case for the SWX03 as the main engine within the Sonogenic.

Hearing is believing, however. Without access to Sonogenic in the stores, I’m forced to compare Remie and PSR against YouTube videos. One of the best Sonogenic voice demonstrations is in Japanese by a laid-back jazzer. I also recommend this Sonogenic demonstration in Russian.

The Japanese demo gets rolling roughly 3:30 in. Our jazzer compatriot plays through the presets without a backing track or lots of effects. This is as close to factory stock as one can get. Thank you! Here are direct links to some of the Sonogenic instruments in the video:

These sound pretty good and much better than Remie. The electric piano can bark! The jazz guitar is decent. Many of the brass and woodwind instruments have vibrato sampled in.

The Sonogenic program change table gives us a major clue about the origin of the Sonogenic voices. Most of the Sonogenic voices match up with the PSR series:

 SHS-500            Bank  Bank
Sonogenic MSB LSB PC# PSR/Genos voice
----------------- ---- ---- --- -----------------------
Saw Lead 1 104 20 91 Gemini
Saw Lead 2 0 104 82 RS Saw Lead1
Quack Lead 0 112 85 Portatone
Bright Decay 104 21 85
Square Lead 0 112 81 Square Lead
Under Heim 104 51 88 Under Heim
Analogon 104 52 82 Analogon
Synth Brass 0 113 64 Ober Brass
Electric Piano 104 28 5
DX Electric Piano 0 112 6 DX Modern
Electric Guitar 104 3 31
Jazz Guitar 104 0 27 Cool! Slide Jazz Guitar
Acoustic Guitar 0 117 26 Steel Guitar
Electric Bass 104 6 34
Slap Bass 0 112 37 Slap Bass
Synth Bass 0 112 39 Resonance Bass
DX Bass 0 118 40 DX100 Bass
Piano 0 112 2 Bright Piano
Piano & Strings 104 39 1
Piano & Pad 104 40 1
Air Choir 0 112 55 Air Choir
Strings 0 116 49 Bow Strings
Brass 0 117 63 Pop Brass
Trumpet 0 115 57 Sweet! Trumpet
Flute 0 115 74 Sweet! Classical Flute
Alto Sax 104 2 66
Tenor Sax 104 3 67
Harmonica 0 112 23 Sweet! Harmonica

I verified the matches by comparing the YouTube video against the same voices on Genos. (Removing the Genos effects, of course.) The blank spots in the table are voices which Yamaha re-sampled from PSR or elsewhere. That’s why the electric piano is so darned good. The piano layer voices have a warmer, mellower timbre than the Bright Piano (which really lives up to its name).

So, there you have it. On the basis of sound quality, the Sonogenic SHS-500 wins over the PSS family. Yes, the Sonogenic is more expensive, but you do indeed get more for the money. If Sonogenic had even a single organ voice, it would be a no-brainer and I would have bought one by now. Oh, Yamaha, why do you leave these things out?

Copyright © 2019 Paul J. Drongowski

Another tiny toy from Yamaha: SHS-300

Yamaha keeps cranking out mini-keyboards!

The SHS-300 Sonogenic is squarely in the musical toy category. The SHS-500 keytar is a solid, well-built instrument with 28 melodic instruments, 2 drum kits (House and Power), and DSP effects. The SHS-300, on the other hand, is a plastic, reduced rendition.

Both keyboards interface with Yamaha’s ChordTracker app and implement Jam mode. Jam mode lets an untrained user flail at the keyboard while the software maps the played notes to the musical scale determined by ChordTracker.

The SHS-300 has just 12 instruments organized into four categories:

  • Synth: Saw Lead, Square Lead, Synth Brass
  • Piano: Piano, Electric Piano, Organ
  • Guitar: Electric Guitar, Acoustic Guitar, Electric Bass
  • Other: Strings, Synth Bass, Dance Kit

The Dance Kit is the sole drum kit. The sounds are definitely entry-level PSR quality with no real effects. The nice solid controls of the SHS-500 are replaced by plastic buttons. Buttons control vibrato and sustain; Pitch bend is the sole wheel.

Street prices should be quite low as Yamaha are aiming for a super-casual, impulse-buy customer base.

Of course, the SHS-300 does not provide 5-pin MIDI out, an alphanumeric display or other niceties. I think I would stick with the bigger sibling SHS-500.