Arturia AstroLab: Yes, I played one!

Right from the git-go, I thank Guitar Center Lynnwood for letting me plink away at an Arturia AstroLab. I dropped in to play before sufficient caffeine had kicked in and I wasn’t really feeling the music. Nonetheless, I was glad to actually play an AstroLab and not watch its demo videos. 🙂
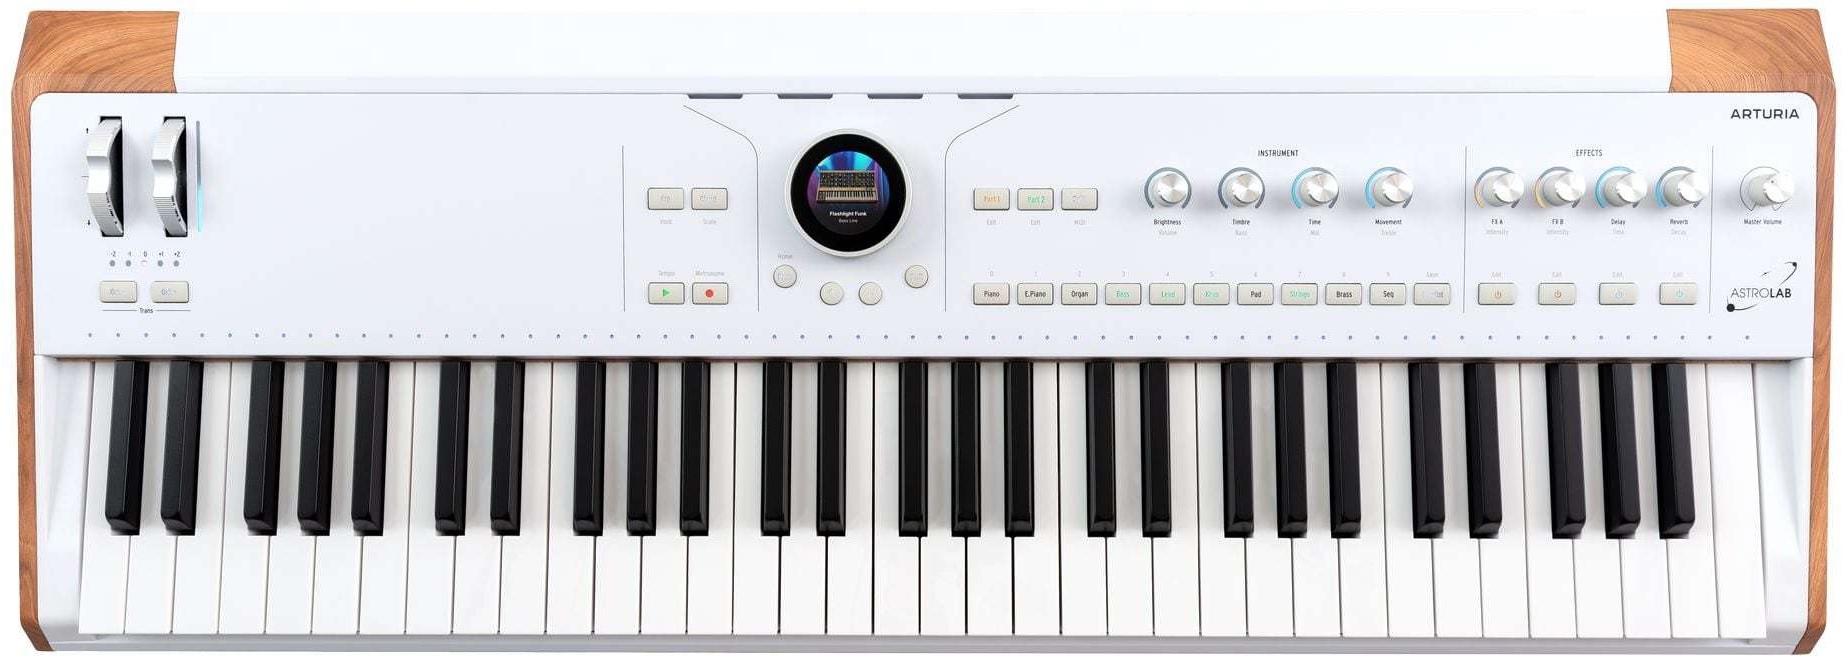
Arturia AstroLab

AstroLab and I are not quite ready for each other yet. I really need the Augmented Brass and Augmented Woodwinds. The Augmented series are pretty sweet instruments and acoustic woodwinds, especially, are essential to what I play live. Still, thanks to playing AstroLab now, I will keep AstroLab on my radar screen.

AstroLab or Analog Lab?

In case you haven’t watched a few videos, AstroLab is Analog Lab in a stand-alone keyboard. That’s the short of it. Sitting down to AstroLab is exactly like sitting down with Analog Lab. Most of Lab’s collection of instruments are there along with a number of recognizable presets. I couldn’t perform a systematic check, but I believe Arturia have cooked up additional presets for AstroLab itself.

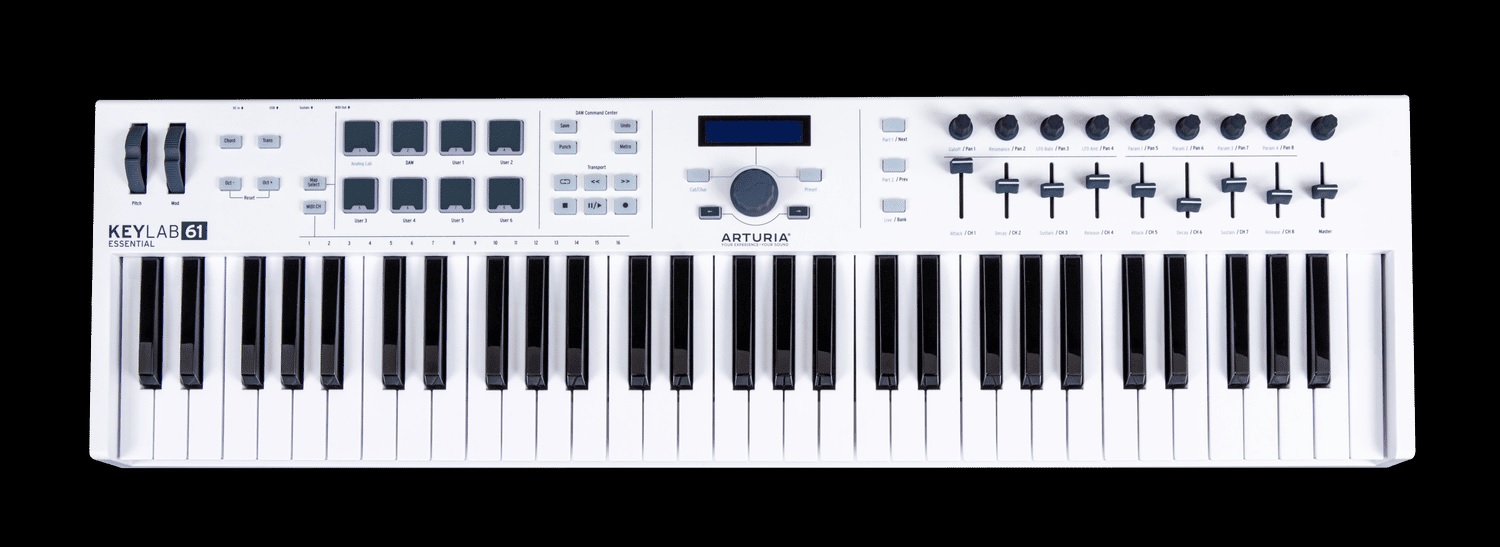
The big elephant in the room: If you have Analog Lab (or V Collection) on a laptop, why AstroLab? AstroLab is not cheap at $1,599 USD (MAP/street). You can get a pretty decent laptop and Analog Lab for $1,600. For that matter, you can buy Analog Lab V bundled with a KeyLab Essential MK3 for only $270 (MAP). Add on a laptop and you’re ahead of the game. [Analog Lab V is integrated brilliantly with the KeyLab controller series, BTW.] So, AstroLab needs to have significant value-added.

From my own perspective, I’m not wild about using a laptop in a live church setting. I once had a laptop balk in church and when I’ve got to play, I’ve got to play. I like the idea of Analog Lab running on a reliable, dedicated keyboard. On the down-side, AstroLab gives up KeyLab’s sliders, having no sliders at all. (To me, pads are MEH.) On the up-side, working at AstroLab is Analog Lab V déjà vu. And that’s a good thing…

Build

AstroLab is an attractive looking instrument. Visually, it would grace any stage. Dimensionally, it is not much wider than the 61-key keybed and, as a result, is quite compact. That’s why AstroLab’s heft is so surprising. At 22 pounds (10 kg), this instrument has some weight and you won’t be throwing it around with palm swipes. The KeyLab Essential 49 and 61 are only 6.1 and 6.8 pounds, respectively. I love my KeyLab Essential 49 for its light weight and portability. Thus, the relatively weighty AstroLab is a double surprise.

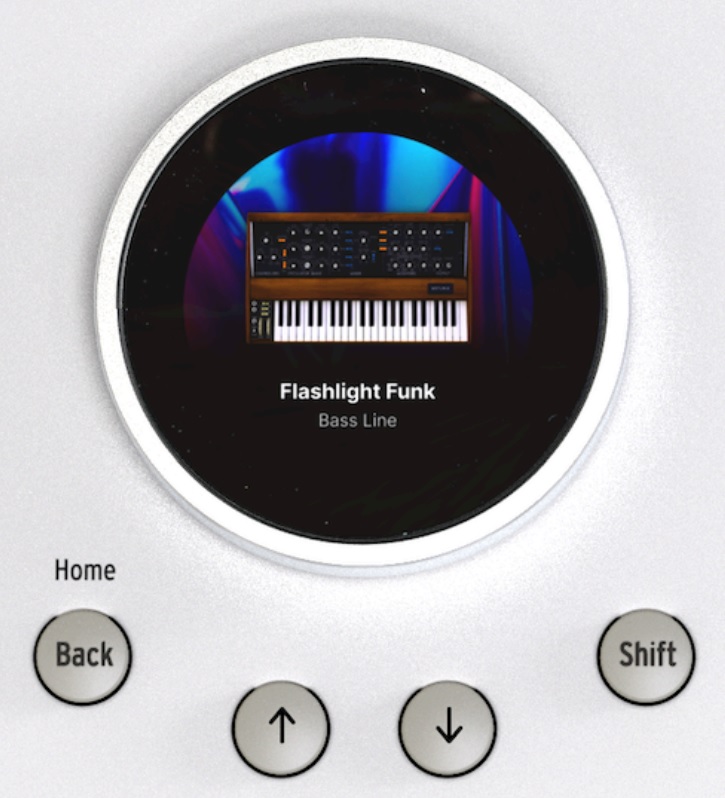
Arturia AstroLab Color Display Encoder

The build, encoder knobs, buttons and keys feel solid and durable. The integrated display knob, not so much. The display knob — what Arturia calls the “Color Screen Encoder” — feels like it rocks around and I feared a bit for its safety in my under-caffeinated hand. I would rather confirm selection with one of those solid-feeling buttons near the display knob.

One near-term suggestion: Ditch the cheesy-assed music stand shown on the Arturia AstroLab “Details” web page. It’s not up to the usually superb Arturia design aesthetics.

Display and UI

I was quite amazed by the amount of detail shown by the color display. You can easily recognize all of the virtual synths and keyboards by their familiar appearance. I didn’t have any trouble reading the instrument, patch, and parameter names. Text is legible.

As to the user interface (UI), you can dial around the menu system (literally). Patches are organized by virtual instrument, sound category (strings, etc.) and artist. The artist category lets you dial in a patch based upon a popular song or what have you, a feature that will be welcomed by cover-band players.

Arturia need to divide a few categories into separate, smaller categories. For example, brass and woodwind instruments are in the same, combined category. In order to find a clarinet, I must scroll through a bunch of brass instruments. It’s bad enough to scroll through a list of instruments, but, hey, lets focus the list and reduce scroll time. How ’bout separate categories for woodwinds and brass?
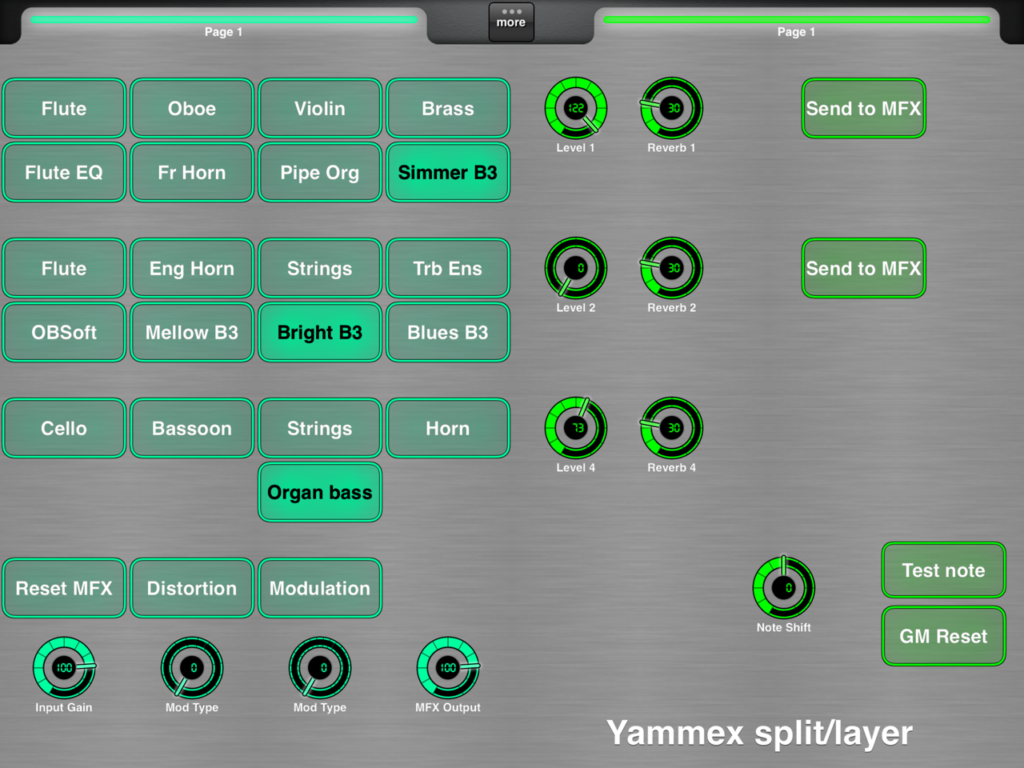
Splits and layers

My only other source of frustration was trying to create a split. I didn’t have time to browse the AstroLab manual before heading down to the music shop. Intuition alone didn’t cut it and I never succeeded in creating a split. Bummer.

Sounds

I took along this week’s music and a few of the jazz tunes that I’ve been working on. Genre-wise, it’s pop, not electronica.

I was pleasantly surprised to find a large number of patches that could fill-in for the Augmented Brass and Woodwind instruments. That’s a relief. Generally, patches sounded bright and I raised this point with the store manager. The staff had compared AstroLab vs. Nord and found more mid- to low-range with the Nord through the same monitors. Tweaks needed?

Some of the acoustic pianos sounded too bright and brittle. Fortunately, they could be tamed with the “Brightness” and “Timbre” knobs. I felt much better once I got into the Augmented Pianos. Nice work, there. I couldn’t assess piano sustain, not having a sustain pedal attached to the demo unit.

As to the keybed, it is comfortable to play. It’s another one of those “Compromise” keybeds which aim for a sweet-spot between acoustic piano, electric piano, organ and synth. I much prefer the AstroLab keybed to KeyLab Essential — by far. The keybed made playing electric piano enjoyable (something I dread on Yamaha MODX6). B-3 organ didn’t feel bad under the fingers, either.

I have only one small, probably correctable, quibble about the key touch. Sometimes a patch wouldn’t trigger (produce any sound) when using my lightest touch. This seemed to occur with synth-y patches and maybe setting the key touch sensitivity would make the instrument more responsive.

I did notice a delay when switching between “sampled” instrument patches. Arturia acknowledge this delay due to sample loading. Plan for it when playing live. Switching between modeled instruments is darned quick. I didn’t notice any drop-outs due to polyphony limits, but then I wasn’t pushing AstroLab very hard with splits or layers.

Conclusion

Earlier, I addressed the big elephant in the room — what you get for what you pay. Arturia want to compete with the Yamahas, Korgs, Rolands and Nords. In terms of build and keybed, they are on par. As to sonic value-added, the AstroLab is a work in progress (WIP).

Arturia are smart enough to know it’s a WIP. They need to fill out the brass and woodwind offerings, for example.

The big value-add is Arturia’s sound design. AstroLab is Analog Lab V (temporarily minus some goodies). If you want Analog Lab V in a dedicated keyboard, you got it now.

Copyright © 2024 Paul J. Drongowski

Arturia AstroLab announced

Arturia have announced its new Arturia AstroLab featuring many (most?) of their AnalogLab instruments and presets: 34 instruments, 1,300 presets. You’ll find lots of pre-release demos on the Interwebs. I recommend the Arturia playthrough video which doesn’t have any yakking.

I’m excited by the AstroLab if, for no other reason, it’s the first significant alternative to the all-in-ones offered by the kaiju (Yamaha, Roland, Korg, Nord, etc.) The current sound set is very comprehensive even though a few Analog Lab instruments for AstroLab are still in development.

A few quick observations. The AstroLab is bi-timbral. That means splitting two independent voices or layering two voices. That might seem limiting, but I rarely use humungous stacks when playing live. The knobs (endless encoders) light up with the color matching the assigned layer or split voice. Neat. Piano and organ polyphony is 48; poly synth polyphony is 8.

There are four endless encoders to control voice parameters and four encoders to control the effects: effect A, effect B, delay and reverb. No sliders. The lack of sliders may raise eyebrows, but you can add a secondary MIDI controller through a USB-A port.

Speaking of encoders, you probably noticed that dial-like thingy in the middle of the front panel. Arturia have invented an innovative control which merges a big wheel with a high-resolution color display in the middle. The wheel turns left and right, and responds to clicks and pressure from the top. One may need to be a little careful so as to avoid inadvertent clicks while turning the wheel.

The keyboard is described as semi-weighted piano keys, channel aftertouch. Natch, one really needs to get the keys under the fingers to discover if the key-feel is really for you. In such a premium-level keyboard, I doubt if Arturia built in a cheapo keybed.

Internal storage is 22GBytes and only 7GBytes are used. That leaves plenty of room for expansion including the new instruments coming to AstroLab at some future date.

Sound editing is generally limited to what is assigned to the encoders. For deep sound editing, you’ll need a licensed copy of the relevant AnalogLab instrument (bundled or individually). In other words, separate software licenses are needed in order to deep-edit.

Physically, AstroLab is an attractive package weighing 22 pounds. That’s a little hefty for me, but is well within reason for a full 61-key instrument. The chassis is metal with molded end-cheeks. (That ain’t natural wood you’re seeing.) The goes-ins and goes-outs are well-provided for including 1/4 inch pedal jacks and 5-pin MIDI.

I see AstroLab priced at $1,600 USD (MAP or “street”) putting it up against Yamaha MODX, Korg Nautilus, Roland JUNO-X and Fantom-0, just to mention a few other products in this pricing tier.

I — for one — would like to try AstroLab and get a feel for the keybed. I’m also curious to hear and control the Hammond B-3 emulation. Would be nice to have sliders for drawbar control, but there is a nice, big flat area on the AstroLab front panel for my Crumar D9U.

A full demo on the new Arturia AstroLab with Bert Smorenburg — good to see and hear Bert!

Copyright © 2024 Paul J. Drongowski

Arturia Keylab Essential mk3

Why do I like Arturia?

First, they make great products and I use ’em. I own and play both an Arturia Keylab Essential mk2 and an Arturia Keystep — not to mention the software!

Second, Arturia really care about customers. Recently, I posted about the new Arturia Keylab Essential mk3 and how it needed to send MIDI Program Change:

I was excited when I saw Arturia’s announcement of the Keylab Essential mk3 MIDI controller. The mk3 has some nice enhancements without increasing weight and size over the mk2. The price is only slightly higher ($219 USD for the 49 mk3). The mk3 adds a larger 2.5″ LCD display, USB-C communications and power, and expression pedal support.

I downloaded the mk3’s manual and was immediately crestfallen. Keylab Essential mk3 cannot send MIDI Program Change. This is a serious step back from the mk2.

The Keylab Essential mk2 is one of the few MIDI controllers that does it right, sending Bank Select MSB, Bank Select LSB and Program Change in one go. I’m still amazed that most other MIDI controllers send Program Change without Bank Select.

Well, guess what? Arturia saw my post and replied:

We really value our users’ input, and we are very sorry to hear that you were disappointed by the fact that the new KeyLab Essential cannot send MIDI Program Change. We know that it was a much appreciated feature on the mk2, and our R&D team is currently doing their best to implement it on the mk3 as soon as possible. For your information, a new firmware should be out in about three weeks, and we’re hoping you’d be willing to give a shot to the KeyLab essential mk3 then.

By the way, I’ll be looking at the new Part feature (split point!) as this is a super, needed advancement over mk2.

Thanks, Arturia, for reading the blog and being proactive! I think it’s always important to call out manufacturers and retailers who go the extra mile (or kilometer) for customers.

Adding zones to Keylab Essential with EPP

My current light-weight rehearsal instrument is a Yamaha Reface YC. Although I have put the YC to work at many a rehearsal, the Reface YC has three major limitations:

  1. It’s organ all the way and I can vary tone color only with drawbars.
  2. The three octave keyboard is maddingly too short and chops either the melody or bass line.
  3. I can cope with the mini-keys, but really?

Thus, my quest for a light-weight rehearsal rig goes on.

The V3 Sound Yammex XXL module and its closely-related sister, the Grand Piano XXL module, have very good orchestral voices. The XXL modules are small and weigh only 0.5 pounds (1.2kg) each. Hmmm, I think we have a candidate here.

The other half of the rehearsal formula is a MIDI controller, of course. Fortunately, I have an Arturia Keylab Essential 49 in hand. The Arturia is a relatively compact 49-key controller with lots of pads (8), knobs (9) and sliders (9). The Keylab Essential 49 is a relatively light 6.6 pounds (3kg).

Seems like we should have a match…

I usually split the keyboard into LOWER and UPPER zones somewhere around G3 (AKA G below middle C). This split gives my left hand enough room to roam and accommodates melody lines that dip below middle C. Although I keep the LOWER sound simple (i.e., one patch), I often layer the right hand. Most synthesized acoustic instruments need a little thickening and timbral shaping. Two UPPER layers are a minimum; three layers are sufficient, four is too many.

Seems like a slam dunk — MIDI the Keylab Essential into the Yammex, make a few configurations, and go. Unfortunately, neither the Keylab Essential or Yammex module support the split and layer capability that I need.

Time to rant about the stupidity of most MIDI keyboard controllers. Only a few 49-key controllers have split, layer, or zone capability: Samson Graphite 49, Nektar Panorama P4, Novation SL MKIII, Roland A-500. In the case of the Yammex module, the controller must send a full Bank Select MSB, Bank Select LSB, Program Change message sequence. Many controllers fail even this basic requirement.

The Arturia Keylab Essential, at the very least, sends a complete patch change message sequence. And, I am not going to buy yet another controller!

Enter the MIDI Solutions Event Processor Plus (EPP). The EPP is a MIDI-powered microcomputer that receives MIDI messages on 5-pin, modifies messages as determined by a set of rules, and sends the modified MIDI stream out through 5-pin. The Keylab Essential has a 5-pin MIDI OUT which is electrically compatible with the EPP. (The Keylab Essential voltage is about 4.5V as measured with a digital multimeter.) The EPP sits between the Keylab Essential MIDI OUT and the Yammex XXL MIDI IN. The EPP is itself a light-weight unit and adds negligible weight to the rig.

I programmed the EPP to split note ON/OFF messages arriving on Channel 1. Destination MIDI channel is determined by key zone: UPPER1 (Channel 1), UPPER2 (Channel 2), UPPER3 (Channel 3), LOWER (Channel 4),

  • Channel 1 note ON/OFF at and above the split point are copied to outgoing Channels 1, 2 and 3.
  • Channel 1 note ON/OFF below the split point are copied to outgoing Channel 4.

I also created rules to respond to button presses sending continuous controller 83 (CC#83). These rules initialize the four channels by sending patch change and expression (CC#11) messages. The EPP-based solution should work with any MIDI controller and multitimbral (multi-channel) module as long as MIDI communication is 5-pin.

Early on, I auditioned the Yammex sound set and had identifed 15 or so favorite Yammex voices. The following four voices are assigned to Yammex channels 1 to 4 by the EPP when it receives CC#83:

  1. Channel 1: 63 / 116 / 7 Full Strings 2 Long
  2. Channel 2: 63 / 118 / 58 Flute EQ
  3. Channel 3: 63 / 117 / 49 Classic Horn Ensemble
  4. Channel 4: 63 / 116 / 7 Full Strings 2 Long

The idea is to use Channel 1 as the main solo voice and Channels 2 and 3 as optional orchestral coloring. Flute EQ and Classic Horn Ensemble are mellow, unobtrusive and mix well with other voices. Channel 4, of course, is the left hand.

Initially, Channels 1 (UPPER1) and 4 (LOWER) are assigned an ensemble string voice, a reasonable default. Expression values are set such that strings are heard, and Channels 2 (UPPER2) and 3 (UPPER3) are silent.

Voices are assigned in the following way to the eight Keylab Essential pads:

      Violin            Oboe           Flute           Eng Horn 
63 / 116 / 22 63 / 118 / 48 63 / 118 / 57 63 / 118 / 49

Full Strings 2 Cello Flugelhorn Bassoon
63 / 116 / 7 63 / 116 / 24 63 / 117 / 15 63 / 118 / 50

Normally, these are the main solo voices to be assigned to UPPER1 (Channel 1). However, using Arturia’s USER MIDI channel feature, these voices can be assigned to UPPER2 (Channel 2), UPPER3 (Channel 3) and LOWER (Channel 4), too. That allows for a lot of game-time flexibility!

Wait, there’s more. I assigned MIDI expression to Sliders 5 through 8:

  • Slider 5: UPPER1 (Channel 1) expression/level
  • Slider 6: UPPER2 (Channel 2) expression/level
  • Slider 7: UPPER3 (Channel 3) expression/level
  • Slider 8: LOWER (Channel 4) expression/level

The sliders let me mix voices dynamically. A voice is silenced when I pull its Slider all the way down.

The table below summarizes the Keylab Essential knob, slider, pad and button MIDI assignments:

Knob #1  Cutoff     CC#74 Brightness 
Knob #2 Resonance CC#71 Timbre
Knob #3 Vib Rate CC#76 Vibrato rate
Knob #4 Vib Depth CC#77 Vibrato depth
Knob #5 Vib Delay CC#78 Vibrato delay
Knob #6 Port Time CC#05 Portamento time
Knob #7 Chorus CC#93 Chorus level
Knob #8 Reverb CC#71 Reverb level
Knob #9 CC#17 free

Slider #1 Attack CC#73 Attack time
Slider #2 Decay CC#75 Decay time
Slider #3 Sustain CC#64 Sustain
Slider #4 Release CC#72 Release time
Slider #5 UPPER1 CC#11 Expression channel 1 Solo
Slider #6 UPPER2 CC#11 Expression channel 2 Flute EQ
Slider #7 UPPER3 CC#11 Expression channel 3 Classic Horn Ens
Slider #8 LOWER CC#11 Expression channel 4 Strings
Slider #9 CC#85 free

Pad #1 63 / 116 / 22 Violin
Pad #2 63 / 118 / 48 Oboe
Pad #3 63 / 118 / 57 Flute
Pad #4 63 / 118 / 49 English Horn
Pad #5 63 / 116 / 7 Full Strings 2 Long
Pad #6 63 / 116 / 24 Cello
Pad #7 63 / 117 / 15 Flugelhorn
Pad #8 63 / 118 / 50 Bassoon

Button #1 (Part1) CC#65 Portamento ON/OFF (toggle)
Button #2 (Part2) CC#82 Momentary (Generic ON/OFF)
Button #3 (Live) CC#83 Initialize voices (Momentary)

So far, I’m having fun mixing and matching voices on the fly and trying new timbral combinations. One drawback is having to carry around a mental map to find, select and mix voices. I wish there was a way to display the current voice assignments! I plan to add stickies to the Keylab Essential to assist navigation and reduce pilot workload.

I hope this article has sparked ideas for your own control set-ups. The general principles should apply to most MIDI keyboard controllers and multi-timbral tone modules.

Copyright © 2022 Paul J. Drongowski

V3 Sound YAMMEX: Progress report

Here’s a quick update on my progress with the V3 Sound YAMMEX XXL sound module.

The V3 Sound XXL series are very compact, light-weight MIDI sound modules based on the Dream S.A.S. SAM5716B synthesis engine. The YAMMEX and its sister, the V3 Sound Grand Piano XXL, have hundreds of high quality voices — 3GBytes of factory samples in a 4GByte waveform memory. The modules also provide two multi-effect (MFX) pipelines which enrich the sound.

V3 Sound YAMMEX XXL expansion module

The XXL modules do not have a built-in user interface (UI) having no display or buttons for selecting voices. All sounds and effects are selected through the MIDI and USB-A ports. V3 Sound provide the tablet-based V3 Sound Control app and two comprehensive MIDI Designer UI templates. The V3 Sound Control app, unfortunately, does not support the YAMMEX. V3 Sound considers the YAMMEX as a Genos/PSR expansion only and expect users to control YAMMEX through a set of predefined voice (VCE) files and the normal Genos/PSR voice selection process.

Well, those VCE files do send MIDI Bank Select MSB, Bank Select LSB and Program Change messages. I can now assure you that these messages are enough to select YAMMEX voices even if you are not using a Genos or PSR.

Yamaha MODX Zone Master works quite well. You need to build MODX Performances consisting of external MIDI zones. Thanks to Zone Master you can select, split and layer YAMMEX voices. The trick is to assign a separate YAMMEX voice to each MIDI channel and use Zone Master channel and note ranges to affect splits and layers.

I have also successfully used the Arturia Keylab Essential with YAMMEX. It took only 15 minutes work to make a control template using Arturia’s MIDI Control Center application. I assigned eight of my favorite YAMMEX voices to the eight Keylab pads and assigned the most common MIDI continuous controllers to the knobs and sliders.

Both of these scenarios are dirt-simple involving a direct 5-pin MIDI connection. Unfortunately, Keylab Essential by itself cannot do splits and layers over 5-pin MIDI. Keylab Essential does not provide the functional equivalent of Zone Master. Keylab Essential can send on only one MIDI channel at a time and doesn’t implement the concept of key ranges (zones). Keylab Essential also restricts the number of selectable voices to what you can programmed into its key pads.

All is not lost, however, as MIDI Designer once again comes to the rescue. First, you need to make connections:

                                 iPad 
|
Keyboard controller --> iRig MIDI --> YAMMEX

The keyboard controller sends MIDI over a 5-pin cable to the iPad which, in turn, sends MIDI to the YAMMEX over a second 5-pin cable. Bonus: I successfully tested Bluetooth MIDI input from Korg Microkey Air. The iPad acts as a Bluetooth wireless interface to YAMMEX.

The iPad runs two applications: StreamByter and MIDI Designer:

    MIDI IN --> StreamByter --> MIDI Designer --> MIDI OUT

Incoming note messages are passed THRU StreamByter and MIDI Designer. StreamByter remaps (rechannelizes) the MIDI notes to three zones/streams:

    Channel 1: UPPER1 
Channel 2: UPPER2
Channel 4: LOWER

UPPER1 and UPPER2 form a two-voice layer above the split point. LOWER is a solo left-hand voice below the split point. I borrowed this simple zone structure from the Casio CT-S1000V. It’s intuitive and is quite powerful even in its simplicity.

StreamByter maps and mangles MIDI data according to user-defined rules. The rules are rather cryptic, so I refer you to the StreamByter documentation. Currently, I am using the following rules to split/layer:

    NX 00-3A = X3 
NX 3A-7F = X0
NX 3A-7F = X1 +C

Yes, the UPPER and LOWER zones have a one note overlap. I’m still experimenting and may make the overlap larger, if a bigger overlap is useful. I don’t like abrupt breaks between upper and lower zones.

Well, the rest of the work is done by MIDI Designer and my YAMMEX control template. The V3 Sound templates struck me as too complicated — the main reason why I went with “the Casio voice structure” and my own template. Here is the first prototype, work-in-progress template:

MIDI Designer template for YAMMEX (work in progress)

There are eight radio buttons to select the UPPER1, UPPER2, and LOWER voices. [Well, I need to add three more voices to LOWER, as you can see.] These are my favorite YAMMEX voices and they will let me build my most frequently used combinations. Knobs set the voice and reverb level for each zone.

The MFX controls do not function correctly at this time. I seem to be missing some magic; YAMMEX is not responding to the MIDI messages sent by the template even though the V3 Sound “factory” template sends the same darned messages! At this point, I need to ask V3 Sound for advice.

All in all, things are coming along — many successes, a few failures. That’s to be expected at this stage!

Copyright © 2022 Paul J. Drongowski


Review: Korg Module General 128

Korg have released a new expansion pack for Korg Module — General 128.

General 128 is one of those expansions where you say “Why didn’t they release this on Day One?” Essentially, General 128 is a 108MB General MIDI sound set minus drums.

Most of us will not sequence MIDI tunes using Korg Module. However, General 128 covers all of the bases, making Korg Module generally useful in a flash. As GM sound sets go, all of the voices are reasonably pleasant and usable enough.

The only real knock on voice quality is their rather plain sonics. The effect programming is very ordinary. Once suitably dressed, individual voices are brought to life. For example, throw a little tremolo on that electric piano. Having a small memory footprint, one shouldn’t expect many (any?) velocity-switched multi-samples. To my ears, most of the voices are very “uni-dimensional” single level multi-samples which just get softer or louder with touch.

This isn’t all bad! I stumbled onto Korg’s introductory sale while casting around for new voices to layer within Module. [The introductory sale price, $9.99 USD, is good through Monday, 31 October 2022.] It’s much easier to layer up simple timbres than harmonically rich, dynamic sounds. For example, you wouldn’t use the oboe for an exposed solo, but it does add a reediness to a French horn producing a more WW section-like tone.

Allowing for the sound set limitations (i.e., one velocity layer), my favorite voices are the Acoustic Grand (warm), Electric Piano 1 (What’d I Say), Synth Strings 1 (warm, not too synthetic), French Horn (fanfare-ish), Bassoon (warm double reed), Flute (simple without devolving to Mellotron).

At the introductory price, the General 128 expansion is a no-brainer. In addition to Korg Module, the pack can be used in Korg Gadget Glasgow and as an AUv3 plug-in. General 128 might get me using Korg Gadget — maybe sequence a demo.

Big picture, I’m feeling quite comfortable with my iPad rig these days and I think it’s rehearsal ready. I would use either the Korg Microkey Air or Arturia Keylab Essential 49 depending upon my degree of laziness on any given day.

I tried going wireless with the Arturia Keylab Essential getting good results with the Yamaha MD-BT01 5-pin Bluetooth dongle. Only the MIDI OUT side is connected since the Arturia doesn’t have a 5-pin MIDI IN port. Connects up to Korg Module without problems. I don’t recommend the Yamaha UD-BT01 USB Bluetooth adapter for the Arturia; I get stuck notes.

I’m also getting more confident with the Roland (Boss) Ev-1-WL Bluetooth expression pedal, now that I understand its darned flashing lights and colors.

Copyright © 2022 Paul J. Drongowski

Review: Arturia Keylab Essential

Oh, did I fail to mention, I added an Arturia Keylab Essential 49 to my iPad rig. I wanted a super light-weight MIDI controller with knobs, sliders, and a minimum of 49 keys with good action. The Keylab Essential 49 fits the bill at 6.6 pounds (3kg), eight pads, nine encoders and nine faders (sliders). The street price is attractive, too: $229 USD. I had a good experience with the Arturia Keystep 32 and decided to give the Keylab Essential a go.

I use the Keystep mainly for control voltage (CV) and gate with littleBits synth modules. Mini-keys are OK for experiments, but not for real playing. If your Keystep keys get dirty, here’s a guide to Keystep teardown and cleaning.

Why the Keylab Essential after Korg Microkey Air joy? I gave the Air’s mini-keys the old college try and then some. First off, most mini-key instruments are three octaves and too short for two-fisted playing. The Microkey Air 49 has four octaves, making it much easier to play most tunes without finger gymnastics. [If you’re a pianist, we’re not even having this conversation!] Although the Microkey Air has Bluetooth MIDI built-in and is battery-powered — genuine plusses — it doesn’t have knobs/sliders for VST control. And, well, it still has those mini-keys.

Arturia Keylab Essential 61

The Keylab Essential 49 is only three inches longer than the Microkey Air: 30.9″ versus 27.9″. Sure, the Keylab Essential is twice as deep, but them encoders and 30mm faders have to go somewhere! I will admit, the Keylab Essential is not a “lap board” like the Air; it needs a proper stand and power source.

The Keylab Essential key action is decent enough. Like the Keystep, it feels a bit soft. If you want a fast, crisp action, this isn’t the droid you’re looking for. Even though the Keylab Essentials are Arturia’s budget line, the encoders and faders feel sturdy with a reasonable amount of resistance.

I’m happy with the Keylab Essential and, yes, I’ll be keeping the Microkey Air, too. Here’s my short Keylab Essential wish list:

  • Battery power
  • Bluetooth MIDI
  • Expression input, not simply sustain (on/off)

Then again, the price would be higher and/or the build quality would be lower. No free lunch.

Analog Lab

I’m mainly interested in iPad (IK BX-3) and hardware (YC and Skulpt SE) control, not PC-based VSTs. However, Analog Lab is a fun leisure destination. Analog Lab and its integration with Keylab Essential are simply brilliant. Prepare to waste long hours jamming away with the best sounds of yester-year with lots of knob twisting and fader slamming.

Controlling Yamaha Reface YC

Yamaha Reface YC is one of my keeper keyboards. It’s been a handy companion at rehearsals and even a few church services. You’ve already heard my gripe about three octave mini-keyboards and Reface YC occupies that doghouse. No need to repeat.

Fortunately, Keylab Essential is almost made for Reface YC. [Dreamers, Yamaha has a full-size YC; forget a Reface re-issue.] Keylab Essential has a 5-pin MIDI OUT which links to the Reface YC dongle MIDI IN. Thank heavens for 5-pin MIDI.

Arturia provide their MIDI Control Center (MCC) app for configuration. The Keylab Essential has eight configuration slots: Analog Lab, DAW and six user slots. MCC communicates with Keylab Essential over USB. Fortunately, the 5-pin MIDI OUT operates concurrently with a USB connection back — no either/or.

Obviously, the faders map to the YC drawbars. Fortunately, the Keylab Essential faders have a drawbar mode, flipping low and high values. The Reface YC drawbars are controlled by MIDI continuous controller (CC) messages CC#102 to CC#110. It’s all right there in the Reface Data List PDF available on the Yamaha Web site.

Amazing how many people will ask a forum for such info. Please RTFM.

The rest of the front panel controls — waveform, rotary speed, vibrato/chorus, percussion, and effects — are under MIDI CC control, too. Keylab Essential has three switches (Part 1, Part 2, Live) which are mapped in the following way:

  • Vibrato/chorus select (CC#79)
  • Percussion on/off (CC#77)
  • Percussion harmonic (CC#112)

The switches are configured as toggles, so that the switch LEDs indicate individual switch state.

Rotary speed is interesting because Reface YC has four states: OFF, STOP, SLOW and FAST. By default, Reface YC modulation (CC#0) switches between SLOW and FAST. As an alternative to the wheel, I assigned OFF, STOP, SLOW and FAST to pads 5 through 8. It’s a shame that Keylab Essential doesn’t support radio buttons. If it did, one could make each pad in the group a toggle showing the current rotary speed state.

As I mentioned, Keylab Essential does not have an expression pedal input. Thus, I route a Yamaha FC-7 expression pedal to Reface YC directly. The Keylab Essential sustain input is still useful, however. I attach a sustain pedal and assign the sustain input to rotary speed (CC#19: SLOW and FAST). Momentary switch mode allows quick changes and speed bumps.

It’s worth noting here that rotary speed has four settings:

     CC#19       Value 
---------- -----
0 - OFF 0
1 - STOP 42
2 - SLOW 85
3 - FAST 127

Switching between SLOW and FAST means changing CC#19 between 85 and 127.

Making the rest of the story short, the remaining Reface YC parameters are assigned to the encoders. Waveform, vibrato/chorus depth and percussion length have five discrete settings each, i.e., they do not sweep continuously across 1 to 127. Expect to hear discrete changes (steps). The step values are: 0, 32, 64, 95, 127.

Vibrato/chorus does not have a Reface on/off switch. Vibrato or chorus are OFF when the vibrato/chorus depth is zero.

Here is a table which summarizes the control mappings:

--------------------------------  ---------------------------------------- 
Reface YC Arturia Essential 49
-------------------------------- ----------------------------------------
Rotary speed 19 0-127 Mod wheel, Pad 5-8 OFF, STOP, SLOW, FAST
Wave 80 0-127 Knob 1

16' 102 0-127 Slider 1
5 1/3' 103 0-127 Slider 2
8' 104 0-127 Slider 3
4' 105 0-127 Slider 4
2 2/3' 106 0-127 Slider 5
2' 107 0-127 Slider 6
1 3/5' 108 0-127 Slider 7
1 1/3' 109 0-127 Slider 8
1' 110 0-127 Slider Master

V/C type 79 0-63, 64-127 Switch Part 1
V/C depth 77 0-127 Knob 2
Perc on/off 111 0-63, 64-127 Switch Part 2
Perc harm 112 0-63, 64-127 Switch Part 3
Perc length 113 0-127 Knob 3

Effect Dist 18 0-127 Knob 7
Effect Reverb 91 0-127 Knob 8
Volume 7 0-127 Knob 9

Oh, yeah, don’t forget volume! With the Keylab Essential at hand, you’ll probably have the Reface YC out of reach at the end of its MIDI tether.

I intend to get into good trouble with the Arturia Keylab Essential. Expect future experiments with iPad, IK Multimedia BX-3 and Modal Skulpt SE.

Copyright © 2022 Paul J. Drongowski