Adding zones to Keylab Essential with EPP

My current light-weight rehearsal instrument is a Yamaha Reface YC. Although I have put the YC to work at many a rehearsal, the Reface YC has three major limitations:

  1. It’s organ all the way and I can vary tone color only with drawbars.
  2. The three octave keyboard is maddingly too short and chops either the melody or bass line.
  3. I can cope with the mini-keys, but really?

Thus, my quest for a light-weight rehearsal rig goes on.

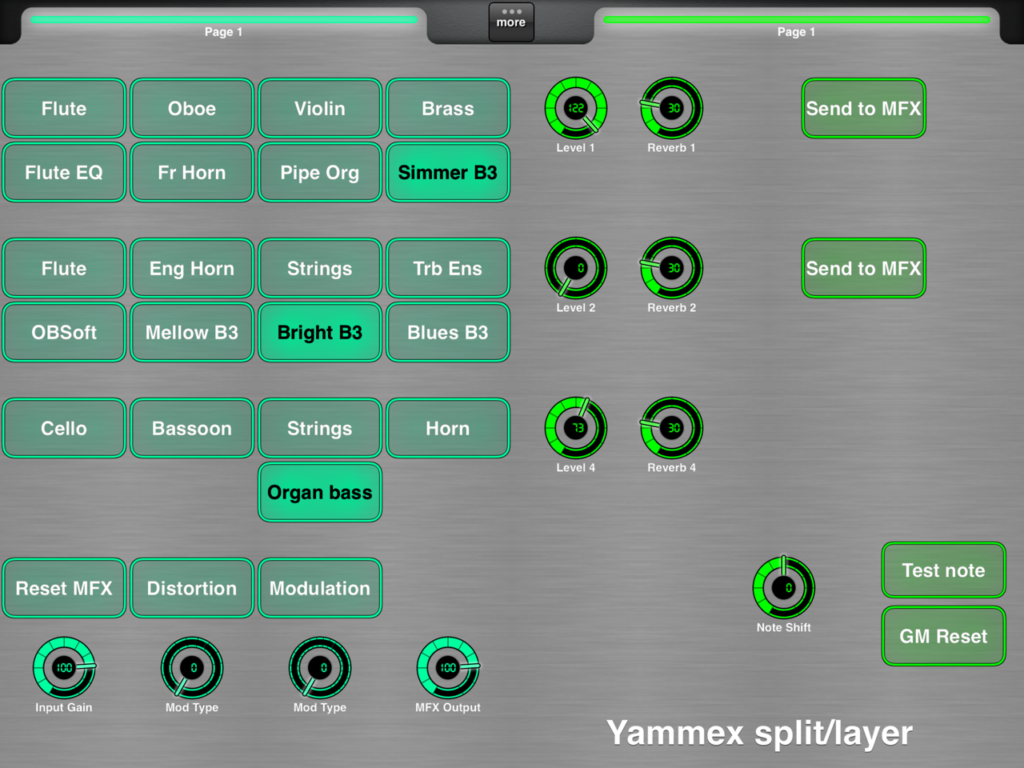
The V3 Sound Yammex XXL module and its closely-related sister, the Grand Piano XXL module, have very good orchestral voices. The XXL modules are small and weigh only 0.5 pounds (1.2kg) each. Hmmm, I think we have a candidate here.

The other half of the rehearsal formula is a MIDI controller, of course. Fortunately, I have an Arturia Keylab Essential 49 in hand. The Arturia is a relatively compact 49-key controller with lots of pads (8), knobs (9) and sliders (9). The Keylab Essential 49 is a relatively light 6.6 pounds (3kg).

Seems like we should have a match…

I usually split the keyboard into LOWER and UPPER zones somewhere around G3 (AKA G below middle C). This split gives my left hand enough room to roam and accommodates melody lines that dip below middle C. Although I keep the LOWER sound simple (i.e., one patch), I often layer the right hand. Most synthesized acoustic instruments need a little thickening and timbral shaping. Two UPPER layers are a minimum; three layers are sufficient, four is too many.

Seems like a slam dunk — MIDI the Keylab Essential into the Yammex, make a few configurations, and go. Unfortunately, neither the Keylab Essential or Yammex module support the split and layer capability that I need.

Time to rant about the stupidity of most MIDI keyboard controllers. Only a few 49-key controllers have split, layer, or zone capability: Samson Graphite 49, Nektar Panorama P4, Novation SL MKIII, Roland A-500. In the case of the Yammex module, the controller must send a full Bank Select MSB, Bank Select LSB, Program Change message sequence. Many controllers fail even this basic requirement.

The Arturia Keylab Essential, at the very least, sends a complete patch change message sequence. And, I am not going to buy yet another controller!

Enter the MIDI Solutions Event Processor Plus (EPP). The EPP is a MIDI-powered microcomputer that receives MIDI messages on 5-pin, modifies messages as determined by a set of rules, and sends the modified MIDI stream out through 5-pin. The Keylab Essential has a 5-pin MIDI OUT which is electrically compatible with the EPP. (The Keylab Essential voltage is about 4.5V as measured with a digital multimeter.) The EPP sits between the Keylab Essential MIDI OUT and the Yammex XXL MIDI IN. The EPP is itself a light-weight unit and adds negligible weight to the rig.

I programmed the EPP to split note ON/OFF messages arriving on Channel 1. Destination MIDI channel is determined by key zone: UPPER1 (Channel 1), UPPER2 (Channel 2), UPPER3 (Channel 3), LOWER (Channel 4),

  • Channel 1 note ON/OFF at and above the split point are copied to outgoing Channels 1, 2 and 3.
  • Channel 1 note ON/OFF below the split point are copied to outgoing Channel 4.

I also created rules to respond to button presses sending continuous controller 83 (CC#83). These rules initialize the four channels by sending patch change and expression (CC#11) messages. The EPP-based solution should work with any MIDI controller and multitimbral (multi-channel) module as long as MIDI communication is 5-pin.

Early on, I auditioned the Yammex sound set and had identifed 15 or so favorite Yammex voices. The following four voices are assigned to Yammex channels 1 to 4 by the EPP when it receives CC#83:

  1. Channel 1: 63 / 116 / 7 Full Strings 2 Long
  2. Channel 2: 63 / 118 / 58 Flute EQ
  3. Channel 3: 63 / 117 / 49 Classic Horn Ensemble
  4. Channel 4: 63 / 116 / 7 Full Strings 2 Long

The idea is to use Channel 1 as the main solo voice and Channels 2 and 3 as optional orchestral coloring. Flute EQ and Classic Horn Ensemble are mellow, unobtrusive and mix well with other voices. Channel 4, of course, is the left hand.

Initially, Channels 1 (UPPER1) and 4 (LOWER) are assigned an ensemble string voice, a reasonable default. Expression values are set such that strings are heard, and Channels 2 (UPPER2) and 3 (UPPER3) are silent.

Voices are assigned in the following way to the eight Keylab Essential pads:

      Violin            Oboe           Flute           Eng Horn 
63 / 116 / 22 63 / 118 / 48 63 / 118 / 57 63 / 118 / 49

Full Strings 2 Cello Flugelhorn Bassoon
63 / 116 / 7 63 / 116 / 24 63 / 117 / 15 63 / 118 / 50

Normally, these are the main solo voices to be assigned to UPPER1 (Channel 1). However, using Arturia’s USER MIDI channel feature, these voices can be assigned to UPPER2 (Channel 2), UPPER3 (Channel 3) and LOWER (Channel 4), too. That allows for a lot of game-time flexibility!

Wait, there’s more. I assigned MIDI expression to Sliders 5 through 8:

  • Slider 5: UPPER1 (Channel 1) expression/level
  • Slider 6: UPPER2 (Channel 2) expression/level
  • Slider 7: UPPER3 (Channel 3) expression/level
  • Slider 8: LOWER (Channel 4) expression/level

The sliders let me mix voices dynamically. A voice is silenced when I pull its Slider all the way down.

The table below summarizes the Keylab Essential knob, slider, pad and button MIDI assignments:

Knob #1  Cutoff     CC#74 Brightness 
Knob #2 Resonance CC#71 Timbre
Knob #3 Vib Rate CC#76 Vibrato rate
Knob #4 Vib Depth CC#77 Vibrato depth
Knob #5 Vib Delay CC#78 Vibrato delay
Knob #6 Port Time CC#05 Portamento time
Knob #7 Chorus CC#93 Chorus level
Knob #8 Reverb CC#71 Reverb level
Knob #9 CC#17 free

Slider #1 Attack CC#73 Attack time
Slider #2 Decay CC#75 Decay time
Slider #3 Sustain CC#64 Sustain
Slider #4 Release CC#72 Release time
Slider #5 UPPER1 CC#11 Expression channel 1 Solo
Slider #6 UPPER2 CC#11 Expression channel 2 Flute EQ
Slider #7 UPPER3 CC#11 Expression channel 3 Classic Horn Ens
Slider #8 LOWER CC#11 Expression channel 4 Strings
Slider #9 CC#85 free

Pad #1 63 / 116 / 22 Violin
Pad #2 63 / 118 / 48 Oboe
Pad #3 63 / 118 / 57 Flute
Pad #4 63 / 118 / 49 English Horn
Pad #5 63 / 116 / 7 Full Strings 2 Long
Pad #6 63 / 116 / 24 Cello
Pad #7 63 / 117 / 15 Flugelhorn
Pad #8 63 / 118 / 50 Bassoon

Button #1 (Part1) CC#65 Portamento ON/OFF (toggle)
Button #2 (Part2) CC#82 Momentary (Generic ON/OFF)
Button #3 (Live) CC#83 Initialize voices (Momentary)

So far, I’m having fun mixing and matching voices on the fly and trying new timbral combinations. One drawback is having to carry around a mental map to find, select and mix voices. I wish there was a way to display the current voice assignments! I plan to add stickies to the Keylab Essential to assist navigation and reduce pilot workload.

I hope this article has sparked ideas for your own control set-ups. The general principles should apply to most MIDI keyboard controllers and multi-timbral tone modules.

Copyright © 2022 Paul J. Drongowski

V3 Sound YAMMEX: Progress report

Here’s a quick update on my progress with the V3 Sound YAMMEX XXL sound module.

The V3 Sound XXL series are very compact, light-weight MIDI sound modules based on the Dream S.A.S. SAM5716B synthesis engine. The YAMMEX and its sister, the V3 Sound Grand Piano XXL, have hundreds of high quality voices — 3GBytes of factory samples in a 4GByte waveform memory. The modules also provide two multi-effect (MFX) pipelines which enrich the sound.

V3 Sound YAMMEX XXL expansion module

The XXL modules do not have a built-in user interface (UI) having no display or buttons for selecting voices. All sounds and effects are selected through the MIDI and USB-A ports. V3 Sound provide the tablet-based V3 Sound Control app and two comprehensive MIDI Designer UI templates. The V3 Sound Control app, unfortunately, does not support the YAMMEX. V3 Sound considers the YAMMEX as a Genos/PSR expansion only and expect users to control YAMMEX through a set of predefined voice (VCE) files and the normal Genos/PSR voice selection process.

Well, those VCE files do send MIDI Bank Select MSB, Bank Select LSB and Program Change messages. I can now assure you that these messages are enough to select YAMMEX voices even if you are not using a Genos or PSR.

Yamaha MODX Zone Master works quite well. You need to build MODX Performances consisting of external MIDI zones. Thanks to Zone Master you can select, split and layer YAMMEX voices. The trick is to assign a separate YAMMEX voice to each MIDI channel and use Zone Master channel and note ranges to affect splits and layers.

I have also successfully used the Arturia Keylab Essential with YAMMEX. It took only 15 minutes work to make a control template using Arturia’s MIDI Control Center application. I assigned eight of my favorite YAMMEX voices to the eight Keylab pads and assigned the most common MIDI continuous controllers to the knobs and sliders.

Both of these scenarios are dirt-simple involving a direct 5-pin MIDI connection. Unfortunately, Keylab Essential by itself cannot do splits and layers over 5-pin MIDI. Keylab Essential does not provide the functional equivalent of Zone Master. Keylab Essential can send on only one MIDI channel at a time and doesn’t implement the concept of key ranges (zones). Keylab Essential also restricts the number of selectable voices to what you can programmed into its key pads.

All is not lost, however, as MIDI Designer once again comes to the rescue. First, you need to make connections:

                                 iPad 
|
Keyboard controller --> iRig MIDI --> YAMMEX

The keyboard controller sends MIDI over a 5-pin cable to the iPad which, in turn, sends MIDI to the YAMMEX over a second 5-pin cable. Bonus: I successfully tested Bluetooth MIDI input from Korg Microkey Air. The iPad acts as a Bluetooth wireless interface to YAMMEX.

The iPad runs two applications: StreamByter and MIDI Designer:

    MIDI IN --> StreamByter --> MIDI Designer --> MIDI OUT

Incoming note messages are passed THRU StreamByter and MIDI Designer. StreamByter remaps (rechannelizes) the MIDI notes to three zones/streams:

    Channel 1: UPPER1 
Channel 2: UPPER2
Channel 4: LOWER

UPPER1 and UPPER2 form a two-voice layer above the split point. LOWER is a solo left-hand voice below the split point. I borrowed this simple zone structure from the Casio CT-S1000V. It’s intuitive and is quite powerful even in its simplicity.

StreamByter maps and mangles MIDI data according to user-defined rules. The rules are rather cryptic, so I refer you to the StreamByter documentation. Currently, I am using the following rules to split/layer:

    NX 00-3A = X3 
NX 3A-7F = X0
NX 3A-7F = X1 +C

Yes, the UPPER and LOWER zones have a one note overlap. I’m still experimenting and may make the overlap larger, if a bigger overlap is useful. I don’t like abrupt breaks between upper and lower zones.

Well, the rest of the work is done by MIDI Designer and my YAMMEX control template. The V3 Sound templates struck me as too complicated — the main reason why I went with “the Casio voice structure” and my own template. Here is the first prototype, work-in-progress template:

MIDI Designer template for YAMMEX (work in progress)

There are eight radio buttons to select the UPPER1, UPPER2, and LOWER voices. [Well, I need to add three more voices to LOWER, as you can see.] These are my favorite YAMMEX voices and they will let me build my most frequently used combinations. Knobs set the voice and reverb level for each zone.

The MFX controls do not function correctly at this time. I seem to be missing some magic; YAMMEX is not responding to the MIDI messages sent by the template even though the V3 Sound “factory” template sends the same darned messages! At this point, I need to ask V3 Sound for advice.

All in all, things are coming along — many successes, a few failures. That’s to be expected at this stage!

Copyright © 2022 Paul J. Drongowski


In the house: V3 Sound YAMMEX XXL

Thought I would post a quick note about the new unit under test — the V3 Sound YAMMEX XXL tone module. The YAMMEX is a member of the V3 Sound XXL family of tone modules. They all share the same triangular shape and are light as a feather:

V3 Sound YAMMEX XXL expansion tone module

The lump-in-the-middle power supply is roughly the same weight!

You might have seen and heard Piano Man Chuck demonstrate the V3 Sound Grand Piano XXL module. [Piano Man Chuck is a V3 Sound dealer, BTW.] Well, the YAMMEX has the same sound set as the Grand Piano XXL. The main differences are:

  • The MIDI bank and program change layouts are different: Grand Piano XXL for general use as an expander, YAMMEX XXL as a Genos/PSR expander.
  • Grand Piano XXL is supported by the V3 Sound Control app; the YAMMEX XXL is not.
  • Grand Piano XXL is supported by two different MIDI Designer templates; the YAMMEX is not.
  • YAMMEX XXL voices are selected using custom Genos/PSR user voices.

YAMMEX XXL arrives from the factory with a USB flash drive containing the custom user voices (VCE files) needed to select voices through Genos/PSR. It’s all described in the YAMMEX XXL manual. [Henceforth, “Yammex” means “YAMMEX XXL”.]

I found a Yammex on ebay at a price that was impossible to refuse. It would be a shame to confine Yammex to Genos duty alone, so I studied the heck out of its MIDI implementation. I also examined the VCE files available from the V3 Sound Web site. Hmmm, looks like it’s a simple matter of uttering the appropriate Bank Select MSB, Bank Select LSB and Program Change messages. We can do that!

An inquiry to V3 Sound about compatibility was answered quickly, but implied that Yammex was only for Genos/MIDI. If you know MIDI and your controller’s capabilities, and if you don’t mind a little work, Yammex definitely can do more than Genos/PSR.

I was sorely tempted by the V3 Sound XXL series because it is based on the Dream S.A.S. SAM5716B synthesis chip. After hearing the SAM2635 and its GM/GS sound set, I wanted to hear what a high-end Dream chip could do with 3GBytes of professionally produced instrument samples. Cut to the chase, V3 Sound do not disappoint especially at the price I paid.

Jeff’s Music Gear is Sweetwater!

The box arrives. I open the shipping carton and what the? The Yammex box is in fine shape, but is covered in round “Demo” labels. I instantly smell “Sweetwater”. And there’s candy, and a Sweetwater “Thank You” card. The ebay seller is Jeff’s Music Gear. After a Google, I discover that Jeff’s Music Gear is Sweetwater’s ebay consignment shop! Nice to know that I was in good hands all along.

OK, then, plug everything up using Yamaha MODX as a controller. (See my article about Yamaha MODX Zone Master.) Ooops, no flashing MIDI light and no sound. I’m already composing a message to Jeff’s when I remember this note in the Yammex manual:

No sound? The YAMMEX XXL sound expander only creates a tone when you call up a sound from the V3 folder in your keyboard’s display. Just connecting it to your keyboard is not enough.

They aren’t kidding! I select a voice through the MODX Zone Master screen and suddenly the MIDI light starts flashing and Yammex starts talking. Delete the message to Jeff’s.

One other note from the manual is helpful during bring up:

Testing MIDI connections and settings. After connecting your MIDI cable and making sure your MIDI settings are correct, select a V3 User Voice. The MIDI LED on the YAMMEX XXL should now blink with every keystroke.

I find this behavior to be a dubious design decision. The purpose of a MIDI light is to indicate MIDI reception under any condition. While troubleshooting, I connected the Yammex THRU port to MIDI-OX on a PC and verified MIDI operation. Most of V3 customers will not be that savvy…

I’ve just begun auditioning sounds and already I’m pleased. I like and prefer the Bösendorfer Imperial 290 (Vienna) over the Steinway Model D (Hamburg). I fell in love with Bösendorfer when I first touched one in 1980. The electric pianos are good although too clean and polite. The organ samples are damned good. There are two flavors: No Leslie and Leslie sampled in. Sans-Leslie voices are meant to be dirtied up by an external pedal. I’ll try the Electro-Harmonix Lester K for spin and throw some overdrive on the EPs, too.

I like the Oberheim pads — another love. The classical strings are solid. That’s as far as I’ve gotten into the sound set. I’m looking forward to hearing the rest.

As to the supplied USB flash drive, the previous customer zorched the factory VCE files. I found an X6A file instead which I recognize as a Yamaha MOXF dump file. I guess the previous customer tried Yammex with MOXF and was disappointed. Fortunately, V3 Sound provide the Genos/PSR VCE files on their Web site. The supplied drive is only 64MB. [Not really a complaint.]

Experiments to come? Once I get my faves down to 8, 16 voices or so, I’ll configure the Arturia Keylab Essential. The extra knobs and sliders will come in handy. Also, I will whip up a simplified MIDI Designer template for the Yammex. The existing templates are comprehensive — yet overwhelming. I’m thinking about a UI similar to Korg Module. Those Korg folks are definitely on to something. Simplicity is king. MIDI Designer (with StreamByter) on iPad should give me splits and layers — maybe even a wireless Bluetooth interface to Yammex? Finally, Dream multi-FX.

Copyright © 2022 Paul J. Drongowski