Combo organ: Montage, MODX, Genos

Contemporary workstation instruments offer several options for combo organ emulation. Every workstation has at least a few internal combo organ waveforms. Korg Kronos, for example, has two Vox organ waves built in. Even the lowly Korg microKorg XL+ has two Vox waveforms (DWGS single cycle).

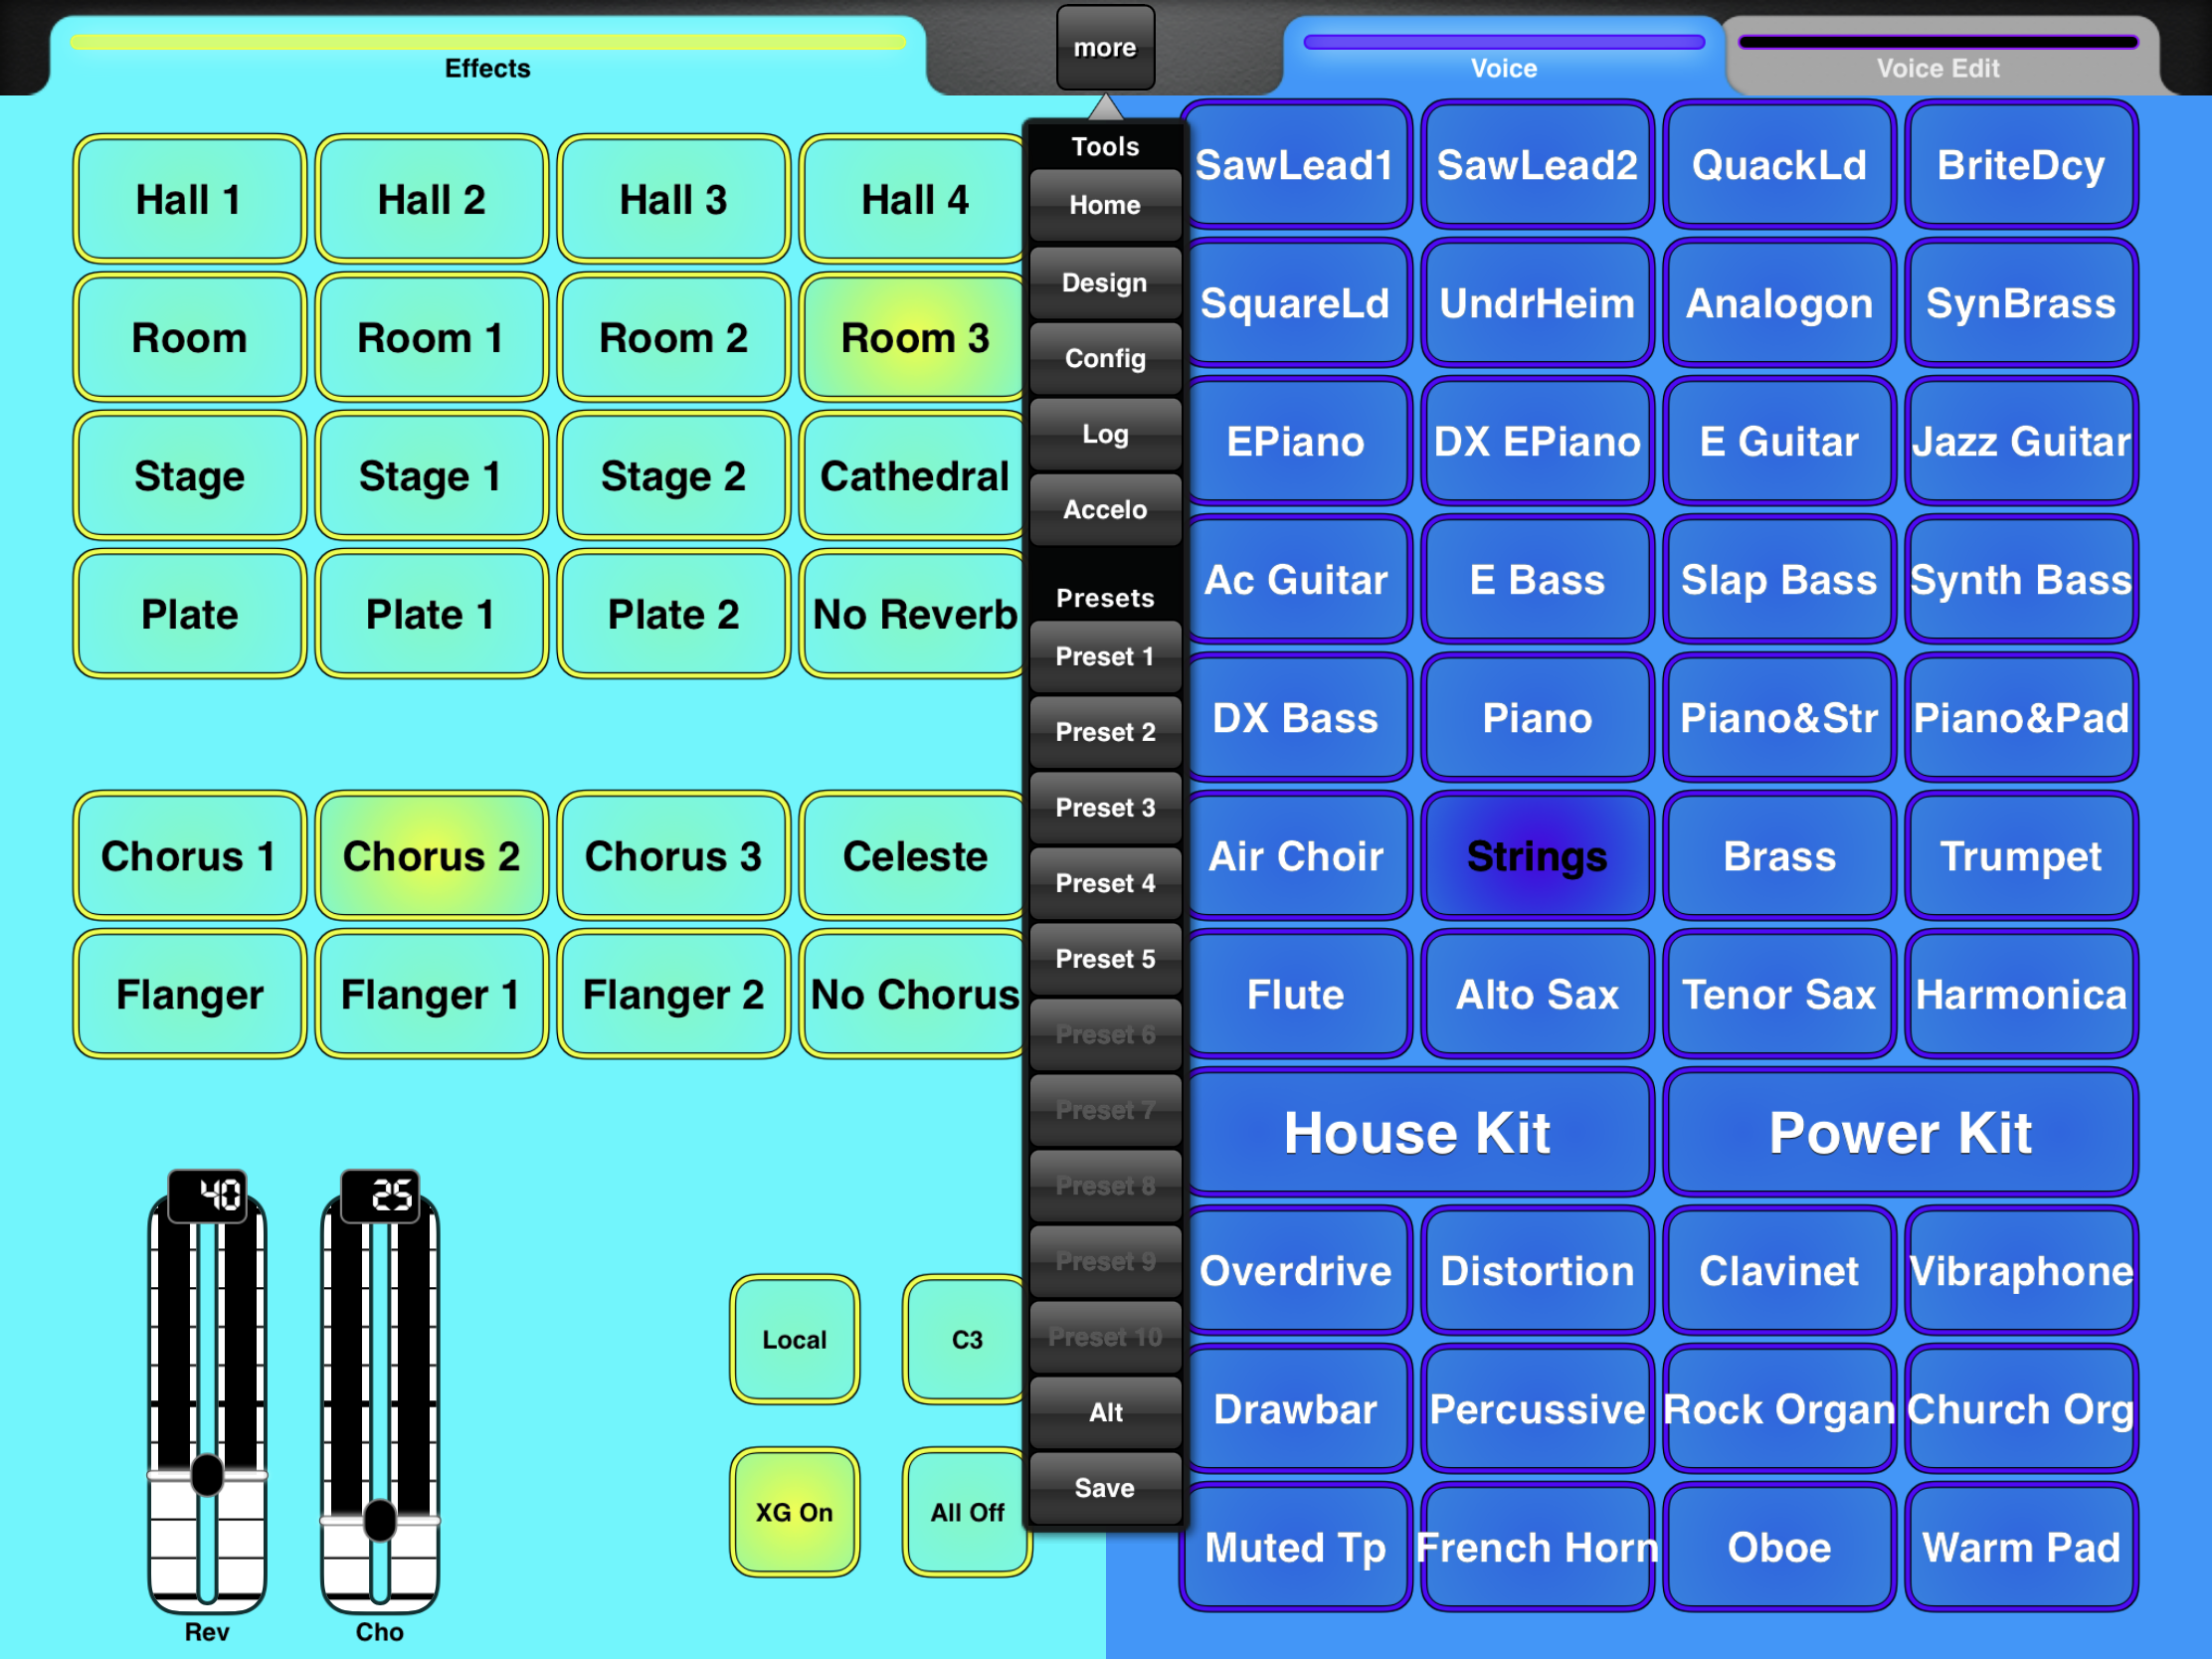
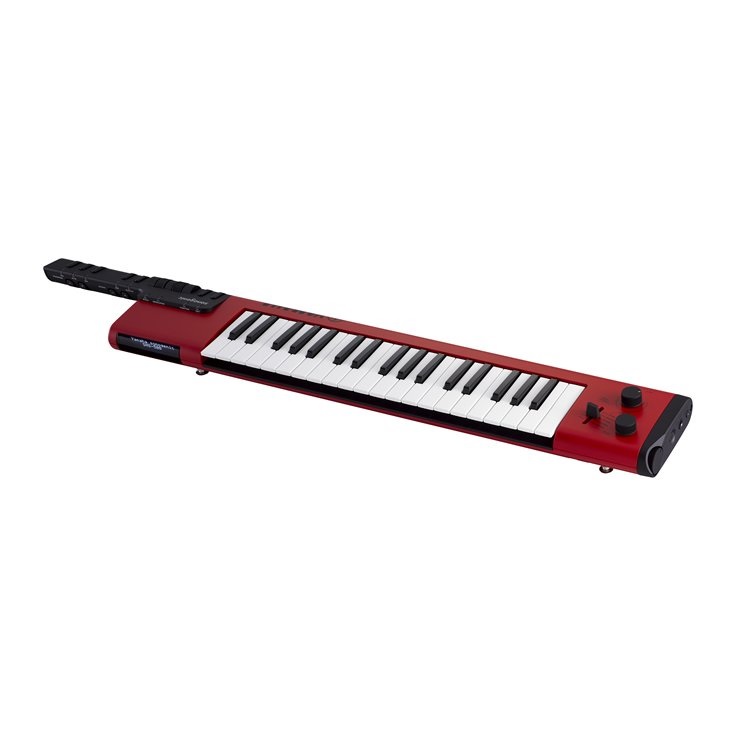
Yamaha MODX and Montage — my focus in this article — have a good variety of Vox and Farfisa waveforms. Yamaha Genos has a lesser endowment as we’ll see. Yamaha Reface YC shares sonic DNA (AWM2 and effects) with the Motif XF and will be the subject of a future post.

Motif, Motif ES and Motif XS

Models in the early Motif series primarily base combo organ patches on two waveforms:

  • Portable Electronic: Vox-y tone
  • Compact Electronic: Farf-y tone

You can hear these waveforms at work in the Tiny Combo Bars 1 performance and the Tiny Combo Bar 2 performance. The patches layer three are more elements playing Portable Electronic or Compact Electronic (respectively). Each element is filtered differently: low pass, band pass and high pass. The net effect is like several distinctive tab stops or drawbars pulled at once.

These waveforms are very old, going back to the original Motif (maybe S80) in the early 2000s. I’ll bet dollars to donuts that the Portable Electronic waveform is the basis for the 60’sOrgan voice (MSB: 0, LSB: 116, PC: 18) in PSR and Tyros keyboards. The 60’sOrgan voice was the sole combo organ mainstay in the arranger line for a loooong time.

Motif XF, Montage, MODX

Motif XF got a big shot of combo juice. Motif XF added several combo organ waveforms:

  • Fr All Tabs
  • Fr Bright Boost
  • Fr Flute
  • Fr String Lo
  • Fr String Hi
  • Fr Trumpet
  • Fr Piccolo
  • Fr Pedal
  • Fr KeyOff
  • Vx Drawbar1-3
  • Vx DrawbarIV
  • Vx KeyOff

The Farfisa (Fr) waveforms support emulation of specific Farfisa features: individual voice tabs (flute, string, trumpet and piccolo), the wicked Bright Boost knee lever, bass keys (pedal), and key off sound. The Fr All Tabs waveform covers one of the most common use cases — all of the tab stops turned on. Subtlety was not a hallmark of sixties combo organ music. 🙂

The Vox (Vx) Vx Drawbar1-3 waveform covers the three Continentel footage drawbars while the mixture drawbar is handled by the Vx DrawbarIV waveform. The Vox waveforms include a Vox key-off noise.

In terms of voice programming, one uses note shift to achieve different footage ranks. Passive filtering is emulated through filter type (low pass, band pass, high pass) and cutoff frequency. Of course, everything can be routed into insert effects for distortion, amp simulation, and other grunge.

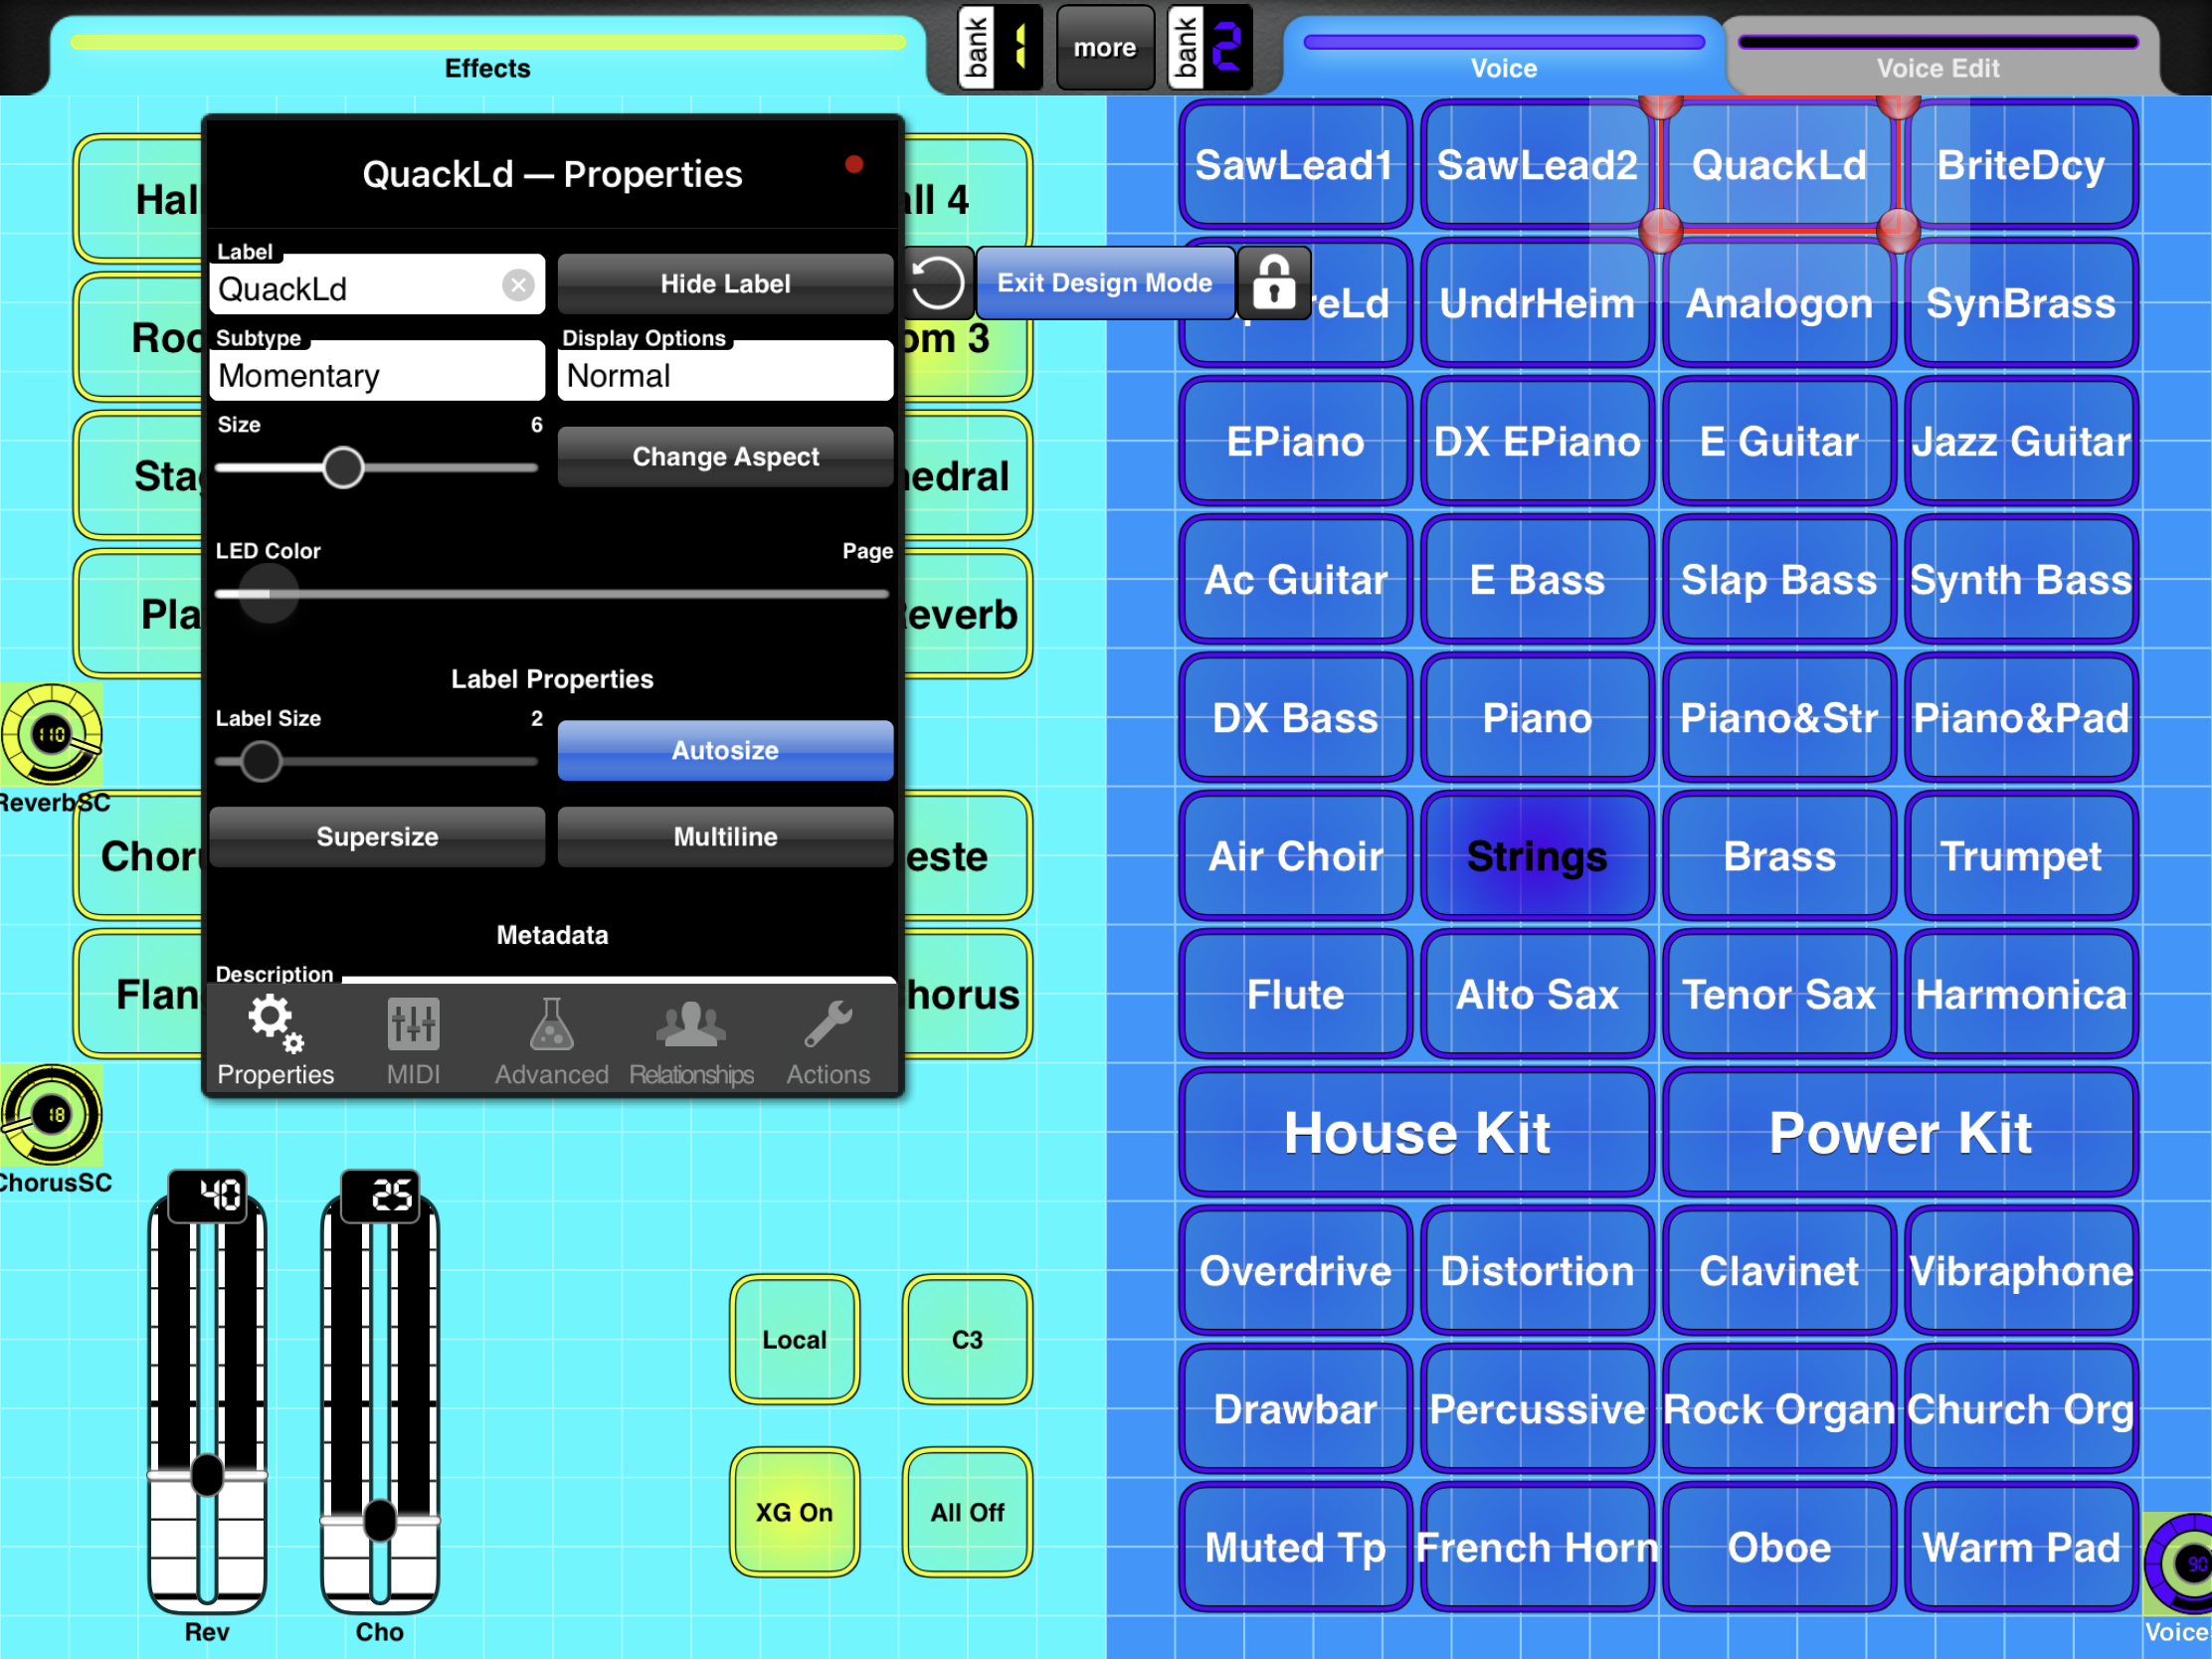
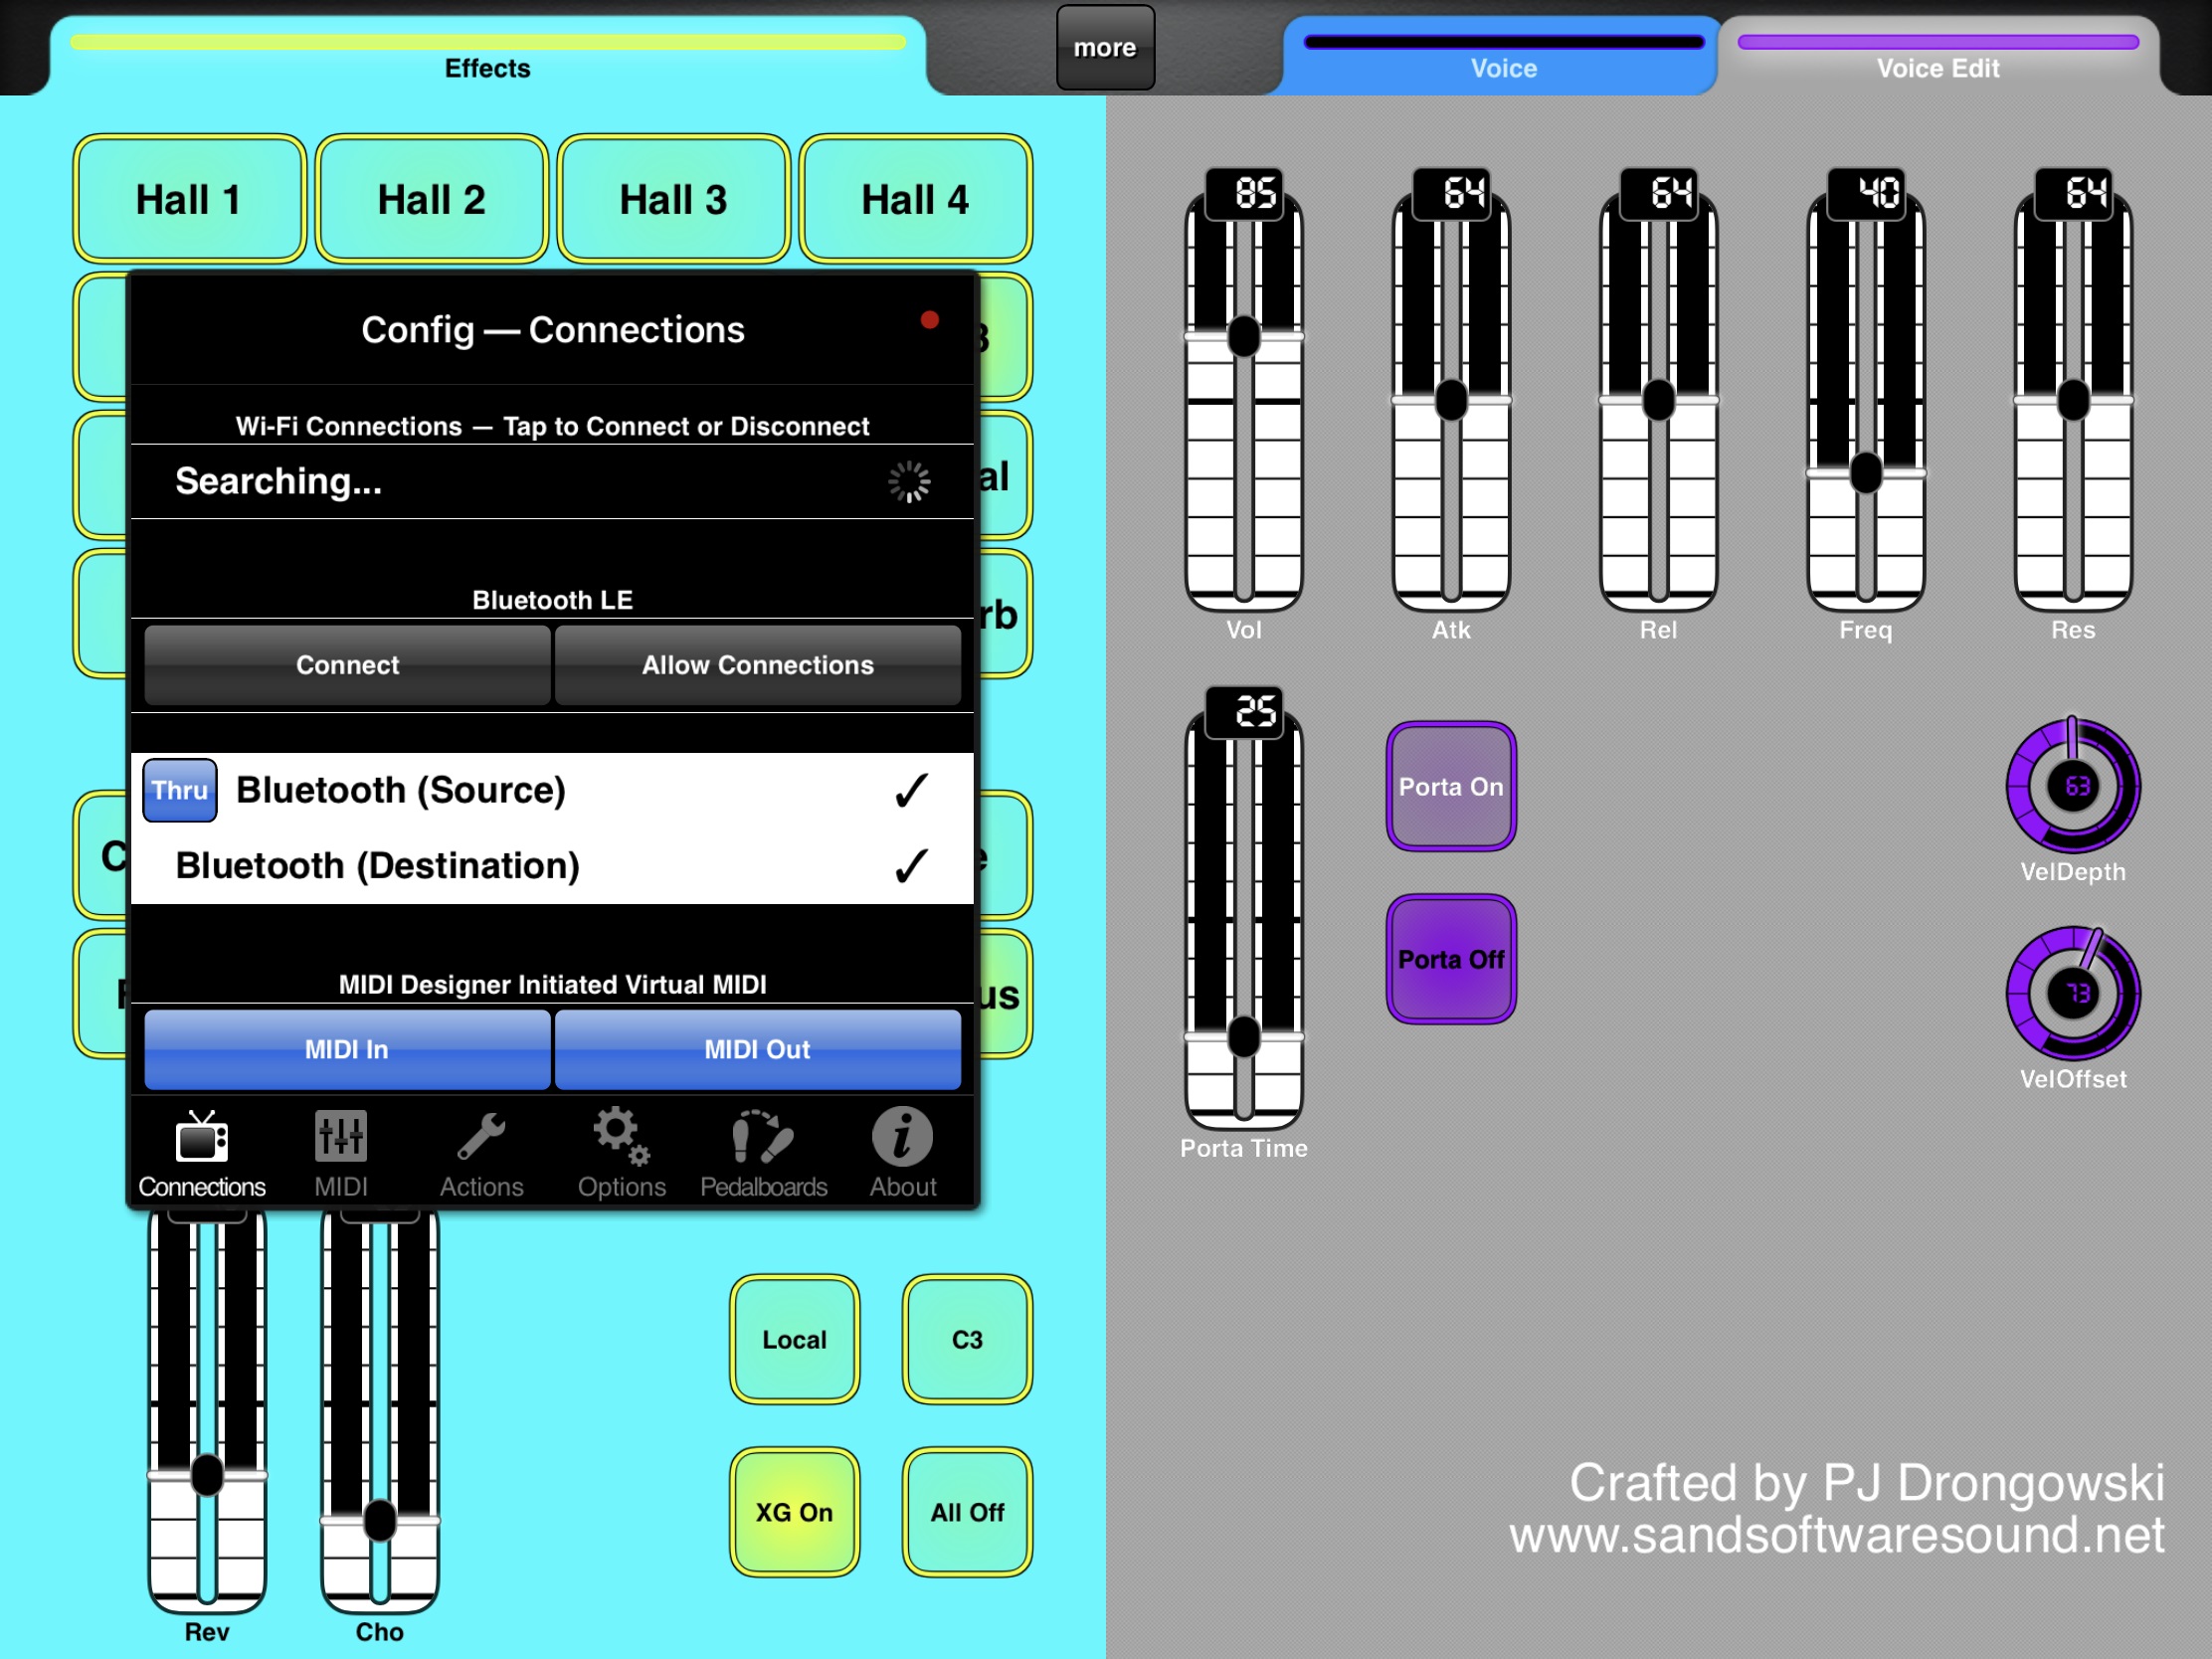
Since Montage and MODX inherit all things Motif, these waveforms and the Motif performances are there for you. The Montage and MODX sliders allow control over individual voice elements. For example, choose the Raspy Tabs performance and assign slider control to element level. The Fr Raspy Tabs waveform-to-element assignment is:

El# Waveform     KeyLo KeyHi VelLo VelHi Coarse Level Cutoff XA Ctrl 
--- ------------ ----- ----- ----- ----- ------ ----- ------ -------
1 Fr String Lo C2 G8 1 127 0 97 255 Normal
2 Fr Trumpet C2 G8 1 127 0 82 255 Normal
3 Fr Flute C2 G8 1 127 24 120 236 Normal
4 Fr Pedal C-2 B1 1 127 0 127 160 Normal
5 Fr String Hi C2 G8 1 127 19 24 236 A.SW2 On
6 Fr KeyOff C2 G8 1 127 6 87 80 Key Off

Different tabs are brought in and out by moving the corresponding slider. Assignable switch 2 turns on additional brightness. The low keyboard octaves play the bass (pedal) tones. Overall, this is a fairly controllable representation of a wheezy Farfisa Compact.

Because the sliders are not discrete, you can probably make up Farfisa tones which aren’t entirely authentic. But, really, should one care? 😉

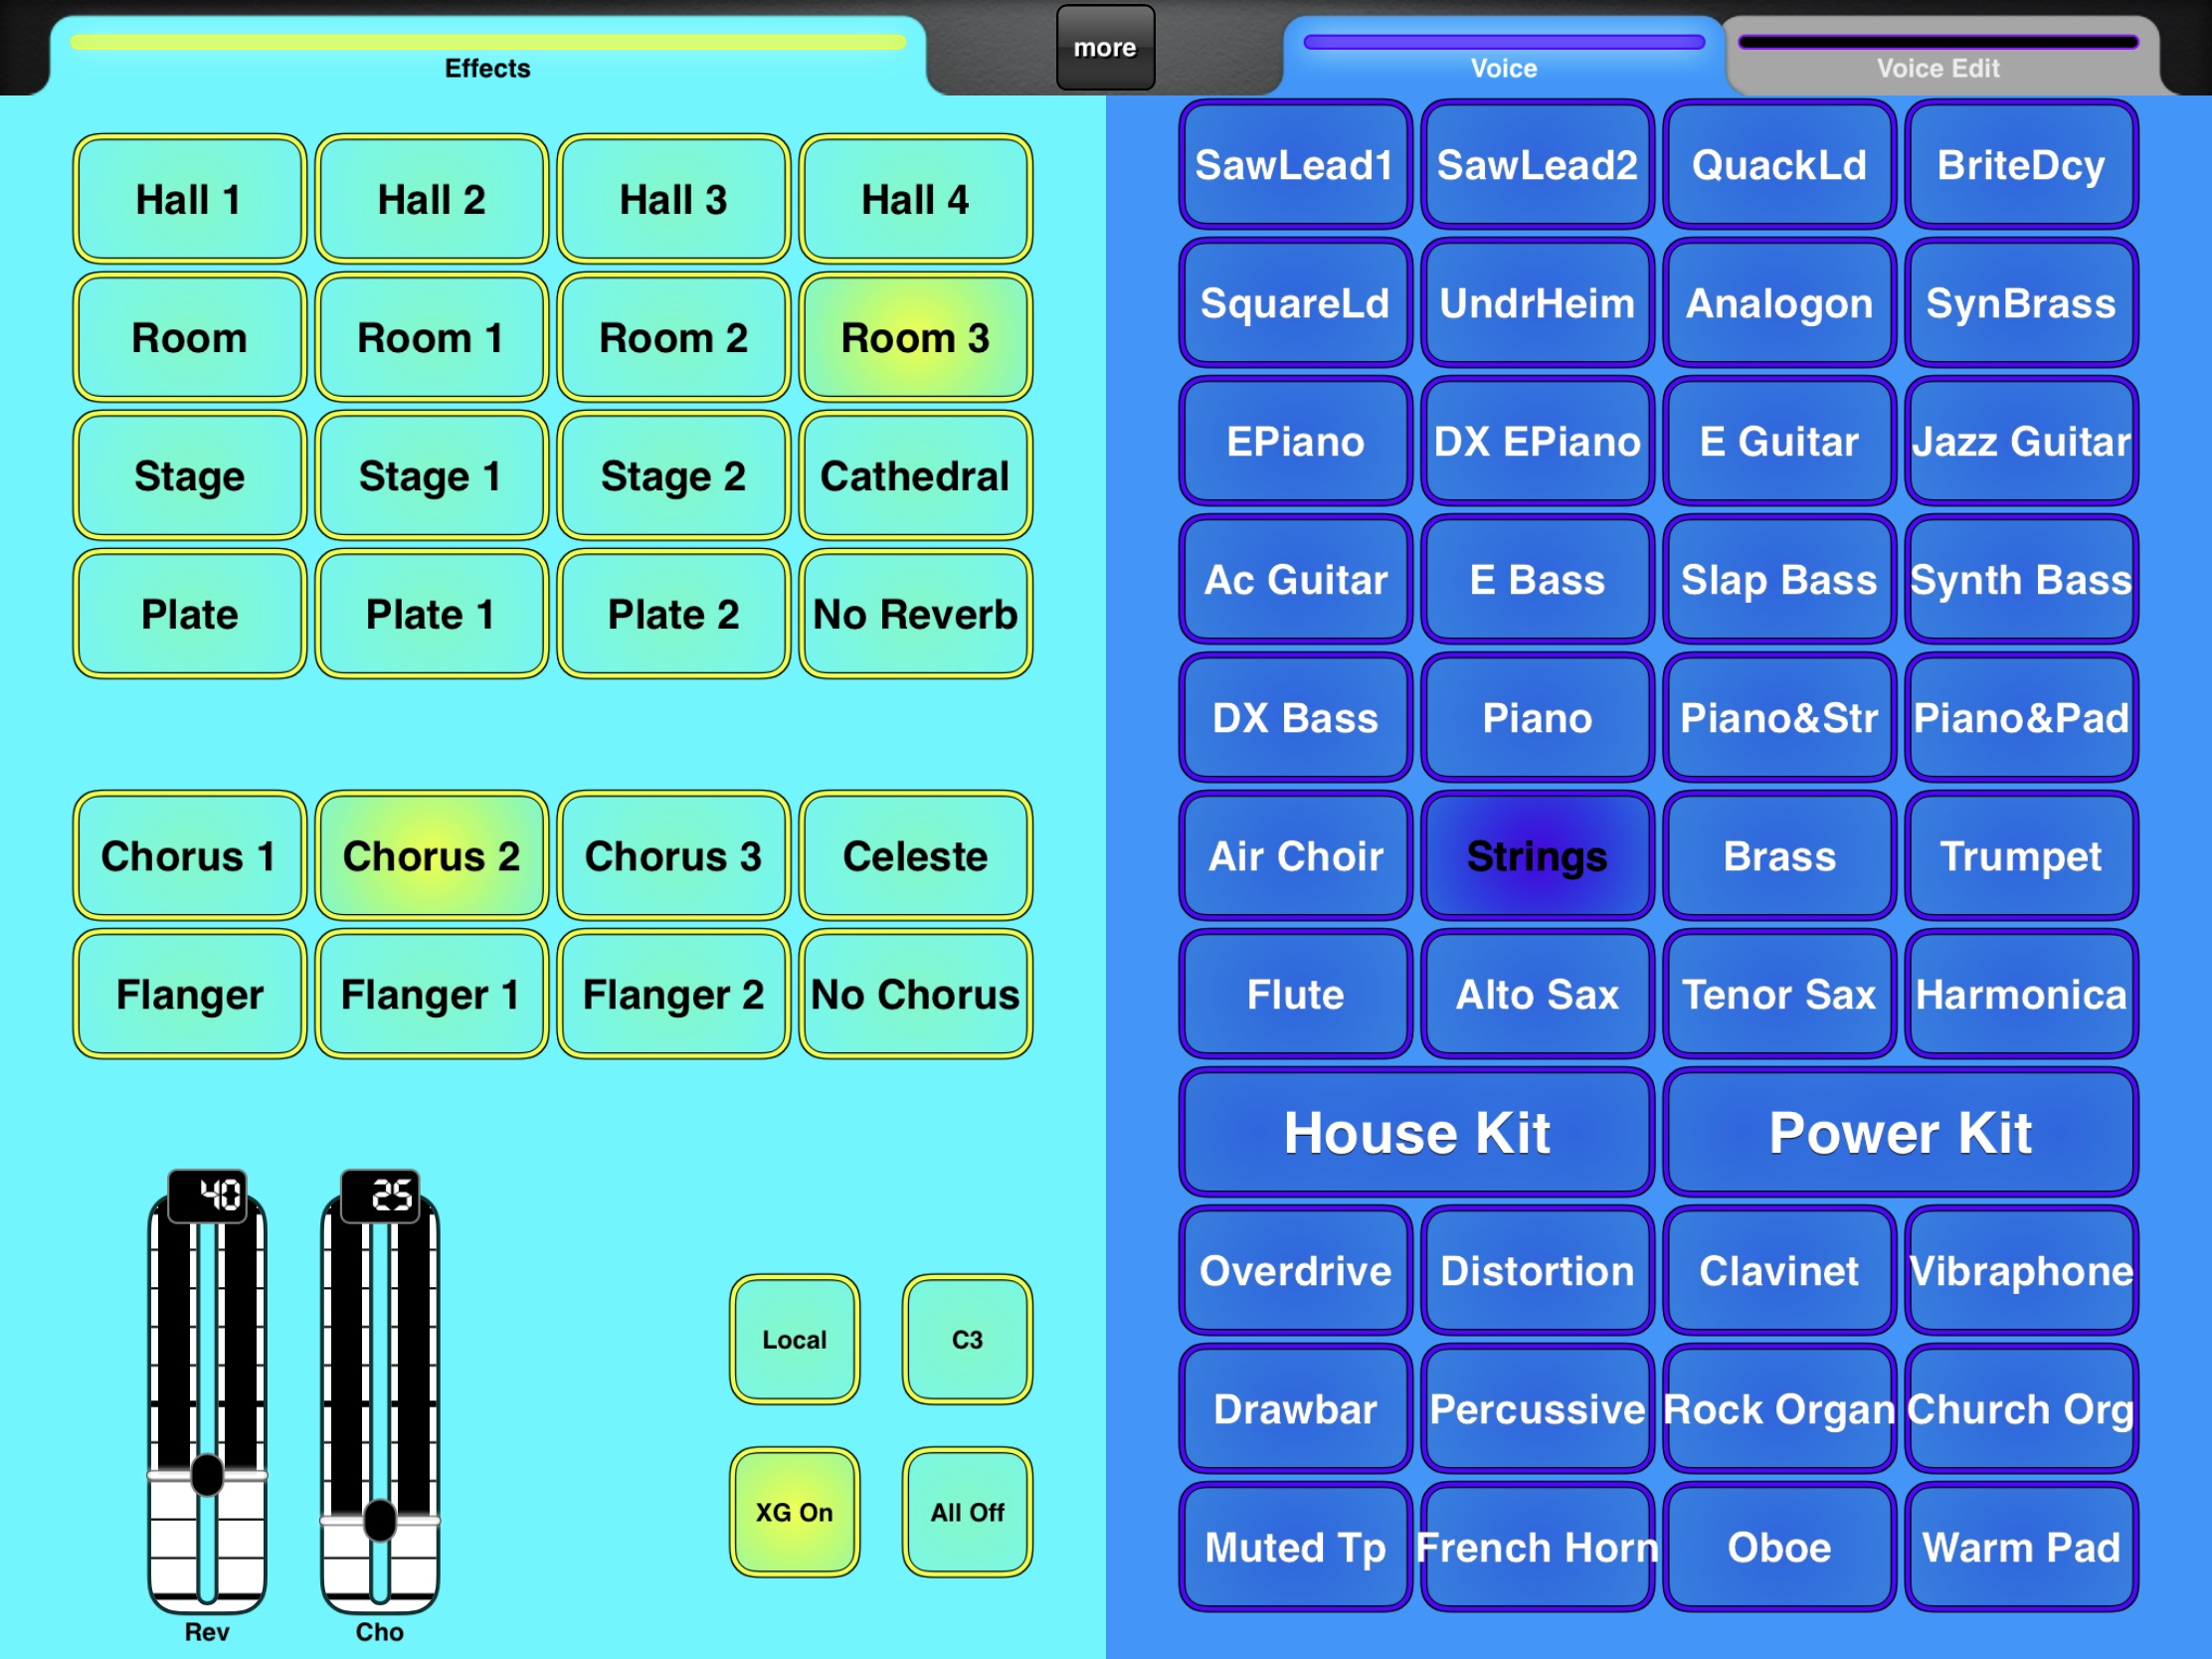
Vox performances have similar control-ability. Here is the waveform-to-element assignment in the Vx Full Bars performance:

El# Waveform      KeyLo KeyHi VelLo VelHi Coarse Level Cutoff XA Ctrl 
--- ------------- ----- ----- ----- ----- ------ ----- ------ -------
1 Vx Drawbar1-3 C-2 G8 1 127 0 75 255 Normal
2 Vx Drawbar1-3 C-2 G8 1 127 12 77 255 Normal
3 Vx Drawbar1-3 C-2 G8 1 127 24 91 255 Normal
4 Vx DrawbarIV C-2 G8 1 127 0 127 250 Normal
5 Vx KeyOff C-2 G8 1 127 4 68 85 Key Off

The first three sliders control the 16′, 8′ and 4′ Vox drawbar settings and the fourth drawbar controls the Mixture (IV) tone. Go ahead, just everything to eleven. 🙂

Montage and MODX FM

But, wait, there’s more! Montage and MODX have two FM combo voices: BOX FM Combo Organ and FM YC Combo Organ. Although these performances don’t sound authentic to my ears, they provide starting points for further programming. I haven’t heard the YC61 as yet, but I wonder if the YC61 combo emulations can be ported to Montage and MODX?
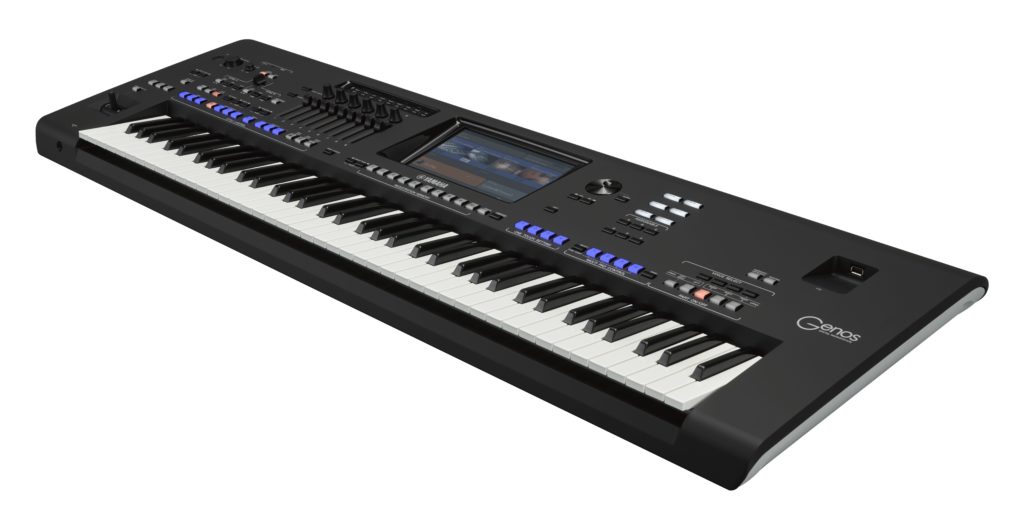
Genos

As I mentioned earlier, the arranger series has been historically short on combo organ sounds, relying on the old 60’sOrgan voice. Wheezy, raspy Farfisa tones are noticably absent. The 60’sOrgan voice sounds like the Portable Electronic waveform on which the Motif 1967 Keys performance is based.

Tyros 4 and Motif XF were introduced at approximately the same time. They certainly were together in the development lab during late 2009. Tyros 4 added four combo organ voices:

  1. 60sComboOrgan1: VoxContiComb1_Full_NoVib waveform
  2. 60sComboOrgan2: VoxContiComb1_Full_VibOn waveform
  3. 60sComboOrgan3: VoxCombi4NoVib waveform
  4. 60sComboOrgan4: VoxCombi4NoVib091117 waveform

Voices 1 and 2 capture one Vox Continental drawbar combination (Comb1) and voices 3 and 4 capture a second combination (Combi4).

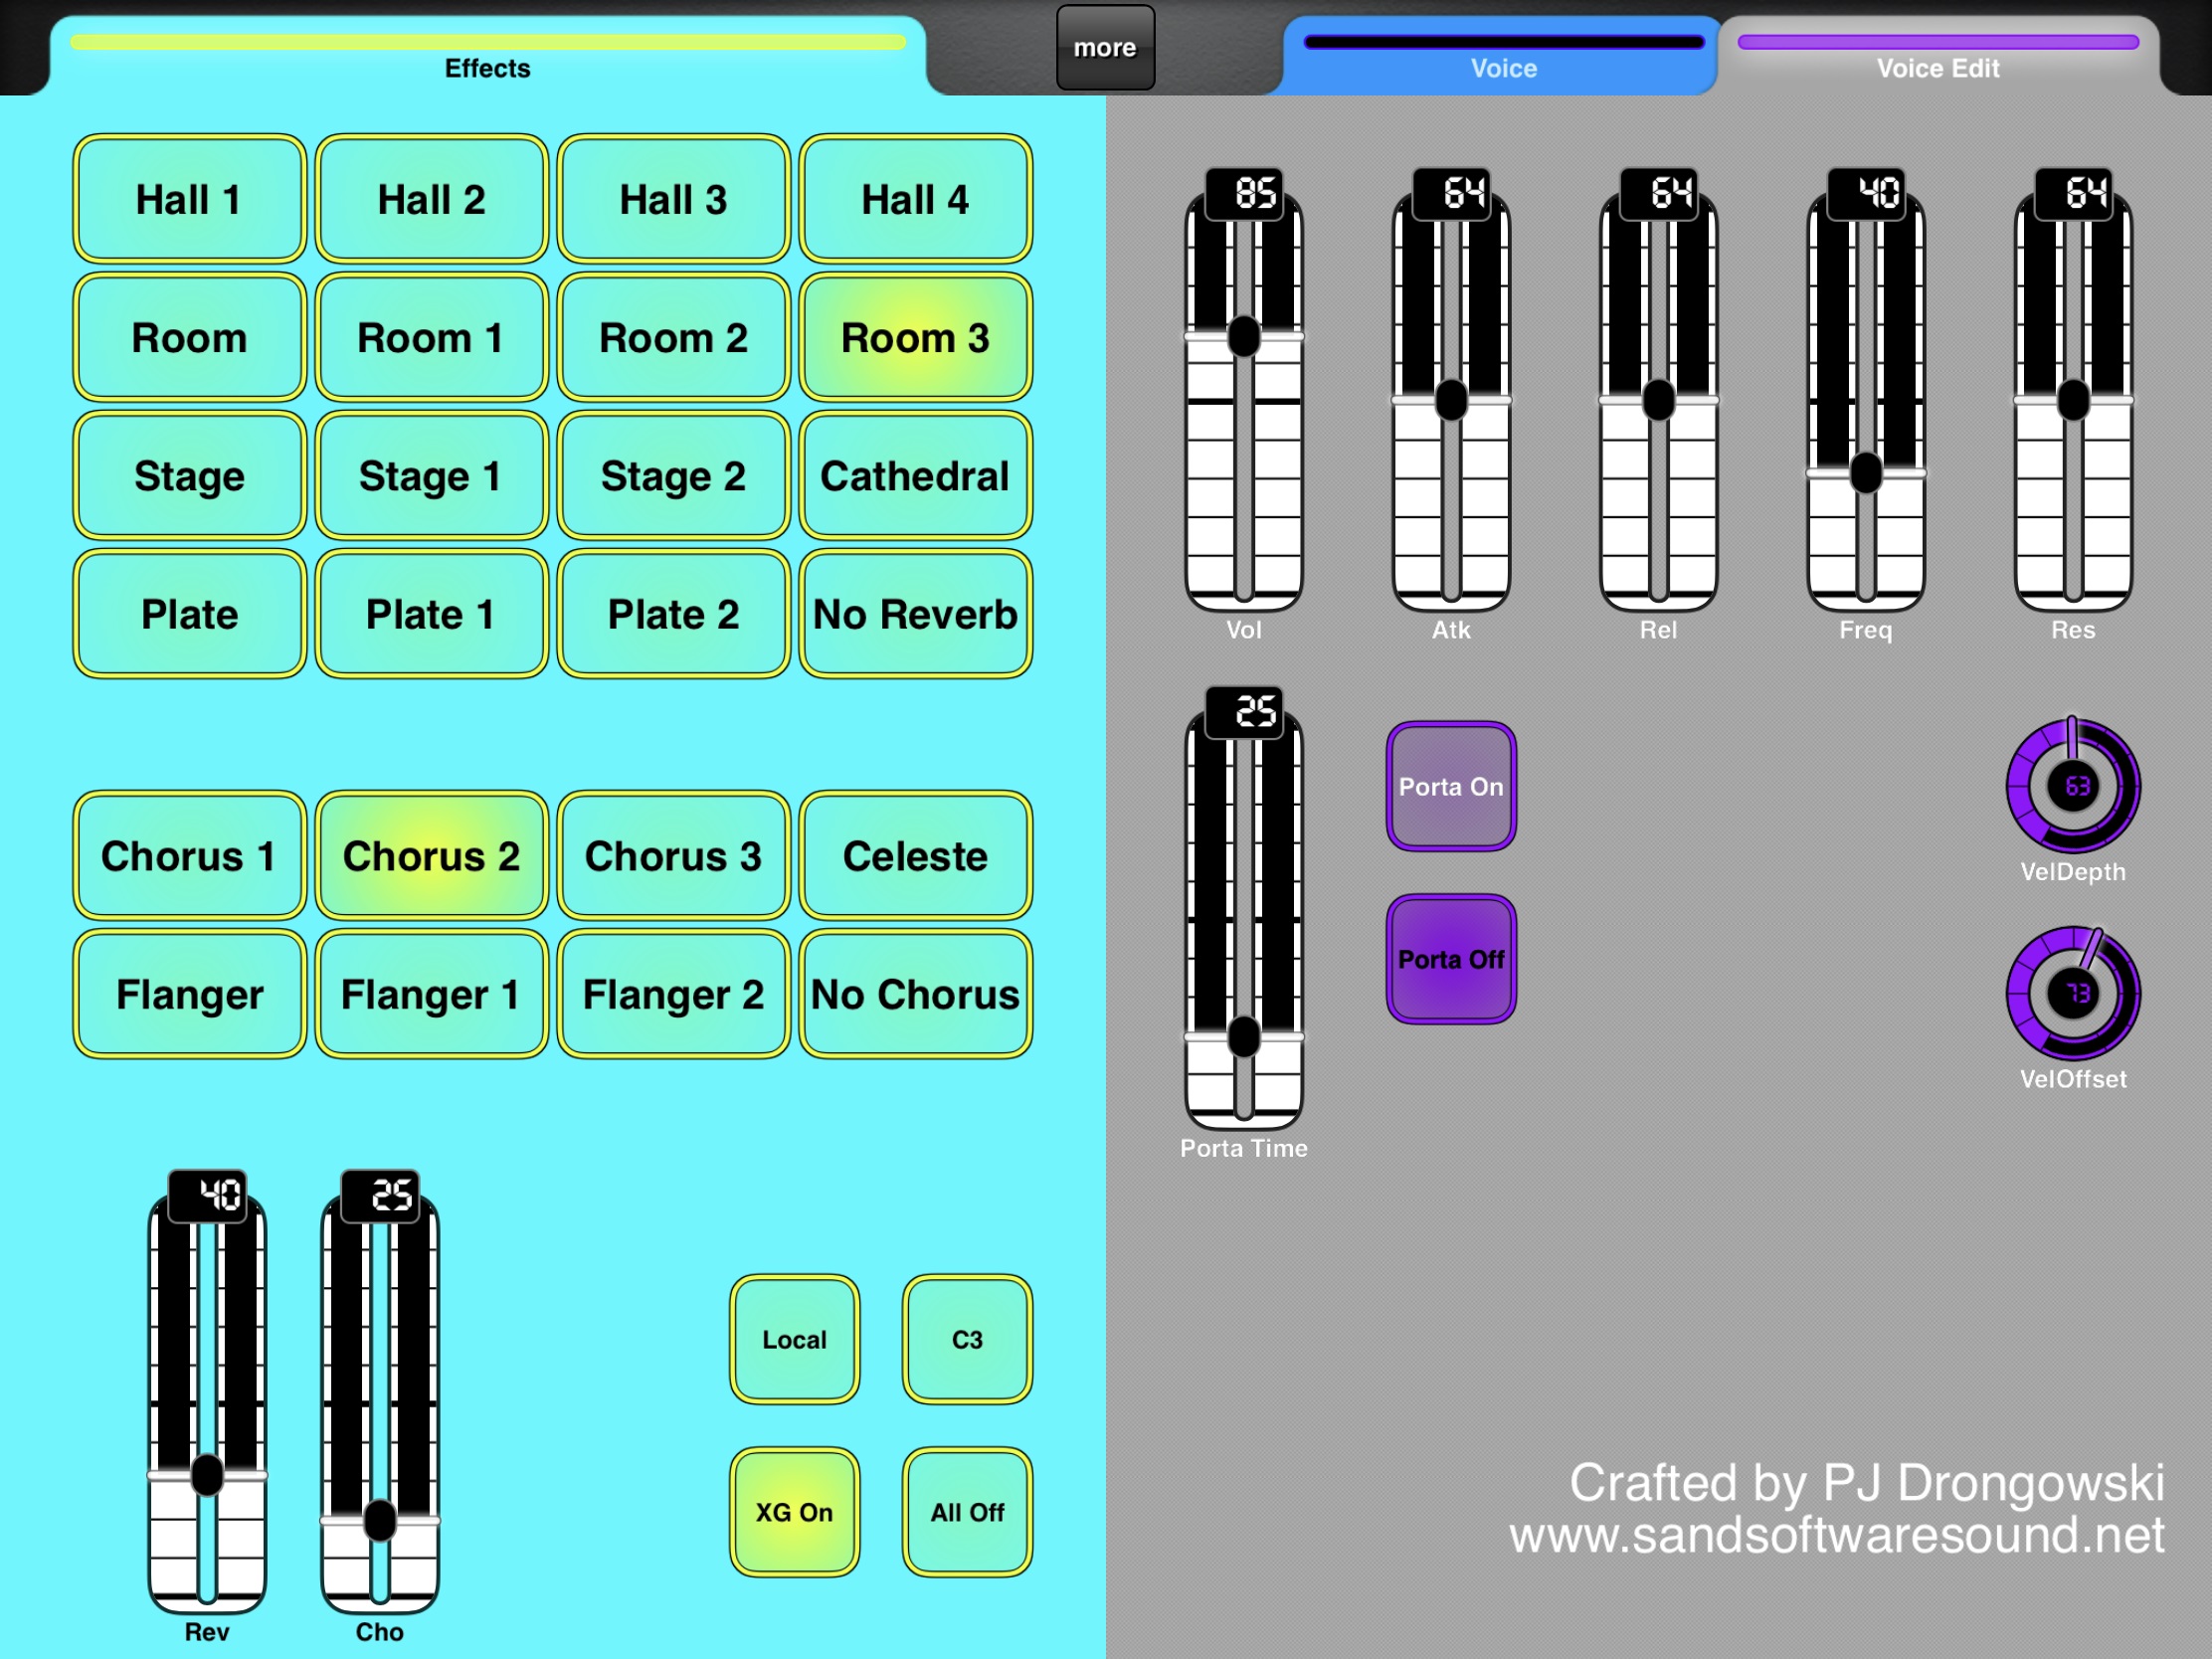
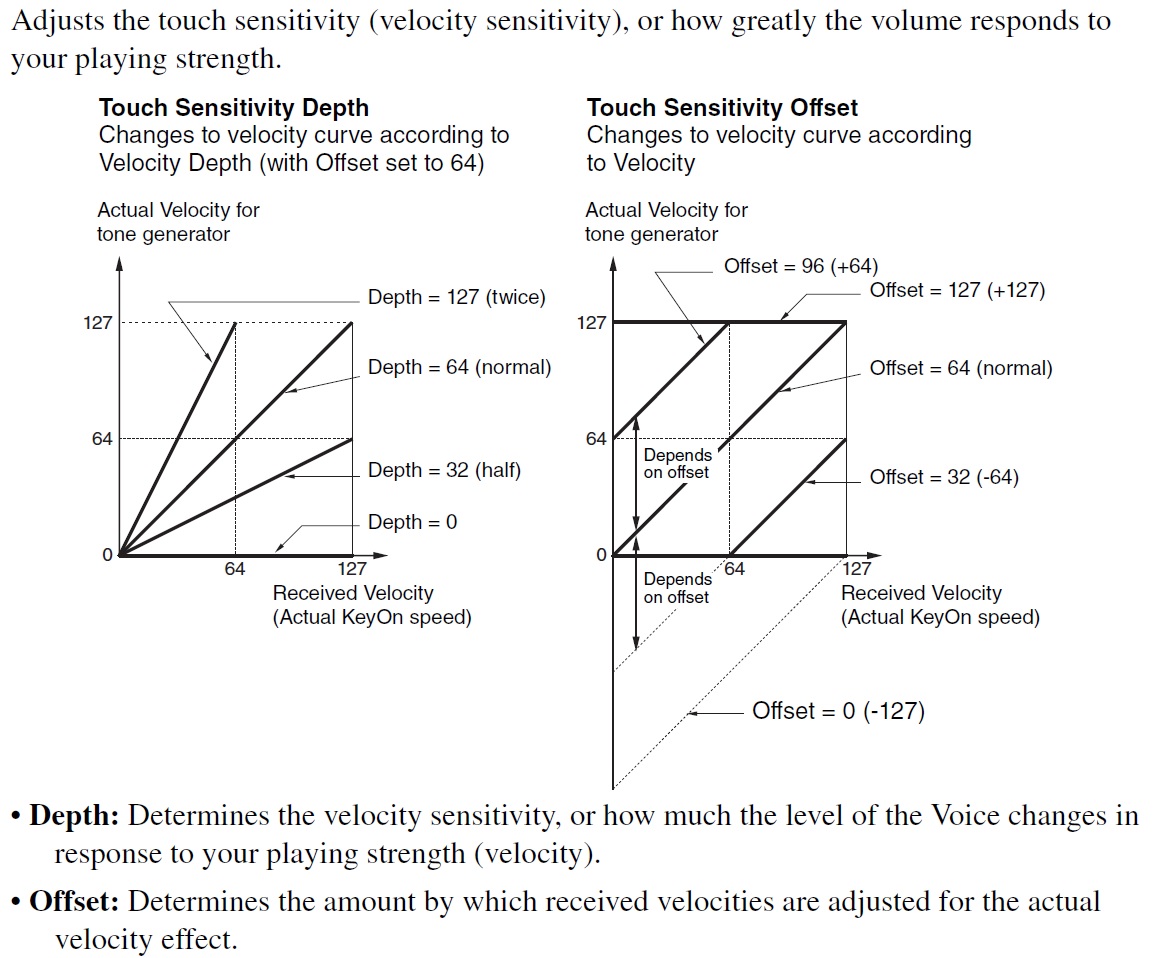
Voices 1 and 3 are without vibrato. Voices 2 and 4, unfortunately, have an excessive amount of vibrato — almost painfully so. When I use voices 2 and 4 in a MIDI sequence, I dial down the vibrato depth using MIDI CC#77 messages. Vibrato frequency is about 5Hz. I also remove touch sensitivity by setting:

  • Velocity sensitivity depth to zero, and
  • Velocity sensitivity offset to 114.

An organ voice should not respond to touch (key velocity) — ever.

PSR, Tyros and Genos players shouldn’t forget the “hidden” Italian 60s organ voice (It60’sOrgan) in the GM2 sound set. On PSR and Tyros, you’ll find It60’sOrgan within the Legacy voices Organ subfolder. On Genos, you need to download GM2 and XG user voices to the USER voice folder. (See this thread in the PSR Tutorial Forum.) Of course, you can select
It60’sOrgan from a DAW (MSB: 121, LSB: 2, PC: 17) .

All-in-all, you can get a nice Vox tone out of Genos. Farfisa is still missing in action, tho’. Kind of an odd shortcoming of a keyboard with styles and a user base that want to play popular hits from days past.

In the next post, I’ll compare Reface YC combo organs against Montage/MODX (Motif XF). The result may surprise you.

Copyright © 2021 Paul J. Drongowski

Customizing the Sonogenic voice editor

Back to the Yamaha SHS-500 Sonogenic voice editor…

Thanks to Brent at Keyboard Corner for suggesting a different set of default voices in my MIDI Designer-based Sonogenic voice editor. Back when I released the editor, I was hoping that folks could customize the user interface, changing or adding their own buttons and controls. Brent downloaded the editor, got everything running, and hit a roadblock with MIDI Designer. That’s understandable because I doubt if anyone can dive right into MIDI Designer as easily as diving into the menu of a synth.

So, smart guy, how do you change bank select and program change? Here’s a sequence of screen shots that may help. [Not so easy a year later, is it? 🙂 ]

MIDI Designer ordinarily runs in its operational mode, that is, the buttons, sliders and other controls are live and send MIDI. In order to make changes, one needs to enter Design Mode (edit mode). With the Sonogenic voice editor loaded, tap the More menu button, then tap the Design button under “Tools”.

MIDI Designer More menu

You should see a floating button widget saying “Exit Design Mode”. If you see that, you’ll know that you’re in Design Mode.

MIDI Designer button (control) properties in Design Mode

Tap a button or other control to select it. MIDI Designer outlines the selected button (or control) in red. Double tap the button (or control) to display and change its properties.

In this case, I double tapped the “QuackLd” button. If you want to name the button something else, tap the “Label” field and change the button name.

Button MIDI properties

To send a different MIDI message, tap the MIDI icon in the lower left corner of the Properties dialog box. MIDI Designer should display the control’s MIDI properties. The Sonogenic QuackLd voice has the following bank select and program change values:

  • Bank select MSB: 0
  • Bank select LSB: 112
  • Program change: 84

Values for the other SHS-500 preset voices are listed in the Yamaha Sonogenic SHS-500 Reference Manual.

Tap the “MIDI Off → On” field to edit the program change value. Tap the “Channel – Bank #” field to change the MIDI channel, bank select MSB value and bank select LSB value. You should probably leave the channel value alone.

MIDI Designer channel and bank select dialog box

The “Channel, Bank MSB, LSB” dialog box displays three spinning number dials (kind of like a slot machine) where the first column is MIDI channel, the second column is bank select MSB and the third column is bank select LSB. Spin the dials to get the setting you want. Tap the return arrow in the upper left corner when you’re finished. To leave a dialog box, just tap a blank area in the user interface background.

MIDI Designer actions

Tapping the Actions icon in the lower right corner of the Properties dialog box displays MIDI Designer actions. Use the “Delete” action to delete the control. Use “Copy” and “Make Similar” to copy the control.

General MIDI voice example

The buttons for the Sonogenic General MIDI (GM) voices are similar. Here, I selected and double tapped the “Vibraphone” button.

General MIDI voice selection properties

Again, tapping the MIDI icon in the dialog box displays the MIDI message properties for the button. The GM voices adhere to the GM standard program change values. However, you must send zero for both bank select MSB and LSB to properly switch the Sonogenic.

Tap the Exit Design Mode button to leave Design Mode. Then test your changes with the Sonogenic. Also, you probably should save the modified MIDI Designer interface following the directions in my original article.

Hopefully, this tutorial is enough to get you started with customization!

Copyright © 2021 Paul J. Drongowski

What did you do in self-isolation?

Yes, this site still does music! 🙂

Several weeks ago, I decided to record the church tunes that I enjoy playing. It’s best to start with favorites, as most of you know how you come to detest a track after playing it over, and over, and over again during production. Energy quickly dissipates when micro-editing MIDI events or digital audio…

Before getting into production notes, here are links to the final tracks (all MP3). The goal was to crank out a new tune each week and send it to the folks in our music ministry. Some tunes are a little more polished than others. Please consider them “demo quality.”

Without going too far into the technical weeds, the primary sound source is Yamaha Genosâ„¢ and the primary vocalist is my spouse Fran. With the Mill Creek Chorale on hiatus — aren’t we all? — I was happy that she could contribute and have fun, too.

Production notes

So, how did all of this go down?

These demoes show off the Yamaha Genos as a sound source and production tool. I had two main subgoals:

  1. Learn how to record a demo with Genos in either audio or MIDI format.
  2. Learn how to mix down with Steinberg Cubase Artist and try out a few of the freebie plug-ins that I’ve collected.

By and large, Genos and Cubase were the main production tools although I back-slid into SONAR on a few occasions for MIDI editing. Old habits die hard. Workflow was not strictly linear from Genos to Cubase. In a few cases. MIDI and/or audio (stereo 16-bit 44,100 WAV) were slung back and forth between tools.

Yamaha Genos

Genos is the sound source with one big exception: drawbar organ. When you hear B-3, you’re hearing Yamaha MODX through an Electro-Harmonix Lester K. I wanted to hear Lester K in musical context. It sits in a song pretty well and has more guts than the Yamaha MODX Leslie simulator. By itself, though, Lester K has some high-end swirliness in the upper drawbars, but in a track, it seems to mesh. You be the judge.

Emphasis was on speed. Get the tracks down quickly and finish a song each week ASAP. The Beatles used to call this recording “on heat.” Even so, it’s amazing how modern technology will drag you into the dank chasm of production minutiae. Don’t you just love hearing the same three measures fifty times while tweaking and tweezing. Not.

All vocals were recorded directly to Genos using its microphone input. Full backing and raw vocal tracks were exported to Cubase via WAV. Everything was processed and mixed in Cubase. The final mix was exported from Cubase as WAV, and then trimmed and converted to MP3 using Sound Forge Audio Studio.

Our God Is Here This was the first demo in the series and the process doesn’t get any simpler than this. All was recorded into Genos Audio Multi Recording. Find a beat, turn it on, lay down the organ part. Unfortunately, I didn’t plan for the ending, which is quite ragged. The organ is Genos in this case (not MODX). Kinda plain, huh? The bass is an overdub.

Audio Multi Recording is a nicely done sound-on-sound recorder a la Les Paul, minus tape hiss. There are two stereo tracks: main and sub. You can record directly to either main or sub, and bounce (sub+main) to main. There are options for punch in and overdub. Audio Multi Recording provides WAV import and export, functionality which eventually got a true work-out.

Audio Multi Recording keeps digital audio in a persistent project. A project resides in the internal Genos 60GB user solid-state drive and is always ready. The project remembers audio and mix settings without requiring explicit save and load user operations. That makes for a clean workflow. Export is the way to get digital audio into a WAV file and it mixes the main and sub on the way to WAV. In order to export a solo vocal track from sub, one needs to dial down the main and then wait while Genos writes the WAV file in real time. I wish there was a simple, direct fast export to WAV supporting both main to WAV and sub to WAV.

In The Day Of The Lord I quickly realized that I do need to think ahead and assemble a basic skeleton on which I could build a tune. (Duh!) In this case, Toontrack EZDrummer provided the drum patterns which I pulled together in Cubase. Genos played the MIDI drum track while I recorded the flute as a melodic guide and layered in the bass and organ — all recorded as audio. We then did a few vocal takes to Genos. I transferred all of the Genos audio as WAV into Cubase for the final mix. Vocal processing typically was light: a little pitch correction, EQ, and maybe double tracking. A touch of reverb (Cubase Revelation) blends everything together here.

Stop By, Lord This tune makes use of the Genos rhythm accompaniment consisting of main patterns and one-bar fills. I recorded a basic guide track in MIDI using the “BigBandBallad” style as the drummer. This meant switching the main and fill patterns with my left hand while playing the melody with my right hand. I layered in the piano, bass and horns, discarding the guide melody along the way. I added the B-3 organ (MODX through Lester K) in an audio pass. Everything was recorded and produced on Genos since we didn’t record vocals.

Psalm 95 If Today “If Today” makes full use of the Genos arranger features. I played the basic accompaniment track using the “Sunny Reggae” style. Whoever built that style, it must have been a labor of love and it fits this song quite well. I vocoded my voice. Both the accompaniment and vocal tracks where exported to Cubase for final assembly and mix down. I had a lot of fun adding dub effects and tons of reverb, Long live King Tubby!

Rise Up With Him “Rise Up” was recorded to MIDI, again using the Genos rhythm accompaniment as the drummer. The electric piano went down first followed by the bass. The B-3 organ is MODX through Lester K. Backing and vocal audio were exported to Cubase for final mix down. Overall, a pretty simple demo to pull together.

O Sacred Head I recorded the MIDI for this tune a long time ago — in the early 2000s on a Roland XP-60. The guitar picking was carefully edited and assembled (years ago!) from Twiddly Bits. I imported the XP-60 MIDI into Cakewalk, choosing Genos voices and effects. The Genos result versus the original XP-60 is amazing. Fran encouraged me to leave it as an instrumental.

This Is The Day This psalm is long out-of-print. A few years agao, I transfered a scruffy copy of the piano score into Sibelius. So, to kickstart this tune, I exported MIDI from Sibelius, restructured the sections, and humanized the piano as much as possible. I tried to keep the accompaniment simple adding just bass and horns. Once again, the backing and vocal tracks were mixed in Cubase. This demo is a good example of Arturia’s Plate-140 reverb — a freebie that Arturia gave away during the Christmas holiday. I love it.

Lead Me, Lord Another simple turn-on-the-beat-box, sound-on-sound production. Everything was recorded to Genos with the backing and vocal tracks exported to Cubase. (Another example of Plate-140, BTW.) The vocal harmony was generated by a TC Helicon Play Electric added in real time. Recording and production was dirt simple although it took a while to get the TC Helicon configured.

Alleluia! Love Is Alive This was the penultimate demo in the series. The basic track is a stripped down Genos “6-8PopBallad” style. Yamaha tends to over-orchestrate styles, so I kept drum, bass and guitars, tossing the rest. Instead of playing the basic track, I created the accompaniment using chord step-record. This MIDI Multi Recording feature lets a musician enter chords and sections from a lead sheet, quickly creating the song skeleton. You can even try different styles if you haven’t chosen one already. Once the skeleton is set, you expand the chord track into MIDI events, thereby obtaining the full backing track in a Standard MIDI File (SMF).

I added the Celtic violin by playing it into a free MIDI track. Using Sonar, I tweaked the tempo in the full MIDI song in order to add energy as the song progressively builds to the end. Finally, with the MIDI finished, I froze the backing tracking to WAV audio. The backing and vocal tracks were mixed down in Cubase with a little automation here and there to add vocal depth and double tracking.

Conclusions?

The preceding discussion is already a lot to absorb and to process. I’ll take a step back in a future post and try to summarize. All the best to ya.

Copyright © 2020 Paul J. Drongowski

Sonogenic voice editor

The Yamaha SHS-500 Sonogenic is a good sounding syntheizer which lets you jam along with ChordTracker songs. The SHS-500 includes a General MIDI Level 1 multi-timbral tone generator that is accessible over MIDI (Bluetooth, 5-pin or USB). Yamaha doesn’t promote the General MIDI capability, but it’s there!

Update: I added a post showing how to customize the Sonogenic voice editor user interface.

The Sonogenic lacks three critical features that one finds in a typical desktop synth:

  1. Although the Sonogenic has 28 great voices and two drum kits built-in, it lacks many important instruments like organ, double reeds, tuned percussion and soft synth pads.
  2. Internal voices cannot be edited, e.g., attack, filter cutoff and so forth cannot be adjusted.
  3. The chorus and reverb types are preselected and cannot be changed.
  4. Edits and changes cannot be stored into and recalled from user memory slots.

This is the ideal situation for a tablet-based app.

MIDI Designer is an iPad-based tool which supports creation and use of MIDI voice editors and controllers called “layouts.” Users have built and shared layouts for many popular synths. Now, I’m pleased to add the SHS-500 Sonogenic layout. With this layout, you can play the General MIDI (GM) voices, change reverb and chorus types, edit General MIDI (GM) voices and save all of your work in MIDI Designer presets. If you turn Sonogenic LOCAL sound generation on, you can layer an internal voice with a GM voice.

This post describes the Sonogenic layout. I recommend reading my post about MIDI Designer to Sonogenic communications (MIDI flow) first. It will help you to understand the relationship between the SHS-500 and the MIDI Designer Sonogenic layout. The write-up may even inspire a new way of using MIDI Designer with Sonogenic.

One thing that’s nice about MIDI Designer and layouts — you can customize them. So, if you want to modify my layout, don’t hesitate. First, though, you should read my post describing Sonogenic’s MIDI implementation. Then you will know more about the MIDI messages behind the layout’s controls.

Click this link to download my Sonogenic layout for MIDI Designer. Use iTunes file sharing to install the layout in MIDI Designer. I plan to upload the Sonogenic layout to the MIDI Designer web site.

Connection

Although you could connect by USB or 5-pin MIDI, the Sonogenic, MIDI Designer and Bluetooth MIDI are made for each other.

midimittr Bluetooth connection to Sonogenic

First, launch the free midimittr app which acts as a bridge between Sonogenic, Bluetooth MIDI and MIDI Designer. midimitter lets MIDI Designer echo Sonogenic’s MIDI note on/off, modulation and pitch bend messages back to the Sonogenic. You should turn Sonogenic LOCAL off unless you intend to layer a Sonogenic voice with a GM voice.

MIDI Designer connection

Next, launch MIDI Designer and make connections to midimittr as shown in the screenshot above. Then load the Sonogenic layout into MIDI Designer. You should be ready to go at this point.

Voices and effects

The Sonogenic layout is separated into three tabs: Effects, Voice and Voice Edit. (See the screenshot below.) Effect-related controls are on the left-hand side of the screen and voice-related controls (tabbed pages) are on the right-hand side.

Effect and voice selection

Selecting a GM voice

The Sonogenic has a strict division between its keyboard sound and the General MIDI sounds over MIDI. You can think of the keyboard sound and GM sounds as two distinct tone generators, each with their own controls. The keyboard sound is selected and controlled through the Sonogenic front panel. The GM sound(s) is selected and controlled by the MIDI Designer layout.

The Voice page has an array of voice buttons. The 28 buttons at the top of the page select one of the preset “panel” voices. The two large buttons in the middle select one of the two preset panel drum kits. The buttons at the bottom of the page select a voice from the General MIDI sound set.

Please note: if you select a panel voice on the Voice page, you are changing the current General MIDI sound. The Sonogenic keyboard sound remains the same. The separation may seem artifical, but it lets us layer two sounds: the keyboard sound and a General MIDI sound.

The Sonogenic panel voices are generally better-sounding than the equivalent GM voice. The layout provides direct access to the panel voices while providing 12 buttons which can be customized for your own favorite GM voices. Of course, you’ll need to learn how to edit the GM buttons…

Effects

The large buttons on the Effects page choose the current reverb and chorus type. Like the voice buttons, the reverb and chorus effect type buttons are “radio buttons,” i.e., you can select only one effect type at a time within the reverb group or chorus group.

The reverb (Rev) and chorus (Cho) sliders adjust the reverb and chorus level for the General MIDI sound. [By the way, the GM voice and its effect levels are on MIDI channel 1.] Change the amount of reverb or chorus effect here. The sliders do not affect the keyboard sound — only the GM sound.

Changing the chorus and reverb type also affects the keyboard sound because the chorus and reverb units are shared by the keyboard sound and the GM tone generator. Reverb and chorus level only affect the GM sound [MIDI channel 1].

The four small buttons are utility buttons:

  1. XG On: Sends an XG System reset to the GM tone generator. This resets the voice (acoustic piano) and all internal MIDI controller values.
  2. Local: Turns Sonogenic LOCAL CONTROL on and off.
  3. All Off: Turns off all notes which may be sounding — a panic button.
  4. C3: Plays the MIDI note C3. Good for testing edits and changes.

Use the XG On button sparingly. The GM tone generator and layout do not automatically re-synchronize with each other.

Voice editing

The Voice Edit page is where you adjust basic voice characteristics like volume (Vol), attack time (Atk), release time (Rel), filter frequency (Freq) and filter resonance (Res). You can spruce things up with these controls. The attack, release, frequency and resonance controls behave like “quick edit” controls, that is, they are offsets from the preset voice parameter values. The middle position (64) specifies a zero offset leaving the original value unchanged. Higher values add an offset and lower values subtract an offset. So, if you want to increase attack time, move the attack slider up. If you want to shorten attack time, move the attack slider down.

Effects and Voice Edit pages

Portamento adds a glide between notes. Press “Porta On” to turn portamento on and press “Porta Off” to turn portamento off. The portamento time slider (Porta Time) sets the glide time.

The velocity sensitivity knobs change how the voice responds to MIDI note velocity (touch). The two voice parameters are:

  1. Velocity Sense Depth (VelDepth)
  2. Velocity Sense Offset (VelOffset)

Please see Yamaha’s explanation in the figure below.

Velocity Sense Depth and Offset

Organ voices, in particular, should not respond to velocity, i.e., a note is either on or off. To achieve this kind of touch response, set velocity sense depth to zero and set velocity sense offset to a value in the range 110 to 127.

The keyboard voices have a default volume which is louder than the General MIDI voices. You may need to set the volume slider (Vol) above 100 in order to get a better balance (mix) between panel and GM voices.

MIDI Designer presets

MIDI Designer itself implements preset storage and recall. A MIDI Designer preset is a snapshot of all the current values in a layout. Here’s a typical usage scenario:

  1. Select a voice.
  2. Select and adjust chorus and reverb effects.
  3. Tweak the voice (e.g., change filter cutoff, etc.)
  4. Save the finished voice as a MIDI Designer preset.

It’s easy to save a preset. Press the more button, press the “Save” button at the bottom of the drop-down menu, and then press one of the ten preset buttons. To recall a preset, simply press more followed by the desired preset button.

MIDI Designer has two groups of presets: regular and alternative. There are ten preset slots in each group, so you get twenty presets total. The Alt button selects the alternative group.

Potential issue: Portamento sometimes stays on (or off) after selecting a preset that changes portamento state. [I’m still investigating.]

Limitations

I experimented with several other controls of the kind normally found on a desktop synth. Unfortunately, the SHS-500 MIDI implementation is rather limited. Here are some known shortcomings:

  • Transpose and note shift
  • DSP effect control
  • Mono and poly mode selection

Should I make any progress with these deficiencies, I will issue an update.

Copyright © 2020 Paul J. Drongowski

Sonogenic UI MIDI flow

My Yamaha SHS-500 Sonogenic user interface (UI) is coming along quite well and is nearly complete. Before presenting the UI itself, I want to explain the overall concept of operation from the MIDI perspective.

The diagram below shows the flow of MIDI messages between the Sonogenic and the apps running on the iPad. The iPad and Sonogenic exchange MIDI messages over Bluetooth MIDI (BLE MIDI).

MIDI message flow

The two iPad apps are MIDI Designer and midimittr. Although MIDI Designer is Bluetooth MIDI capable, it is not able to echo incoming MIDI note on, note off and modulation messages back to the Sonogenic. For that, we need the (free) midimittr app. midimittr is launched first and makes the connection to the Sonogenic. In Bluetooth terms, midimittr is the “Central” and the Sonogenic is the “Peripheral.” MIDI Designer is launched after midimittr and virtual MIDI connections in and out are made to midimittr. THRU is turned on.

Thus, midimittr acts as a bi-directional pipe for incoming and outgoing MIDI messages (i.e., incoming and outgoing with respect to MIDI Designer.) MIDI Designer along with midimittr forms a MIDI loop-back.

Back in the Sonogenic, keyboard and modulation control messages are sent to the MIDI OUT link and, under the control of the LOCAL ON/OFF switch, are sent to the Tone Generator. If LOCAL is ON, keyboard messages are sent to the Tone Generator. If LOCAL is OFF, keyboard messages only go out on MIDI and no sound is initiated.

In this design, the Sonogenic transmits outgoing MIDI messages on channel 1. MIDI Designer also sends its messages on channel 1. The net effect of the loop-back is to merge messages sent by the Sonogenic with messages sent by MIDI Designer.

The incoming MIDI message stream always goes to the Tone Generator. Along this path, the Tone Generator implements a General MIDI Level 1, 16-channel synthesizer. All channel 1 messages are recognized and interpreted by the Tone Generator whether they originated within the Sonogenic or MIDI Designer.

The incoming MIDI messages and the keyboard messages (when LOCAL is ON) are received by the Tone Generator via two separate and independent ports.

  • The keyboard port is not one of the 16 MIDI channels. Panel voice selection and DSP effect control are available through this port. No General MIDI control is possible through this port.
  • The General MIDI message port handles all 16 channels including channel 1 which carries the merged messages from the Sonogenic loop-back and MIDI Designer. General MIDI messages cannot change the panel voice or DSP effect.

Now you can see why MIDI Designer loops Sonogenic MIDI messages back to the tone generator. And, you can see why there are certain limitations.

However, we do gain one advantage by having two such independent tone generator ports. If LOCAL is turned ON, you can layer a panel voice (selected on the Sonogenic) with a GM voice (selected in MIDI Designer). Want a phat stacked synth? You got it. Want to layer EPiano over strings? You got it.

The MIDI Designer UI lets you select and edit General MIDI voices. You can also select among all of the available chorus and reverb types. Thanks to MIDI Designer’s preset capability, you can save and recall the edited voices. The Sonogenic does not have patch editing or patch storage.

I hope this explanation is helpful. Soon, I will dive into the MIDI Designer interface.

Copyright © 2020 Paul J. Drongowski

SHS-500 Sonogenic MIDI

The Yamaha SHS-500 Sonogenic has hidden (undocumented) MIDI abilities! This post covers “What mother didn’t tell you.” I’m working on a MIDI Designer-based user interface for the SHS-500 and spent time exploring its MIDI implementation. Here’s the results.

For those who are “tl:dr”, The MIDI implementation is similar to (based on?) the Yamaha PSR-E463/-EW410. If you continue reading, you’ll learn a few new things about the E-series models, too.

General MIDI tone generation

The big news, of course, is the built-in General MIDI Level 1 tone generator. You can use the SHS-500 as a full 16-channel, multi-timbral General MIDI (GM) sound source (GM System On/Reset):

    F0 7E 7F 09 01 F7

You can also enable and select the panel voices by putting the Sonogenic into its ultra-light XG mode (XG System On):

    F0 43 10 4C 00 00 7E 00 F7

I won’t reproduce the GM voice table here nor the list of SHS-500 panel voices. Consult the SHS-500 Reference Manual for the bank select and program change values needed for panel voice selection.

Chorus and reverb effects

Like the E463/EW410, the Sonogenic implements a smattering of basic chorus and reverb effect types. Reverb type is selected by a MIDI message of the form:

    F0 43 10 4C 02 01 00 MSB LSB F7

The reverb types are:

                MSB  LSB  SysEx                        
--- --- -----------------------------
No effect 0 0
Hall 1 1 0 F0 43 10 4C 02 01 00 01 00 F7
Hall 4 * 1 1 0 01
Hall 2 1 16 01 10
Hall 3 1 17 01 11
Cathedral * 1 23 01 17
Room 2 0 02 00
Room 3 * 2 7 02 07
Room 1 2 17 02 11
Room 2 2 19 02 13
Stage 3 0 03 00
Stage 1 3 16 03 10
Stage 2 3 17 03 11
Plate 4 0 04 00
Plate 1 4 16 04 10
Plate 2 4 17 04 11

Please note the three reverbs added in the E463 (Hall 4, Cathedral, Room 3).

Chorus type is selected using a MIDI message of the form:

    F0 43 10 4C 02 01 20 MSB LSB F7

The chorus effect types are:

             MSB  LSB  SysEx 
--- --- -----------------------------
No Effect 0 0
Chorus 3 65 0 F0 43 10 4C 02 01 20 41 00 F7
Chorus 2 65 2 41 02
Celeste 66 0 42 00
Chorus 1 66 17 42 11
Flanger 67 0 43 00
Flanger 1 67 8 43 08
Flanger 2 67 17 43 11

Unfortunately, Yamaha have not given us a way to select the DSP effect type. The Sonogenic does not implement CC#94 which is needed to control variation send when the variation effect is configured in system mode. I performed many experiments trying to enable the DSP effect as an insertion effect, failing all attempts. Yamaha’s MIDI set-up (for SMFs) on the E463 does not contain DSP configuration. So, I think we’re hosed when it comes to DSP effects via MIDI.

I couldn’t find a way to change the Master EQ through MIDI.

MIDI Continuous Controllers

The SHS-500 Sonogenic implements the following MIDI Continuous Controller (CC) messages:

 CC#  Function / purpose
--- -----------------------------------------------
0 Bank Select (MSB)
1 Modulation
5 Portamento Time
6 Data Entry (MSB)
7 Main volume (channel volume)
10 Pan 11 Expression 32 Bank Select (LSB)
38 Data Entry (LSB)
64 Sustain (Off: 0 to 63, On: 64 to 127)
65 Portamento On/Off (Off: 0 to 63, On: 64 to 127)
71 Resonance
72 Release Time
73 Attack Time
74 Cutoff Frequency
84 Portamento Control (amount of portamento)
91 Reverb depth (Effect 1 Depth)
93 Chorus depth (Effect 3 Depth)
96 RPN/NRPN data increment
97 RPN/NRPN data decrement
100 Registered Parameter Number (RPN) LSB
101 Registered Parameter Number (RPN) MSB
120 All Sound Off
121 Reset All Controllers
122 Local On/Off switch (Off: 0 to 63, On: 64 to 127)
123 All Notes Off
124 Omni Off
125 Omni On
126 Mono (0 to 16)
127 Poly

These CC channel messages are pretty standard. Without deep diving, note that CC#91 and CC#93 set the reverb depth and chorus depth, respectively. It’s still possible to have a lot of fun with CC#71, CC#72, CC#73, and CC#74 for voice editing. However, you’ll have to find a way to save your edits since the Sonogenic doesn’t have any user patch memory. I’m hoping to edit and save patches through my MIDI Designer user interface.

Sadly, there isn’t a way to control vibrato. It would be nice to control vibrato rate and depth, but what you hear is what you get. The best one can do is to control vibrato depth via CC#1 modulation.

Registered Parameter Numbers

The Sonogenic implements the General MIDI Registered Parameter Numbers (RPNs):

RPN MSB  RPN LSB  Function / purpose 
------- ------- -------------------------------------
0 0 Pitch Bend Range
0 1 Fine Tuning
0 2 Coarse Tuning
0 5 Modulation Sensitivity

I tested only coarse tuning as a means to achieve transpose.

No Non-Registered Parameter Numbers (NRPN) are supported.

Utility messages

The PSR-E463 MIDI Reference lists a few “utility” messages:

  • MIDI Master Volume
  • MIDI Master Tuning
  • Local ON/OFF

I tested Local ON/OFF and the Sonogenic responds to it. (The SHS-500 MIDI implementation chart shows this message as recognized).

None of the General MIDI Level 2 messages are implemented, e.g., Master Coarse Tuning. Thus, options for transpose (note shift) are limited.

XG extensions

I spent a fair bit of time searching for Yamaha XG extensions. Almost all XG extensions are ignored except velocity sense control:

Velocity Sense Depth (Part: 1, Default: 64)
F0 43 10 4C 08 00 0C vv F7
Velocity Sense Offset (Part: 1, Default: 64)
F0 43 10 4C 08 00 0C vv F7

I’m glad velocity sens control is supported. Organ voices, in particular, do not respond to key touch. If you want to turn off touch response in a MIDI channel, try:

    Velocity Sense Depth: 0 
Velocity Sense Offset: 115 to 127

Both parameters default to 64 (Hex 0x40).

Based upon my analysis of E463 song set-up messages, the Sonogenic is likely to support XG Scale Tune messages.

Display chord name

You’ve probably seen demonstrations of Chord Tracker driving the SHS-500. Chord Tracker communicates chord names to the Sonogenic over MIDI. It uses the same SysEx chord name message as the Genos/PSR series keyboards. For example, the following two messages send “Dm7” and “G7” to the Sonogenic.

F0 43 7E 02 32 0A 32 0A F7     Dm7
F0 43 7E 02 35 13 35 13 F7 G7

Chord names are displayed when the Sonogenic is in Jam Mode.

Here is Yamaha’s definition of the chord name messages as taken from the Genos Data List PDF:

F0 43 7E tt d1 d2 d3 d4 F7     Type1 (tt=02) 
11110000 F0 = Exclusive status
01000011 43 = YAMAHA ID
01111110 7E = Style
00000010 02 = type 1
0ddddddd d1 = chord root (cr)
0ddddddd d2 = chord type (ct)
0ddddddd d3 = bass note (bn)
0ddddddd d4 = bass type (bt)
11110111 F7 = End of Exclusive

cr : Chord Root 0fffnnnn
fff: b or #, nnnn: note(root)
0000nnnn 0n bbb 0fff0000 x0 reserved
0001nnnn 1n bb 0fff0001 x1 C
0010nnnn 2n b 0fff0010 x2 D
0011nnnn 3n natural 0fff0011 x3 E
0100nnnn 4n # 0fff0100 x4 F
0101nnnn 5n ## 0fff0101 x5 G
0110nnnn 6n ### 0fff0110 x6 A
0fff0111 x7 B

ct : Chord Type 0 to 34, 127
00000000 00 0 Maj 00010010 12 18 dim7
00000001 01 1 Maj6 00010011 13 19 7th
00000010 02 2 Maj7 00010100 14 20 7sus4
00000011 03 3 Maj7(#11) 00010101 15 21 7b5
00000100 04 4 Maj(9) 00010110 16 22 7(9)
00000101 05 5 Maj7(9) 00010111 17 23 7(#11)
00000110 06 6 Maj6(9) 00011000 18 24 7(13)
00000111 07 7 aug 00011001 19 25 7(b9)
00001000 08 8 min 00011010 1A 26 7(b13)
00001001 09 9 min6 00011011 1B 27 7(#9)
00001010 0A 10 min7 00011100 1C 28 Maj7aug
00001011 0B 11 min7b5 00011101 1D 29 7aug
00001100 0C 12 min(9) 00011110 1E 30 1+8
00001101 0D 13 min7(9) 00011111 1F 31 1+5
00001110 0E 14 min7(11) 00100000 20 32 sus4
00001111 0F 15 minMaj7 00100001 21 33 1+2+5
00010000 10 16 minMaj7(9) 00100010 22 34 cc
00010001 11 17 dim

bn: On Bass Note Same as Chord root; 127:N o bass chord
bt: Bass Chord Same as Chord type; 127: No bass chord

MIDI Realtime messages

The SHS-500 Sonogenic sends the following MIDI Realtime Messages:

  • Start (0xFA): Jam mode only, when play/pause is pushed while stopped
  • Stop (0xFC): Jam mode only, when play/pause is pushed while playing
  • Active Sense (0xFE)
  • MIDI Timing Clock (0xF8)

Miscellaneous messages

The Sonogenic sends the following message when tuning is changed via the function menu:

    F0 43 10 27 30 00 00 08 00 00 F7

The Sonogenic responds to the MIDI Identity Request message:

    F0 7E dd 06 01 F7

It returns an Identity Reply message:

    F0 7E dd 06 02 vv ff ff mm mm ss ss ss ss F7
vv Manufacturer (vendor)
ff Family
mm Model
ss Version

F0 7E 7F 06 02 43 00 44 23 1F 00 00 00 6F F7
vv ff ff mm mm ss ss ss ss

Summary

Overll, there are enough messages to be dangerous! I already have a prototype patch editor constructed in MIDI Designer. In addition to MIDI Designer, I’m running the free midimittr iPad app in order to send the Sonogenic’s note on, note off and modulation messages back to itself. midimittr merges the Sonogenic’s messages with the editing and control messages from MIDI Designer. No wires — it’s all transmitted over Bluetooth MIDI. Patches are stored and recalled using MIDI Designer presets.

So, I say, dive right in! The SHS-500 offers more than what’s document in the manuals.

Copyright © 2020 Paul J. Drongowski

SHS-500: Snap review

After analyzing the Yamaha SHS-500 Sonogenic from every possible angle (even the service manual!), I finally got one. On-line retailers are currently flooded with post-Christmas returns and bargains can be had. And so it was.

First, I must compliment Sweetwater for their prompt service and excellent packing. The SHS-500 was double-boxed. (The inner box was Yamaha’s original packing carton.) The unit is in excellent condition, matching Sweetwater’s assessment of its condition. Even though the inner carton has a big “DEMO” sticker on it, the Sonogenic is “like new.” Money saved and well-spent.

Since the Sonogenic was a demo, the initial settings are probably not factory. Thus, your out-of-the-box experience may be a little different than mine. I loaded the battery compartment with six AA batteries and turned it on.

Yamaha SHS-500 Sonogenic in fire-engine red

The internal speaker is not going to impress anyone. Sound quality is at roughly the same level as Reface and I never warmed to that. I’ll be playing the Sonogenic through either headphones, my trusty, portable JBL Charge 2 or a powered monitor. Sonogenic has a master EQ and it’s important to set it appropriately. My unit was set to “Line Out” and the sound through the speaker was weak. Changing to the “Speaker” EQ setting was much better. Be sure to change back to “Line Out” when connecting to an external powered monitor. (Or “Boost,” or “Mild”.)

The SHS-500 is quite solid in the hands — much better build quality than the new PSS series or the SHS-300. Key feel is comparable to Reface. After playing the Sonogenic, the PSS keys have a cheaper feel. Yes, you get what you pay for. The SHS-500 is like a Reface keytar.

Natch, the first thing was quick tour of the sounds. Every panel voice has a DSP effect. (See the table below for default assignments.) Sound quality is on-par with good PSR E-series voices and in a few cases, S-series. The SHS-500 is not a Genos. 🙂 However, the SHS-500 is better than PSS by far.

 SHS-500            Bank  Bank
Voice MSB LSB PC# Default effect
----------------- ---- ---- --- --------------
Saw Lead 1 104 20 91 LPF
Saw Lead 2 0 104 82 Flanger
Quack Lead 0 112 85 DSP Chrs
Bright Decay 104 21 85 Phaser
Square Lead 0 112 81 Phaser
Under Heim 104 51 88 DSP Chrs
Analogon 104 52 82 Flanger
Synth Brass 0 113 64 DSP Chrs
Electric Piano 104 28 5 Phaser
DX Electric Piano 0 112 6 DSP Chrs
Electric Guitar 104 3 31 Dist.2
Jazz Guitar 104 0 27 DSP Chrs
Acoustic Guitar 0 117 26 LPF
Electric Bass 104 6 34 LPF
Slap Bass 0 112 37 DSP Chrs
Synth Bass 0 112 39 Phaser
DX Bass 0 118 40 LPF
Piano 0 112 2 DSP Chrs
Piano & Strings 104 39 1 DSP Chrs
Piano & Pad 104 40 1 DSP Chrs
Air Choir 0 112 55 LPF
Strings 0 116 49 DSP Chrs
Brass 0 117 63 DSP Chrs
Trumpet 0 115 57 HPF
Flute 0 115 74 LPF
Alto Sax 104 2 66 LPF
Tenor Sax 104 3 67 LPF
Harmonica 0 112 23 Tremolo
House Kit 127 0 65 LPF
Power Kit 127 0 88 LPF

The House Kit has the same program selection numbers as the House Kit in the PSR-E463 and PSR-EW410. These instruments and the SHS-500 are the only ones with this “House Kit.” Go figure.

My favorite voices are the Electric Piano, Jazz Guitar, Electric Bass, Synth Bass, Piano & Pad, Strings, Flute, Tenor Sax and Harmonica. Electric Piano with the Tremolo DSP effect is nice. Can’t wait to try these out with my backing tracks. Here’s a few more snap opinions.

  • I’ve never been that excited by the PSR synth voices although Quack Lead, Under Heim and Analogon can be fun. Drop Quack Lead down an octave or two for an alternative synth bass.
  • The electric guitar is OK and the DSP distortion effect is welcome versus a static sampled overdriven guitar. However, the DSP effect is not up to the PSR S-series, Genos or MODX, that’s for sure. It’s an early Yamaha algorithm.
  • The main piano is bright — think “house.” The piano in the layered voices is warmer.
  • The tenor sax needs to be played stylistically. The low end gets into baritone territory — a plus.
  • The harmonica is decent enough to go a little Jon Batiste or Stevie with the thing.
  • A few of the voices (e.g., flute, tenor sax) have vibrato sampled in. If you’re a PSR-type person, you’ll recognize these as “Sweet!”
  • The LPF is a bit of a let-down. One can hear changes due to cut-off, but a certain dynamic aspect is missing.

The DSP effects sound a little over-done. It’s easy enough to strip the effect off by dialing it out with the Effect Control knob. One might get tired of doing this after every voice change, which is why I want to experiment with MIDI Designer as a graphical front end for the Sonogenic.

In addition to the default DSP effect, the Sonogenic sets the octave which is appropriate (in some sound designer’s view) for the instrument. Change the voice and you change the octave, too. Depending upon the scenario, this could be a drag. There isn’t a way to go directly to a voice; you need to spin the Select knob and step through the voices — another motivation for a MIDI Designer front-end.

Jack positions all seem well thought out. The USB and MIDI DIN connector are hidden behind a rubbery cover. The MIDI DIN connector is the same as the Reface connector and takes the same breakout adapter to produce 5-pin IN and OUT.

The audio Line Out is mono. (Yes, mono, according to the Service Manual.) The headphone output is stereo. If you need stereo, give the headphone output a try. Dunno if the waveforms or effects are stereo, but the stereo signals are sent to the headphone jack. (The DAC is an AK4430ET, BTW.)

The SHS-500 includes a PA-130 power adapter. I have a PA-150 plugged in at all times and it works just fine with the SHS. The PA-150 supplies the same voltage and has a higher amp rating. All good.

Overall, the Sonogenic SHS-500 is worth the (reduced) price. Will I take it to rehearsals? Heck, yeah! It’s a shame that Yamaha left at least one organ patch out of the voice set. There is enough here for those weeks when organ is not in the church gig spotlight. Almost wish the SHS-500 and Reface YC were combined into the same ax…

Copyright © 2020 Paul J. Drongowski

Early wave table and FM synthesis

Discussions about Yamaha Montage/MODX AWM2 and FM-X sent me digging into the past to unearth early AWM and FM implementations in order to get insight into today’s tone generation hardware. Although Yamaha do not publish design information about their proprietary SWP, SWX, SWL, etc. processors, they have published datasheets for their merchant line of LSI products. Yamaha were very active in the mid- to late-1990s when desktop music (Soundblaster, XG, Sondius, etc.) was king.

The Yamaha YMF278B OPL4 was one such LSI component. The OPL4 combines a 2-/4-op FM synthesizer and a wave table synthesizer on a single 80-pin quad flat pack (QFP). The FM synthesizer can:

  • Generate 18 voices in 2-op modes or 15 2-op voices plus five rhythm sounds.
  • Generate 6 voices in 4-op mode with an additional 6 voices in 2-op mode, or 6 voices in 4-op mode with an additional 3 voices in 2-op mode and five rhythm sounds.

The FM synthesizer has eight selectable waveforms and generates a stereo output. The wave table synthesizer can generate 24 voices simultaneously (i.e., 24 voice polyphony) producing stereo output at a 44.1kHz sampling rate with bit depths of 8-, 12- and 16-bits. Wave ROMs up to 32Mbits are supported with up to 512 wave tables.

The OPL4 has six sound channels which can be sent to an external DAC (YAC513) or a digital effects processor (YSS225). Sadly, documentation for the YSS225 cannot be found on-line. The YSS225 is said to perform reverberation, echo, flange and other effects.

The FM and wave table synthesizers are two separate hardware units. I wouldn’t be surprised if this is still the case in the modern day SWP70 Standard Wave Processor. Separation lets the engineers optimize the synthesis hardware for a particular synthesis type.

Wave table synthesis

The OPL4 does not implement AWM2 synthesis. The synthesizer does not have the AWM2 filter hardware. This is not too surprising because in that era, Yamaha regarded AWM2 and its analog-like filter as a special competitive advantage. Why would they give that same advantage to other sound card vendors? It’s a safe bet, however, that the XG-compliant variants are full AWM2.

Nonetheless, a peak inside gives us a look at Yamaha’s wave table machinery. The synthesizer consists of a synthesis core that fetches waveform samples and waveform meta-data from external wave memory.

YMF278B block diagram

Quoting the OPL4 data sheet:

The wave table synthesizer can generate up to 24 sounds simultaneously. Each sound is referred to as a “channel”. The channels are numbered from 1 to 24. These numbers are called “channel numbers”.

Wave table synthesis is controlled by a few hundred registers. The main control CPU writes common and channel-specific synthesis parameters into the registers. The synthesizer reads the registers during each synthesis macro-cycle and produces a new sound sample for each channel. The channel-specific control registers are organized into register groups. Each group consist of 24 registers, i.e., 24 values of a specific synthesis parameter type, one value per channel. A quick glance at the table below clarifies the register organization and the wave table synthesis parameters. Parameters for envelope generation, pan, LFO control, etc. are easily identifiable. (The YMF278B data sheet has the details).

YMF278 wave table synthesis control registers

I conjecture that today’s SWP70 is organized in a similar way. The CPU-SWP70 communication bus is a memory bus that gives the CPU direct access to the SWP70 synthesis control registers. Think about it. With 128 stereo AWM2 channels, there are several hundred (thousand!) synthesis values which must be configured at the hardware level. Software’s job is easier and fast by making the synthesis registers (channel-specific parameter value) directly accessible.

Wave table in external memory

The waveform data and meta-information in external memory cosnsist of two parts: Up to 384 waveform headers and the waveform sample data. Each waveform header is 12 bytes containing:

  • Wave data start address
  • Loop address
  • End address
  • Voice parameters: LFO, VIB, ADSR, etc.

Today’s wave table is probably similar albeit much bigger. Explore Yamaha’s Universal Voice Format (UVF) and you’ll see what I mean.

FM synthesis

The OPL4 supports 2- and 4-op frequency modulation (FM) synthesis. Quoting the data sheet:

The part that generates one sine wave is called an “operator”. A combination of these operators is called an “algorithm”. The first stage operator (see diegram below) is called the “modulator” and the second stage operator is called the “carrier”. The frequency and envelope can be set for each operator. “Feedback FM” is available to generate a wider range of sounds.

Basic FM system
Feedback FM system

Like the wave table synthesizer, the FM synthesizer has a large table of common and channel-specific synthesis parameters. The register table organization is a little more complicated. Quoting:

The OPL4 has 36 circuits that generate a sine wave. A circuit which generates a sine wave is called a “slot”. A sound unit which is generated by combining two or four operators is called a “channel”. There are two kinds of sound generation control registers: registers settable in slot units and registers set in channel units.

In 2-op mode, two slots are used to generate on FM sound. With 36 available slots, 18 channels of sound can be generated. In 4-op mode, four slots are used to generate one FM sound. Six channels are generated using 24 slots.

YMF278 FM synthesis control registers

Whew! Given the two dimensional nature of register organization, addressing a specific parameter value for a specific operator is a complicated matter. (See the data sheet for details.) Without going a deep dive into register addressing, here is an image showing common and channel-specific synthesis parameters.

YMF278 4-op algorithms

Summary

I would say that the overall architecture today (SWPxx) is not unlike the architecture of yesteryear. The number of synthesis parameters, of course, has exploded with new features in the wave table synthesis hardware (filtering!) and FM synthesis hardware. Modern FM can route FM output samples to AWM2 wave table filters, adding many wrinkles to datapath and control design.

The main CPU is responsible for channel allocation as notes are played and for channel deallocation as notes are released and completed. Once a channel is allocated, the main CPU must write the appropriate voice parameters into the channel registers. Then, it’s up to the synthesizer hardware to crank out a new sound sample at a 44.1kHz rate. Of course, the per-channel sound samples must be mixed and routed to the DSP effects processors. I would love to get a look at the mixing and DSP processing.

I hope this trip into the past gives you some insight into present-day AWM2 and FM-X hardware and an appreciation for the complexity and sheer number of details at the 10,000 foot level of digital synthesizer design.

Copyright © 2019 Paul J. Drongowski

Yamaha hold many patents on wave table and FM synthesis techniques. I recommend U.S. Patent 5,250,748 (1993) which describes the digital filter in AWM. For the modern era, I suggest U.S. Patents 8,779,267 (2014), 8,957,295 (2015) and 9,040,800 (2015).

Remie: A Christmas Story

My Yamaha PSS-E30 Remie review promised updates about how Remie works out in the real world with a two year old. Here’s a the first update (and why we moved out west to be with our grandson).

Background: Our grandson attended Kindermusik classes while he was an infant and, man, we can see the effects already. He also hangs with older kids and his big-kid grandfather (me) who all play keys, so playing keys already seems like an every-day activity.

When he comes over to our house, we put on music, or he and I sit down at the Yamaha MODX or Genos, depending on what’s set up and handy. He is in love with the MODX Superknob and the built-in beats, now referring to beat music as “orange music.” Orange is his favorite color and he will literally ask us to play “orange music”. One wonders if he has synesthesia or if he just likes the occasional warm orange glow from the MODX Superknob.

Yamaha PSS-E30 Remie

Well, come Christmas day, he unwrapped Remie and broke into a joyful smile. He quickly started pushing the start/stop button; Do kids understand icons that early? We dropped a few beats and he literally was dancing along. So, I would say the first encounter with Remie was quite successful!

A few minutes later, we caught his mom (a former wind player) trying different features and taking a quiz. Couldn’t have been better. We’ll see how Remie works out in the long run.

Hey, Yamaha! You missed an opportunity, tho’. Kids love the Superknob. Your next keyboard for kids should have a Superknob on it!

Merry Christmas and Happy New Year! (And support art/music education).

Copyright © 2019 Paul J. Drongowski

SHS-300: The PSS keytar?

I made a little more progress delineating Yamaha’s mini-key product lines. The PSS series is built for low manufacturing cost. Thanks to PSS-E30 (Remie) and PSS-A50 tear-downs, we know that the PSS series is based on the ultra-small, relatively inexpensive SWLL (YWM-830) processor.

So, what to make of the Yamaha SHS-300 and SHS-500 keytars?

The SHS-300 shares the same basic spec as the PSS series: 32 voice polyphony, 8cm speaker, only one effect (reverb), no MIDI, no Bluetooth, etc. Sound quality is comparable to the PSS series. I suspect that the SHS-300 is based on the SWLL, too.

The SHS-500, however, has a much better spec: 48 voice polyphony, MIDI and audio over USB, MIDI over Bluetooth BLE, 9 DSP effects, Master EQ, chorus, reverb, etc. A glance at the SHS-500 service manual shows that the SHS-500 has much in common with the current PSR E-series keyboards, including the SWX03 processor.

If I get the time, I’ll write a quick post about SHS-500 internals.

The SHS-500 is definitely a cut above the SHS-300 in build quality, sound, MIDI capability and tweak-ability. I’m sorely tempted to take a bite of the apple. NAMM, however, is fast approaching (16-19 January 2020) and good sense tells me to wait. Yamaha’s pre-show press release promises 75 new products including a new family-oriented home keyboard.